Disclosure: As an Amazon Associate, ilcastellomenu.com earns from qualifying purchases. Product examples below link to Amazon, where you can check current availability and specifications; this guide itself lists no fixed prices because printer pricing and bundles change frequently.
How does a 3D printer work? It builds an object one thin layer at a time from a digital model: software called a slicer cuts the model into hundreds of horizontal layers and converts them into machine instructions, and the printer then deposits melted plastic filament — or cures liquid resin with light — layer upon layer until the object exists. Nothing is carved away; material is only added, which is why the technology is formally called additive manufacturing. This explainer walks through the full journey from a file on your screen to a finished part in your hand, covering the two home technologies, FDM and resin, and the vocabulary you need to read any printer specification with confidence.
Shopping while you learn? Our roundups at Best 3D Printers for Home Use and Best 3D Printers Under 500 for Printing Minatures show these principles applied at real budgets.
The Short Answer: How Does a 3D Printer Work, Layer by Layer
Every home 3D printer, whatever its shape or price, follows the same five-stage pipeline. A digital model is prepared, sliced into layers, turned into motion instructions, printed by a machine moving in three dimensions, and finished by removing supports and cleaning the part. Master this pipeline and the differences between printer types become variations on a theme.
From idea to digital model
Objects begin as 3D models — designed in CAD software, downloaded from model libraries, or captured by 3D scanning. The model is a hollow mesh of triangles describing the object’s surface, usually stored as an STL or 3MF file. The printer cannot use this file directly; it describes shape, not motion.
Slicing: the translator
Slicer software cuts the model into layers as thin as a fraction of a millimetre and plans every movement the printer will make: where to draw walls, how to fill the interior, where supports are needed. The output is G-code — a long list of coordinates and commands. Your settings in the slicer (layer height, speed, fill density) shape the result as much as the printer does.
Printing and finishing
The printer executes the G-code, building the object over minutes or hours. When printing ends, the part is removed, supports are snapped or dissolved away, and resin prints are washed and cured. Post-processing — sanding, priming, gluing sections — turns a raw print into a finished object.
In this guide
FDM Printing: Melting and Drawing With Plastic
Fused Deposition Modeling is the most common home technology: a spool of plastic filament is melted and drawn, like a very precise hot-glue gun moving in three dimensions. Most printers in Best 3D Printers for Hobbyists roundups — and nearly all budget models — are FDM machines.
The extruder and hotend
Filament feeds from a spool into the extruder, a motorised gear that pushes it into the hotend. There, a heater melts the plastic and it exits through a fine nozzle. The nozzle traces each layer’s outline (the walls) and then fills the interior with a patterned infill that gives strength without using solid plastic.
Motion systems: bed-slingers and CoreXY
Something must move: either the print bed shuttles back and forth beneath a gantry (the classic ‘bed-slinger’), or the head moves in all axes above a bed that only descends (CoreXY and similar designs). Faster modern printers favour the second layout because a moving bed limits speed as prints grow tall and heavy.
Materials: PLA, PETG, ABS and beyond
PLA is the beginner standard — easy, low-warp, plant-derived. PETG adds toughness and weather resistance for functional parts. ABS and ASA are stronger and heat-resistant but warp and fume, needing an enclosed printer. Flexible TPU prints gaskets and phone cases. The material menu is a large part of FDM’s appeal.
The two home 3D printing technologies compared
| Aspect | FDM (filament) | Resin (MSLA) |
|---|---|---|
| Material | Plastic filament spools | Liquid photopolymer resin |
| How layers form | Nozzle deposits melted plastic | UV light cures each layer through an LCD mask |
| Detail level | Good | Excellent — finest features |
| Typical build size | Larger | Smaller |
| Part strength | Strong, functional | More brittle (standard resins) |
| Post-processing | Remove supports | Wash, remove supports, UV cure |
| Mess and safety | Low | Gloves and ventilation needed |
| Running cost | Low per part | Higher per part |
Resin Printing: Sculpting With Light
Resin printers (MSLA) work by curing liquid photopolymer with ultraviolet light, one layer at a time, using an LCD screen to shape each layer’s image. The process sounds exotic but the machines are simple — and their output detail is in a different league from FDM.
Vat, screen and build plate
A vat of liquid resin sits above an LCD screen with a UV light source beneath. For each layer, the screen displays that layer’s shape as a mask; light cures the exposed resin into a solid film stuck to the build plate, which lifts slightly, lets fresh resin flow in, and lowers for the next layer. The object grows upside down, emerging from the vat.
Why resin detail is finer
An FDM nozzle has physical width; a resin printer’s ‘brush’ is a pixel of light. Resin therefore reproduces miniature faces, jewellery detail and tabletop figures that FDM cannot approach — the reason Best Resin Printers for Miniatures is its own category. The trade-offs are smaller build volumes, messier handling and mandatory post-curing.
Washing and curing
A finished resin print is coated in uncured resin and not yet fully hardened. It must be washed (usually in isopropyl alcohol or a wash station), supports removed, and then cured under UV light to reach final strength. Resin is a skin irritant before curing, so gloves and ventilation are part of the process, not optional extras.
Key Terms Every Beginner Meets
Printer listings and slicer settings share a vocabulary. These are the terms that actually affect your prints, in the order you will meet them.
Layer height and resolution
Layer height is the thickness of each slice — smaller means smoother surfaces and longer prints. It is the FDM equivalent of resolution. Resin printers quote pixel size of the screen instead. In both cases, finer is slower, and the visible difference shrinks as layers get thinner.
Infill, walls and supports
Infill is the internal lattice that fills a print’s volume; its percentage balances strength against material and time. Walls (or perimeters) are the outer shells that define surface quality. Supports are temporary structures holding up overhangs, removed after printing — the bane of beginners and a normal part of the craft.
Bed adhesion and levelling
The first layer must stick to the build surface perfectly: too far and the print detaches, too close and it squashes. Levelling (tramming) the bed, and modern auto-levelling sensors, exist to nail this. Most failed prints trace back to the first layer, which is why experienced users watch it print before walking away.
Slicer profiles
A profile bundles every setting for a printer-and-material combination: temperatures, speeds, cooling, retraction. Good profiles are why two identical printers can produce very different results in different hands — and why beginners should start from the manufacturer’s profile rather than improvising.
What Actually Happens During a Print
Watching a print with informed eyes turns a mysterious process into a readable one. Each phase has a purpose, and most problems announce themselves early.
Priming and the first layer
The printer heats up, homes its axes, probes the bed if equipped, purges a little filament, and lays the first layer slowly and deliberately. This layer is the foundation; a clean, even first layer predicts a successful print more reliably than any other sign.
The long middle
Layer follows identical layer. The printer manages filament flow, retracting slightly when moving between areas to avoid stringing, and cooling each layer with fans before the next lands. Tall prints test stability; large flat prints test bed adhesion at the corners, where warping tries to lift them.
Finishing the job
The final layers are solid top surfaces, printed slowly for smoothness. The printer then parks its head, cools down and signals completion. FDM parts can be used immediately; resin parts go to washing and curing. Either way, supports come off and the object gets its first inspection — the moment every maker recognises.
Common Misconceptions About 3D Printing
Popular imagination gets several things wrong about how these machines behave, and the corrections matter if you are deciding whether to buy one.
'It prints anything, instantly'
Printing is slow — hours for substantial objects — and ‘anything’ is bounded by build volume, overhang physics and material properties. Design for the process (or choose models designed for it) is a real skill that the machines reward.
'More expensive means better prints'
Price buys speed, size, automation and reliability more than raw quality. A well-tuned budget FDM printer produces excellent parts; an expensive one produces them faster, larger and with less supervision. The picks in Best 3D Printers for Hobbyists reflect that spread honestly.
'Resin is just better'
Resin is better at small, detailed, smooth objects and worse at large, strong, cheap ones. FDM filament costs far less per kilogram of finished part, parts are tougher, and there is no liquid chemical handling. The technologies are complements, not rivals — many hobbyists own both, alongside the tools in Best Software for 3D Printers.
From Print to Part: Materials and Their Personalities
The machine is only half the story; the material you feed it decides what the finished object can do. These are the personalities a beginner actually meets, and why the same printer produces a toy in one spool and a working bracket in another.
PLA: the friendly default
Polylactic acid prints easily, warps little and smells faintly sweet while printing. It is stiff and fine for models, prototypes and household items that live indoors. Its weaknesses are heat — it softens in a hot car — and brittleness under impact. Nearly every beginner success story starts with PLA for good reason.
PETG: the functional step up
PETG trades a little ease for a lot of toughness: it flexes rather than shattering, resists water and moderate heat, and suits brackets, containers and outdoor items. It strings more during printing and sticks almost too well to some build surfaces. Most makers graduate to PETG for anything that must survive being used.
Speciality filaments
Flexible TPU makes gaskets, grips and phone cases. Wood- and metal-filled filaments change appearance and weight, not structural nature, and their abrasive fillers wear standard nozzles. Glow, colour-change and silk finishes are PLA at heart. The lesson is consistent: choose material by the object’s job, then tune the printer to the material — never the reverse.
Resins have personalities too
Standard resin is detailed but brittle; ‘tough’ and ‘ABS-like’ resins flex more; water-washable resins simplify cleanup; flexible resins print gaskets and grips. Resin choice matters as much as printer choice for miniatures that must survive gaming tables, and mixing resin types in one vat is a false economy that ruins both.
What Determines Print Quality in Practice
Two owners with the same printer routinely produce different results. Quality lives in a handful of controllable factors, and knowing them is the difference between blaming the machine and tuning the process.
Calibration and maintenance
A level bed, correct nozzle-to-plate distance, clean build surface and sound belts produce the baseline. Modern auto-calibration handles much of this, but ‘automatic’ systems still reward an owner who recognises a bad first layer and stops the print instead of hoping. Five minutes of attention at minute one saves five hours of filament.
Slicer settings are the real specification
Layer height, wall count, infill, speed and cooling decide strength, surface and time more than the printer’s badge does. Manufacturers’ profiles encode good defaults; learning to adjust three settings — layer height for detail, walls for strength, supports for geometry — covers most of what owners ever need to touch.
Environment
Drafts cool FDM prints unevenly and cause warping and layer splits, which is why enclosures help with demanding materials. Resin prefers a warm room; cold resin flows poorly and cures reluctantly. Humidity swells filament over weeks, and serious makers store spools dry. None of this is exotic — it is the same respect for materials any craft demands.
Choosing Your First Printer With the Process in Mind
Now that the process is clear, printer listings read differently: every feature maps to a stage of the pipeline. This closing section translates the common selling points into process terms so a first purchase is an informed one.
Automation features map to the first layer
Auto-levelling, bed probing and first-layer inspection all exist to secure the foundation layer this guide identified as the make-or-break stage. For a beginner, these features are worth more than raw speed, because they remove the commonest failure while skills are forming. Experienced users can compensate manually; beginners should let the machine help.
Speed claims map to motion design
Headline speeds describe ideal conditions with specific materials. The motion system — moving bed versus fixed bed with a moving gantry — predicts real-world speed and tall-print stability better than any number. Buy the architecture that suits your intended objects: tall and heavy argues for a bed that does not shuttle.
Ecosystem maps to your learning curve
Slicer profiles, material libraries, spare-part availability and community size determine how quickly a new owner climbs from first print to reliable results. A slightly less capable printer inside a strong ecosystem routinely out-produces a exotic machine its owner must tame alone. This is the least visible specification and, for a first printer, possibly the most important.
Troubleshooting Through the Lens of the Process
Understanding the process converts the commonest print failures from mysteries into diagnoses, because each failure lives at a specific stage of the pipeline. This closing section maps the big three to their stages.
'It will not stick' — a first-layer problem
Prints that detach, curl at the corners or turn into a ball of string all failed at the foundation: the first layer did not bond to the build surface. Causes cluster tightly — plate too far from the nozzle, a contaminated build surface, the wrong temperature for the material. The cure is never ‘print it again and hope’; it is to clean the surface, re-level or re-probe, and watch the first layer like it matters, because it does.
'It looks rough or stringy' — a flow problem
Blobs, strings between parts and rough walls mean plastic is arriving at the wrong rate or temperature: too hot, retracting too little, or filament that has absorbed moisture and pops as it melts. Dry the filament, return to the manufacturer’s profile, and change one setting at a time — the slicer discipline from earlier in this guide, applied as diagnosis.
'It stopped halfway' — a supply or motion problem
Prints that end mid-air ran out of material, jammed in the extruder, lost a belt’s grip or lost power. Modern printers increasingly detect filament runout and power loss and can resume; on simpler machines the lesson is inventory and maintenance — keep spools sufficient for the job, and belts and nozzles on the same small-attention schedule as any tool you depend on.
Gear for This Guide
The examples below come from our verified product pool and illustrate the printer classes discussed in this guide. They are examples, not a ranked list — use the criteria in this article to judge any model, including newer revisions of these machines.

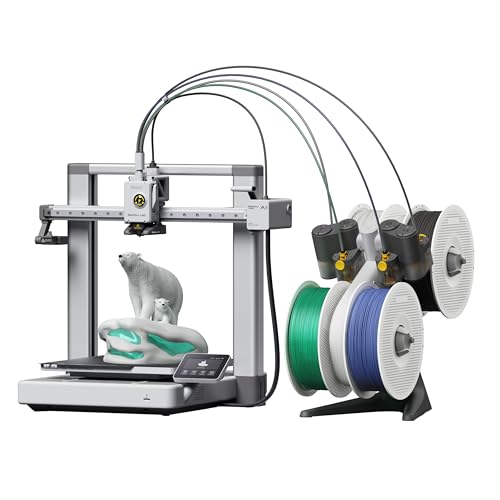
Bambu Lab A1 Combo
A representative modern FDM printer with multi-colour capability and heavy automation — auto-levelling and flow calibration handle the first-layer discipline this guide describes. Bambu Lab A1 Combo — Check on Amazon
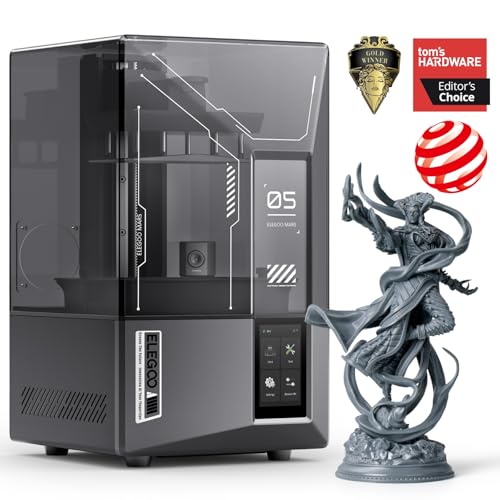
ELEGOO Mars 5 Ultra
A representative desktop resin printer: high-resolution screen, compact vat and the wash-and-cure workflow that resin printing requires. ELEGOO Mars 5 Ultra — Check on Amazon

Creality Ender 3 V3 SE
A representative budget FDM machine in the classic layout, showing how much of the core process is available at entry level. Creality Ender 3 V3 SE — Check on Amazon
A Worked Example: One Phone Stand, From File to Finished Object
Abstract pipelines become clear when you follow a single ordinary object through them. Take a simple phone stand, the kind of model distributed freely on the model-sharing sites: a flat base, two angled supports, a lip to hold the phone. Downloaded, the file is pure geometry — a shell of triangles describing the stand’s surfaces, with no notion of material, thickness or time. In the slicer, you orient it flat on its base, which the model’s designer intended: that face is wide and stable, the supports rise at an angle the printer can manage without support structures, and the layer lines will run along the stand rather than across the parts that flex. You choose a standard layer height, three outer walls for strength, and a moderate grid infill, because a stand needs stiffness more than it needs to be solid.
The slicer’s arithmetic is where the print’s character is decided. At the chosen layer height, the stand’s height becomes a few hundred individual layers; the slicer estimates the filament each layer consumes — long, fast runs for the base’s solid bottom layers, a lattice for the infill middle, careful slower passes for the visible top surface — and totals them into a time measured in hours, not minutes. The G-code it emits is unglamorous and complete: thousands of instructions that move the head to coordinates, extrude specified lengths of filament while moving, retract slightly at each travel move to prevent strings, and regulate the hotend and bed temperatures throughout. The printer itself knows none of the stand’s shape; it simply obeys the list with mechanical fidelity, which is why two printers given the same file produce near-identical objects and why a slicing mistake reproduces perfectly on any machine.
Printing begins with the least visible and most important layer of all, the first: the printer lays a skirt or brim, homes its axes, and presses the initial layer onto the bed at a deliberately slow pace, because every subsequent layer trusts that foundation. Hours later the last top layer irons itself smooth, the bed cools, and the stand releases with a flex of the build plate. Weigh it and you will find a modest handful of grams of plastic; the rest of the filament on the spool is the object’s siblings waiting to happen. Nothing in the process resembled printing a document except the queue it waited in, and nothing resembled machining either — the stand was not carved from anything. It was accumulated, and every property it has, from its strength along the layers to its weakness across them, descends from that accumulation.
Inside the Slicer: Infill, Walls and the Decisions That Shape Strength
The slicer is where a model becomes a manufacturing plan, and three of its settings deserve a plain-language unpacking because they govern almost everything about the result. Walls — also called perimeters or shells — are the concentric outlines traced on every layer, forming the object’s skin. Because they are continuous extrusions, walls contribute disproportionately to strength and surface quality; adding a wall usually strengthens a part more than adding infill, which is why experienced users reach for wall count first when a bracket snaps. Infill is the internal lattice between the walls on solid-looking parts, and its percentage is widely misunderstood: a part at moderate infill is not a weak version of a solid part, because loads travel through the walls and the lattice’s job is mainly to support the top surfaces and resist crushing. Doubling infill roughly doubles print time and material while adding a fraction of that in strength.
Infill pattern matters in subtler ways. Grid and lines patterns are fast and adequate for most shapes; gyroid and other three-dimensional patterns distribute strength more evenly in all directions and flex slightly rather than cracking; honeycomb-style patterns are strong for their weight in the directions parts are usually loaded. Layer height interacts with all of it: finer layers mean more walls’ worth of bonding surfaces, smoother curves and longer prints, while coarser layers print fast and chunky with visible stepping on slopes. Adaptive layer settings split the difference, using fine layers where the surface curves and coarse ones where it runs straight. None of these choices is visible in the model file or the printer’s specification sheet, which is the deepest lesson the slicer teaches: in 3D printing, the operator is part of the machine, and the same hardware produces flimsy or durable objects depending on decisions made in software before the first motor turns.
Motion, Accuracy and Why Prints Drift: Belts, Screws and Resonance
A 3D printer is a positioning machine before it is anything else, and its accuracy story is told by humble components. Most desktop FDM printers move the head and bed with toothed rubber belts driven by stepper motors — motors that rotate in precise increments without feedback, trusting that every commanded step happened. Belts are light and fast, which suits printing, but they stretch minutely under load and their tension decides whether circles print round and corners print sharp. The vertical axis usually rides on a lead screw, a threaded rod that converts rotation into slow, powerful, precise lifting, one layer at a time. Resin printers simplify the motion problem radically — only the build plate moves, rising from the vat a fraction at a time — which is one reason they achieve their fine detail so consistently.
Two gremlins follow from this architecture. The first is missed steps: if a nozzle catches a curled edge of the print, or a cable snags, the motor can skip increments, and because the system has no feedback, the printer continues serenely from the wrong position, producing the famous layer shift — a model that looks like two halves glued with an offset. The second is resonance: at certain speeds the machine’s frame and belts vibrate sympathetically, printing faint ripples, called ringing or ghosting, after every sharp corner. Modern firmware fights resonance with input shaping, measuring the machine’s vibration signature and pre-compensating the motor commands, which is why recent printers print cleanly at speeds that would have shaken their predecessors into corduroy. Understanding these mechanics reframes troubleshooting entirely: most quality defects are not mysteries of plastic but sentences in a mechanical language of tension, rigidity and speed, each with a specific remedy.
Reading the Specifications With the Process in Mind
Specification sheets list numbers whose meaning only the process can supply. Build volume is the obvious one — the largest object the machine can accumulate — but the useful interpretation is subtler: most real prints use a fraction of it, large volumes matter for batch printing many parts at once as much as for single big objects, and a tall volume is worth less than a wide one for the shapes households actually make. Nozzle diameter, standard at a size that balances detail and flow, governs the finest line the printer can lay and therefore the thinnest wall it can print in one pass; swapping to a finer nozzle buys detail in miniature work at a steep cost in time, while a wider nozzle transforms big, simple parts from overnight prints into evening ones.
Layer height ranges tell a similar story: the minimum figure advertises resolution the machine can achieve on its best day, while the practical range for everyday work sits several times coarser, because print time scales inversely with layer height and patience is a real specification too. For resin machines, the headline figure is the screen’s pixel size across the build area — smaller pixels mean finer possible detail — qualified by the screen’s size, since the same pixel count spread over a larger plate yields larger pixels. Heated bed and chamber specifications predict which materials the machine can print without warping rather than how well it prints the easy ones. Read as a set, the specifications answer one question: which corner of the material-detail-size triangle this machine was designed to occupy. Our best 3D printers for miniatures roundup shows the detail corner populated, while the machines in the best 3D printers for cosplay guide compete on build volume for wearable parts.
After the Print: Post-Processing, Where Objects Become Products
The printer finishing is the midpoint of making, not the end, and the two technologies diverge most after the build plate stops moving. FDM parts emerge essentially dry and usable: supports snap or dissolve away, seams and layer lines can be left as honest texture or attacked with sandpaper, filler and paint for a finished surface, and parts can be smoothed, drilled, tapped and glued with ordinary workshop methods. The craft skill in FDM post-processing is knowing how far to go — a functional bracket needs nothing, a display model rewards hours — and designing with the finish in mind, since a part oriented to hide its layer lines needs half the sanding of one oriented carelessly.
Resin parts emerge unfinished by definition: coated in liquid resin that must be washed off, usually in alcohol, and then cured under ultraviolet light to reach final hardness and safety. Until that cure completes, the part is both weaker and more chemically active than its final state, and the handling rules — gloves, ventilation, no skin contact with uncured resin, careful disposal of contaminated wash liquid and paper — are not bureaucratic garnish but the actual safety content of the technology. This post-processing burden is the honest price of resin’s detail, and it explains the technology’s centre of gravity in miniature and dental-style work, where the detail is the point and the parts are small enough to wash and cure in batches. Anyone choosing between the technologies should picture not the printing but the sink, the curing light and the glove box, and decide whether that workflow fits their space and patience.
When Precision Matters and When It Honestly Does Not
New owners often chase precision as an abstract virtue, so it helps to know where tolerances actually bite. Printed parts shrink slightly as they cool, holes print a fraction smaller than drawn because extruded lines have width and round inward, and mating parts designed on a screen with zero clearance will not mate in plastic. Functional printing therefore designs with the process: clearances between moving parts, holes drawn slightly generous and reamed if they must be exact, flat mating faces printed flat on the bed. A part that must fit an existing object — a replacement knob, a bracket for a specific rail — rewards a small test print of just the mating feature before committing hours to the whole. That test-print habit, cheap in filament and time, is the single most professional behaviour a beginner can adopt.
And then there is the larger territory where precision is a distraction: plant pots, organisers, toys, decorations, prototypes whose job is to be looked at and handled rather than fitted. For these, the standard settings, the default nozzle and a relaxed attitude produce objects indistinguishable in service from obsessively tuned ones. Knowing which territory a print lives in — fit-critical or free — lets you spend your attention where physics will notice it, and enjoy the rest of the hobby at the speed it wants to run. That judgement, more than any machine feature, is what experienced makers mean when they say someone has learned how 3D printing works.
One final framing helps everything else in this guide settle: a 3D printer does not manufacture objects so much as it performs a file, the way a player piano performs a roll. The intelligence lives in the model and the slicing; the machine contributes fidelity, patience and physics. Judge a printer, then, the way you would judge an instrument — by how faithfully and reliably it performs what it is given — and put your own learning where the leverage is, in the files and settings you feed it.
Frequently Asked Questions
Why do 3D prints take so long when the machine moves so fast?
Because the material throughput, not the motion, is the bottleneck. The printer can only melt and deposit plastic at the rate its hotend can liquefy filament and its nozzle can lay it down; move faster than that rate and the extrusion starves, leaving gaps. A print is also simply a large amount of accumulated path: even a small object contains kilometres of individual extrusion lines when every layer’s walls and infill are summed, and laying kilometres of line at centimetres per second takes the hours the slicer predicts. Larger nozzles, coarser layers and lower infill all raise the material rate or reduce the path, which is why they are the honest levers on print time — and why a quoted print speed in millimetres per second, without the layer and nozzle context, tells you almost nothing about how long your object will take.
Can a home 3D printer print metal or wood?
Not in the way the words suggest. What home machines print are composites: plastic filament loaded with metal or wood particles, which looks and feels suggestive of the real material — wood-filled prints can even be sanded and stained — but has the strength and heat behaviour of the plastic carrying it. True metal printing exists in industry using powder and high-energy fusion, at costs and hazards far outside the home. There is one home-accessible detour: metal-filled prints can, with a kiln and expertise, be fired so the plastic burns away and the metal particles sinter into a genuinely metal, smaller object, but that is a specialist process with shrinkage and safety demands of its own, not a printer feature. Buy composites for their appearance, and you will be pleased; buy them expecting metal, and you will not.
How strong are 3D printed parts, really?
Strong along the layers, weaker across them — that asymmetry is the honest answer. Within a layer, the extruded plastic is essentially solid material with respectable strength; between layers, the bond is a weld formed as hot plastic meets the previous layer, and it is the first thing to fail under load, which is why a printed bracket snapped across its layers breaks cleanly along a layer line. Design works with this: orient the part so the main loads run along layers rather than peeling them apart, add walls where strength matters, and choose materials by their layer adhesion as well as their raw strength. Treated with that respect, printed parts serve for years in brackets, jigs, enclosures and household repairs; treated as if they were moulded or machined stock, they will eventually correct the misunderstanding at an inconvenient moment.
Do 3D printers use a lot of electricity?
Less than their size and heat suggest. A desktop FDM printer draws its serious power in bursts — heating the bed and hotend — and settles to a modest running draw once at temperature, comparable to a small appliance rather than a heater; resin printers draw less still, since their energy goes to a screen and a small motor. Long prints accumulate hours, so a multi-day print is a real but unremarkable addition to a household’s consumption, in the territory of leaving a computer running rather than running an oven. The bed’s insulation, an enclosure on machines that have one, and printing at sensible temperatures for the material all trim the figure further, but for most owners the electricity is among the smallest costs of the hobby, well behind filament and time.
How long does a 3D print take?
Small objects take under an hour; typical functional parts take two to eight hours; large or fine-detailed prints can run overnight or longer. Layer height and size dominate the time.
What file do I need to print something?
A 3D model file (usually STL or 3MF), which slicer software converts into G-code instructions for your specific printer. Models are widely available from online libraries, or you can design your own in CAD software.
Is 3D printing expensive to run?
FDM filament is inexpensive and a typical part uses a modest amount. Resin costs more per part and adds washing supplies. Electricity use is comparable to a light bulb or a small PC while printing.
Can a 3D printer print metal or wood?
Home printers print plastics, including composites filled with wood fibre or metal powder for appearance. True metal printing is an industrial process. Some speciality filaments need hardened nozzles because the fillers are abrasive.
Why do prints fail?
Most failures are first-layer adhesion problems, followed by supports failing, running out of material, or a model that was not designed for the process. Watching the first layer catches the majority before they waste hours.
Which type should a beginner buy?
FDM, for most people: it is cheaper, cleaner, stronger for functional parts and more forgiving. Choose resin first only if your main interest is miniatures, jewellery or highly detailed display models.
Do I need a powerful computer to run a 3D printer?
No. Slicing typical models runs comfortably on an ordinary laptop, and the printer itself needs no computer connection at all once the file is on its card or sent over the network. Designing complex models benefits from a decent machine, but printing does not.
Is 3D printing safe to do at home?
With normal precautions, yes. FDM printing with PLA in a ventilated room is the low-concern option; some materials benefit from enclosures and filtration. Resin printing requires gloves, eye care and ventilation because uncured resin is an irritant. Follow the material maker’s guidance for the specific product you use.
Why does my printer need 'supports' if it prints in layers?
Because each layer needs something beneath it. Overhangs printed onto air droop or fail, so the slicer builds temporary scaffolding under steep overhangs, which you remove afterwards. Designing or orienting a model to minimise overhangs reduces supports, print time and surface marks.
What is the difference between a 3D printer and a CNC machine?
They are opposites in method and complementary in a workshop. A 3D printer is additive: it starts with nothing and accumulates material only where the part needs it, which makes it superb at hollow, complex and internal geometry and wasteful of nothing but time. A CNC mill is subtractive: it starts with a solid block and removes everything that is not the part, which makes it faster for simple shapes, capable of true engineering materials such as aluminium, and far more precise — at the cost of the removed material and an inability to make enclosed internal voids. Many makers own both eventually, printing the shapes only accumulation can make and machining the parts that must be metal and exact, and understanding your own projects’ balance between those two families is the real answer to which machine belongs in a workshop first.
How long does a 3D printer itself last?
The frame, motors and electronics of a decent desktop machine can serve for many years and thousands of printing hours; what wears are the consumable-adjacent parts — nozzles abrade, especially with filled filaments, build surfaces scar and lose adhesion, belts stretch, fans grow noisy, and resin machines consume their screens and vat films as designed wear items. Owners who treat those parts as scheduled replacements, the way a cyclist treats tyres, keep machines printing well long past the point where owners who expected a maintenance-free appliance declare theirs worn out. The technology rewards a light mechanical sympathy: an occasional check of belt tension, a nozzle changed before it ruins a long print, a build surface replaced when adhesion fades.
The Bottom Line
A 3D printer is a small automated factory that builds objects in layers from a sliced digital file — with melted filament in FDM machines, or light-cured resin in MSLA machines. Understand the pipeline of model, slice, print and finish, and every specification, review and troubleshooting guide in the hobby suddenly makes sense.
Related Guides
Keep exploring with these guides and roundups from the same printers collection: