Learning how to program a keyboard means teaching it new tricks: moving a key, building a layer of shortcuts, or recording a macro that types a whole sequence for you. Modern keyboards make this far easier than it sounds — with the right board, most programming is done by clicking keys in an app rather than writing code — and this guide covers the main routes, from manufacturer software to QMK and VIA, in plain language.
Programming pays off fastest on compact boards, where layers replace missing keys, but it is just as useful on a full-size board for media controls, application shortcuts, and accessibility remaps. Before you start, check what your board supports, because the method depends entirely on the firmware your keyboard runs. If you are still shopping, programmable models feature heavily in Best Keyboards for Programmers for good reason.
Disclosure: As an Amazon Associate, ilcastellomenu.com earns from qualifying purchases. Product details and availability can change; check the retailer listing before you buy.
What keyboard programming actually changes
At its simplest, programming a keyboard changes what a key sends. Remapping swaps one key’s output for another — Caps Lock becomes Escape or Control, a classic change for programmers and touch typists. Macros go further, sending a sequence of keys or text from a single press. Layers go furthest: like the Shift key creating a second character set, a function layer gives every key an alternate job while a modifier is held.
The important distinction is where the programming lives. Onboard programming stores changes in the keyboard’s own memory, so your layout travels to any computer. Host software, by contrast, only works while its app runs on that machine. For a board you carry between a work laptop and a home PC, onboard storage — common on QMK and VIA boards — is the feature that matters.
Gamers program differently from typists. Gaming software emphasises per-game profiles, lighting-linked macros, and rapid-fire or multi-action keys, while programmer-focused setups emphasise layers, home-row modifiers, and text expansion. Knowing which camp you are in tells you which software experience to prioritise when comparing boards like those in Best Keyboards for Coding.
In this guide
Step 1: identify your board’s programming route
Check the manual or product page for one of four routes. Manufacturer software (for example the companion apps from major gaming brands) handles remapping and macros with a friendly interface. VIA is a real-time configurator for QMK keyboards: plug in, open the app or web version, click a key, assign a new one, done — no reflashing. QMK itself is the open-source firmware underneath, offering total control at the cost of editing files and compiling. A fourth group of boards offers only onboard shortcuts described in the manual, such as holding Fn and another key to swap functions.
Your operating system matters too. Some manufacturer apps are Windows-only, which is a genuine problem for Mac and Linux users with a board that stores nothing onboard. VIA and QMK shine here because changes persist in the keyboard itself. If cross-platform freedom matters, weigh it before purchase using the checks in How to Choose a Keyboard.
Write down your board’s exact model and firmware version before changing anything, and export or photograph the default layout. Every programming session should start from a known state you can return to, because the most common beginner problem is not breaking the board — it is forgetting what you changed.
Step 2: remap keys with VIA or manufacturer software
Connect the keyboard by cable, even if it is wireless; configurators generally require a wired link. Open the software and confirm it detects your board. Select the key you want to change on the on-screen layout, then choose its new function from the key picker — a standard key, a modifier, a media control, or a layer key. Test immediately by typing; real-time tools like VIA apply changes instantly, which makes experimentation safe and satisfying.
Start with high-value, low-risk changes: Caps Lock to Escape or Control, a dedicated key for mute, or swapping Alt and Command positions on a Mac. Live with each change for a few days before adding more, because muscle memory adapts in stages and a wholesale layout transplant on day one usually ends with everything reverted in frustration.
If your board uses layers, assign a comfortable layer key — often holding Caps Lock or a key near your thumb — and place arrows, a number pad, and media controls on that layer in positions that mirror their physical locations. Mirroring is the trick that makes layers memorable: arrows under your usual arrow fingers, numbers across the top in order.
Step 3: build useful macros
A macro records a sequence — keystrokes, delays, sometimes mouse actions — and replays it from one key. Good macro candidates are repetitive and exact: a standard email sign-off, a code boilerplate block, a complex game rotation, or a multi-shortcut application command. In most software you click record, type the sequence slowly and deliberately, stop, then assign the macro to a key and set whether it plays once, repeats while held, or toggles.
Keep macros honest and safe. In competitive games, some titles prohibit certain automation, so check the rules of your game before binding multi-action macros; single-key remaps are generally treated differently from automated sequences. At work, never store passwords or sensitive text in a macro — the data sits in software or keyboard memory in plain form, and a typed password macro is a security incident waiting for a borrowed desk.
Delays deserve attention. Recorded macros often include your real typing pauses, making playback sluggish; most editors let you trim delays to a few milliseconds between steps. Test macros in a harmless document first — a blank text file has saved many people from sending a half-edited macro to a client or a team chat.
Step 4: advanced control with QMK
QMK firmware unlocks features the graphical tools only hint at: tap-versus-hold keys (a key that is Escape when tapped and Control when held), combos that fire when two keys are pressed together, per-layer lighting, and layouts limited only by your imagination. The workflow is to edit a keymap file, compile it into firmware, and flash it to the board with the manufacturer’s bootloader process — methodical rather than difficult, with extensive community documentation.
Flashing deserves respect but not fear. Follow your board’s exact instructions, never disconnect mid-flash, and keep the stock firmware file downloaded so you can restore. Most boards also support a factory reset combination documented in the manual. If you are buying specifically for this ecosystem, hot-swappable QMK/VIA boards like the Keychron example in the gear section are the friendly on-ramp, and @@how-to-program-a-keyboard@@ readers typically graduate from VIA tweaks to a personal QMK keymap within a few months.
Programmers who live in Vim or Emacs often build the most elaborate setups, and the overlap between keyboard firmware and coding culture is why programmable boards dominate Best Mechanical Keyboards for Programming. Start from a community keymap for your board rather than a blank file; standing on a working layout and modifying it teaches faster than starting from zero.
Common mistakes and troubleshooting
The classic mistake is changing twenty keys at once and remembering none of them. The second is forgetting which layer a function lives on, which feels like the keyboard randomly misbehaving. Print or save a layer diagram until the layout is in your fingers. The third is assuming a wireless board can be configured over Bluetooth — most need the cable for setup even though the finished layout then works wirelessly.
If a remap seems ignored, check the basics in order: is the configurator connected to the right device, is the board on the layer you think it is, is a manufacturer profile overriding your changes, and does the board need its onboard profile slot selected? If a board stops responding after a flash, use the documented reset or bootloader mode and reflash the stock firmware before concluding anything is broken.
Keep a simple log of your changes with dates. When something feels off weeks later, the log tells you whether you changed it or the keyboard did — and it makes your setup reproducible when you buy a second board for another desk.
The bottom line on programming a keyboard
Programming a keyboard is a spectrum: a two-minute remap in VIA, an afternoon building macros, or a hobby-deep QMK layout. All three levels repay the effort because the keyboard adapts to you instead of the reverse. Begin with one remap you will use hourly, add a layer when a compact board demands it, and let the setup grow at the speed of your muscle memory.
If you are choosing a board with programming in mind, prioritise onboard memory and VIA or QMK support, then verify the basics with How to Test a Keyboard when it arrives. For ready-made candidates, browse @@best-keyboards-for-programmers@@ and the compact options in Best 60 Keyboards for Gaming, many of which are programmable by design.
How to program a keyboard: a sensible order of operations
Program in this order and the process stays painless: first fix annoyances (the key that is simply in the wrong place for your hands), then add convenience (media, volume, and application keys you reach for daily), then build layers (for missing keys or specialist functions), and only then craft macros (for sequences you perform identically many times a week). Each stage should earn a few days of use before the next begins, because each changes what the following stage needs to be.
This ordering prevents the classic failure mode of keyboard programming: an elaborate architecture built on guesses, abandoned within a fortnight. Annoyance-fixes are guaranteed value — you already know you want them. Layers and macros are hypotheses about your behaviour, and hypotheses deserve small tests before the whole board is rebuilt around them.
Keep a written map of your layout as it grows: a simple diagram or list, dated, stored with your other setup notes. The map is your backup when firmware resets, your reference when a key ‘misbehaves’ (it is usually doing exactly what you told it to), and your migration guide when a second board joins the household.
Layer design that your memory will thank you for
Good layers obey one principle: position echoes meaning. Arrows belong under the fingers that would press physical arrows, in the same arrangement; numbers belong in a row or a pad shape that mirrors the real thing; media controls belong near each other, in playback order. Every layer that follows this principle teaches itself within days, and every layer that violates it — however clever its logic — remains a lookup table forever.
Limit yourself to two or three layers beyond the base. Each additional layer multiplies the ‘where did I put that?’ problem and the chance that a borrowed computer session on someone else’s board feels like typing in a foreign language. Depth is not a virtue in layer design; instant recall is. If a function is used hourly, it deserves the base layer or a dedicated key, not a chord.
Choose layer-access keys your hands already visit: a held Caps Lock, a thumb key, or a little-used key near the spacebar. Avoid making a frequently typed letter do double duty as a layer key until you have lived with tap-hold timing, because a mistimed layer key produces the exact gibberish that convinces beginners programming was a mistake.
Macros for work: patterns that pay rent
The highest-value work macros are unglamorous: date and timestamp insertions, standard document scaffolding, the multi-step export sequence in your main application, the greeting-plus-structure of your commonest email. Each saves seconds; together, across a year of workdays, they save hours — and, harder to price, they remove the small friction spikes that make repetitive work feel heavier than it is.
Build macros from your application’s own shortcuts rather than from mouse movements wherever possible: keyboard sequences are stable across window sizes and resolutions, while recorded pointer paths break the first time a toolbar moves. Name every macro for its job, group them on one layer or key cluster, and review the set quarterly — macros for dead workflows are clutter that future-you must memorise around.
Respect the boundaries: no credentials, no personal data, no sequences that send or submit anything irreversible without a deliberate final keypress from you. A macro should prepare; you should commit. That single rule keeps automation an assistant rather than a liability, in the office and everywhere else.
Programming for accessibility and comfort
Remapping is an accessibility technology as much as a convenience one. Moving a modifier to a stronger finger, placing a painful chord on a single key, enlarging the effective target of an essential function by duplicating it — these changes decide whether a keyboard is usable for hours or merely tolerable for minutes, for users with limited mobility, repetitive-strain histories, or simply hands that disagree with the standard layout’s assumptions.
If comfort is your programming goal, work with your body’s evidence: note which reaches hurt, which chords twist, which keys your weaker fingers fumble, and design the layout as the answer to that list. Change one thing at a time and live with it, because comfort adaptations interact — moving one key changes the hand’s whole choreography — and the layout that emerges over a month of small, tested changes will fit you better than any template, including the templates in this guide.
Profiles for work, play, and other people
Boards with onboard profiles let one keyboard hold several personalities: a work layout with text macros and media controls, a gaming layout with the operating-system key tamed and abilities clustered, and a guest layout that is ruthlessly standard for the moment a colleague sits down at your machine. That third profile is the mark of a thoughtful setup — power that knows when to disappear.
Name profiles by purpose, keep their base layers identical wherever possible, and let only the function layers diverge. Consistency underneath variety is what keeps profiles usable: if the letters move between profiles, your fingers mutiny; if only the extras move, switching profiles feels like changing jackets rather than languages. Gamers should also check whether their games’ rules treat profile macros differently from simple remaps before a tournament does it for them.
Backing up and migrating your layout
Your layout is data, and data wants a backup. Export the configuration file where the software allows it, screenshot the layer diagrams, and keep both with your other setup records. Firmware updates, a replacement board, or a second board for another desk all become migrations instead of reconstructions when the backup exists — and reconstructions from memory are always, subtly, different layouts that your fingers must relearn.
Migration is also the moment to audit: a layout carried for years accumulates fossils — macros for dead jobs, layers for abandoned games. Moving to a new board with only the living parts is a free spring-cleaning, and the discipline of asking ‘do I still use this?’ of every customisation keeps a mature setup feeling designed rather than accumulated.
Teaching your hands: the adaptation protocol
New layouts fail in the fingers, not in the software, so give adaptation a protocol. Week one: base-layer changes only, with a printed map visible. Week two: introduce the primary layer, and drill its five commonest keys deliberately for a few minutes a day. Week three: macros join, one at a time. At each stage, the previous stage should feel boring before the next begins — boredom is the sensation of a layout becoming yours.
Expect a temporary speed dip and do not measure yourself against last month’s numbers during it; measure error patterns instead, because they tell you which placements fight your hands and deserve redesign rather than more practice. A layout is a negotiation between intention and anatomy, and the protocol’s job is to let anatomy speak before you finalise the treaty.

Designing layers around your real day, not around theory
Layer design fails when it starts from the keyboard and works outward — what could this key do? — instead of starting from your day and working inward: what do I reach for and miss? Spend one normal day noticing friction. Every time you stretch for a key, chord an awkward shortcut, or move your hand to the mouse for something a key could do, that is a layer candidate. Most people find the same short list: navigation (arrows, Home, End, Page Up, Page Down), editing (word-delete, line-select), media and volume, and a handful of application shortcuts they use fifty times a day. That list, not the firmware’s feature catalogue, is your layer.
Assign by geography, not by logic puzzles. Keys your fingers can find without looking — the ones adjacent to the home row and under your strongest fingers — are prime layer real estate. Keys that require a stretch should hold functions you use occasionally, because a layer that makes a rare function easy and a common function awkward is a net loss. Keep the layer key itself somewhere your thumb or pinky can hold comfortably for several seconds, since many layer actions are hold-and-press rather than tap-and-press.
The two-layer rule for beginners
Start with exactly one extra layer, plus the base. Two layers total is enough to transform a compact board and small enough to learn in a week. Add a second extra layer only when the first is fully automatic — when you stop thinking about where things are — because each new layer multiplies the memory burden of all the others. Enthusiasts with six layers exist, and most of them built up over years. The boards that get abandoned in drawers are usually the ambitious ones programmed on day one. Restraint is not a lack of ambition; it is the mechanism by which the habit survives long enough to grow.
Print or write your layer map and keep it visible for the first fortnight. This feels like cheating and is actually how motor learning works: reference, repetition, then recall. Note which mappings you look up most — those are candidates to move somewhere more memorable — and which you never use, which are candidates for deletion. A layer that shrinks to the twelve functions you truly use beats a layer of forty you half-remember.
Macros that survive contact with real software
A macro is a promise your keyboard makes to software it cannot see, and software breaks promises in predictable ways. Timing is the first: macros that fire keystrokes faster than an application can accept them will drop characters, especially in remote desktops, virtual machines, and web apps with heavy input handling. Build in small delays between steps — a few tens of milliseconds is invisible to you and transformative for reliability — and test the macro in the slowest environment you actually use, not the fastest.
Focus is the second failure mode. A macro that types a sequence assumes the right window is active and the cursor is in the right field. Make your macros start from states you can guarantee: begin with a shortcut that selects the field or opens the dialog, rather than assuming you left things in the right place. And give destructive macros a deliberate trigger — a two-key combination you cannot hit by accident — because a macro that deletes, sends, or submits will eventually fire at the wrong moment if it sits on an easy key.
Text expansion, signatures, and the honest limits of macros
The highest-value macros for most people are boring: email addresses, standard replies, code boilerplate, date stamps, and the phrases your job makes you type daily. These are pure profit, with no downside when they fire correctly and trivial cost when they do not. Build them first. Resist building macros that navigate complex interfaces by blind keystrokes — tab counts change when software updates, and a navigation macro becomes a small machine for putting text in the wrong field. If a task needs to see the screen, it belongs in software automation tools, not in keyboard firmware.
Keep a written inventory of your macros with their triggers and purposes. Firmware is invisible; six months from now you will press a combination by accident, watch a paragraph appear, and have no idea which of your past selves to thank or blame. An inventory also makes migration painless when you change boards, and it reveals duplication — most people who list their macros find two or three that overlap and one they have not used in a year. Prune without sentimentality.
Tap, hold, and the timing settings that decide whether a layout feels clever or broken
Modern firmware lets one key do two jobs: tap for one output, hold for another. This is the feature that makes tiny boards viable and the feature that makes beginners hate their keyboards, because its behaviour is governed by timing settings with unfriendly names. The core setting is the tapping term — the window, usually a few hundred milliseconds, in which a press is judged a tap rather than a hold. Set it too short and your holds trigger early mid-word; too long and your taps feel laggy, as the board waits to see whether you meant to hold.
Tune it against your own rhythm. Fast typists release keys quickly and can run a shorter term; deliberate typists need a longer one. There is no universal correct value, only a correct value for your hands, and finding it takes an afternoon of small adjustments, not a forum consensus. Change one setting at a time, live with it for an hour of real typing, and keep notes. Settings interact — options that decide whether a hold activates early when another key is pressed, or only after release, change the feel as much as the term itself — so methodical single changes are the only way to know what helped.
Where dual-role keys belong, and where they do not
Put dual-role behaviour on keys you press deliberately: the thumbs, the outer columns, keys you reach for rather than rest on. Keep it off the home row until you are experienced, however elegant home-row modifiers look in other people’s layouts. Home-row dual-role keys punish typing bursts, because rapid sequences are exactly where tap-versus-hold judgement is hardest, and a misjudged modifier mid-word produces shortcuts instead of letters. Many enthusiasts do adapt to them; many others quietly remove them after a month. Both outcomes are fine, but starting with them is choosing the hardest version of the skill first.
A useful diagnostic: if you find yourself typing more slowly and carefully to avoid errors, the layout is taxing you rather than serving you. Programmable boards should disappear under your hands within two weeks. Persistent conscious effort means the design, not your ability, needs revision — simplify the dual-role assignments, lengthen the term, or move the cleverness to keys that see less traffic.
Programming for games, creative tools, and other specialist software
Games and creative applications reward different programming from office work. In games, the valuable moves are usually repositioning rather than automation: bringing a hard-to-reach action onto a comfortable key, putting a push-to-talk key under a thumb that is otherwise idle, or building a layer that swaps a block of keys for a specific title’s control scheme. Be aware that some games and anti-cheat systems treat rapid automated sequences as scripting; single-key remaps and layers are universally safe territory, while timed multi-action macros can cross a game’s rules. Program for comfort and reach, not for automation, and you stay on the right side of every policy.
Creative software — editors, DAWs, design tools — is shortcut-dense and modifier-heavy, which makes it ideal for a dedicated layer. Map the layer around the tools you use in sequence: selection, transform, nudge, zoom. A layer that mirrors the order of your actual workflow becomes a physical menu you operate by feel. Artists who use a keyboard beside a drawing tablet benefit especially, because the keyboard hand does everything while the pen hand never leaves the tablet; a compact board with a well-built creative layer is the standard companion setup for a reason.
Per-application profiles and the discipline of consistency
Profiles multiply power and confusion in equal measure. The discipline that makes them work is consistency of the shared core: navigation, volume, and your most-used editing keys should live in the same place in every profile, with only the specialist block changing. If you must relearn the basics in each application, profiles cost more than they give. Automatic profile switching by application is convenient when it works and bewildering when it misfires, so test it deliberately — alt-tab between your applications a dozen times and confirm the board follows — before trusting it during real work.
Document each profile the way you document macros. A profile built for a program you return to after three months away should explain itself through your notes, not demand archaeological reconstruction. One line per mapping, in plain language, is enough.
Troubleshooting programmable boards: a diagnostic order that saves hours
When a programmed board misbehaves, the fault sits in one of four layers of its own: the physical switch, the firmware layout, the host software, or the computer’s settings. Diagnose in that order and you will rarely waste time. First, test the key on the base layer with no software running — a key that fails there is hardware or firmware, not your macro. Second, check whether the behaviour follows the board to another computer; onboard layouts travel with the board, software profiles do not, and that single test splits the possibilities in half.
Third, suspect the most recent change. Firmware and software problems are overwhelmingly introduced by the last edit, the last update, or the last new profile. Revert that one change before you investigate anything exotic. Fourth, check the mundane host settings that mimic exotic faults: operating system keyboard layouts that remap punctuation, accessibility features that alter key timing, and application-level shortcuts that override yours. A startling share of ‘my firmware is broken’ reports end at an OS layout switched by an accidental shortcut.
When flashing goes wrong, and how to stay calm
A board that stops responding after a firmware flash looks dead and usually is not. Most programmable boards have a hardware reset — a button under the board, a key combination held at plug-in, or a bootloader mode the manufacturer documents — that returns it to a flashable state regardless of what the firmware is doing. Find that procedure for your specific board before you ever flash, and write it on the same note as your layout map. The rule for flashing is the rule for surgery: know the recovery procedure before you begin, keep the board connected and undisturbed during the operation, and never flash on a low laptop battery or through a hub you do not trust.
Keep your previous working firmware file and your layout source alongside the new ones, with dates. Rollback is then a five-minute operation instead of a rebuild. This is also why exporting and backing up your layout, covered earlier in this guide, is not housekeeping for its own sake: it is the difference between an inconvenience and a lost weekend.
If you are evaluating a board’s basic health rather than its programming, the systematic checks in the keyboard testing walkthrough separate hardware faults from configuration faults cleanly, and they are worth running before you blame your layout for a dying switch.
Sharing, lending, and the social side of a custom layout
A programmed keyboard is a personal instrument, and other people will occasionally have to play it. Colleagues covering your desk, a partner borrowing your computer, a technician diagnosing a problem — each will meet a board whose spacebar might be a layer key and whose Caps Lock does something noble and unexpected. Plan for guests. Keep a guest profile or a quick toggle that restores a standard layout, and know the keystroke that activates it. Label nothing permanently, but be ready to explain the three differences that matter: where Escape lives, where the modifiers live, and how to get back to normal.
The same courtesy applies in reverse when you borrow or buy second-hand. A used programmable board may carry its previous owner’s layout in onboard memory, presenting as a board with bizarre faults. Before diagnosing a second-hand board, factory-reset its layout or flash a known default; a surprising number of ‘defective’ used boards are simply still programmed for someone else’s hands. Sellers rarely think to reset them, and buyers rarely think to ask.
Teaching someone else your layout, on purpose
Occasionally the sharing is deliberate: a teammate adopts your editing layer, or you set up a board for someone with a hand injury who needs a custom arrangement. Teach it the way you learned it — one layer, a printed map, a week of patience — and resist demonstrating your full setup, which overwhelms. The measure of a good layout, it turns out, is partly whether another person can learn its core in a day. If they cannot, the layout may be more personal than practical, which is a legitimate choice for your own board and a poor one for a shared one.
A worked example: building a compact-board layout from a blank page
Abstract advice becomes clearer walked through once, end to end. Imagine a 65 percent board — no function row, no dedicated arrows in some variants, one layer key — owned by someone who writes, codes a little, and attends calls all day. The blank-page question is not ‘what can the firmware do?’ but ‘what did yesterday hurt?’ Yesterday hurt in four places: reaching for arrow keys mid-sentence while editing, stretching for Delete, hunting the function row for volume during calls, and typing an email address and a standard sign-off dozens of times.
The design answers each hurt with the least machinery possible. Hold the layer key with the right hand’s home area and the left hand gains arrows under the most natural diamond the letter cluster offers, so editing never moves either hand far. Delete joins Backspace on the same layer, one key over, because the two are siblings in every editing task. Volume and mute go on the layer along the number row, where their positions can borrow the mental image of a slider — left is quieter, right is louder. The email address and sign-off become two macros on keys that nothing else wanted, on the same layer, far from the editing cluster so they cannot fire mid-word.
What was deliberately left out
Notice what the example does not contain: no second layer, no dual-role home row, no mouse keys, no elaborate macro chains. Each omission is a decision. The owner’s day did not ask for them, and every unbuilt feature is memory and reliability saved. If, three months later, a real hurt appears — say, a new job tool with a dozen shortcuts — the layout grows then, in one place, for a named reason. Layouts grown by need stay legible; layouts grown by possibility become archaeology.
The build order matters too. Remaps first, because they are testable in minutes. The layer second, used for a week before anything joins it. Macros last, once the layer is automatic, because a macro on a layer you still fumble will be blamed for the fumbling. And the whole design fits on an index card — which is the real test. If your layout cannot be written on a card in plain words, it is not finished, however impressive it looks in the configurator. The card, kept by the monitor for a fortnight and then filed with your notes, is both the learning aid and the backup documentation if the board is ever reset.
Adapt the example rather than copying it. Your hurts differ — a spreadsheet user’s card would show navigation and number entry, a streamer’s would show scene and audio controls — but the method transfers intact: observe a day, answer each hurt with the least machinery, build in stages, and keep the card. That method, more than any specific mapping, is what programming a keyboard well actually consists of.
Version control for layouts: treating your configuration like work you value
Your layout is a small body of work that took weeks to refine, and it deserves the same care as any other work product. Keep the editable source — the configurator export, the keymap file, the software profile backup — in a folder that is itself backed up with the rest of your documents, not stranded in an app’s local storage on one machine. Name files with dates and board names. When you make a significant change, save a new dated copy rather than overwriting, and add one line to a change note: what changed and why. Six months later, when a mapping puzzles you, the note answers before frustration does.
This discipline pays out in three predictable moments. The first is disaster: a reset board, a replaced computer, a corrupted profile. Restoration from your folder takes minutes. The second is migration: a new board arrives, and instead of designing from memory you port deliberately, mapping by mapping, learning in the process which parts of the old layout you no longer miss. The third is sharing: a colleague or family member wants your editing layer, and you can hand over a file and a card instead of an afternoon of dictation.
Knowing when a layout is finished
A layout is finished when a month passes without a change you can justify by a named hurt. After that point, further tinkering has a cost — every change reopens a learning period — and should clear a higher bar. This is not an argument against experimentation; it is an argument for doing experiments on a spare profile or a second board, where they cannot tax the setup your work depends on. Treat your main layout like a production system and your spare profile like a laboratory, and you get both stability and play. The enthusiasts who keep layouts for years are not the ones who stopped learning; they are the ones who learned where learning belongs.
Gear mentioned in this guide
The products below are examples referenced in this guide. They were verified through the Amazon Creators API product pool for this site; use them as concrete reference points for the features discussed, not as a ranked list.
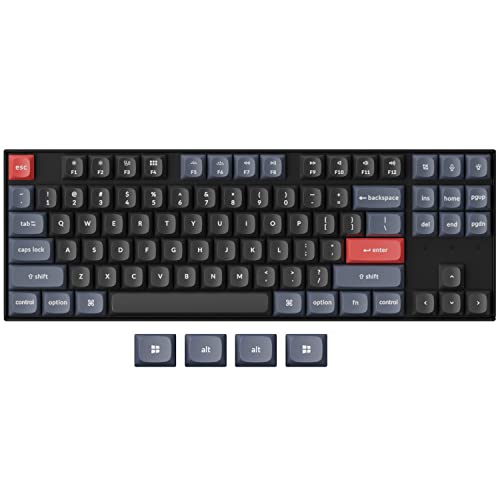
- Keychron K8 Pro QMK/VIA Wireless Mechanical Keyboard, Hot-Swappable TKL Custom Programmable Macro Wired Keyboard with Gateron G Pro Blue Switch, White Backlit, PBT Keycaps for Mac Windows Linux — Check on Amazon
- Corsair K70 RGB TKL – Champion Series Tenkeyless Mechanical Gaming Keyboard – Cherry MX Speed Keyswitches – Durable Aluminum Frame – Per-Key RGB LED Backlighting – Detachable USB Type-C Cable — Check on Amazon

Frequently asked questions
What is the difference between VIA and QMK?
QMK is the firmware that runs on the keyboard; VIA is a friendly configurator that changes a QMK board’s layout in real time without compiling or flashing. Most people start in VIA and only edit QMK directly when they want advanced features like tap-hold behaviours.
Can I program any keyboard?
No. The board needs a programmable controller and software support — manufacturer apps, VIA/QMK, or documented onboard remapping. Basic office boards often accept no changes at all, in which case operating-system tools or remapping utilities on the computer are the fallback.
Will my programmed layout work on another computer?
If the changes are stored onboard, yes — that is the main advantage of QMK/VIA boards and gaming boards with onboard profiles. If your setup depends on a companion app running, it only works where that app is installed and running.
Are macros allowed in games?
It depends on the game. Many titles allow simple remaps but prohibit automation that performs multiple actions from one press in competitive modes. Check your game’s terms before using multi-action macros, and keep macros to convenience tasks in single-player or productivity contexts if in doubt.
What is a layer, in plain terms?
A layer is an alternate set of key assignments you access while holding a special key, exactly like Shift gives letters a second identity. Layers let a 60 percent board offer arrows, F-keys, and media controls without physical keys for them.
How do I reset a keyboard I have messed up?
Use the factory-reset key combination in the manual, or reflash the stock firmware following the manufacturer’s instructions. Before experimenting, export your working layout so your own reset point exists as well.
Related Guides
Keep exploring with these guides and roundups from the same desk and audio cluster: