Knowing how to test a keyboard properly takes ten minutes and saves real money: it catches dead switches, chattering keys, and stabiliser problems while you are still inside the return window, and it gives a second-hand or freshly built board a clean bill of health. This guide covers the full routine — online key testers, rollover checks, stabiliser and sound checks, and the comfort test that only real typing can provide.
You need nothing more than the keyboard, its cable, and a browser, although the same routine works when you are evaluating a board in a shop or checking a build after modifications such as the switch work in How to Lubricate Switches on a Keyboard. Work through the steps in order; each one isolates a different failure mode.
Disclosure: As an Amazon Associate, ilcastellomenu.com earns from qualifying purchases. Product details and availability can change; check the retailer listing before you buy.
What you need and how to set up the test
Connect the keyboard by cable for testing even if you plan to use it wirelessly, so connection dropouts do not masquerade as switch faults. Open an online keyboard tester — these pages light up each key as it registers — and also open a plain text document for the chatter and feel tests. If the board has multiple layers or profiles, set it to its default state first, following the manual, so a remapped key does not look like a dead one.
Note your board’s claimed features before you begin: if it advertises N-key rollover, you will verify it; if it is hot-swappable, a faulty switch is a two-minute swap rather than a return. The definitions behind claims like rollover are explained in What is N Key Rollover, and understanding them turns marketing terms into things you can actually check.
Finally, test in the configuration you will actually use. A board that behaves perfectly on a bare desk may sound and feel different on your desk mat with your keycaps fitted. The goal is a verdict on your setup, not on an idealised version of it.
In this guide
Step 1: test every key, one by one
Press each key slowly and deliberately while watching the tester: alphas, numbers, punctuation, modifiers on both sides, the function row, navigation cluster, and number pad if fitted. Each press should light exactly one key, exactly once. A key that lights its neighbour suggests a solder or socket fault; a key that lights twice from one press is chattering, a classic failing-switch symptom.
Then type normally for a few minutes in the text document, hunting for the subtler version of the same faults: doubled letters (‘thhe’) point to chatter that fast deliberate presses can miss, and missed letters point to inconsistent registration. Type your own name and a pangram repeatedly; familiar text makes errors jump out. If you find a dead or double-firing key on a new board, that is a return or a switch swap — not something to live with.
Do not forget the unglamorous keys: Caps Lock and its indicator, Num Lock, the Fn combinations printed on the keycaps, media keys, and any rotary knob or dial. Extras are easy to skip in testing and annoying to discover broken a month later, especially once you have programmed functions onto them as described in How to Program a Keyboard.
Step 2: check rollover and ghosting
Rollover describes how many simultaneous keys the board reports correctly. Press and hold combinations your use demands: for gaming, the classic test is holding W plus Shift plus Space plus a direction; for typing, rolling chords of six or more letters. The tester shows which keys registered. A board that drops keys in your real combinations will drop them in your real games or fast typing, no matter what the box claims.
Ghosting is the opposite fault — a key registering that you never pressed — and it appears on some membrane boards and cheap matrices when specific three-key combinations collide. Test a spread of three-key corners across the board. Modern gaming boards with anti-ghosting design should show none; if yours ghosts in combinations you actually use, it is the wrong board for you.
Interpret results against your needs rather than a leaderboard. Full N-key rollover matters to fast typists and gamers pressing complex chords; a solid 6-key rollover covers most people. The explainer @@what-is-n-key-rollover@@ goes deeper if you want the matrix and USB-report reasoning behind the numbers.
Step 3: judge stabilisers, sound, and build
Press the large keys — spacebar, Enter, Shift, Backspace — on their left edge, right edge, and centre. Each press should feel even and sound clean, without rattle, ticking, or a mushy corner. Stabiliser rattle is the most common quality complaint on otherwise good boards, and it is far easier to flag on day one than to fix later, although lubricant on the wires helps, as covered in the stabiliser section of the lubrication guide.
Listen to the board as a whole. Type a paragraph at normal speed and note scratchiness in individual switches, spring ping on release, and case echo. One scratchy switch on a hot-swappable board is a swap; scratch across the whole board is a characteristic to accept or a reason to return. If overall volume is the issue rather than individual faults, the fixes in How to Fix a Loud Mechanical Keyboard separate board problems from room and desk problems.
Finish with a physical inspection: case flex, wobbling feet, a cable connector that sits firmly, keycaps that are seated and evenly lit if backlit, and a spacebar that returns crisply. On wireless boards, test each connection mode you will use — cable, dongle, and Bluetooth pairing to a second device — because a board can be flawless wired and flaky over one wireless mode.
Step 4: the real-typing comfort test
Specifications cannot tell you whether a board suits your hands, so type something long: twenty minutes of real work, a typing test, or a chapter of notes. Note finger fatigue, bottom-out harshness, wrist angle, and whether the layout causes errors — compact boards with compressed right Shift or relocated keys punish some typists and suit others perfectly. This is the test that predicts month six, and it is why the size decision in How to Choose a Keyboard matters so much.
Gamers should replicate the comfort test in-game: hold movement keys for extended periods, execute your usual ability combinations, and confirm no key feels awkward under the fingers you actually use. A board that tests perfectly in a browser can still cramp your hand in a long session if its layout fights your keybinds.
If the board passes every check but feels merely fine, that is still useful data. Keyboards are daily-contact tools; ‘fine’ at a premium tier is a legitimate reason to exchange for a different switch type while returns are painless.
Common testing mistakes
Testing only the letter keys is the big one — modifiers, stabilised keys, and Fn combinations hide a large share of faults. Testing only by cable on a board you will use wirelessly is another. A third is dismissing early chatter as your own typing; doubled letters on day one rarely improve, and on a mechanical board they usually mean a switch that will get worse.
Also avoid testing on a glass or bare metal desk and judging sound harshly; surfaces amplify everything. Test where and how you will use the board. And keep the packaging until the tests are done — returns without boxes are a self-inflicted wound.
The bottom line on testing a keyboard
Ten structured minutes — every key, rollover chords, stabilisers, sound, connection modes, then real typing — tells you nearly everything about a keyboard’s health and fit. Run the routine on every new board, every second-hand purchase, and after any modification, and you will almost never be stuck with a fault you could have caught for free.
If testing reveals your current board is healthy but wrong for you, the selection framework in Keyboard Buying Guide will help you choose its replacement, and the shortlists in best-keyboards-for-typing cover the comfort-first end of the market.
How to test a keyboard you are buying second-hand
Second-hand boards add questions new ones do not: wear you cannot see in photos, modifications you cannot verify, and a history of spills that sellers remember selectively. Test in person where possible, with a laptop and a key-tester page ready. Work the full routine from this guide, then add three probes: shine and wear patterns on the keycaps (honest age is fine; inconsistency with the claimed age is information), the smell test for smoke or spill residue, and a close look at the cable connector and case screws for signs of rough opening.
Ask directly about modifications — lubed switches, replaced stabilisers, firmware changes — and treat detailed answers as a good sign even when the mods are not to your taste; a seller who knows the board’s history is selling a known quantity. Vague answers plus a price too good for the model is the combination to walk away from.
Price your findings, do not just collect them. A board needing switches is a discount negotiation; a board needing a PCB is a different product. The structured test turns a gamble into an inspection, which is the entire difference between the second-hand market’s bargains and its traps.
Testing wireless performance honestly
Wireless boards deserve a dedicated test block because their faults are environmental: a board flawless beside the receiver may stutter across a room, through a desk, or beside a busy USB hub. Test at your real distance, with your real obstructions, in each wireless mode, while typing fast and holding gaming chords. Then test the rude cases: waking from sleep, switching between paired devices, and operating at low battery, where some boards economise in ways that feel like faults.
Interference has fingerprints — dropouts that coincide with a microwave, a hub waking, or a specific port — and noting what coincides is how you fix it: move the dongle to a front port or a short extension, away from USB 3 storage devices whose noise is a known neighbour problem. A board that fails only in one cursed configuration is not faulty; your layout is, and layouts can be rearranged for free.
Battery claims deserve the same scepticism as any specification: run the board with your backlight settings for a working week and note the drain. Your number, on your settings, is the only battery figure that will ever matter to you.
Building a five-minute retest habit
The full routine in this guide is for arrivals and purchases; a compressed version belongs in your maintenance life. Every few months — or after any spill scare, drop, firmware update, or modification — run the five-minute pass: every key once on a tester, the big stabilised keys by their edges, one rollover chord set, and a paragraph of real typing while listening. Five minutes, four checks, and emerging faults are caught while they are still one switch rather than a pattern.
Keep the results somewhere boring: a dated line in a notes file (‘all keys pass, spacebar slight tick, battery ~a week at my settings’). Dated lines compound into a health history that makes warranty claims factual, resale honest, and your own troubleshooting — when something does fail — a matter of reading rather than remembering.
That habit is the real product of this guide. Testing is not an event performed on new gear; it is the ongoing, inexpensive attention that keeps a daily tool trustworthy, and it scales from a budget board to the centrepiece of an enthusiast desk without changing its shape at all.
Testing keycaps, legends, and backlighting
The standard routine under-tests the visual layer, so add a pass for it. In a darkened room, check backlighting for evenness, for legends that are legible at your working brightness, and for bleed that makes adjacent keys glow — cosmetic on day one, irritating by month three. In daylight, check that legends contrast honestly with the caps; grey-on-grey designer legends photograph beautifully and read terribly at 7 a.m., and your eyes, not the product photos, are the authority.
Press each keycap’s corners to feel for wobble beyond the switch’s own stem play, and confirm caps sit at a uniform height across each row. A single high or tilted cap usually reseats with firm, even pressure; a row of them suggests a plate or cap-set issue worth raising inside the return window rather than living around.
Testing the software and firmware layer
Modern boards are partly software products, so test that half too. Install the companion app or open the configurator, confirm the board is recognised, change one harmless setting, and verify it persists after unplugging and reconnecting. Check for firmware updates through official channels only, and note the shipped firmware version in your records before updating anything — a version number is the difference between a support conversation and a guessing game.
Test any onboard profile switching and layer indicators the board advertises, because features untested at arrival have a way of being discovered broken at the exact moment they are first needed — usually a presentation, a match, or a deadline. Ten minutes of clicking through the feature list while returns are painless is the cheapest insurance in the whole purchase.
Interpreting results: fault, trait, or taste?
Every test produces three kinds of finding, and confusing them wastes returns and money. Faults are objective failures — dead keys, chatter, dropouts — and they justify exchange without debate. Traits are the board working as designed in ways you dislike — a pingy case, a firm plate — and they justify exchange only as preference, within the retailer’s grace. Taste is the remainder: the board is fine and simply is not for you, which is also a legitimate return reason but should be recognised as such, because it tells you the next board must differ in kind, not just in unit.
Write findings under those three headings as you test. The discipline prevents the commonest testing error — returning three consecutive boards for the same trait while calling it faults — and converts your returns history into a specification for the board that will finally stay.
Testing a keyboard in a shop, in five minutes flat
Shop testing compresses the routine: connect or ask for the board powered, run a key-tester if internet is available or type the pangram repeatedly if it is not, work the stabilised keys by their edges, hold a six-key chord, and type one long paragraph at your real speed while listening. Then step back and judge the two things only presence can judge — how the switches feel under your actual fingers and how the board sounds in a real room.
Note the model, switch variant, and your verdict in your phone before leaving; shop impressions evaporate quickly and the note is what survives to comparison-shop at home. A board that wins the shop test and fits the budget rarely disappoints at the desk, because the desk adds nothing the shop could not show you except time — and time’s verdicts are what return windows are for.

Building a test script you will actually reuse
Ad-hoc testing finds the fault you already suspect. A script finds the fault you did not. Write a short, fixed routine — the same one every time — and run it on every board you buy, borrow, or resurrect from a cupboard. Consistency is the point: when the routine never changes, differences in results mean differences in keyboards, not differences in your mood or method. Keep it to about fifteen minutes; a routine longer than that will be skipped exactly when it matters, on the busy day a replacement board arrives.
A good script has five blocks. A full-key sweep, every key pressed individually and verified on screen. A rollover block, holding the combinations your games and shortcuts actually use. A speed block, a timed typing test you repeat three times and average. A sound block, typing the same paragraph in your real room at your real desk, ideally recorded on your phone so you can compare boards later without relying on memory. And a comfort block, ten minutes of your genuine work — code, prose, spreadsheets — because synthetic tests miss the reach or angle that only real tasks expose.
Scoring without fooling yourself
Score each block simply: pass, note, or fail. A note is a trait you could live with — a slightly firm spacebar, a legend font you find ugly. A fail is a defect or a mismatch you would think about weekly: a dead or double-firing key, stabiliser rattle that cuts through calls, a layout that forces an error your fingers cannot unlearn. Writing scores down matters because purchase excitement inflates them in memory. The dated scoresheet from a board you returned is also the best shopping brief for its replacement.
Test in the environment of use. A board tested on a kitchen table at noon will be used on your desk at night under different light, on a different surface, beside a different mouse. Backlight legibility, cable reach, wireless behaviour around your actual router and monitor — none of these transfer from a test bench. If you buy online, the home test during the return window is the real test; the script exists to make that window count.
Double-firing, missed presses, and the faults that hide at speed
The most important keyboard faults are intermittent, and intermittent faults hide from slow testing. A switch that chatters — registering two presses for one — may behave perfectly when you press keys one at a time at a stately pace, then produce doubled letters throughout a fast paragraph. Test at your real typing speed and above it: run your speed block, then read the text character by character looking specifically for doubled letters and transposed pairs. Transpositions are usually you; doubled identical letters, especially on the same few keys, are usually the board.
Missed presses hide the same way. A switch near the end of its life, or a keycap that binds at an angle, registers when pressed squarely and fails when struck glancingly the way fast typing strikes. Deliberately type with your natural sloppiness — do not centre every press — and press each suspect key from different angles and at different points on the cap. Real typing is off-centre typing; a board that only works when typed on carefully is a board that does not work.
Separating switch faults from connection faults
When failures appear, pattern is diagnosis. Faults on one key point at that switch or its socket. Faults scattered randomly across the board, varying session to session, point at the connection: a cable, a dongle in a bad port, Bluetooth contention, or a battery sagging under load. Faults in a straight line or a block point at the matrix or PCB. Note the pattern before you change anything, then change one variable — cable for dongle, port for port, wired for wireless — and retest the same block. The variable that makes the pattern move is your culprit.
Heat and time are variables too. Some faults appear only after an hour, as a board warms or a battery fades. If a board passes your script cold but misbehaves in the evening, run the script again at the end of a long session before you conclude anything. Warranty claims and returns both go better with that evidence: ‘doubles the E after roughly an hour of use, wired or wireless’ is a sentence support teams can act on.
Testing sound properly: your room, your desk, your microphone
Keyboard sound is a system, not a switch: case, plate, keycaps, desk, and room all contribute, which is why the same board sounds different in every video you watch. Your test should therefore happen in your room, on your desk, with your desk mat or lack of one. Record thirty seconds of normal typing and thirty seconds of your fastest typing on your phone, placed where a colleague or microphone would sit. Then listen on headphones. You will hear stabiliser rattle, spring ping, and case echo that your ears politely filtered out while you were concentrating on typing.
Judge three sounds separately. The downstroke sound is the main event and the hardest to change later. The upstroke — keys returning — is often louder on light switches and is affected by technique and keycap weight. Stabiliser noise is a rattle or tick on the large keys, and it is the most fixable of the three, responding to lubrication and tuning. A board whose only sin is stabiliser rattle is a good board with a known cure; a board whose basic downstroke you dislike will annoy you for years, because changing that means changing switches, caps, or board.
The call test
If you take calls at this desk, run one with the board before the return window closes — or simulate one by recording a voice message while typing the way you would while taking notes. Microphones compress and emphasise transients, so a board that sounds moderate in the room can sound aggressive on a call. This is also the test that decides whether a clicky board is viable in your life. Many people keep two boards, or one board and a quiet set of switches for the spacebar-to-letters cluster, purely because of what the call test revealed. Discovering it in week one is a preference; discovering it in month two is a problem.
For the full menu of cures when a board fails the sound test, work through the fixes for a loud mechanical keyboard, which orders interventions from free (desk and technique) to involved (switch changes), so you can judge whether your test board is one cheap fix away from right.
Wireless testing beyond ‘it connects’
A wireless board that pairs successfully has passed the easiest test it will ever face. The real tests are wake behaviour, contention, and endurance. Wake behaviour: let the board sleep, then type a sentence immediately. The first characters are where lazy implementations lose or delay input, and you will do this a thousand times a year. Test it ten times across a day, including after the computer itself has slept, because board sleep and host sleep interact in ways a single test misses.
Contention: use the board in your real wireless environment — router nearby, phone on the desk, wireless mouse and headphones active, microwave running if your kitchen is close. Bluetooth shares its band with all of these, and a board that stutters only when the house is busy has a real fault for your life even if it is flawless in a quiet test. Dongle placement matters enormously here: a receiver in a rear port behind a metal case is a different product from the same receiver on a short extension at the desk edge. Test the placement you will actually use, and if you need the extension to make it reliable, count that as part of the setup, not as a failure.
Battery claims versus battery reality
Manufacturer battery figures are measured under conditions you will not reproduce — backlight off, modest use, ideal signal. Your test cannot run for the weeks a full drain would take, but it can establish a rate: note the charge level, use the board normally for three days with your backlight habits, and note the level again. Extrapolate honestly and decide whether the charging rhythm fits your life. Also test the low-battery behaviour: some boards warn you gracefully days ahead, others die mid-sentence, and a few behave erratically — missed keys, dropped connection — for the last stretch of charge, which you may otherwise misdiagnose as a fault. Knowing your board’s low-battery personality is part of owning it.
Finally, test the wired fallback while the battery is healthy. The day the battery dies before a deadline, you will plug in the cable for the first time; discovering then that the cable is short, the port is awkward, or the board cannot type while charging is discovering it too late.
Testing for the long term: what a new board cannot tell you, and how to infer it
A fifteen-minute script cannot measure durability, but it can collect the evidence from which durability is inferred. Flex the case gently: a board that creaks and twists in the hand will not feel more solid in year three. Examine keycap legends and ask how they were made, because worn legends are the most common visible ageing in keyboards. Check whether wear parts are replaceable — cable, keycaps, switches on a hot-swappable board, feet — since a board whose wear parts are all standard and swappable has no fixed lifespan at all in practical terms.
Look at the maker’s support footprint: firmware updates published and dated, a manual that exists, spare parts or at least specifications available. These are proxies for whether the board will still be supported when your computer’s operating system changes around it. Wireless boards in particular live or die by this, as pairing standards evolve. None of it is glamorous, and all of it predicts your fifth year with the board better than the switch brand does.
The second-hand deep test
Used boards add two tests to the script. First, a history test: ask what the board was used for and whether it has been modified, then verify — pull a few keycaps and look for the shine patterns, dust load, and switch consistency that confirm or contradict the story. Second, a hygiene and wear reset: clean the board fully before judging its feel, because a dirty switch feels scratchy in a way that has nothing to do with its remaining life, and many ‘worn out’ used boards are simply filthy. Judge the board after cleaning, not before. The earlier section of this guide on buying second-hand covers pricing and negotiation; the point here is narrower — never let dirt make a durability decision for you.
If you are testing because you are choosing rather than verifying, pair the script with the selection framework in the guide to choosing a keyboard by use, size, and switch feel: test tells you whether a specific unit is sound, choosing tells you whether the model was right in the first place, and confusing the two is how people return three good boards in a row.
Keeping a baseline: retesting a board you already own
Testing is usually treated as a purchase activity, but its second use is maintenance. Run your script — or even just the full-key sweep and the speed block — every few months on the board you own, and keep the dated results. A board’s decline is gradual and deniable: the spacebar gets a little louder, one key doubles once a week, the battery lasts a little less. A dated baseline converts ‘is it worse, or is it me?’ into a comparison, and it times interventions well. Lubrication, a switch swap, or a deep clean done when the numbers first move is a small job; the same job deferred a year is a restoration.
The baseline also protects you during troubleshooting. When a key starts misbehaving, your last clean test tells you the fault is new and probably local — a spill, a knock, a dying switch — rather than the start of general collapse. And when you lend, sell, or hand down the board, the test history is an honest description of its condition, which is worth real money and goodwill in the used market.
A five-minute monthly version
Compress the script for routine use: one full-key sweep on an online tester, one fast paragraph read closely for doubles, one listen to the spacebar and Enter for new rattle, one glance at battery trend if wireless. Five minutes, monthly, catches nearly everything while it is still cheap to fix. Put it on the same rhythm as your other small maintenance — it belongs with checking backup drives and cleaning fans, in the category of tiny habits that prevent the only keyboard emergencies there are: the ones that happen on deadline day.
Testing keycaps, stabilisers, and the parts your fingers grade daily
Switches get the attention, but your fingers spend their day on keycaps and your ears judge the stabilisers, so a thorough test grades all three. Start with the keycaps. Run a fingertip slowly across the home row: the surface should feel consistent from cap to cap, with no sharp moulding edges on the sides your fingers brush mid-word. Tilt the board under your desk light and look along the rows — legends should sit level and evenly printed, and caps should sit at a uniform height; a single tall or tilted cap usually means a cap not fully seated, which pressing it firmly home will fix, and if it will not seat, that is a finding worth recording.
Type the specific characters each finger owns at speed. Keycap profiles are sculpted row by row on many boards, and a profile that suits the home row can feel wrong on the number row if your style reaches rather than lifts. Pay attention to the spacebar’s edges: if you strike it off-centre, as most people do, a sharp front edge announces itself within a paragraph. None of these are defects in the manufacturing sense; they are fit findings, and fit findings are exactly what a return window is for.
A stabiliser examination in four presses
Test each stabilised key — spacebar, Enter, Shift keys, Backspace — with four presses: centre, left end, right end, and a fast double-tap. Centre tells you the basic sound. The ends expose rattle and binding, because a stabiliser’s job is precisely to keep a long key level when struck off-centre; a key that ticks at one end or feels mushy at the other has a stabiliser that is dry, loose, or poorly tuned. The double-tap exposes return speed: a large key that comes back lazily will limit fast typing and gaming more than any switch specification. Score each large key separately on your sheet. Stabiliser faults are the most fixable findings on this entire list — lubrication and tuning cure most of them — so a board that fails only here is a candidate for a small project rather than a return, if you are willing. If you are not willing, the finding is still a fail, and it is better recorded than rationalised.
While you are at the large keys, test the spacebar for the whole board’s acoustic character. Spacebar strikes dominate the sound of typing in calls and recordings, and a hollow, booming spacebar on an otherwise quiet board is the single most common sound complaint owners report. It is also, fortunately, one of the most treatable, responding to foam, tape mods inside the cap, or a different cap entirely.
The typing test itself: choosing passages and reading results honestly
What you type during testing steers what you find. A passage of common words flatters every board, because your fingers know it too well. Use three passages instead. The first is ordinary prose — an email you might actually send — which tests the board against your real vocabulary and punctuation habits. The second is symbol-heavy: a paragraph of code, a formula-laden note, or a passage you compose full of brackets, quotes, and numbers, which exposes layout compromises and weak keys outside the letter block. The third is your name, address, and the phrases you type most in life; errors there are the errors you will make daily, and boards differ surprisingly on familiar strings because confidence makes you fast and speed exposes chatter.
Read results like an analyst, not like a fan. Count errors by type and by key. Errors spread evenly are adaptation, and they halve every day for a week. Errors concentrated on one key are a board finding. Errors concentrated on one finger’s keys across every board you test are a you finding — useful knowledge that no purchase will fix and that a different layout or switch weight might accommodate. Speed scores deserve the same scepticism: a new board is almost always slower on day one, and the honest comparison is your day-seven score on the new board against your remembered plateau on the old, not your day-one score against your best-ever.
Testing with the software you actually use
Finish the evaluation inside your real applications, because they mediate the board in ways a typing-test website does not. Remote desktops and virtual machines add latency and occasionally swallow combinations. Some games poll input differently and can make a board that feels instant on the desktop feel soft in play. Design and editing tools lean on modifier chords that expose rollover and dual-role timing choices. Spend twenty minutes in each of your two or three core applications doing ordinary tasks, and add their verdicts to the sheet as separate lines. A board is not tested when the website is satisfied; it is tested when your Tuesday is.
Record the conditions, too: wired or wireless, which device, which desk. Test results without conditions cannot be compared later, and comparison is the entire value of the exercise when the next board arrives.
Deciding: the return, the project, or the keeper
Every test programme ends in one of three verdicts, and naming them in advance makes the decision cleaner. The keeper passes everything that matters and its notes are traits you genuinely do not mind. The project fails on fixable findings only — stabiliser rattle, one scratchy switch on a hot-swappable board, a cable you would rather replace — and the fixes are within your skill and patience. The return fails on something structural: a layout your hands reject after a fair week, a downstroke sound you dislike at its root, wireless behaviour that fights your environment, or defects in more than one place, which predict a ownership of small grievances.
The discipline is in the deadlines. Decide the project’s fixes will be attempted within the return window, not after it, so a failed fix still leaves the return open. Decide the keeper by the end of the window too, and then stop testing and start using; perpetual evaluation is its own dissatisfaction, and boards judged fairly for a week and then trusted tend to be enjoyed for years. And when you do return a board, send your scoresheet findings with it if the retailer asks — specific, dated, pattern-based notes are how good retailers spot bad batches, and they make your next purchase from them smoother.
If the verdict is a keeper, file the scoresheet rather than binning it. It becomes the baseline described at the end of this guide — the dated evidence against which the board’s ageing, and your next board’s audition, will be measured. Testing, done this way, stops being a chore attached to buying and becomes the small, repeatable craft of knowing your own tools.
Gear mentioned in this guide
The products below are examples referenced in this guide. They were verified through the Amazon Creators API product pool for this site; use them as concrete reference points for the features discussed, not as a ranked list.
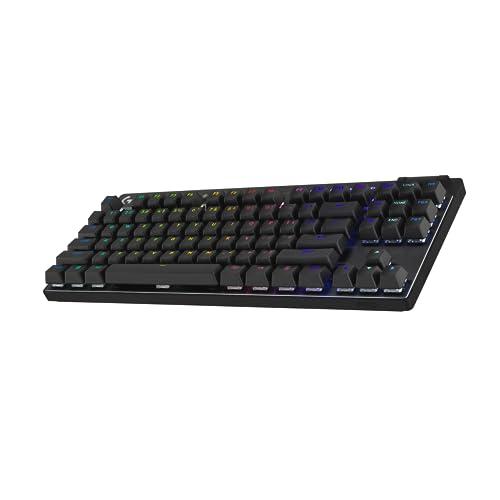
- Logitech G PRO Mechanical TKL Tenkeyless Gaming Keyboard (Clicky) – Black — Check on Amazon
- Keychron K2 Version 2 Wireless Gaming Mechanical Keyboard, Bluetooth/USB Wired Compact 84 Keys RGB LED Backlit Aluminum Frame for Mac Windows, Gateron G Pro Blue Switch — Check on Amazon

Frequently asked questions
What is the fastest way to test all keys?
An online keyboard tester that highlights each key as it registers. Work methodically across every row including modifiers and the function row, then type normally for a few minutes to catch chatter and missed presses that slow testing misses.
What does it mean when a key types twice?
That is key chatter — one press registering multiple times — usually caused by a failing or dirty switch contact. On a hot-swappable board, swapping the switch normally cures it; on a new board, treat persistent chatter as a return reason.
How do I test rollover without special equipment?
Hold down combinations you actually use — movement keys plus modifiers for gaming, or rolling six-key chords for typing — while watching a key tester. Every held key should show as registered, and no unpressed key should appear.
Should I test a wireless keyboard differently?
Test every mode: wired, 2.4 GHz dongle, and Bluetooth, including pairing to a second device if you will use one. Also type at your normal distance from the receiver, since wireless faults often appear only at range or through obstructions.
Is stabiliser rattle a defect or normal?
Mild stabiliser sound is common, but loud rattle, ticking, or uneven large keys on a new board are quality issues worth flagging inside the return window. Lubricant and tuning can improve stabilisers later if you keep the board.
When should I re-test a keyboard?
After modifications such as lubing or swapping switches, after a spill or drop, when a new fault appears, and before selling or buying second-hand. The routine is quick enough to be a habit.
Related Guides
Keep exploring with these guides and roundups from the same desk and audio cluster: