Learning how to lubricate switches on a keyboard is the single most rewarding bit of maintenance a mechanical keyboard owner can do: a thin, correctly applied film of switch lubricant removes spring ping, smooths scratchy presses, and deepens the sound of a board in an afternoon. It is also easy to overdo, and overlubed switches feel sluggish and muted, so this guide emphasises restraint at every step.
You will need access to your switches, which means a hot-swappable board or soldering skills if the switches are soldered in. The process below assumes a swappable board — see Hot Swappable vs Soldered Keyboard if you are not sure which you own — and it covers what to buy, how to open a switch safely, exactly where lubricant goes, and how to test as you work so one bad batch never ruins a whole board.
Disclosure: As an Amazon Associate, ilcastellomenu.com earns from qualifying purchases. Product details and availability can change; check the retailer listing before you buy.
What you need before you start lubricating switches
The essentials are a switch opener matched to your switch type, a switch puller, a keycap puller, a small flat brush, your lubricant, and a switch film or lube station if you want to stay organised. A magnifier helps if your eyesight protests at small parts, and a few spare switches are cheap insurance against a bent leaf or a lost spring during your first attempt.
Lubricant choice matters. Switch lubricants are sold in different thicknesses: thinner formulas suit tactile switches because they preserve the bump, while thicker formulas are popular on linears for maximum smoothness. Stem and housing lubes are sometimes sold separately from spring treatments such as bag-lubing with oil. If you are shopping for supplies, the community favourites are gathered in Best Lube for Keyboards; buy one well-regarded product rather than experimenting with household oils, which are not formulated for this and can damage plastics or attract dust.
Set up a clean, flat workspace with good light and a tray or mat with compartments. Switch internals are small, springs escape enthusiastically, and a tidy station is the difference between a relaxing hobby session and an hour on your knees with a torch. Put on a podcast; a full board takes most people one to three hours the first time.
In this guide
Step 1: remove keycaps and switches safely
Photograph your layout first so keycaps go back in the right places, then pull keycaps straight up with a wire puller. On a hot-swappable board, grip each switch with the switch puller on its release tabs, squeeze gently, and rock — never yank — the switch free. Forcing a switch tears socket contacts in the PCB, which converts a fun project into the dead-key repair described in How to Fix a Keyboard Key that is Not Working.
Work in batches. Lube ten switches, reassemble them, reinstall, and type on them before touching the rest of the board. That test batch tells you whether your application amount is right while only ten switches are at stake, and it gives you a direct before-and-after comparison on the same board, which is the fastest way to calibrate your technique.
Keep removed switches in order if your board mixes switch types — some boards ship with different switches on modifiers or the spacebar area — and inspect each switch as it comes out. A switch that was already scratchy or inconsistent is a candidate for replacement rather than lubricant.
Step 2: open the switch and lay out the parts
A mechanical switch has four parts: top housing, bottom housing, stem, and spring, plus the metal leaf contacts fixed in the bottom housing. Use the opener to release the housing clips evenly; prising one side hard can crack a clip. Lay the parts out in a consistent pattern — housings in one row, stems in another, springs in a small container — so reassembly is mechanical rather than detective work.
Look at the leaf before you touch anything. The leaf is the delicate cross-shaped metal contact in the bottom housing, and it must never be lubed on its contact points or bent. Most scratch and ping comes from the stem rails, the housing rails, and the spring, which are exactly the parts you will treat. Knowing what not to touch is half the craft.
If your switches feel loose or wobbly, this is also the moment for switch films, thin gaskets that sit between the housings and tighten the fit. Films are optional, cheap, and reversible, and they can reduce housing wobble on switches whose clips are not perfectly tight.
Step 3: apply lubricant — thin, and only where it belongs
Load the brush by touching it to the lubricant and wiping most of it off; the correct amount looks like almost nothing. Paint a whisper-thin film on the bottom housing rails where the stem slides, the matching stem rails, and the sides of the stem — avoiding the stem legs on tactile switches unless you deliberately want to soften the bump, because lubing tactile legs rounds off the very feedback you chose the switch for.
For springs, the efficient method is bag-lubing: put the springs in a small bag with a drop of suitable oil, seal, and massage until each spring carries an even sheen, then fish them out with tweezers. Alternatively brush the ends of each spring, which is where spring ping and crunch originate. Either way, a treated spring is the cure for the metallic ringing many people wrongly blame on the keyboard case.
Reassemble each switch as you finish it and press it a dozen times. A correctly lubed switch feels smooth with a clean bottom-out; an overlubed one feels slow, sticky, or oddly silent at the end of travel. If a switch feels wrong, reopen it and wipe the excess off with a dry brush — lubricant is forgiving if you catch mistakes during your test batch rather than after ninety switches.
How to lubricate switches on a keyboard: the sound-tuning view
Lubrication is also sound design. Smoother switches reduce high-frequency scratch and rattle, springs stop pinging, and the board’s overall voice drops and tightens. If noise is your primary complaint — a board that annoys housemates or colleagues — combine lubed switches with the case and desk measures in How to Fix a Loud Mechanical Keyboard rather than expecting lubricant alone to silence a hollow case or a ringing aluminium plate.
Stabilisers deserve separate attention. The wire bars under the spacebar, Enter, Shift, and Backspace keys are the most common source of rattle on any board, lubed or not. A thicker lubricant on the stabiliser wires and contact points, applied after removing the keycap, transforms the keys you hit hardest. Many owners lube stabilisers first and switches second, because the perceived improvement per minute of work is higher.
Foam and case mods interact with lube too: a board already damped with case foam, like those in Best Foam for Keyboards, will showcase smooth switches better than a hollow shell that amplifies every imperfection. Treat sound as a system — switches, stabilisers, case, keycaps, and desk surface all contribute.
Common mistakes and pro tips
Overlubing is mistake number one, and it is not close. If you can see a glossy bead of lubricant, there is too much. Mistake two is lubing the leaf contacts, which can cause inconsistent registration. Mistake three is lubing an entire board before testing a batch; mistake four is mixing lubricants randomly, which can produce unpredictable feel. Mistake five is rushing reassembly and trapping a spring off-centre, which makes a switch feel crunchy no matter how well it was lubed.
Pro tips from experienced builders: keep one unlubed switch aside as a reference so you can compare honestly; lube in daylight or under a neutral lamp so you can judge film thickness; log which lubricant you used on which board so a result you love is repeatable; and give a freshly lubed board a day of typing before judging it, because lubricant settles and redistributes slightly with use.
If the whole project sounds like more commitment than you wanted, that is useful information too. Plenty of modern boards ship with factory-lubed switches that capture most of the benefit — the pre-lubed examples in the gear section show how far factory application has come — and there is no hobby rule that says you must lube your own.
The bottom line on lubricating switches
Thin lubricant, the right places, a test batch first, and patience: that is the entire method. Done well, lubricating switches makes a good board feel custom-built, and the skill transfers to every future keyboard you own. Done hastily, it makes ninety switches feel like they are typing through honey — so let the test batch be your teacher.
Once your board is back together, run the checks in How to Test a Keyboard to confirm every key registers cleanly, and if you are still deciding whether your next board should be swappable for exactly this kind of maintenance, what-is-a-hot-swappable-keyboard explains the hardware that makes it possible.
Lubricant types and where each belongs
Switch lubricants divide by viscosity, and viscosity is destiny. Thin lubricants flow into tight rail interfaces and preserve tactile character; thick lubricants coat heavily, maximise smoothness on linears, and punish heavy-handed application by slowing the switch’s return. Neither is universally better — the match between lubricant weight, switch family, and your application restraint decides the result, which is why experienced builders own two or three and beginners should own exactly one, matched to their switches.
Springs prefer oil-style treatments because the goal is an even film over a coil, not a packed grease layer; the bag method exists because brushing ninety springs individually tests anyone’s devotion. Stabiliser wires want the opposite: a thick, stay-put lubricant that remains where the wire meets its housing through thousands of spacebar presses. Buying one product for all three jobs guarantees two of them are compromised.
Store lubricants sealed, at room temperature, and labelled with the date opened. They last a long time, but a labelled jar prevents the classic drawer mystery — three identical pots, three different viscosities, one ruined batch of switches — that every long-term hobbyist has either lived or narrowly avoided.
Films, springs, and the supporting cast of mods
Switch films tighten the junction between housing halves. Their audible effect is a reduction in the slight rattle and pitch variation loose housings produce; their tactile effect is a marginally more solid press. They are most valuable on switches known for loose housings and least necessary on modern tight-tolerance switches, so treat them as a targeted remedy rather than a default ingredient in every build.
Spring swapping is lubing’s sibling mod: a longer or differently weighted spring changes the force curve’s shape, not just its height, altering how a switch returns and how it feels at the bottom of travel. If your complaint about a switch is its return speed or its bottom-out weight rather than its smoothness, springs — not lubricant — are the honest fix, and the swap takes seconds while the switch is already open for lubing.
Combine mods conservatively. A filmed, spring-swapped, thickly lubed switch has three variables changed at once, and if the result disappoints you will not know which change to blame. The test-batch discipline from the main guide applies doubly here: one mod, ten switches, a day of typing, then decide.
Maintaining a lubed board over the years
Lubricant does not last forever at full effect: over years of use it migrates, thins in high-contact areas, and collects the dust that any desk environment supplies. The decline is gradual and honest — a board does not wake up scratchy; it drifts. Most owners re-lube on a two-to-three-year rhythm or when a specific switch announces itself, and spot-treating individual switches as they complain is a perfectly respectable maintenance strategy.
Keep a small ‘board file’ — a note, physical or digital, recording which lubricant went where, which switches were filmed, and any springs changed. Future maintenance becomes archaeology without it, because a switch gives no outward sign of what is inside it. The file takes ninety seconds to start and saves an afternoon of sampling and guessing later.
Finally, remember that a lubed board still wants basic hygiene: debris blown out periodically, spills treated as emergencies, and keycaps cleaned so the grime of the surface never reaches the switches you so carefully tuned. Maintenance is a system, and lubrication is its most enjoyable component — not its only one.
Lubing tactile switches without killing the bump
Tactile owners fear lubing for one reason: the bump is the product, and lubricant on the stem legs — the parts that create the bump as they pass the leaf — rounds it toward linear. The conservative tactile method therefore treats rails and housing only, leaves legs dry, and uses the thinnest lubricant in the drawer. The result preserves the event your fingers bought while removing the scratch that surrounds it, which for most tactile switches is exactly the improvement available.
Test the boundary deliberately on your batch of ten: lube five conservatively and five including the lightest possible touch on the legs, then type both for a day. Some tactiles — particularly those whose bump owners describe as harsh or gritty — genuinely improve with a whisper on the legs; others lose their identity. Your switch, your bump, your call — but make it on evidence from ten switches, not faith applied to ninety.
Lubing clicky switches and linear switches: the differences
Clicky switches contain an extra moving part — the click jacket or bar — whose motion makes the sound. Lubing the rails smooths a clicky like any switch, but lubricant reaching the click mechanism can muffle or make it inconsistent, and since the click is the point of the switch, the rule is restraint bordering on abstinence anywhere near the jacket. Many clicky owners lube springs only and leave the rest factory, which is a respectable complete answer for that family.
Linears are the opposite: with no bump to protect and no click to preserve, they accept the full treatment — rails, stem sides, springs — and repay it with the deepest smoothness gains in the hobby. If your first lubing project can be a linear board, choose it: the margin for error is widest, the improvement is most audible, and the skills transfer intact to the fussier families later.
How much lubricant to buy and how to store the project
A small pot of switch lubricant services several full boards; the hobby’s running joke is that everyone owns a lifetime supply because application is measured in whispers. Buy the small size, keep the receipt of what it was, and resist the three-pot starter collection until a specific switch gives you a specific reason. Springs oil is similarly modest in consumption — the bag method uses drops, not capfuls.
Store the project like a project: switches in a labelled container per board, the lubricant and brushes together, and a note of what was done to which batch. Lubing sessions are often separated by weeks of ordinary life, and the note is what lets session three continue session two’s decisions instead of restarting the calibration from zero.
Knowing when not to lube
Some switches should not be lubed because they are already there: modern factory-lubed switches from reputable makers capture most of the benefit, and adding your own layer on top of a good factory job can push a switch from smooth to sluggish. Type the board for a month first. Lube is a remedy for specific complaints — scratch, ping, rattle — and a board without complaints is not a patient.
Some boards should not be lubed because the owner’s honest appetite for the project is smaller than the project. That is not a character flaw; it is scheduling. A factory-lubed board bought knowingly serves that owner better than a half-lubed board resented at switch forty, and the hobby’s health depends on both kinds of owners being honest about which one they are.

Decide the outcome before you open a single switch: three different goals
Lubrication is one word covering three different projects, and confusing them is how beginners end up with a board that feels worse than stock. The first project is repair: a switch that feels scratchy or sounds gritty needs the friction surfaces smoothed, and the goal is to restore the feel the switch was designed to have. The second project is sound tuning: you are chasing a deeper, quieter keystroke, and lube is one tool among several alongside films, foam, and keycap choice. The third project is feel tuning: you want a smoother, sometimes slightly softer press, accepting that the switch will feel different from factory intent, not just better.
Each goal uses lubricant differently. Repair needs the least product, applied precisely to the slider rails and leaf contact area, because the aim is to remove a fault. Sound tuning cares as much about the spring and the bottom housing as the slider, since spring ping and bottom-out clack are sound problems, not friction problems. Feel tuning is where overlubing happens, because the temptation is to keep adding smoothness until the switch turns sluggish and the tactile event disappears. Name your goal out loud before you start; when a step does not serve that goal, skip it, however popular it is in forum posts.
The test-switch protocol
Never lube a whole board in one pass. Lube four switches: one for each corner of the board, or four in a row on a spare switch tester if you have one. Install them, type for a day, and live with the result at different times — morning alertness and evening fatigue judge feel differently. If you love it, you have a reference standard for the rest of the board and a recipe to repeat. If you do not, you have four switches to clean or replace instead of eighty. Every experienced modder has a story about a full board lubed in an evening and regretted for a month; the test-switch protocol exists so that story is not yours.
Photograph your test switches before and after, and write down what you applied where. Memory for quantities is unreliable — ‘a thin coat’ means something different on switch forty than it did on switch four, and drift across a long session is the main reason boards end up feeling inconsistent from left to right. A written recipe and a reference switch keep the eightieth switch identical to the first.
Workspace, lighting, and the ergonomics of a two-hour bench session
Lubing is fine motor work at the edge of what your eyes resolve easily, and the workspace decides whether it is satisfying or miserable. You need bright, diffuse light angled so it does not reflect off glossy plastic into your eyes; a desk lamp you can reposition beats a ceiling light you cannot. You need a surface that shows small parts clearly — a pale mat or tray against dark switch housings, or the reverse — because a dropped spring on a matching carpet is a spring lost. And you need containers: one for opened tops, one for bottoms, one for stems, one for springs, so that reassembly is a sequence rather than a search.
Work in batches sized to your patience, not to the board. Ten to fifteen switches per session keeps quality high and hands fresh; a full-size board is then a week of pleasant evenings rather than one punishing marathon. Rushing shows up as inconsistency — heavier coats late in a session when your brush control fades, parts forced because you want to finish. Set the batch out, finish the batch, stop. The board does not care whether it was finished on Tuesday or Sunday; your fingers will remember the difference.
Keeping springs and small parts under control
Springs are the part everyone loses and the part that most punishes carelessness. A spring that rolls away and gets stepped on is bent, and a bent spring changes feel and can scratch a stem. Work over a tray with raised edges. Handle springs by the coil body, never by pulling an end, and if you bag-and-tag springs by switch position you can return each spring to its original switch — worthwhile on boards where you suspect factory variation. A magnetic parts tray, borrowed from any electronics hobby, is the single cheapest upgrade to the whole process.
Static and dust are quieter enemies. A freshly opened switch is a small clean room; a crumb or a hair inside becomes a scratch you can feel. Work away from food and pets for the session, wash and dry your hands before starting, and close switches promptly rather than leaving rows of open housings collecting room dust while you take a break. If you must pause mid-batch, cover the tray with a clean cloth. These habits sound fussy; they are the difference between a board that feels silky and one that feels almost silky except for three keys you cannot explain.
Lubricant chemistry in plain language: what the numbers and names mean
Product names in this hobby are codes, and decoding them prevents expensive mistakes. Greases and oils are graded by consistency: thin products flow into tight spaces and suit springs and stabiliser wires, while thicker products stay where you place them on slider rails and housing contact points. A product that is perfect on a stabiliser wire can make a switch stem feel gummy, because the clearances differ by design. When a guide recommends one product for switches and another for stabilisers, that is not brand loyalty; it is viscosity matching the gap it has to fill.
Compatibility matters as much as thickness. Switch housings and stems are specific plastics, and a lubricant that is safe on one plastic can craze or soften another. Stick to products the hobby has used for years on switch plastics, and be suspicious of general-purpose workshop greases, penetrating oils, and anything marketed for metal machinery. Silicone products have their own caution: they migrate, they are hard to remove completely, and a tiny amount on a contact leaf can cause the intermittent behaviour you were trying to cure. If you are unsure about a product, the test-switch protocol doubles as a compatibility test — a week in one switch will reveal softening or weirdness before it reaches the whole board.
How much is actually on the brush
The most common instruction in lubing — use less than you think — is useless until it is made visible. Load the brush, then wipe most of it off on the rim of the container: the brush should look almost dry, with a sheen rather than a bead. Paint one rail and hold it to the light; you want a wet-looking film you cannot see as a layer with edges. If you can see a ridge, a droplet, or a white-ish accumulation in a corner, that is too much, and the excess will migrate to the leaf and the bottom of the housing over the following weeks. Thin coats also explain why lubing is slow: the work is in restraint, not coverage.
Springs need a different technique because their surface is a coil, not a flat. The bag method — a drop of oil in a small bag, springs added, air trapped, and the bag worked gently so every coil gets a film — coats evenly with almost no waste and no brush control required. It also keeps oil off your fingers and bench. Donut-dipping spring ends into grease addresses the specific ping that comes from spring ends seating against plastic. Choose by symptom: full-length oil for general ping and scratch, end treatment for a localised ringing on release.
Switch-by-switch judgement: reading a switch before you treat it
Open a switch and it tells you its history. Wear polish on the slider rails — shiny tracks where the plastic has been burnished by use — shows you exactly where friction lives on that unit. Factory lube, when present, is usually a light film on the rails or the spring; its presence means the manufacturer already did part of your job, and your task may be only to even it out rather than add more. A dry, matte switch from a budget board is the opposite case: it will take a standard coat gratefully and improve the most. Judging each batch of switches on its starting condition is what separates tuning from ritual.
The leaf — the small metal contact assembly in the bottom housing — deserves respect and distance. Its tension and surface decide both the tactile event and the electrical reliability of the switch. Keep lubricant off the leaf contact points. A film there can insulate intermittently, producing the maddening fault of a key that works except when it does not. If you suspect you have contaminated a leaf, clean it with a dry brush and patience; do not bend it to inspect it, because leaf geometry is set at the factory and your fingers will not improve it.
Stems, legs, and the tactile bargain
On tactile switches, the bump comes from the stem legs passing over the leaf. Lube on those legs softens the event — which is a dial, not a switch. A whisper of lube on the legs rounds a harsh bump into a pleasant one; a full coat can erase the tactility you paid for. So decide per switch family: linears can take lube on every slider surface, tactiles get lube on rails and housing but a deliberate choice on the legs, and clicky switches get the most conservative treatment of all, because their sound mechanism depends on parts moving freely and striking cleanly. The same board can legitimately contain three different recipes if it mixes switch types, which some people do across rows.
Springs also carry information. A spring that is unevenly wound or visibly tilted will feel inconsistent no matter what you apply. Swapping a suspect spring for a known-good one during the same session is cheap diagnosis. And if several switches from one production batch share the same flaw, note it: consistent faults are manufacturing traits, and the right response may be to lube around them rather than chase an ideal that batch cannot reach.
Reassembly, first typing, and the break-in week
Reassembly is where patience pays out or evaporates. Seat each stem in its bottom housing in the correct orientation, check the spring is centred on its post, and close the top housing until every latch clicks — a housing closed on three latches instead of four will rattle and can pop open in the board. Press each finished switch by hand before it goes back into the plate: it should travel smoothly, return fully, and sound like its neighbours. Catching a bad unit on the bench takes seconds; catching it after the board is reassembled and the keycaps are on takes a disassembly you will resent.
The first typing session after a full lube is not the final verdict. Fresh lubricant redistributes under use: excess migrates away from contact points, films even out, and switches that felt slightly heavy on day one often settle into consistency by day four. Give the board a genuine break-in week of normal use before you judge it, and resist the urge to reopen switches on day two. The exception is a clear fault — a key that sticks, fails to return, or stops registering — which points to overlubing or a mis-seated part and should be fixed immediately rather than lived with.
Documenting the result so future-you can repeat it
Write down the recipe you actually used: product, where applied, spring treatment, film or no film, and the date. Note which switches, if any, behaved differently. This record turns a one-off project into a repeatable skill — when you lube a second board, or replace a damaged switch two years from now, you can match the existing board instead of guessing. Enthusiasts who keep these notes produce consistent boards; enthusiasts who rely on memory produce boards that feel like cousins rather than siblings.
If the result disappoints, change one variable at a time on your test switches before touching the board again. Most disappointments trace to quantity, not product choice, and the cure is usually removal and a thinner reapplication rather than a different purchase. Keep perspective: lubing is refinement measured in small percentages. A board that was good becomes smoother and quieter; a board with a fundamental problem — a rattly case, poor stabilisers, a switch family you simply dislike — will still have that problem afterwards, and no lubricant was ever going to fix it. For that wider sound picture, see the companion guide on quieting a loud mechanical keyboard as a whole system, where lube is one fix among several.
Safety, warranty, and the switches you should leave alone
Lubing is a low-risk hobby activity, but it is not risk-free, and the risks are worth naming plainly. The work is done on a disconnected keyboard — if your board is wireless, switch it off; if it is wired, unplug it — because you will be handling metal tools near a PCB for hours. Switch openers and tweezers can slip; work away from your face, and treat a sprung spring as the small projectile it is. Lubricants are skin-contact products for most hobby brands, but wash your hands after a session, keep them away from food preparation surfaces, and store them sealed and labelled, especially in a house with children who should not mistake a small jar for anything edible.
Warranty is the financial risk. Opening switches on a soldered board, or removing switches at all on some designs, can void coverage depending on the maker’s terms, and hot-swappable boards are not automatically exempt — some warranties cover the board but not user-opened switches. Read the terms before the first session if the board is new and expensive, and consider living with a new board unmodified through its early weeks, when manufacturing faults are most likely to appear and a warranty claim is cleanest. Modifying a board you may need to return is the one genuinely expensive mistake in this hobby.
Boards and switches to skip
Some switches should simply be left alone. Sealed or non-openable designs exist; forcing them damages housings. Optical and magnetic switches have sensing elements whose alignment and cleanliness matter more than slider friction, and they follow different rules — the comparison in optical versus mechanical switch designs explains why their internals differ. Very cheap switches with loose tolerances may not reward the hours: lube cannot create precision that the moulding never had. And a board you rely on for work tomorrow morning is the wrong candidate for your first-ever session tonight. Practise on spare switches or a secondary board, then bring the skill to the board that matters.
Troubleshooting the finished board: a symptom-by-symptom clinic
Even a careful session can leave a board with symptoms, and each symptom points at a specific cause. Work through this clinic before you consider stripping the board and starting again, because most post-lube problems are local — a few switches, not the whole set — and local problems have local cures.
- A key feels sluggish or returns slowly. Almost always overlubing on the stem or rails of that switch, or lube that has migrated onto the spring. Open that one switch, wipe the stem and rails down to a bare film, and retest before reapplying anything.
- A key stopped registering or registers intermittently. Suspect lube on the leaf contact points. Open the switch, inspect the leaf area, and clean it dry. Do not bend the leaf. If the fault follows the switch when you move it to another socket, the switch is the problem; if it stays with the socket, look at the board instead.
- The tactile bump vanished on a few switches. Their stem legs took more lube than their neighbours’. Wipe the legs specifically; the bump usually returns without touching anything else.
- One switch sounds different — scratchier or pingier — than the rest. A dry spring or a missed rail. Compare it against your documented test switch, treat only the differing element, and resist re-lubing the whole switch out of symmetry.
- The whole board feels heavier than before. A systematic over-application, most often from brush loading drifting upward during a long session. This is the one case where a broader redo may be honest: work switch by switch, wiping down rather than adding, in the same batches you originally used.
- A switch pops open or rattles in the plate. A housing latch did not close fully at reassembly, or a film was omitted where the housing needed it. Reseat and relatch by hand before blaming the lubricant.
Keep notes as you work the clinic, switch position by switch position. A board with three corrected switches and a note explaining each is a finished project. A board with three corrected switches and no notes will present the same mysteries again the next time you open it, because the causes were never recorded. The clinic also has a stopping rule: if a switch has been opened three times for the same symptom without improvement, replace the switch. Some units are simply out of tolerance, and your time is worth more than their redemption.
Finally, remember that some change after lubing is the lubricant settling, not a fault. Films redistribute over the first week of typing, springs bed in, and a board that feels merely good on day one frequently feels right on day five. Judge faults — sticking, failing, rattling — immediately. Judge feel after the break-in week. Confusing those two judgements is how good boards get needlessly reopened and genuinely fixed switches get disturbed.
Gear mentioned in this guide
The products below are examples referenced in this guide. They were verified through the Amazon Creators API product pool for this site; use them as concrete reference points for the features discussed, not as a ranked list.
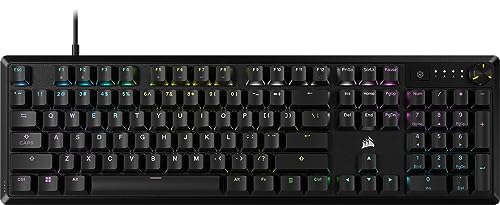
- CORSAIR K70 CORE RGB Mechanical Wired Gaming Keyboard – QWERTY NA – Black — Check on Amazon
- Keychron K8 Pro QMK/VIA Wireless Mechanical Keyboard, Hot-Swappable TKL Custom Programmable Macro Wired Keyboard with Gateron G Pro Blue Switch, White Backlit, PBT Keycaps for Mac Windows Linux — Check on Amazon

Frequently asked questions
Can you lube switches without removing them?
You can apply a tiny amount through the stem opening with the switch in place, and it helps mildly, but it risks overlubing blind and contaminating contacts. Opening the switch gives control over rails and spring, which is where most benefit lives. For a soldered board, in-place lubing or desoldering are the only options.
What lubricant should a beginner buy?
Buy one switch lubricant matched to your switch family — a medium-thickness grease-style lube for linears, a thinner one for tactiles — plus a suitable oil if you plan to bag-lube springs. One correct product beats a drawer of experiments, and community roundups track current favourites.
How long does lubing a full keyboard take?
Expect one to three hours for a full-size board the first time, less for a 60 percent board and less again once your technique settles. Working in tested batches of ten keeps the pace sustainable and catches mistakes early.
Will lube fix a scratchy switch?
Usually, yes — scratch comes from friction on the stem and housing rails, which is exactly what the film addresses. A switch that is damaged, gritty with debris, or inconsistent in registration may need cleaning or replacement instead.
Does lubing void a keyboard warranty?
Opening switches on a hot-swappable board is generally treated as normal user customisation, but policies vary by brand and desoldering a soldered board is riskier territory. Check your manufacturer’s terms if the board is new and the warranty matters to you.
Can you remove lube if you overlube?
Yes. Reopen the switch and wipe parts with a dry brush or lint-free cloth; most excess comes off readily. It is tedious across a full board, which is why the test-batch habit exists.
Related Guides
Keep exploring with these guides and roundups from the same desk and audio cluster: