Learning how to set up a router is mostly a matter of connecting three cables in the right order, then spending ten minutes in the settings before you start using the network. This guide walks through the whole process for a typical home router and a separate modem: unboxing and placement, the physical connections, first sign-in, naming your Wi-Fi network, choosing the right security settings, updating the firmware, and connecting your devices. Nothing here requires special tools, and you can undo every step if something goes wrong — a factory reset returns any router to its out-of-box state.
If you have not chosen the router yet, start with the shortlist logic in Best Routers for Beginners, which favours models with guided app setup. If your internet arrives through a combined modem-router box from your provider, the steps are nearly identical; the main difference is that the modem half is already built in, a distinction explained in a companion explainer.
Disclosure: As an Amazon Associate, ilcastellomenu.com earns from qualifying purchases. Links to Amazon on this page are affiliate links; they cost you nothing extra. Listing details such as price and availability change often, so check the current Amazon listing before you buy.
How to set up a router: what you need before you start
Gather everything first and the setup itself rarely takes more than twenty minutes. You need the router and its power adapter, the modem or fibre terminal (ONT) supplied by your internet provider, one Ethernet cable (usually included in the router box), and a phone or laptop you will use to run the setup. You also need your account details from your provider if your connection type requires a username and password — most cable and fibre connections do not, while some DSL and PPPoE fibre plans do, so check the welcome letter or app from your provider before you begin.
Pick the router’s home before you plug anything in. A central, raised, open spot gives the Wi-Fi the best chance of covering the home evenly, and it is much easier to place it well now than to move it later. The full reasoning is covered in How to Position a Router; for setup purposes, just make sure the spot has a power outlet and is within cable reach of the modem.
In this guide
Step 1: Connect the modem and router in the right order
Order matters because the modem needs to recognise the router as the device it hands the internet connection to. Follow this sequence:
- Power everything off. Unplug the modem (and remove any battery backup inside it, if it has one) and leave the router unplugged for now.
- Connect modem to router. Run the Ethernet cable from the modem’s Ethernet port to the router’s WAN or Internet port — it is usually a different colour from the other ports and labelled WAN, Internet, or with a globe symbol.
- Power the modem first. Plug the modem back in and wait until its Online or Cable light is solid, which can take two to five minutes. Do not rush this step; a router switched on before the modem is ready often ends up with no internet and needs a restart anyway.
- Power the router. Plug it in and give it a minute or two until its power and internet lights settle into a steady state.
If the router’s internet light stays red or amber after several minutes, the most common causes are a modem that was not fully power-cycled or a connection type that needs provider credentials entered in the router’s internet settings. The diagnostic walkthrough in a companion troubleshooting guide covers that situation step by step.
Step 2: Connect to the router for setup
You have two routes into the settings: the manufacturer’s phone app, or a web browser. The app is the friendlier option on most current routers and walks you through naming the network and setting passwords with prompts. The browser route works on every router: connect your laptop to one of the router’s LAN ports with a cable, or join the temporary Wi-Fi network printed on the sticker underneath the router, then open the setup address from that same sticker — commonly a numeric address such as 192.168.0.1 or 192.168.1.1, or a friendly address the brand prints on the label.
Sign in with the default administrator credentials from the sticker if the router asks. Some models have a unique default password printed per unit; older designs used standard defaults. Either way, you will replace this password in step 4 — it is the single most important security change you will make, for reasons detailed in How to Secure a Router.
Step 3: Name your network and set the Wi-Fi password
Choose a network name (SSID) that does not reveal your address, your name, or the router model — the model name in particular advertises exactly which exploits might work against it. A neutral, memorable name is best. For the Wi-Fi password, use a long passphrase of several unrelated words with a number mixed in; it needs to be typed on TVs and games consoles, so favour length over symbols that are painful on an on-screen keyboard.
Most routers offer to use one name for both the 2.4 GHz and 5 GHz bands (sometimes called band steering or smart connect). Accept that default: devices then pick the better band automatically, and you avoid the confusion of two similar network names. A handful of smart-home gadgets with picky setup routines prefer a temporarily separate 2.4 GHz network; you can enable that later in settings if a device refuses to join.
Step 4: Change the administrator password and set encryption
Separate from the Wi-Fi password, the administrator password protects the router’s settings themselves. Change it now, and store it in a password manager or somewhere safe — without it, a forgotten password means a factory reset and starting setup over. While you are in the wireless security settings, confirm the encryption is set to WPA3 if your devices support it, or WPA2-AES (often shown as WPA2/WPA3 mixed mode). Never leave the network open, and avoid the old WEP and WPA-TKIP options entirely; they are broken or obsolete. The complete hardening checklist, including turning off WPS and remote management, is in How to Secure a Router.
Step 5: Update the firmware before you do anything else
Routers ship with whatever firmware was current when the unit was manufactured, which can be many months old. Updating during setup closes known security holes and often improves stability, so do it before connecting the whole household. Look for the firmware or system update option in the app or the administration section of the web interface, run the check, and let the router download and reboot — never unplug a router mid-update. Turning on automatic updates, where offered, means you never have to think about this again. The detailed walkthrough, including what to do when an update fails, is in How to Update Firmware on a Router.
Step 6: Connect your devices and test properly
Join your phone to the new network and test in a few rooms rather than only next to the router: run a video call, stream a short clip, and load a few heavy pages. Then connect the rest of the household — computers, TVs, consoles, smart speakers, cameras. Wired devices such as desktop PCs, TVs and consoles deserve an Ethernet cable whenever the router is within reach: a wired connection is immune to Wi-Fi congestion and always delivers the router’s full speed, which matters more than most settings. If your home has dead zones even with good placement, a mesh system or an extender is the usual fix; the trade-offs are compared in Mesh Wi-Fi vs Router and extender options are rounded up in a companion roundup.
Common setup mistakes to avoid
- Powering the router before the modem is online. The classic cause of ‘no internet’ on a brand-new setup; power-cycle in the right order and it usually resolves.
- Leaving the default admin password in place. Default credentials for many models are publicly documented, which is why changing them is step 4 rather than an optional extra.
- Hiding the router in a cabinet or behind the TV. Enclosures and metal AV gear absorb and block signal; placement has more effect on coverage than any setting.
- Skipping the firmware update. Old firmware is the main avoidable security and stability risk on a new router.
- Writing the Wi-Fi password on the router itself. Anyone in the house — guests, tradespeople — can read it. Keep it in a password manager instead.
Setup differences by internet type
The physical steps are identical everywhere, but what the router needs to know varies by connection. On cable, the router normally just asks for an automatic (DHCP) connection and works the moment the modem is online — cable is the most forgiving setup there is. On DSL, the router or modem-router usually needs your provider username and password (PPPoE), found in your welcome paperwork; type them exactly, because a single wrong character produces a router that connects to the modem perfectly and reaches nothing beyond it. On full fibre, the ONT on the wall does the modem’s job; some providers also tag traffic with a VLAN ID that must be entered in the router’s internet settings, and their support pages or welcome pack will state it if so. Satellite and fixed-wireless setups behave like cable in most cases. If you are unsure which type you have, your provider’s app or bill names it — five minutes confirming beats an hour of guessing at settings.
One more variation: if your provider supplied a gateway and you are adding your own router behind it, decide before you start whether the gateway goes into bridge mode (provider support can enable it) or whether you accept the gateway running the network with your router in access-point mode. Two full routers chained together both handing out addresses — double NAT — works for browsing but breaks some games, VPNs and remote access, and it is much easier to choose the clean topology now than to unpick it later.
Your first-week checklist after setup
Setup day proves the network exists; the first week proves it works. Run through these once, a few days in, when real life has loaded the network: check the router’s client list and confirm you recognise every device — an unknown entry is worth a password change and a look at who you have given the Wi-Fi password to. Test the guest network by joining it yourself and confirming it reaches the internet but not your shared folders or printer, if you set one up. Make a wired speed test at the router and compare it with your plan; a large shortfall beside the router points at the line or the modem, not the Wi-Fi. Save a backup of the router’s configuration if it offers export — after any future reset or replacement, restoring takes two minutes instead of twenty. Finally, write down where the admin password is stored and which email the router’s app account uses; the person who needs that information in three years is you, mid-fault, in a hurry.
If setup goes wrong: the three first-hour failures
The setup page or app cannot find the router
You are almost certainly not connected to the router: join its temporary network or plug into a LAN port, confirm the cable is in a LAN port rather than the WAN port, and try the exact address on the sticker rather than one from memory. Turning off mobile data on a phone helps, because phones helpfully abandon a Wi-Fi network that has no internet yet and then cannot reach the router at all.
Setup completes but there is no internet
Work the order: modem lights first, then the WAN cable in the correct port, then a full power cycle in the correct order. If the modem is healthy and the router still shows no connection, the remaining suspects are PPPoE credentials, a VLAN setting, or the provider needing to register the new router — all covered in the provider section above.
Devices will not join the new network
Usually the password, typed wrong on a TV remote, or a device old enough to dislike WPA3: switch the router to WPA2/WPA3 mixed mode and retry. A gadget that still refuses often wants a 2.4 GHz-only network for its first pairing; most routers can broadcast a temporary one, and the gadget will work happily on the main network afterwards.
Understanding the lights before you call it done
Every router speaks in lights, and learning its dialect takes two minutes that pay off at every future fault. The power light should be solid after boot; a router still blinking after five minutes is stuck, and a power cycle is the first remedy. The internet/WAN light is the important one: solid green or white means the router holds a live connection to the modem; red, amber or off means it does not, and the fault lies in the modem, the cable, or the connection settings — in that order of likelihood. The Wi-Fi lights (one per band, on models that have them) flicker with traffic and confirm each band is broadcasting; a band light that never appears after setup suggests that band is disabled in settings. The LAN lights correspond to wired devices and flicker with their activity. Photograph the all-healthy pattern now, on your phone, while everything works. In six months, mid-fault, that photo is the fastest diagnostic you own: compare, spot which light has changed its story, and you have halved the search before touching a setting.
Setting up a router when you cannot use the app
Apps fail for mundane reasons — an old phone, a store account problem, a router model whose app has been retired. The browser method is the permanent fallback and works on every router ever made, so it is worth knowing even if the app succeeded. Connect a laptop by cable to a LAN port (this bypasses every Wi-Fi uncertainty), open the admin address from the sticker, and you are in the same settings the app presents, arranged differently. If no laptop exists, a phone browser works too: join the router’s temporary network, switch off mobile data so the phone stops abandoning the internet-less Wi-Fi, and open the same address. If the address on the sticker fails, the router’s default gateway address can be found in the connected device’s Wi-Fi details, where it is listed as the router or gateway. And if the admin password is not the sticker one because someone set this router up before, that is what the factory reset exists for: hold the recessed button as the manual directs, wait for a full reboot, and the sticker credentials rule again. Nothing about a second-hand or previously configured router should survive that reset — which is also why it is the correct first step for any router you did not unbox yourself.
The short version
Connect modem to the router’s WAN port, power the modem fully online first, then the router. Set up through the app or the address on the sticker. Name the network neutrally, set a long Wi-Fi passphrase, change the administrator password, confirm WPA3 or WPA2-AES encryption, update the firmware, and enable automatic updates. Then test around the home and wire anything stationary. Twenty careful minutes at setup saves hours of troubleshooting later — and when something does misbehave months from now, our restart guide explains the correct way to reboot before you change anything else.
Gear mentioned in this guide
You do not need new hardware for most of the steps in this guide, but the products below are the ones referenced above. Each was verified against Amazon’s Creators API product data for this site, so the link matches the exact model named.
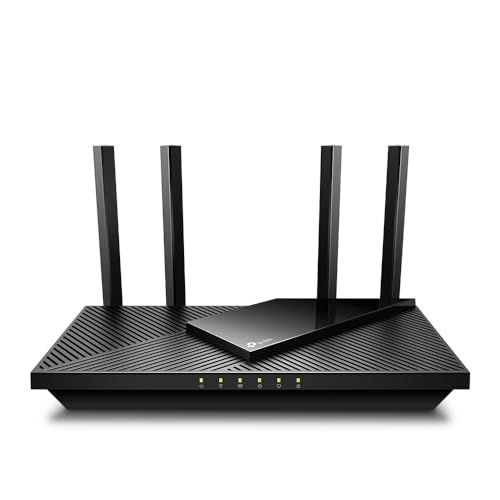
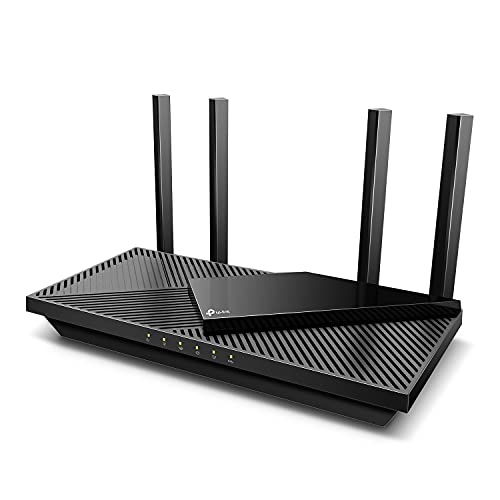
TP-Link AX1800 WiFi 6 Router (Archer AX21 V5)
The TP-Link Archer AX21 is a dual-band Wi-Fi 6 router whose app-guided setup mirrors the steps in this guide closely, which is why it suits first-time installs; it is also EasyMesh compatible if you later add coverage.
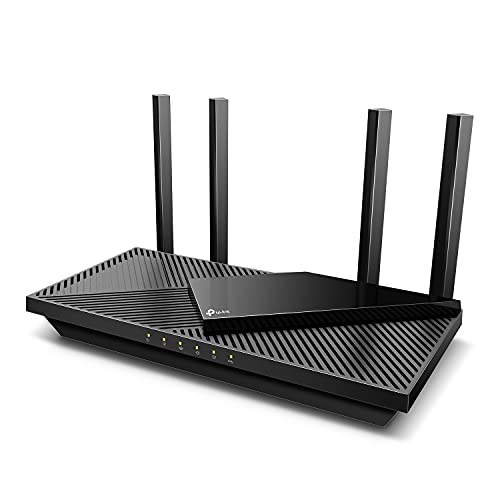
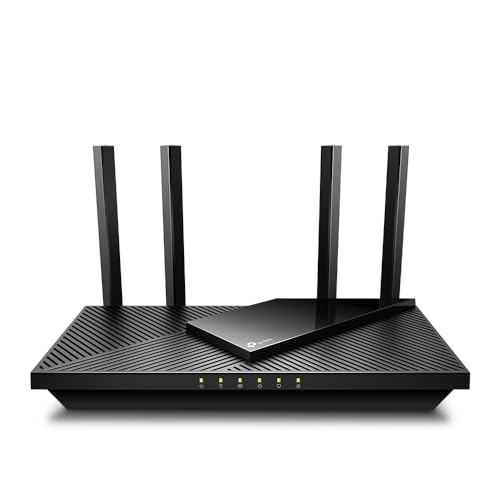
TP-Link Dual-Band AX3000 Wi-Fi 6 Wireless Gigabit Internet Router for Home
The TP-Link Archer AX3000 model (Archer AX55) adds a USB 3.0 port and TP-Link HomeShield security features to the same app-based setup flow, suiting homes that want a step up without a more complicated install.
Planning the wired side while everything is still unplugged
Most setup guides treat the Ethernet cables as an afterthought, something you sort out once the Wi-Fi is live. That order wastes the one moment when rewiring is painless: the moment when everything is already switched off and the cables are already in your hands. Before you power the new router up, decide which devices in the home deserve a permanent cable, because a wired device is a device that never competes for airtime, never drops off the network at an awkward moment, and never needs its Wi-Fi password re-entered after an update. The usual candidates are a desktop computer that lives near the router, a games console used for competitive play, a television or streaming box that sits within cable reach, a network printer, and any small home server or network storage box. If two or three of those sit in the same room as the router, a short cable each removes a surprising amount of wireless contention for everything else.
Count the ports on the back of the router before you promise cables to devices. Most home routers offer four LAN ports, and one of them may be claimed by the run to another room or by a mesh node with wired backhaul. If your wired ambitions exceed the port count, an unmanaged gigabit switch is the correct answer: one cable from a router LAN port to the switch, then cables from the switch to each device. Unmanaged switches need no configuration, no password and no app, and they do not slow anything down at gigabit speeds. What you should not do is chain an old router into service as an improvised switch without putting it into access point or bridge mode first, because a second device handing out addresses creates the double NAT and conflicting-address problems that make a new network feel haunted from day one.
Cable quality matters less than cable condition. Any Cat5e or Cat6 cable in good condition carries gigabit speeds over the distances found in a home. The cables that cause mysterious slowdowns are the ones that have been pinched in door frames, kinked sharply behind furniture, or chewed by a pet, because a damaged pair inside the jacket can force the connection to negotiate down to a tenth of its proper speed while still appearing to work. During setup, when you are handling every cable anyway, flex each one gently and look at the plugs: a broken retaining clip means the plug will creep out of its socket over the following weeks and produce dropouts that look exactly like a faulty router. Replace suspect cables now, while the floor is already covered in packaging.
Finally, label both ends of any cable that leaves the room. A strip of masking tape and a pen are enough. Six months from now, when you are crouched behind the television stand trying to work out which cable feeds the study, those labels turn a twenty-minute guessing game into a glance. Setup day is the only day when you know, with certainty, what every cable does. Capture that knowledge while you have it.
Giving every device a name and a fixed place on the network
A week after setup, open the router’s list of connected devices and you will probably find it full of mysteries: strings of letters and numbers, a couple of entries called simply “android” or “ESP”, and several devices you cannot identify at all. That list is your main diagnostic tool for the life of the router, and it is only useful if you can read it. Spend ten minutes during setup week renaming devices in the app or admin page to something a human would say out loud: “Maya’s laptop”, “hall printer”, “boiler thermostat”. Most routers let you rename clients and pick an icon, and the names persist. When a problem appears later — an unknown device on the network, one gadget eating bandwidth, a smart plug that keeps vanishing — a labelled list is the difference between spotting it in seconds and shrugging.
While you are in that list, consider address reservations for the handful of devices that other devices need to find. A reservation tells the router to always hand the same local address to a given device, instead of whatever address happens to be free. Printers are the classic case: computers that print by address rather than by discovery stop failing every time the printer’s address changes. The same applies to network storage, a home server, security cameras you view through an app on the local network, and any device you reach through port forwarding or a VPN connection into the home. Reservations live in the LAN or DHCP section of the settings, and you set them by picking the device from the connected list rather than typing hardware addresses by hand, which removes the usual source of typos.
Resist the urge to reserve addresses for everything. Phones, tablets and laptops gain nothing from a fixed address, and a long reservation list becomes its own maintenance burden when devices are replaced. A good rule is to reserve only for devices that provide a service to the rest of the network: they serve files, print pages, record video or accept connections. Everything else is a guest in the address pool and can take whichever number it is given. If you later add a smart home hub or a second access point, revisit the list then; five minutes of tidying at each change keeps the network map accurate for years.
Setting up for the whole household, not just yourself
The person who installs the router usually configures it around their own devices and their own habits, and then discovers the household’s real requirements one complaint at a time. A better approach is to treat setup as a small negotiation. Walk through the home and note who does what, where: the teenager whose video calls for school happen in a back bedroom, the partner whose work laptop must stay on a stable connection through the day, the grandparent whose tablet is used for reading in one particular chair. Those are the locations and devices your testing should cover before you declare the job finished, because a network that is fast at your desk and unusable at theirs is not set up, it is half set up.
Most modern routers offer per-person or per-device profiles in their apps, and setup day is when profiles are easiest to build because every device is joining fresh and announcing itself. Group each person’s devices under their name, and you gain three practical abilities. You can pause the internet for one profile at bedtime without touching anyone else. You can see, at a glance, which devices belong to whom when something odd appears on the network. And you can apply content filtering or safe-search enforcement to children’s profiles while leaving adult devices unrestricted. Set expectations out loud while you build the profiles — a pause schedule introduced as a surprise at 9 p.m. goes down far worse than one agreed over the setup boxes in the afternoon.
Also decide, together, what the guest arrangement is. A guest network with its own name and a password you are happy to say aloud or write on a card by the door keeps visitors off the main network, where your storage, printers and smart home controls live. Some routers can display a QR code for the guest network that visitors scan with a phone camera; printing that code and keeping it in a drawer or on the fridge removes the “what’s the Wi-Fi password?” ritual entirely. Change the guest password once a year, or after any period when it was shared unusually widely, and no other maintenance is needed.
Write the essential facts down somewhere that is not the router itself: the network names, the admin login location, the provider’s account number, and where the router’s settings backup is saved. A single page in a kitchen drawer or a note in a shared password manager means that when you are away and the internet stops, someone else in the house has a fighting chance of following the restart steps and reading the lights. Networks outlive the memory of the afternoon they were installed; the written page is what makes the setup a household asset rather than one person’s private knowledge. If the household is already comparing options for a busier home, the picks in Best Routers for Multiple Devices show how much headroom different models leave for this kind of per-person management.
Replacing an old router: the migration path in detail
Swapping a router for a newer model is a different job from a first installation, because the household already depends on the network and every smart device in it remembers the old one. The smoothest migration keeps the same network name and password — the base guide covers that choice — but the details around it decide whether the swap takes half an hour or a whole weekend. Start by photographing the old router’s cable connections and its status lights while everything still works, and export or screenshot its settings if it offers that option. Note especially any port forwarding rules, reservations, custom DNS settings and the provider connection type, because those are the settings people forget they ever made until the camera system or the work VPN stops working three days later.
Do the physical swap at a low-stakes time. Mid-morning on a weekday when someone has a video meeting at noon is the wrong moment; early evening, with the old router still on the shelf and labelled, is the right one. Connect the new router, run through its setup, apply the old network name and password, and then walk the house with a phone, watching which devices rejoin on their own. Most phones, computers, televisions and modern smart devices reconnect within minutes. The ones that typically refuse are older smart plugs, some cameras, printers that were configured by address, and anything that was set up on the old router’s 2.4 GHz band with band steering now merging the names differently. If a stubborn device will not join, the reliable fix is to forget the network on that device and set it up fresh, rather than rebooting the router repeatedly and hoping.
Keep the old router, unplugged but intact, for at least a fortnight. If the new unit develops a fault, or a setting on the old one turns out to be essential, you can restore the old network in minutes by plugging it back in. After that settling period, factory-reset the old router before it is sold, given away or recycled, so your network name, password and configuration do not leave the house with it. If the replacement is happening because the household has outgrown the old hardware rather than because it failed, guides such as Best Routers for Home Use can help match the successor to the way the home actually uses its connection.
Proving the setup worked: a baseline you can compare against later
“It works” is a weak conclusion to a setup session, because it gives you nothing to compare against when performance feels off in three months. A ten-minute baseline turns feelings into evidence. First, run a speed test from a computer wired directly to the router, and write down the download and upload figures and the date. That wired result is close to the best your line can deliver; if a future problem shows wireless speeds collapsing while the wired figure holds steady, the fault is inside your home network, and if the wired figure has fallen too, the conversation belongs with your provider. Second, run the same test over Wi-Fi standing next to the router, then in the two or three rooms where the connection matters most. Expect wireless figures below the wired one — that gap is normal physics, not a defect — but note them anyway, room by room.
Test the things the household actually does, not just the numbers. Start a video call from the furthest regularly used room and walk slowly towards the router while talking; note where the audio first breaks up. Stream the highest-quality video the household watches on the television for five minutes and check whether the picture stays at full resolution. If someone plays games online, a few matches will reveal more about latency under load than any single measurement: what matters is whether the connection stays steady while someone else starts a large download or a cloud backup. Most routers can prioritise a device or an activity through their quality-of-service settings; setup week, with fresh baseline notes, is exactly when a quick experiment with those settings shows whether they help your household or make no difference worth keeping.
Save the baseline where you saved the network facts: a dated note with the wired result, the per-room wireless results, and a line about anything that was already marginal. Marginal corners do not fix themselves, and the note stops you re-diagnosing the same weak bedroom every few months as if it were a new fault. It also frames the next decision cleanly: if the baseline says one room was weak from day one, the answer is placement work or an extra node, not a warranty claim. Households in bigger properties may find the systems in Best Routers for Large Homes a useful reference for what full coverage hardware looks like when a single router’s baseline leaves too many rooms behind.
Setup in homes that fight back: thick walls, outbuildings and rented rooms
Some homes resist the standard setup sequence, and recognising yours early saves a frustrating afternoon. Thick masonry, foil-backed insulation, metal studwork and underfloor heating mats all weaken Wi-Fi far more than ordinary stud walls, and in such homes the router’s position relative to the rooms that matter counts for more than its raw power. If the internet enters the house in a corner — as it often does, wherever the provider’s engineer found it convenient — ask whether the modem can be connected through a longer Ethernet run to a router placed nearer the centre. The modem must stay where the line arrives, but the router can sit at the end of a cable up to a hundred metres long, which in practice means anywhere in the house. That single permission, to separate modem and router by a cable, solves more coverage problems than any settings change.
Outbuildings add a second chapter. A garden office, garage workshop or granny annexe at the bottom of the garden is usually beyond comfortable Wi-Fi range from the house router, and the dependable answers are a buried or overhead Ethernet run to a small access point in the building, or a mesh node placed where it still has a strong link back to the house — typically by a window facing the outbuilding, not inside the outbuilding itself where the signal has already died. Point-to-point wireless bridges exist for longer distances, but for most gardens the cable, unglamorous as it is, wins on reliability and needs no aiming or weatherproofing decisions. Plan this during the main setup, even if the outbuilding network happens later, so the router ends up with a free port and a sensible position for the run.
Renters face a different constraint: the network must be set up without drilling, and sometimes without moving the provider’s equipment at all. Flat Ethernet cables that run under carpets and along skirting boards, adhesive cable clips that remove cleanly, and a router on a bookshelf rather than in a cabinet all achieve a central, elevated position without touching the walls. If the tenancy leaves you stuck with the provider’s gateway in a bad spot, your own router can often still be added behind it, placed where you want it, with the gateway’s Wi-Fi switched off. When the tenancy ends, the whole installation unclips in an hour and the settings backup travels with you to the next home — one more reason that backup, made during setup, earns its keep.
Frequently asked questions
How long does it take to set up a router?
Plan on twenty to thirty minutes including the firmware update and its reboot. The physical connections take two minutes; most of the time is the modem coming online, choosing names and passwords, and testing coverage in a few rooms.
Can I set up a router without a computer?
Yes. Every major brand’s phone app handles the full setup, and the browser method also works from a phone browser. A laptop with an Ethernet cable is only a fallback if the app and Wi-Fi methods both fail.
Do I need to call my internet provider when I install my own router?
Usually not for cable and fibre. Some providers need the new router’s MAC address registered, and DSL or PPPoE connections need your account username and password typed into the router’s internet settings. If the internet light stays red after a correct power cycle, that registration step is the likely missing piece.
Should I keep the network name and password from my old router?
Reusing the same SSID and Wi-Fi password is a legitimate shortcut: every device in the house reconnects automatically. Only do it if the old password was strong; otherwise take the opportunity to set a better one and reconnect devices once.
What if my provider gave me a combined modem-router?
You can either use it as-is and follow the same settings steps, or put it in bridge mode and let your own router run the network — preferable if you want your router’s features. Ask the provider’s support line to enable bridge mode if the option is locked.
Should I set up the 2.4 GHz and 5 GHz bands with the same name or different names?
For most households, one shared name is the better default: the router and your devices negotiate which band each connection uses, devices move between bands as you walk around the home, and nobody has to remember which network the printer joined. Split the names only when you have a specific reason — an older smart device that fails to join a combined network during its own setup, or a fixed device you want pinned to one band permanently. If you do split them, give the names an obvious suffix so guests and family can tell them apart, and expect to spend a little time manually steering devices that cling to the slower band.
How many devices can I connect during setup before something breaks?
There is no sharp cliff. A modern home router handles dozens of household devices — phones, computers, televisions, plugs, bulbs, speakers — without strain, because most of them are idle almost all the time. What matters is not the count of connected devices but the number that are busy at once, and the band they share. If your setup-day test involves every device streaming simultaneously, you are testing a scenario your household will rarely create. Connect everything, label it, and then judge the network by a normal busy evening rather than an artificial worst case.
Is it worth setting up a separate network for smart home gadgets?
It can be, and setup day is the cheapest time to do it. Many routers offer an IoT or guest-style network that keeps inexpensive smart devices — plugs, bulbs, cameras from lesser-known brands — separated from the computers and storage holding your files. The benefit is containment: a compromised gadget cannot wander the main network. The cost is a little complexity, because your phone sometimes needs to be on the same network as a device to configure it. A pragmatic middle path is to put the gadgets you trust least, and any camera that faces into the home, on the separate network, and keep mainstream devices on the main one.
My new router offers a setup “optimisation” or “network health” scan. Should I let it change settings automatically?
Let it scan, but read its suggestions before accepting them. These tools are genuinely good at picking clearer channels and spotting a device stuck on a weak connection. They are less reliable when they propose changing security settings, disabling bands, or renaming networks, because the tool cannot know which of your devices depends on the current arrangement. Accept channel and power suggestions freely; treat anything that changes names, passwords or security modes as a decision for you, made with the baseline notes from your setup session in front of you.
Related Guides
- How to Secure a Router — the hardening checklist to run right after setup
- How to Position a Router — placement guidance that decides your coverage
- Router Buying Guide — how to choose the next router when this one ages out
- Best Routers for Home Office — router picks suited to working from home