Disclosure: As an Amazon Associate, ilcastellomenu.com earns from qualifying purchases. Product links on this page may earn a commission at no extra cost to you.
Knowing how to install a hard drive is one of the most useful upgrades you can learn: the job takes basic tools, a little patience and no special training, whether the drive is going into a desktop, a laptop or an external enclosure. The steps below cover a standard internal SATA installation, with notes for laptops and portable enclosures along the way.
Before you start, back up anything important on the computer. Installation is low risk, but you will be working inside a machine with cables and connectors, and a current backup turns any surprise into a minor delay. If the new drive will hold games or media, our lists of Best Internal Hard Drives for Desktop and Best Internal Hard Drives for Laptops show the form factors each machine type expects.

Gear mentioned in this guide
The products below are examples that fit the situations described in this article. They are mentioned so you can picture the kind of hardware involved, not as a claim that one model suits every computer, console or NAS. Check the form factor, interface and capacity against your own system before you buy anything.
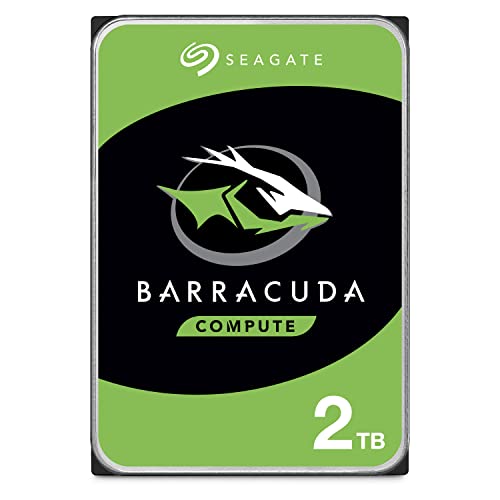
Seagate BarraCuda 2TB HDD — Seagate BarraCuda 2TB Internal Hard Drive HDD – 3.5 Inch SATA 6Gb/s 7200 RPM 256MB Cache – Frustration Free Packaging (ST2000DM008/ST2000DMZ08). Check on Amazon

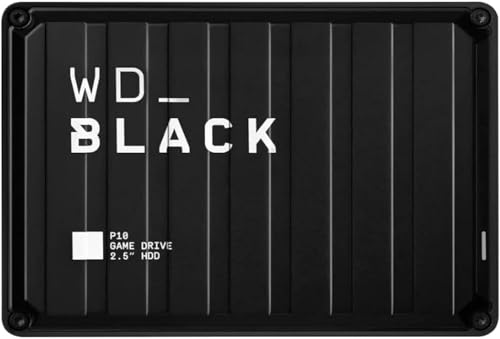
WD Black 4TB Performance HDD — Western Digital 4TB WD Black Performance Internal Hard Drive HDD – 7200 RPM, SATA 6 Gb/s, 256 MB Cache, 3.5″ – WD4005FZBX. Check on Amazon

Crucial MX500 1TB SATA SSD — Crucial MX500 1TB 3D NAND SATA 2.5 Inch Internal SSD, up to 560MB/s – CT1000MX500SSD1. Check on Amazon
In this guide
What you need before you open the case
Gather a small Phillips screwdriver, the drive itself, a SATA data cable if your desktop does not have a spare already routed, and a free SATA power connector from the power supply. Desktops normally include several power connectors along one cable run. You also need a free drive bay or mounting points, plus the screws or tool-less rails your case uses. Lay everything out first; hunting for a screw with the case open and cables moved aside is how small parts get lost inside a build.
Work on a clear table with the computer fully shut down and unplugged. Touch a metal part of the case to discharge static before handling the drive, and hold drives by their edges rather than the circuit board. Keep drinks away from the workspace and put screws in a small dish. These habits sound fussy, but a hard drive is a precision device with exposed electronics on many models, and ten seconds of care protects both the drive and the computer.
Desktop, laptop and enclosure differences
Desktops offer the most room and standard 3.5-inch bays. Laptops use 2.5-inch drives behind a small panel or the bottom cover, and thickness matters, so confirm the exact height your laptop accepts. External enclosures take a bare 2.5-inch or 3.5-inch drive and connect by USB, which is a good way to reuse an old internal drive for backups after an upgrade. The physical steps differ slightly, but the logic — mount, connect data, connect power, then initialise in software — is the same everywhere.
Mounting and connecting the drive
Slide the drive into a bay with its connectors facing the side where your cables arrive, then secure it with screws or rails on both sides where the case allows. A hard drive contains spinning platters, so a firm mount matters: a drive left dangling by its cables vibrates, makes noise and stresses the connectors. In a laptop, transfer any caddy or bracket from the old drive to the new one and reuse the original screws, tightening them snugly without forcing them.
Connect the SATA data cable between the drive and any free SATA port on the motherboard; the L-shaped connectors only fit one way. Connect a SATA power plug from the power supply. Both plugs should seat with gentle, even pressure — if a connector resists, check its orientation rather than pushing harder. Route cables so they do not block fans or rest against hot components, then close the case loosely until you have confirmed the system sees the drive.
Initialising, partitioning and formatting in Windows and macOS
A brand-new internal drive is invisible in File Explorer until it is initialised and given a volume. In Windows, open Disk Management, initialise the disk when prompted, then create a simple volume and format it, normally as NTFS for a Windows-only internal drive. The walkthrough in How to Format a Hard Drive explains each choice, including when exFAT makes more sense for drives shared between Windows and Mac. Assign a drive letter and a clear volume label such as Media or Backups so future-you knows what the drive is for.
On a Mac, Disk Utility performs the same job: select the new drive, erase it with a name and format, choosing APFS for modern Mac use or exFAT for cross-platform sharing. If the drive does not appear at all, do not keep reformatting things at random. Shut down, reseat both cables, try a different SATA port or USB cable, and check whether the system firmware lists the drive. Our troubleshooting guide How to Fix a Hard Drive that is Not Detected works through that sequence calmly and in a safe order.
Moving data and checking your work
Once the volume exists, copy a small folder first and open a few files to confirm everything behaves. Then move or copy larger libraries in batches rather than one enormous overnight copy, so an interruption only affects one batch. If this drive replaces an old system drive, cloning may suit you better than a fresh start; How to Clone a Hard Drive covers cloning checks and the mistakes that cause cloned drives not to boot. Keep the old drive untouched for a week or two after a successful migration, as insurance, before repurposing or erasing it.
Finish with a quick health baseline. Note the drive model and serial number, run the manufacturer’s diagnostic or a SMART viewer, and record that the drive started life healthy. That baseline makes later troubleshooting far easier, because you can compare new warnings against a known-good starting point. Finally, update your backup plan so the new capacity is actually used: point your backup software at the new drive or add the new drive as a source worth protecting.
How to install a hard drive, step by step
This condensed sequence mirrors the sections above. Follow it in order, and do not skip the verification steps at the end — most installation problems are simply a cable that looked connected but was not fully seated.
Step 1: Shut down, unplug and open the machine
Turn the computer off completely, switch off the power supply if it has a switch, and unplug it. Remove the side panel or laptop cover following the manufacturer’s instructions. Ground yourself by touching the metal chassis. Working on a live or merely sleeping machine risks both the hardware and your data, and there is never a good reason to rush this step.
Step 2: Mount the drive securely
Fit the drive into the correct bay or caddy and fasten it properly. In desktops, use both sides where possible; in laptops, transfer the bracket from the old drive. A firmly mounted drive runs quieter and protects its connectors from vibration stress. Check that no cables are trapped under the drive before tightening the final screw.
Step 3: Connect data and power
Attach the SATA data cable to the drive and motherboard, then a SATA power connector from the supply. For an external enclosure, seat the drive on its connector board and close the housing. Every connector is keyed; gentle pressure is enough. If you must force anything, stop and look again, because forced connectors are how pins get bent.
Step 4: Close up, power on and enter the firmware if needed
Replace the panel, reconnect power and start the machine. Most systems detect a new SATA drive automatically. If you plan to boot from this drive later, you may need to check the boot order in firmware settings, but for a data drive there is usually nothing to change. Listen for normal spin-up sounds; repeated clicking is a stop sign covered in our clicking-drive guide.
Step 5: Initialise and format the volume
Open Disk Management or Disk Utility, initialise the drive and create a formatted volume with a clear label. Choose the file system for how the drive will be used: NTFS for Windows internal storage, APFS for a modern Mac, exFAT for a drive that moves between systems. Formatting a new, empty drive is safe; formatting the wrong existing drive is not, so double-check the capacity and model before confirming.
Step 6: Test, then migrate in batches
Copy a small test folder, open files, and confirm the drive behaves. Then move larger libraries in stages, verifying as you go. Keep the old drive intact until everything has run well for a while. Only when the new installation has survived real use should you repurpose the old drive, ideally as the backup target your new data now needs.
Common mistakes to avoid
Forgetting the backup before starting
Installation rarely harms data, but cables get knocked, wrong drives get formatted and old hardware picks odd moments to fail. A verified backup made before you open the case converts every one of those accidents into an inconvenience instead of a loss. It takes minutes and is the cheapest insurance in the whole project.
Leaving the drive loose in the bay
A drive resting on cables or held by one screw vibrates against the case, adding noise and stress. Hard drives are mechanical; they deserve a solid mount. If your case uses rails or trays, use them properly, and if screws are missing, replace them rather than improvising with tape or foam.
Formatting the wrong disk
Disk Management lists every drive by size and model, and in a machine with several similar drives it is easy to pick the wrong one. Before any initialise or format command, confirm the model and capacity match the new drive, and disconnect other external drives to shorten the list. Formatting is effectively irreversible for ordinary users.
Practical tips that make a real difference
Photograph the original cable layout
Before moving anything inside a desktop, take a clear photo of the existing connections. If something stops working afterwards, the photo tells you exactly what changed. It is a ten-second habit that has saved countless builders from guessing games, especially in compact cases where cables route in non-obvious ways.
Run a health check in the first week
A quick SMART review and a look at the manufacturer’s diagnostic after a few days of use catches early problems while returns are painless. The method in How to Test the Health of a Hard Drive shows which attributes matter and which warnings are noise.
Installing in a NAS enclosure and a games console
A NAS installation follows the same logic with enclosure-specific manners. Power the NAS down if its manual requires it, slide the drive into its tray or caddy with the connectors aligned, and let the enclosure’s software discover it. Hot-swap bays on some models allow fitting while running, but a first installation is calmer done powered down, following the maker’s sequence. Once fitted, the NAS will offer to initialise the drive into a new array, an expansion or a spare; choose deliberately, because array operations that follow can run for many hours and should be started when the household can leave the box alone.
Consoles divide into those that accept internal upgrades for specific slots and those that expect external drives. Where an internal expansion exists, the console maker publishes exact requirements for the drive type and any heatsink or formatting steps, and those instructions outrank every general guide, including this one. External console drives are simpler: connect, let the console format the drive for its own use, and accept that the drive is now dedicated to that ecosystem. In both cases, back up saved data to the console maker’s cloud or another drive before changing hardware, because installation day is the wrong day to discover what was stored where.
Cable management and airflow inside a desktop
A desktop installation is not finished when the drive is detected; it is finished when the case is closed and temperatures stay sensible. Route the new drive’s cables away from fan intakes and exhaust paths, keep them clear of the processor cooler’s airflow, and avoid draping them across hot graphics hardware. A drive bay stuffed with cabling runs warmer than the same bay breathing freely, and drive temperature is a lifespan variable, not a cosmetic detail. If your case offers several bays, spacing multiple hard drives apart rather than stacking them adjacently spreads heat and vibration more kindly.
While the case is open, it is worth a gentle clean: dust filters rinsed or brushed, intake fans cleared, and the existing drives’ mountings checked for the screws that quietly loosened over years. Do not use compressed air carelessly around spinning fans, and never vacuum inside a case with ordinary household equipment that can generate static. Ten minutes of housekeeping during an installation is maintenance you will never schedule on its own, and the new drive — the component most sensitive to heat in the whole build — is the main beneficiary.
After installation: the first-week routine
New drives deserve a probationary week. Fill the drive gradually rather than in one heroic overnight copy, glance at its health counters after the first days of real work, and listen once or twice to its normal voice so you will recognise a change. Early-life failure is a recognised pattern in storage: a drive with a manufacturing weakness tends to declare it young, inside the return window, if it is actually exercised. Light, real use during the first week is therefore a test protocol, not just settling in.
Finish the week by integrating the drive into your records and routines. Its label carries the in-service date; your storage register names its job and its backup pairing; your backup software either protects it or is protected by it, according to its role. If the drive replaced an older one, decide the elder’s fate now — spare, retiree copy-holder, or recycling — rather than letting it drift into the drawer of mystery drives. An installation that ends with documentation and a backup decision is complete; one that ends at detection is merely powered on.
Installing a drive in an older machine: patience and legacy quirks
Older computers reward the same steps with a little extra patience. Cases may lack tool-less rails, power supplies may offer fewer SATA connectors, and firmware may need the new drive’s port enabled before it appears. None of this is a defect; it is the archaeology of a machine built when storage expectations were smaller. Work slowly, photograph the original layout before touching it, and expect the initialisation step to matter more, because older operating systems are less forgiving about partition styles and capacity limits than current ones.
The prize for that patience is often disproportionate. An older machine that feels finished frequently needs only storage room and, where its design allows, a faster system drive to return to useful service for years. Installing carefully in old hardware — supporting cables that have grown stiff, replacing a fan that has grown loud while the case is open — is maintenance and upgrade in one session. The machine’s age is an argument for the health baseline and the backup, not against the project.
Frequently asked questions
Do I need to install drivers for a new hard drive?
Normally no. SATA and USB storage use drivers built into Windows and macOS. If a drive is not recognised, the cause is almost always a cable, power, initialisation or enclosure issue rather than a missing driver. Work through power and connections first, then initialisation, before searching for software fixes.
Why does my new drive not show up in File Explorer?
Because a new drive has no volume yet. It should appear in Disk Management or Disk Utility, where you initialise and format it. If it does not appear there either, check cables, power and firmware detection. A drive missing from every tool is a hardware-path problem, not a formatting problem.
Can I install a hard drive in a laptop that came with an SSD?
Only if the laptop has a suitable bay or the drive replaces the existing device with the right form factor and thickness. Many modern laptops have no 2.5-inch bay at all. Check the service manual for your exact model before buying, and consider an external drive if internal expansion is not offered.
Is it safe to install a drive while the computer is in sleep mode?
No. Shut the machine down fully and unplug desktops. Sleep still powers parts of the system and can corrupt file systems if hardware changes mid-state. A full shutdown takes a moment and removes an entire category of avoidable problems from the job.
What size screws and cables do I need?
Cases usually include drive screws, and many drives ship without cables, so check the box contents. Desktops need a standard SATA data cable and a SATA power lead from the supply. If you are short of power connectors, buy parts from reputable sellers and avoid bargain splitters that can overload a rail.
Should the new drive be my boot drive?
If responsiveness matters, an SSD is the better boot device and the hard drive should hold bulk files. If the hard drive is your only option, it will work fine, just expect slower starts and loading. Many people install the hard drive as storage now and add an SSD later, which is a sensible staged upgrade.
The bottom line
A careful installation is mostly patience: prepare, mount firmly, connect gently, initialise deliberately and verify before trusting the drive with your only copies. Follow that order and a new hard drive becomes one of the easiest, most satisfying upgrades in computing — extra room, a tidier library and, with a backup plan attached, genuinely safer data.
Desktop variations: cramped cases, tool-less cages and stubborn rails
The standard desktop installation assumes a tidy case with a welcoming drive cage, and many real cases decline to cooperate. Small-form-factor systems may hide their drive mounts behind the power supply or beneath a graphics card, so photograph the interior before you remove anything and note which cables you moved to reach the bay. Tool-less cages use plastic rails or trays that flex in a specific direction; forcing them the wrong way snaps the retaining clips that make the system convenient. If a tray resists, stop and look for the release tab rather than pulling harder — the tab is always there, and it is always cheaper than a replacement tray.
Older cases present the opposite problem: bare metal cages, sharp edges and screws of several lengths in the same bag. Keep screws sorted as you remove them, because a screw that is slightly too long can bottom out against a drive’s circuit board or distort its frame. Work with the case laid on its side on a table rather than balanced upright on carpet, both for the better light and because a dropped screw inside an upright case has a talent for lodging behind the motherboard, where retrieving it means undoing your work.
Cable routing in tight cases deserves a plan before the drive goes in. Decide where the SATA data cable will run, confirm it reaches without tension, and check that its bend radius stays gentle — sharp folds damage these cables internally while leaving them looking fine. Route the power connector so its latch seats fully; a half-seated power plug is one of the most common causes of a drive that appears, vanishes and reappears over the following week.
Laptop and console installs: the differences that matter
Laptop installations compress the same job into a space with no spare room and several fragile connectors. The battery should be disconnected where the design allows it, both for safety and because a short during installation can cost far more than the drive you are fitting. Many laptops hold the drive in a thin caddy with screws smaller than anything in a desktop; work over a tray or a sheet of paper so a dropped screw stays visible, and transfer the caddy to the new drive exactly as it sat on the old one, including any rubber isolators or foil shields, which control vibration and heat in a chassis with no slack.
Thickness is the trap specific to laptops. Drives of the same 2.5-inch family come in several heights, and a taller drive in a bay designed for a slim one will either refuse the cover or sit under pressure that stresses the chassis and the drive. Measure the outgoing drive or check the service manual’s listed height before ordering, and never use the bay cover screws to pull an over-thick drive down into place.
Consoles add a software dimension: the system typically wants to format and provision a new internal drive itself, may require a system software file on separate USB media for a full reinstall, and will treat the drive as its own from that moment. Back up saved data through the console’s own tools before you open anything, because the outgoing drive’s contents are generally not readable by a computer afterwards. The physical swap is easy; the preparation is the job.
External enclosures and docks: fitting a bare drive for desk duty
Installing a drive into a USB enclosure looks trivial and mostly is, but three details decide whether the result is reliable. First, the enclosure’s bridge chip sets the practical capacity limit and whether health data passes through to your software; very old enclosures may not address modern large drives correctly, showing a truncated capacity that tempts people to blame the drive. Second, ventilation: many slim enclosures are sealed for looks, and a hard-working drive inside one can run hot for hours during a large copy. If the enclosure will see long transfers, choose one with a metal body that acts as a heatsink and give it air space on the desk. Third, the connector: prefer enclosures whose cable is either captive or a standard you already own, because a proprietary cable lost in a drawer turns a working drive into an inaccessible one at the worst moment.
Open-frame docks, where the drive stands vertically in a slot, suit technicians and frequent swaps but expose the drive’s circuit board to dust, knocks and static. They are excellent for a cloning session or a recovery attempt and poor as a permanent home. Whichever style you choose, eject the drive through the operating system before powering down or unplugging; caches on both the computer and the enclosure need that moment to finish writing, and a surprising share of file-system corruption stories begin with an impatient unplug during what looked like an idle moment.
First boot detective work: when the drive does not appear
A new drive that does not show up in your file manager has usually not failed; it is simply uninitialised, and operating systems hide uninitialised drives from the places beginners look. The correct first stop is the disk management tool, where a healthy new drive appears as unallocated space waiting for a partition. If it does not appear there either, work outward in layers: confirm the drive is listed in the system firmware setup, which separates hardware detection from operating-system issues in one glance. Present in firmware but missing in the OS points to drivers, initialisation or a disabled port in software. Missing in firmware points to the physical layer — reseat both ends of the data cable, try a different power connector, and test the drive in a dock or second machine if one is available.
Resist the urge to accept an initialisation prompt on any drive that already holds data. That prompt is normal for a blank drive and alarming for a drive you expected to read, because initialising writes a new partition structure over the old one’s remains. If a previously working drive suddenly asks to be initialised, stop, disconnect it, and treat the situation as a recovery problem rather than an installation step. Our troubleshooting guide on the troubleshooting steps for a drive that is not detected walks through that branch in detail.
After the install: partitioning choices you will live with
Installation ends with a working drive, but the partitioning decisions you make in the same sitting shape years of use. A single large partition is the right default for most data drives: simple, flexible and easy to back up. Splitting makes sense when the split enforces a real boundary — a separate partition for a backup target that backup software should never overflow into media space, or a small partition in a format an older device can read alongside a main partition in a modern format. Splitting for tidiness alone usually disappoints, because libraries refuse to grow in the proportions you predicted, and one partition ends up full while its neighbour idles.
Choose volume labels as if a stranger will one day need to understand your system, because that stranger is you in three years, tired, mid-recovery, looking at four similar drives. A label carrying the role and the year — Archive 2026, Media, Backup B — prevents hesitation at exactly the moments hesitation is expensive. Set the drive’s power behaviour too: desktop drives can usually spin down after a sensible idle period to save noise and wear, while a drive serving a media library to a household may be better kept awake during waking hours to avoid delays and repeated spin-up cycles.
Keeping a record of the installation
Before you close the case for the last time, spend two minutes creating the record you will want later. Note the drive’s model and serial number, the bay and port it occupies, the purchase date and the partition layout you chose, in the same note or file where you keep the rest of your system documentation. Photograph the installed drive showing its label and connections if the case will be hard to open again. This record turns a future failure from an archaeology project into a lookup: you will know the warranty status without opening the machine, and anyone helping you remotely can reason about the system accurately.
More installation questions, answered
Do I need to set jumpers or switches on a modern SATA drive?
Almost never. SATA drives are configured by the host, and the configuration pins found on some models exist for factory or specialist use. If you are coming from the era of master and slave settings on parallel cables, the modern equivalent of that ritual is simply choosing the right boot order in firmware when the new drive will hold an operating system.
Can I install the drive while the computer is running?
Only if both the drive bay and the controller genuinely support hot swapping, as some server and NAS bays do. Consumer desktops and laptops should be shut down and unplugged. The few minutes saved are not worth a shorted connector or a corrupted file system, and a drive added to a running system may not be detected cleanly in any case.
My cables reach, but only just. Is tension a real problem?
Yes, over time. A cable under constant sideways pull can work its connector partly out of the socket as the machine warms, cools and vibrates, producing intermittent detection faults that are maddening to diagnose. Reroute, use a longer cable, or move the drive to a nearer bay. A connection that sits relaxed stays seated.
Should the drive be screwed in if the tray feels snug?
Yes. Snug trays loosen as plastic ages and cases move, and an unsecured drive transmits vibration to the chassis and receives it back, which is bad for the drive and audible to you. The screws or the tray’s locking mechanism are part of the drive’s mounting system, not an optional finishing touch.
Installing into a NAS bay versus a computer: what changes
A NAS installation replaces the operating-system half of the job with the appliance’s own logic, and the differences catch people who treat the bay like a PC slot. The trays matter: many NAS units use tool-less carriers whose rails must match the drive’s mounting holes exactly, and a drive screwed into the wrong hole pattern sits slightly recessed, making a connection that feels seated and is not. Seat the carrier, slide it home until the latch engages, and confirm the bay’s indicator behaves before you close anything up. Then stop touching hardware: from that moment the work is in the NAS interface, where the crucial decision is whether the new drive joins an existing array, replaces a member, or starts a volume of its own. Those are three different operations with three different risk profiles, and the interface’s wording deserves a slow read — adding a drive to some array types restripes data across all members, a process that runs for hours and should never be started before a backup check or during a storm season of power cuts.
Replacing a failed array member has its own discipline: confirm twice which bay holds the failed drive, using the serial number the interface reports matched against the label you can see, because pulling a healthy member from a degraded array converts a routine replacement into an emergency. After the swap, the rebuild begins automatically on most systems; your job is to leave it alone, keep the unit cool and powered, and resist testing your luck with heavy workloads until the array reports itself whole again.
Working safely around power and static, without the folklore
Static precautions for drive handling are simple and frequently overdramatised. Touch a grounded metal part of the case before handling the drive, avoid working on carpet in socks, hold the drive by its edges rather than its circuit board, and keep it in its anti-static bag until the moment of fitting. That is the whole ritual for a home installation; you do not need special clothing, and you do need to avoid the genuinely dangerous habit the folklore distracts from, which is working inside a machine that is still plugged in and switched on at the supply. Unplug the machine, then press its power button once to drain residual charge, then begin.
Power safety has a second chapter for external work: use the adapter that came with the enclosure or dock, not the nearest lookalike from a drawer. Adapters with the same plug can deliver different voltages, and a drive powered incorrectly may fail instantly and silently. If an enclosure’s original adapter is lost, replace it by specification — voltage, polarity and sufficient current — rather than by fit. The plug going in smoothly is not evidence of compatibility; it is only evidence of a shared plug shape.
Installing a second drive for backup duty inside the same machine
One of the most useful installations is also the least discussed: adding an internal drive whose sole job is to receive backups of the first. The physical work is identical to any other install, but the configuration choices differ. Give the backup drive its own volume with a unmistakable label, set your backup software to it explicitly rather than accepting a default, and schedule the backup for hours when the machine is reliably on. Then perform the step everyone skips: restore something. Copy a folder back from the new backup to a test location and open its files. An untested backup is a hope with a progress bar; a tested one is a system.
Understand the arrangement’s limit, too. An internal backup protects against the main drive’s failure, accidental deletion and most software mishaps, which are the common disasters. It does not protect against theft, fire or a power event that damages the whole machine, which is why mature setups pair the internal backup with an occasional copy kept elsewhere. Installing the internal drive is the right first half of that system — just do not mistake it for the whole.
The ten-minute post-install checklist
Before the machine returns to service, run this sequence once: the drive appears in the disk manager with the expected capacity; the volume label matches your plan; the health tool reads the drive and shows a clean baseline, which you note with the date; a large test file copies to the drive and back without error; the drive’s mounting is secure and its cables sit without tension; and the case or enclosure is closed with its airflow paths unobstructed. Ten minutes, six checks, and the installation is not merely finished but verified — a distinction your future self will appreciate the first time anything goes wrong and you can say with confidence when the drive last demonstrably worked.
Special case: installing a drive in a system you cannot open
Some machines — all-in-one desktops, sealed mini PCs, many modern laptops — offer no user-accessible bay at all, and the installation job changes from fitting a drive to choosing the least-bad external path. The good news is that the principles survive the translation. The enclosure becomes the bay, so its ventilation and bridge chip matter as they would in a dock; the connection becomes the cable run, so a short, direct USB connection to a rear port beats a front hub; and initialisation, partitioning and labelling proceed exactly as they would for an internal drive. Treat the external unit with the same ceremony — health baseline, test copy, clear label — and it stops feeling like a compromise and starts behaving like a component.
Where the sealed machine is a laptop that travels, add one protection: encrypt the external drive with the operating system’s built-in tools and store the recovery key with your other system records. A small drive in a laptop bag is the easiest storage you own to lose, and encryption is the difference between losing hardware and losing data. The installation is not complete, for a portable drive, until that step is done and the key is proven to work by locking and unlocking the drive once.
When to hand the job to a technician
There is no virtue in completing every installation personally. Hand the job over when the machine is under a warranty that opening would void and the manufacturer offers a fitting service; when the system is a work machine whose downtime is measured in other people’s deadlines; when the interior reveals damage — swollen components, scorch marks, a power supply that smells of hot electronics — that has nothing to do with your drive; or when the data on the existing drives is irreplaceable and unbacked-up, in which case the first job is not installation at all but rescue, in the right order. A technician’s bench fee for a straightforward fitting is modest, and knowing which jobs to delegate is part of competence, not a failure of it.
Tools worth owning if you will do this more than once
A single installation needs little beyond a suitable screwdriver, but anyone who maintains a household’s worth of machines benefits from a small, deliberate kit. A magnetic parts tray keeps the tiny screws of laptop work from emigrating. A set of precision drivers in the common sizes prevents the cammed-out screw heads that turn a ten-minute job into an extraction exercise. A spare SATA data cable and a spare power splitter, bought before they are needed, convert the most common installation-day discoveries — a perished cable, a connector that will not quite reach — from a shopping trip into a shrug. Add a USB dock or adapter, the same one you would use for cloning and recovery, and a torch you can aim with your head rather than your third hand. None of this is exotic, all of it fits in a shoebox, and together it is the difference between installations that feel like a craft and installations that feel like a siege. Label the box, keep it with the machine records, and replenish it the day you use its last spare, not the day you next need one.