Disclosure: As an Amazon Associate, ilcastellomenu.com earns from qualifying purchases. Product links on this page may earn a commission at no extra cost to you.
Knowing how to fix a hard drive that is not detected starts with a calming fact: most undetected drives are not dead. Cables work loose, enclosures fail, new drives simply need initialising, and ports and power supplies cause more disappearances than failed platters do. The trick is checking causes in a safe order, from the outside in.
Work through this guide step by step and stop at the step that solves it — or at the step that tells you the problem is beyond home repair. If the drive also makes clicking or grinding sounds, read How to Fix a Clicking Hard Drive first, because a mechanically failing drive changes the rules: power it down rather than experimenting on it.

Gear mentioned in this guide
The products below are examples that fit the situations described in this article. They are mentioned so you can picture the kind of hardware involved, not as a claim that one model suits every computer, console or NAS. Check the form factor, interface and capacity against your own system before you buy anything.
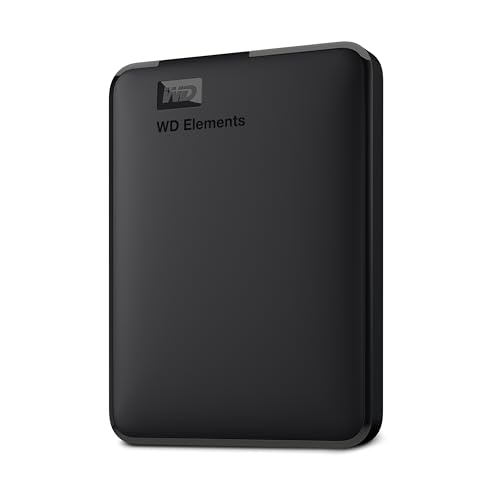
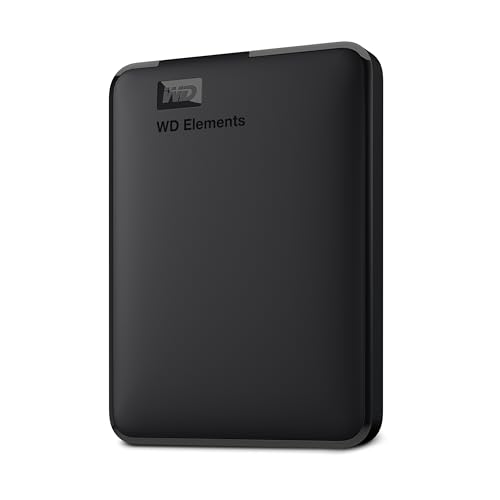
WD Elements 2TB Portable — WD 2TB Elements Portable External Hard Drive for Windows, USB 3.2 Gen 1/USB 3.0 for PC & Mac, Plug and Play Ready – WDBU6Y0020BBK-WESN. Check on Amazon

Seagate 2TB Portable HDD — Seagate 2TB Portable Hard Drive | USB 3.0 (STGX2000400) | Everyday HDD storage. Plug-and-play backup. Windows & macOS. Adobe CC trial included. 1-Year Warranty. Check on Amazon

Toshiba Canvio Basics 2TB Portable — Toshiba Canvio Basics 2TB Portable External Hard Drive USB 3.0, Black – HDTB520XK3AA. Check on Amazon
In this guide
Symptom summary: what ‘not detected’ can mean
The phrase covers several different situations, and separating them is the first diagnostic step. A brand-new drive that appears in disk management but not in File Explorer is not faulty at all; it needs initialising and formatting, as the installation guide describes. An existing drive that vanished from everywhere, including the system’s firmware and disk tools, has a connection, power or hardware problem. A drive that appears with the wrong name or a tiny fraction of its real capacity is reporting something more serious about its electronics or firmware.
Note exactly where the drive is missing from. Check, in order: the file manager, the disk management tool, and the firmware or BIOS device list. Each layer you descend removes software from suspicion. A drive visible in firmware but not in Windows points to drivers, initialisation or file-system trouble. A drive invisible even to firmware points to cables, power, enclosure or the drive itself. Write down what you observe before changing anything; the pattern is the diagnosis.
Safety boundaries for this guide
Everything here is external and safe: cables, ports, enclosures, settings and software tools that read the drive. Nothing here involves opening the sealed drive body, which must never be opened outside a professional clean environment, or bypassing electrical safety on powered equipment. If the steps point to internal drive failure and the data matters, the correct next step is a professional recovery firm, not a braver home attempt. The recovery guide How to Recover Files From a Hard Drive explains how to make that decision.
Likely causes, most common first
Loose or failed cables cause more ‘dead drives’ than any other single factor, especially after a machine has been moved, cleaned or upgraded. USB cables for portables wear at their connectors; internal SATA cables get knocked during other work; and a portable drive’s short bundled cable is often the first thing to fail in the whole setup. Power is the twin suspect: a portable that cannot draw enough current through an old port or unpowered hub may spin weakly, click softly or never appear, and a desktop drive with a disconnected power lead is perfectly silent and perfectly healthy.
Next come enclosures and adapters, whose electronics can fail while the drive inside remains sound; initialisation and drive-letter conflicts in software, which hide healthy drives from the file manager; and finally genuine drive failure — electronics, firmware or mechanics. The order matters because the common causes are free to test, while assuming the worst first leads people to discard good drives or, worse, to attempt risky procedures on drives that only needed a cable.
Working down the layers: connection, power, enclosure
Begin with the drive disconnected and the computer shut down for internal drives. Reseat every connector firmly at both ends, then substitute a known-good cable — not another untested cable from the same drawer of mysteries. Connect portables directly to the computer, never through a hub, and try a second port and, if available, a second computer. For a desktop internal drive, try a different SATA port and a different power connector from the supply. Change one thing at a time and test after each change, so the fix, when it comes, teaches you the cause.
If a portable or external drive remains invisible, test the bare drive outside its enclosure where the design permits removing it, using a known-good adapter or dock. Many externals are standard SATA drives behind a USB bridge board, and a failed bridge is a cheap, external fault. Listen while you test: a healthy drive spins up smoothly. Silence can mean no power; repetitive clicking means stop and treat the drive as mechanically failing. A drive that spins, is detected in a dock, and shows its data has just told you the enclosure was the whole problem.
Software layer: initialisation, letters and file systems
When a drive is visible in disk management but not in the file manager, the causes are usually administrative. A new drive needs initialising and a formatted volume. A drive from another system may lack a drive letter, or carry a letter that conflicts with an existing device; assigning a fresh letter in disk management is a safe, reversible step. A volume marked RAW has a damaged or unrecognised file system — the drive is detected, but its contents are not readable by ordinary means, which moves the job from fixing detection to the recovery workflow, with its rule of writing nothing to the drive.
On a Mac, Disk Utility’s View, Show All Devices reveals whether the physical drive is seen even when no volume mounts. Firmware checks complete the picture: if the BIOS or UEFI lists the drive, hardware communication works and your problem is in software layers. If no layer anywhere can see the drive after cable, power and enclosure substitution, the evidence points to the drive’s own electronics or mechanics, and home diagnosis has honestly reached its end.
When to stop: repair, replacement and professional help
Stop and escalate when the drive clicks or grinds, when it appears with the wrong capacity, when it vanishes intermittently under load, or when it is invisible through every known-good cable, port and enclosure. Those are signatures of internal failure. If the data is expendable, replacement is the answer and the health guide’s lessons apply to the new drive from day one. If the data is irreplaceable, professional recovery is the answer, and every additional power-up at home slightly worsens the odds, so restraint is a genuine contribution to the outcome.
If the fix turned out to be a cable, enclosure or letter assignment, finish the job properly: run a health check on the rescued drive, because a drive that has been through connection chaos deserves a clean bill before returning to duty, and verify your backups while the lesson is fresh. Many ‘undetected’ scares end with the discovery that the drive held the only copy of something. Fix that too, with the backup options in Best Backup Hard Drives for PC, while you still remember the feeling.
The safe diagnostic sequence, in order
Follow these steps in sequence and do not skip ahead. Each step is cheaper and safer than the next, and the order guarantees you test the likeliest causes while they are still easy to rule out.
Step 1: Observe before touching anything
Record where the drive is missing: file manager, disk tool, firmware list. Note any sounds at power-up, any recent changes — a move, an upgrade, a spill, a storm — and whether other drives work normally. This two-minute observation prevents random part-swapping and often names the culprit immediately, because a drive that vanished after the PC was moved is a cable story until proven otherwise.
Step 2: Reseat and substitute cables and ports
Shut down for internal work. Reseat data and power connectors at both ends, then swap in a known-good cable, a different port, and a direct connection with no hub. Test after each single change. Most undetected drives return during this step, and the rest have now been cleared of the commonest causes, which makes every later conclusion trustworthy.
Step 3: Test the drive in a different environment
Connect the drive to a second computer, or place an internal drive in a dock or a different machine. For an external, test the bare drive outside its enclosure if it can be removed without opening the sealed drive itself. A drive that works elsewhere has convicted its original cable, port or enclosure. A drive that fails everywhere has told you the problem travels with it.
Step 4: Check the software layers
With the drive connected where it is most visible, open disk management or Disk Utility with all devices shown. Initialise only a genuinely new, empty drive. Assign a letter to a healthy volume that lacks one. Treat a RAW or corrupted volume as a recovery case: no formatting, no repair attempts that write to it, until its data is copied or professionally assessed.
Step 5: Read the health evidence
If the drive is visible to tools, read its SMART verdict and error counters before returning it to service. A drive that disappeared because its electronics are failing may reappear intermittently, and trusting it again without evidence invites a repeat at a worse moment. Clean health plus a proven external cause is a pass; errors or instability is a retirement decision.
Step 6: Decide: return to service, replace, or escalate
Return the drive to duty only when a clear external cause was found and health is clean. Replace it when health is doubtful and data is safe elsewhere. Escalate to professional recovery when the data is irreplaceable and the drive shows internal-failure signatures. Making the decision explicitly, rather than drifting into hopeful reuse, is the real fix this guide exists to teach.
Common mistakes to avoid
Formatting a drive that appears as RAW
When a file system is damaged, formatting makes the drive usable by destroying the index to your files — the exact opposite of a fix when the data matters. A RAW volume is a recovery case. Copy or recover first, format only when the data is safe or genuinely expendable, and never let a setup wizard talk you into initialising a drive that used to hold your life.
Repeatedly power-cycling a silent or clicking drive
Hoping for a lucky start is understandable and harmful. Mechanical and electronic failures do not heal between attempts, and each power-up can worsen internal damage. After the cable, port and enclosure checks, further attempts add risk without adding information. That is the moment restraint becomes the most skilled move available to you.
Testing with a drawer of unknown cables
Substituting one suspect cable for another proves nothing and burns hours. Use a cable you know works — ideally the one from a working drive — so a continued failure actually eliminates cabling as a cause. Diagnostics only move forward when each test is trustworthy; sloppy tests create loops.
Practical tips that make a real difference
Keep one known-good dock or adapter
A simple, trusted USB dock turns the hardest diagnostic question — is it the drive or everything around it? — into a two-minute test. It is among the cheapest tools in home computing and the one professionals reach for first. Store it with a known-good cable so the test kit is complete when you need it.
Label SATA and power leads in a desktop
In a crowded case, knowing which cable serves which drive prevents the classic accident of reseating the wrong device’s connections and creating a second problem. Small labels during any case work pay for themselves the first time a drive disappears after an upgrade.
How to fix a hard drive that is not detected after common triggers
Undetected drives often have a biography, and naming the trigger shortens the diagnosis. After a computer was moved or cleaned, suspect cables first, because transport and dusting disturb connectors more than any component fails spontaneously. After an operating system update, suspect the software layer — letters, drivers and power settings — because the hardware demonstrably worked yesterday under identical connections. After a power cut or storm, widen the suspicion to the drive’s electronics and the power supply, and test the drive in a second environment early, because electrical events are the trigger most likely to have caused genuine damage.
After a drop, stop troubleshooting for detection and start thinking about data value: a portable that fell while running and now hides from the computer has likely suffered the mechanical injuries covered in the clicking guide, whether or not it makes dramatic sounds. After a drive was swapped between enclosures or machines, suspect formatting and partition-style mismatches and enclosure electronics before the drive itself. In every case the sequence from the main guide still governs — the trigger simply tells you which step will probably be the productive one, and which results should make you stop and escalate sooner.
Drive letters, initialisation prompts and other software traps
Windows sometimes greets a drive that holds data with a prompt to initialise it, particularly when the drive arrives from another platform or its partition information is damaged. That prompt is a trap for the hurried: initialising rewrites the partition structures and can turn a recoverable drive into a much harder case. If a drive that used to work is suddenly described as unknown or not initialised, do not accept the invitation. Treat it as a detection success and a data emergency: the hardware is communicating, the map is damaged, and the recovery workflow — read-only, copy-first — is the correct next chapter.
Drive-letter conflicts are the benign opposite. A portable assigned a letter already used by a network share or another device may simply fail to appear in the file manager while sitting perfectly healthy in disk management. Assigning an unused letter is safe, instant and reversible, and it resolves a surprising share of ‘my drive vanished’ reports in offices with mapped shares. The lesson generalises: the disk management view is the courtroom where detection cases are actually heard, and the file manager is only a witness. Always hear the case in the courtroom before concluding anything about the drive.
Prevention: making drives stay detected
Most detection failures are environmental, so prevention is housekeeping. Use the cable a portable drive shipped with, replace cables that need wiggling, and retire hubs that drop connections. Inside a desktop, seat connectors fully during any work, route cables so panels do not pinch them on closing, and label leads so future upgrades do not disturb the wrong device. Keep firmware and operating systems reasonably current, because storage drivers and power management are living code, and note which of your enclosures pass health data so a future diagnosis starts with transparent tools.
The deeper prevention is architectural. A drive whose disappearance would be a crisis is a drive holding something uncopied, so the backup system is the real fix for detection anxiety: when copies exist elsewhere, an undetected drive is a troubleshooting exercise rather than an emergency, and you can work the safe sequence slowly, in order, without the panic that causes the classic errors. Every guide in this batch ends at the same door, because it is the only door that matters: detection can be fixed, cables can be replaced, but data that exists once can be lost in a dozen ordinary ways on an ordinary afternoon.
Frequently asked questions
Why does my new hard drive not show up?
Because it has no volume yet. New drives appear in Disk Management or Disk Utility, where you initialise them — GPT for modern systems — and create a formatted volume. Only then does the file manager display them. If a new drive appears in none of those tools, check cables and power, because initialisation explains invisibility in Explorer, not invisibility everywhere.
My drive shows in Disk Management but not in Explorer. What now?
Usually it needs a drive letter, or it is a new drive awaiting a volume. Assign a letter that is not in use, or create and format a volume if the drive is genuinely empty. If the volume is marked RAW and holds data, stop: that is file-system damage, and the recovery workflow, not formatting, is the safe path.
Can a USB hub cause a drive to disappear?
Yes. Unpowered hubs often cannot supply a portable drive’s full current, and the drive responds by failing to spin up, disconnecting under load or never appearing. Connect storage directly to the computer for diagnosis and for important transfers. If a hub is unavoidable, use a powered model from a reputable maker.
The drive works on another computer but not mine. Why?
Then the drive is healthy and your machine holds the fault: a port, a cable, a driver or power issue, or a drive-letter conflict. Work your machine’s side of the chain — different port, direct connection, letter assignment — with confidence, because the cross-test has already cleared the drive itself. This is why testing in a second environment is such a powerful step.
Is it safe to run repair tools on an undetected drive?
Tools can only work on drives the system can see, so the question usually answers itself. Once visible, prefer read-only health checks first. Avoid write-heavy repair attempts on a drive whose data matters and whose file system is damaged; image or copy first. Repairs are for drives whose contents are already safe or expendable.
When is an undetected drive truly dead?
When it is invisible through known-good cables, ports, enclosures and a second computer, or when it reports the wrong capacity, or clicks and grinds — the internal-failure signatures. Even then, ‘dead’ means dead to home tools; a professional laboratory may still recover data from it. The home verdict decides your next step, not the data’s final fate.
The bottom line
Fix detection problems from the outside in: observe, reseat, substitute, cross-test, then read the software and health layers, stopping the moment the evidence points inside the drive. Most disappearances end at a cable or a drive letter. The rest end with a clear, evidence-based decision — and either way, you finish knowing why, which is what troubleshooting is for.
The diagnostic flow, written as a decision tree in prose
Work the problem as a series of gates, each of which halves the possibilities, and do not skip a gate because a later one looks more interesting. Gate one: does the drive make any sign of life — spin, vibration, warmth, a light? A drive with no signs at all has a power problem until proven otherwise, and every subsequent test should be about power delivery: the adapter, the cable, the port, the supply. Gate two: with power proven, does any computer detect the drive at any level — the firmware setup, the disk manager, a dock on a second machine? Detection anywhere moves the problem up a layer, from hardware toward configuration; detection nowhere, with power proven, moves it toward the drive’s own electronics or the enclosure’s bridge. Gate three: where the drive is detected, what does the system say about its contents — unallocated, uninitialised, a foreign file system, a healthy volume with no letter? Each answer is a different, specific, usually gentle fix, and none of them involves opening anything. Gate four: what does the health data say, now that you can read it? The answer decides whether you are configuring a healthy drive or rescuing a failing one, and the two projects must not be confused, because the rescue’s first rule — stop writing to the drive — is the configuration’s last step.
Keep notes as you pass the gates: what you tried, what changed, what the system reported, in order. Diagnosis notes feel like overhead during a calm problem and become the whole game during a hard one, because intermittent faults are diagnosed by pattern across attempts, and memory edits patterns mercilessly. The note also protects the data: it records which irreversible offers — initialisation, formatting, repair — were declined, so that a helper picking up the problem later does not accept one unknowingly.
Not detected after specific events: matching the trigger to the layer
After a power cut or a storm, suspect delivery first: supplies and adapters fail in surges more often than drives do, and a drive that vanished with the lights should be tested on known-good power before any other conclusion is drawn. After a house move or a desk rearrangement, suspect the physical layer with near-certainty — cables reseated imperfectly, a hub substituted for a direct port, a drive connected through a chain it previously bypassed — and rebuild the connection exactly as it was, one link at a time. After an operating-system update, suspect configuration: drivers refreshed, power-management settings reset to aggressive defaults that now sleep the drive or its controller into invisibility, drive letters reassigned in the confusion. After installing new hardware, suspect resources and firmware settings — a port shared with a new device and silently disabled, a boot order that now hides the older drive from the places you looked. The trigger rarely proves the cause, but it orders the search, and an ordered search is most of what separates a twenty-minute fix from a lost weekend.
The enclosure deserves its own interrogation
External drives fail to be detected for reasons that belong entirely to their shells, and the shell must be interrogated separately from the drive inside it. The bridge chip that translates between USB and the drive can fail, can be confused by a drive larger than its addressing understands, can hide the drive’s health data while passing its files, and can die in a way that leaves the drive itself blameless and unreadable until rehoused. The test that separates shell from drive is a second home: a dock, another enclosure, or a direct internal connection, any of which that detects the drive acquits it and convicts the shell in a single step. This is why experienced technicians keep a known-good dock the way electricians keep a known-good meter — half of all ‘dead drive’ diagnoses are actually dead enclosures, and the dock is the instrument that tells the difference before money, panic or data are spent on the wrong suspect.
Two cautions belong to the rehousing test. Some external products bind the drive to their bridge with encryption, so a drive moved to a dock appears as unreadable noise despite being healthy; check the product’s documentation before concluding anything from that result. And opening a sealed external unit may end its warranty, so sequence the decision honestly: warranty first if the data is backed up, rehousing first if the data matters more than the warranty — a ranking each owner must set for themselves, preferably before the evening it is needed.
When the drive is detected but the data is not: the fork in the road
A drive the system sees, holding data the system cannot show, is a different problem from an undetected drive, and it forks immediately. One branch is administrative: a missing drive letter, a file system the current operating system cannot read because the drive came from another platform, a volume marked offline by a cautious system. These yield to the disk manager’s gentle tools, and the data emerges unharmed, usually within minutes, to the owner’s disproportionate relief. The other branch is structural: the partition table or file system is damaged, and the system offers — helpfully, dangerously — to initialise or format. Decline both, always, on any drive whose contents matter, because those offers solve the system’s confusion by erasing the map to your data. The structural branch belongs to recovery method: image the drive if it shows any health doubt, read it with tools that do not write, and repair only copies. Knowing which branch you are on is the entire skill, and the disk manager’s exact wording — unallocated against uninitialised against RAW against healthy-but-letterless — is the signpost. Read it twice before clicking anything once.
Prevention, engineered: making this the last time
Most detection failures are born long before the day they are noticed, and their prevention is a short list of unglamorous arrangements. Keep connections direct and few: every hub, adapter and extension between a drive and its computer is a suspect pre-hired for a future investigation. Label drives and their adapters as pairs, so a drive is never fed by a stranger’s power supply with the same plug and a different voltage. Set the operating system’s power management to treat storage respectfully — no aggressive sleeping of drives or controllers on machines whose drives must answer when called. Keep the disk manager’s layout documented in your system notes, partition by partition, so that a changed layout announces itself as damage rather than confusing you into repairing a healthy arrangement. And keep the dock. Prevention lists rarely end with a purchase, but this one does, because the dock is prevention for diagnoses: the instrument that turns the next disappearance from a mystery into a measurement.
Our round-up of external hard drives for laptops favours models whose enclosures report health data properly — a preference this article’s readers will now understand from the inside, having met the enclosures that hide it.
Detection questions from the front line
The drive appears, vanishes, and appears again. Which gate is that?
That rhythm is the signature of a marginal connection or marginal power: a cable seating imperfectly, a port worn loose, a supply that sags under spin-up, a hub negotiating badly. It is rarely the drive’s surface, and it is never solved by formatting. Substitute the chain link by link — cable, port, power, enclosure — and the flicker will follow the guilty link with a faithfulness that makes the diagnosis almost satisfying.
My system offers to initialise the drive every time I connect it. The data was fine last month.
Then something has damaged the structures the system reads first — or the enclosure is presenting the drive incorrectly. Decline the offer every time; it does not become safer with repetition. Image the drive if its health is in any doubt, examine it with read-only tools, and treat the situation as the structural branch above. Data that was fine last month is usually recoverable this month, provided nobody accepts the system’s tidy, destructive suggestions in between.
Can a virus hide a drive?
Malware more often hides files and folders than entire drives, but a system behaving strangely in several ways at once deserves a security scan from clean boot media before its storage symptoms are taken at face value. The larger truth is that detection problems are overwhelmingly physical and administrative, and exotic explanations should queue behind cables, power and the disk manager’s testimony, in that order.
The drive works in a dock but not in its own enclosure. Must I replace the enclosure?
Effectively yes, and count yourself lucky: the diagnosis is complete, the data was never at risk, and the remedy is the cheapest in this entire article. Move the drive to its new home, verify its health baseline in the process, and keep the dead enclosure out of circulation — labelled as failed, so that some future tidy-up does not rehouse a good drive into a bad shell and restart the mystery from the beginning.
A closing discipline: the ten-minute rule
End with the habit that ties the whole article together. When a drive is not detected, give the problem ten disciplined minutes before giving it any worried ones: power proven, connection rebuilt link by link, the disk manager read carefully, the drive tried in a second home if one exists, and notes taken throughout. Most detection failures surrender inside those ten minutes, because most are a cable, a setting or a shell confessing under orderly questioning. The minority that remain are the serious ones, and they are exactly the problems that deserve your worry — with the notes from your ten minutes already in hand, the backup verified, and nothing irreversible clicked in haste. Order first, concern second, clicking last: a drive that is not detected is a question, and questions reward being asked properly.
Not detected in a NAS or array: the stakes change, the method does not
When the missing drive belongs to an array, resist every instinct to hurry, because the array’s other members are both your safety net and your responsibility while one of their number is missing. Read the NAS’s own account first: which bay, which serial number, what the logs recorded at the moment of disappearance, and whether the array is degraded but whole or has deeper complaints. A drive undetected after a power event may return with a reseat; a drive the array dropped for errors is a different patient, and re-adding it without diagnosis invites the array to trust a member it already voted against. Match physical bays to reported serial numbers twice before removing anything — the classic array disaster is the healthy drive pulled in the missing one’s place — and let the system’s rebuild, once a verified replacement is seated, run to completion without new experiments. The method of this article survives translation intact: power, connection, detection, configuration, health, in that order, at the array’s pace rather than yours. What changes is only the cost of improvisation, which in an array is denominated in everyone’s data at once.
Keeping a detection diary for the intermittent case
The drive that vanishes monthly and returns on a reseat is the hardest case in this article, because every individual incident looks trivial and the pattern is the diagnosis. Keep a diary for it: date, what the machine was doing, which layer restored it, any pattern of temperature, workload or power events that precedes the disappearances. Three entries usually convict the culprit — the cable that fails when the case warms, the port that drops under backup load, the supply that sags when a second drive spins up. Without the diary, intermittent faults are repaired by replacement roulette, one innocent component at a time. With it, they are the most satisfying fixes in all of troubleshooting: a pattern, a substitution, a silence where the fault used to be.
Teaching the household the three-minute version
Detection failures rarely schedule themselves for the hour when the household’s most technical member is home, rested and equipped. Leave the three-minute version where anyone can find it — a card with the system notes, a page in the household file — written for a tired non-specialist at a bad moment. It says: do not accept any offer to initialise or format anything; check that the drive has power and that its cable is the right one, seated at both ends; try the drive’s own port directly, not through the hub; write down what the screen says, word for word; then stop and wait for help, with the machine left exactly as it is. That card has saved more data than any utility in this article, because the destructive moments in detection stories are almost never the fault itself — they are the well-meaning clicks of the first responder. Equip your first responders. The diagnosis can wait for the diagnostician; the data, protected by a card on a cupboard door, will still be there when they arrive.
One final reassurance belongs in print, because owners in the middle of this problem consistently overestimate how bad their position is. The great majority of undetected drives are not dead; they are unplugged in spirit, misconfigured in software, or orphaned by a failed shell — conditions with remedies measured in minutes and small change. The minority that are genuinely failing announce it in their health data once you can read it, and even they usually surrender their data to an orderly rescue. The problem feels catastrophic because the data is invisible, and invisible feels like gone. Work the gates, read what the system actually says, and let evidence, not the empty window where your files used to be, tell you which story you are in. Most of the time, it is a shorter and kinder story than the first five minutes suggested.
And when the drive reappears — as, statistically, it will — close the incident properly. Record what the cause turned out to be in the system notes, beside the drive’s name, so the next disappearance starts from knowledge instead of from zero. Replace the guilty cable rather than returning it to the drawer of spares, where it would wait to star in a sequel. Verify the drive’s health and the backup’s currency while the lesson is warm. An undetected drive that returns is a free audit of your system’s weak points, delivered without data loss. Accept the audit, file its findings, and the next incident — for there is always a next incident in storage — will find a household that has rehearsed.
Keep this guide with those notes, and keep the dock beside the spare cables, and the next invisible drive will meet a household that treats invisibility as a procedure rather than a catastrophe — which, in the end, is all that fixing it ever meant.
The one-page version, for the inside of the cupboard door
Power first: prove the drive is fed, with its own adapter, on a direct port. Connection second: one cable, both ends reseated, no hub in between. Detection third: read the firmware setup and the disk manager, and believe what they say about which layer you are in. Configuration fourth: letters, initialisation status, file-system identity — and no destructive offers accepted on any drive with data on it. Health fifth: the moment the drive can be read, read its report before its files. Second home sixth: dock, enclosure or another machine, to separate the drive from its circumstances. Notes throughout, patience as policy, and the backup verified before anything irreversible is so much as considered. Seven lines; nearly every case in this article is one of them, waiting to be recognised.
Tape the page up today, beside the system notes, in the calm before any incident. Procedures written in calm are followed in crisis; procedures improvised in crisis are how healthy drives get initialised. Your future self, facing the empty window, will be grateful for the handwriting.
And then get on with the ordinary, unrecorded business of a system that works — which is, after all, what every drive in this article was trying to return to.
The gates will be there when you need them, in order, patient as only a method can be. Work them, and let the drive — detected, configured, verified — take its place in the system again, with its story filed where the next story can find it.
Most drives, given that patience, return the favour — appearing exactly where they should, as if they had never been away, and leaving you with nothing but a note, a replaced cable and a story with a happy ending.
Accept it gracefully, and move on.