Disclosure: As an Amazon Associate, ilcastellomenu.com earns from qualifying purchases. Product links on this page may earn a commission at no extra cost to you.
Learning how to clone a hard drive means copying everything — operating system, applications, settings and files — from one drive to another so the new drive can take over without a reinstall. Done carefully, cloning is the fastest way to move to a larger drive or replace an ageing one before it fails.
Cloning is also unforgiving of one particular error: choosing the wrong destination, because the process overwrites the target drive completely. Read the checks below before you open any software. If your goal is a bigger game or media library rather than a system move, the picks in Best Hard Drives for Gaming PC and the cloning-focused list Best Software for Cloning Hard Drives are useful companions to this guide.

Gear mentioned in this guide
The products below are examples that fit the situations described in this article. They are mentioned so you can picture the kind of hardware involved, not as a claim that one model suits every computer, console or NAS. Check the form factor, interface and capacity against your own system before you buy anything.
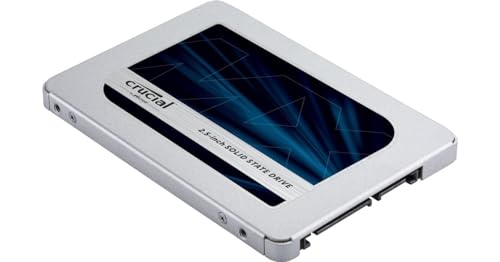
Crucial MX500 1TB SATA SSD — Crucial MX500 1TB 3D NAND SATA 2.5 Inch Internal SSD, up to 560MB/s – CT1000MX500SSD1. Check on Amazon

Samsung 970 EVO Plus 1TB NVMe SSD — Samsung 970 EVO Plus SSD 1TB NVMe M.2 Internal Solid State Drive w/V-NAND Technology, Storage and Memory Expansion for Gaming, Graphics w/Heat Control, Max Speed, MZ-V7S1T0B/AM. Check on Amazon

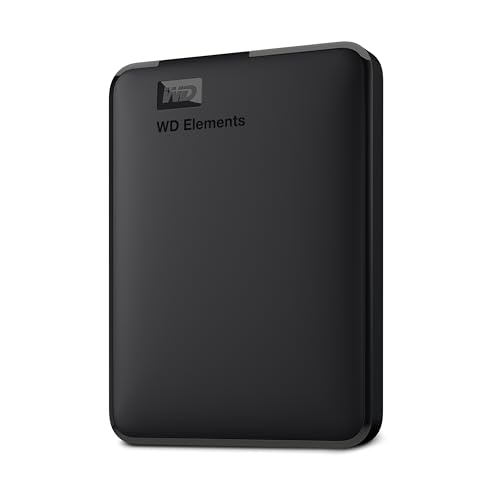
WD My Passport 5TB Portable — WD 5TB My Passport, Portable External Hard Drive, Black, backup software with defense against ransomware, and password protection, USB 3.1/USB 3.0 compatible – WDBPKJ0050BBK-WESN. Check on Amazon
In this guide
Cloning, imaging and copying: know which you need
Cloning copies a drive directly to another drive, producing a ready-to-use twin. Imaging saves a compressed snapshot of a drive into a file, which you can store and restore later; images are better for backups because several can live on one large drive. Plain file copying moves documents but not the operating system, boot records or hidden partitions, so a copied drive will not start a computer. Choose cloning when the destination drive will immediately replace the source, imaging when you want a restorable backup, and copying when only files matter.
Most cloning tools offer both clone and image modes, and the menus can look similar. Slow down at the mode selection screen and confirm you are in the right one. Also decide whether you want a sector-level clone, which copies everything including empty space and takes longer, or a file-aware clone, which copies only used data and is usually faster. For healthy drives moving to equal or larger destinations, the file-aware default is the sensible choice.
When cloning is the wrong tool
Do not clone a failing drive as your first rescue move if the data matters and the drive is clicking, freezing the system or disappearing. Cloning stresses a weak drive with a long, continuous read. In that situation, copy the most important files first while the drive still responds, or go straight to professional help. The priorities in How to Recover Files From a Hard Drive explain how to triage a sick drive without making its condition worse.
Preparing both drives
The destination must be at least as large as the used data on the source, and ideally at least as large as the source drive itself, because some tools refuse smaller targets even when the data would fit. Connect the destination reliably: internally by SATA where possible, or with a good USB adapter or dock for a laptop job. A loose USB connection that drops mid-clone wastes hours, so seat cables firmly and keep the desk still during the process.
Back up anything on the destination drive, because cloning erases it. Then run a health check on the source; a drive already reporting serious errors may clone its problems or fail during the run. Finally, close applications, pause cloud sync tools that will fight the clone with constant file changes, and plug laptops into mains power. A clone interrupted by a flat battery or a system update restart is a clone you get to start again.
Resizing partitions and the boot test
When cloning to a larger drive, decide how the extra space will be used before starting. Most tools can extend the main partition to fill the new drive automatically, which is what most people want. If you prefer a separate data partition, set that up deliberately rather than accepting a layout by accident. Also confirm the tool will copy all partitions, including the small boot and recovery partitions at the start of a system drive; missing those is the classic reason a cloned drive will not start.
After cloning, the real test is booting from the new drive with the old drive disconnected. Leaving both connected invites confusion, because the system may quietly boot from the old drive and you learn nothing. Shut down, disconnect the source, set the new drive first in boot order if needed, and start the machine. Use it normally for a day or two — updates, restarts, your main applications — before erasing or repurposing the old drive. That probation period is your safety net.
Cloning to an SSD or a different size drive
Cloning from a hard drive to an SSD follows the same steps and is one of the most satisfying upgrades available, because the system feels new again. Check that the cloning tool aligns partitions correctly for SSDs; reputable tools do this automatically. After the move, confirm the operating system recognises the device as an SSD so its maintenance features behave properly. Our storage round-ups such as Best Ssds for PC show the common destination choices if you are still deciding what to clone onto.
Cloning to a smaller drive is possible when the used data genuinely fits and the tool supports intelligent resizing, but it leaves no headroom and can fail late in the process if hidden data was underestimated. If the smaller target is an SSD for the system only, consider moving big media libraries to the old hard drive as a data disk instead of forcing everything onto the new device. A calm split — system on SSD, bulk on HDD — is often the best outcome of a clone project.
How to clone a hard drive without the usual disasters
Follow the order below. The preparation steps look slow, but they are what separate a boring, successful clone from an evening of troubleshooting and a destination drive overwritten by mistake.
Step 1: Verify source and destination twice
In the cloning tool, identify both drives by model, serial and capacity, not just by drive letter, because letters can mislead when several drives are attached. Say out loud which drive will be erased. This ten-second ritual prevents the single most destructive cloning mistake, and experienced technicians still do it on every job.
Step 2: Connect the destination solidly
Attach the target internally if you can, or use a quality dock or adapter and a short, undamaged cable. Avoid hubs for cloning; connect directly to the computer. Confirm the destination appears at its full capacity in the tool before proceeding, because a drive showing the wrong size signals an adapter or enclosure limitation to fix first.
Step 3: Select clone mode and all partitions
Choose direct cloning rather than imaging, select the entire source disk rather than a single partition, and confirm the small system and recovery partitions are included. Pick the option to expand the main partition if the destination is larger and you want the space in one volume. Review the summary screen the tool presents; it exists for this moment.
Step 4: Start the clone and leave it alone
Begin the process and let it run without using the computer for other work. Large hard drives can take hours, especially over USB. A progress bar that moves slowly is normal; a drive that starts clicking or a tool that reports growing read errors is not. If errors multiply, stop, protect the source, and switch to a file-first rescue plan instead of forcing the clone.
Step 5: Boot from the new drive alone
Shut down, disconnect the old drive, and start the computer from the clone. Work through a normal routine: sign in, open your main applications, restart once, and let updates run. If the system refuses to boot, reconnect the old drive, confirm it still starts, and revisit partition selection and boot order rather than wiping anything in frustration.
Step 6: Keep the old drive as a timed safety net
Store the old drive untouched for at least a week of normal use. It is a complete, bootable backup of your previous state, which is enormously valuable if a problem surfaces late. After the probation period, you can erase it and reuse it for backups or bulk storage, ideally after a fresh health check.
Common mistakes to avoid
Cloning onto the wrong drive
The destination is erased without ceremony. Model and serial checks, plus disconnecting every drive you do not need for the job, make this mistake almost impossible. If your computer has several identical drives, label them physically before you start so the software list matches the hardware in front of you.
Testing the clone with the old drive still attached
Systems often boot from the old drive by default, so a ‘successful’ test may prove nothing. Worse, two identical bootable drives can confuse updates and repair tools. Always test with the source disconnected, and only reconnect it later as a clearly labelled data or backup drive.
Cloning a dying drive until it dies
A long clone is heavy work for a failing mechanism. If the source clicks, stalls or throws errors, stop and prioritise irreplaceable files, or consult a professional. Preserving the data matters more than preserving the installation, because software can be reinstalled and photographs cannot.
Practical tips that make a real difference
Clone before the old drive forces the issue
The best time to clone is while the source is healthy and the process is boring. If your drive is ageing, the health checks in How to Test the Health of a Hard Drive help you decide when to move. A planned clone on a quiet afternoon beats an emergency clone at midnight.
Keep a bootable rescue USB handy
Many cloning tools can create rescue media that boots the computer independently of Windows or macOS. Make it before you need it and test that it starts your machine. If a clone goes wrong, rescue media plus your untouched old drive gives you calm options instead of panic.
Cloning a laptop drive with only one bay
Laptops with a single drive bay are the commonest cloning puzzle: the new drive has nowhere internal to live during the copy. The standard solution is a USB dock or enclosure for the destination drive during cloning, followed by the physical swap. This works well, with two cautions. First, the USB connection is the slow path, so allow generous time and keep the laptop on mains power with sleep disabled for the duration. Second, choose a dock or adapter known to pass the drive’s full capacity correctly, because an adapter that misreports size produces a clone that fails at the final hurdle.
After the swap, keep the old drive in that same enclosure: it becomes a bootable archive of your previous system and, once its probation is over, an ideal backup target. Label it with the date of the clone. Months later, when a file is missing and you wonder whether it existed before the upgrade, that labelled drive answers the question in minutes. The enclosure you bought for one afternoon’s cloning thus earns a permanent role, which is why buying a decent one, rather than the cheapest available, is money placed well.
Sector-by-sector, file-aware and other options you will meet
Cloning tools present options that deserve a calm read. A sector-by-sector clone copies every block, including empty space and deleted remnants; it is slow, produces an exact-size result, and is mainly useful for forensic-style copies or drives with unusual layouts. A file-aware clone copies only live data, resizes partitions intelligently, and is the right default for healthy drives and upgrades. Some tools offer to optimise for SSD destinations, aligning partitions and adjusting settings; accept that offer when cloning onto solid-state storage.
You may also meet options about the boot environment: cloning from within your running system, or booting the tool’s own rescue media to clone a resting system. A resting system clones most consistently, because no files are changing mid-copy, and rescue media is the safer choice when the source is a system drive showing any instability. Whichever route you choose, the verifications do not change: identify drives by model and serial, include every partition, and test the result with the source disconnected. Options are variations; the discipline is the constant.
When the clone finishes but something feels wrong
A cloned system that boots but behaves oddly — a program that lost its activation, a sync service that wants to re-upload everything, an update that fails — is usually suffering from identity, not damage. Software that fingerprints hardware notices the new drive; cloud services notice a new device identity and respond with caution. Work through these one at a time, reactivating and re-authorising as prompted, and resist the urge to re-clone in response to what are licensing and account events. Your untouched old drive remains the fallback while you tidy up, which is exactly why the probation period exists.
Performance surprises have their own short checklist. If the new drive is an SSD, confirm the system recognises it as one and that its connection negotiated the expected speed; a cloned system on a slow port feels like a failed upgrade. If the new drive is a hard drive, confirm it is not SMR where sustained writes matter, and give the system a day of indexing and updates before judging its pace. Most post-clone strangeness resolves into a setting, a licence or a first-day chore — and the minority that does not is why you kept the old drive intact.
Cloning drives with encryption, accounts and other real-world wrinkles
Encrypted system drives clone successfully with mainstream tools, but they deserve a rehearsal of the recovery path before you begin. Confirm you hold the recovery key for the encryption, stored somewhere other than the drive being cloned, because a hardware change is exactly the moment a system may ask for it. After the clone boots, verify the new drive shows as encrypted and protected in the system’s settings; a clone that quietly lost its encryption has traded safety for convenience without telling you, and the settings check is how you catch the trade.
Account-linked software presents the smaller wrinkles: media libraries that count authorised machines, creative suites that fingerprint hardware, games platforms that notice a new device. Expect a handful of re-sign-ins and reactivations in the first days and treat them as the clone’s paperwork, not its failure. Keep a short list as you resolve each one; if you ever clone again, that list becomes the checklist that turns a day’s surprises into an hour’s routine. The old drive, still untouched in its probation, remains the reference copy against which every ‘did it move?’ question can be answered with certainty.
One last habit separates tidy cloners from lucky ones: document the clone while it is fresh. Note the date, the source and destination models, the tool used and any options you changed, and file that note with your storage register. If the system misbehaves in a month, the note tells you exactly what changed and when, which turns a vague suspicion about the upgrade into a checkable fact. If everything runs well, the note becomes the recipe for the next clone, which will otherwise be attempted from memory in three years’ time, on a busier evening, with the same small decisions waiting to be re-derived under pressure. Documentation is the cheapest form of experience: it lets one careful afternoon teach every future one.
Frequently asked questions
How long does cloning a hard drive take?
Anywhere from under an hour to most of a day, depending on data volume, drive speeds and the connection. Internal SATA is fastest, USB docks are slower, and failing drives are slowest of all. Plan for the long end of the estimate, start the job when you do not need the computer, and judge progress by steady movement rather than the clock.
Can I clone a larger drive to a smaller SSD?
Often yes, if the used data fits comfortably and the tool supports resizing. Leave real headroom rather than squeezing to the last gigabyte, and consider moving media libraries off the system drive first. If the tool refuses, it is protecting you from a clone that would fail or leave the system with no working space.
Will cloning copy my applications and settings?
Yes. A proper clone copies the whole system state, including applications, settings, accounts and files, which is the point of cloning rather than copying. After booting the clone, most software works exactly as before. A few licensed products may ask to reactivate on new hardware; that is a licensing check, not a cloning failure.
What if the cloned drive will not boot?
First, confirm you are actually trying to boot from it, with the old drive disconnected and boot order checked. Next, verify the clone included the small boot partitions. Many tools offer a boot-repair function in their rescue media. If the source still boots, you have lost nothing; adjust one variable and try again.
Is cloning the same as backing up?
No. A clone is a single twin on another drive, useful for migration. A backup strategy keeps multiple, preferably versioned copies, so you can recover from deletion, corruption or ransomware as well as drive failure. After cloning, set up real backups for the new drive rather than assuming the old drive will serve forever.
Can I use the computer during a clone?
It is better not to. Files changing during the copy can cause inconsistencies, and heavy use slows everything down. Close applications, pause sync services, and let the tool work. The clone will finish sooner and you avoid the subtle errors that only appear days later.
The bottom line
A successful clone is a quiet event: prepare carefully, verify the destination twice, include every partition, test the new drive on its own, and keep the old drive as a safety net until the new one has earned your trust. Follow that discipline and moving your whole system to a new drive becomes routine maintenance instead of a gamble.
Before you clone: the pre-flight checks that prevent most failures
Cloning software rarely fails randomly; it fails at the exact weakness a ten-minute inspection would have found. Begin with free space arithmetic. The target must hold the source’s used data with room to spare, and ‘used’ means the data in all partitions, including the recovery and system partitions people forget because they have no drive letter. If the target is smaller than the source drive but larger than the source’s used space, most modern tools can shrink partitions during the clone — but only if the data is not scattered to the physical end of a partition, which is one reason a defragmentation pass on a mechanical source, and a tidy-up of enormous temporary files, genuinely improves a tight clone’s odds.
Check the source’s health before you clone it, not after. A source with growing numbers of reallocated sectors may clone perfectly or may stall for hours on an unreadable patch, and you would rather learn which before you are committed. Run the manufacturer’s extended self-test, look at the key health attributes, and back up the irreplaceable files separately first. That separate file backup is your insurance if the clone has to be abandoned halfway: the project can fail without the data being at risk.
Finally, decide how the target connects during the clone. A target on a fast direct connection finishes sooner and errors less than one hanging off an elderly hub through two adapters. If you are cloning a laptop’s only drive bay through USB, use the adapter or dock you would trust for a recovery, plug the laptop into mains power, and disable sleep for the duration. A clone interrupted by a laptop sleeping at forty percent is a clone you get to start again.
Understanding what the software is doing while it copies
File-aware cloning reads the file system’s map and copies only the blocks in use, skipping free space, which is why it is fast and why it can move a half-empty large drive onto a smaller target. Sector-by-sector cloning copies every block including free space and deleted-file remnants; it is slower, demands a target at least as large, and earns its keep in forensic situations and with file systems the software cannot interpret. Most household clones should be file-aware, and choosing sector mode ‘to be safe’ usually buys hours of waiting and a target-size problem in exchange for nothing you need.
Intelligent tools also handle the small partitions that make a drive bootable: the EFI system partition, the reserved partitions and the recovery environment. These are tiny, hidden and absolutely essential, and their presence in the clone’s layout is the difference between a target that boots and a target that holds your files but starts nothing. Before you confirm a clone, look at the preview layout the software offers and confirm every source partition appears in the plan, in the same order, with the boot partitions flagged to copy. Thirty seconds reading that preview prevents the most common cloning disappointment of all.
Alignment is the quiet technical detail with real consequences when the target is solid-state. Partitions should begin at boundaries the flash memory prefers, and current cloning tools handle this automatically when they detect the target type — another reason to use a maintained, current version of the software rather than an ancient disc from a drawer. If your tool offers an explicit optimise-for-SSD option, use it; the performance difference persists for the life of the installation.
The boot test, done properly
A clone is not finished when the progress bar completes; it is finished when the target boots the machine alone. Test with the source physically disconnected or disabled, because a machine with both drives attached may quietly boot from the original while showing you the clone’s desktop through the other drive’s files — a confusion that has convinced many people a clone worked until the day the source was wiped. Boot the target, sign in, open several applications and files from different folders, connect to your network, and let the machine run long enough for updates and indexing to stir. Then restart once more. Two clean boots with the source absent is the standard a clone should meet before you repurpose the source.
Keep the source untouched for a settling period afterwards — a week of normal use is a sensible minimum for a machine you depend on. The source is your rollback, and it costs nothing but shelf space. Only when the target has survived updates, restarts and your real workload should the old drive be wiped, reformatted or reassigned to backup duty. Many experienced technicians go further and keep the old system drive, labelled, until the next major change has also settled.
Cloning encrypted, account-bound and otherwise stubborn systems
Full-disk encryption changes the clone’s character. File-aware tools may see only encrypted blocks and fall back to a sector copy, which is slow and size-bound, or the platform may require you to clone from within the running system using its own sanctioned path. Neither is a reason to panic, but both are reasons to read your encryption product’s guidance before starting rather than discovering the behaviour at midnight. Have your recovery key located and verified before the clone, not during it; a cloned encrypted drive that asks for a key you cannot produce is a very secure paperweight.
Licensed software and signed-in accounts occasionally object to waking up on new hardware identifiers. Expect a few applications to ask for reactivation and a few services to treat the cloned system as a new device. This is normal, mildly annoying and best handled after the boot test, one prompt at a time, with your account credentials to hand. If a critical professional application uses hardware-locked licensing, check its transfer policy before cloning so the reactivation path is planned rather than improvised under deadline.
Cloning as part of a bigger migration
Sometimes the clone is one move in a larger rearrangement: a new boot drive arrives, the old boot drive becomes the game library, and the old game drive becomes a backup target. Sequence these moves so that at every moment at least one verified copy of everything exists. Clone first, boot-test second, and only then reassign the older drives. The temptation to wipe and reuse drives mid-project to save buying one enclosure is how migrations turn into recoveries. Our guide on software for cloning hard drives compares the tool options if you are choosing one for a migration of this kind.
Document the migration as you go: which drive holds what, which is the rollback, and what remains to be done. A three-line note on paper beside the machine outperforms memory, especially across a weekend project interrupted by ordinary life. When the project closes, update your system record with the new layout and the date, and label any drive whose role changed — the label from its previous life is now misinformation, which is worse than no label at all.
When cloning is the wrong tool
Cloning copies everything, including the accumulated problems. A system that is unstable, infected or burdened by years of orphaned software often deserves a clean installation with files migrated selectively, even though it takes longer, because the clone would faithfully preserve the very behaviour you are trying to escape. Similarly, a source drive with serious mechanical symptoms — clicking, repeated disappearances, escalating errors — should be imaged cautiously for its data, not cloned as a system; the priority order flips from ‘working system’ to ‘rescued files’, and the techniques differ.
There is also a scale at which cloning stops making sense. Moving to a machine with a different storage controller generation, a different firmware mode or a different operating system version can leave a cloned system booting but subtly wrong, accumulating odd errors for months. A fresh installation on genuinely new hardware, with your documents, browser profile and application settings migrated deliberately, is often the faster route to a machine that feels new — because it is.
Cloning questions that come up mid-project
The progress bar has sat at the same percentage for an hour. Is it stuck?
Possibly, but not certainly: a difficult patch of the source — an area the drive retries repeatedly — can slow a clone to a crawl at one point. Check whether the software’s transferred-bytes counter or the drives’ activity lights are still moving. If bytes are moving, patience is correct. If nothing has changed for a long stretch and the source is making repetitive seeking sounds, stop the clone, let the drive rest and cool, and switch strategy to rescuing the important files first.
Can I use the computer while it clones?
Light use is possible with some tools and unwise with all of them. Files changing during the copy can arrive at the target inconsistent, and the workload slows both the clone and your work. Treat the cloning machine as occupied: start the clone, leave it, and use another device. The exception is a tool explicitly designed for live imaging, used with its snapshot feature — and even then, quiet systems clone cleaner.
The target boots but some programs lost their settings. Did the clone fail?
Usually not. A handful of applications store settings in machine-bound locations or protect them with hardware fingerprints, and those reset by design when the hardware identity changes. Your documents and the great majority of settings travel fine. Reconfigure the few objectors, note them in your migration record, and expect the same names on any future clone.
Should I keep the cloning cable and adapter afterwards?
Yes, in the box with the spare cables, labelled. The same adapter is the tool you reach for during a recovery, a health check on a removed drive, or the next upgrade. Storage projects recur every few years; keeping the small kit together turns the next one from a shopping trip into an afternoon’s work.
Cloning across generations: when the new drive speaks a newer language
Clones that cross hardware generations carry subtleties a same-era swap avoids. A system cloned from a SATA drive onto an NVMe target may need a storage driver the old installation never loaded, and modern operating systems usually sort this out on first boot — but ‘usually’ is doing work in that sentence, and the fix, enabling the driver before cloning through the system’s own configuration tools, is far easier before the swap than after a boot failure. Similarly, a clone moving between firmware boot modes, from legacy BIOS to UEFI or the reverse, changes the boot partition requirements themselves; the cloning tool must convert the layout, and not all do. Identify these crossings before you start, by noting the source system’s boot mode and the target machine’s expectations, and choose a tool that explicitly supports the conversion you need.
Secure Boot adds a signature check to the chain. A faithfully cloned system normally passes, because its boot files are unchanged, but a clone that involved rebuilding boot structures with third-party tools can occasionally trip it. If the cloned target refuses to boot with a security message, the answer is to repair the boot files using the operating system’s own installation media, not to disable security features permanently — a cloned machine should end up exactly as protected as the original was.
Speed expectations and how to shorten a long clone
Cloning time is governed by the slowest element in the chain: the source’s read speed on its worst patches, the connection between the drives, and the target’s write speed. A mechanical source reading through a basic USB adapter sets a pace no setting can improve, and a large, well-filled drive can legitimately take much of an evening. Plan for that honestly — start after dinner, let it run overnight with sleep disabled and the laptop on mains power, and judge progress by bytes transferred rather than by the percentage, which advances unevenly as the copy crosses partitions of different density.
What genuinely shortens a clone is reducing what must move. Uninstall the games you no longer play, empty the downloads folder’s accumulated installers, clear temporary files and the recycle bin, and consider excluding bulky, easily re-downloaded libraries from the clone entirely and restoring them afterwards. Removing a few hundred gigabytes of re-obtainable data can halve a clone’s duration and, as a bonus, the target starts life tidier than the source. What does not shorten a clone is interrupting and restarting it with different settings; the copy begins again from zero, and the evening is spent either way — just less usefully.
Verifying the clone beyond the boot test
Booting proves the system survived; verification proves your data did. After the boot test, spot-check the material that matters in layers. Open the document folders you use weekly and confirm the newest files are present and current — check dates, not just names. Open your photo library and browse to the most recent month. Start your mail client or confirm your browser profile carried its bookmarks, history and signed-in sessions as expected. If you keep a local database — accounting, a media library catalogue, a virtual machine — open it and let it run its own consistency check.
For a thorough verification, many cloning and imaging tools offer a verify or compare pass that reads the target against checksums recorded during the copy. It adds time, and for a system drive you depend on professionally it is time well spent, because it converts ‘the clone seems fine’ into ‘the clone is demonstrably complete’. Whichever depth you choose, record the outcome in your migration note: date, tool, source, target, boot test result, spot checks passed. That record is what lets you wipe the source a week later with a clear mind instead of a lingering doubt.
A note on cloning drives for other people
Cloning a family member’s or a small business’s drive carries a responsibility the solo project does not: you are briefly the custodian of everything they own digitally. Agree in advance what you will do if the clone reveals a failing source, keep the source untouched until they confirm the new system works for their real tasks — not just that it boots — and hand back both drives with a plain-language summary of which is which. Label everything. More confusion, and more loss, comes from two identical unlabelled drives on a shelf than from any software failure in the whole process.
Record-keeping for clones you may need to defend
For a personal machine, the migration note described earlier is enough. In a small business, a school or any setting where the machine belongs to an organisation, a clone deserves a slightly more formal record, because questions about it arrive months later from people who were not in the room. Record the date, the machine’s identifier, the source and target drives by model and serial number, the tool and its version, who performed the clone, and the verification steps completed. Note where the source drive is stored and the date after which it may be wiped, and have that wipe date agreed rather than assumed. This sounds bureaucratic until the first time an auditor, an insurer or a new IT volunteer asks what happened to a drive that once held client records — at which point the half-page record is the difference between an answer and an excavation.
The same record protects you in the opposite direction. If the cloned system later misbehaves, the note establishes what changed and when, and just as importantly what did not change, so troubleshooting starts from evidence rather than folklore. Cloning is a small project; treat its paperwork with the same respect as its cables, and both halves of the job will hold up.
The clone is done: a closing ritual
Finish every clone with the same five gestures. Label the target’s role in the system record and the source with its status and wipe-after date. Store the source somewhere cool, dry and findable — not loose in a drawer of cables. Return the cloning adapter to its labelled place. Delete any temporary disk images you made along the way, or file them deliberately with names that say what they are. And set a calendar note for the end of the settling period, so the decision about the source drive happens on purpose, on a day when you can verify the target once more first. Projects end cleanly when someone performs the closing ritual; otherwise they trail off, and trailing off is where unlabelled drives and forgotten copies come from.
Cloning a drive that holds your photo library’s only working copy
One scenario deserves its own warning label. If the source drive holds the only current copy of anything irreplaceable — most often the family photo library that was going to be backed up properly one day — then the clone must not be the first time that data is copied anywhere. Make a plain file copy of the irreplaceable folders to any other storage you have, even borrowed storage, and verify it opens, before the clone begins. The reason is asymmetry: a clone that succeeds gives you a new system drive, but a clone that fails midway on a deteriorating source can leave you with neither a finished target nor an untouched original in the worst cases. The file copy takes an hour and converts the clone from a gamble into a procedure. Afterwards, let the experience finish its lesson: the newly cloned system should gain the backup routine the old one never had, so that no future drive in this machine is ever again the sole custodian of the family’s memory. A clone is a fresh start in more ways than the obvious one, if you let it be.