Disclosure: As an Amazon Associate, ilcastellomenu.com earns from qualifying purchases. Product links on this page may earn a commission at no extra cost to you.
Knowing how to test the health of a hard drive gives you the one thing storage failures usually deny you: warning. Most drives report their condition through a monitoring system called SMART, and a ten-minute check can reveal problems weeks or months before files start disappearing.
This guide explains what to check, which warnings matter, and what to do with the results — including when the correct response is simply to back up and replace the drive. If a check convinces you replacement time has come, the options in Best Hard Drives for Backups and Best Hard Drives for Long Term Storage cover the drives people usually move to next.

Gear mentioned in this guide
The products below are examples that fit the situations described in this article. They are mentioned so you can picture the kind of hardware involved, not as a claim that one model suits every computer, console or NAS. Check the form factor, interface and capacity against your own system before you buy anything.
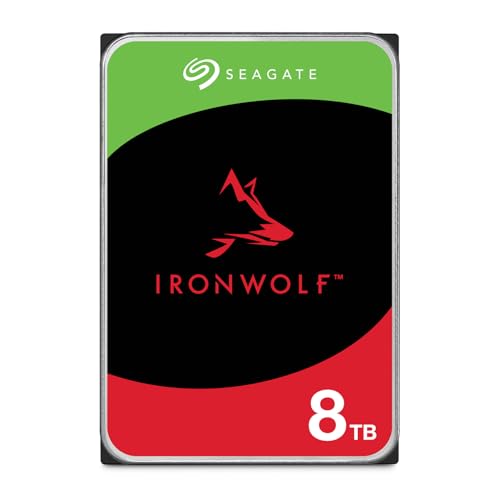
Seagate IronWolf 8TB NAS HDD — Seagate 8TB IronWolf Internal NAS Hard Drive | SATA 6 Gb/s (ST8000VNZ04) | 24/7 NAS-optimized HDD. AgileArray, All-CMR, RV sensors for multi-bay, 180TB/year. 3-Year Warranty + 3-Year Rescue. Check on Amazon

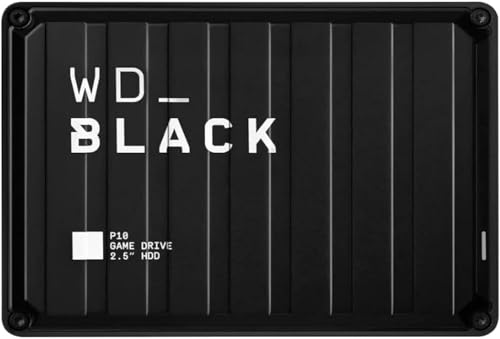
WD Black 4TB Performance HDD — Western Digital 4TB WD Black Performance Internal Hard Drive HDD – 7200 RPM, SATA 6 Gb/s, 256 MB Cache, 3.5″ – WD4005FZBX. Check on Amazon

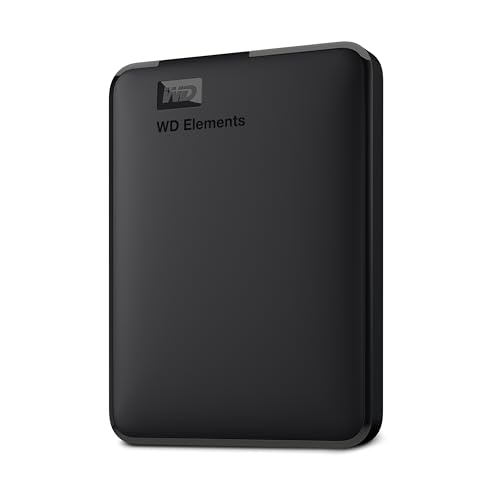
WD Elements 2TB Portable — WD 2TB Elements Portable External Hard Drive for Windows, USB 3.2 Gen 1/USB 3.0 for PC & Mac, Plug and Play Ready – WDBU6Y0020BBK-WESN. Check on Amazon
In this guide
What SMART actually tells you
SMART — Self-Monitoring, Analysis and Reporting Technology — is a set of internal counters every modern hard drive maintains: how long it has been powered on, how many times it has started, whether sectors have failed and been replaced, and whether the drive has struggled to read or write data. Viewing tools translate those counters into a simple verdict such as Healthy, Caution or Bad, alongside the raw numbers. The verdict is a summary, not a guarantee, but a drive flagged Caution deserves immediate respect and a verified backup.
Three counters deserve special attention. Reallocated sectors mean the drive found damaged areas and substituted spares; a handful on an old drive is wear, a growing count is decline. Pending sectors are areas the drive could not read and is watching; they often precede reallocations. Uncorrectable errors are the most serious, indicating data the drive could not recover at all. Watch trends, not single snapshots: a counter that climbs between weekly checks is a drive planning its exit.
The limits of health checks
No test can promise a drive will survive tomorrow. Electronics can fail without warning, and SMART cannot predict a dropped laptop or a failed power supply. Health testing is about catching the common, gradual failures — surface wear, growing error counts, mechanical struggle — early enough to act calmly. It complements backups; it never replaces them. A drive reporting perfect health still needs its data copied elsewhere, because the failure modes tests cannot see are exactly the sudden ones.
Quick checks on Windows, macOS and NAS systems
On Windows, the built-in status appears in several places, but a dedicated SMART viewer gives the clearest picture, showing the overall verdict and every attribute. Manufacturer tools from the drive makers add their own short and extended self-tests, which ask the drive to scan itself and report the result. Run the short test first; run the extended test when the short test fails, when errors are suspected, or as an annual deep check on an important drive, knowing it can take hours on large capacities.
On a Mac, Disk Utility reports a basic SMART status for internal drives, though many USB enclosures hide SMART data entirely, which is a limitation of the enclosure rather than the drive. NAS systems usually present the clearest dashboard of all, with per-drive health, temperatures and test scheduling built in, plus email alerts when a verdict changes. Whatever platform you use, the routine matters more than the tool: check on a schedule, and act on changes. Our NAS-focused lists such as Best NAS Hard Drives for Synology assume drives whose health the NAS will monitor continuously.
Listening and watching: symptoms tests cannot capture
Your ears are a diagnostic tool. A healthy hard drive makes a soft spin-up whir and gentle activity sounds. Repetitive clicking, grinding, beeping or a drive that spins up and down repeatedly is reporting mechanical distress that software may not yet reflect. The guide How to Fix a Clicking Hard Drive explains which sounds mean stop immediately. Treat new noises as a health result in their own right: back up first, investigate second, and do not run long stress tests on a drive that sounds injured.
Behaviour matters too. Files that take suddenly long to open, copies that stall at the same point, applications freezing while the drive light stays solid, and a system that occasionally cannot find the drive at boot are all soft symptoms. Any one of them can have innocent causes, but together with SMART warnings they form a pattern you should not argue with. When symptoms and counters agree, replace the drive and keep the old one only as a last-resort copy until the new setup is proven.
What to do with the results
A healthy verdict means carry on, keep backups current, and check again on schedule — monthly for important drives is a sensible rhythm. A caution verdict means back up now, verify the backup by opening files, and plan replacement; the drive may work for months, but you are now living on borrowed time and the plan should not depend on it. A bad verdict, failed self-test or uncorrectable errors mean the drive’s working life is over: copy what you can, starting with the irreplaceable, and retire it.
Record your results. A simple note with the date, drive serial and key counters turns one snapshot into a trend, and trends are where the real insight lives. When you replace a drive, the migration guides in this batch — installation and cloning — turn the replacement into a controlled project. The goal of health testing is never anxiety; it is replacing drives on your schedule, during a calm afternoon, instead of during a crisis.
A complete health check in six steps
This sequence takes about ten minutes for the quick version. Do it for every important drive, including the external drive that holds your backups — a backup drive with failing health is a false sense of security.
Step 1: Identify the drive precisely
Note the model, serial number and capacity from the viewing tool so results attach to the right physical drive. In systems with several similar drives, this step prevents the classic error of testing the healthy drive twice while the failing one goes unchecked. Labels on the drive and in software should agree; if they do not, resolve the mismatch before trusting any result.
Step 2: Read the overall verdict and key counters
Start with the summary status, then look at reallocated, pending and uncorrectable counts, plus power-on hours for age context. Zero error counters on a drive of any age is a good sign. Small, stable numbers on an old drive call for monitoring; numbers that grow between checks call for replacement planning. Write the figures down with the date.
Step 3: Run the manufacturer’s short self-test
Use the drive maker’s diagnostic tool where available and run its quick test, which exercises electronics and a sample of the surface in a few minutes. A pass supports the SMART picture. A fail outweighs a cheerful SMART summary, because the test asked the drive to perform rather than merely report. Either way, record the result next to your counters.
Step 4: Check temperature and environment
Drives dislike sustained heat. A drive idling far hotter than its neighbours may have blocked airflow, a failing enclosure fan or a workload it cannot shed. Note the temperature during your check and, if it is high, improve ventilation before blaming the drive itself. NAS enclosures and compact external cases deserve particular attention in warm rooms.
Step 5: Listen during a controlled copy
Copy a large file and listen. Smooth, even activity sounds are normal; rhythmic clicking, repeated spin-ups or long silent stalls are not. This simple observation catches mechanical problems that counters sometimes lag behind. If you hear distress sounds, stop testing, prioritise backup, and treat the drive as failing regardless of what the software summary claims.
Step 6: Decide and schedule the next check
End with a decision: healthy and recheck in a month, caution and replace soon, or bad and retire now. Put the recheck on a calendar rather than relying on memory. Health testing only protects you as a habit; a single check, however thorough, is just a photograph of one day in a drive’s life.
Common mistakes to avoid
Running stress tests on a drive you suspect is dying
Extended surface scans are heavy work. On a healthy drive they are harmless diligence; on a clicking, error-throwing drive they can consume its remaining life before you copy the files that matter. Sequence matters: backup first, deep tests only when the data is already safe or the drive’s contents are expendable.
Trusting a single green tick
A ‘healthy’ summary can hide a slowly growing reallocated count or a drive that runs hot in a sealed enclosure. Read the underlying counters and temperature, and compare them with last month’s note. The trend is the diagnosis; the tick is just the headline.
Never checking the backup drive
People test the drive they use daily and forget the one in the drawer holding their only copies. Backup drives age, get dropped and sit in unsuitable conditions. Include them in the same monthly routine, and verify the backup by restoring a few files, because an unreadable backup is worse than none — it feels like safety.
Practical tips that make a real difference
Automate alerts where you can
NAS systems and some utilities can email or notify you when a SMART verdict changes. Turn those alerts on. A warning you never see protects nothing, and automation converts health testing from a chore you might forget into a background habit that only interrupts you when action is genuinely needed.
Retire drives by plan, not by failure
Many people replace important drives on a schedule informed by age and health rather than waiting for errors. The lifespan guide How Long do Hard Drives Last explains typical service life so you can plan replacements calmly, especially for NAS drives that work continuously.
How to test the health of a hard drive on a schedule that sticks
The difference between people whose drives fail without warning and people whose drives get replaced in time is rarely knowledge; it is a calendar entry. Attach the health check to an existing monthly habit — the evening you run updates, pay a bill or back up the photo library — and it will happen. The check itself is short: open the health tool for each important drive, read the verdict, glance at the three error counters and the temperature, and jot the numbers in the same note as last month’s. Five minutes, once a month, is the entire cost of converting storage from luck into management.
For households with a NAS, the schedule is partly automated: turn on the enclosure’s notifications, schedule its built-in drive tests for a quiet hour, and let the dashboard accumulate the trend for you. Your monthly job shrinks to reading the summary the NAS sends. For backup drives that live disconnected in a drawer, fold their check into the backup routine itself: every time a backup drive is connected for its scheduled run, it gets its thirty-second health glance as part of the same session. A drive that is never connected is also never checked, which is an argument for scheduled backups on its own.
Reading a SMART report line by line
A full attribute list looks forbidding, but most lines can be ignored by home users. Beyond the three error counters covered earlier, a few deserve a glance. Spin-up time drifting upward over months can hint at mechanical wear. Seek error rates that climb suggest the positioning mechanism is working harder. A rising temperature trend with no environmental change can mean a drive working against internal friction or an enclosure fan quietly failing. In each case the operative word is trend: the raw values are normalised differently by each manufacturer, so comparing a number against the internet’s idea of normal is far less useful than comparing it against the same drive’s own history.
This is why the note-taking habit matters more than the tool choice. Any reputable viewer shows the same counters; only your records turn them into a story. Keep the note boring and consistent — date, drive, verdict, three counters, temperature — and patterns will announce themselves. A drive whose reallocated count has been zero for two years and is zero today is a healthy citizen. A drive that has added a few each month for a quarter is writing its resignation letter in instalments, and your job is simply to have read it before the final day arrives.
Testing drives inside enclosures, docks and RAID
Enclosures complicate testing because some pass SMART data through and some hide it, and the same drive can look untestable in one housing and fully reported in another. When an important drive reports nothing through its enclosure, test it in a dock or bay known to pass the data, or accept the enclosure swap as part of the diagnostic. Note which of your enclosures are transparent to health data and prefer those for drives whose condition you actively monitor, such as the primary backup drive. The enclosure is part of the monitoring system, not just a box.
RAID members need a gentler testing philosophy. The array’s own controller watches its drives continuously, and the correct response to its warnings is to trust the system’s design: replace the flagged member, let the rebuild proceed, and resist running extra stress tests on the surviving members mid-rebuild, because a rebuild is already the heaviest work an array does. Schedule the NAS’s own self-tests for quiet periods, stagger them so members are not all exercising at once, and treat the controller’s verdicts as the senior opinion in the room.
Health testing for drives you cannot see: soldered, sealed and remote
Some drives resist the routine entirely. Laptops with sealed designs still report health through the operating system, so the check survives even when the drive cannot be touched. Drives inside relatives’ computers, or a NAS at a second property, need the check delegated: teach the person nearest the machine the thirty-second version, or use the NAS dashboard’s remote access and alerts so the evidence travels to you. A drive you cannot check is not exempt from failing; it is simply a drive whose warnings nobody will hear, which argues for stronger backups around it rather than optimism about it.
Cloud-synced folders create a subtler blind spot: the local drive’s health matters less for files that exist in the cloud, and enormously for the folders that were excluded from sync to save space. Know which of your data is protected by sync and which merely lives near it. The health routine should always be weighted toward the drives holding un-synced, un-copied material, because those are the drives whose silent decline becomes a loss. Attention, like backup capacity, belongs where the risk actually concentrates.
Frequently asked questions
How often should I test my hard drives?
Monthly quick checks suit drives holding important data, with an extended self-test once or twice a year. NAS systems can report continuously, so review their dashboards whenever they alert you and glance at them monthly. The right rhythm is the one you will actually keep; a simple monthly habit beats an elaborate quarterly plan that gets abandoned.
Can SMART predict exactly when a drive will fail?
No. SMART catches gradual wear well but cannot foresee sudden electronic failure, physical shocks or power events. Treat a good SMART result as encouraging evidence, not a promise, and keep backups regardless. Treat a bad result as a strong instruction to act, because drives that flag errors fail at much higher rates than drives that do not.
My drive shows a few reallocated sectors. Is it dying?
A small, stable count on an older drive is wear to watch, not a death sentence. A count that grows between checks is decline, and the drive should be replaced on your schedule rather than trusted indefinitely. Context decides: back up, note the number, check again soon, and let the trend make the decision for you.
Why does my USB drive show no SMART data?
Many USB enclosures and adapters do not pass SMART information through to the computer, so tools report nothing. The drive itself still tracks its health internally. Testing the drive in a different enclosure, a dock known to pass SMART, or inside a computer gives a clearer picture. Absence of data is not evidence of a problem.
Should I keep using a drive that failed its self-test?
No, not for anything that matters. A failed self-test is the drive’s own diagnostic declaring a problem. Copy irreplaceable files off it if it still responds, starting with the most valuable and working calmly, then retire it. Continuing to trust it risks losing both the data and the chance to copy it while copying is still possible.
Does formatting fix a drive with health warnings?
No. Formatting reorganises the file system; it does not repair worn surfaces, failing heads or growing error counters. A formatted failing drive may appear to behave briefly, which makes the trap worse. If health tools report real hardware problems, the fix is replacement, and formatting is only useful afterwards on the new drive.
The bottom line
Testing hard drive health is a small habit with an outsized payoff: read the verdict, watch the error counters and temperature, listen to the drive, and act on trends while you still have choices. Combined with real backups, it turns drive failure from a disaster into a scheduled replacement — which is the best outcome storage can offer.
Building a testing routine around how you actually live
Health testing fails as a habit when it is designed like a laboratory protocol instead of a household routine. The sustainable version attaches itself to something you already do: the monthly evening you update the household machines, the start of each season, or the backup check you run before a holiday. Pick one anchor, put a recurring reminder on it, and define the routine small enough to survive a busy month: glance at the health summary of each drive, confirm the backup completed, and note anything that changed. A five-minute routine performed four times a year catches far more real problems than an heroic annual inspection that gets postponed twice and abandoned.
Keep a simple log. One line per drive per check — date, overall health status, the count of reallocated sectors if your tool shows it, and any odd behaviour noticed — takes a minute to write and becomes genuinely diagnostic over time. A single reading of a health attribute means little; the same attribute moving across three log entries is a story, and it is the story, not the snapshot, that justifies replacing a drive. Store the log with your backup settings or system notes so the next check starts where the last one ended.
Interpreting the attributes people misread most
Several SMART attributes generate anxiety out of proportion to their meaning. Raw read error rates on some manufacturers’ drives use vendor-specific counting that produces enormous raw numbers on perfectly healthy hardware; the normalised value and the threshold are the comparable figures, and a drive whose normalised value sits comfortably above its threshold with a frightening raw count is usually fine. Temperature readings need context too: a drive reporting a warm figure during a summer backup marathon is behaving differently from one that idles hot in a cool room, and only the second pattern deserves action.
The attributes that deserve prompt respect are the ones tied to the recording surface and the mechanics: reallocated and pending sector counts that grow between checks, offline uncorrectable errors, and spin-up or seek failures. Growth is the key word. A drive that reallocated a handful of sectors two years ago and has been stable since may serve for years under watchful backup. A drive whose counts climb at every check is telling you its surface is deteriorating progressively, and the correct response is to plan its replacement on your schedule rather than its own.
Power-on hours and start-stop counts provide the biography rather than the diagnosis. They tell you whether a drive’s life matches its claimed history — invaluable when assessing a second-hand drive or a system you inherited — and they calibrate your expectations. A drive with very high hours and perfect surface attributes is a veteran to back up diligently; a young drive with surface errors is a warranty conversation, not a monitoring project.
Testing drives in the awkward places: laptops, consoles and sealed systems
Some drives cannot be removed without disproportionate effort, and some systems offer no friendly health tool at all. Laptops are usually manageable: the same SMART utilities work on the internal drive, and the practical challenge is only remembering that a laptop’s drive endures heat and movement its desktop cousins avoid, so its checks deserve slightly higher priority. Consoles are more closed; their internal drives generally expose no user-facing health data, so your test becomes behavioural — loading times that stretch, texture pop-in that worsens, errors during game installs — and your protection is keeping saves backed up through the console’s own services rather than any diagnostic.
For sealed external drives and network appliances, test what you can reach: the SMART data many NAS systems surface in their dashboards, the self-test schedules the appliance can run itself, and periodic verification copies of a sample of files. If an external drive’s enclosure blocks health data entirely, a practical workaround for a drive you care about is a periodic spell in an open dock that passes the data through — an hour on the bench twice a year gives you the readings the sealed enclosure hides. Our round-up of hard drives for backups includes options whose enclosures handle this reporting well, if a replacement is ever on the table.
From test result to decision: a calm framework
Every test ends in one of four decisions, and naming them in advance removes the dithering that wastes the warning a test gave you. Continue: results are clean, the log gains a line, nothing changes. Watch: something minor moved, so you shorten the interval to the next check and verify the backup today. Replace on schedule: deterioration is real but slow, so the drive joins your next planned purchase and its data migrates in an orderly way. Replace now: errors are active, data is at immediate risk, so the drive stops being trusted today — its workload moves, and it is retired or returned under warranty.
Notice what is absent from that framework: panic, and its cousin, denial. A bad result with a verified backup is an inconvenience and a shopping task. A bad result without a backup is a recovery problem, which is why the framework’s zeroth step, before any test, is confirming that the backup of this drive is current. Test results tell you about hardware. Backups decide whether the hardware’s news matters.
Testing after an incident: drops, surges and strange events
Certain events earn a drive an out-of-schedule check regardless of the routine. A dropped external drive, a power cut mid-write, a lightning storm that took other electronics, a system crash that mentioned storage errors — each justifies connecting the drive, reviewing its health data and running at least a short self-test before trusting it again. Mechanical drives can sustain damage that declares itself gradually; the drive that survives the drop may develop symptoms over the following weeks, so note the incident in your log with its date, and treat new symptoms in that window as related until proven otherwise.
Heat incidents count too. A failed case fan discovered after a summer of silent cooking, or a NAS found with its vents blocked by a repositioned book, means every drive in that enclosure deserves a check and a closer watch for a while. Heat rarely kills a drive on the day; it spends the drive’s remaining margin, and your log is how you notice the spending.
Health questions readers ask between checks
Can testing itself wear out a drive?
Short and extended self-tests are designed into the drive’s firmware and use its normal reading mechanisms; running them on a sensible schedule adds negligible wear compared with ordinary use. The surface scans in some utilities are heavier, but even those sit well within what a healthy drive does in service. A drive so fragile that a self-test endangers it was already at the edge, and learning that from a test beats learning it from a failure.
My tool and my NAS disagree about a drive’s health. Which do I believe?
Believe the more detailed source and investigate the difference. Dashboards often summarise conservatively or read a subset of attributes, while a dedicated utility shows the raw table. If the detailed table is clean, the dashboard may be flagging age or hours. If the detailed table shows growing surface errors, the dashboard’s cheerful summary is the one to distrust. The log you keep settles most disagreements: trends outrank any single verdict.
Is a drive with a caution status safe for backups?
A backup target must be more trustworthy than the drive it protects, so a drive under a health caution should not hold your only backup copy. It can serve as a second, extra copy — redundancy tolerates a weak member — or as scratch space for replaceable data. Promoting a doubtful drive to sole backup duty converts its warning into your risk.
How do I test a drive I am about to sell or give away?
Run the extended self-test, review the attributes, and then perform a full overwrite pass, which both erases your data and exercises the entire surface as a final examination. Report the results honestly to the recipient, including the power-on hours. A tested, honestly described used drive is a kindness; an untested one is a lottery ticket you have handed to a friend.
What the manufacturers’ own tools add — and where they stop
Each major manufacturer offers a diagnostic utility for its drives, and these tools earn a place in your routine for three reasons. They read vendor-specific attributes with the correct interpretations, sparing you the false alarms that generic tools can raise over raw values counted in a proprietary way. They run the definitive version of the drive’s self-tests and can produce the diagnostic codes a warranty claim will ask for. And they report firmware versions and can apply updates, which matters when a known firmware issue masquerades as failing hardware.
Their limits are equally clear. A manufacturer’s tool naturally speaks best to its own drives and may show little or nothing for a competitor’s hardware in the same machine, so a mixed system still needs a general utility for the full picture. The tools also tend to be built for Windows, leaving Mac and Linux users to the platform utilities and command-line options. Treat the manufacturer’s diagnostic as the authority for a warranty conversation and one voice among several for routine monitoring, and you have its role exactly right.
Environmental testing: the conditions around the drive
A health check that looks only at the drive misses half the evidence, because drives live in environments, and environments drift. While you are running tests, note the drive’s temperature under a sustained copy compared with its idle figure; a small gap suggests healthy airflow, while a drive that climbs steeply and stays hot is reporting on its enclosure as much as on itself. Check that the machine’s fans actually spin, that filters and vents are clear of the dust mat they quietly grow, and that a NAS on a shelf has not been gradually buried by the household’s paper tide.
Vibration is the other environmental factor with a test of its own: place a hand on the case during heavy access and feel for a buzz that was not there last season. A loosening mount, a new drive added against an old one, or a desk arrangement that now couples the machine to a subwoofer can all raise the vibration a drive endures, and drives answer chronic vibration with retries and errors that look like surface problems in the logs. When health attributes deteriorate in a machine whose environment recently changed, investigate the environment before condemning the drive — you may fix the replacement’s future as well as misdiagnose the present.
Teaching the rest of the household to read the signs
If other people use the machine, your testing routine has a gap no software closes: the symptoms they notice and dismiss. A short conversation multiplies your sensors. Teach the household the three reports you always want to hear: new noises from the machine, files or folders that seem to have vanished or refuse to open, and saves or copies that fail or take inexplicably long. Make clear that reporting early is a favour, not an interruption, and that nobody will be blamed for a failing drive — blame is how symptoms get hidden until they become losses.
Write the response down where anyone can find it: if the machine clicks, grinds or reports storage errors, stop saving new work to it, note what you were doing, and call the person who handles backups. That single page, taped inside a cupboard door or pinned in the household notes, converts a panicked improvisation into a procedure, and procedures are what data survives by.
Testing a drive before trusting it with a new role
Drives change jobs: the old system drive becomes the backup target, the retired desktop drive becomes the media library. Every promotion or demotion deserves a gate check — an extended self-test, a review of the full attribute table against your log, and a complete write-and-read pass if the new role is backup duty. A drive should arrive in its new job with a fresh baseline recorded, because the log’s value lies in continuity, and a role change is exactly where continuity breaks. Ten drives’ worth of future confusion is prevented by the line in the log that says: moved to backup duty, tested clean, this date.
How professionals read the same numbers differently
Watch a technician assess a drive and you will notice the order of operations differs from a beginner’s. The beginner asks whether the drive passed; the technician asks what changed, in which direction, and how fast. A drive can pass every threshold today while its pending-sector count has tripled in a month, and the professional treats that trajectory as the finding, with the pass verdict as a footnote. Professionals also weight the workload’s context: the same attribute movement means one thing on a drive that has just survived a documented heat incident and another on a drive in a cool, stable server, because diagnosis is always the numbers plus the story.
You can adopt the professional’s habit without the professional’s tools. It amounts to three questions at every check. What moved since last time? Does the movement have an innocent explanation I can verify, such as a heat event or a power cut? And if the same movement repeats by the next check, what will I do? Answering the third question in advance, while the situation is calm, is the entire secret: replacements decided in advance happen on schedule, with backups verified and parts ordered, while replacements decided in a panic happen at whatever the emergency costs.
A short glossary for the health report in front of you
Reallocated sector: a spot on the surface the drive has retired and replaced with a spare. A few, stable, is history; a growing count is a prognosis. Pending sector: a spot the drive could not read and is watching; it will be retested on the next write and either forgiven or reallocated. Uncorrectable error: data the drive’s error correction could not reconstruct — the most serious of the surface reports. Load cycle: one parking and un-parking of the heads, a wear counter that climbs quickly on aggressively sleeping drives. Power-on hours: the drive’s odometer. Keep this glossary with your log, and the next report you read will take two minutes instead of twenty.
Testing drives you are given, lent or inherit
Drives arrive in your life with unknown pasts: inside a second-hand computer, as a hand-me-down from a relative upgrading, in a job lot from an office clear-out. Test these arrivals before assigning them any role, and test them in a specific order. First, connect the drive through a dock and read its health table before writing anything to it; the power-on hours and surface attributes tell you whether you are holding a lightly used spare or the survivor of a decade of continuous duty. Second, run the extended self-test, which costs an evening of dock time and no risk. Third, if the drive will hold anything that matters, give it a full write-and-read pass with your own test data — a large folder copied on, verified, and copied back — because a drive should demonstrate health under your workload, not merely report it.
Assign roles according to the evidence, without sentiment. A clean, young drive can take backup duty. An older drive with a spotless surface record can hold replaceable media or serve as a transport drive. A drive with any active surface errors gets exactly one job — none — and goes to recycling once its previous owner’s data question is settled. That last point matters: an inherited drive may contain someone else’s files, and the courteous, safe sequence is to ask before wiping, offer the contents back, and only then erase thoroughly before reuse or disposal. Testing tells you about the hardware; courtesy governs the data, and a complete routine respects both.
When the test itself is the deliverable
Sometimes you test a drive not to decide its future but to document its present: before returning a suspect drive under warranty, before selling a machine, when an employer or insurer asks for evidence after an incident. In those cases, save the actual report — the utility’s exported log or a dated screenshot of the full attribute table — rather than your summary of it. Evidence ages better than memory, and a saved report showing clean health on the day a machine changed hands has settled more than one later disagreement. File the report with the drive’s record, alongside the serial number it belongs to, so the document and the hardware can always be matched.
One last habit: test the backup by restoring from it
A health routine that examines drives but never exercises the backup is half a routine. Once or twice a year, pick a folder from the backup, restore it to a scratch location, and open the files. This tests the backup drive, the backup software and your own understanding of the restore process in a single calm exercise, on a day when nothing is at stake. The first real restore of your life should not also be the first restore you have ever performed; make it the third or fourth, and make the earlier ones boring. Boring, in storage, is the highest compliment a system can earn.