Disclosure: As an Amazon Associate, ilcastellomenu.com earns from qualifying purchases. Product links on this page may earn a commission at no extra cost to you.
Understanding how to format a hard drive matters because formatting is both the first step in using a new drive and the most destructive command in ordinary computing: it prepares a drive for a file system and, in the process, makes existing data inaccessible. The good news is that a careful format takes minutes once you know which choices to make.
This guide explains file systems in plain language, walks through Windows and macOS steps, and covers the safety checks that prevent the one formatting error nobody can undo. If the drive is brand new and not yet installed, start with How to Install a Hard Drive; if it is a portable drive for a mixed household, Best External Hard Drives for Mac and PC shows the formats manufacturers expect people to use.

Gear mentioned in this guide
The products below are examples that fit the situations described in this article. They are mentioned so you can picture the kind of hardware involved, not as a claim that one model suits every computer, console or NAS. Check the form factor, interface and capacity against your own system before you buy anything.
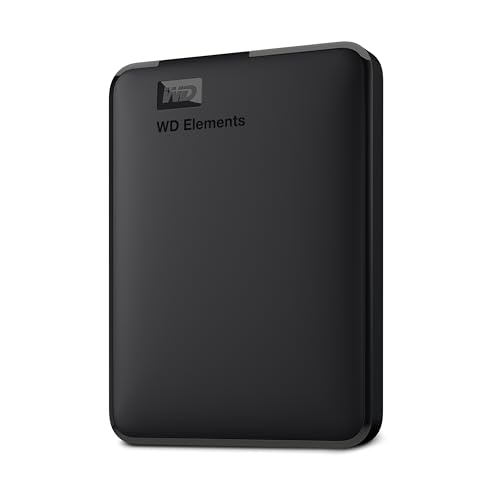
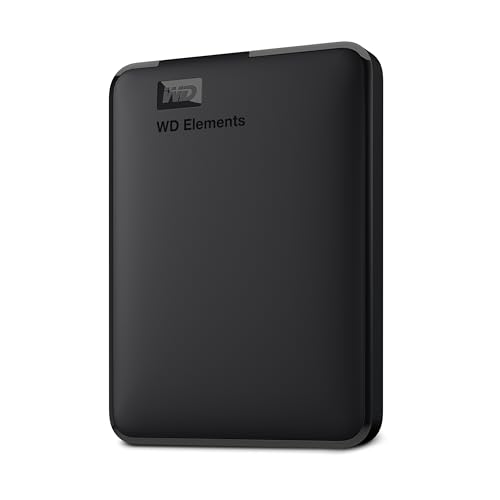
WD Elements 2TB Portable — WD 2TB Elements Portable External Hard Drive for Windows, USB 3.2 Gen 1/USB 3.0 for PC & Mac, Plug and Play Ready – WDBU6Y0020BBK-WESN. Check on Amazon

Toshiba Canvio Basics 2TB Portable — Toshiba Canvio Basics 2TB Portable External Hard Drive USB 3.0, Black – HDTB520XK3AA. Check on Amazon

WD My Passport 5TB Portable — WD 5TB My Passport, Portable External Hard Drive, Black, backup software with defense against ransomware, and password protection, USB 3.1/USB 3.0 compatible – WDBPKJ0050BBK-WESN. Check on Amazon
In this guide
What formatting actually does
Formatting creates a fresh file system — the index and rules a computer uses to store and find files — on a partition of the drive. A quick format writes a new, empty index and marks the space available, which is fast and is what most people need for a new drive or a trusted drive being reused. A full format additionally checks the surface as it goes, taking far longer on large drives. Neither is a secure erase for a drive leaving your possession; disposing of a drive calls for dedicated erasure tools or physical destruction, a different topic with higher stakes.
Before the file system comes the partition style. Modern systems use GPT, which supports large drives and current operating systems; the older MBR style has capacity and partition limits and survives mainly for compatibility with old hardware. When Windows asks during initialisation, GPT is the right default for almost everyone. Choosing wrong is not fatal — you can reinitialise an empty drive — but choosing deliberately avoids a confusing second round of setup.
Formatting erases access, so verify first
Formatting the wrong drive is the most common data-loss accident in home computing, and it happens to careful people who were in a hurry. Before confirming, match the drive’s model and capacity against the physical device, disconnect external drives you do not need, and be certain any wanted files exist somewhere else. If the drive contains the only copy of anything important, stop and copy it first. The recovery guide How to Recover Files From a Hard Drive exists for after accidents; the checks here exist so you never need it.
Choosing a file system: NTFS, APFS, exFAT and friends
NTFS is the standard for internal Windows drives. It supports large files, permissions and journaling that helps the system recover from crashes. Windows can read and write it natively; macOS can read it but not write without extra software. Choose NTFS for a drive that will live inside a Windows PC, including drives holding games, media libraries and backups made by Windows tools.
APFS is the modern macOS standard for internal drives and Time Machine targets in recent macOS versions, optimised for Mac use. Windows cannot read it natively. exFAT is the diplomat: both Windows and macOS read and write it, it handles very large files such as long videos, and it suits portable drives that move between systems, consoles and cameras’ big brothers. Its trade-off is fewer safety features than NTFS or APFS, so keep backups of anything stored on an exFAT drive and always eject it properly before unplugging.
Formatting on Windows, step by step in words
For a new internal drive, open Disk Management, initialise the disk as GPT when prompted, right-click the unallocated space, and create a new simple volume. The wizard asks for size — use the full space unless you deliberately want multiple partitions — a drive letter, and the file system with a volume label. Give the label a human name such as Archive or Media, because months later that label is how you will recognise the drive’s purpose in a list of similar devices.
For an existing drive or a portable drive, File Explorer’s format command or Disk Management both work, but Disk Management shows the whole picture — partitions, capacities and health states — which reduces mistakes. Confirm the file system choice, leave allocation unit size at its default unless you have a specific reason to change it, and keep quick format ticked for a trusted drive. When it finishes, copy a test file, open it, and only then move real data across.
Formatting on a Mac and for special jobs
On macOS, Disk Utility does the job: choose View, Show All Devices so you see physical drives rather than only volumes, select the correct drive, and use Erase with a name, format and scheme. GUID Partition Map is the scheme for modern Macs. The Show All Devices step matters, because erasing a volume when you meant the whole device — or the reverse — produces confusing results that look like errors.
Special jobs have special formats. Time Machine drives follow macOS guidance automatically when you assign them. Game consoles usually insist on formatting a drive themselves the first time it is connected, and that console format makes the drive dedicated to that system. Drives for older recorders or car systems may need FAT32 despite its file-size limits. In every case, let the destination device do or dictate the formatting, and accept that a dedicated drive is dedicated; swapping roles means reformatting again.
The safe formatting sequence
Whatever your operating system, the safe order never changes: identify, verify, choose, format, test. Skipping the first two steps is how accidents happen; skipping the last is how problems hide.
Step 1: Identify the exact drive
Match model, serial where shown, and capacity to the physical drive in front of you. If two drives share a size, unplug the one you are not formatting. Renaming known drives beforehand with clear labels makes this identification trivial, which is why experienced users label every volume the day it is created.
Step 2: Verify nothing unique lives on it
Open the drive and look. Check for stray folders, old backups, or the photos you meant to copy last year. If anything matters and exists nowhere else, copy it now and verify the copy opens. Formatting is a one-way door for ordinary users, and this verification step is the only lock on it.
Step 3: Choose partition style and file system deliberately
GPT for modern systems, MBR only for legacy compatibility. NTFS for Windows internal use, APFS for Mac internal use, exFAT for drives that travel between systems. If the drive is destined for a console or recorder, let that device dictate. Write the choice down if you are preparing several drives, so they end up consistent.
Step 4: Run the format and wait for a clean finish
Start the format and let it complete without unplugging anything or putting the computer to sleep. A quick format should finish in moments; if it hangs, errors or the drive vanishes mid-format, treat that as a health symptom rather than a software quirk, and investigate before trusting the drive with data.
Step 5: Label, test and document
Give the volume a clear name, copy a test file, open it, and delete it. Note the date, file system and purpose in your backup records. A drive whose role is documented gets backed up appropriately; a mystery drive in a list of letters is how important data ends up on the device nobody thought to protect.
Step 6: Set up the drive’s real job immediately
Install the backup schedule, move the library or assign the drive in your console settings now, while the project has your attention. Drives formatted ‘for later’ tend to accumulate random files and lose their intended purpose. Finishing the job in one session keeps your storage system coherent and understandable.
Common mistakes to avoid
Using FAT32 for large modern files
FAT32 cannot store a single file larger than four gigabytes, which rules out long videos, disk images and many game files. People rediscover this limit mid-copy, with an unhelpful error. For portable drives, exFAT removes the limit while keeping Windows and Mac compatibility, making it the default choice FAT32 used to be.
Quick-formatting a drive you plan to sell or give away
A quick format makes data inaccessible to casual browsing but recoverable with common tools. If a drive leaves your control, use a proper erase method appropriate to the drive type, or physically destroy it. Your old documents, photos and saved credentials deserve a more thorough goodbye than a quick format provides.
Interrupting a format in progress
Pulling a USB cable or closing a laptop mid-format leaves a drive in a half-prepared state that can confuse operating systems. The fix is usually to format again cleanly, but repeated interruptions can signal a failing cable or drive. Start formats when you can let them finish, and investigate hardware if a format cannot complete.
Practical tips that make a real difference
Eject properly every time
Especially with exFAT portables, use the eject command and wait for the system’s confirmation before unplugging. Pulling a drive during a delayed write corrupts the file system in ways that look like drive failure. The troubleshooting guide How to Fix a Hard Drive that is Not Detected starts with cable and connection checks for exactly this family of problems.
Keep one drive formatted for sharing
Households with Windows and Mac machines benefit from one clearly labelled exFAT portable for moving large files. It avoids the weekly puzzle of why a drive is read-only on one machine, and it keeps your dedicated NTFS and APFS drives in their native roles.
How to format a hard drive for special devices and second lives
Some formatting jobs are dictated entirely by the receiving device. A drive destined for a television’s recording feature, a car entertainment system or an older media player may need a specific, sometimes older file system, and the device will often insist on performing the format itself. Let it. A device-formatted drive is guaranteed compatible with its host in a way a computer-formatted guess is not, and the price — the drive becomes dedicated to that host — is simply the nature of the arrangement. Keep a note of which drive belongs to which device, because a dedicated drive reconnected to a computer will look empty or unreadable to anyone who does not know its story.
Second-life formatting deserves the same deliberateness. A drive retiring from system duty to become a backup target should be formatted clean, given a label that states its new role and the date, and entered into your backup rotation with its health checked first. A drive leaving the household — sold, donated, recycled — needs more than formatting: use a proper overwrite or secure-erase method suited to the drive, or arrange physical destruction, because a quick format leaves data recoverable by common tools. The format command is the same button in each story; the intent behind it is what changes, and choosing the intent is the real skill this guide teaches.
Multiple partitions: when splitting a drive helps and when it hurts
Partitioning divides one physical drive into several volumes that behave like separate drives. It has legitimate uses: separating a system from data on the same device, dedicating a section to a different file system, or matching the volume layout a particular backup strategy expects. Each volume gets its own format choice, which is how one drive can present an NTFS section to Windows and an exFAT section for sharing. For a new internal drive, the Disk Management and Disk Utility tools handle partitioning during the same session as formatting, and doing both in one planned pass beats reshaping a drive that already holds data.
The costs are rigidity and illusion. A partition that fills while its neighbour sits empty cannot borrow space without reorganisation, and partitions provide no protection against the drive’s physical failure, because all the volumes share one mechanism. New users often partition out of a tidiness instinct and spend years working around boundaries they did not need. The honest default for a data drive is one volume, clearly labelled, organised with folders. Partition when a specific job requires it — a dual-system machine, a device that demands it — and let folders do the organising everywhere else.
Formatting as part of troubleshooting: knowing when it is not the answer
Formatting is frequently proposed as a cure for drives that disconnect, volumes that mount read-only, or file systems that report errors. Sometimes it is the correct final step: a healthy drive with a corrupted file system, whose data is safe elsewhere, can be formatted back into trustworthy service. But formatting a drive whose underlying health is failing produces a drive that formats beautifully and fails again, because the cause was never the file system. Sequence is everything: check health first, copy data second, format last — and only when the first two steps justify it.
A drive that needs formatting repeatedly is delivering a verdict about itself. So is a format that cannot complete, a volume that corrupts within days, or errors that migrate between file systems. At that point the troubleshooting question changes from how to format to why this drive keeps needing it, and the answer is retirement. Keep the distinction sharp in your mind: formatting fixes organisation, never mechanics, and a mechanic’s problem wearing an organiser’s disguise is the commonest trap in home storage repair.
Formatting drives for backup rotation and media duty
A drive entering a backup rotation should be formatted as a small ceremony: health check first, clean format second, a label naming its rotation slot and month third, and a test backup with a verified restore before it is trusted. Rotations fail quietly when a member drive was formatted hastily and never actually written to by the backup software, so the test restore is the step that converts a formatted drive into a functioning backup. Record the format’s file system in your register too, because a rotation spanning Windows and Mac targets may need deliberate consistency to stay interchangeable.
Media drives — the ones that live attached to a television, a streamer or a games console — reward a different deliberateness. Format them in the host device where the platform allows it, accept the dedication that follows, and keep their role narrow: a media drive that also becomes the family’s overflow archive is a drive whose reformatting for a new console generation becomes a household negotiation. Narrow roles, clear labels and formats chosen by the host are what keep media storage boring, and boring, throughout this batch, is the highest compliment storage can earn.
Frequently asked questions
Does formatting delete everything permanently?
Formatting removes the file system’s index, so the computer treats the data as gone and the space as available. Much of the underlying data may remain recoverable until overwritten, which is why formatting is not a secure erase. For reuse within your household that distinction rarely matters; for disposal it matters completely.
How long should a format take?
A quick format takes seconds to a few minutes. A full format on a multi-terabyte drive can take many hours because it checks the surface as it writes. If a quick format takes unusually long or fails, suspect the cable, enclosure or drive health rather than repeating the command hopefully.
Which format is best for a drive used on Windows and Mac?
exFAT, for almost every portable use case. Both systems read and write it, and it handles large files. Keep a backup of important data stored on it and eject it properly, because exFAT lacks the journaling protections of NTFS and APFS. For a drive permanently attached to one system, use that system’s native format instead.
Can I change the file system later without losing data?
Generally no. Switching file systems means reformatting, which removes access to the data. Copy everything elsewhere, reformat, and copy back. A few specialist tools claim in-place conversion in limited cases, but the safe, supported path is always backup, reformat, restore — with the backup verified before you begin.
Why does my formatted drive show less space than the box says?
Manufacturers count a terabyte as a trillion bytes; operating systems count in binary units and report a smaller number. The difference is accounting, not missing space, and it grows more noticeable on larger drives. File system overhead uses a little more. Every buyer sees the same gap, so compare drives by their labelled capacity consistently.
Should I format a new portable drive out of the box?
Only if its factory format does not suit your systems. Many portables arrive formatted exFAT or NTFS and work immediately. If it will live on a Mac, APFS or the Time Machine setup flow may serve better. Check what it arrived as before reformatting out of habit, and keep any bundled utilities you might want before erasing them.
The bottom line
Format deliberately: identify the drive twice, verify nothing unique lives on it, pick the file system for the systems that will use it, and test the result. Those few minutes of care turn the most destructive ordinary command in computing into a safe, boring setup step — exactly what it should be.
Formatting on Linux and from the command line: the same ideas, fewer guardrails
Linux formats drives with the same underlying logic — partition table, partitions, file systems — but the tools assume you know which device you mean, and that assumption is where the danger lives. Graphical tools such as a disks utility behave much like their Windows and Mac counterparts, complete with device sizes and model names to sanity-check, and they are the right choice for most desktop users. The command-line route, using partition editors and file-system creation tools directly, offers no confirmation dialogues worth the name: the command you type is executed against the device you named, and device names are assigned in an order that can change between boots when several drives are attached.
The professional habit that makes command-line formatting safe is identification by serial number and size, never by device letter alone. List the attached devices with their models and capacities, match the target against the physical label you can see, and re-check immediately before the destructive command, not from memory of a listing you printed ten minutes and two cable swaps ago. Unmount the target’s partitions before partitioning, and afterwards verify the result by mounting the new file system and writing a test file. The tools are excellent; they simply transfer all of the caution from the software to you, so bring enough for both of you.
Command-line formatting does offer one genuine advantage worth knowing about: control over alignment and file-system options that graphical tools hide. For a drive destined for a specific workload — a media server, a virtualisation host, a backup target with enormous files — the ability to set allocation behaviour deliberately can matter. For a general-purpose data drive, the defaults chosen by any modern tool are well judged, and the honest advice is to accept them rather than tuning parameters whose effects you cannot measure.
Quick format versus full format: what the choice really trades
The quick option rebuilds the file system’s structures and declares the space empty, leaving the old data physically present until new writes overwrite it. The full option on modern systems also writes across the surface, which verifies that every area can accept data and destroys the old contents in the process. The trade is time against two kinds of assurance: surface verification and erasure. For a new drive you own, or a trusted drive being repurposed within your household, quick formatting after a separate health check is reasonable. For a drive with any history of errors, a full format doubles as a stress test whose failure is valuable information. For a drive leaving your possession, the full overwrite is the point of the exercise, and it should be followed by the same thought about sensitivity: a single full pass is the accepted household standard, while drives that held genuinely sensitive material deserve the stronger erasure methods their operating systems offer, or physical destruction if the data’s value warrants it.
One misconception needs retiring: a full format does not repair a failing drive. It can force the drive to retire weak areas it encounters, which sometimes produces a drive that behaves for a while, but a surface that is deteriorating will continue to deteriorate, and the format has spent hours discovering what a ten-minute health test would have told you. Format to prepare a drive, test to judge it, and never let the first activity impersonate the second.
Formatting drives for other devices: consoles, cameras, recorders and older hardware
Many devices want to format their own storage, and the general rule is to let them. A console, a dash camera, a TV recorder or a car stereo formats a drive or card to the exact variant, partition layout and folder structure it expects, including quirks a computer would consider wrong. Formatting such media on a computer first and then asking the device to use it invites subtle failures: the device may accept the drive, record happily for a week, and then stumble over a partition detail during a long recording. When a device offers to format, accept the offer, after rescuing anything you need from the media, and let the device own its format from then on.
Older hardware adds a capacity dimension. Devices built before large drives were common may address only a limited capacity, may require the older partition style, or may accept a large drive and then behave strangely at the boundary of what they understand. If a legacy device matters to you — a beloved music player, an older console, a machine tool controller — research its documented limits before formatting a modern drive for it, and consider dedicating a smaller, era-appropriate drive to the job. Compatibility with the past is a specification like any other, and it is checked before formatting, not discovered after.
Allocation unit size, labels and the small options in the dialogue
Format dialogues present a few quiet options that most people accept blindly, and mostly they are right to. Allocation unit size — the smallest chunk of space a file occupies — trades a little wasted space on tiny files against efficiency on huge ones, and the default, which scales with volume size, suits mixed libraries well. Deliberate choices make sense at the extremes: a drive holding only large video files can use a larger unit without penalty, while a drive holding tens of thousands of small documents wastes measurably more with oversized units. If neither extreme describes your drive, the default is your friend.
The volume label, by contrast, deserves your full attention for the few seconds it takes. This is the name that will identify the drive in every future dialogue, backup log and moment of confusion, and the time to give it a meaningful name — role, format, year if useful — is now, while the drive’s purpose is fresh. Renaming later is possible but rarely happens, and the archaeology of drives labelled with a previous owner’s name or a factory default is a tax you pay at the worst moments. Type the good label now.
After formatting: the first-hour routine
A freshly formatted drive should be proven before it is trusted, in the same spirit as a new drive’s first week. Copy a substantial folder to it — large enough to exercise real writing, not a token text file — then copy it back to a scratch location and let your software verify the copy, or open a sample of the files from the drive itself. Confirm the reported capacity matches expectations for the file system you chose, since a mismatch here is how wrong-device and wrong-partition mistakes announce themselves while they are still free to fix. If the drive will serve as a backup target, run the first real backup now and restore one folder from it; if it will hold a library, create the folder structure you planned and move a first, non-critical collection across.
Record the format in the drive’s entry in your notes: date, file system, partition style, label and purpose. Six months from now, when a device refuses the drive or a backup log mentions it by name, that line explains the drive to you instantly. Formatting feels like an ending — the old contents gone, the slate clean — but operationally it is a beginning, and beginnings deserve documentation.
Formatting as disposal: the last format a drive receives
When a drive leaves your life — sold, donated, recycled — its final format is a security procedure, and it should be performed with the drive’s whole history in mind. Data you deleted years ago may still be physically present in areas the file system abandoned, so a quick format before disposal is closer to a gesture than a protection. Use a full overwrite, or your operating system’s secure erase option where offered, and verify afterwards by attempting to read the drive with a recovery tool: a drive you cannot recover anything from is a drive a stranger cannot either. For drives that held financial, client or health information, or drives that no longer function well enough to be overwritten reliably, physical destruction through a reputable recycler is the proportionate answer, and it is what organisations do as a matter of routine.
Keep a note of the disposal itself: which drive, by serial number, when, by what method, and where it went. If a question about old data ever arises, that note is your evidence that the drive’s ending was handled as carefully as its working life. Our round-up of external hard drives for PC is a sensible next read if the disposal is making room for a replacement.
Formatting questions from the inbox
Can formatting fix a drive that keeps disconnecting?
Almost never, because disconnection is a connection, power or electronics problem, and formatting changes none of those. If a drive vanishes mid-use, work the physical layer first — cable, port, power, enclosure — and the health data second. Formatting a disconnecting drive mostly adds data loss to a hardware fault, and occasionally converts a recoverable situation into an unrecoverable one if the drive dies mid-format.
How many times can a drive be formatted before it wears out?
Effectively without limit for a mechanical drive in normal use. A full format writes across the surface once, which is trivial wear compared with years of ordinary service, and a quick format writes almost nothing. Format when the job calls for it — a new role, a new file system, a disposal — and do not ration the operation out of a misplaced mechanical sympathy.
My drive shows two partitions and I only want one. Is deleting them safe?
On a drive whose contents you have copied off and verified, yes: deleting all partitions and creating one fresh partition spanning the drive is a standard part of formatting, and the disk tools present it clearly. The safety lies entirely in the preparation — the verification that everything on every partition, including the small one you never used and the hidden one the manufacturer created, is either copied or genuinely unwanted.
Should I format a brand-new drive before first use?
Most new drives arrive formatted in a general-purpose file system or unformatted for you to initialise. If the supplied format matches your platform and purpose, you may use it as it stands, though many experienced users format anyway to choose the label, confirm the partition style and start from a known state. If the drive will serve a specific device or a cross-platform role, formatting to your specification is part of the installation, not an optional extra.
Formatting in a RAID or NAS: the volume is not the drive
Inside a NAS or RAID array, the thing you format is usually a volume that spans several drives, and the individual drives are managed by the system rather than by you. Formatting the volume reinitialises the shared space while leaving the array’s structure intact; removing and formatting a single member drive is a different operation entirely, one that degrades the array until the drive returns and the rebuild completes. The practical rule is to work at the level the interface presents: create, expand and delete volumes through the storage manager, let the system prepare member drives itself, and never pull a member to format it on a computer unless you are deliberately retiring it from the array and understand that the array will treat its return as a stranger’s arrival.
File-system choice inside a NAS deserves its own moment of thought, because the options the appliance offers — typically a traditional or a modern copy-on-write file system — carry consequences for snapshots, integrity checking and recovery behaviour that persist for the volume’s whole life. The modern options generally reward you with better protection against silent corruption and more flexible snapshots, at some cost in overhead on modest hardware. Read the appliance maker’s guidance for your model, choose deliberately, and accept that changing your mind later means copying everything off, reformatting and copying back — which is itself an argument for deciding before the volume fills.
A calm troubleshooting ladder for format failures
When a format fails, the error message is the beginning of the diagnosis, not the end of the drive. Work the ladder in order. First, the connection: a drive that disappears during a long full format is usually reporting a cable, port, power or enclosure problem, so reseat, substitute and retry the connection before condemning anything. Second, the drive’s health data: run the short self-test and read the surface attributes, because a format that stalls at the same percentage repeatedly is often stuck at a physically damaged area the health table already knows about. Third, the tool: try the platform’s other utility — the graphical tool if the command line failed, a different computer if both failed — because partition structures left by other devices can confuse one tool and not another. Fourth, the verdict: a drive that fails formatting across two computers, with healthy cables and a clean bill from no test at all, is not a formatting problem any more. It is a drive at the end of its service, and the correct next step is data triage and replacement, not a fifth attempt with a different utility downloaded at midnight.
Formatting a drive that will be encrypted
If the drive’s job involves sensitive material, decide about encryption before the first real files arrive, because enabling full-disk encryption on an empty, freshly formatted drive is quick and clean, while converting a drive already full of data is slow and occasionally fraught. Format, encrypt, verify the recovery key is stored safely outside the drive itself, and only then load the data. The sequence costs ten extra minutes at the start and saves the particular misery of an encrypted drive whose key lived in a file on the same drive — a mistake that is made exactly once by everyone who makes it.
Two formatting stories and what they teach
Consider the photographer who formats a card in the camera after every shoot, as professionals are taught, and the one time the ritual misfires: the card from yesterday’s wedding, not yet copied, goes into the camera and the format completes before the mistake registers. The rescue worked — the shoot had ended hours earlier, nothing had been written to the card since, and a recovery tool lifted the images from the untouched data areas in an afternoon. The lessons are the ones this guide keeps repeating, in their sharpest form: a quick format is a labelling decision, not an erasure; the data survives until overwritten; and the single habit that saved the wedding was stopping — no new photographs, no experimentation, just a powered-down camera and a phone call. Formatting knowledge matters most in the sixty seconds after a mistake, when the difference between a scare and a loss is whether you keep writing to the medium.
The second story is quieter. A small business retires a bookkeeping computer, and the owner, conscientious and in a hurry, deletes the files and empties the recycle bin before donating the machine. A year later a dispute arises and the question of what the machine once held becomes uncomfortable for everyone, because deletion had left the data recoverable by the recipient’s curious nephew with free software. Nobody acted in bad faith; the owner simply believed deletion and erasure were the same word. They are not, and the full overwrite this guide describes — ten unglamorous minutes of it — is the entire difference between the two stories’ endings. Format deliberately, erase completely when the drive is leaving, and let every drive you own have both a documented beginning and a documented end.
A short field guide to partition styles, in one place
Two partition styles dominate everything you will meet. The older style, MBR, comes from the early PC era, limits a drive to four primary partitions without workarounds, and cannot address the full capacity of very large drives. The modern style, GPT, removes both limits, stores backup copies of its own tables at both ends of the drive, and is required by current systems booting in UEFI mode. When you initialise a new drive, choose GPT unless a specific older device demands MBR — a legacy console, an elderly media player, a specialist instrument — and note the choice in the drive’s record, because converting later means emptying the drive first. Mixed households accumulate both styles across their drives, which is normal and harmless; what matters is that each drive’s style suits the machine it serves, and that you know which is which before a troubleshooting session, not during one. If a drive ever appears with only a fraction of its capacity available after initialisation, a mismatched partition style or an enclosure’s addressing limit is the usual culprit, and both are fixable at this stage — before data arrives — with a calm re-initialisation rather than a workaround you will regret.
One final distinction is worth carrying away from all of this. Formatting is an act of preparation you perform on a drive you trust, for a job you have chosen. The moment either half of that sentence stops being true — the drive’s health is in question, or the job is really an attempt to make symptoms disappear — formatting stops being the right tool, and the honest sequence is the one used throughout this site: verify the backup, read the health evidence, and decide what the drive is actually telling you before you ask it to hold anything new.