Disclosure: As an Amazon Associate, ilcastellomenu.com earns from qualifying purchases. Product links on this page may earn a commission at no extra cost to you.
Working out how to recover files from a hard drive starts with a counterintuitive instruction: stop using the drive. Every write to a drive with deleted or missing files risks overwriting the very data you hope to get back, and every hour of operation on a mechanically failing drive reduces what anyone can recover from it.
This guide separates the recoverable situations from the dangerous ones, gives you the safe order of operations for each, and is honest about the point where professional recovery is the only sensible path. If the files are backups of a wider library, our guides to Best Backup Hard Drives for PC and Best Hard Drives for Backups help you rebuild a setup where recovery heroics are rarely needed again.

Gear mentioned in this guide
The products below are examples that fit the situations described in this article. They are mentioned so you can picture the kind of hardware involved, not as a claim that one model suits every computer, console or NAS. Check the form factor, interface and capacity against your own system before you buy anything.
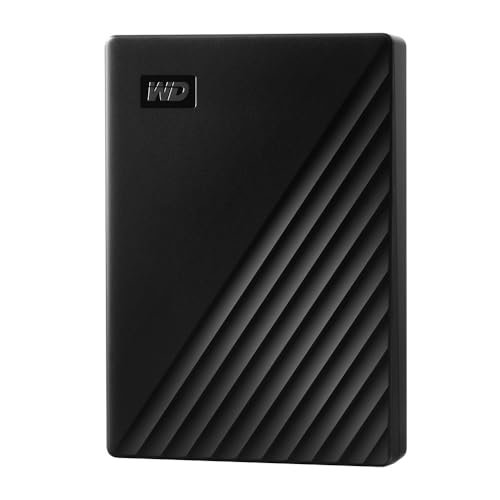
WD My Passport 5TB Portable — WD 5TB My Passport, Portable External Hard Drive, Black, backup software with defense against ransomware, and password protection, USB 3.1/USB 3.0 compatible – WDBPKJ0050BBK-WESN. Check on Amazon

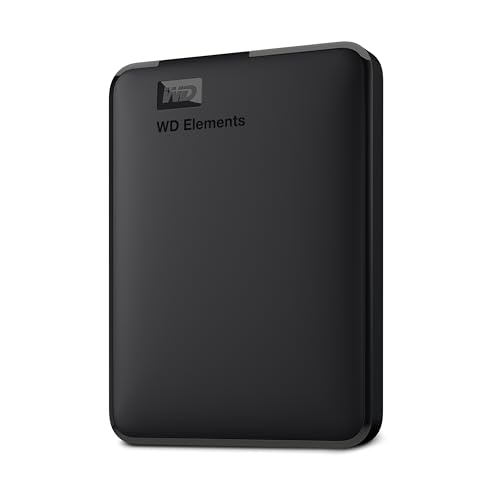
WD Elements Desktop 8TB — Western Digital 8TB Elements Desktop External Hard Drive, USB 3.0 external hard drive for plug-and-play storage – Western DigitalBWLG0080HBK-NESN, Black. Check on Amazon
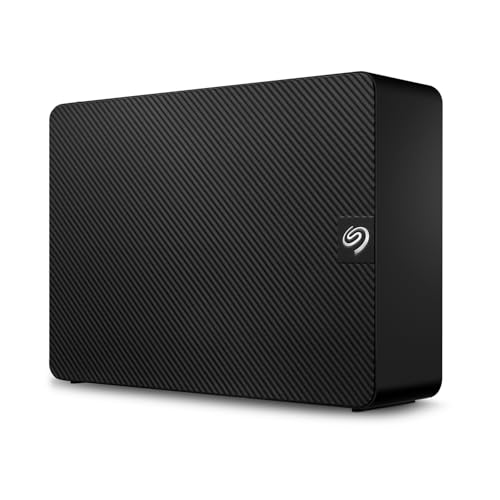
Seagate Expansion 8TB Desktop — Seagate 8TB Expansion Desktop Hard Drive | USB 3.0 (STKP8000400) | Desktop HDD for easy backup, plug-and-play, drag-and-drop, auto detects Windows & Mac. 1-Year Warranty + 1-Year Rescue. Check on Amazon
In this guide
First, classify the problem honestly
Recovery situations fall into three groups with very different rules. Logical problems — deleted files, a formatted volume, a corrupted file system — leave the hardware healthy, and software recovery has a genuine chance. Electronic problems — the drive is not detected, a board or enclosure has failed — sometimes yield to a cable, enclosure or adapter change. Mechanical problems — clicking, grinding, beeping, or a drive that will not spin — are professional territory, because the moving parts inside are damaged and running the drive makes the damage worse.
Classify before you act, because the groups demand opposite behaviour. A logical problem rewards calm software work on a healthy drive. A mechanical problem punishes experimentation: each power-up can drag damaged heads across the platters that hold your data. If you hear repetitive clicking or grinding, power the drive down and skip to the professional section of this guide. No file is improved by being attempted on dying hardware with home tools.
What never to do
Never open the sealed body of a hard drive outside a professional clean environment. The platters and heads inside work at tolerances where ordinary room dust is a destructive contaminant, and opening the cover is the single most reliable way to turn a recoverable drive into an unrecoverable one. Likewise, ignore folklore about freezing drives or tapping them; these tricks belong to outdated anecdotes, risk condensation and impact damage, and no reputable recovery engineer recommends them. Safe recovery is boring: stop writes, image carefully if the drive is healthy, and escalate when it is not.
The safe order for logical problems
For deleted files on a healthy drive, stop saving anything to that drive immediately — including downloads and the recovery software itself. Install recovery tools on a different drive, connect the problem drive as a secondary device if it holds your operating system, and scan it read-only. Recover found files to a different physical drive, never back onto the drive being scanned, because writing recovered files onto the source can overwrite other files still waiting to be found.
Work in priority order. Recover the irreplaceable first — family photos, documents, creative work — before bulk media that can be re-downloaded or re-ripped. Verify recovered files by opening a sample from each folder, because recovery tools can list files whose contents are partly overwritten. A filename restored perfectly with corrupted contents is only half a recovery, and knowing early lets you try a deeper scan or a different tool while the source drive remains untouched.
When the drive is not detected
A drive the computer cannot see may have a simple external cause. Try a different cable, a different port, and a different enclosure or adapter, and test on a second computer if one is available. Portable drives with a failed USB bridge board sometimes become readable when the bare drive is connected through a known-good adapter, a safe, external step that does not involve opening the drive itself. The sequence in How to Fix a Hard Drive that is Not Detected covers these checks in order, from the most common causes to the least.
If the drive is undetected everywhere, makes no sound at all, or appears with the wrong capacity, home options narrow quickly. At that point the question becomes economic: how much are the contents worth? Professional laboratories can address electronic failures that defeat home tools. What you should not do is repeatedly power-cycle a silent or clicking drive hoping for a lucky start; each attempt can worsen mechanical damage and raise the eventual cost or lower the eventual yield.
Professional recovery: what to expect
A reputable recovery firm will assess the drive, explain the failure in plain terms, quote before working, and charge mainly for successful recovery. They work in clean environments with specialised tools and donor parts, addressing failures — heads, motors, electronics, firmware — that are simply beyond home repair. Send the drive well packaged, describe exactly what happened and what you have already tried, and list the files that matter most so the engineers can prioritise them if a full recovery is not possible.
Professional recovery is skilled work and priced accordingly, so reserve it for data that is genuinely irreplaceable: family archives, business records, creative work with no other copy. For data that can be recreated or re-downloaded, replacement is cheaper. Either way, let the experience change the future: the correct price of recovery is the argument for the backup system in the next section, and every professional in the field will tell you the same thing.
Rebuilding so this never happens again
After any recovery — successful or not — build the system that makes recovery unnecessary. Keep three copies of important data, on two different kinds of storage, with one copy off-site or in cloud storage. Automate the local copy so it happens without willpower, and test restores occasionally, because an untested backup is a hope rather than a plan. The health routine in How to Test the Health of a Hard Drive adds early warning, so failing drives get replaced during calm maintenance rather than discovered during a loss.
Label drives, document what lives where, and keep one copy physically separate from the computer it protects. Most home data loss is not exotic: it is a single drive, holding the only copy, meeting an ordinary failure. Your rebuilt system does not need to be elaborate. It needs to ensure that no single drive, theft, spill or mistake can take the only copy of anything that matters — and that is an achievable standard for any household.
Safe recovery steps for a healthy drive with missing files
These steps apply only to logical problems on a drive that spins normally, is detected correctly and makes no distress sounds. If your drive clicks, grinds or vanishes, skip the steps and read the professional section above.
Step 1: Stop all writes to the drive
Close applications that might save to it, do not download anything onto it, and if it is your system drive, shut the computer down and work from another machine or a rescue environment. Deleted data survives in unallocated space until something overwrites it. From this moment, the drive is evidence: you read from it, you do not write to it, until recovery is complete.
Step 2: Connect it as a secondary drive
Attach the drive to a working computer internally or through a reliable adapter, so nothing boots from it or writes logs and temporary files onto it. Confirm it appears with the correct capacity. If it appears incorrectly or not at all, stop and reassess the problem class instead of pushing forward with software meant for healthy, visible drives.
Step 3: Scan read-only with recovery software
Run a reputable recovery tool in its scan mode and let a deep scan finish, even if it takes hours on a large drive. Judge the preview: file names, folder structure and previews of photos or documents indicate what is realistically recoverable. Avoid tools that demand payment before showing any preview, and avoid running several scans simultaneously, which only slows the drive down.
Step 4: Recover to a different drive, in priority order
Save recovered files to a separate physical drive with enough free space. Work through your priority list first — documents and photos before media libraries — and verify samples as you go by opening them. Keep the source drive untouched and powered down between sessions if the process spans days, rather than leaving a suspect drive spinning unnecessarily.
Step 5: Verify, then back up the recovered data immediately
Open a broad sample of recovered files across folders and file types. Some files will be incomplete; note which matter and consider a second tool or professional advice for those specifically. As soon as verification is done, copy the recovered set into your new backup system. Data that has been lost once deserves two copies from day one.
Step 6: Diagnose why it happened before reusing the drive
Was it deletion, corruption, or early hardware failure? Run health checks before trusting the drive again, and retire it from important duty if SMART reports errors or the corruption had no clear cause. Reusing a drive that corrupted data for unexplained reasons invites a repeat performance with higher stakes.
Common mistakes to avoid
Installing recovery software on the drive being recovered
Downloads, installers and temporary files all write to disk, potentially overwriting the deleted data you are trying to save. Always install tools elsewhere and recover files to a different drive. This single sequencing error quietly destroys more recoverable data than any other home mistake.
Opening the drive to look inside
Curiosity is understandable and fatal to the data. The sealed compartment must stay sealed outside a professional cleanroom. There is nothing inside a hard drive that a home user can adjust, clean or repair, and opening it contaminates the surfaces the data lives on. Keep the cover on and escalate instead.
Repeatedly powering a clicking drive to try one more thing
Each start of a mechanically damaged drive can worsen the damage. If a drive clicks or grinds, the experiment phase is over. Note the symptoms, power it down, and decide based on the value of the data whether professional recovery is justified. Restraint at this moment preserves options; persistence destroys them.
Practical tips that make a real difference
Act fast on deletions, slowly on hardware
Deleted files reward speed because overwriting risk grows with use. Hardware symptoms reward the opposite: stop, think, and get advice before further attempts. Knowing which clock is ticking — the overwrite clock or the damage clock — tells you whether to hurry or to pause, and confusing the two is costly.
Keep a spare drive for recovery targets
Recovery needs somewhere large and healthy to write to. A spare external drive in the cupboard, like the portables in Best External Hard Drives for PC, turns an emergency into a procedure. Buy it before you need it; in a crisis you will not want to wait for delivery while a sick drive sits powered.
Imaging a fragile drive before attempting recovery
When a drive is readable but suspect — slow, occasionally erroring, with health counters that worry you — the professional’s first move is one home users can imitate in spirit: make a sector image of the drive onto a healthy one, then work on the image. Imaging reads the source once, as gently and sequentially as possible, and every subsequent scan, experiment and recovery attempt happens against the copy, which cannot degrade. Tools designed for imaging failing drives read patiently, skip damaged areas and return to them later, rather than grinding at the first bad patch while the rest of the drive waits un-copied.
Imaging needs a destination at least as large as the source and the patience to let a big copy run. It is worth that patience whenever the source shows any sign of decline, because it converts a deteriorating situation into a stable one. If the drive is healthy and the problem is a simple deletion, imaging is optional caution; if the drive stutters, stalls or reports growing errors, imaging is the difference between one careful pass over weakening hardware and a dozen hopeful ones. Should the source die mid-image, you still hold everything the image captured, which is more than repeated direct attempts would have left you.
How to recover files from a hard drive after deletion, formatting and corruption
Accidental deletion is the kindest case. The file’s space is marked free but its contents usually remain until overwritten, so a prompt, write-free response recovers most deletions completely. This is why the first instruction is always to stop using the drive: the next download, update or temporary file may land exactly where your document lived. Formatted drives are the next kindest, provided the format was quick and little has been written since; the index is new but the contents largely persist, and deep scans reconstruct by recognising file signatures even when names and folders are gone.
Corruption is the mixed case. A damaged file system may hide intact files behind a broken index, which deep scanning handles well, or the corruption may reflect failing hardware scattering damage through the data itself, which no software fully undoes. Recover in priority order, verify as you go, and calibrate expectations by file type: documents and photos often survive in large numbers, while databases and virtual machine images, which must be internally perfect to open, are the least forgiving. Knowing which accident you had — and therefore which outcome distribution to expect — keeps hope and effort in proportion.
After recovery: verifying what you actually got back
A recovery is not finished when the copying stops; it is finished when the recovered files have been opened, sampled and counted against what mattered. Work folder by folder through your priority list. Open documents at random pages, view photos at full size rather than trusting thumbnails, and play a few seconds from the middle of videos, because corruption hides in middles. Note the gaps honestly: a folder of file names with damaged contents is a partial result, and knowing it while the source drive still exists lets you attempt a second tool, a different scan depth, or a professional opinion on the specific remainder.
Then protect the survivors immediately, before tidying anything. Copy the verified set into your rebuilt backup system the same day, because recovered data has already demonstrated its talent for being lost once. Only after two copies exist should you organise, rename and reintegrate the files into your library. It is tempting to celebrate by sorting; resist. Data that has been to the edge deserves its safety copies first and its filing afterwards, and the discipline of that order is the final lesson the recovery teaches.
Frequently asked questions
Can I recover files from a drive that was formatted?
Often, yes, if little has been written since. A quick format replaces the file system’s index but usually leaves file contents in place until overwritten. Stop using the drive, scan it read-only from another system, and recover to a different drive. A full format or heavy use after formatting reduces the chances substantially, so speed and restraint decide the outcome.
My drive is clicking. Can software recover it?
No. Clicking indicates mechanical failure, and software cannot repair mechanics. Running the drive further risks turning partial recovery into none. Power it down and contact a professional firm if the data is irreplaceable. Be honest with yourself about value: professional recovery is skilled, priced work, justified by data that cannot be recreated.
How much does professional recovery cost?
It varies widely with the failure, from moderate sums for electronic faults to substantial ones for mechanical work requiring donor parts and cleanroom time. Reputable firms assess and quote before committing you. Get the quote, compare it with the true value of the data to you, and decide calmly. Avoid any service that will not explain its process or pricing structure.
Can I recover files from a drive the computer does not detect?
Start with external causes: cables, ports, enclosures and a second computer. A failed enclosure board is common and cheap to rule out. If the bare drive is still invisible everywhere, home software has nothing to work with, because recovery tools need the operating system to see the device. That is the boundary where professional diagnosis takes over.
Will recovery software damage my drive?
Reputable tools scan read-only and do not write to the source. The risks come from your choices around the tool: installing it on the source drive, recovering files back onto the source, or running long scans on mechanically failing hardware. Follow the safe order in this guide and software recovery is a low-risk procedure on a healthy drive.
I recovered the files but some will not open. Why?
Partly overwritten files are the usual cause: the name and directory entry survived, but some content blocks were reused by newer data. Try opening copies in tolerant applications, and try a second scan tool, which may reconstruct differently. If the specific files are irreplaceable and still resist, a professional may extract more from the same drive with specialised methods.
The bottom line
Recover calmly and in the right order: classify the problem, protect the drive from writes, image or scan only if the hardware is healthy, recover to a different drive, and escalate mechanical failures to professionals without opening anything. Then rebuild your backups so the next failure is an inconvenience. The best recovery is always the one you never need.
Recovery from the other failures: corruption, ransomware and the dying system drive
Not every recovery begins with a deletion. File-system corruption — the drive is healthy, the data is present, but the map is damaged — rewards patience and punishes improvisation. Work from a copy wherever possible, let the operating system’s repair tools run against the copy or, if you must run them against the original, understand that repair tools prioritise a consistent file system over your files: they will amputate what they cannot reconcile, and the orphaned fragments they collect are a poor substitute for the folders they came from. A recovery tool that reads the damaged structures without altering them, run first, often extracts more than the repair preserves. Repair second, after extraction, if the drive is to return to service.
Ransomware changes the order of operations entirely. Disconnect the affected machine from the network and from its backup drives immediately — a connected backup is a backup the malware can reach — and preserve the encrypted drive as evidence before attempting anything, because decryption tools for specific strains appear over time and only help if the encrypted data still exists untouched. Recovery in this scenario usually means rebuilding from the offline or cloud backup the malware could not reach, which is precisely the backup architecture this article’s prevention advice exists to create. If no clean backup exists, professional help and patience are the honest options; paying anyone is a decision to take with law-enforcement guidance, not from a forum at 2 a.m.
A failing system drive adds a boot problem to the data problem. The practical route is to stop asking the sick drive to run the computer: boot from installation media or another system, attach the drive as a secondary, and recover files in the priority order you would use for any fragile drive — irreplaceable first, in small batches, with rests. Only when the files are safe should the conversation turn to whether the system itself is worth salvaging, and usually it is not: a fresh installation on a healthy drive, with recovered files restored into it, is faster and more trustworthy than resurrecting an installation whose drive has already announced its intentions.
Recovering specific treasures: photos, documents and project files
Different file families recover differently, and knowing their habits shapes your expectations. Photographs, especially in the common compressed formats, are self-contained and recover well even from fragmented storage, though a recovered photo may lose its filename and its place in your folder structure, arriving as one of thousands of numbered files that must be sorted by their embedded dates. Build that sorting time into your plan, and be grateful for the metadata: the camera’s timestamps survive far more reliably than the names you gave the folders.
Documents recover with their names more often when the file system’s records survive, but their internal structure is less forgiving — a document with a damaged middle may open with warnings, open empty, or refuse entirely, and the application’s own autorecovery copies, temporary files and emailed versions become valuable parallel sources. When a crucial document will not open, search the drive and your mail for its siblings before accepting the loss; creative work in particular tends to exist in more versions than its author remembers creating.
Project files — video edits, music productions, design work — are ecosystems rather than files, depending on media, plug-ins and folder relationships scattered across a system. Recover the whole project folder tree, not the project file alone, and recover the media folders even if their contents look duplicated elsewhere, because the project’s links point at specific paths. Expect to relink some media on first open, and regard a project that opens with all media found as a small victory worth immediately backing up twice.
Verifying recovered data before you celebrate
A recovery tool’s success report counts files, not usefulness. Verification is your job, and it should be systematic: open the recovered material by category, sample the oldest and newest files in each, and specifically open the largest files, whose size gives damage the most room to hide. Videos should be played at several points, not just started; archives should be test-extracted; documents should be scrolled to their ends. Files that fail verification are not necessarily lost — a second recovery pass with different settings, or a different tool reading the same image, sometimes extracts what the first attempt mangled — but they must be identified now, while the source drive is still available and unchanged, rather than discovered months later when the source has been wiped in a fit of tidiness.
Keep the recovered set quarantined from your live library until verification finishes. Merging unverified files into your organised archive contaminates the good with the doubtful, and future you will not remember which holiday folder was the rescued one. A clearly named recovery folder, dated, with a note of what was verified and what was not, preserves the information honestly. Once verification is complete and a backup of the recovered set exists, then merge, rename and reorganise with confidence.
The economics and ethics of professional recovery
Professional recovery is priced the way it is because the laboratory’s costs are real: clean facilities, donor parts inventories, specialist imaging hardware and engineers whose judgement is the product. When you request quotes, expect an evaluation first and a price that depends on the failure, and be wary of any service that guarantees outcomes or quotes a single low figure for every scenario — certainty is not a thing this trade can honestly sell. Ask what happens to your drive, how your data is handled and returned, and what you pay if nothing recoverable is found; reputable firms answer all three plainly.
There is also an ethics of sending a drive away: it contains your digital life, so choose a firm whose confidentiality practices you can describe afterwards, ship the drive tracked and insured as the valuable object it currently is, and never send the only copy of anything through the post without weighing that the parcel itself can be lost. For most households the calculus resolves simply — the data that justifies laboratory prices is the data that justifies the backup system that makes laboratories unnecessary — and the firms themselves will tell you so, because their waiting rooms are full of people learning the same lesson at the expensive end.
After recovery: the rebuild that makes it a one-time story
Every recovery ends with a choice about whether it will be a story you tell once or a genre you revisit. The rebuild has three parts, and none is optional. First, the hardware: the drive that failed does not return to trusted duty regardless of how well the recovery went, because a drive with a history is a drive with a prognosis. Second, the backup: implement the rotation you now understand you needed, with at least one copy that is not continuously connected, and test a restore before declaring the system finished. Third, the habits: the deletion that started the story, the single copy that made it serious, the ignored warning signs — name yours honestly and change the specific behaviour, not behaviour in general.
Give the rebuild a finishing date and check it. A month after the recovery, confirm the backups have been running, restore one folder as a drill, and review the note you wrote during the incident while the details are still instructive. Readers rebuilding from scratch may find our guide to hard drives for backups a practical place to choose the rotation’s hardware. Recovery stories that end with a system are the ones with happy endings; the rest are merely pauses between incidents.
Recovery questions that deserve straight answers
I deleted files weeks ago and have used the drive since. Is recovery pointless?
Not necessarily pointless, but expectations must drop honestly. Every write since the deletion may have overwritten some of the deleted data, and recovery becomes a salvage operation whose yield depends on how full the drive was and where new data landed. Photos and documents in lightly used areas of a spacious drive survive surprisingly often. Run a read-only scan against an image of the drive and see what the tool finds before deciding; the scan costs nothing but time and tells you the truth of your specific case.
Can I recover files from a drive I have already formatted?
A quick format, yes, often — the data largely remains until overwritten, and recovery tools are built for exactly this. A full format with overwriting, no; that process exists to prevent recovery, and it works. This is why the article insists on imaging before experimenting: the difference between the recoverable format and the final one is a single dialogue choice, made in a hurry, by someone who did not know its weight.
The recovery tool found thousands of files but none of my folders. Did it fail?
It succeeded at the deeper level and failed at the filing level, which is common when the file system’s records are damaged. The files are recovered by content, stripped of names and folders, and must be sorted by type, date and inspection. It is tedious and it is still a rescue: the alternative was no files at all. Sort with the metadata, rename in batches, and let the experience argue for the backup system one final time.
Should I keep using recovery software on a drive that is getting louder?
No. Escalating noise is a mechanical symptom, and every hour of operation spends what may be a finite remaining life. Stop, decide what the data is worth, and follow the fragile-drive path: professional imaging if the value justifies it, or a single careful, prioritised copy attempt of the most important files if it does not. Software cannot recover data from a drive whose mechanics fail completely mid-scan.
Recovering from a backup that turns out to be incomplete
A common and bitter discovery during recovery is that the backup you trusted has gaps: a folder excluded by a default setting, a library that stopped syncing months ago, a drive letter that changed so the backup quietly protected an empty location. Treat the discovery as a second recovery problem with its own sources. Cloud services retain version histories and deleted-item bins longer than most people realise; email accounts hold attachments that duplicate important documents; phones hold the originals of photos that were copied to the computer and then deleted from the phone’s card but not its cloud. Work these sources methodically before concluding anything is lost, and keep a list of what each source yielded, because the gaps in one are so often the strengths of another.
Then fix the backup’s definition of completeness while the lesson is fresh. A backup is complete relative to a list — the folders and libraries you have named as mattering — and that list, written down and reviewed whenever you start a new kind of work, is the difference between a backup and a hope. The recovery that teaches you to write the list has, at least, charged tuition for something durable.
Helping someone else recover their files: a note on care
Sooner or later the person with the recovery tools becomes the person relatives call, and the technical work is the easy half. The drive’s owner is often embarrassed, frightened or grieving — the files are frequently photographs of people who are gone — and your manner is part of the service. Explain before you touch anything what you will do, what it might cost the data if the drive is fragile, and what the possible outcomes are, including the outcome where nothing comes back. Never experiment on the only copy to satisfy curiosity, never keep copies of what you recover, and return or securely delete your working copies in front of the owner when the job ends. Hand back the recovered files on new media, with the verification caveat honestly stated, and the backup advice offered once, kindly, without a lecture. The families who take the advice are usually the ones who were not shamed for needing the rescue.
Keeping a small recovery kit ready
The time to assemble recovery tools is before they are needed, because several of them — a bootable rescue environment, a known-good dock and cables, imaging software you have practised with — cannot be downloaded onto a machine whose drive has just failed without borrowing another machine anyway. Build the kit on a calm weekend: a USB stick with your rescue environment, tested by booting it once; the dock and a spare data cable; a note of where your backup drives and recovery keys live. Then practise the central skill, imaging a drive, on a spare or unimportant drive, so that your first real image is not also your first attempt. Recovery under pressure rewards rehearsal exactly the way first aid does: the procedure should be familiar before the day it matters.
What recovery teaches you about your files while you still have them
People emerge from a recovery with an unexpectedly clear view of their own data, because the process forces an inventory that ordinary computing never demands. They learn which folders actually matter — usually a far smaller set than the drive’s total contents — and which vast regions were ballast: duplicate downloads, abandoned projects, caches of things the internet will happily supply again. That clarity is worth keeping after the crisis. Write the list of what mattered, in the recovery’s own folder, and let it become the specification for your backups and your future storage purchases alike. A household that knows its irreplaceable data occupies a modest, named territory can protect it superbly and cheaply; a household protecting ‘everything, somehow’ protects nothing in particular and discovers the fact at the worst times.
The inventory usually reveals a second truth: the most valuable files are often the worst organised, living in download folders, desktop piles and application directories with names that made sense to a program rather than a person. The rebuild after recovery is the one painless moment to fix this, because the recovered set must be sorted anyway. Give the treasures a shallow, dated, human structure as they return, and let the ballast go without ceremony. Months later, the recovered drive’s owner typically reports a strange gratitude alongside the regret: the data is back, the system protecting it is real this time, and the library that returned is the first one they have ever fully understood. Recovery, survived properly, is an education — the aim of everything in this guide is that you need it at most once.
Recovery and the cloud copies you forgot you had
Before any tool touches a failing drive, spend twenty minutes hunting the copies that modern life scatters without asking. Phones upload photographs to cloud libraries by default and keep them after the computer copies are lost. Messaging applications hold the images and documents you sent and received, often in full resolution, on their own servers and in the phone’s local store. Email accounts are accidental archives of every important document ever sent as an attachment, in both directions. Work applications keep version histories that reach back further than their trash folders suggest, and collaborators frequently hold copies of shared work in better condition than the original. Assemble these windfalls first, in a fresh folder, and note what remains genuinely missing. The list that survives this hunt is the true recovery target — frequently a tenth of the original panic’s size — and it lets any subsequent work on the drive itself be narrow, prioritised and calm. More than one recovery has ended at this stage, with the drive unplugged and untouched, because the data had been quietly living in three other places all along.
Carry one sentence out of this guide and let it govern every storage scare from now on: the time to protect a file is while you still have it. Recovery is a remarkable craft and sometimes a miraculous one, but it is always the second-best outcome, purchased with money, time or luck. The best outcome is the boring one — a deletion shrugged off, a failed drive replaced from a backup over coffee — and it is available to every reader of this article for the cost of the rebuild described above. If your recovery succeeded, build the system. If it failed, build the system anyway, in memory of the files that argued for it.
And if you are reading this guide before any disaster, out of prudence rather than panic, you are in the best position of all. Run the hunt for scattered copies today, while it is a treasure hunt instead of a triage. Write the list of what matters. Buy nothing yet; simply knowing the shape of your data makes every later decision — the backup you choose, the drive you buy, the recovery you may never need — smaller, cheaper and calmer. Preparedness in storage is mostly this: a clear inventory, a tested backup and a household that knows the first three steps by heart.
Keep this guide bookmarked beside that inventory. If the day ever comes, you will not be starting from fear; you will be starting from a list, a kit and a procedure — and that is most of the battle already won.