Disclosure: As an Amazon Associate, ilcastellomenu.com earns from qualifying purchases. Links to Amazon on this page are affiliate links; they cost you nothing extra. Listing details such as price and availability change often, so check the current Amazon listing before you buy.
Learning how to test a graphics card properly answers three different questions people often blur together: Is this card working correctly? Is it performing as it should? And is it stable under real load, not just on the desktop? This guide gives you a complete, safe testing workflow — baseline checks, synthetic benchmarks, in-game verification, temperature and stability monitoring — that works for a brand-new card, a used purchase you are vetting, or an older card you suspect is failing.
The golden rule of GPU testing is to change one variable at a time and write down what you observe. A card that crashes in one game but passes everything else is telling you something different from a card that artifacts on the desktop, and the notes you take during these tests are exactly what a warranty claim, a seller dispute, or a support forum will ask for. Start with a current driver — How to Update Drivers on a Graphics Card covers that in ten minutes — because testing on a broken driver wastes everyone’s time.
What you need
- A current, correctly installed graphics driver for your card.
- A monitoring tool: HWiNFO64 or GPU-Z for sensors (temperature, clocks, power, fan speed), plus the overlay built into the NVIDIA App or AMD Adrenalin for in-game viewing.
- One synthetic benchmark: 3DMark (the free demo includes Time Spy) or the free Superposition or Heaven benchmarks.
- A stress tool for stability: OCCT’s GPU test or FurMark — used briefly and attentively, as explained below.
- Two or three games you know well, ideally including the most demanding title you own.
- A notebook or notes app. Seriously — recorded numbers are the difference between testing and vibes.
In this guide
Step 1: Baseline checks before any load
Start at the desktop. Confirm the card is detected correctly in Task Manager and Device Manager with no warning icons, that your monitor is plugged into the graphics card’s outputs (not the motherboard’s — the classic silent performance killer), and that the display is running at its full resolution and refresh rate in Windows settings. Note the idle temperature after ten minutes of desktop use: most modern cards sit in a cool, fan-stopped state at idle, so an idle card that is already hot and spinning points at background load, a stuck process, or a cooling problem worth investigating before you add benchmark heat.
Check the sensors agree with reality: GPU-Z’s Sensors tab shows clock speeds, memory, temperature, fan RPM, and board power. At idle, clocks should drop to low values. If the card holds maximum clocks on the desktop, look for a high-refresh multi-monitor setup, a recording/streaming app, or a power-management setting forcing performance mode — all common, all fixable in settings rather than hardware.
Step 2: Synthetic benchmarks — is it performing as it should?
Run 3DMark Time Spy (suited to mid-range and up) or Fire Strike (older/lower cards), or Unigine Superposition at a preset matching your monitor. Record the overall score, the graphics score, and the peak GPU temperature during the run. Then compare the graphics score against published results for the same GPU model: being within a few percent of typical scores means the card is performing normally. Chassis cooling, CPU pairing, and memory speed explain small differences; a large shortfall (say, a fifth or more below typical) means something is wrong — wrong slot, missing power cable, thermal throttling, or a driver issue.
Repeat the run once more after a short cooldown. Scores should be consistent within a small margin. A second run that drops sharply suggests heat: the card boosts while cool, then throttles. That pattern sends you to the airflow and temperature work in How to Fix Graphics Card Overheating rather than to a returns label. While you benchmark, keep an eye on the GPU utilisation figure — in a GPU benchmark it should sit at or near full load; if it does not, the test is being limited elsewhere.
Step 3: Stability stress testing — carefully
Synthetic benchmarks are sprints; stability testing is holding a heavy weight. OCCT’s GPU test and FurMark place an unusually heavy, sustained load on the card — heavier than any real game — which makes them excellent at exposing marginal power delivery, failing memory, and unstable overclocks. That same heaviness is why you should use them in short, attended sessions: run ten to fifteen minutes while watching temperatures, and stop immediately if temperatures climb beyond the card’s normal gaming range and keep rising, if you see visual artifacts, or if the system behaves strangely.
Never leave a stress test running unattended, never run one on a card you already suspect is dying ‘to see what happens’, and remember that some manufacturers consider extreme stress tools outside normal use — a standard game loop is the safer long-duration test. In practice, thirty to sixty minutes of your most demanding game, with the monitoring overlay on, is the stability test that matters most, because it is the load the card will actually face for its whole life.
Step 4: In-game verification
Benchmarks tell you the card matches its spec sheet; games tell you it does the job you bought it for. Play your two or three reference titles for at least twenty minutes each with the performance overlay visible. Record average frame rate in a repeatable scene, the GPU temperature and utilisation, and any stutter, texture pop-in, or artifacting. GPU utilisation near maximum with smooth frame delivery is healthy. Low utilisation with low frame rates in a light game usually means a CPU limit or a frame-rate cap (VSync, an in-game limiter, or a driver-level cap) — a settings discovery, not a sick card.
If you test a used card, this stage is your buyer’s inspection: run the seller’s card (or your new purchase, within its return window) through a demanding game at the settings you actually intend to use. Artifacts — flashing textures, coloured speckles, geometry stretching — under stock settings are a walk-away signal for a used purchase and a warranty conversation for a new one. Cards shortlisted from roundups like Best Graphics Cards for 1440p Gaming should deliver the experience those guides describe; if yours does not, these test numbers tell you whether the card or your system is the reason.
Reading the results: a quick diagnostic table
| Observation | Likely meaning | Next step |
|---|---|---|
| Benchmark score near typical results, stable in games | Card is healthy | Done — record the numbers as your baseline |
| Score far below typical, GPU not reaching full load | Wrong slot/cables, driver issue, or CPU limit | Reseat, check power cables and slot, clean-install driver |
| Good first run, poor second run, high temperatures | Thermal throttling | Improve case airflow; see the overheating guide |
| Artifacts or speckles under load at stock settings | GPU core or VRAM fault | Stop stress testing; warranty/return if recent |
| Crashes in one game only, everything else passes | Game or driver-specific bug | Verify game files, try another driver version |
| Black screens with fans ramping to full speed | Power delivery or driver fault | Check PSU cables and capacity; clean-install driver |
Common mistakes when testing a graphics card
- Testing on a broken setup. Monitor plugged into the motherboard, missing PCIe power cable, or a years-old driver will make a perfect card look faulty. Verify the basics first.
- Comparing against the wrong reference. Your score should be compared with the same GPU model and similar settings — not with a higher tier, a different resolution, or a reviewer’s open test bench with a flagship CPU.
- Marathon FurMark sessions. Extreme stress tools are for short, attended diagnostics. Hours of unattended synthetic load tests nothing a game would not, and adds real wear and heat risk.
- Judging by one crash. Games crash for their own reasons. A hardware conclusion needs a pattern across titles or tests, ideally reproducible.
- No written baseline. Six months from now, ‘it feels slower’ is unanswerable. Today’s recorded scores and temperatures make future-you’s diagnosis a five-minute job.
Pro tips
Save your benchmark screenshots and a one-line summary (driver version, score, peak temperature) in a folder named for the card; when you eventually sell the card, that history is a genuine selling point, and when you troubleshoot, it is gold. Re-run the same benchmark after any major change — new driver, new case, repaste, an overclock from How to Overclock Safely a Graphics Card — so every change has a measured effect. And test the boring outputs too: if you run multiple monitors, confirm every port you rely on works, since a single dead DisplayPort is exactly the kind of fault that hides until the day you need it — the multi-display picks in Best Graphics Cards for Multiple Monitors assume all ports earn their keep.
How to test a graphics card for specific jobs
General health is only half the question; the other half is whether the card does your job. Gamers should test in their actual titles at their actual settings, because a card can ace synthetic benchmarks and still stumble in the one engine that matters to you — shader compilation stutter, a driver quirk in a specific game, or VRAM pressure from a texture pack. Streamers should test the full pipeline at once: game running, encoder active, a recording saved and inspected, because NVENC/AMF encoding faults hide until the encoder shares the GPU with a game. Creators should render or export a real project and compare times against the figures their community reports for the same card, since timeline scrubbing and export use the GPU differently from any benchmark. In every case the principle is identical: the most representative test is your workload, instrumented — benchmarks are the control group, not the verdict.
Memory deserves its own focused test because VRAM faults are sneaky: they can pass a quick benchmark and corrupt textures twenty minutes into a session. OCCT includes a dedicated VRAM test that fills and verifies the memory; run it when vetting a used card or chasing artifacting that appears only in long sessions. Combine it with a texture-heavy game at maximum texture settings — the scenario most likely to exercise every gigabyte — and you have covered the failure mode that quick tests miss.
Interpreting temperatures and clocks like a technician
Numbers need reference points. Under a gaming load, expect the GPU core to settle at or below its temperature target (commonly low-to-mid 80s °C at most) with clocks fluctuating near the card’s rated boost; the hotspot sensor typically reads higher than the headline temperature, and a large, growing gap between the two on an older card suggests tired thermal interface material. Board power should approach the card’s rated figure in a heavy benchmark; a card that never gets near it while also underperforming is being held back by something — a power cable arrangement, a slot running at reduced width, or a limiter setting. Fan behaviour tells its own story: fans that never spin up under load are as suspicious as fans pinned at maximum in a cool case. None of these readings requires expertise to collect — only the habit of recording them, which is what turns ‘it seems off’ into a diagnosis.
The used-card inspection, condensed
- Visual: dust state, fan spin by hand (power off), connector condition, any sign of disassembly or damage.
- Baseline: correct detection, idle temperature and clocks behaving normally on the desktop.
- Benchmark: score within a few percent of published results for the model.
- Load: 20–30 minutes of a demanding game; watch temperatures, listen to fans, look for artifacts.
- VRAM: a dedicated memory test or a max-texture game session for long-session faults.
- Outputs: every port you will use, tested with a real display.
- Verdict: buy, negotiate, or walk — decided by the notes, not by hope.
Sellers who welcome this routine are telling you something good about the card; sellers who refuse any testing are telling you something too. Price what you cannot verify as risk, and remember that a slightly more expensive card with a warranty and a clean test sheet is usually the cheaper purchase over its life with you.
Testing second-hand and returned cards: the trust protocol
A used card deserves a sterner version of the standard routine, because you are underwriting its whole unknown history. Add three checks. First, identity: confirm in GPU-Z that the card is what its shroud claims — remarked and BIOS-flashed impostor cards exist, particularly around mining-boom models, and a genuine card reports its true GPU, memory type, and bus width without being asked twice. Second, endurance: extend the gaming stability session, because marginal cards often survive twenty minutes and fail at forty as heat soaks into tired thermal pads; a card that cannot complete an hour of honest load at sane temperatures is priced wrong at any number. Third, provenance questions, asked plainly: what was it used for, was it mined on, was it ever opened or repasted, and why is it being sold? The answers matter less than the seller’s reaction to being asked. Combine the protocol with buyer protection — a platform with returns, a seller with history — and the used market becomes what it should be: a discount for homework, not a lottery.
Building a repeatable test scene
Comparisons are only as good as their repeatability, so build yourself a test scene and keep it forever. Pick a demanding game with a built-in benchmark if possible — built-ins remove player variance entirely — or define a manual run: same save point, same route through a level, same settings, recorded with the same tool. Note the environmental variables that quietly move results: driver version, ambient temperature, whether the case was warmed by a previous test. Run the scene three times and record the middle result; single runs lie by a few percent in both directions. With a fixed scene, every future change — driver, overclock, new case, repaste, a Windows update — becomes measurable rather than debatable, and ‘is my PC slower than it was?’ becomes a question with an answer instead of a feeling with a forum thread. This small laboratory, built once, is the highest-leverage habit in PC ownership.
What good results look like, summarised
- Benchmark graphics score within a few percent of the model’s published typical results.
- GPU utilisation at or near full load in GPU-bound tests, with clocks near rated boost.
- Temperatures plateauing at a sane level — not climbing indefinitely — with fans behaving proportionally.
- Thirty-plus minutes of demanding gameplay with no artifacts, no driver resets, no black screens.
- VRAM test (where run) completing without errors, and no texture corruption in long sessions.
- Every display output you rely on verified with a real monitor at its native resolution and refresh rate.
A card that ticks every line is not ‘probably fine’ — it is measured fine, which is a different and much more useful state of knowledge. File the results. They are your baseline, your warranty evidence, your resale documentation, and your future self’s favourite inheritance.
Testing etiquette: when the card belongs to someone else
A final, human note on testing cards you do not yet — or no longer — own. If you are the buyer, propose the test session plainly and early, offer to run it in the seller’s presence or over a video call, and bring your own known-good game or benchmark so the seller is not asked to install strangers’ software. If you are the seller, welcome the tests, publish your own baseline results with the listing, and treat a thorough buyer as the compliment they are: people who test are people who pay fairly and complain rarely. Both sides should agree the pass criteria before the session starts — which benchmark, what score range, how long under load — because criteria invented after results arrive are just arguments in costume. Handled this way, testing is not suspicion; it is the mechanism by which strangers transact expensive, fragile electronics with confidence, and it is a large part of why the used market works at all when it works well.
Gear mentioned in this guide
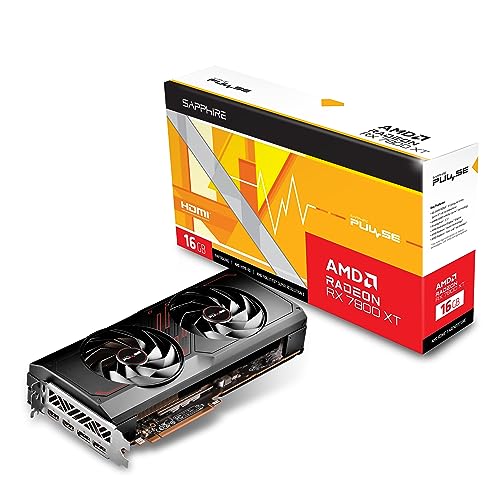
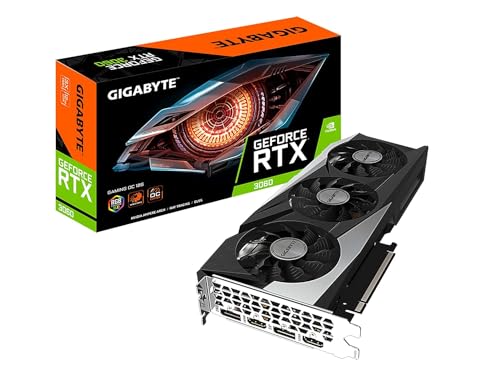
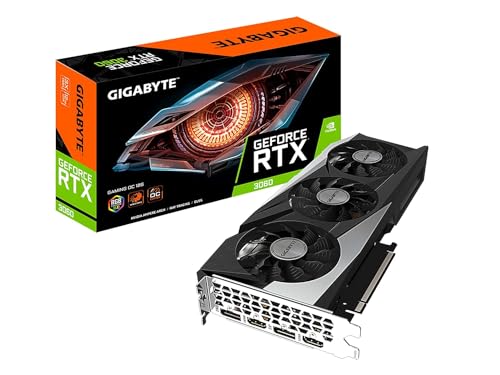
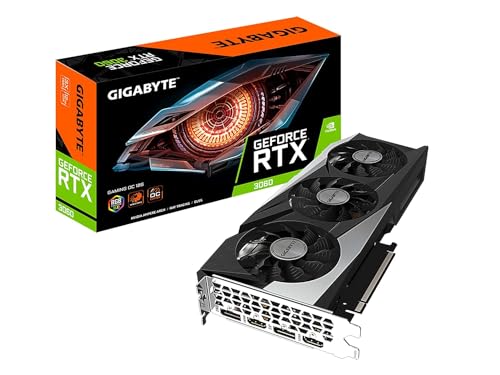
Two current cards used as reference examples in the testing discussion — a 12 GB mid-range card and a 16 GB upper-mid-range card. Testing your own card needs no purchase at all.
- GIGABYTE GeForce RTX 3060 Gaming OC 12G (REV2.0) — Check on Amazon
- Sapphire Pulse AMD Radeon RX 7800 XT 16GB — Check on Amazon

Controlling the variables: what separates a test from an impression
The steps earlier in this guide give you the tools. This section is about discipline, because most misleading test results come from uncontrolled variables rather than faulty cards. Before any run you intend to trust, fix five things and write them down. Lock the game’s settings or the benchmark’s preset, including resolution and upscaling mode, because a single changed toggle can move results more than the difference between two cards. Use one driver version for the whole session and note it; testing half a card before an update and half after produces numbers that describe neither state. Close background applications properly — browsers with hardware acceleration, launchers downloading updates, recording overlays — because each steals a little GPU and a little memory. Let the card reach operating temperature before recording results: a cold card boosts higher for the first minutes, so a quick benchmark on a freshly booted PC flatters any card, and flatters a used card you are judging most of all. Finally, test at the resolution and settings you actually care about. A card that aces a synthetic 1080p run can still disappoint at your ultrawide resolution if its memory system is the weak point.
Repeat each important test at least twice and compare. If two runs of the same scene differ wildly, the test is telling you about your method, not the card — find the wandering variable before drawing conclusions. This is the same repeatability principle behind our guide to building a repeatable test scene in the main steps, applied with a notebook rather than from memory.
Looking past average frame rate: frame time, lows and stutter
Average frames per second is the number everyone quotes and the number that hides the most. A card can average a healthy figure while delivering an uneven experience, because averages smooth over the hitches you actually feel. When you test, capture three additional things. First, the low percentiles — often shown as 1% and 0.1% lows — which describe the slowest moments: door transitions, explosions, new areas streaming in. Lows that sit far below the average point to stutter, and stutter has causes worth separating. If lows collapse when entering new areas or turning quickly, suspect data streaming and memory: VRAM near its limit, a slow drive, or a game loading assets. If lows collapse in busy combat with many effects, suspect raw compute or a CPU that cannot prepare frames fast enough.
Second, watch a frame-time graph while you play a fixed route. A healthy graph looks like a fairly flat band with occasional single spikes. A sick one shows a repeating sawtooth — often a thermal or power limit cycling — or regular spikes at a fixed interval, which can point to a background task or a sync problem rather than the card at all. Third, trust your hands as well as the graph. Mouse movement that feels gritty despite a high average usually matches poor frame pacing, and frame pacing problems are exactly what averages conceal. Record how the test felt in one sentence beside the numbers; when you compare a replacement card weeks later, that sentence will be worth more than the second decimal place of any benchmark.
A simple stutter hunt you can run in any game
Pick a demanding area you can cross in about a minute. Run it three times at your normal settings and note where hitches happen. Then lower only texture quality by one step and run it again. If the hitches vanish, memory capacity or bandwidth was involved, and you have learned something specific about your card’s limits. Restore textures, then cap the frame rate slightly below your typical average and run once more. If that smooths the route, your problem was pacing and variance, not power. Two five-minute experiments like this turn a vague complaint — this card stutters — into a diagnosis you can act on.
Testing the parts benchmarks ignore: outputs, encoder and media engines
A graphics card is also your display hub and, for many owners, a video machine. Benchmarks ignore both jobs, so test them yourself, especially on a used card where a damaged port is a plausible hidden fault. Connect each output in turn — every HDMI and DisplayPort socket — and confirm each one reaches your monitor’s native resolution and full refresh rate, not merely a picture. Ports can work at low modes while failing at high bandwidth, so set the full refresh rate and watch for flicker, sparkles or dropouts over a few minutes. If you run multiple monitors, connect them all at once and wake the PC from sleep several times; multi-display wake problems are a classic fault that single-screen testing never reveals.
Then test the media engines. Play a high-resolution streaming video and confirm, in your monitoring tool, that video decode is being handled by the GPU rather than hammering the CPU. If you record or stream, run your capture software for five minutes at your usual settings and check the recording for dropped frames and audio sync; the hardware encoder is a separate block on the chip and it can be the part that misbehaves while games run perfectly. Creators should go one step further and render a short timeline in their editor, because that exercises decode, effects compute and encode together in the pattern their real work uses. Our roundup of the best graphics cards for streaming explains why encoder generation matters when you replace a card that fails here.
Sound, vibration and the tests you run with the case open
Some faults announce themselves to your ears before any graph. During your stress testing, spend one run listening deliberately. Fans should rise smoothly with load; a fan that rattles at a particular speed, clicks as it starts, or changes pitch unevenly is telling you about bearing wear, which matters enormously on a used card because fans are the main moving parts and the most common age-related failure. Coil whine — a buzzing or chirping that tracks frame rate, loudest in menus with uncapped frame rates — is usually harmless electrically, but test for it if the PC lives in a quiet room, because a whine you cannot tolerate is a practical defect for you even if the card is technically healthy. Cap the frame rate in a menu and confirm the whine fades; that confirms the diagnosis and gives you the workaround in the same minute.
With the PC powered down and unplugged, a gentle physical inspection completes the picture: look for dust mats between fan blades, check that the cooler shroud is firmly attached, and confirm the card sits in its slot without strain. Never open the cooler assembly itself during a purchase inspection — breaking seal stickers can void whatever warranty a used card has left, and nothing you need to know requires it.
Soak testing: proving stability over hours, not minutes
Short tests catch broken cards. Long tests catch marginal ones — the card that is fine for twenty minutes and crashes at minute ninety when heat has soaked into every component, the memory that errors only when fully warm, the power supply that sags only in a long session. If you are validating a used purchase or signing off a system after repairs, one long session matters more than five short ones. Run a demanding but realistic load — a graphically heavy game you own, played normally, is better than an artificial furnace — for at least the length of your longest typical session, while logging temperatures, clocks and fan speeds. Stay nearby; a soak test is supervised by definition, and you should stop any test that produces burning smells, visible artefacts spreading across the screen, or temperatures climbing past the limits described earlier in this guide.
Read the log afterwards rather than relying on memory. Healthy signs: clock speeds settle into a narrow band after the first minutes and stay there, temperatures plateau instead of creeping, and the frame rate in a repeated scene at the end matches the same scene at the start. Unhealthy signs: a slow downward drift in clocks across the session, temperatures that never level off, or errors that appear only late. Late-appearing faults are the ones sellers of used cards may genuinely not know about, which is why a soak test protects both sides of a private sale when its results are shared honestly.
Comparing your results with the rest of the world, fairly
Eventually you will compare your numbers with reviews and other owners, and fair comparison needs care. The same GPU model varies a little from chip to chip — the silicon lottery — and partner cards vary in cooler quality and factory settings, so a few percent either way is normal and meaningless. Bigger gaps usually trace back to the rest of the system: a slower CPU, single-channel or slower system memory, a case that starves the card of air, or a different driver version. Before concluding your card underperforms, align those variables as far as you can, retest, and only then worry. Keep your own baseline numbers filed with the PC’s records. They are the comparison that matters most over the card’s life, because a drop against your own baseline, on your own system, is the earliest reliable warning of dust, drying thermal paste or a tiring fan — the maintenance items covered in our guide to fixing graphics card overheating.
Recognising artefacts: what each visual fault is telling you
During testing, the screen itself is an instrument, and different visual faults point at different suspects. Learn the main dialects. Small flashing dots or sparkles scattered across busy scenes — often called snow — usually implicate memory running at or beyond its stable limit, whether from an overclock, heat, or age. Large stretched or spiking triangles, where geometry briefly tears into shards, point more often at core instability or a driver problem under a specific shader load. Whole-screen checkerboard patterns or blocks of wrong colour are more serious: they suggest memory errors at a deeper level and, on a card being evaluated for purchase, are a walk-away signal rather than a tuning opportunity. A screen that freezes while sound continues implicates the driver or core; a screen that goes black while fans ramp to full speed implicates power delivery or a protection trip, and deserves the power-supply checks described in our guide to graphics card power consumption.
Whatever you see, capture it. A phone photo or a short screen recording of an artefact, with the game, settings and temperature noted, converts an argument about a faulty card into evidence — for a seller, a warranty claim or your own memory in three weeks when the fault returns. Note also whether the fault appears in more than one program. Artefacts in exactly one game, at exactly one settings combination, after a game patch, are frequently the game’s bug, not your card’s decline; artefacts that follow the card across titles and benchmarks are the card confessing.
Testing for creative and AI workloads when gaming is not the job
If the card earns its keep in editing, rendering or local AI rather than games, game benchmarks are the wrong final exam. Test with the actual applications and files the card will face. In a video editor, build a short timeline from your own camera footage — not stock clips — with the effects you actually use, and time both playback smoothness at full resolution and a complete export. Hardware decode support is codec-specific, so footage from your camera is the only honest test of the decode path you will live on. In 3D tools, render one of your own scenes and compare the time and the memory reported against the scene’s known demands; a card can game brilliantly and still be the wrong tool if your scenes overflow its memory and fall back to slow system RAM.
For local AI work, the test is first about fit and only then about speed. Load the largest model you realistically intend to run and confirm it fits in VRAM with room for the working data around it; a model that spills into system memory runs at a small fraction of its in-memory speed, which no benchmark headline will warn you about. Then run a sustained generation or training batch and watch memory temperature and stability over at least half an hour, because these workloads hold the card at full load in a way games rarely do, and marginal cards reveal themselves there. Record the settings and versions alongside the results, since AI software moves quickly and a retest after an update is only meaningful against a written baseline. Owners weighing a card mainly for this work will also find the capacity discussion in our guide to VRAM directly relevant.
Writing the test report you will thank yourself for later
End every serious testing session by writing the report while the numbers are still on screen. It needs only a few lines: date, card and driver version, room temperature, the tests run, the headline results — benchmark scores, peak core and memory temperatures, sustained clocks, fan behaviour — and one sentence on anything odd you saw, heard or felt. Save any screenshots of results with the report, and file it with the PC’s other records rather than in a downloads folder it will vanish from.
This modest habit compounds. When the card misbehaves next year, the report tells you what healthy looked like on this exact system, turning a vague worry into a measurable comparison. When you sell the card, the report is honest evidence that supports your price. When you shop for its replacement, the report reminds you which of your workloads actually stressed the old card, so you buy for your real needs instead of a reviewer’s suite. Testing, done this way, stops being a verdict you reach once and becomes the card’s service history — and machines with service histories are simply easier to own.
Testing a card you cannot install yet
Sometimes you must judge a card before it can go into its final machine — a gift, a marketplace purchase in another town, a spare bought for a future build. You can still learn a great deal. Ask for a short video, recorded in one take, showing the card installed, the machine booting, a recognised benchmark result screen and the seller’s note with the date beside the monitor; that single-take format is far harder to fake than screenshots. Check the card’s physical identity in the video against listing photos: fan count, backplate, connector layout and the serial label. If the card can be tested in any machine at all, even a friend’s, the output and benchmark checks from this guide take twenty minutes and settle most of the risk. What you cannot fully judge remotely is long-session stability, which is exactly why the purchase channel and its return protection matter more for remote buys than for local ones where your own soak test can speak first.
Frequently asked questions
What is a good free benchmark for testing a graphics card?
The 3DMark demo on Steam includes Time Spy and is the most widely compared. Unigine Superposition and Heaven are free, quick downloads with published score databases. Any of them works — consistency with your own baseline matters more than which one you pick.
How hot is too hot during a stress test?
Most modern cards are designed to run their boost clocks up to a temperature target in the low-to-mid 80s °C under full load, and will throttle rather than damage themselves beyond it. Sustained temperatures well above a card’s usual gaming range, or a hotspot reading climbing without levelling off, are your cue to stop and fix cooling rather than keep pushing.
My card passes benchmarks but crashes in one game. Is it faulty?
Probably not. A card that passes synthetic load and other games but fails in a single title is usually hitting a game bug, a corrupted install, or a driver issue specific to that title. Verify the game files, try a different driver version, and test again before blaming hardware.
How long should I test a used graphics card before buying?
Long enough to run one synthetic benchmark and twenty to thirty minutes of a demanding game while watching temperatures and looking for artifacts. That combination exposes the overwhelming majority of faults. If the seller will not allow even that, price the risk accordingly — or walk away.
Can stress testing damage my graphics card?
Normal gaming and standard benchmarks cannot damage a healthy card; protections throttle or shut down before damage. Extreme stress tools used for long, unattended sessions are the exception — use them briefly, watch temperatures, and stop at the first sign of artifacts or runaway heat.
Can I test a graphics card without installing benchmark software?
Yes, up to a point. Your games themselves are valid tests if you use a fixed scene, fixed settings and a frame-rate overlay, and Windows Task Manager plus the vendor app will show utilisation, memory use and temperature. What dedicated tools add is repeatability and logging: saved results you can compare across days and cards. For a quick health check, games alone suffice; for judging a used purchase against a return deadline, install at least one recognised benchmark so your verdict rests on a standard workload.
How should I test a graphics card in a laptop?
Adapt the same principles to the machine’s limits. Confirm in settings that the game is running on the dedicated GPU rather than the integrated one, test while plugged into mains power because battery mode caps performance, and expect temperatures to run higher and clocks lower than a desktop card with a similar name — laptop chips share a tight thermal budget with the CPU. Compare your results only with other laptops, never with desktop figures, and treat fan noise under load as normal unless it changes character suddenly.
Ambient temperature changes my results. Is my card inconsistent?
No — your room is part of the cooling system. A card tested on a cool morning and a hot afternoon can differ by several degrees and a small amount of sustained clock speed, because the air entering the case sets the floor for everything. Note the room temperature in your test log, and when you compare results across weeks, compare like with like. A sudden change at the same room temperature is the signal worth investigating; a gradual change tracking the seasons usually is not.
What should I test first when the return window is short?
Work in this order: all display outputs at full refresh, one recognised benchmark against published results for the model, a thirty-minute in-game session in your most demanding title watching for artefacts, and one encode or decode task if you create content. That sequence covers the faults most likely to justify a return — dead ports, underperformance, instability under real load — inside an hour, and leaves the longer soak test for the following days while the window is still open.
The bottom line
Testing a graphics card is a method, not a single program: verify the baseline, benchmark against the model’s typical results, stress briefly and attentively, then confirm in real games while recording temperatures and scores. Do that once and you own a baseline that makes every future question — upgrade, overclock, warranty, resale — answerable with numbers instead of guesses. If your tests point at heat, continue with how to fix graphics card overheating; if they point at confusion about what the numbers mean, graphics card power consumption explained fills in the power side of the picture.