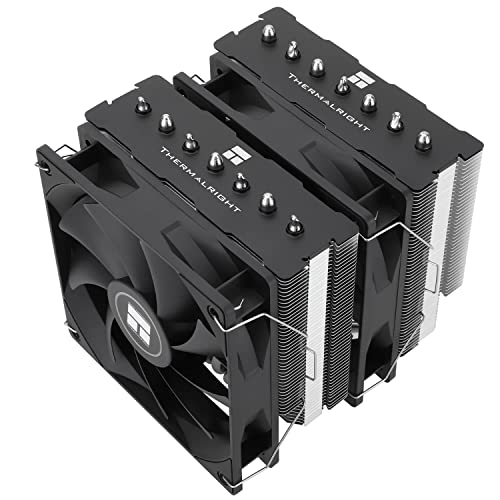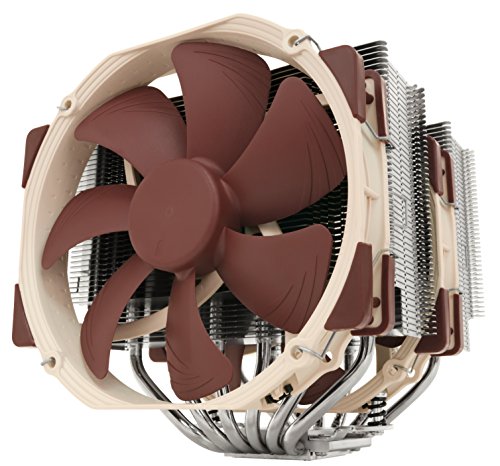
CPU cooler clearance explained in one sentence: clearance is the set of physical gaps — between CPU and side panel, fin stack and memory, radiator and graphics card — that decide whether a cooler physically fits your build, and each gap is a published number you can compare before buying. A cooler can be perfect for your socket and your budget and still not fit by 3mm. This explainer defines every clearance figure, shows where to find it, and works through the combinations that catch builders out.
Clearance problems are the number-one cause of cooler returns, ahead of noise and performance combined, because they are discovered at the worst moment: cooler in hand, build half finished. The good news is that every number you need is published by case, cooler and memory makers — the skill is knowing which numbers pair together. This guide is the measurement companion to How to Check Compatibility of a CPU Cooler.
Disclosure: As an Amazon Associate, ilcastellomenu.com earns from qualifying purchases. Product examples below link to Amazon, where you can check current availability and specifications; this guide itself lists no fixed prices because pricing and bundles change frequently.
The Main Measurement: Cooler Height vs Case Clearance
What 'maximum CPU cooler height' actually measures
A case’s stated maximum CPU cooler height is the distance from the top surface of an installed CPU to the inside of the closed side panel, with the motherboard fitted. A cooler’s height is measured from its base (the CPU contact plate) to its highest point — usually the top of the heat-pipe caps or the fan frame, whichever is taller, with fans in their lowest position. Compare the two figures directly and keep a margin of a few millimetres: panel flex, manufacturing tolerance and a slightly proud fan clip all eat space. If the case maker publishes no figure, measure a built system with a ruler from the CPU spreader to the panel, or use the cooler’s height plus motherboard standoff depth against the case’s internal width as a rough cross-check — then add margin, because rough is the operative word.
Why flagship air coolers are the usual casualties
Dual-tower air coolers are 160–170mm tall by design: two fin stacks flanking 140mm fans cannot be shorter. Many slim mid-towers and most small cases cap clearance at 155–165mm, which is why a flagship can miss by less than the width of a fan clip. The classes in Tower Cooler vs Low Profile Cooler exist because of this single measurement. When you miss by a hair, the honest fixes are a shorter cooler or a different case — never leave the side panel off or force it closed against the heat pipes.
In this guide
RAM Clearance: The Second Measurement
Clearance under the fin stack
Tower coolers overhang the memory slots, so what matters is the vertical space beneath the lowest fin (or the front fan’s bottom edge) above the DIMM slots. Memory module height is the other half: plain modules are about 30mm tall, mainstream heatspreader designs run 35–45mm, and tall RGB modules can exceed 50mm. Cooler makers publish a ‘RAM clearance’ figure or a diagram; compare it with your modules’ specified height, not with a photo. If the front fan can slide up the stack to gain room, remember that every millimetre gained under the fan is a millimetre added to total cooler height — the two measurements trade against each other, which is exactly how a build passes the RAM check and fails the panel check.
Slot position and board layout matter too
On some boards the first DIMM slot sits closer to the socket than on others, and some coolers are offset — designed asymmetrically to lean away from the memory or the top PCIe slot. Offset designs are a legitimate solution, but only the maker’s compatibility diagram for your board tells you whether the offset leans the right way. This is why How to Choose a CPU Cooler insists on checking the specific board, not just the socket.
Radiator Clearance: Liquid's Version of the Same Problem
Length, thickness and the fan sandwich
A radiator’s nominal size (240, 280, 360mm) describes its fan layout, not its full dimensions: the actual unit is longer than the fans by the end tanks, and its thickness plus a 25mm fan must clear the motherboard’s top edge, its VRM heatsinks and the memory when top-mounted. Case makers publish radiator support per position, sometimes with thickness limits. Front-mounting trades against graphics-card length instead — the case will list GPU clearance with a front radiator fitted, and that reduced number is the one your card must satisfy. The cases in Best PC Cases for Water Cooling are shortlisted on the strength of these published figures.
Tube reach and orientation
Tubes have a fixed length and a minimum bend radius. A radiator position can be dimensionally perfect and still unreachable from the socket in a large case, or force a bend tight enough to kink. Check the AIO’s tube length against the socket-to-mount distance, and plan the block orientation so the tubes exit toward the radiator without crossing the memory at a strained angle. None of this is guessable from the box’s front panel — it is all in the specification tables, which is the recurring moral of this guide.
Worked Examples: Putting the Numbers Together
Example 1: the 3mm miss
A mid-tower specifies 165mm maximum cooler height. A flagship dual-tower is 165mm with its fans at their lowest — but the build’s 44mm RGB memory forces the front fan up by 6mm to clear it, making the effective height 171mm. Verdict: does not fit, despite both headline numbers appearing to agree. The fixes, in order of preference: lower-profile memory, a cooler with more under-fin clearance, or a 240mm AIO on the case’s top mount. This exact trap is why the worked example in How to Check Compatibility of a CPU Cooler starts from memory height, not cooler height.
Example 2: the front radiator and the long GPU
A case allows a 360mm front radiator and lists GPU clearance of 400mm bare, 370mm with that radiator and its fans fitted. A 355mm graphics card passes; a 380mm card does not, even though ‘the case supports 360mm radiators and 400mm GPUs’ is true as two separate statements. Clearance figures interact, and the only safe method is to check the combined configuration you actually intend to build — the same discipline the builders in Best PC Cases for Cooling apply when shortlisting high-airflow cases.
Common Misconceptions About Clearance
'It fit in my old case' and other transfers
Clearance does not transfer between builds. A different case, board or memory kit changes every gap, so recheck all of them on every build — the five-minute habit that How to Install a CPU Cooler assumes you have already done before the first screw turns.
'The panel bulges a little, it's fine'
A side panel pressed against heat-pipe caps transmits vibration, can buzz at certain fan speeds, and stresses the cooler mount every time the panel is removed. If the panel does not close with finger pressure alone, the cooler does not fit. Choose the shorter cooler or the liquid option and enjoy a build with no asterisks.
Clearance for the Parts Around the Cooler
The headline measurements get the attention, but builds fail on the secondary gaps too. These are the ones to verify once the big three pass.
Top-panel fans, EPS cables and M.2 heatsinks
A tall tower’s top edge can meet the case’s top fan mounts or the motherboard’s EPS power cable, which routes over the board’s top edge exactly where cooler fins want to be — check that the cable’s connector clears the fin stack, because a cable pressed against fins vibrates and chafes. Tall M.2 heatsinks near the socket can clash with wide cooler bases and with AIO block fittings. None of these appear on a cooler’s headline specification; they appear in the maker’s footprint diagram and in your board’s layout photo, compared side by side. Five minutes of diagram work is the entire skill.
Side-panel glass and the transport question
Tempered-glass panels flex less than steel and forgive nothing: a cooler that ‘just touches’ a steel panel may crack against glass under a desk-knock. Keep real margin with glass. And if the PC travels — to LAN events, between home and office, in a car — remember that a tall, heavy tower is a lever on the socket over bumps. Many builders remove very large coolers for transport or support them; a low-profile cooler or an AIO’s light block travels without the thought. Clearance, in other words, is also about the space the cooler needs from the world, not just from the case.
A Measurement Session, Start to Finish
Here is the whole discipline performed once, slowly, on a hypothetical build — the template to copy for your own.
Fifteen minutes with three specification pages
Open the case page: maximum cooler height 168mm, top radiator support 280mm, GPU clearance 380mm bare and 350mm with a front radiator. Open the cooler page: height 162mm with fans low, RAM clearance 45mm with the front fan able to rise 8mm at the cost of height. Open the memory page: module height 44mm. Now the arithmetic: fan stays low (44 under 45), total height 162 under 168 — passes with 6mm. The alternative AIO: 280mm radiator on top, thickness plus fans 52mm against the case’s stated 55mm top clearance over the board — passes with 3mm, and the 330mm graphics card is unaffected because the radiator is not at the front. Two options verified, zero surprises pending. That is clearance explained as it is actually practised: not a talent, a habit — the same habit the compatibility checklist in How to Check Compatibility of a CPU Cooler formalises into five lines.
Clearance Myths That Refuse to Die
A few durable pieces of forum folklore about fit deserve direct rebuttal, because each one has stranded real builds.
'The specs are conservative — it will fit'
Sometimes true of a specific case, worthless as a method. Manufacturers measure to different points: one brand’s cooler height includes the fan at its lowest clip position, another’s does not; one case’s clearance is measured to the panel’s inner skin, another’s to a raised emboss. The variance cuts both ways, which is why the margin rule exists. A builder who plans on the tolerance fairy is gambling a return shipment on a rumour. Measure your own parts when the paper margin falls under a few millimetres — the ruler is the only reviewer who has your exact case, board and memory on the bench.
'Just leave the side panel off'
An open case is not a cooling strategy; it is an admission that the build does not fit, with costs: dust ingress accelerates dramatically, the case’s designed airflow path (which the cooler and GPU fans depend on) collapses into turbulence, pets and fingers gain access to spinning fans, and the machine’s noise escapes unfiltered. The correct responses to a failed clearance check are a shorter cooler, a liquid option, low-profile memory, or a different case — in ascending order of expense and descending order of how often they are the right answer. Every one of them produces a finished computer. The open panel produces a project that is never quite done, humming beside the desk as a monument to a measurement not taken.
'RAM clearance is the memory maker's problem'
It is a shared interface, which in practice means it is your problem. Memory makers publish module heights; cooler makers publish under-fin clearances; board makers set slot positions. Nobody in that chain is coming to your house to reconcile them. The reconciliation is a two-number comparison performed by the buyer — which is, in the end, the thesis of this entire explainer: clearance is not a property of any single part, it is a relationship between parts, and relationships are checked, not assumed.
Gear for This Guide
The examples below come from our Creators-API-verified product pool and illustrate the cooler classes discussed in this guide. They are examples, not a ranked list — use the criteria in this article to judge any model, including newer revisions.
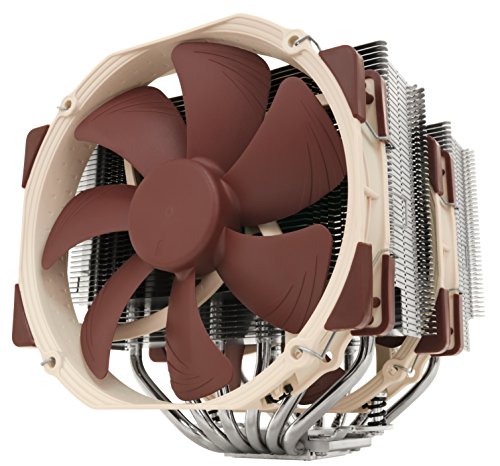
Noctua NH-D15
At 168mm tall with a front fan that may need to slide upward over tall memory, this flagship is the classic clearance case study — superb, provided your case and RAM agree. Noctua NH-D15 — Check on Amazon
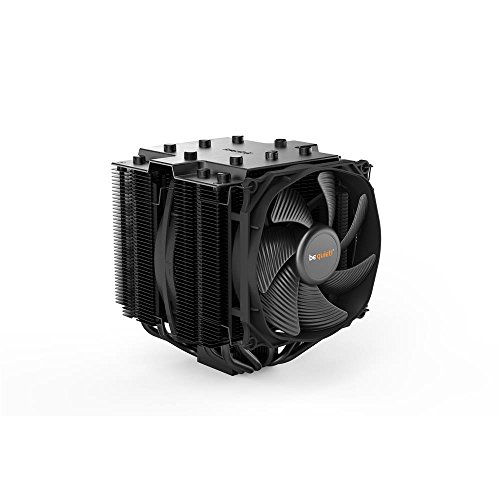
be quiet! Dark Rock Pro 4
A large dual-tower whose published RAM-clearance figure shows the second measurement that matters: the space beneath the fin stack, not just the height above the CPU. be quiet! Dark Rock Pro 4 — Check on Amazon

Thermalright Phantom Spirit 120SE
A dual-tower kept to a more case-friendly height illustrates the modern design response to the clearance problem: flagship-class cooling that fits more mid-towers. Thermalright Phantom Spirit 120SE — Check on Amazon
CPU cooler clearance explained: The Short Version
Clearance is arithmetic, not luck: height against panel, fins against memory, radiator against graphics card, all checked in the configuration you will actually build. Measure first and the cooler simply fits.
Clearance Is a Chain, Not a Number
Every clearance figure in a build is really a small stack of measurements pretending to be one. The case maker’s “maximum CPU cooler height” is measured from the motherboard’s surface in their test layout, with their standoffs, to a side panel assumed perfectly flat. Your build inserts its own variables into that chain: the processor sits in a socket whose height above the board differs slightly between platforms, the heat spreader adds its own thickness, the cooler’s published height is measured from its coldplate to its highest point — which may be a heat-pipe cap, a fan frame or a decorative cover, three different answers on three different models — and your side panel may carry sound damping, a window frame or a slight inward bow. None of these tolerances is large; together they routinely account for three to five millimetres, which is why a combination that “fits by two millimetres” on paper so often does not fit in the metal. The professional habit is to budget the chain: take the case’s figure, subtract a tolerance allowance, and shop against the result. Clearance problems are almost never caused by one big lie in a specification; they are caused by five honest roundings all leaning the same way.
Where the highest point actually is
Before trusting a cooler’s height figure, identify what it measures to. On many towers the fin stack is not the summit — the heat pipes protrude a few millimetres above it, capped or bare. On others the fan, raised to clear tall memory, becomes the highest component, which means the cooler’s effective height in your build is a number no datasheet prints, because it depends on your memory. A few designs hide the summit in a magnetic top cover or a display housing. The maker’s dimension diagram, usually buried in the manual’s second page, shows the true profile; find the tallest element in that drawing and measure your plans against it, not against the headline number in the store listing, which may describe a different configuration of the same product.
Dynamic Clearance: The Space Parts Need While Working
Static clearance — the gap with everything at rest — is only the entry requirement. Parts move in service. Fans vibrate on their mounts, and a fan frame a millimetre from a side panel can buzz against it at specific speeds even though it never touches at rest. Side panels flex inward when a case is lifted by them, when a child leans on the desk, when a cat selects the warm top of the machine as a bed — a load case more common than any test lab admits. Cables swell their bends over time as insulation relaxes, and a graphics card power cable that cleared the panel in January can lean against it by June. Thermal expansion is small but real across a tall aluminium stack warming through fifty degrees. The working rule that absorbs all of this is a service margin of roughly three to five millimetres between any cooler summit and the panel, and a finger’s width wherever a cable passes a fan. Builders who leave those margins never learn the names of the problems the margins prevent, which is precisely the point.
Clearance for your hands is clearance too
A build can be dimensionally legal and practically unserviceable: the cooler fits, and now the memory clips cannot be reached, the top M.2 screw is under the fin stack, the 8-pin power connector cannot be unplugged without removing the cooler, and the first graphics card slot’s release is a rumour behind a fan. When you plan a tight build, rehearse its future maintenance in your head — memory upgrade, drive swap, a repaste in three years — and ask what must come out first for each job. Sometimes the answer justifies choosing a cooler ten millimetres shorter than the maximum, trading a degree of performance for a machine that can be serviced without a full teardown. That trade is invisible in reviews and obvious in year three, which is where experienced builders live.
Clearance in the Other Directions: Front, Back and Below
Height monopolises the conversation, but coolers collide in every direction. Forward, a deep tower’s front fan overhangs the memory, and its intake can sit close behind a front-mounted radiator or a thick front fan stack, starving in a pocket of turbulence. Backward, the fin stack approaches the rear exhaust fan and the I/O shroud; a millimetre of contact there transmits vibration and can bow a thin shroud. Below, wide coolers descend toward the graphics card’s backplate, and the gap between a hot backplate and the fins is an airflow decision as much as a fit decision — too close, and the cooler drinks the card’s heat directly. Even the motherboard’s own geography participates: a cooler that clears everything on one board can meet a repositioned M.2 heatsink or a taller capacitor row on another board with the same socket. This is why the footprint diagram matters as much as the height figure, and why a complete clearance check walks the cooler’s outline in plan view, not only its silhouette from the side. The builders who internalise this stop asking “how tall is it” and start asking “what does it stand next to, on all four sides, and above” — the question the best CPU coolers under a mid-range budget all answer well precisely because their footprints were designed for crowded mainstream boards.
Small Cases: Clearance as the Case’s Constitution
In small-form-factor design, clearance stops being a specification and becomes the architecture. Many compact cases are literally drawn around a cooler height: the sandwich-layout cases allocate a fixed spine-to-panel distance that dictates not only the cooler but, through it, the processor class the case can cool, the memory height it accepts and the graphics card thickness that balances the other side of the spine. When you shop these cases, read the cooler clearance as the case’s constitution — the law every other part must obey — and choose the processor after it, not before. The community around each popular small case maintains tested combinations, and those lists, with photographs, outrank any calculation: in a case where the margin is two millimetres by design, a photographed fit is the only evidence class that fully counts. Accept, too, the small-case corollary that clearance is spent, not saved — any millimetre you do not use on the cooler is a millimetre the design has already given to something else, so there is no virtue in undersizing beyond the format the case was drawn for.
When Clearance Fails Mid-Build: The Recovery Ladder
Suppose the panel will not close. Work the ladder from cheapest to most drastic, and stop at the first rung that solves it honestly. First, configuration: lower the front fan to its standard position if your memory actually allows it, rotate the cooler if the bracket permits a better orientation, and re-route any cable whose bulge is the true summit. Second, substitution within the build: swap tall memory for low-profile sticks of equal performance if the fan position is the problem, or move a radiator to its alternate mount. Third, the cooler itself: many towers have a smaller sibling sharing the same mounting system and most of the performance, and exchanging into it while the return window is open is a nuisance, not a defeat. Fourth, the case: if the build has outgrown it in several dimensions at once — cooler, card length, radiator — a case change may be the honest answer, and it is cheaper now than after a year of fighting the box. What never appears on the ladder: leaving the panel off, bending fins, forcing a panel against a summit, or sanding anything. A clearance problem solved by force becomes a vibration problem, a thermal problem or a cracked-panel problem wearing a disguise, and it will collect its payment later with interest.
Document the clearances you ended with
Whatever the outcome, write down the final numbers: cooler height as installed with the fan where it sits, the remaining gap to the panel, memory height, radiator stack position. That one-minute record converts your build from an anecdote into a reference — for your next upgrade, for the friend with the same case who asks the internet a question you can now answer with evidence, and for the day a new graphics card’s length must be judged against a machine whose free dimensions you actually know. Clearance knowledge compounds; the first build teaches you yours, and every build after starts from data instead of hope.
Clearance for Air Itself: The Invisible Occupant
There is one more occupant in every clearance budget, and it has no dimensions on any datasheet: the air. A cooler does not merely need to fit in its space; it needs to breathe from it and exhaust into it. A tower whose intake face sits twenty millimetres behind a solid front panel is technically fitted and practically suffocated, fed by whatever air leaks around the panel’s edges. A downdraft cooler under a perforated panel needs that perforation to actually overlap its fan, not merely to exist somewhere on the panel — a surprisingly common mismatch in small cases, where the vent pattern was drawn for a different component layout. Radiators need their own version of the same courtesy: a radiator mounted flush against a restrictive grille or a dense filter can lose a meaningful share of its airflow before the air reaches a fin. When you evaluate a tight build, hold a tissue or a strip of paper at the intakes while the machine works hard and watch whether air is genuinely moving through the paths the designer intended. Clearance that fits the metal but starves the air is a half-finished job, and it explains a category of builds that measure perfectly and cool mysteriously badly — the parts all fit, and the invisible part did not.
Planning Clearance Backwards From the Upgrade You Want Next
Finally, aim the tape measure at the future. Most clearance crises are not caused by the build on the desk but by the upgrade that arrives in two years: the taller memory kit bought on sale, the thicker graphics card, the radiator that replaces the tower. A build planned with its next step in mind keeps a deliberate reserve — a case one size class up from today’s needs, a cooler short of the case’s maximum by enough to admit a raised fan over future memory, a radiator mount left free. Reserves look wasteful in photographs and wise in retrospect, because the cheapest upgrade is the one that fits the machine you already own. If you know your habits — and after one build, you do — spend clearance the way you spend money: generously on the dimensions your history says you will need, and tightly only where you have never once wished for more. That is the whole subject in one habit: measure the chain, keep the margin, write it down, and let the next builder of your machine, who is you, inherit a system whose spaces are known rather than guessed.
Frequently Asked Questions
What is the most important clearance measurement?
Cooler height versus the case’s maximum CPU cooler height — the distance from the installed CPU’s top surface to the closed side panel. It is the measurement that rules flagship dual-tower coolers in or out of most builds. Keep a few millimetres of margin beyond the paper figures.
How do I measure clearance if my case maker does not publish it?
Measure the built system: with the motherboard and CPU installed, measure from the CPU heat spreader’s top to where the side panel sits. Alternatively, compare the cooler’s height against the case’s internal width minus tray and cable-management depth — then add extra margin, because that estimate is rough. A ruler on your own hardware beats any forum guess.
Why does RAM height affect cooler height?
Because on many dual-tower coolers the front fan slides up the fin stack to clear tall memory — and every millimetre gained under the fan adds a millimetre to the cooler’s total height. A build can pass the RAM check and fail the side-panel check because of the same adjustment. Always evaluate the two measurements together, in the configuration you will actually run.
Does a front radiator really reduce graphics card clearance?
Yes — the radiator and its fans occupy 50mm or more of the case’s front interior, and case makers publish GPU clearance both with and without a front radiator fitted. Use the reduced figure for your card. ‘Supports 360mm radiators’ and ‘supports 400mm GPUs’ are separate statements that may not be true at the same time.
The cooler fits by 1mm. Is that fine?
It is risky. Panel flex, tolerances and a slightly proud fan clip all consume space, and a panel pressed against heat-pipe caps can buzz at certain fan speeds. If the panel does not close with light finger pressure, treat the cooler as not fitting and choose a shorter cooler or a liquid option instead.
Do I need to recheck clearance when I upgrade parts?
Yes. A new case, board, memory kit or graphics card changes at least one of the gaps. Rechecking takes five minutes with the specification pages open and prevents the classic upgrade-day discovery that the new part and the old cooler cannot coexist. The checklist in How to Check Compatibility of a CPU Cooler covers all five checks.
Can I measure cooler clearance with the processor’s stock cooler still installed?
Yes, and it is a good way to measure an upgrade in a working machine. With the PC off and the panel removed, measure from the motherboard surface beside the socket — a flat reference you can reach — up to the inside face of the closed panel’s position, using a straight edge laid across the case’s panel rails as your stand-in for the panel itself. Note the stock cooler’s own height from its datasheet and compare the two measurements as a sanity check; if your ruler work and the known cooler roughly agree, your case figure is trustworthy. Subtract your tolerance margin before shopping, and remember the new cooler may also be wider and deeper, not only taller, so walk its footprint against your board’s layout photo as well.
Does a glass side panel change the clearance calculation?
Slightly, in both directions. A glass panel is rigid and does not bow inward the way a thin steel panel can, which returns a millimetre or so of real space; but its mounting frame and any inner lip can intrude further than a flat steel panel’s edge, and glass advertises contact mercilessly — a fan frame resting against it will be seen as well as heard. Measure to the glass’s inner frame, not to the visible surface, keep the usual service margin, and be especially careful with raised front fans, whose frames are the most common summit to meet the glass. The reward for the care is that a rigid panel also resists the vibration transmission that makes steel panels sing.
My cooler clears the panel but touches the graphics card’s backplate. Is that acceptable?
Contact is not acceptable; closeness is. A fin stack resting on a backplate couples the two thermally — the cooler begins drinking the card’s heat through metal, not just air — and couples them mechanically, so fan vibration and card vibration trade places and the pair can fret against each other over months. A gap of even a few millimetres breaks both couplings. If your combination truly touches, the fixes are the usual ladder: check the cooler is seated squarely and fully, confirm the card is fully seated and its support, if any, is fitted, and if the geometry still collides, one of the two parts is in the wrong build and should be exchanged while returning it is still a formality rather than a negotiation.
Why do two cases with the same published clearance fit different coolers?
Because the published number is a summary of a shape, and the shapes differ. One case’s clearance is a clean rectangular envelope; another’s is interrupted by a window frame, a cable grommet bar, a fan hub or a panel stiffening rib exactly where your cooler’s summit wants to be. Socket position varies between the boards each maker tested with, standoff heights vary, and some makers measure generously while others measure honestly. This is why the same cooler can be a photographed fit in one “160mm” case and a panel-won’t-close story in another. The defence is the one this guide keeps returning to: trust photographed builds of your exact combination, measure your own case when you can, and hold a margin that forgives the summaries for being summaries.
How much clearance does a radiator need behind its fans?
Enough that the fans are not breathing through a wall. A fan exhausting into a panel or grille a few millimetres behind it loses airflow and gains noise, because the air leaving the blades has nowhere to spread. As a working rule, give radiator fans the same courtesy you would give any fan: a centimetre or more of open space on the intake side where you can, an unobstructed grille on the exhaust side, and no cable bundles parked in the gap. In top-mount positions the hidden thief is the motherboard’s top edge — tall memory, heatsinks and the CPU power cable all rise into the radiator’s breathing space — so measure that stack as carefully as the case’s headline radiator figure, which was almost certainly recorded with an empty board.
Is it safe to run a cooler with the side panel removed while I wait for a replacement?
As a short, supervised stopgap, yes; as a configuration, no. An open case changes the airflow design completely — most cases are tuned as closed systems, and some components, especially motherboard regulators and drives that relied on directed case air, can run warmer open than closed even as the processor runs cooler. The open panel also invites dust, pets, children and dropped screws into the machine. Run it open for days if you must while a part travels, keep the area around it clear, and treat the episode as what it is: evidence that the clearance budget failed, to be fixed properly with the ladder described in this guide rather than normalised into the machine’s permanent state.
What clearance does the area under the motherboard need?
More than most builders ever check. The backplate and its standoffs occupy a patch behind the socket whose depth is set by the mounting kit, and that patch must be flat and unobstructed: no tray standoff in the wrong hole, no cable routed behind the board, no case panel pressing the plate. A plate held a fraction off flat by an obstruction tilts the coldplate above it, and the symptom — one hot corner of the processor under load, invisible at idle — sends owners chasing paste and fans for a problem that lives behind the board. When a mount misbehaves after a verified-good installation on the front, put this hidden clearance on the suspect list early; it is the only dimension in the whole build that you cannot see without removing the motherboard, which is exactly why it gets forgotten.
Do I need to re-measure clearance after changing only the fans on my cooler?
If the replacement fan differs in thickness or position, yes — a thicker fan or one clipped higher to clear new memory raises the assembly’s summit exactly as surely as a taller heatsink would, and fans are swapped casually in a way heatsinks are not. The check takes a minute: fit the fan, close the panel gently while watching and listening for contact, then run the machine and listen for the buzz that means a frame is kissing the panel at speed. Standard-thickness fans in the standard position change nothing, which is one more argument for standard sizes when you replace a fan on a tight build — the ecosystem’s boring choices are boring because they keep fitting.
Why does my cooler’s box list a height 2mm different from the maker’s website?
Because one of them was printed earlier, measured differently, or describes a different included configuration — a fan fitted or not fitted, a top cover on or off. Manufacturers revise dimension drawings as products are quietly updated, and retail listings copy whichever figure they inherited. When two official numbers disagree, believe the dimension diagram in the current manual over both, because the drawing shows what the number measures to. And when the disagreement is small, let it remind you why the margin exists: if a two-millimetre discrepancy in the maker’s own documents can reach your desk, a build planned to zero clearance was never planned at all.
Treat every published clearance figure, then, as a claim to be verified against your own case with your own ruler — a habit that takes minutes on build day and quietly prevents the single most common category of “it almost fit” stories in the whole hobby.
What is the quickest reliable clearance check I can do in a shop?
Bring the two numbers that matter and one photograph. The numbers are your case’s measured internal height from board surface to panel, taken by you rather than copied from a listing, and the cooler’s true summit from its dimension diagram. The photograph is your motherboard’s socket neighbourhood, which lets you judge the footprint against the shrouds, slots and memory in front of you rather than from memory in a car park later. If the shop stocks your case, even better: staff will often let you stand the cooler beside a display unit. Ninety seconds of that beats an evening of returns, and it is the closest thing shopping has to a test fit.
Keep those two numbers and that photograph in the same note as your build’s other measurements, and every future cooler, memory kit and radiator question starts from evidence you gathered once and can trust for the life of the machine.
That small archive is the difference between a builder who hopes and a builder who knows, and it costs less time than a single avoided return journey ever will.
Start the archive with this build, whatever stage it has reached, and let the next measurement you need be one you already own.
Every builder who keeps such a record says the same thing a year later: the five minutes felt optional at the time and indispensable ever since.
Related Guides
Keep exploring with these guides and roundups from the same CPU-cooling collection: