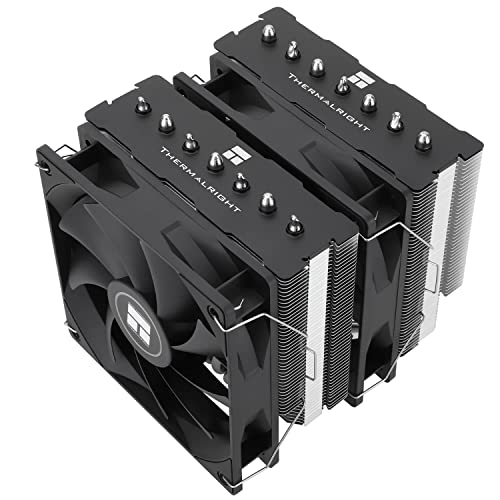
To learn how to check compatibility of a CPU cooler before you buy, verify five separate things: the mounting kit supports your motherboard’s socket, the cooler’s height (or radiator size) fits your case, the fin stack clears your memory, the cooler does not block slots or headers you need, and — for liquid coolers — the radiator and tubes fit without stealing space your graphics card needs. Each check takes a minute with the right specification page open, and together they eliminate the returns-counter surprises that make cooler shopping frustrating.
Compatibility failures are almost never about cooling performance; they are geometry and brackets. This guide gives you the exact numbers to compare and where to find them. It pairs with How to Choose a CPU Cooler for the buying decision itself and CPU Cooler Clearance Explained for the deep dive on measurements.
Disclosure: As an Amazon Associate, ilcastellomenu.com earns from qualifying purchases. Product examples below link to Amazon, where you can check current availability and specifications; this guide itself lists no fixed prices because pricing and bundles change frequently.
Check 1: Socket and Mounting Hardware
The socket is the non-negotiable. If the bracket does not exist for your socket, nothing else matters.
Identify your socket with certainty
Find the socket name in one of three places: the CPU’s specification page (every processor listing states its socket), the motherboard manual’s first pages, or a system-information utility in your OS that reports the exact CPU model, from which the socket follows. Current AMD desktop is AM5, preceded by the long-lived AM4; recent Intel desktop sockets include LGA1851 and LGA1700, with LGA1200/115x in older machines. Write the socket name down — ‘AMD’ or ‘Intel’ alone is not enough, because brackets differ between generations of the same brand.
Confirm the bracket is in the box, not just 'supported'
Cooler product pages list supported sockets, but a cooler manufactured before a new socket launched may need a free or paid mounting kit shipped separately. Check the product page’s compatibility notes and the ‘in the box’ list for your socket’s bracket by name, especially when buying older stock or second-hand — a used cooler with a missing AM5 kit is a common and annoying purchase. Reputable makers publish per-socket kit part numbers, which makes verification a two-minute job.
In this guide
Check 2: Case Clearance for Height and Radiators
Air coolers: height versus case specification
Every case lists a maximum CPU cooler height, and every cooler lists its height with fans fitted. Compare them directly and keep a few millimetres of margin, because side panels flex and specifications are measured to different points by different brands. If the case maker publishes nothing, measure from the CPU’s installed top surface to the side panel with the board fitted — or measure the interior width and subtract the motherboard tray offset the case maker specifies. Our full measurement method is in CPU Cooler Clearance Explained. Tall dual-towers are the usual casualties: flagship air coolers run 160–170mm, beyond many slim cases.
Liquid coolers: radiator mounts, thickness and tubes
For an AIO, find the case’s radiator support list (front/top/rear, and which sizes at each position) and compare radiator length, width and thickness — a thick radiator plus its fans can foul the motherboard’s top edge or memory even when the nominal size ‘fits’. Then check tube length against the distance from socket to mount, and confirm a front-mounted radiator still leaves the graphics-card length your card needs; case makers usually publish GPU clearance with and without a front radiator. The shortlists at Best PC Cases for Water Cooling exist precisely because radiator support varies so much between cases.
Check 3: Memory and Slot Clearance
RAM height under the fin stack
Tower coolers overhang the memory slots, so the figure that matters is the clearance beneath the fin stack (and beneath the front fan, which often sits lower). Compare it with your memory modules’ height: plain low-profile sticks are roughly 30mm, while tall RGB heatspreaders can exceed 50mm. Many dual-tower coolers let the front fan slide up to gain clearance, at the cost of total cooler height — which loops back to Check 2. Some makers publish RAM-clearance diagrams per cooler; use them, and prefer them over forum guesses for your exact board.
PCIe slots, VRM heatsinks and headers
Very wide coolers can crowd the first PCIe slot, which matters if it holds your graphics card or a capture card. Tall motherboard VRM heatsinks and EPS power connectors at the board’s top edge can clash with top-mounted radiators and with the rear of wide towers. Check the cooler’s width and footprint diagram against your board layout photo. Finally, confirm you have the fan headers the cooler needs — a CPU_FAN header within cable reach, and a pump header for AIOs — because a cooler that fits physically but cannot plug in is not compatible either.
Check 4: How to Check Compatibility of a CPU Cooler Using Maker Tools
Manufacturers have automated much of this; use their tools, then sanity-check the result by hand.
Compatibility databases and case lists
Several cooler makers run searchable databases: enter your motherboard model and the tool reports which of their coolers fit, including RAM and slot notes. Case makers publish cooler-height and radiator tables per model. Use both directions — cooler maker for the socket and board fit, case maker for the enclosure fit — because each database only knows its own half of the problem. Where the two disagree, trust the physical measurements you can verify with a ruler.
A worked example
Suppose you have an AM5 gaming board with tall RGB memory in a mid-tower rated for 165mm coolers. Socket check: any current cooler listing AM5 with the bracket in the box passes. Height check: a 168mm flagship dual-tower fails by 3mm before you even consider its front fan sliding up for the tall RAM — which would add several more millimetres and fail harder. The realistic shortlist becomes a 155–162mm dual-tower with published RAM clearance over your modules’ height, or a 240–280mm AIO if the case’s top mount accepts it. That is the whole method: five checks, arithmetic, no drama. Shortlists built on the same logic are at Best CPU Coolers for Ryzen and Best CPU Coolers for Am4 for AMD builds.
Common Compatibility Mistakes
Assuming brand loyalty implies fit
A cooler from the same brand as your old one does not inherit compatibility: sockets change, and a five-year-old cooler may lack brackets for a current board even from the same maker. Check the socket list every time.
Measuring the case, not the clearance
Exterior case width tells you nothing; what matters is the internal distance from CPU surface to panel, minus tray and cable-management depth. Use the maker’s stated CPU-cooler clearance figure, or measure the built system, never the box dimensions.
Forgetting the upgrade path
If you plan a memory upgrade to taller RGB modules or a longer graphics card later, a cooler that fits today’s parts with zero margin may block tomorrow’s. Leave headroom where you can — the same advice our choosing guide, How to Choose a CPU Cooler, gives when it suggests matching the cooler to the hottest CPU you realistically plan to run.
Compatibility When Building Around a Specific CPU
The five checks generalise, but certain popular CPUs concentrate the pitfalls. These patterns recur constantly in builder questions.
High-end chips on compact boards
Flagship CPUs often land on compact high-end boards whose VRM heatsinks are tall and whose first PCIe slot sits close to the socket. Wide dual-tower coolers that fit the socket on paper can foul the slot or the heatsinks in three dimensions. For these builds the cooler maker’s per-board compatibility database is not a courtesy but the deciding document — check your exact board model, and favour coolers with published offset designs or narrower footprints. The same boards appear throughout the shortlists for chips like those in Best CPU Coolers for Ryzen 9 5900x, where cooler width is a recurring filter.
Reusing an older cooler on a new platform
The heatsink does not age, but its bracket box does. A cooler from two platforms ago may support your new socket only via a kit the maker sells or supplies separately — and second-hand examples routinely lack it. Verify three things: the kit exists, it is obtainable now (not ‘coming soon’), and its cost does not erase the saving of reusing the cooler. Also confirm the old cooler’s capacity suits the new chip: platform upgrades usually raise heat output, and a cooler that was generous for its original CPU can be marginal for its successor.
A Ten-Minute Compatibility Worksheet
Run these in order with the specification pages open. Each line is a number or a yes, and any ‘no’ stops the purchase before money moves.
The worksheet, line by line
Line one: socket name, from the CPU specification — and the cooler lists it, with the bracket in the box. Line two: cooler height against case maximum, margin of at least a few millimetres. Line three: memory height against the cooler’s under-fin clearance, in the fan position you will actually use. Line four: cooler footprint against the board’s first PCIe slot and VRM heatsinks, from the maker’s diagram. Line five (liquid only): radiator size, thickness and tube length against the case’s radiator table and your graphics card’s length. Line six: headers — CPU_FAN within reach, pump header present. Six lines, ten minutes, and the cooler that arrives is the cooler that fits — which is the entire promise of the method this guide, and its companion How to Choose a CPU Cooler, exist to deliver.
Compatibility Traps in Popular Build Archetypes
Certain fashionable build types concentrate compatibility risk. If yours is one of these, run the five checks with extra care — the traps are known and named.
The all-white and RGB showcase build
Showcase builds stack the three most common clearance hazards at once: tall RGB memory (the tallest modules made), a flagship dual-tower or a large radiator chosen for looks, and a case selected for its glass rather than its dimensions. Each hazard is manageable alone; together they consume every millimetre of margin in three directions simultaneously. The discipline that saves these builds is ordering: choose the case for verified clearances first, the cooler second, and the memory last, with each part’s published figures checked against the parts already chosen. Aesthetics chosen in that order survive contact with physics; aesthetics chosen by moodboard get returned.
The reused-case upgrade
Upgrading a CPU and motherboard inside an existing case imports an unknown: the case’s clearance figures may predate modern coolers, its radiator mounts may not exist, and its front panel may strangle any cooler’s intake. Measure the actual case — cooler height from the built board, radiator positions that physically exist, GPU length as built — rather than trusting a decade-old product page. The reused case is a fine economy when its measurements pass, and a false one when a new cooler must be chosen from the shortlist of things that fit a box designed for another era. Measure first, and let the numbers make the decision.
The prebuilt with proprietary bones
Some prebuilt desktops use non-standard motherboard layouts, proprietary power supplies and cases with minimal clearance, and their cooler compatibility is a research project of its own. Before ordering anything for such a machine, confirm the board’s mounting holes are the standard pattern for its socket, that the case offers real clearance, and that the power supply can support any added fans or pump. If the answers are murky, a modest tower known for compact dimensions is the safer upgrade path — and in some proprietary cases the honest verdict is that the cooler is not upgradable, which is information worth having before money moves.
Gear for This Guide
The examples below come from our Creators-API-verified product pool and illustrate the cooler classes discussed in this guide. They are examples, not a ranked list — use the criteria in this article to judge any model, including newer revisions.
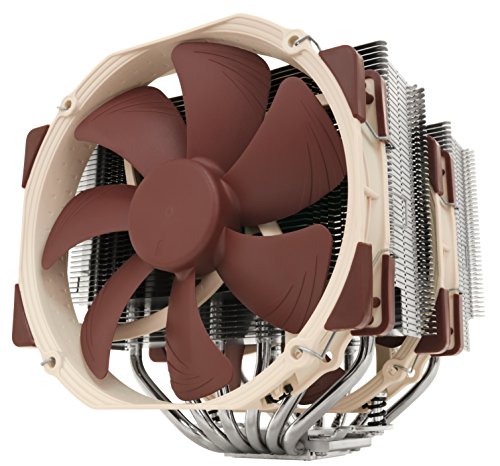
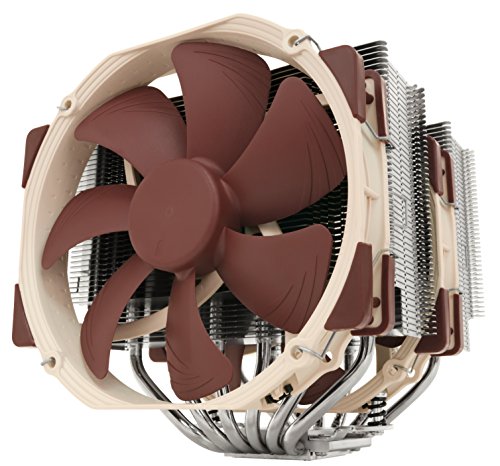
Noctua NH-D15
Its published 168mm height and detailed memory-clearance diagrams make it the perfect compatibility exercise: a superb cooler that simply does not fit every case or every RAM kit. Noctua NH-D15 — Check on Amazon

Cooler Master Hyper 212 Black II
At 152mm tall with a slim single tower, this is the shape that passes almost every mainstream case check — a useful contrast when your measurements come back tight. Cooler Master Hyper 212 Black II — Check on Amazon
how to check compatibility of a CPU cooler: The Short Version
Five checks, all published numbers: socket, height or radiator, memory, slots and headers, and the combined configuration. Ten minutes with specification pages open is the difference between a build and a return.
The Compatibility Checks Nobody Lists: Clearances Beyond the Socket
Socket, height and memory are the famous checks, and the base checks in this guide cover them. The incompatibilities that actually ambush experienced builders tend to live elsewhere on the board. Start with the voltage-regulator heatsinks that surround the socket on modern motherboards. Premium boards wear tall, sculpted VRM cooling, sometimes with a decorative shroud that extends well above the board surface, and a wide dual-tower’s fin stack or a liquid block’s fittings can foul that shroud even when every published dimension says the cooler fits. The published dimensions describe the cooler in empty space; your motherboard is not empty space. Compare the cooler’s footprint diagram — most makers publish one showing the outline the cooler occupies around the socket centre — against your board’s layout photo, and pay attention to anything tall within that outline: VRM heatsinks, the rear I/O cover, tall capacitors, and the first M.2 heatsink, which on some boards sits close enough to the socket to meet a mounting bar.
Check the back of the board as well. A backplate needs a flat, unobstructed patch behind the socket, and some compact boards place components, an M.2 slot or a reinforcing plate exactly there. Cases complicate this further: the motherboard tray’s CPU cutout must actually align with your board’s socket position, which is not guaranteed on unusual layouts, and a missing or misaligned cutout turns a simple bracket job into a motherboard removal. While you are looking at the tray, confirm there is depth behind it for the backplate’s thickness plus any standoff height, because a plate pressed against the tray or a side panel can tilt the whole mounting stack by the fraction of a millimetre that later shows up as an uneven paste imprint and one hot corner of the chip.
Vertical graphics cards, risers and other modern furniture
Contemporary builds contain furniture that older compatibility advice never met. A vertically mounted graphics card on a riser cable sits parallel to the motherboard, directly in the space a tall tower cooler’s intake fan wants to breathe from, and in tight cases the card’s backplate can sit millimetres from the fins — thermally legal, acoustically and thermally miserable. Thick flagship graphics cards in the conventional orientation reach upward toward the socket from below; a wide tower overhangs the top slot on some boards, which matters if the card needs to live in that slot rather than the second one. Even cable combs, strimer-style lighted cables and chunky 12V power connectors for the graphics card compete for the corridor beside the cooler. None of these appear in a cooler’s specification, so walk your intended build in your head, component by component, and ask of every part not “does it fit” but “what does it stand next to, and what does that neighbour do to its air and its access.”
Electrical Compatibility: Headers, Power and Control
A cooler is also an electrical device, and its connections must match what your board offers. The baseline is simple — a four-pin PWM fan belongs on the CPU_FAN header — but liquid coolers and feature-rich air coolers ask for more. A pump wants a header that can deliver its current draw continuously and, ideally, run at a constant full or fixed speed rather than following a fan curve designed for a fan; many boards label this AIO_PUMP or CPU_OPT and rate it for higher current, and plugging a pump into a low-rated header shared with fans can underpower it or overload the header. Coolers with displays, lighting controllers or USB-connected screens need an internal USB 2.0 header, a resource that is suddenly scarce once a case front panel, a lighting hub and a liquid cooler all want one. Count your internal USB headers the way you count fan headers, before ordering, and remember splitters exist for USB in a way they meaningfully do not for pump power.
Control compatibility matters after everything powers on. A PWM fan on a header locked to DC voltage mode will run, but at speeds the board cannot govern precisely, and some boards auto-detect wrongly. A pump’s tachometer signal needs a header that reads it, or the board may report a fan failure and refuse to boot — a protective feature that becomes a compatibility bug when the pump is wired to a header the BIOS does not monitor. Check your board’s BIOS options for which headers can be set to full-speed, PWM or DC, and which one the CPU-fan warning watches, then plan the wiring to satisfy the strictest of those rules. The five minutes this takes at the planning stage replaces the miserable hour of swapping cables in a finished build that will not POST because it believes — incorrectly but firmly — that it has no cooler at all.
Lighting ecosystems are a compatibility question too
If your cooler carries addressable lighting, its connector speaks one of two dialects — the three-pin 5V addressable standard or the older four-pin 12V standard — and they are not interchangeable, physically or electrically. Plugging a 5V device into a 12V header can destroy the lighting outright. Boards vary in which they offer, cases add hubs that convert or complicate, and software ecosystems add a second layer: a cooler whose lighting only fully works inside its maker’s software may sit dark or rainbow-defaulted in a build standardised on another platform. Decide whether you care before the build, because the honest options are matching the ecosystem, accepting the default effect, or choosing the unlit version of the same cooler and spending the difference on fins and fans instead.
Compatibility Across Time: The Cooler You Keep for Three Builds
A heatsink can outlive the platform it was bought for, which makes future compatibility a present-day check. The mechanism is the mounting kit: when a new socket arrives, the cooler fits it if the manufacturer designs and supplies a bracket, and makers differ enormously in how long and how generously they support old models. Before buying, read the maker’s track record the way you would read any support promise — do they list kits for the previous two socket generations for coolers of your model’s age, are the kits free, paid or unobtainable, and does the product page name your exact cooler as eligible? A cooler from a maker with a decade-long habit of free brackets is a different purchase from an identical-performing cooler whose maker abandons each model at the next launch.
Protect your own future options with small habits. Keep every unused bracket, standoff and screw from the box, labelled, because the kit you need in four years may be the one you nearly threw away today. Register the product if the maker ties kit eligibility to registration. Photograph the mounting hardware laid out with the socket names from the manual, so a future you — or a buyer, if you sell the cooler — can identify parts without archaeology. And when you plan a platform upgrade, check cooler support for the new socket before you check anything else about the build, because a cooler that carries over is money that moves to the processor or graphics budget, while a cooler that does not fit is an unplanned purchase discovered at the worst possible moment: with the new board already on the desk.
Verifying With Real Builds Instead of Only Datasheets
Manufacturer compatibility lists are necessary and incomplete: they certify socket support and headline dimensions, not your specific combination of board, memory, case and card. The second source is the community’s build record. Search for your exact motherboard and cooler together, and your exact case and cooler together, and read what builders report — the phrases that matter are the small confessions: “front fan raised 5mm for RAM,” “fits with the rear I/O shroud removed,” “radiator only fits up top with low-profile memory.” Completed-build galleries with photographs are worth more than forum opinions, because a photo of your cooler sitting on your board in your case is empirical evidence no datasheet can match. Treat a total absence of results as information too: a combination nobody has documented may be fine, but it carries first-discovery risk, and if your schedule cannot absorb a return and a rethink, choose the pairing that a hundred strangers have already proven boring.
Retailer tools deserve the same calibrated trust. Automated compatibility checkers catch the gross errors — wrong socket, cooler taller than case — reliably, and they are a sensible final pass over a parts list. They do not model VRM shrouds, raised front fans or radiator-plus-fan thickness, and their databases lag new products. Use them as a smoke alarm, not as a structural survey: if they complain, investigate; if they approve, your own worksheet from this guide still governs. The builders who never have fit problems are not the ones with the best tools — they are the ones who treat every tool’s approval as provisional until a tape measure or a photograph confirms it, a discipline the shortlists behind the best CPU coolers for AM4 and other socket-specific roundups assume their readers will apply to their own exact boards.
One Build, Three Traps: A Worked Compatibility Audit
Watch the checks earn their keep on a plausible parts list: a high-end processor on a premium board with tall VRM shrouds, tall RGB memory, a flagship graphics card, and a compact mid-tower case, cooled by a flagship dual-tower. The socket check passes instantly — the bracket is in the box. The height check passes by the datasheet, with 4mm to spare. Then the audit deepens. The memory check fails quietly: the sticks are tall enough that the cooler’s front fan must rise 8mm to clear them, and those 8mm consume the case margin twice over, so the combination as listed does not close its side panel. The footprint check fails differently: the board’s I/O shroud stands inside the cooler’s outline, and the fin stack would rest against it, tilting the mount. The electrical check passes, the future-support check passes, and the community search delivers the verdict — two photographed builds of this exact board and cooler, both using low-profile memory, one noting the shroud contact and solving it by choosing the cooler’s narrower sibling.
The fixes cost nothing because nothing has been ordered: low-profile memory of the same capacity and speed, and a cooler variant a few millimetres narrower that performs within a degree of the flagship. That is the entire argument for the audit. Every trap in this build was invisible to the socket check, visible to ten minutes of deeper checking, and expensive only in the version of events where the boxes arrive first and the thinking happens second.
Ordering Strategy: Sequence Your Purchases Around the Risk
When a build’s compatibility carries any doubt, let the order of purchase absorb the risk. Buy the case, motherboard and memory first — the fixed geometry — and the cooler after you can measure the real assembly, or buy the cooler from a retailer whose returns process you have actually read, and keep its packaging pristine until the dry-fit passes. Dry-fit means the bracket stack assembled and the cooler seated by hand pressure with the board out of the case, fans clipped on, memory in place: ten minutes that convert every remaining doubt into an observation while a return is still painless. If you are upgrading one machine rather than building anew, the same logic shrinks to a single rule — never sell, give away or discard the old cooler until the new one has been fitted, booted and load-tested, because the old cooler is your insurance policy, your diagnostic spare and your fallback, all in one finned lump of aluminium.
Compatibility for Liquid Coolers: The Radiator Is Only Half the Question
Liquid adds a second body to fit, and builders who check the radiator mount and stop there meet the rest of the geometry at installation time. Begin with thickness as a stack, not a number: radiator plus its fans must fit the space, and at a top mount that stack hangs down toward the motherboard, where it can meet tall memory, VRM heatsinks and the 8-pin CPU power cable whose connector stands tall at the board’s top edge. A combination that fits with the fans in pull may foul with them in push, so decide the fan side before declaring victory. Continue with the tubes: their length fixes the distance the block can be from the radiator, their stiffness fixes how tightly they can bend, and their exit direction from the block decides whether they arc gracefully or press against the first memory slot. A front-mounted 360mm radiator in a long case cooling a processor on a board whose socket sits high can be a genuine stretch, and “the radiator fits the case” says nothing about it.
Then check the block itself against the same crowded socket neighbourhood as any air cooler — VRM shrouds, I/O covers, the top M.2 heatsink — with the added detail that many blocks are wider than they look because the fittings and tube exits extend the footprint on one or two sides, sometimes rotatable, sometimes not. Finally, plan the pump’s electrical home and the radiator fans’ cabling route as part of fit, because a cable that reaches only by crossing the fin area under tension has not really reached. Liquid compatibility is a route-planning exercise as much as a measuring one: two bodies, two tubes, three cables, and every centimetre of every path accounted for before the box is opened.
When the answer is genuinely “it depends”: test-fit etiquette
Some combinations cannot be settled from documents at all — an unusual board layout, a brand-new case, a cooler with no photographed builds. In that territory the test fit is the research, and it has an etiquette that keeps it reversible. Buy from a seller whose returns accept a carefully opened box. Handle the cooler by its edges, leave protective films in place until the geometry is proven, keep every bag and screw in order, and never apply paste or peel a coldplate film for a fit check — a dry seat by hand pressure answers every dimensional question. If it fails, the cooler goes back indistinguishable from new, which is fair to the seller and to the next buyer. If it passes, you proceed with the confidence of someone who has not read about the fit but has seen it, in their own case, with their own board — the strongest form of compatibility evidence there is.
Keep a Compatibility Record for the Machine You Own
The last check is one you create yourself. When the build is finished and everything fits, spend three minutes recording the clearances as they actually turned out: cooler height against the panel, front fan position relative to the memory, radiator stack against the board’s top edge, the tightest cable bend. A note with the build’s photographs turns your machine from a mystery into a documented system. Every future upgrade question — will a taller memory kit fit, can the radiator move to the front, is there room for a thicker graphics card — gets answered from your own measurements instead of fresh guesswork, and if you ever sell the machine, that record is the difference between a confident listing and a shrug. Compatibility work feels like friction before a build; done once and written down, it becomes an asset that pays out for the entire life of the PC.
Frequently Asked Questions
How do I find out what socket my motherboard has?
Check the CPU’s specification page — every processor listing states its socket — or the motherboard manual’s opening pages, or a system-information utility that reports your exact CPU model, from which the socket follows. Write the full socket name down; ‘AMD’ or ‘Intel’ alone is not specific enough, because brackets differ between generations.
What if a cooler supports my socket but the bracket is not in the box?
This happens with older stock bought after a new socket launched. Reputable makers supply mounting kits separately, sometimes free on proof of purchase. Verify the kit exists and its part number before buying the cooler, and be especially careful with second-hand coolers, which often arrive missing exactly the bracket you need.
How much clearance margin should I leave?
A few millimetres between the cooler’s height and the case’s stated maximum. Specifications are measured slightly differently by different brands, side panels flex, and a front fan may need to slide up to clear memory — which adds height. A cooler that ‘exactly fits’ on paper often does not fit in the case.
Can a cooler block my RAM or graphics card?
Yes, in three dimensions: wide towers overhang the first memory slots (compare under-fin clearance with your modules’ height), very wide coolers can crowd the top PCIe slot, and front radiators consume graphics-card length. Check the maker’s footprint and clearance diagrams against your specific board, not just the socket list.
Are manufacturers' compatibility databases reliable?
They are the best starting point — cooler makers test against real boards and case makers publish per-model limits — but check both directions, because each database only knows its own half of the problem. Where two sources disagree, trust measurements you can verify with a ruler on your own hardware.
Does an AIO need a special motherboard header?
It needs a header for the pump that can run at constant full speed (often labelled AIO_PUMP or CPU_OPT) plus CPU_FAN for the radiator fans. Almost all modern boards provide suitable headers, but confirm locations and reach before buying — a pump cable that cannot reach its header is a compatibility failure just as surely as a missing bracket.
The cooler fits my socket but the screws do not reach the backplate. Is it incompatible?
Usually it is assembled wrong rather than incompatible. Screws that will not reach almost always mean a standoff of the wrong height is in the stack — kits include near-identical spacers for different socket generations — or the backplate is oriented so its threaded inserts sit recessed instead of raised. Strip the stack back to the plate, rebuild it against the manual’s diagram for your exact socket name, and confirm each standoff’s height matches the drawing. If a screw still falls short with the verified stack, then you have a genuine mismatch, and the manufacturer’s support line, with your board model in hand, is the fastest route to the correct kit.
Can I trust a cooler maker’s “fits all sockets” claim on the box?
Trust it as a claim about the sockets that existed when the box was printed, with the brackets included in that box. Sockets launched later need kits designed later, and a warehouse-fresh-looking box may have sat on a shelf through two socket generations. The product page on the maker’s website, which is updated as kits appear, is the living document; the box is a snapshot. Check the page for your socket by name, and if a kit is required, confirm whether it ships in the box, ships free on request, or must be bought — three very different meanings of the word “supports.”
My case lists a maximum cooler height that my cooler exactly matches. Should I buy it?
Treat an exact match as a fail. Published case clearance and published cooler height are both nominal figures with tolerances, the side panel may bow slightly inward, a raised front fan for tall memory adds height neither figure includes, and a cooler that touches the panel transmits fan vibration into a large sounding board inches from your ear. Keep a working margin — a few millimetres at minimum, more if your memory will force the fan upward. If the cooler you want cannot have its margin, the case is telling you to choose a different cooler, and it is cheaper to listen now than after the panel refuses to close.
I am only upgrading the cooler in an existing PC. Which checks can I skip?
Fewer than you would hope, but they get faster. The socket check becomes a records check, because you know your board — still confirm the new cooler’s kit names your exact socket rather than its family. Height, memory and footprint checks all still apply in full, because the new cooler has different dimensions from the old one in exactly the places that matter, and your case and memory have not changed to accommodate it. You can skip the parts-list archaeology: the machine is in front of you, so measure the real clearances directly with the old cooler removed, including the space behind the tray for a new backplate. An upgrade measured in the metal takes ten minutes and beats an evening of datasheet comparison, with the old cooler sitting by as your guaranteed fallback if a measurement says no.
Do I need to check compatibility again if I only change my memory or graphics card later?
Yes, in miniature, because both parts live in the cooler’s neighbourhood. Taller memory can collide with a front fan that cleared your old kit, and the standard fix — raising the fan — consumes case height you may not have. A thicker or longer graphics card can meet a wide tower’s overhang or steal the fresh air a vertical mount depends on. The check is quick precisely because your baseline has not changed: compare the new part’s dimensions in the one or two directions that face the cooler, and consult the compatibility record you kept from the original build. Two minutes of comparison now is the whole cost; the alternative is discovering the collision with both purchases already open.
What is the single most overlooked compatibility check of all?
The space behind the motherboard tray for the backplate, and it wins the title because no headline specification mentions it. Builders verify the glamorous dimensions — socket, height, radiator size — and then discover at installation that the case’s CPU cutout is smaller than the plate, offset from the socket, or backed by a panel so close that the plate and its standoffs cannot sit flat. Every other incompatibility announces itself in a product photo or a dimension table; this one hides behind the board until the build is half assembled. Look behind your tray before you order, and the most overlooked check becomes the one you never have to think about again.
Add that one look behind the tray to your worksheet today, and it joins the short list of checks that have never once been a waste of the minute they take.
The same is true of the footprint overlay and the header count: small checks, done early, that quietly decide whether build day feels easy or feels cursed.
Write them on the worksheet rather than trusting memory, because a build assembled months after the planning will not remember what a hopeful builder once assumed, while a written measurement can be checked in seconds and trusted completely.
Related Guides
Keep exploring with these guides and roundups from the same CPU-cooling collection: