Disclosure: As an Amazon Associate, ilcastellomenu.com earns from qualifying purchases. Product examples below link to Amazon, where you can check current availability and specifications; this guide itself lists no fixed prices because pricing and bundles change frequently.
Knowing how to upgrade a gaming PC in the right order saves more money than any sale: diagnose the actual bottleneck, fix the cheapest limiting component first, and let each upgrade reveal whether the next is even necessary. Most PCs do not need everything replaced — they need one or two targeted changes, made in the right sequence, and this guide gives you that sequence with the reasoning behind it.
The golden rule is to upgrade against evidence, not vibes. Before spending anything, watch your system under load in your main game: if the graphics card sits at near-full utilisation while the CPU idles, the GPU is your ceiling; if the GPU waits around while one CPU core is pinned, the processor is. Free monitoring tools built into Windows and your graphics software show all of this. With that observation in hand, the ladder below tells you where your money goes first.
How to Upgrade a Gaming PC: The Priority Ladder
For a typical ageing gaming PC, the order of impact per cost runs: storage first if you are still on a hard drive, RAM second if you are below 16 GB, graphics card third for frame rates, then cooling and power to support bigger steps, and CPU-plus-motherboard last because it is effectively a rebuild. Each rung is independent — stop whenever the machine feels right again. Players coming from an old office machine will find the same logic applies there too — a modest base can go surprisingly far.
Why Diagnosis Beats the Ladder When They Disagree
The ladder is a prior, not a command. If your monitoring shows the CPU limiting your favourite simulation game, the CPU rung jumps the queue regardless of what a generic list says. Upgrade money spent on a non-bottleneck buys benchmark numbers in tools you do not play and nothing in the games you do. Write your utilisation observations down before shopping; they are the brief your purchase has to answer.
In this guide
Upgrade 1: Storage — The Hard Drive Replacement
If your games or Windows still live on a mechanical hard drive, an SSD is the highest-impact upgrade in all of PC gaming relative to its cost and effort. Load times collapse, open-world stutter from asset streaming eases, and the whole machine feels newer. An NVMe drive is ideal where the motherboard supports it; a SATA SSD is still a transformation over spinning rust. Clone your existing drive with the maker’s free tool or install Windows fresh — fresh installs are the cleaner start if your current system is years old and cluttered.
Practical notes: check your motherboard’s M.2 slots and whether populating one disables a SATA port (a common quirk worth knowing before, not after), keep the old hard drive as bulk storage for recordings and libraries, and remember that game installs have grown enormous — capacity discipline today is regret tomorrow. The Samsung and WD_BLACK drives in the gear section are the class of part this rung calls for.
Upgrade 2: RAM — Capacity, Then Configuration
Below 16 GB, adding memory is cheap and immediately felt, especially if your system currently leans on the page file mid-game. Two subtleties matter more than the headline capacity: run memory in matched pairs so it operates in dual-channel mode, and match the new sticks’ speed and timings to your existing ones or replace the set outright. The full reasoning — including when 32 GB genuinely helps — is in How Much Ram does a Gaming PC Need.
Check before buying: your motherboard’s supported memory generation (DDR4 and DDR5 are physically incompatible), the number of free slots, and any height clash between tall memory heat spreaders and a large CPU cooler. These are five-minute checks that prevent the most common upgrade-day disappointment in this entire guide.
Upgrade 3: The Graphics Card — The Frame-Rate Lever
When frame rates are the complaint and monitoring confirms the GPU is the ceiling, this is the upgrade that moves them. Choose the new card against your monitor’s resolution using What GPU does a Gaming PC Need, then verify three physical things before ordering: the card fits your case’s length and thickness limits, your power supply meets its wattage and connector requirements, and your CPU is not so old that it will strangle the new card at your resolution — at higher resolutions the GPU does more of the work, which forgives older processors.
Installation is the friendliest surgery in PC building: power off, unplug, remove the old card’s power connectors and bracket screw, release the slot latch, seat the new card firmly, reconnect power, and install fresh drivers — ideally after removing the old ones with a proper cleanup if you are switching GPU brands. Keep the old card until the new one has survived a week of your games; it is both your fallback and your diagnostic spare.
Upgrade 4: Cooling and Power — The Enablers
Stronger components run hotter and hungrier, and two supporting upgrades quietly decide whether headline upgrades succeed. If temperatures climb and fans roar after a GPU swap, your case airflow or CPU cooler is the limiter — How to Cool a Gaming PC covers fan layout, cooler classes and the diagnostic order, and How to Fix a Gaming PC that Overheats handles the acute version of the problem. Treat cooling as performance equipment, because a throttling component is a slower component than the one you paid for.
Power is the other enabler, and the one never to bargain with. If a new graphics card’s requirements approach your power supply’s rating, replace the supply first, with a reputable unit and headroom to spare. A failing or overloaded PSU produces the most confusing symptoms in PC ownership — random shutdowns under load that mimic every other fault — and risks the components around it. This is also the moment the air-versus-liquid cooling comparison becomes practical rather than theoretical, since a cooler upgrade often rides along with a card upgrade.
Upgrade 5: CPU and Motherboard — Knowing When It Is a Rebuild
A processor upgrade may be a drop-in if your motherboard supports a stronger chip on the same socket — the best-value move in this whole guide when available. When it is not, CPU, motherboard and often RAM change together, and honesty requires calling that what it is: a new build reusing your case, storage, power supply and graphics card. That is not a failure of the upgrade path; it is its natural final stage, and the selection method in How to Choose a Gaming PC applies to the new core exactly as it did to a whole machine.
Sequence a platform upgrade carefully: back up your data, note that Windows may need reactivation on a new motherboard, and budget an evening rather than an hour. And throughout every rung of this ladder, keep the discipline that started the guide — retest your main game after each single change, record the improvement, and let evidence, not enthusiasm, authorise the next purchase. Players who upgrade this way routinely get flagship-feeling machines out of mid-range budgets, one honest step at a time; complete-system comparisons like Best Gaming PC Build Under 2000 show what the fully assembled version of that patience looks like.
Compatibility Checks That Save the Weekend
Most upgrade misery is a compatibility detail discovered at midnight with the case open, so run the boring checks while the parts are still in their boxes. Graphics card: length and slot thickness against your case’s clearance, and the power connectors your supply actually has — adapters are a compromise, not a plan. Cooler: height against the case, footprint against the memory slots and the motherboard’s top slot. Storage: whether your board’s M.2 slot shares bandwidth with a slot you are using, which the manual states plainly and nobody reads. Memory: generation, and the board’s tested-vendor list if you are chasing high speeds.
Keep the old parts until the new ones have survived a week, keep the new parts’ boxes until the return window closes, and photograph your cable layout before disturbing it — a thirty-second insurance policy that has saved many builders an evening of reconstruction. Work on a clear table, ground yourself by touching the case’s metal regularly, and keep screws in a dish rather than in the carpet’s custody. Upgrading is a gentle craft; nearly all of its disasters are haste wearing a disguise.
The Software Half of Every Upgrade
Hardware changes ripple into software, and planning for it separates a smooth upgrade from a haunted one. A graphics card swap wants fresh drivers, ideally after a proper removal of the old ones when changing brands. A platform swap wants a Windows plan: backup first, expect reactivation, and consider the clean install that a new motherboard honestly deserves. A storage upgrade wants a cloning tool or a fresh-install decision made before the drive is in your hand, plus a check that the boot order and the drive’s firmware are current afterwards.
After any upgrade, validate like a reviewer for one session: temperatures under load, memory running at its rated profile and channel mode, the new drive’s reported health, and your main game’s performance against the ‘before’ numbers you recorded. That last comparison is the point of the whole exercise — if the bottleneck you diagnosed has not moved, your diagnosis was wrong, and the time to learn that is while returns are still possible, not at the next upgrade. Write the new baseline down; it is the first page of the next upgrade’s brief.
Knowing When to Stop Upgrading
Every platform has a horizon, and wisdom includes seeing it. When the next meaningful step requires a new motherboard — and with it, new memory and a processor — the upgrade has become a build, and it should be priced and judged as one, against the complete machines in the system roundups. Sentiment is the trap here: a beloved case and a history of successful upgrades can keep a platform on life support long past the point where a fresh foundation serves better. The honest test is cost per year of good service ahead, and by that measure even a faithful machine eventually earns its retirement — ideally as a second PC, a server or a hand-me-down, where its remaining strengths still matter.
A Worked Example: Reviving a Five-Year-Old Build in Stages
A real upgrade story, compressed. The machine: a five-year-old gaming PC, respectable when built, now stuttering in current titles and slow to load anything. Its owner budgets for a graphics card because that is the famous upgrade. The diagnosis says otherwise: monitoring shows the GPU waiting while the system pages to a nearly full hard drive, and memory sits at 8 GB, permanently pressed. The famous upgrade would have bought frame rates the rest of the machine could not deliver.
Stage one follows the evidence instead: an NVMe SSD (the board has the slot) and a matched memory pair bringing the system to the comfortable tier. The transformation is out of proportion to the spend — loading collapses, the stutter from streaming disappears, and the old graphics card, finally fed properly, reveals it had more to give. The owner plays happily for a season on a machine that feels new, at a fraction of the planned budget, and banks the difference.
Stage two, a year later, is the graphics card — now genuinely the bottleneck, now installed into a system that can honour it, with the power supply checked and found adequate with headroom. The two-stage path cost roughly what the one-stage GPU purchase would have, spread across a year, and delivered two transformations instead of one disappointment. It is the ladder’s whole philosophy in one household: evidence first, cheapest limiting factor first, and the patience to let each upgrade argue for or against the next.
Diagnosing the Bottleneck Before Spending Anything
Every upgrade decision in this guide’s ladder assumes you know which component is actually limiting your games, and that knowledge is cheaper to get than any part. The method is observation under load. Play your most demanding game with a monitoring overlay showing GPU usage, CPU usage per core, memory use and temperatures. If the GPU sits near full utilisation while the CPU cruises, the graphics card is the wall and everything else is scenery. If the GPU idles at partial load while one or two CPU cores are pinned, the processor is feeding frames too slowly, and a GPU upgrade would buy you a more expensive view of the same limit.
Memory and storage announce themselves differently. A system that stutters when entering new areas, with the drive light or usage graph spiking in time with the hitches, is streaming assets too slowly — storage or memory capacity, not raw compute. A system whose frame rate decays over a long session while temperatures climb is thermal, and the upgrade it needs is cooling or cleaning, not silicon. Each symptom has a signature; learn to read them and the ladder in this guide becomes a diagnosis rather than a shopping list.
Do the observation in the games you actually play, at your settings, because bottlenecks are personal. A strategy player and a shooter player can own identical PCs and be limited by opposite components. Benchmarks describe the average machine; your overlay describes yours, and upgrades bought from your own data are the ones that feel like magic — because they were aimed.
The Order of Operations: Sequencing Upgrades Across Months
Few players upgrade everything at once, so the practical question is sequencing: which order turns a series of small purchases into a coherent machine rather than a pile of bottlenecks taking turns. The governing principle is to upgrade the limiting component first, then re-diagnose, because each fix promotes a new component to the position of limit — and that is success, not failure. A PC that is always limited by something is simply a PC; the art is ensuring the limit sits where frames are cheapest.
Mind the dependencies while sequencing. A GPU upgrade may require the power supply first if the current unit lacks the wattage or connectors; treat the PSU not as a separate upgrade but as part of the GPU’s true cost and schedule. A platform upgrade — CPU, motherboard and possibly memory together — is a single event wearing three boxes, and it should be planned as one, with the operating system reinstall and data migration scheduled into the same weekend. Storage and memory upgrades are the flexible fillers: cheap, quick, reversible, and schedulable whenever a gap in the plan or the budget appears.
Keep a written upgrade log with dates, parts and the diagnosis that justified each step. It sounds bureaucratic until the day you sell the machine, troubleshoot a weird interaction, or try to remember whether the memory was bought as a matched kit. The log also disciplines the habit: an upgrade that cannot be justified in one written sentence — ‘GPU at 99 percent, CPU at half, frames below target’ — is an upgrade to postpone.
Power Supply: The Upgrade That Enables All the Others
The power supply is the least glamorous component in any upgrade plan and the one most likely to veto it. Before any GPU or platform upgrade, establish three facts about your current unit: its rated wattage, its age, and its connector inventory. A quality unit with headroom is a foundation you can build on for a decade; a bargain unit already near its limit is a ceiling on every ambition, and replacing it is not wasted money — it is the purchase of every future option at once.
Judge quality by evidence, not by the wattage number alone. Reputable manufacture, modern protections and honest ratings matter more than a large figure on an unknown label, because a PSU’s failure mode is not merely stopping — it is stopping badly, in ways that can take other components with it. This is the one component where the cheap option carries asymmetric risk, and experienced builders’ conservatism here is not snobbery; it is actuarial.
When you do replace it, buy for the next upgrade as well as this one: sensible headroom above your calculated load, the connectors your likely next GPU will want, and cabling that suits your case. A PSU bought with headroom is bought once per decade; a PSU bought exactly to size is bought with every GPU. Few components repay foresight this directly.
Selling, Donating and Recycling the Parts You Replace
Every upgrade produces a small pile of displaced hardware, and what you do with it is part of the upgrade’s real economics. Working parts have value: the old GPU is the component most likely to fund a meaningful share of its replacement if sold promptly, because graphics cards depreciate on a schedule set by product launches, and a card sold this month is worth more than the same card sold after the next launch. Clean it, photograph it honestly, keep the original box if you have it, and describe its history plainly — buyers pay for confidence.
Parts that are not worth selling are often worth donating. A retired SSD, memory kit or entry GPU is a transformative upgrade for a school machine, a younger sibling’s first build or a community project, and the hand-me-down chain is how many players got their start. Wipe drives properly before they leave your hands — a secure erase, not a quick format — because your old data should not become someone else’s discovery.
What genuinely cannot be reused should be recycled as e-waste rather than binned, and batteries and damaged components especially so. Build the disposal into the upgrade weekend’s plan rather than letting a drawer of dead hardware accumulate into a problem you bequeath to a future house move. The upgrade habit is a cycle: diagnose, replace, rehome. Completing the cycle is part of doing it well.
The Software Aftermath: Drivers, BIOS and Fresh Starts
Hardware is only half an upgrade; the software half decides whether the new part performs or merely functions. A GPU change wants a clean driver installation — old drivers removed properly, current drivers installed fresh — because driver stacks remember previous hardware in ways that produce exactly the stutters and crashes owners blame on the new card. A platform change wants more: current chipset drivers, a BIOS version that supports the new CPU properly, and memory settings verified rather than assumed, because a new kit running at default speeds instead of its rated profile is an upgrade you paid for and did not receive.
Decide deliberately between migrating your existing Windows installation and starting fresh. Migration preserves your world and carries its accumulated cruft; a fresh install costs an afternoon and buys a known-clean baseline against which the upgrade’s gains can actually be judged. For platform changes especially, the fresh install is usually the honest choice — the one that lets you say the new machine is faster because of the hardware, not because you finally cleaned the software attic.
Verify the upgrade afterwards with the same overlay you diagnosed with. The post-upgrade numbers close the loop: utilisation should have moved to the next component, frame rates should match the expectation that justified the purchase, and temperatures should sit in their safe band under sustained load. An upgrade verified is an upgrade finished; an upgrade assumed is a story you tell until the first demanding game audits it.
Case, Clearance and the Physical Audit
Before any part is ordered, audit the physical space it must live in, because more upgrades die of millimetres than of electronics. Measure the graphics card clearance from the expansion slots to the drive cage or front radiator, the CPU cooler height between socket and side panel, and the radiator mounting options if liquid cooling is in the plan. Manufacturer drawings give case dimensions; your tape measure gives the truth about the specific obstructions — cable bundles, cages, a front fan fitted thicker than standard — that drawings omit.
While the case is open, audit its condition as an upgrade platform. Are the front-panel connectors modern enough for your needs? Are fan mounts free or blocked by drive cages you no longer use? Is the airflow path the one your cooling plan assumes? A case that fails the audit does not have to be replaced in the same weekend — but it should be replaced in the plan, because a case is the one component that physically constrains every other choice, and upgrading everything else into a box that fights you is money spent in the wrong order. Our guide on how to measure GPU clearance in a PC case walks the most failure-prone of these measurements step by step.
Take photographs before you disconnect anything. Cable routing that seemed obvious during disassembly becomes archaeology by reassembly, and a phone full of ‘before’ pictures is the cheapest insurance in the entire upgrade process. Photograph the front-panel wiring especially; its connectors are small, unlabelled in practice, and always the last thing standing between you and a booting machine.
Knowing Your Platform’s Ceiling
Every platform — the combination of socket, chipset and memory generation your motherboard defines — has a ceiling: the fastest CPU it accepts, the memory standard it uses, the features it lacks. Upgrading well means knowing where your ceiling is, because money spent approaching a low ceiling buys less future than money spent moving to a higher one. A top-of-socket CPU upgrade on an ageing platform can be excellent value if the platform’s other traits still serve you; it is poor value when the same money, plus the sale of your current platform parts, would have bought entry into a newer generation with years of headroom.
Learn to spot the signs that the ceiling, not a component, is your limit. When the upgrade list requires replacing CPU, board and memory together, the platform is the upgrade. When a new GPU would be held back by an old interface’s bandwidth in your specific workloads, or when the features you want — faster storage standards, modern connectivity — are absent at the board level, the platform is again the honest answer. Platform upgrades feel expensive because they are several parts at once; they are also the only upgrades that reset the clock on the whole machine.
Time platform changes to your own calendar rather than the industry’s. There is always a next generation coming, and waiting for it is a decision that can be repeated forever. Buy the platform that serves the games you play now and the upgrades you can foresee, install it on a weekend you chose, and let the launch cycle proceed without you. The best platform is the one in your case, working.
Upgrading on a Deadline: Events, Seasons and Visiting Players
Upgrades often acquire deadlines — a tournament, a holiday season of gaming, a visiting friend who expects the second PC to work — and deadlines change the correct strategy. The governing rule is that no upgrade is finished until it has survived a week of ordinary use, so work backwards from the date and refuse any plan whose verification week does not fit. An upgrade installed the night before an event is not an upgrade; it is a wager, placed with hardware you have not met, on the occasion you cared most about.
Under deadline pressure, prefer the reversible and the separable. Storage and memory upgrades can be undone in minutes and tested independently; platform changes cannot. If two upgrades compete for the same weekend, do the one whose failure leaves the machine working. Keep the old parts, untouched and un-sold, until the event has passed — the ability to revert completely is worth more than the parts’ resale value for exactly as long as the deadline looms.
And after the event, finish the job properly: the verification runs, the driver tidying, the old parts photographed and rehomed. Deadline upgrades have a way of becoming permanent improvisations, held together by the fact that nothing has gone wrong yet. The week after the pressure lifts is when a rushed job gets converted into a finished one — schedule that conversion before you start, or the calendar will never find room for it.
Gear for This Guide
The examples below come from our verified product pool and illustrate the product classes discussed in this guide. They are examples, not a ranked list — use the criteria in this article to judge any model, including newer revisions.

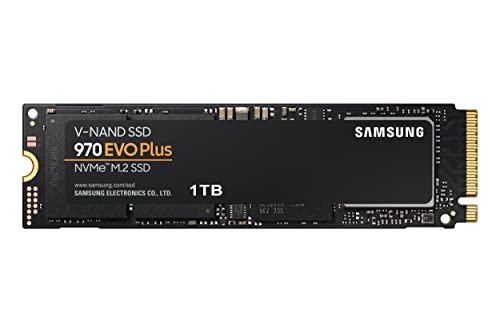
Samsung 970 EVO Plus SSD 1TB NVMe M.2
The archetypal first-rung upgrade: an NVMe drive that transforms loading and streaming behaviour in any machine with a free M.2 slot. Samsung 970 EVO Plus SSD 1TB NVMe M.2 — Check on Amazon

WD_BLACK 1TB SN770 NVMe Internal Gaming SSD
A gaming-positioned NVMe option for the same rung — fast game storage with room for a modern library. WD_BLACK 1TB SN770 NVMe Internal Gaming SSD — Check on Amazon
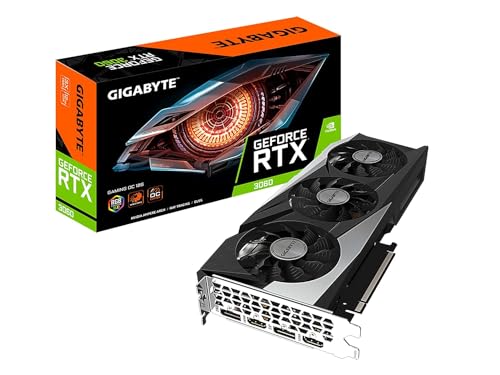
GIGABYTE GeForce RTX 3060 Gaming OC 12G Graphics Card
Illustrates the third rung: a generous-memory graphics card of the class that revives an ageing build at mainstream resolutions. GIGABYTE GeForce RTX 3060 Gaming OC 12G Graphics Card — Check on Amazon
Frequently Asked Questions
What should I upgrade first in an old gaming PC?
Diagnose first, but the statistical answer is: an SSD if you lack one, RAM if you are under 16 GB, then the graphics card. Those three, in that order, resolve the majority of ‘my PC feels old’ complaints.
Can I upgrade a prebuilt gaming PC?
Usually yes for storage, RAM and graphics card, provided the case and power supply allow it. Some compact or proprietary prebuilts limit power supply and motherboard swaps, which is worth checking before you plan a platform upgrade.
Will a new GPU work with my old CPU?
It will work, but an old CPU may limit it, especially at 1080p where the processor carries more of the load. At higher resolutions the pairing is more forgiving. Monitoring after installation tells you the truth for your games.
Do I need to reinstall Windows after upgrading?
Not for storage additions, RAM or a graphics card. A motherboard change is the exception — a fresh install is recommended there, and you should back up and expect reactivation steps.
How do I know if my power supply can handle a new graphics card?
Compare the card maker’s recommended system wattage with your supply’s rating, check you have the required PCIe power connectors, and favour headroom. If the supply is unbranded or near its limit, replace it first — it protects the whole machine.
Should I upgrade several parts at once to save time?
One at a time, with a test between, whenever you can. Simultaneous changes make faults un-attributable — if the machine misbehaves afterwards, you will not know which part to return. The exception is a platform change, where CPU, board and memory genuinely move together.
Bottom line: monitor first, then climb the ladder — storage, RAM, graphics card, cooling and power, platform last — retesting after every rung. Upgrading against evidence turns one ageing PC into several more years of good gaming.
Can I upgrade a prebuilt PC, or are they locked down?
Most prebuilts from mainstream makers upgrade like any PC — memory, storage and often the GPU swap freely — but verify three things before planning: the power supply’s wattage and whether it uses standard connectors, the case’s clearance for longer graphics cards, and whether the motherboard is a standard form factor or a proprietary board. Some compact and budget prebuilts use proprietary power supplies and boards that narrow your options considerably, which is worth knowing before the upgrade rather than during it.
Will upgrading one part void my warranty?
On a custom build, each part carries its own warranty and upgrading affects only what you touch. On a prebuilt under a system warranty, opening the case and swapping parts is treated differently by different makers — some permit it freely, some restrict it. Check the terms before the machine is out of its return window, and keep the original parts until the warranty expires so any claim can be made with the machine in its sold configuration.
How do I know if my CPU will bottleneck a new GPU?
Run the overlay test from this guide before buying: if your GPU already sits near full utilisation in your games, your CPU has headroom to feed a faster card. If the GPU loiters at partial load while CPU cores are pinned, the CPU is the current limit and a GPU upgrade will disappoint. After the upgrade, repeat the test — a mild CPU limit at very high frame rates is normal and harmless; a severe one means the platform upgrade moves up your list.
Is it worth upgrading a PC that is more than seven years old?
Sometimes, for storage and memory, which are cheap and transformative even on old platforms. But once the plan includes CPU, motherboard, memory and GPU, you are buying a new PC one part at a time at worse prices and with more compatibility friction than a planned replacement. The honest test: if the upgrade list keeps the case and power supply only, price a fresh build before proceeding — sentiment aside, the numbers often prefer it.
Should I upgrade before or after a big game release I care about?
Before, with a buffer. Upgrading in the fortnight after a major launch means competing with every other player doing the same, and it means troubleshooting new hardware and a new game simultaneously, unable to tell which one owns a problem. Upgrade a month ahead, verify stability on your current library, and let the launch be about the game.
Do I need to reinstall Windows after upgrading the GPU or RAM?
For a GPU or memory upgrade, no — a clean driver installation for the card and a settings check for the memory are sufficient, and Windows will not notice the change beyond new hardware detection. For a motherboard change, a fresh installation is strongly recommended even when the old one technically boots, because chipset and storage-controller differences leave behind exactly the kind of subtle instability that gets blamed on the new parts for months.
How much should I expect an upgrade to improve frame rates?
Set the expectation from the diagnosis, not from hope. Replacing the component that was at full utilisation typically delivers gains in proportion to that component’s generational improvement in your games; replacing anything else delivers little until the true bottleneck is addressed. If the post-upgrade overlay does not show the limit moving to a new component, the diagnosis was wrong — which is useful information, best learned from the numbers rather than from disappointment.
Can I upgrade just the CPU on my existing motherboard?
Often, yes, within the socket’s supported range — and it can be the best-value upgrade on an ageing platform if your diagnosis shows the CPU as the limit. Check the motherboard maker’s CPU support list and required BIOS version before buying, update the BIOS while the old CPU is still installed, and confirm your cooler and power supply suit the new chip’s demands. The support list, not the socket’s name alone, is the authority.
Is it normal for an upgrade to make a different part suddenly seem weak?
Completely normal — it is the signature of a successful upgrade. Removing the old bottleneck promotes the next component to the position of limit, and games that were held back uniformly now show their next constraint clearly. Do not read it as the upgrade failing; read it as the diagnosis for the next step, to be taken when the budget and the calendar allow. A PC is a queue of bottlenecks, and upgrading is the art of keeping the queue’s head somewhere cheap.
What tools do I actually need to upgrade a PC?
Remarkably few: a Phillips screwdriver in the common PC size, a container for screws, good light, and your phone for photographs and torch duty. Anti-static precautions can be as simple as working on a hard floor, touching the case’s metal to equalise charge, and handling boards by their edges. Magnetic parts trays and full toolkits are pleasant, not necessary. The tool that matters most is patience — most upgrade damage is done by forcing a connector that was latched, or rushing the one step that wanted a second look.
My upgraded PC will not boot. What is the calm way to approach it?
Return to the last known-good state mentally and check the simple physical causes first, because they own most no-boot cases: memory sticks not fully seated, power connectors — especially the CPU’s — not fully home, the front-panel power switch lead on the wrong pins, a monitor cable plugged into the motherboard instead of the new graphics card. Reseat before you replace anything, change one thing at a time, and resist reinstalling software to solve what is almost certainly a connector. A methodical half hour beats a panicked evening of swapping parts at random.
How often should I expect to upgrade a gaming PC?
Plan on a rhythm rather than a schedule: storage and memory as needs arise, a GPU roughly every few years if you chase current titles at high settings, and a platform when the diagnosis says the ceiling has been reached. Players who play a stable library of older or lighter games can stretch every interval considerably. The trigger is always the same — your games, at your settings, falling short in a way the overlay can name — and never the calendar or a launch event alone.
Should I keep my old parts as spares or sell them immediately?
Keep them until the upgraded machine has survived a few weeks of ordinary use — the ability to revert or to bisect a new problem by swapping a known-good part back is worth more than the small depreciation over that period. After the probation, sell or donate promptly, because parts lose value on the market’s schedule, not yours. The exception is a genuinely useful spare — a power supply or drive you would actually deploy in a failure — which earns its shelf space as insurance rather than inventory.
What is the cheapest upgrade that still feels like an upgrade?
On a machine still booting from a hard drive, an SSD, by a distance no other answer approaches — it transforms boot times, loading and general responsiveness for the smallest money in the catalogue. On a machine already on an SSD, the honest cheap answers are a memory kit that takes a starved system to comfortable capacity, and a proper cleaning plus fresh thermal paste on an old, hot machine, which can restore performance the owner thought required new silicon. Cheap upgrades work when they are aimed at a measured bottleneck; aimed at nothing, even expensive ones disappoint.
What should I photograph before I start taking things apart?
Everything you are about to touch: cable routing, connector positions, the front-panel wiring, and the orientation of anything that can be installed backwards. Photographs cost seconds and repay themselves the first time reassembly asks a question your memory cannot answer — which, in most builders’ experience, is the first reassembly.
Is it worth upgrading a PC I plan to replace within a year?
Only with parts that travel: storage and sometimes memory move to the next machine or sell easily, while platform-specific parts strand their value in a machine you are leaving. If the replacement is truly a year away and the current machine genuinely cannot play what you want to play, a modest, transferable upgrade is rational. A major platform investment is not — save its budget for the successor.
Related Guides
Keep exploring with these guides and roundups from the same Gaming PCs collection: