Disclosure: As an Amazon Associate, ilcastellomenu.com earns from qualifying purchases. Product examples below link to Amazon, where you can check current availability and specifications; this guide itself lists no fixed prices because pricing and bundles change frequently.
Learning how to cool a gaming PC properly is mostly learning how air moves: cool air in low at the front, hot air out high at the back and top, with nothing important sitting in a dead zone. Most hot PCs are not under-cooled in hardware terms — they are badly ventilated, dust-choked or fighting their own fan layout. This guide covers the diagnosis, the airflow rules, the cooler choices and the quiet wins, in the order that fixes the most machines.
A note on stakes: heat is not just noise and discomfort. Modern processors and graphics cards automatically reduce their speed as they approach temperature limits, so a hot PC is literally a slower PC than the one you paid for — and sustained heat shortens component life. If your machine is already shutting down or throttling hard, treat this as the planned version of How to Fix a Gaming PC that Overheats and work through both.
How to Cool a Gaming PC: Measure Before You Spend
Install a free hardware monitor and record temperatures in three states: idle on the desktop, after fifteen minutes of your most demanding game, and — if the numbers worry you — during a stress test. Note the CPU and GPU figures separately, because they have different cooling systems and different problems. As working orientation, a gaming CPU that lives in the 60s and 70s under load is healthy, the 80s deserve attention, and sustained 90s mean throttling territory; graphics cards commonly run warmer by design, with the 70s and low 80s under load being unremarkable.
Context matters as much as the numbers: a hot room raises every temperature in it, and a PC under a desk in a carpeted corner breathes its own exhaust. Before buying anything, run the same game with the case’s side panel removed. If temperatures fall dramatically, your problem is case airflow. If they barely move, your problem is a cooler, its mounting or its paste. That single test divides this entire guide in half — take it seriously.
In this guide
Airflow Fundamentals: The Path Air Should Take
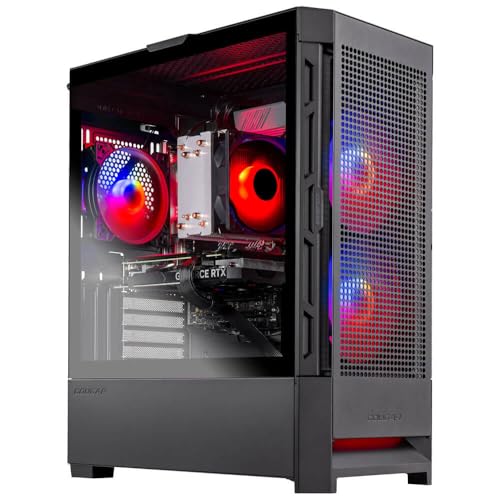
Airflow is a path, not a pile of fans. The standard, proven layout draws cool air in through the front (and sometimes bottom) and exhausts it through the rear and top, following heat’s natural rise and giving every component a place in the stream. Front fans should be intakes, rear and top fans exhausts, and the power supply should breathe its own air from beneath the case where the design allows. A case with a mesh front panel will out-cool a sealed glass box with twice the fans, every time — when shopping, airflow is the case specification that matters, as our system roundups at Best PC Tower for Gaming consistently reflect.
Positive Pressure and Dust
Slightly more intake than exhaust — positive pressure — is the preferred balance for most builds, because air then leaks out through every seam instead of being sucked in through unfiltered gaps, and dust stays on the filters where you can clean it. Whatever your balance, filters only work if cleaned: a clogged front filter can strangle an otherwise excellent layout within months. Add filter cleaning to the same monthly rhythm as desk cleaning, and position the PC off carpet, on a hard surface, with clear space behind its exhausts.
CPU Cooling: Air Towers and Liquid Loops
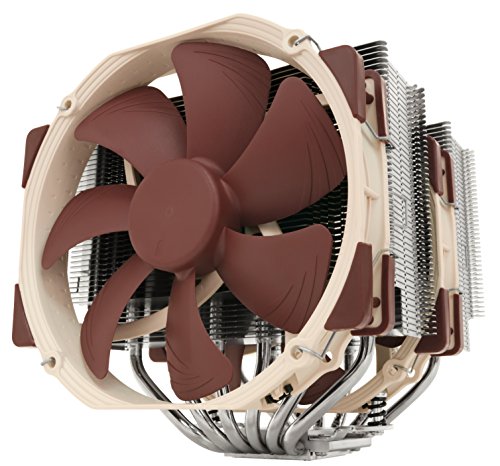
The CPU cooler is the component players most often under-buy relative to their processor. Stock and slim coolers are adequate for modest chips at stock settings and inadequate for sustained gaming loads on stronger ones. A quality tower air cooler — dual heatsink stacks with a large fan or two, like the Noctua and Thermalright examples in the gear section — handles the overwhelming majority of gaming processors quietly and indefinitely, with no pump to fail and no liquid to age. The full comparison with liquid cooling, including when liquid genuinely wins, is in Air Cooling vs Liquid Cooling for Gaming PC.
If your CPU runs hot on an existing cooler, suspect the interface before the hardware: a cooler mounted unevenly, a forgotten plastic film on its base (a rite of passage more common than anyone admits), or dried-out thermal paste after years of service. Remounting with fresh paste is an inexpensive, high-yield maintenance task — but do it as maintenance, in a planned session with the PC powered off and unplugged, not as a mid-panic experiment. Liquid-cooled owners should additionally listen for pump noise changes and check that the radiator is mounted so air bubbles collect away from the pump, per the maker’s guidance.
GPU Cooling and Case-Level Fixes
The graphics card cools itself with its own fans, but it breathes case air — so a card can be blameless and still suffocate. Give it room: avoid jamming it against a solid power-supply shroud with no intake path, use your graphics software to set a sane fan curve that starts cooling before the card is hot rather than after, and consider that a vertical GPU mount against glass looks wonderful and breathes terribly. Undervolting — reducing the card’s voltage slightly through its tuning software — deserves mention as the connoisseur’s fix: on many cards it cuts heat and noise noticeably at equal performance, though it should be done gradually and stability-tested, as with any tuning.
Case-level wins accumulate: route cables out of the airstream, add one quality intake fan before adding three mediocre ones, and set fan curves in the BIOS or motherboard software so case fans respond to load rather than idling while components cook. Curve tuning is also the noise fix — most ‘loud PC’ complaints are really ‘badly curved PC’ complaints, with fans slamming between silent and full speed. A gentle ramp matched to your measured temperatures from step one gives you a machine that is quiet at the desktop and merely businesslike in games. If you are selecting components for a new build with thermals in mind, How to Choose a Gaming PC folds these priorities into the whole-system decision.
Room, Placement and Maintenance Habits
The last cooling system is the room. A PC exhausting into a closed, sun-warmed room will lose the fight by evening no matter its fans; ventilation, a door ajar, or simply moving the machine out of a dead corner can be worth several degrees. Keep radiators and heating vents from blowing directly at the intakes in winter — an under-appreciated seasonal cause of ‘suddenly hot PC’ reports.
Maintenance closes the guide: filters monthly, a gentle interior dust-out with compressed air a few times a year (PC off, fans held still so they do not spin up), and a temperature log checked whenever a new game feels louder than the last. Cooling is a habit, not a purchase. Build the habit and the hardware you already own — perhaps with one good cooler from the gear list — will quietly do its best work for years; if you are planning a broader refresh, How to Upgrade a Gaming PC shows where cooling sits in the upgrade order.
Fan Curves: The Free Performance Nobody Configures
If this guide has a highest-value paragraph, it is this one: most gaming PCs ship with fan curves chosen for a showroom, not for your room, and fifteen minutes in the BIOS or motherboard software transforms both temperature and noise. The method is empirical. Note the temperature your CPU reaches in your heaviest game; set the curve to reach full fan speed a few degrees above that figure, to sit near silent at desktop temperatures, and to ramp smoothly between the two points rather than stepping. Repeat for the case fans, ideally tied to the warmer of the CPU or motherboard sensors your software offers. The goal is a machine whose fans you notice only when you listen for them.
Resist two temptations: the flat-out curve that runs everything at maximum permanently — it buys a degree or two at the cost of noise and fan life — and the silence-obsessed curve that holds fans down until temperatures are already high, then slams them in a panic cycle your ears will hate. A smooth ramp matched to real measurements beats both ideologies, and it is free. Revisit the curve when seasons change your room temperature materially, and after any hardware change that alters the heat load.
Radiator Placement and the AIO Owner’s Details
Liquid-cooled owners have placement decisions air owners never face, and they are worth a deliberate pass. A front-mounted radiator drawing cool outside air gives the CPU its best temperatures and warms the case air the GPU breathes; a top-mounted radiator exhausting gives the GPU the better deal and the CPU slightly warmer air. For gaming loads, where the GPU usually works hardest, top exhaust is the common recommendation — but either is legitimate when chosen knowingly rather than by whichever way the tubes reached. What is not optional is bubble management: mount so the radiator’s highest point sits above the pump, letting air collect in the radiator instead of circulating through the pump, where it adds noise and wear.
Check the loop’s behaviour seasonally: listen for new pump sounds, confirm the radiator’s fins are dusted, and remember that the unit is a consumable with a service life measured in years. An AIO that cools worse each summer is not being betrayed by the weather; it is ageing on schedule, and planning its replacement beats being surprised by it. None of this diminishes liquid cooling — it simply prices its ownership honestly, which is what good guides are for.
Cooling the Rest: VRMs, Memory, Storage and the GPU’s Neighbours
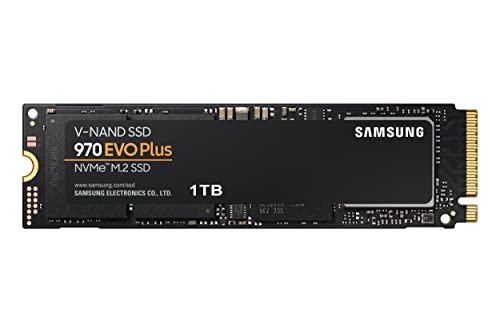
The headline components get the attention, but a case’s thermal story includes supporting actors. Motherboard power delivery (the VRM) runs hot under sustained processor load and depends entirely on case airflow passing over its heatsinks — a top exhaust fan earns its keep here. Memory asks little but appreciates not being baked. NVMe drives under a motherboard heatsink are usually content; a drive reporting high temperatures under sustained transfers may want its heatsink’s thermal pad checked for contact. None of these usually limits a gaming PC, and all of them benefit automatically from the front-to-back airflow path this guide builds — which is the real lesson: a good air path is a rising tide that cools every component you forgot to worry about.
Worked Example: The Loud PC That Needed No Parts
A familiar patient: a two-year-old gaming PC, once quiet, now loud enough to hear through a door during games, with temperatures that have crept into the range that makes owners browse cooler listings at midnight. The side-panel test comes first and is dramatic — temperatures fall by a wide margin with the panel off, which acquits both coolers and indicts the case’s air path before a single part is priced.
The inspection finds the usual syndicate. The front filter is matted to felt. One of the two front fans was installed as an exhaust during a long-ago cable tidy, so the front of the case has been fighting itself — one fan in, one fan out, net airflow near zero where the graphics card breathes. The fan curves, checked last, are set to a silent profile that holds everything down until the processor is already hot, then panics. Three faults, zero of them purchasable: a filter, a fan direction and a curve.
An hour later — filters washed and dried, the fan turned around, curves set from the measured gaming temperatures — the machine runs its heaviest game at temperatures comfortably in the healthy band, at a noise level its owner describes as ‘the old PC back’. The midnight cooler listing is closed. Keep the moral in proportion: this is the common case, not the universal one, and genuinely undersized coolers exist. But the order of operations in this guide exists because the common case is this common — arrangement and housekeeping first, and the shopping cart only for what survives them.
Understanding Heat: Where It Comes From and Where It Must Go
Cooling advice makes more sense once the heat itself is accounted for. Nearly every watt your PC draws from the wall becomes heat inside the case — the electricity does its work and retires as warmth — so a system pulling several hundred watts under load is, physically, a several-hundred-watt space heater that also plays games. The cooling system’s entire job is logistics: move that heat from two small, hot chips to the room air, through a chain of handoffs, without letting any link in the chain saturate.
The chain runs: chip to heat spreader, spreader to cooler through thermal paste, cooler to the air immediately around it, and that air out of the case and away. A failure at any link presents identically at the sensor — high temperatures — which is why diagnosis in this guide starts with identifying which link is weak rather than buying parts for all of them. A superb cooler inside a case whose air never changes is a strong link in a broken chain; the case air becomes a warm bath and the cooler, however mighty, ends up cooling with bathwater.
Room air is the chain’s final link and the one players forget. A PC exhausting into a small, closed, already-warm room raises its own intake temperature degree by degree across a long session, so temperatures that look fine in a ten-minute test drift upward by hour three. If your temperatures creep across sessions rather than spiking within them, suspect the room before the rig: a door opened, a fan moving air, or the PC relocated out of its alcove can be the entire fix.
Thermal Paste and Mounting Pressure: The Cheap Degrees
Between the chip and the cooler sits the least expensive and most consequential layer in the whole chain: thermal paste and the pressure that spreads it. Paste exists to fill microscopic air gaps between two metal surfaces that look flat and are not; air is an insulator, so even a thin gap taxes the handoff. Old paste dries, pumps out under thermal cycling, and loses its ability to fill those gaps — which is why a several-year-old PC that has never been repasted can gain a surprising temperature improvement from a consumable that costs less than lunch.
Mounting matters as much as the paste itself. A cooler tightened unevenly — one corner cranked, the opposite corner floating — tilts the cold plate and opens a wedge-shaped gap no paste quantity fixes. Tighten in a cross pattern, a little at a time, the way wheel nuts are seated, and if you remove a cooler for any reason, clean both surfaces and apply fresh paste rather than trusting the old layer to reseat. It will not reseat; it will trap air in new and creative patterns.
Know when this link is not your problem, too. A PC whose temperatures were fine last month and are terrible today, untouched in between, is rarely suffering paste failure — paste degrades on a calendar of years, not weeks. Sudden changes point at fans, dust, software or a failing pump. Gradual, year-over-year creep is paste’s signature, and matching the remedy to the signature is the difference between maintenance and superstition.
Dust: The Slow Saboteur and How to Fight It Properly
Dust is cooling’s chronic disease. It insulates heatsink fins, clogs intake filters, mats across fan blades and settles on every surface that was supposed to exchange heat with air. Its damage is gradual enough to be invisible week to week, which is why players discover it as a mystery: the PC that was quiet last year roars this year at the same settings. The overlay tells the story if you keep records — the same game, the same room, temperatures a clear band higher than your baseline notes from a year ago.
Fight it on a schedule matched to your environment rather than your guilt. A PC on a carpeted floor in a home with pets lives in a different dust economy from one on a desk in a filtered room, and their cleaning intervals differ by months. Intake filters are the front line: clean them often — they are designed to be the cheap, washable sacrifice — and the interior will need attention far less frequently. When you do clean the interior, use short bursts of air, hold fans still so they cannot spin up and generate current or damage bearings, and work outside or over a bin unless you enjoy redistributing the dust into the room the PC breathes.
Prevention beats cleaning. Positive-pressure airflow — slightly more intake than exhaust, through filtered intakes — means the case’s leaks breathe outward and dust enters mainly through the filters you can wash. Raising the PC off carpet, even onto a simple stand, cuts its dust intake dramatically. And a room-level habit helps more than any product: the PC breathes the room, so the room’s dust is the PC’s dust, on a delay.
Reading Temperatures Like a Technician, Not a Scoreboard
Temperature numbers invite scoreboard thinking — lower worshipped, higher feared — and a technician’s reading is more useful. First, know which temperature you are looking at: a CPU reports several, and the headline figure may be a single hot core’s spike rather than the package’s sustained state. Brief spikes during loading screens are normal physiology; sustained temperatures under real gaming load are the vital sign that matters, and they should be judged over minutes, not in the worst second a graph can find.
Second, judge temperature against headroom and behaviour, not against other people’s screenshots. What matters is the distance between your sustained load temperature and the point where your components begin throttling — and whether they ever actually throttle, which the clock speeds in your overlay will confess. A system running warm but holding full clocks indefinitely is a system doing its job with a smaller margin; a system hitting its limit and shedding frequency is a system asking for help, whatever the absolute number says.
Third, watch the delta that diagnoses: the gap between component temperature and room temperature under the same load. That gap is your cooling system’s report card, independent of season. If the gap widens across months, the chain is weakening — dust, paste, a tiring fan or pump. If the gap holds while absolute temperatures rise in summer, your cooling is innocent and the weather is guilty, and the correct response is room management, not parts.
Cooling the Room and the Desk, Not Just the PC
The final frontier of PC cooling is outside the case. Placement decides the quality of the air the PC breathes: a tower wedged between a wall and a desk side, exhausting against a surface inches away, recirculates its own output and climbs steadily. Give the exhaust room to leave and the intake room to draw — a hand’s breadth of clearance is a minimum, more is better — and never enclose a gaming PC in a closed cabinet without serious ventilation surgery, because a cabinet is an oven with a door.
Desk-level heat sources conspire quietly. A monitor’s power brick, a console, a second PC, even a desk lamp add their warmth to the same pocket of air your gaming PC inhales. Spread them, and notice that the PC’s intake usually sits low and forward — exactly where a tower case under a desk meets the warm layer rising from everything else. Small rearrangements here regularly outperform component purchases, because they improve the one temperature every other temperature is built on: the air going in.
For rooms that run genuinely hot, manage expectations and sessions honestly. Air conditioning is the blunt, effective answer where available; where it is not, shifting long sessions to cooler hours, adding a room fan that exchanges air rather than stirring it, and accepting slightly reduced settings in a heatwave are all legitimate cooling strategies. The PC does not care whether its thermal headroom came from a radiator or a window. Neither should you.
Small Form Factor and Laptop-Adjacent Realities
Compact PCs play the same physics on a harder difficulty setting: less air volume, shorter airflow paths, components heating each other’s intake, and coolers chosen from a much shorter list. The principles in this guide still govern, but their expression tightens. In a small case, cable management stops being aesthetics and becomes airflow engineering, because a cable bundle occupies a meaningful fraction of the case’s whole volume. Component choice also becomes a cooling decision at purchase time — a lower-wattage GPU and CPU are not compromises in a small build; they are the design working as intended.
Expect a well-built compact PC to run warmer and louder than its full-size equivalent at the same performance, and judge it against its class rather than against tower numbers. What should not be accepted, in any class, is throttling: a small PC that sheds performance in long sessions was specified beyond its thermal envelope, and the honest fixes are the envelope’s — better exhaust paths, undervolting, or a settings concession — rather than another fan crammed into a space that has no air left to move.
External reality matters more, not less, at this size. A compact PC in a TV cabinet or a bookshelf nook lives or dies by the nook’s ventilation, and its owner should treat the furniture as part of the cooling system: open backs, clearance above the exhaust, and a door that stays open during play are components as real as any fan. The smaller the PC, the larger the room’s share of its cooling — plan both together.
A Seasonal Cooling Routine That Takes an Hour a Year
Cooling maintenance works best as a rhythm rather than a rescue. Once a year — spring is the traditional choice, before the warm months audit your system for you — give the PC its annual hour. Clean the filters and the interior, inspect every fan by spinning it gently and listening for bearing protest, check that the cooler’s mounting is firm, consider fresh thermal paste if the machine is several years old or its temperature-versus-baseline gap has widened, and re-verify your fan curves still match the hardware you own after any year’s upgrades.
During that hour, also update your baseline notes: room temperature, idle temperatures, and a standardised load — the same game scene or benchmark you used last year — recorded the same way. A single annual data point, kept for years, is worth more diagnostically than a month of anxious graph-watching, because it converts ‘the PC feels hotter lately’ into a comparison with evidence. Most cooling decline announces itself in that annual delta long before it announces itself in a shutdown.
Then leave the machine alone for another year. Cooling is a system that rewards being set correctly and then ignored, and the owner who fiddles weekly with fan curves is usually optimising their anxiety rather than their temperatures. Set it, verify it, record it, and spend the saved attention on the games the cooling exists to serve.
Troubleshooting Order: When Temperatures Suddenly Change
A PC that was fine and is suddenly hot is telling a different story from one that was always warm, and it deserves its own diagnostic order — cheapest and likeliest first. Begin with software: a new background process, a stuck update, or a game patch that changed load patterns can raise temperatures without any hardware changing at all, and your overlay’s utilisation figures will show it. Next, look with your eyes before you touch anything: a fan visibly stopped, a filter visibly blinded, a cable fallen into a fan’s path, a pet asleep against the exhaust. A surprising share of sudden-heat cases are solved by looking.
Then check the room’s biography. Did the PC move, the season turn, a radiator come on for winter beside the desk, a second heat source join the room? Intake air is half the equation and it changes without consulting you. After that, the mechanical suspects in order of likelihood: dust that crossed a threshold, a fan bearing dying audibly, an AIO pump whose sound or reported speed has changed, and only then the slow causes — paste and mounting — which almost never explain a sudden change and should not be disturbed while likelier culprits stand unexamined.
Work one variable at a time and re-measure after each, using the same load that revealed the problem. The discipline feels slow and is actually the fastest route, because sudden problems have single causes, and single causes are found by elimination, not by replacing the cooling system wholesale and hoping the culprit was in the pile. Our dedicated guide on how to fix a gaming pc that overheats works this order as a full troubleshooting routine when the change crosses from warm into shutdown territory.
Gear for This Guide
The examples below come from our verified product pool and illustrate the product classes discussed in this guide. They are examples, not a ranked list — use the criteria in this article to judge any model, including newer revisions.
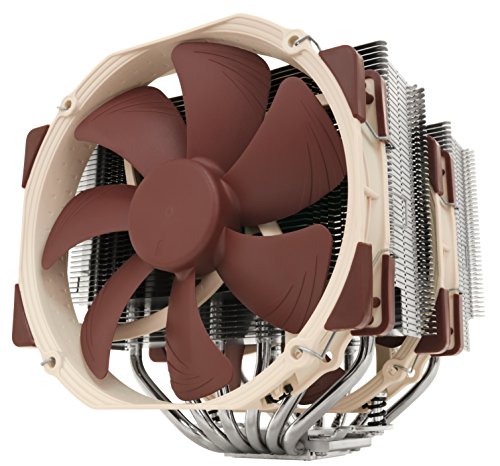
Noctua NH-D15 CPU Cooler
The benchmark big tower air cooler: dual stacks and large fans that cool flagship-class processors quietly, with no pump and nothing to wear out but a fan. Noctua NH-D15 CPU Cooler — Check on Amazon
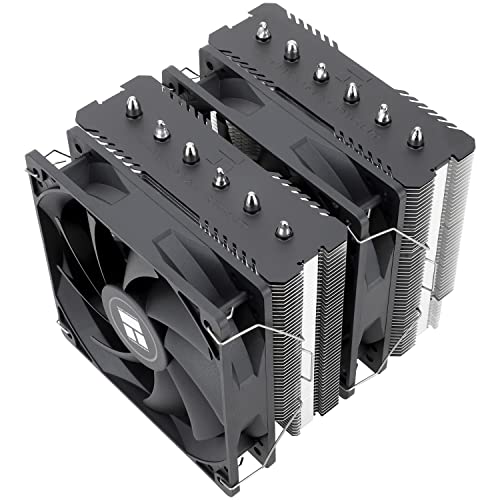
Thermalright Peerless Assassin 120 SE CPU Cooler
Proof that excellent tower cooling exists at the value end too — dual fans and six heat pipes in a compact, case-friendly height. Thermalright Peerless Assassin 120 SE CPU Cooler — Check on Amazon

Corsair iCUE H100i Elite Capellix Liquid CPU Cooler
The liquid alternative for cases and processors that suit it: a 240 mm radiator loop for builds where air towers do not fit the plan. Corsair iCUE H100i Elite Capellix Liquid CPU Cooler — Check on Amazon
Frequently Asked Questions
What is a safe temperature for a gaming CPU and GPU?
As working guidance: CPUs are comfortable in the 60s–70s under gaming load, deserve attention in the sustained 80s, and throttle near the 90s–100 depending on model. GPUs commonly run in the 70s to low 80s by design. Your specific model’s limits are in its documentation — sustained proximity to them is the thing to avoid.
How many case fans do I actually need?
Two intakes and one exhaust, well placed, cool most gaming PCs properly. Beyond that, returns diminish quickly; fan quality, placement and curves matter more than count. A single additional intake helps GPU temperatures more than a third exhaust usually does.
Does opening the case help cooling?
As a diagnostic, yes — a big improvement with the panel off proves an airflow problem. As a lifestyle, no: it invites dust, spills and curious pets, and it abandons the directed airflow that a good layout provides. Fix the layout instead.
Is liquid cooling quieter than air?
Not inherently. Large air towers are extremely quiet under gaming loads; liquid loops add a pump’s voice and still use fans on the radiator. Liquid’s real advantages are case compatibility and heat transport to the case edge, not silence.
How often should thermal paste be replaced?
Good paste lasts years. Replace it when you remount a cooler for another reason, or if temperatures have crept up over time with airflow and dust already ruled out — not on a fixed annual schedule.
Should case fans spin all the time, even at idle?
At low speed, yes — a gentle idle airflow keeps temperatures stable and prevents the ramp-up cycles that make PCs acoustically annoying. Many modern fans can stop entirely at idle safely, but a slow constant spin is the simpler, quieter-feeling behaviour for most builds.
Bottom line: measure first, let the side-panel test split airflow problems from cooler problems, build a clean front-to-back air path, and maintain filters and dust. Most hot PCs need arrangement and housekeeping, not a shopping spree.
How often should I clean my PC’s dust filters and fans?
Filters monthly in a dusty or pet-owning home, every couple of months in a cleaner one — they are quick to rinse or vacuum and they protect everything downstream. The interior needs attention far less often: inspect it when you clean the filters and deep-clean when you can see dust matting on fins and fan blades, or when your temperature-versus-baseline notes say the cooling chain has weakened. Let the temperatures, not the calendar alone, call the deep cleans.
Is it safe for a CPU to run hot during long gaming sessions?
Modern components protect themselves by throttling before damage, so a hot-running PC is rarely in danger — it is in decline: shedding the performance you paid for and running its fans at a roar to do it. Judge by behaviour, not fear. If clocks hold and you accept the noise, the machine is coping. If clocks sag as sessions progress, the cooling chain is asking for the diagnosis this guide lays out, and answering it restores performance rather than rescuing hardware.
Do more fans always mean better cooling?
No — airflow is a path, not a crowd. Fans arranged without a coherent intake-to-exhaust direction mostly stir the same warm air and add noise, and an extra fan fighting the established path can make temperatures worse. Add fans to complete a path or to feed a starved intake, and stop when temperatures stop answering. The quietest well-cooled PCs usually have fewer fans than the loud hot ones, placed with more thought.
Should I open my case’s side panel to cool it in summer?
As an emergency diagnostic, it is informative: if temperatures drop sharply with the panel off, your case airflow is the weak link and you have learned something valuable. As a permanent arrangement it is poor practice — it defeats the designed airflow path, invites dust directly onto components, and exposes the interior to spills and pets. Use it to diagnose, then fix the airflow properly.
Does undervolting count as cooling?
It is one of the most effective cooling measures available, because it reduces the heat generated at the source rather than improving its removal — many components run at voltages above what their individual silicon needs, and trimming that margin converts directly into lower temperatures and quieter fans at identical performance. It requires care and stability testing, and it is not for every owner, but as a concept it belongs in any complete cooling conversation: the cheapest watt to cool is the one never turned into heat.
Why are my temperatures fine in benchmarks but bad in one particular game?
Because games load the system differently from benchmarks. A title that hammers CPU and GPU simultaneously — large open worlds with heavy simulation are the usual suspects — produces a combined heat load that single-component stress tests never replicate, and it also heats the case air that both coolers share. Judge your cooling by your worst real game, not by the friendliest test, and if only one game suffers, its settings menu is the first cooling tool to reach for.
Does a vertical GPU mount or a glass front panel hurt cooling?
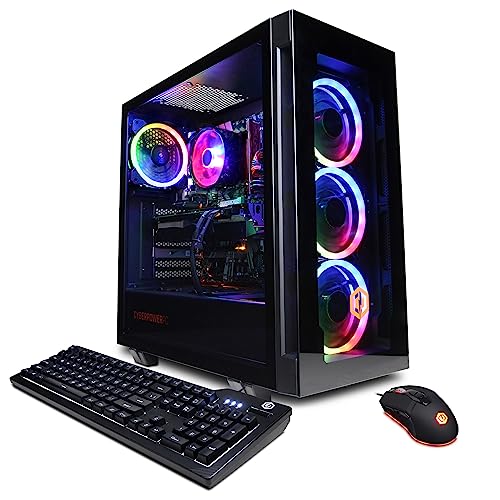
Both can. A vertical mount that parks the GPU’s fans millimetres from a glass panel starves them of intake air, and a sealed glass front turns the case’s main intake into a decoration unless the side vents are genuinely generous. Neither is automatically disqualifying — some designs ventilate around their looks honestly — but when temperatures disappoint in a showcase case, the showcase is the first suspect to interrogate.
Can I use my PC’s temperatures to tell if a fan has failed?
Often, yes — a failed intake or exhaust fan rarely announces itself, but its absence shows up as a changed temperature pattern: one component’s temperatures climb while others hold, or the whole system runs a band hotter with no change in load or room. Compare against your baseline notes, then confirm visually with the panel off and the machine running. Fans are cheap and their failure is gradual in effect, which makes them the highest-value check in any sudden-warmth investigation.
Is liquid cooling worth it purely for lower temperatures?
For most gaming loads, a good air cooler reaches temperatures close enough that the difference buys little performance, because modern components throttle at limits both solutions can respect. Liquid earns its place for sustained high-wattage CPUs, for noise shaping — spreading heat across a large, slow-fan radiator — and for cases designed around it. Buy it for those reasons if they are yours; buying it purely for a smaller number on a temperature readout is buying a scoreboard, not a benefit.
Should my GPU or CPU temperature worry me more?
Whichever is closer to its throttling point under your real games — and the overlay will tell you, because throttling shows up as clock speeds falling while temperatures sit at their ceiling. In most gaming systems the GPU does the heavy work and deserves first attention, but CPU-bound titles and small cases can reverse the priority. Worry is a resource; spend it on the component the data points at, not on the one with the scarier reputation.
Do I need to reapply thermal paste when I change my cooler?
Yes, every time a cooler is removed and refitted — the old layer has taken the shape of the previous mounting and will trap air if reused. Clean both surfaces until they are bare and bright, apply fresh paste in the amount your cooler’s instructions suggest, and seat the new cooler with the cross-pattern tightening described in this guide. It is five minutes of work guarding the single most important junction in the cooling chain.
Why does my PC get louder as a game session goes on?
Because heat soaks. In the first minutes, the coolers and case air absorb the load with capacity to spare; as every mass in the system warms toward equilibrium, the fans must work progressively harder to hold the same temperatures, and fan curves translate that into rising noise. A machine that is quiet at minute five and loud at minute ninety is not malfunctioning — it is showing you its sustained-state character, which is the state that matters and the one to optimise with curves, airflow and placement.
What is the one cooling habit you would give every PC owner?
Keep a baseline. Note your room temperature and your main components’ temperatures in one standard game scene, once, while the machine is healthy — and repeat it whenever something feels off and once a year for maintenance. Nearly every cooling mystery in this guide is solved by comparing a sick machine against its own healthy numbers, and nearly unsolvable without them. The habit costs ten minutes a year and converts every future temperature worry from an argument into a measurement.
Do case fans wear out, and how would I know?
Yes — their bearings are mechanical and they live spinning for years. The signs are a new clicking, grinding or wavering tone, a fan that starts reluctantly or wobbles visibly, and eventually a fan that stops. Because the failure is gradual, the temperature record usually notices before the ear does: a slow widening of the gap between component and room temperatures across a season, with no other change, is a fan asking to be inspected.
Should I worry if only one CPU core runs much hotter than the rest?
A spread between cores is normal — workloads favour some cores and sensor placement varies — but a single core running dramatically hotter than its siblings under an even load can indicate uneven cooler contact or paste coverage. If the spread appeared after a cooler refit, reseating the cooler with fresh paste and even pressure is the correct first response.
Related Guides
Keep exploring with these guides and roundups from the same Gaming PCs collection: