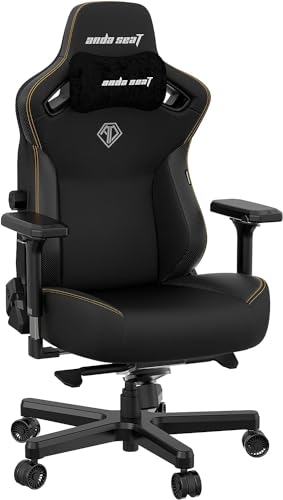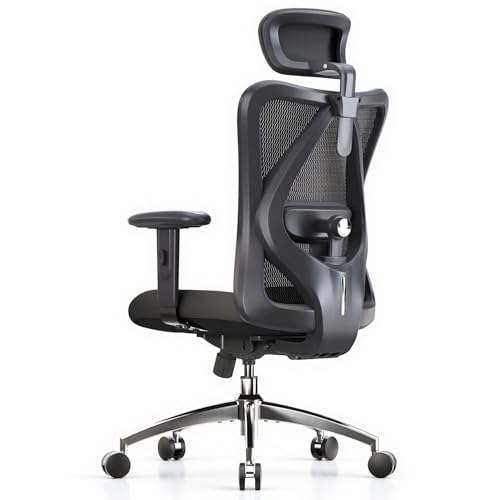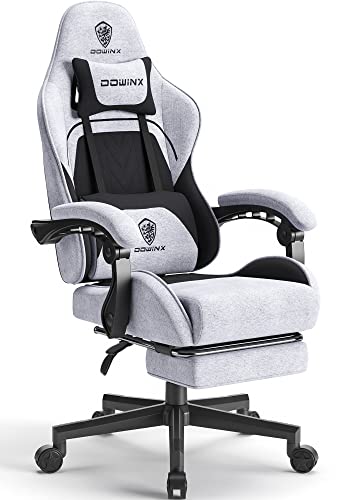
Learning how to clean a gaming chair properly matters because the wrong cleaner can crack PU leather, fade fabric dye or soak foam that then smells for weeks. The right routine is simple: dust and vacuum first, clean the upholstery according to its material, then wipe down the base, casters and mechanisms. This guide gives a material-by-material method, a stain playbook, and a realistic schedule that keeps a chair looking new without turning cleaning into a project.
Disclosure: As an Amazon Associate, ilcastellomenu.com earns from qualifying purchases. Product links on this page may earn us a commission at no extra cost to you. Prices and availability change on Amazon, so check the product page for the current details before you buy.
Know Your Material Before Anything Touches It
Gaming chairs come in three upholstery families, and each wants different chemistry. PU leather (also labelled faux leather, bonded leather or leatherette) is a plastic coating: it likes mild soap and water and hates solvents, bleach and abrasive pads, which strip the coating and start the cracking-and-peeling cycle. Fabric upholstery tolerates a wider range of cleaners and can be shampooed, but it absorbs liquid, so the rule is minimal moisture and good drying. Genuine leather sits between the two: mild cleaners are fine, but it needs occasional conditioning to stop the hide drying out.
Check the care tag or the manufacturer’s care page for your model before experimenting, and always test any cleaner on a hidden patch — the underside of the seat is ideal — and wait ten minutes. The material decision itself, including how each finish ages, is compared in Fabric vs Leather Gaming Chair; if you are still shopping, cleanability is a legitimate reason to pick one over the other, as noted in How to Choose a Gaming Chair.
In this guide
What You Need: A Small, Cheap Cleaning Kit
- Two or three microfibre cloths (one for washing, one for rinsing, one dry for buffing)
- A soft brush or old soft toothbrush for seams and stitching
- Mild liquid soap or a dedicated upholstery cleaner for your material
- A vacuum with an upholstery or crevice attachment
- A spray bottle of clean water for rinsing fabric
- Leather conditioner (genuine leather only), and a silicone-free plastic trim wipe for the base if you like
That is genuinely all. Avoid steam cleaners on PU leather — heat and moisture together can delaminate the coating — and avoid soaking any chair enough that liquid reaches the foam. Foam that gets wet deep inside dries slowly and is where musty smells are born.
How to Clean a Gaming Chair, Step by Step
- Strip the chair: remove lumbar and head pillows and shake or vacuum them separately; their covers often unzip for washing — check the label.
- Dry clean first: brush loose dust off, then vacuum every surface including seams, the seat-back gap and under the seat, where crumbs migrate.
- Wash the upholstery (method in the next section for your material), working one panel at a time so cleaner never sits long on any surface.
- Wipe the armrest pads, side covers and plastic trim with a damp soapy cloth, then a clean damp cloth to remove residue.
- Clean the base and casters: pull hair and thread from caster axles with tweezers, wipe the wheels, and check each spins freely.
- Let the chair air-dry fully before replacing pillows or sitting — an hour in a ventilated room, longer for fabric.
While the chair is stripped and you have access to its underside, spend two minutes with the Allen key checking bolt tightness. Cleaning day is the natural maintenance day, and a loose bolt found now prevents the problems in How to Fix a Squeaky Gaming Chair later.
Cleaning PU Leather Without Cracking It
Mix a few drops of mild soap in a bowl of lukewarm water. Dip a microfibre cloth, wring it until it is just damp, and wipe the surface in small sections. For grime in the grain or stitching, use the soft brush with the same solution and a light touch. Follow immediately with a second cloth dampened with plain water to lift soap residue — residue left behind attracts dirt and dulls the finish — then buff dry.
Never use alcohol-based wipes, acetone, bleach sprays or ‘magic’ melamine sponges on PU leather; each one removes a little of the coating, and the damage shows up months later as flaking. Keep the chair out of prolonged direct sunlight for the same reason: UV and heat are the two biggest accelerants of PU breakdown. If your chair’s finish is already starting to peel, gentle cleaning is all you can do — peeling is a coating failure, not dirt, and no cleaner reverses it. That lifespan reality is part of How Long do Gaming Chairs Last.
Cleaning Fabric Upholstery and Mesh
Fabric rewards a different approach: vacuum thoroughly first, because most of what makes fabric look tired is ground-in dust. For general cleaning, use a fabric upholstery shampoo or a weak solution of laundry detergent, applied as foam with a soft brush rather than as liquid — foam cleans the fibres without soaking the cushion beneath. Work in small areas, then ‘rinse’ by blotting with a cloth dampened in clean water, changing the water when it clouds.
Drying is the step people skip and regret. Aim a fan at the chair or leave it in moving air until the fabric is completely dry to the touch before use; sitting on damp fabric presses moisture into the foam. Mesh backs and seats simply need vacuuming and a wipe with a damp soapy cloth, and they dry in minutes — one reason mesh features in so many picks in Best Gaming Chairs for Long Hours.
Stains, Spills and Smells: The Playbook
Fresh spills: blot, never rub. Rubbing drives liquid deeper and spreads the stain. For food and drink on fabric, blot, then treat with foam shampoo and blot again. On PU leather, most spills wipe straight off if you get there within a few minutes — the material’s one great advantage. Ink and dye transfer (from new jeans, for example) are the hardest marks on light PU; a dedicated faux-leather cleaner gives the best chance, applied gently and early.
For smells, the source is almost always absorbed sweat in the seat foam. Surface-clean the upholstery, then sprinkle plain baking soda over fabric, leave it for several hours or overnight, and vacuum it up. Repeat if needed. Keep the chair in a ventilated room and resist fragranced cover-up sprays, which layer scent over the problem instead of removing it. Persistent deep smells after a thorough clean usually mean the foam itself is saturated — at that point a replacement cushion or a new chair from a roundup like Best Comfortable Chairs for Gaming is the honest fix.
How Often Should You Clean a Gaming Chair?
A realistic rhythm: a quick vacuum and wipe of armrests and seat weekly if you eat or snack at your desk (and even if you think you do not), a full upholstery clean every one to three months depending on use, and caster and bolt checks at the same time. Chairs in hot rooms or used for long daily sessions benefit from the shorter interval because sweat is the main ageing agent for both fabric and PU finishes.
Build the habit around something you already do — many players clean the chair on the same day they deep-clean their desk setup, following How To Organize Cables On A Gaming Desk for the cable side. Twenty minutes a month is all it takes to keep a chair looking and smelling like it did in its first year.
Deep-Cleaning Day: The Full Reset Routine
Once or twice a year, give the chair the full reset rather than the maintenance wipe. Strip the pillows, remove any zip-off covers the manufacturer explicitly allows to be washed, and take the chair somewhere you can work around it — the vacuuming stage will evict a surprising amount of dust from the seat-back gap and under-seat area. Work top to bottom so dislodged dust falls onto surfaces you have not cleaned yet.
Clean the upholstery by the material method in this guide, then detail the parts maintenance cleaning skips: the underside of the armrest pads, the inside faces of the side covers, the telescopic lift cover, and the base’s top surface where dust cakes around the centre socket. Wipe the exposed piston rod of the gas lift with a clean, dry cloth — grit on the rod gets dragged through the seal with every height adjustment, and a clean rod is a longer-lived lift.
Finish by inspecting as you reassemble: bolt tightness, caster condition, bracket cracks, upholstery wear at the seat front edge. A deep clean that ends with an inspection catches next year’s problems while they are still this year’s five-minute fixes.
Protecting the Chair Between Cleans
Prevention outperforms cleaning. A throw or fitted cover over the seat during non-gaming hours shields upholstery from sunlight and pet hair; a small towel on the seat in summer absorbs the sweat that otherwise migrates into foam. Players who eat at their desks — which is to say, most players — should keep snacks on the desk side away from their lap, because crumbs find the seat-back gap with homing instinct.
Room conditions matter as much as cloths and cleaners. PU leather ages fastest in hot, sunlit, dry rooms; a chair parked beside a south-facing window will crack years before its twin in a shaded corner. If your chair must live in sunlight, a cover during the day is the single most effective lifespan intervention available, ahead of any cleaning product.
Finally, treat spills as emergencies with a two-minute drill — blot, mild cleaner, dry — rather than letting them join the monthly list. Every stain in this guide’s playbook is dramatically easier in its first five minutes than its first five days.
Cleaning the Parts Nobody Sees: Base, Lift and Underside
Turn the chair over — or tilt it safely against a wall — once or twice a year and clean the underside properly. Dust mats itself around the tilt mechanism and inside the telescopic lift cover, and that mat holds moisture against metal. A vacuum, a brush and a dry cloth restore it in minutes. While you are there, this is the natural moment for the bolt check that keeps the chair silent and level.
The base’s top surface around the centre socket collects a ring of grit that migrates into the socket itself. Wipe it away and check the socket for cracks radiating outward — early cracks are visible long before they are felt, and catching one converts a future collapse into a warranty conversation. Caster stems deserve the same wipe: grit on the stem is grit inside the swivel bearing.
The exposed piston rod of the gas lift should be wiped with a clean, dry, lint-free cloth and nothing else — no oils, no sprays. A clean rod protects the seal it slides through, and the seal is what keeps the lift’s pressure where it belongs. Never attempt to clean inside the lift or remove its seals; the unit is sealed for life, by design and for your safety.
Armrest undersides and the seat’s bottom board are the last forgotten surfaces: a damp cloth, dried immediately, and a check that the mounting screws are snug. Chairs cleaned underneath age like chairs cleaned on top — the difference only shows in year four, which is precisely when it matters.
Seasonal and Situation-Specific Cleaning
Summer is the chair’s hardest season: sweat is the main chemical attack on both fabric and PU, and a light weekly wipe of the seat and backrest contact zones — not the full routine, just the contact zones — removes most of it before it soaks in. A small towel over the seat during heatwaves is unfashionable and extremely effective, and it washes in seconds compared with shampooing a cushion.
Illness in the house changes the rules briefly: hard surfaces — armrest pads, plastic trim, PU upholstery — can be wiped with a cloth dampened with a mild disinfectant solution, then wiped again with plain water and dried. Fabric chairs should be vacuumed and aired rather than soaked in disinfectant, which can set odours into foam. Airing a chair near an open window does more than most sprays.
After a move or a spill-heavy party, resist the urge to deep-clean everything at maximum strength. The gentle method, repeated, beats the aggressive method once — upholstery remembers chemical abuse the way it remembers sunlight, cumulatively and permanently. Mild, early and often is the whole philosophy of chair care in four words.
Cleaning Products Decoded: What the Labels Mean for Your Chair
Upholstery cleaners divide into families, and the family matters more than the brand. pH-neutral cleaners are the safe default for both PU and fabric — they lift soil without attacking dyes or coatings. Alkaline cleaners cut grease harder but can dull PU’s finish and fade fabric with repetition; reserve them for genuinely greasy marks, diluted, and rinse after. Solvent-based spot removers are the heavy artillery: effective on ink and dye on some fabrics, capable of dissolving PU coatings outright. On PU, they are simply banned in this guide.
Conditioners divide by material too. Genuine leather wants a true leather conditioner occasionally. PU wants nothing marketed as leather food — the coating cannot absorb it, and the residue attracts dirt; a clean, dry PU surface is a finished job. Fabric wants no conditioner at all, only clean fibres and full drying.
When a product’s label does not name your material, treat that silence as a no and test on the hidden patch under the seat regardless. The patch test is the cheapest insurance in all of cleaning: ten minutes of waiting against a permanently marked seat cushion. Professionals patch-test reflexively; amateurs learn why, once.
The Chair in a Pet Household
Pets rewrite cleaning schedules. Hair embeds in fabric weaves and migrates into caster axles with industrial efficiency, so pet households should vacuum the chair twice as often and clear the casters monthly rather than quarterly. A rubber-bristled brush or a damp rubber glove lifts hair from fabric faster than any vacuum attachment, and keeping a lint roller in the desk drawer turns a daily annoyance into a five-second habit.
Claws are the harder problem. On PU, a single enthusiastic leap can puncture the coating, and punctures become peel points; a throw over the seat when the chair is unoccupied is the practical defence. On fabric, claws snag loops rather than puncturing, and tightly woven modern fabrics tolerate pet life surprisingly well — one more entry in fabric’s long-service ledger.
Accidents follow the playbook in this guide with one amendment: speed matters even more, and an enzymatic cleaner formulated for organic stains earns its place in pet households specifically. Blot first, enzyme second, patience third — and air the chair properly before the next session.
When Cleaning Reveals Damage: The Inspection Dividend
Every cleaning session is secretly an inspection, and its findings deserve the same follow-through as the cleaning itself. Fine cracks appearing in PU tell you the coating’s clock has started; note the date, because the progression from cracks to peeling is the chair’s remaining cosmetic life, and it informs when a replacement search should leisurely begin rather than urgently erupt.
Loose bolts found while cleaning are tightened on the spot — the key lives with the cleaning kit for exactly this reason. Fraying caster tyres, a lift rod that no longer wipes clean, a mechanism that has developed play: each is a small note in the chair’s file and a future repair made cheaper by being anticipated.
This is why this batch keeps pairing cleaning with maintenance. Dirt is the visible task; information is the real product. A chair cleaned attentively for years almost never surprises its owner — its failures are all announced in advance, quietly, during routine wipes.
Storing a Chair: The Clean Before It Goes Away
Chairs go into storage for house moves, spare-room rotations and the arrival of a replacement that has not quite earned trust yet, and storage punishes a dirty chair. Anything organic left in the upholstery — skin oils in the seat, a spill you meant to treat — becomes food for mould in a still, dark space, and foam stored under compression in a warm loft can take a permanent set that no amount of airing reverses. The pre-storage clean is therefore the full deep-clean from this guide, followed by the step storage uniquely demands: drying measured in days, not hours. A chair that feels dry to the hand can still hold moisture deep in the seat foam, so give it two or three days in a ventilated room after its final clean before it is wrapped or closeted.
Store the chair upright and unloaded if space allows, with nothing stacked on the seat, and never store it reclined against a wall with the backrest bearing weight at an angle — months of that lean teaches brackets and foam a shape you will meet again as a lean complaint. A breathable cover or an old cotton sheet protects against dust without trapping humidity the way a sealed plastic wrap does; plastic is for the moving van’s rainy hour, not for the season in the garage.
When the chair comes back out, reverse the ritual: vacuum the dust of storage, wipe every surface, and run the bolt and caster checks before the first sit. Storage loosens nothing by itself, but it hides everything — a caster that seized, a lift rod that gathered grit — and the returning inspection is what separates a chair that resumes service from one that resumes service with three small faults compounding quietly.
Light-Coloured Chairs: Yellowing, Dye Transfer and Defence
White and pale chairs are the category’s showpieces and its maintenance final exam. Their signature failure is yellowing, and it has two distinct causes worth separating, because only one of them is cleanable. Surface yellowing is contamination — body oils, smoke film, airborne cooking grease — and it lifts, slowly, with the gentle PU method from this guide repeated over several sessions. Material yellowing is the coating itself oxidising under ultraviolet light and heat, and no cleaner reverses it, because there is nothing on the surface to remove; the colour change is in the plastic. A chair yellowing evenly on its sun-facing side is telling you about chemistry, not dirt.
Dye transfer is the pale chair’s second enemy: indigo from new jeans, colour from a new dark hoodie, even print from a cushion can migrate into PU’s surface, especially in warm rooms where you sit longest. Caught within days, a dedicated faux-leather cleaner worked gently with a microfibre cloth lifts much of it. Caught after a season of sitting, the dye has usually become a permanent resident, which is why the defence is behavioural: wash new dark garments before they meet the chair, and put a light throw over the seat during the first weeks of any new pair of jeans.
None of this makes a pale chair a mistake — it makes it a commitment, like a white car. Buyers who vacuum weekly, wipe the contact zones fortnightly and keep the chair out of direct sun keep pale chairs pale for years. Buyers who want the monthly rhythm from this guide’s schedule should choose the mid-tone version of the same chair and spend their discipline elsewhere.
Smoke, Vape and Cooking Films: The Residues You Cannot See
Some contamination arrives as a film rather than a spill, and it defeats owners because it is nearly invisible until it is advanced. Tobacco smoke is the classic case: its residue coats PU in a sticky, yellowing layer and loads fabric and foam with an odour that surface cleaning barely touches. Vape aerosol leaves a different film — a glycerin-based slick that feels faintly greasy, attracts dust out of the air, and builds fastest on the chair’s upper backrest and headrest, exactly where exhaled vapour drifts. Cooking does the same work more slowly in studio flats where the chair lives near the kitchen: airborne grease settles on every horizontal surface, seat first.
The cleaning response is frequency, not strength. Films are removed easily while they are thin — the standard damp microfibre wipe, done monthly on the exposed surfaces — and become genuinely difficult once they have polymerised into varnish-like layers, at which point owners reach for the aggressive chemicals this guide bans and damage the coating they were trying to save. If you vape or cook near the chair, promote the contact-zone wipe from a summer habit to a permanent monthly one.
Odour already established in foam is the honest limit of this guide’s methods. The baking-soda treatment and ventilation will improve a film-smelling chair meaningfully; a chair saturated by years of indoor smoking usually keeps a background note of it for life. That is worth knowing before buying a used chair, and it is why the second-hand inspection in this batch treats smell as structural information rather than a cosmetic detail.
The Pillows, Up Close: Washing Covers and Airing Foam
Lumbar and head pillows live harder lives than the chair they serve: they take concentrated sweat at exactly two contact points, they are handled and repositioned daily, and their straps stretch, twist and gather grime in the elastic. They deserve their own routine. Unclip them monthly, shake and vacuum them with the chair, and inspect the straps while they are off — a strap losing its elasticity is why a pillow that used to stay at belt height now migrates to your shoulder blades by midnight, and replacement straps or a repositioned routing usually cure what feels like a support problem.
Covers that unzip and are explicitly labelled washable can be washed cool and gentle, then air-dried fully before refitting; heat from a dryer shrinks covers into a wrestling match and ages elastic in one cycle. The foam inside should never be soaked — if it smells, air it outdoors in shade for a day, with the baking-soda treatment on its cover doing the odour work. Memory foam that has gone flat or crumbly is not dirty, it is finished, and replacement pillows are among the cheapest comfort restorations in the whole setup.
While the pillows are off, clean what they hide: the backrest zones behind them are the least-cleaned surfaces on most chairs, and on PU they often carry a perfect negative of the pillow in polished grime. Two minutes with the damp cloth restores the panel — and shows you exactly where your pillows have been spending their time.
Cleaning a Chair You Are About to Sell or Pass On
A chair being sold deserves one honest deep clean, and the emphasis belongs on honest. The goal is a chair that photographs as it truly is: upholstery cleaned by the material method, casters cleared so it rolls sweetly for the buyer’s test sit, bolts checked so nothing clunks during the demonstration. Cleaning a chair for sale is the standard routine from this guide with the inspection dividend spent differently — every fault you find is a sentence in your listing, not a surprise in the buyer’s hallway.
Disclose the material facts: the lift that sinks an inch overnight, the PU cracking at the seat edge, the foam that has softened. Used-chair buyers are not expecting new; they are pricing condition, and a seller who names faults accurately sells faster and argues less than one whose chair is discovered. Photograph the wear zones in daylight after cleaning — a cleaned chair photographs its true condition better than a dirty one, which hides cracks under grime and makes honest chairs look worse than dishonest ones.
The same logic applies, minus the marketplace, when a chair is handed down to a younger player or a spare room. Clean it as a gift rather than a disposal: full routine, pillows washed, bolts snug, and the chair’s file — manual, spare bolts, model number — passed along with it. A chair handed over with its paperwork is worth measurably more to its next owner, because every future repair starts from information instead of archaeology.
Dusty Rooms, Hard Water and Other Local Problems
Cleaning advice quietly assumes average air and average tap water, and some rooms fail both assumptions. Homes near busy roads, building work or open countryside in pollen season load a chair with abrasive dust at several times the normal rate, and the correct response is to shorten the dry stages of the routine — brush and vacuum weekly without fail — because dust left in place is ground into upholstery by your own body every time you sit. In dust country, the vacuum is not preparation for cleaning; it is the cleaning, and the damp cloth is the finishing step.
Hard water writes its own signature: a cloth dampened for wiping PU can leave faint mineral tide-marks as it dries, which owners misread as cleaner residue and scrub at, compounding the problem. If your water is hard, do the final wipe with a cloth dampened in filtered or boiled-and-cooled water, or buff the surface dry immediately rather than letting it air-dry. The marks are cosmetic and lift with a plain damp wipe once you know what they are.
Coastal rooms add salt air, which is kind to upholstery and unkind to exposed metal: check the base and bracket bolts for the first freckles of corrosion during deep cleans, and wipe metalwork dry rather than leaving it damp. None of these local adjustments change the guide’s chemistry — mild, minimal, material-matched — they change its rhythm and its water, which is usually where local problems actually live.
Cleaning Around Electronics: Massage Units, Speakers and Heated Chairs
Powered chairs add electrical geography to the cleaning map, and the rule set is simple: the chair gets unplugged before any cloth touches it, and moisture stays away from every connector, port and control pod. USB ports and charging sockets collect dust exactly the way caster axles collect hair, but they are cleaned dry — a soft brush and a puff of air — never with a damp cloth, and never with a metal tool that can bridge contacts or scratch them into corrosion.
The lumbar massage unit’s housing and the speaker grilles in the headrest are dust traps with electronics behind them. Vacuum them with the brush attachment on low suction, and wipe their surrounds with a cloth that is barely damp and immediately dried. If your chair has a removable power bank, take it out before any upholstery work: a chair being cleaned gets tilted, dragged and occasionally sprayed near, and the bank’s contacts want no part of that afternoon.
Heated chairs add one more caution: never clean a heated panel while it is warm, and let the chair dry completely before switching the heat back on. Moisture plus a heating element plus foam is a combination with no good outcomes, and the patience costs you an evening at most.
Cables deserve inspection while you clean, following the same logic as the desk cables in this batch: run the recline through its full range and watch the chair’s own leads for pinching or chafing, especially where they pass the hinge. A cable cleaned, checked and rerouted with proper slack during a deep clean is a failure prevented at the cheapest possible moment — which is the recurring bargain this entire guide is built on.
The Ten-Minute Guest-Ready Clean
Sometimes the chair does not need the full routine; it needs to be presentable in ten minutes because a friend is coming to play, a stream starts soon, or a parent has announced a visit. The guest-ready clean is a triage with a fixed order, and it works because guests judge a chair by its contact zones and its smell, in that order, and by nothing else at all.
Minutes one to three: vacuum the seat, the seat-back gap and the armrest tops — the visible crumb zones. Minutes four to six: the damp-cloth wipe of the armrest pads, the seat front edge and the headrest, the three places hands and eyes land. Minute seven: pillows plumped, repositioned to belt and neck height, straps straightened — a chair with its pillows squared reads as maintained even under harsh light. Minutes eight and nine: casters given a quick pull of hair so the chair rolls without its telltale judder when your guest first sits and moves.
Minute ten is the smell check, performed honestly by leaving the room for a moment and coming back in — your own nose adapted hours ago. If the chair fails it, the baking-soda treatment is tonight’s job, not this afternoon’s; open the window instead and let moving air do the achievable part. The guest-ready clean is not a substitute for the real routine, and a chair that only ever receives triage will age like it. But as the visible tenth of the maintenance iceberg, it is the ten minutes guests actually experience.
When PU Turns Dull: Diagnosing the Grey Phase
Owners of PU chairs often report a stage where the surface is not cracked or peeling but simply dull — a grey, tired film over the panels that cleaning seems not to lift. Three different conditions hide under that description, and they separate with one test: wipe a small area with a cloth dampened in plain water, dry it, and compare it under a lamp with the panel beside it. If the test patch brightens, your dullness is residue — soap film and cleaner build-up from months of wiping without rinsing — and the cure is the discipline this guide repeats: a second cloth, plain water, every time, until the whole chair has been rinsed back to its actual finish.
If the patch does not brighten, feel it. A surface that has gone slightly rough or matte under the fingers has micro-scratched — thousands of tiny abrasions from gritty dust wiped across it dry, from textured clothing, from years of contact. Micro-scratching is wear, not dirt; it does not wash off, and chasing it with stronger chemicals only adds coating damage to abrasion. The honest treatments are acceptance, a cover for the worst panel, and prevention on the next chair: dust removed dry before any damp wiping, so the cloth is never dragging grit.
The third condition is the earliest stage of coating failure: dullness with a faint tackiness, where the surface feels very slightly sticky even when clean. That is the plasticiser chemistry of ageing PU announcing itself, the overture to the cracking described elsewhere in this guide. Note the date when you first identify it. You have not caused it and you cannot clean it away — you have been given the chair’s remaining cosmetic lifespan as advance information, which is worth more than any product sold to disguise it.
Gear for This Guide
You do not need to buy anything to follow most of this guide, but the items below are the ones that genuinely come up again and again in this topic. Each one is a current, widely sold model rather than a placeholder pick.

Dowinx Gaming Chair Fabric with Pocket Spring Cushion
Dowinx’s fabric model is a good illustration of why fabric fans accept a little more cleaning effort: the cloth breathes in summer and responds well to the foam-shampoo method described above, and the pocket-spring cushion keeps its shape under daily use. Check on Amazon

Secretlab Titan Evo XL (Leatherette)
Secretlab’s leatherette finish shows the PU side of the guide: spills wipe off in seconds, and the material is formulated to resist the cracking that cheaper PU suffers — though it still wants mild soap only, never solvents. Check on Amazon
Frequently Asked Questions
Can I use disinfectant wipes on a PU leather gaming chair?
Occasional use on a small area is unlikely to ruin a chair instantly, but alcohol-based wipes dry the coating and repeated use accelerates cracking. A cloth with mild soapy water cleans just as well without the risk.
How do I get the smell out of my gaming chair?
Clean the upholstery first, then treat fabric with an overnight baking-soda application and vacuum it up. Ventilation helps more than fragrance. If the smell survives two full cycles, it has reached the foam and is very hard to remove completely.
Can I remove the cover and machine-wash it?
Some chairs have zip-off covers, but many zips are for manufacturing access, not washing, and covers can shrink or be extremely hard to refit over foam. Only wash a cover if the manufacturer explicitly says it is removable and washable.
What removes hair and lint from fabric chairs?
A vacuum with an upholstery head does most of it; a damp rubber glove wiped across the fabric balls up pet hair remarkably well. Finish with the foam-clean method if the fabric still looks dull.
How do I stop my chair’s casters marking the floor?
Clean casters roll without grinding trapped grit into the surface, which is where most marks come from. A chair mat is the permanent solution on both carpet and hard floors.
Can I use a carpet or upholstery extraction machine on a fabric gaming chair?
With caution, and only on fabric. Extraction machines push more water into the cushion than the foam-shampoo method in this guide, so the drying obligation grows with it — the chair needs moving air and a full day or more before use. Never use one on PU leather, where heat and moisture together can delaminate the coating, and test any cleaning solution in the machine on the hidden patch under the seat first.
How do I clean stitching, seams and piping properly?
Those details trap grime because cloths glide over them. Use the soft brush with your material’s cleaning solution, working along the seam rather than across it, then lift the loosened soil with a damp microfibre cloth. On PU, keep the touch light — stitching holes are where the coating is perforated, and aggressive scrubbing there starts the peeling this guide exists to prevent.
I bought a used chair that smells of smoke. Can it be saved?
Partially, in most cases. Clean every surface by its material method, treat fabric with the overnight baking-soda cycle, and air the chair in moving air for several days. Expect real improvement rather than perfection: smoke odour lives in foam, and foam cannot be washed. If two full cycles leave the smell strong, the honest options are living with it or replacing the chair — no spray changes that arithmetic.
Can I clean a gaming chair with a steam mop or garment steamer held at a distance?
This guide advises against it on every material. Steam’s risk is not only heat at the surface — it drives moisture through seams and stitching into the foam, where it dries slowly and feeds the musty smells owners then chase for months. The foam-shampoo method on fabric and the damp-cloth method on PU achieve the same cleaning with a fraction of the water, which is the entire point.
How soon after cleaning can I sit in the chair again?
When it is dry to the touch everywhere, including the seat-back gap and under the pillows — not merely when the main panels feel dry. PU chairs are usually ready within the hour; fabric chairs that had the full foam-shampoo treatment need several hours in moving air, and sitting early presses residual moisture deep into the foam where it dries slowest and smells first. When in doubt, give it the evening: a chair cleaned after your session and left overnight is always ready by morning.
The Short Version
Match the method to the material: mild soap and a just-damp cloth for PU leather, foam shampoo and thorough drying for fabric, vacuum-and-wipe for mesh. Blot spills immediately, deodorise with baking soda, and pair every deep clean with a caster clean and a bolt check. Gentle and regular beats harsh and rare, every time.