Knowing how to test a motherboard properly means resisting the urge to declare it dead. In real repair work, the board is accused constantly and guilty occasionally: loose cables, a failing power supply, a bad memory stick, and a short from a stray screw all produce symptoms that look exactly like a dead motherboard. This guide works the way technicians do — power off and unplugged before anything is reseated, checks ordered from cheapest and most likely to least, and one change at a time so the result actually tells you something. By the end you will know how to reach a verdict you can trust before spending money on a replacement.
A note on scope and safety: everything here is user-level diagnosis — lights, beeps, cable checks, part swapping with the power off. It deliberately excludes probing a live board with a multimeter and anything involving opening a power supply, which is sealed, dangerous, and never necessary to reach the verdicts in this guide. If your tests point at the power supply itself, the test is ‘replace it with a known-good unit’, full stop.
Disclosure: As an Amazon Associate, ilcastellomenu.com earns from qualifying purchases. Product links on this page may earn us a commission at no extra cost to you, and that support helps us keep testing and writing guides like this one.
How to Test a Motherboard: What You Need
You need less than you think: a Phillips screwdriver, the motherboard manual (for header diagrams and any diagnostic-code table), a monitor and cable you trust, and ideally access to known-good spares — a power supply, a memory stick, a basic graphics card. Spares are what turn guesses into verdicts, so borrow before you buy. A phone torch helps you read tiny header labels. Keep a notebook: write down each change and its result, because three changes in, nobody remembers which one mattered.
- Screwdriver and the board’s manual, for headers and diagnostic codes
- A known-good monitor and video cable, tested on another device if possible
- Known-good spares if available: power supply, one memory stick, basic GPU
- A notebook or notes app — one change at a time, results written down
In this guide
Step 1: Rule Out Everything Outside the Case First
Start where the fault often actually lives. Confirm the wall outlet works by plugging in something else. Check the switch on the back of the power supply is on — it gets knocked during cleaning and moving more often than anyone admits. If the machine shows a picture problem rather than a power problem, test the monitor and its cable on another source, and make sure the display is set to the input the PC is actually using. A surprising share of ‘dead PC’ calls end at this step, with the motherboard innocent.
Then look at what changed. A fault that appeared right after a move, a cleaning, a storm, or a hardware change has a different suspect list than one that crept in over months. If the trouble began the day you fitted a new processor, BIOS support belongs near the top of your list — How to Update the BIOS on a Motherboard covers that check and its risks in full.
Step 2: Observe What the Board Does at Power-On
With the PC connected to power, press the power button and observe carefully before changing anything. Do fans spin, even briefly? Do lights appear on the board? Does it beep, and if so, in what pattern? Many boards carry small diagnostic LEDs that stop beside the stage that failed — CPU, memory, graphics, boot — and some show a two-digit code. Your manual decodes both. This observation is the single most informative free test you have: a board whose fans never twitch points at power delivery or the power switch circuit, while a board that spins fans but stalls on the memory LED has already told you where to look.
If the system starts and runs but misbehaves later — crashing, freezing, restarting — you are in a different branch of diagnosis. Note when it fails: during boot, under load, or randomly at idle. Random restarts under load point at power or heat; failures while booting point at storage or memory configuration. The specific pattern of a machine that loops before it ever boots is covered in How to Fix Motherboard Boot Loop.
Step 3: The Safe Reseat Pass — Power Off, Unplugged
Now, and only now, hands go inside — with the power supply switched off and its cable unplugged from the wall. Press the case power button once after unplugging to drain residual charge, and touch grounded metal before handling parts. Reseat, one at a time: the 24-pin main power connector, the CPU power connector at the top of the board, each memory stick (out, inspect the contacts, back in until both clips snap), and the graphics card. Loose seating — especially memory that looks in but is not fully clicked, and a CPU power cable that was never quite home — is the leading cause of boards being wrongly condemned.
While parts are out, look. A magnifier or phone camera helps: check for bent socket pins if the CPU comes out (it usually should not need to), bulging or leaking capacitors on older boards, scorch marks, and anything metallic loose in the case. Also confirm no extra standoff sits behind the board where it has no mounting hole — see How to Install a Motherboard for why that classic assembly error mimics board failure.
Step 4: The Minimum-Parts Test (Breadboarding Logic)
If the reseat pass changes nothing, strip the system to the minimum that can show signs of life: motherboard, CPU with its cooler, one memory stick in the manual’s recommended slot, power supply, and a way to see output — integrated graphics if the CPU offers it, otherwise a graphics card. Disconnect everything else: drives, extra sticks, USB devices, add-in cards. This is sometimes done with the board outside the case on its box, which also eliminates case shorts entirely; on a non-conductive surface, powered carefully, it is a legitimate and decisive test.
A minimum system that starts tells you the board, CPU, and that memory stick are fundamentally alive, and the fault is in something you removed — reintroduce parts one at a time, powering off between changes, until the fault returns. A minimum system that still will not start has narrowed the field to board, CPU, power supply, or that one memory stick, which the next step separates.
Step 5: Substitute Known-Good Parts, One at a Time
Substitution is the most reliable test in this entire guide, and the order matters. Swap the power supply first — it fails far more often than motherboards and produces identical symptoms, and it is the easiest swap. Then the memory stick, then the graphics card if one is in play. The CPU is last: processors fail rarely, and swapping one is the most invasive job. After each single swap, test. The moment the system starts, you have found your culprit — and notice how often it is not the motherboard.
If you have no spares, a local repair shop’s bench test is cheaper than a guessed motherboard purchase, and it comes with the same substitution logic done on their parts. What you should not do is buy a replacement board on suspicion: if the real fault was the power supply, the new board will appear dead too, and you will have spent the money and kept the problem. Should the verdict genuinely land on the board, the shortlists in Best Motherboards for Gaming are organised by the processors they pair with, which is where a replacement search starts.
Step 6: Test a Board That Boots but Misbehaves
A board that starts needs different tests. For instability, run memory diagnostics from a bootable tool overnight — memory errors indict the sticks or their settings far more often than the board. Watch temperatures in the BIOS hardware monitor: a CPU cooking at idle means a cooler problem, not a board problem. Test each memory slot with one known-good stick; a board with one genuinely dead slot has a real, provable fault, and you have isolated it cleanly. Try the graphics card in another slot if one exists.
Keep separating ‘the board’ from ‘things plugged into the board’. USB devices that disconnect can be a dying device or cable. Storage errors follow the drive and its cable when swapped. The board earns the blame only when a fault stays with it across known-good parts — that is the standard of proof to hold yourself to before replacing it, and the standard this whole guide is built around.
When the Verdict Really Is the Motherboard
Call it when: the minimum-parts system will not start with a known-good power supply and memory; diagnostic LEDs halt at the same stage with known-good parts fitted; physical damage is visible; or a slot or port is proven dead with parts that work elsewhere. At that point, check warranty before buying anything — boards carry multi-year warranties more often than people remember, and a proven fault with your test notes makes an RMA conversation short. Keep your notes either way; they are the difference between a warranty claim and an argument.
Reading Diagnostic LEDs and Codes Like a Technician
Modern boards speak in three dialects at startup, and learning yours takes one manual page. The four-LED system lights each stage — CPU, DRAM, VGA, BOOT — in sequence and parks on the failure; it is the most useful dialect because it requires no lookup mid-panic. The two-digit hexadecimal display shows checkpoint codes that change constantly during a healthy boot; only the code it stops on matters, and the manual’s table translates it. Beep codes, from a small speaker or header, are the oldest dialect: patterns of long and short beeps whose meaning is maker-specific. In all three systems, the message is a starting point, not a verdict — a DRAM light, for instance, means ‘the memory stage did not complete’, which implicates the sticks, their slots, their settings, and occasionally the CPU’s memory controller, in that order of likelihood.
A subtle trap: the LED that lights is the stage being attempted, and a board can stall between stages. Treat the light as ‘start here’, then work that subsystem with the substitution method rather than replacing the named part on faith.
Testing Individual Subsystems Once the System Boots
A board that boots lets you test it in slices. Memory slots: run one known-good stick through each slot in turn, booting between moves (always power off and unplugged to move it); a slot that alone fails has identified a board fault precisely. Expansion slots: a graphics card that works in the second slot but not the first tells the same kind of story. USB ports: test each with a simple device; a single dead port is a board or connector fact, while all rear ports dead together suggests a driver or a whole controller. Storage ports: move a known-good drive between M.2 slots and SATA ports with a known-good cable, and watch which combination fails — the pattern separates board, cable, and drive cleanly.
Keep a written grid as you go: subsystem, known-good part used, result. Ten minutes of grid beats an evening of impressions, and if the board ends up in a warranty claim, the grid is your evidence file.
Intermittent Faults: Testing the Problem That Hides
The hardest board tests are for faults that appear weekly, under heat, or only under load. Strategy changes from swapping to logging and stress. Log first: note date, workload, temperature if you can see it, and what the machine was doing; intermittent faults have triggers and the log finds them. Then reproduce deliberately: memory diagnostics overnight for RAM-adjacent crashes, sustained CPU and GPU loads for power and heat questions, and gentle flex-free checks — never bend a board to provoke a fault; instead, verify every connector’s seating once, thoroughly, since a marginal connector is the intermittent fault’s favourite costume.
Heat deserves respect in intermittent cases: a system stable when cold and flaky after an hour points at a component drifting with temperature — power delivery, a solder joint, the supply. Testing in a cool room versus a warm one can confirm the direction before any part is bought. And accept the honest limit of home diagnosis: a fault you cannot reproduce on demand cannot be proven fixed, only unobserved. Technicians live with that uncertainty by changing the most probable part and keeping the receipt.
What a Repair Shop Does That You Cannot (and Vice Versa)
A good shop brings a bench of known-good parts, a POST diagnostic card, spare processors for your socket, and experience of your board model’s known quirks. What it does not bring is your history of the fault — which is why arriving with your test notes, your subsystem grid, and your ‘it started when…’ story makes the shop faster and cheaper. Ask for the diagnosis as a finding, not just a quote: which part failed, proven how. If a shop cannot explain the proof, the quote is a guess with a logo on it.
Software-Side Tests Once the Machine Runs
A board that boots opens the door to software diagnostics that no amount of staring at hardware can replace. Memory testers that boot from USB exercise the memory subsystem for hours and report errors with addresses — patterns in those addresses can even hint at which stick or slot misbehaves. Stress tools that load the CPU, the graphics, and both together expose power and cooling weaknesses that idle testing never will; watch temperatures and clock behaviour while they run, because a board whose power delivery fades under sustained load announces itself as throttling long before it fails outright. Drive-health tools read the storage’s own self-monitoring data, separating ‘the board loses my drive’ from ‘the drive is dying and the board is the messenger’.
Run these tests with intent: one variable loaded at a time, results written down, and a baseline taken while the machine is healthy if you can — a stress test first run during a crisis gives you numbers without a ‘normal’ to compare them against. The deeper principle is that a motherboard is tested by the company it keeps: each subsystem test that passes with known-good parts moves the board closer to innocence, and the one that fails, repeatably, with the part proven elsewhere, is where the board’s defence ends.
Testing a Board You Are Buying Used
Second-hand boards deserve their own protocol, because the test begins before money moves. Ask the seller to demonstrate the board running — a short video of it posting with a processor and memory fitted is worth more than any description, and honest sellers expect the request. Inspect photographs for the tells: a socket photo taken straight-on reveals bent pins as breaks in the pin grid’s pattern; port photos reveal damage; the board’s back reveals scratches that cross traces. In person, add your nose and eyes: a burnt smell around the power circuitry and any discoloured patch are walk-away signals no discount repairs. Check that the I/O shield, and ideally the manual and cables, are included — their absence is not fatal but is a legitimate price argument, since the shield is model-specific and annoying to replace.
Once it is yours, bench-test it before it goes anywhere near a case: minimum parts, on the box, exactly the method from this guide’s middle sections. A used board that passes a minimum-parts bench test, a memory run, and a check of every slot and port you intend to use has earned its place; a board installed untested into a finished build has merely hidden its verdict inside your cable management. The used market rewards this discipline handsomely, because good boards are common and the testing is free.

Gear for This Guide
The products below come from our verified listings pool and are mentioned because they genuinely fit this topic, not because they are the newest or the most expensive option.
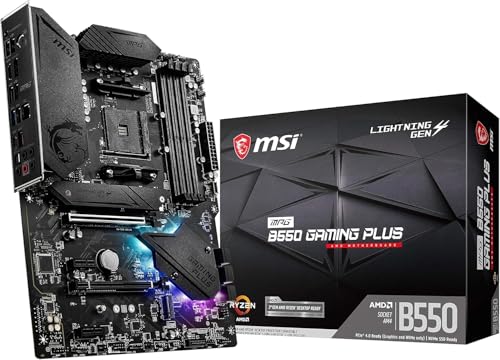
- MSI MPG B550 Gaming Plus Gaming Motherboard — a sensible known-good reference point if your tests do convict the board and the replacement search begins on the AM4 platform. Check on Amazon
Testing After a Power Event: Surges, Outages, and Storms
A system that misbehaves after a thunderstorm, a blackout, or a breaker trip needs a modified version of this guide’s method, because a power event changes the suspect list and the order in which to clear it. The power supply absorbs the first insult by design, and it frequently dies doing so — sometimes completely, sometimes partially, in ways that imitate motherboard failure almost perfectly: fans that twitch, lights that glow, a board that starts but collapses under load. For that reason, after any power event, the substitution test in Step 5 moves to the front of the queue. Do not condemn a board that has only ever been tried on a supply that just survived a surge.
Work the path the electricity took. Inspect the wall outlet and any power strip or surge protector first — a sacrificed surge protector that now passes power without protection, or no power at all, is a common and invisible culprit. Smell the power supply’s exhaust vent; a sharp, acrid odour is evidence, and it ends the inquiry for that unit. Then run the standard sequence: external checks, observation at power-on, the reseat pass, minimum parts. One addition belongs in the reseat pass for this scenario — examine the board’s ports. A surge that arrives through a network cable or an external drive can damage a single port or controller while the rest of the board survives, so a system that boots but has lost its Ethernet, or one USB bank, after a storm is showing you a localised injury rather than a dying board. Test the remaining subsystems individually, as the subsystem section of this guide describes, and judge the board by the whole map of what works, not by the one casualty.
Finally, let the event teach the setup a lesson. Once the machine is healthy, a functioning surge protector — replaced if it absorbed the hit, since protective components are consumed by doing their job — and a small uninterruptible power supply for machines that hold important work convert the next event from a diagnosis session into a non-event. Testing knowledge and prevention are the same knowledge, read in opposite directions.
When the Tests Disagree: Deciding Under Conflicting Evidence
Real diagnosis is rarely as tidy as the steps imply. The board that fails the minimum-parts test on Tuesday passes it on Thursday. The diagnostic LED blames memory, yet three known-good sticks fail identically. The system crashes under a graphics load but survives every memory and CPU stress test you own. Conflicting evidence is not a sign you are testing badly; it is a sign the fault is conditional — dependent on heat, load, time, or a specific combination of parts — and conditional faults need a different discipline from the one-variable method.
That discipline is replication before interpretation. A result you cannot reproduce is weather, not climate: before acting on any single observation, provoke it twice more under the same conditions and record exactly what you did. Note the ambient conditions technicians instinctively track — cold start or warm restart, five minutes in or five hours, which devices were attached, which slot, which cable. Patterns in those notes are the diagnosis in embryo. The fault that only appears on warm restarts points at components whose behaviour drifts with temperature. The fault that follows a specific peripheral across two machines acquits the board entirely. The fault that vanishes whenever the case is open is telling you about heat or about a cable that only sits wrong when the panel presses it, and both readings are useful.
When two tests genuinely conflict — substitution says the board is guilty, inspection shows nothing, the shop’s bench could not reproduce it — weight the evidence by its nature. Substitution with known-good parts, repeated, is the strongest evidence available to you; a single pass on a stranger’s bench, with different memory and a different supply, is weaker than it looks, because the conditions that provoke your fault may simply not have occurred there. This is also where the written grid from the subsystem section earns its keep a second time: a warranty claim or a shop visit armed with dated, specific observations — “fails warm restart, three of five attempts, memory LED, two different kits” — gets taken seriously and tested properly, while “it crashes sometimes” gets a shrug and a reimage. If the evidence stays genuinely tied after honest effort, the rational move is to replace the cheapest suspect that fits the evidence, not the most expensive one; in practice that is very often the power supply, which is also the part whose failure can imitate everything else in this guide.
Testing Power Delivery Behaviour Under Sustained Load
One board subsystem hides from every test described so far, because it only misbehaves when asked to work hard for a long time: the voltage regulators that feed the processor. A board can pass every boot test, run office work flawlessly, and still be the cause of a system that throttles its CPU speed during long renders, drops to a crawl in extended gaming sessions, or shuts down forty minutes into heavy work and then restarts as if nothing happened. These are power-delivery symptoms, and testing for them means observing the board under the conditions that provoke them.
The observable signs are accessible without instruments. Run a sustained, repeatable CPU load — a long render, an encoding job, a stress tool — while watching the processor’s clock speed and temperature in a monitoring utility. A healthy system holds its expected boost behaviour, temperatures plateau, and the job finishes at a consistent pace. The power-delivery failure pattern looks different from ordinary overheating: the CPU’s own temperature reads acceptable, yet its clock speed falls in steps and stays low, or the system resets without any temperature ever approaching its limit. The board is protecting its regulators, or failing to feed the processor what it requests. Corroborate with airflow: temporarily direct a desk fan into the open case at the regulator area beside the CPU socket. If sustained performance returns with that crude cooling, you have localised the fault to the board’s power-delivery cooling with a confidence no software report can match — and you have also found the interim fix, since case airflow aimed at that area is a legitimate long-term remedy for a marginal board.
Context keeps this test honest. High-core-count processors on entry-level boards are the classic mismatch, and it is a mismatch of specification, not a defect: the board was built to a budget for mainstream chips. Before condemning the hardware, check the board maker’s CPU support list for any notes about your processor, confirm the cooler’s mounting pressure and the case’s airflow are what they should be, and re-run with the processor at completely stock settings. If a flagship CPU still cannot hold its rated behaviour on a board sold as supporting it, with cooling proven adequate, that is a legitimate warranty conversation — and your load-test notes, with times and clock speeds, are the evidence that makes it a short one. For the buying-side version of this lesson, the VRM discussion in our motherboard choosing guide shows how to read power-delivery claims before money changes hands.
The No-Spares Playbook: Testing When You Own Nothing to Swap
The substitution steps in this guide assume access to known-good parts, and many readers reasonably ask what testing means without them. Quite a lot, it turns out — the no-spares playbook is narrower than substitution but far from empty. Begin by exhausting configuration as a variable: load BIOS defaults, run the memory at its slowest standard speed with no profile enabled, and remove every overclock or undervolt. A remarkable share of “failing boards” are failing settings, and defaults are the control condition every later result is compared against.
Then exploit the parts you do have as their own spares. Two memory sticks are two test subjects: run each alone, in each slot, and you have performed a genuine substitution matrix that separates stick faults from slot faults from channel faults. Integrated graphics, if your processor has them, substitute for the graphics card. A second storage device — even an old drive or a bootable USB stick with a live operating system — substitutes for your main drive and its installation at once, which is why a bootable USB toolkit is the single most valuable “spare” a no-spares owner can prepare in advance. Your phone substitutes for test equipment more often than pride admits: its camera inspects sockets and reads tiny labels, its torch lights the case, and its stopwatch times boot loops and failure intervals precisely enough to reveal patterns.
Know, too, when the playbook has honestly run out. If the minimum-parts system will not start, settings are default, the memory matrix is clean, and no display appears by any route, the remaining suspects — board, CPU, power supply — cannot be separated without at least one known-good part, and guessing wrong costs more than diagnosis. That is the moment the economics in this guide’s repair-shop section take over: a bench fee buys certainty, and borrowing a supply from a friend’s machine for one evening buys the single most informative test of all. Testing well is partly technique and partly knowing where your evidence ends; the board deserves neither a pardon nor a conviction your tests cannot support. If the verdict does land on replacement, the shortlists in our best motherboards for gaming roundup are a reasonable place to see what the current generation offers.
Cold Boots and Warm Restarts: What Timing Tells You
A free diagnostic signal hides in a question owners rarely think to ask: does the fault care whether the machine is cold or warm? Deliberately test both states and record the answer, because the pattern discriminates between whole families of causes. The machine that fails its first cold boot of the day but then runs perfectly is a classic pattern with a short suspect list — ageing capacitors that need warmth to behave, a power supply whose output sags until it stabilises, solder joints that make contact only once expansion closes them. The machine that starts cold without complaint but fails warm restarts, or degrades the longer it runs, points the other way: toward heat-sensitive components, marginal cooling, and regulators drifting out of tolerance as they soak.
Neither pattern convicts the motherboard by itself — the power supply appears on both lists, which is why substitution still outranks pattern-reading — but timing evidence focuses everything else. Tell a repair shop “cold-start failure, fine once warm” and you have handed them a different, shorter worksheet than “it crashes”. Test timing the way you test everything else in this guide: deliberately, repeatedly, and in writing. Three mornings of cold-boot results are data; one is an anecdote, and boards have been replaced on anecdotes often enough that the distinction is worth the notebook.
Building the Evidence Pack: Testing With Warranty in Mind
If there is any chance the board is under warranty, test as if you will have to prove your work — because you will. Manufacturers and retailers grant replacements on evidence, and the quality of your testing record decides whether a claim is a formality or an argument. The evidence pack is simple to assemble while you test and impossible to reconstruct afterwards: dated notes of each test and its result, the grid from the subsystem section, photographs of the board’s condition showing no physical damage, and a short video of the failure itself — the diagnostic LED stalling, the loop repeating — captured on a phone. Add the details of every known-good part used, by model, because “tested with another power supply” persuades nobody while a named, adequate unit does.
Two habits protect the claim itself. Keep the board’s accessories, box, and proof of purchase together from the day it arrives; a claim missing its paperwork moves at half speed. And stop testing at the point this guide calls the verdict, rather than pressing on into experiments — no firmware heroics, no borrowed processors from unsupported lists, nothing that lets a support agent reasonably wonder whether the testing caused the failure. A clean claim tells a clean story: the board failed, here is the method, here are the known-good parts, here is the moment the evidence converged. Shops and manufacturers see hundreds of these stories; the ones documented like a technician’s worksheet are the ones that end with a replacement board in the post.
Cross-Checking the Board’s Own Sensors and Fan Control
A board that boots and passes stress tests can still be lying to you politely, through its sensors and fan control — and since cooling decisions throughout the system’s life are made from those readings, testing them belongs in a complete examination. The method is cross-checking: compare what the board reports against an independent reference. In the BIOS, note the CPU temperature at idle after a cold start; it should sit modestly above room temperature and climb slowly. In the operating system, compare two different monitoring utilities against each other and against the BIOS figure at the same idle moment. Readings that disagree wildly between tools, a temperature that never changes under load, or a fan reported at a speed its noise plainly contradicts are all findings — they indicate sensor or firmware quirks that will distort every fan curve you set.
Test fan control directly, header by header: set each header to a fixed full speed, then a fixed low speed, and confirm the attached fan obeys and reports plausibly. A header that cannot modulate, or that reports nonsense, matters more than it first appears — a CPU-cooler header misbehaving is a reliability fault, not a cosmetic one. Voltage readings in software deserve a mention for calibration: they are approximations from inexpensive monitoring circuitry, useful for spotting a rail that is absent or wildly adrift, useless for fine judgement, and never a reason by themselves to convict a board or a supply. Treat the board’s telemetry the way you treat everything else in this guide — as testimony to be corroborated, never as the verdict itself.
One More Variable: The Room the Machine Lives In
Occasionally every test passes and the machine still fails — in one room, on one outlet, in one building. Before the board takes the blame for a haunting, test the environment. Move the system, or at minimum its power feed, to a different circuit in the house and run it there for the period that would normally provoke the fault. Faults that follow the building rather than the machine have mundane but real causes: a circuit shared with a heavy appliance whose startup sags the voltage, a damaged outlet with an intermittent connection, or wiring faults in older properties that no surge protector can fully disguise. The giveaway pattern is correlation with the household rather than the workload — failures when the heating cycles, when a compressor starts, at the same hour daily.
This test costs nothing but a cable run and patience, and it closes the last loophole in the elimination method: you have verified the parts, the assembly, the settings, and now the wall they all depend on. A board that fails identically in two buildings, on two circuits, with known-good parts has nowhere left to hide; a board that only fails at home never had anything wrong with it. Diagnosis ends when the evidence has no honest alternative reading — and the room is part of the evidence.
Frequently Asked Questions
Can I test a motherboard without a CPU?
Only in a very limited sense. Most boards will show power signs — lights, a fan twitch — and boards with a CPU-less BIOS flash feature can update firmware, but the board cannot complete its startup checks or display anything without a processor. Real diagnosis needs a CPU fitted.
My motherboard has no lights and no fans. Is it dead?
Not necessarily — that pattern points first at power: the outlet, the supply’s rear switch, the supply itself, or the front-panel power switch wiring. Test or substitute the power supply before concluding anything about the board; a board receiving no power looks exactly like a dead board.
What do the little diagnostic LEDs on a motherboard mean?
They light in sequence as the board checks the CPU, memory, graphics, and boot device during startup, and they stop beside the stage that failed. They are the fastest free clue in no-display diagnosis. Your manual names each LED for your model.
Is it safe to run the motherboard outside the case?
Yes, with care: place it on a non-conductive surface such as its own box, connect only the minimum parts, and power off and unplug before touching or changing anything. Never run it on metal, on carpet, or on the anti-static bag it shipped in, whose outer surface can be conductive.
Should I test with a multimeter?
For most users, no. Probing a powered board risks shorting adjacent points and creating the fault you are hunting, and the substitution tests in this guide answer the same questions more safely. Leave live electrical measurement to technicians with the board’s schematics.
How do I know if it is the motherboard or the CPU?
By elimination: a known-good power supply and memory in a minimum-parts system, diagnostic LEDs stalling at the CPU stage, and the same behaviour across reseats. CPUs fail rarely, so the board is the more likely of the two — but ‘more likely’ is why a shop bench test beats guessing when no spare CPU exists.
How long should motherboard testing take?
The structured pass in this guide — external checks, observation, reseat, minimum parts — takes under an hour for most systems. Intermittent faults are the exception: they are tested in days of logging rather than minutes of swapping, because the test is only valid when the conditions that provoke the fault have genuinely occurred. Budget your patience by fault type, not by the clock.
Can software tell me definitively that my motherboard is faulty?
No single program can, because software runs on the board and sees the world through it; a faulty board can make good components report errors, and monitoring tools read sensors the board itself provides. Software diagnostics are excellent at indicting memory, storage, and cooling, and their results form part of the evidence — but the board itself is convicted by elimination and substitution, not by an app.
My board beeps once and shows a logo, but Windows will not load. Is the board fine?
Mostly, yes — that pattern means the board has passed its own startup checks and handed over to the boot device, so suspicion moves to the drive, its cable and port, the storage controller settings in the BIOS, and the operating system installation itself. Test with a bootable USB stick: if the machine runs happily from it, the board has effectively been acquitted.
Is it worth testing a very old motherboard, or should I just replace it?
Test the cheap things regardless — reseats, defaults, the memory matrix — because they cost nothing and fix a real share of old-board faults. Beyond that, weigh the platform: if the board’s socket still supports a worthwhile replacement board at sensible cost, diagnosis has value; if any failure means a full platform change anyway, limit testing to what you need to protect your data and your other components.