Learning how to update the BIOS on a motherboard matters at exactly a few moments in a PC’s life: when a new processor needs support the board did not ship with, when a security or stability fix addresses a problem you actually have, or when newer memory or storage will not behave. Outside those moments, the honest advice is to leave a working BIOS alone. The update itself takes minutes, but it rewrites the firmware the board needs to start at all, so this guide treats it with the respect it deserves — preparation first, a stable power supply throughout, and a clear recovery plan before you begin.
Read this warning before anything else: a BIOS update that is interrupted — by a power cut, a tripped breaker, or an impatient reset — can leave the board unable to start. That risk is small but real, and it is the reason ‘only update when you need to’ is the professional rule rather than timidity. If your system runs well and the update notes list nothing relevant to your hardware or problems, skip it. If you do need it, the steps below, done in order, make it a routine job.
Disclosure: As an Amazon Associate, ilcastellomenu.com earns from qualifying purchases. Product links on this page may earn us a commission at no extra cost to you, and that support helps us keep testing and writing guides like this one.
How to Update the BIOS on a Motherboard: First, Decide Whether You Need It
Manufacturers publish a changelog for every BIOS release, and it is short enough to read in full. Legitimate reasons to update: the notes add support for the processor you are installing; they fix a bug you are experiencing, such as memory instability, a device that will not wake, or a security vulnerability; or a new component requires it. Reasons that do not justify the risk: the update is merely newer, a forum post praised it vaguely, or you hope for performance gains — BIOS updates rarely change performance in any way you could measure, and they can reset settings you relied on.
There is one more planning case: you are buying an older-stock board for a newer CPU. Then the update is not optional, and the smart move is choosing a board with a CPU-less flash feature so the update does not depend on borrowing a supported processor. Boards bought for exactly that pairing fill our list of Best Motherboards for Ryzen 5 5600x, where BIOS support history is part of the value.
In this guide
Step 1: Record Your Current BIOS Version and Settings
Restart into the BIOS setup — usually by tapping Delete or F2 during the first seconds of boot — and note the version string shown on the main screen. Photograph it with your phone. Then walk through any settings you have changed from defaults: memory profiles, fan curves, boot order, virtualisation switches, secure boot state. An update resets most of these to defaults, and rediscovering your fan curves by ear, weeks later, is nobody’s idea of fun. Many boards let you save a settings profile to a USB stick; do that as well, while knowing profiles sometimes cannot be restored across major version jumps.
Also record your current version because update paths occasionally matter: a few boards require an intermediate version, or a chipset-driver update first, before jumping to the latest release. The board’s download page states this when it applies. Skipping a stated prerequisite is one of the few ways a routine update becomes a recovery job.
Step 2: Download the Correct File From the Manufacturer Only
Get the BIOS exclusively from your board manufacturer’s support page, matched to your exact model — including revision suffixes, because boards with near-identical names can use different firmware, and flashing the wrong model’s file is the most destructive mistake available here. Download pages list versions newest-first with dates and changelogs. Never take a BIOS file from a forum attachment, a driver-aggregator site, or a search result ad; firmware is the one download where the source matters as much as the file.
The download is usually a small archive. Extract it and read any included notes. Some makers require renaming the file to a specific short name for their CPU-less flash feature; the manual states the exact name. If you are preparing the update because the board will not start with your new CPU, our troubleshooting walk-through at How to Fix a Motherboard that Will Not Post covers how the BIOS question fits into the wider diagnosis.
Step 3: Prepare a USB Stick and a Stable Environment
Use a plain USB stick formatted as FAT32 — the firmware’s own file browser is simple and expects that format. Copy the extracted BIOS file to the root of the stick, not inside a folder. If your board supports updating from within Windows through a vendor utility, you can use it, but the BIOS’s built-in updater is the calmer route: fewer background programs, no antivirus interference, no surprise operating-system restart in the middle.
Set up the environment like the interruption risk is real, because it is. Plug the PC directly into the wall or, ideally, a UPS; do not update during a thunderstorm or when your building’s power is flaky; close the door on helpful family members and curious pets for ten minutes. Laptop builders should update on mains power with a well-charged battery. This is also the moment to decide your recovery route: does the board have a backup BIOS or a CPU-less reflash feature? Knowing that before you start turns a worst case into an inconvenience.
Step 4: Run the Update From Inside the BIOS
With preparation done, the update itself is a short, supervised wait. Follow this sequence:
- Restart the PC and enter BIOS setup (Delete or F2 at boot).
- Load optimised defaults if the maker’s instructions ask for it, save, and re-enter setup.
- Open the BIOS update tool (each brand names it differently — Q-Flash, EZ Flash, M-Flash, and similar).
- Select the BIOS file from your USB stick and confirm the version shown matches the one you downloaded.
- Confirm the update and then do not touch anything: no keyboard, no power button, no reset.
- Let the board finish and restart itself, even if the screen stays dark for a while or it reboots more than once.
Using the CPU-less flash button instead
Boards with a BIOS flashback-style feature let you update with no CPU or memory installed: you place the correctly renamed file on a FAT32 stick, plug it into the marked USB port, connect power supply power, and press the dedicated button. An LED blinks while it works and stops when done. This is the standard rescue for a board that cannot start with a newer processor, and the method to use when the system will not reach the BIOS screen at all. The exact port, filename, and LED behaviour are model-specific — the manual is authoritative here, not habit.
Step 5: Reconfigure and Verify After the Update
After the restart, go straight back into setup and confirm the new version string is displayed. Then restore your settings: re-enable the memory profile so your kit runs at its rated speed, rebuild fan curves, check boot order points at the right drive, and re-enable anything you use such as virtualisation or resizable BAR. Expect the first boot into Windows to take longer than usual and possibly to trigger a device re-detection; that is normal after firmware changes.
Spend a few minutes verifying rather than assuming: confirm all memory is recognised at the right speed, all drives appear, and temperatures and fan behaviour look sane. Then use the PC normally. If a problem you updated to fix is gone, you are done — resist the urge to keep updating to each new release. If new instability appears that was not there before, note that most boards allow flashing back to the previous version by the same method, which is another reason you recorded the original version number first.
Honest Risk Warnings, Collected in One Place
Interruption is the core risk: power loss mid-write can corrupt the firmware, and while dual-BIOS boards and CPU-less reflash features recover from it, a basic board without those features may need a manufacturer’s repair service. The second risk is identity: the wrong model’s file, accepted in a careless moment, is far worse than no update. The third is expectation: an update will not fix failing hardware, will not make an unsupported CPU supported unless the changelog says so, and can occasionally introduce quirks of its own — which is why updating a stable, working system ‘just because’ trades a known-good state for an unknown one.
None of this should scare you away from updates you genuinely need. Thousands of boards are updated uneventfully every day by people who did three things: matched the file to the exact model, kept the power stable, and kept their hands off the machine until it finished. This guide exists to put you in that group.
Common Mistakes When Updating the BIOS
Downloading from a third-party driver site. Flashing a file for a similarly named model. Updating through Windows with a dozen programs running. Resetting the machine because the screen went dark for ninety seconds — memory retraining after an update can look exactly like a hang. Forgetting that settings reset, then blaming the update for slow memory that is really just the profile switched off. And the quiet classic: updating the BIOS to fix a problem that was actually a loose cable, which is why diagnosis order matters — How to Test a Motherboard shows how to confirm the board is the problem before firmware enters the picture.
The Update Methods Compared: Which Route Should You Use?
Manufacturers offer up to three routes, and they are not equal. The built-in BIOS updater — Q-Flash, EZ Flash, M-Flash and their siblings — runs from a USB stick inside the firmware itself, with no operating system in the way; this is the recommended default for almost everyone. The Windows utility offered by some makers is convenient but adds variables: background software, driver states, and an OS that might choose that moment to restart for its own updates. Use it only if the maker directs you to for a specific update. The CPU-less hardware flash feature is the specialist: it exists for boards that cannot boot with the intended CPU, and for recovery, and it follows its own exact procedure of filename, port, and button.
Whichever route, the invariants hold: file matched to the exact model and revision, power kept stable, process never interrupted, settings recorded beforehand. If two routes are available to you, choose the one with fewer moving parts — that is the BIOS’s own updater, every time.
Special Situations Worth Knowing About
Updating on a board you just bought for a newer CPU: ask the seller whether the stock has a recent BIOS, and look for a sticker on the box stating support for the CPU generation — makers apply these when a production run’s firmware catches up. Updating a system that will not boot after a hardware change: work the diagnosis first; firmware is one branch of it, not the trunk. Updating a laptop: the same principles apply, with the maker’s utility usually the only route, the battery charged and mains connected, and BitLocker suspended if your system uses it — firmware changes can trigger recovery-key prompts on encrypted systems, on desktops too. Have your recovery key located before you start, not after the prompt appears.
And the situation nobody plans: an update that appears to have failed — black screen, no response well beyond the patient window. Do not repeatedly power-cycle in panic. Consult the manual’s recovery procedure: many boards retry from a backup BIOS automatically on the next cold start, and CPU-less flash features exist precisely to rewrite a corrupted BIOS from a prepared stick. If neither exists on your model, the manufacturer’s support is the route, and a board under warranty with a failed official update is a straightforward conversation.
Aftercare: the Week Following an Update
Treat the first days after an update as a probation period. Use the machine normally and pay mild attention: any new sleep or wake weirdness, USB devices dropping, memory errors, or fan behaviour changes are worth noting with dates, because a pattern of ‘since the update’ is exactly what a support conversation or a decision to roll back needs. Keep the previous BIOS file on the same USB stick, labelled, until the new version has earned your trust; rolling back is painless when the file is at hand and annoying when it must be re-downloaded and re-verified.
Resist stacking changes on top of a fresh update. If you planned a memory upgrade or an overclocking experiment, let the new firmware prove itself for some days first — otherwise, if instability appears, you will not know which change brought it. One variable at a time is the discipline that makes firmware boring, and boring is the highest praise a BIOS update can earn.
Understanding Version Numbers and Release Channels
BIOS versioning looks arbitrary until you see the pattern: makers number sequentially, sometimes with letters marking interim or beta releases, and the download page lists them newest first with dates. Two habits follow. First, prefer the latest stable release over any beta unless the beta specifically fixes your problem and you accept its unfinished status — beta firmware is a tool for the desperate, not a lifestyle. Second, read two or three changelogs, not just the newest: makers summarise cumulatively in the newest notes only sometimes, and a change introduced two versions back — a memory-training adjustment, a default that flipped — may be the one that matters to your system. Knowing what changed across the gap you are jumping is part of updating like a professional.
Keep your own record, too: a simple note of the version you came from, the version you installed, the date, and the reason. Six months later, when a quirk appears and you wonder whether it predates the update, that note answers in seconds what memory will argue about for an evening. Firmware is the least visible layer of the machine; a written trail is how you make it visible.
And a closing perspective on cadence: a healthy board might receive several updates in its first year — new CPU support, memory improvements, security fixes — and then settle into rare, maintenance-only releases as the platform matures. That tapering is normal and good. The goal was never a new BIOS; it was a board that supports your hardware and minds its business, and once yours does both, the correct number of further updates is zero until a changelog gives you a reason.
What ‘Bricked’ Really Means, and Why It Is Rarer Than Feared
The word that haunts BIOS discussions is ‘bricked’ — a board rendered as useful as a brick by a failed update. The fear is understandable and the reality is narrower. A failed update corrupts the firmware image, and a board with no recovery path then cannot start. But recovery paths have become common: dual-BIOS designs carry a second chip that takes over; CPU-less flash features rewrite the firmware from a USB stick with nothing else working; and some boards retry automatically from a backup image after a failed boot. The population of truly unrecoverable boards is concentrated in older and entry-level models without those features — which is a concrete, checkable fact about your specific board, not a general dread. Before updating, look up whether your model has any of these safety nets and note which one; that single fact converts the update’s worst case from ‘replace the board’ to ‘follow the recovery page in the manual’.
Proportion matters too. Boards are updated constantly — by manufacturers’ own service centres, by system builders imaging fleets, by ordinary users following exactly the steps in this guide — and the failure rate under stable power with the correct file is very low. The horror stories cluster around the identifiable causes this guide has flagged throughout: wrong file, unstable power, impatience during the dark-screen phase. Respect those three, know your recovery path, and the update returns to what it should be — a maintenance task with a checklist, not a gamble.

Gear for This Guide
The products below come from our verified listings pool and are mentioned because they genuinely fit this topic, not because they are the newest or the most expensive option.
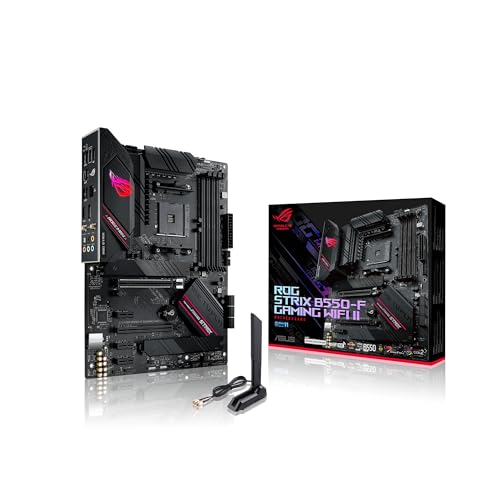
- Asus ROG Strix B550-F Gaming WiFi II AMD AM4 — chosen because its BIOS Flashback feature — named right in its listing — is the CPU-less recovery route this guide describes, making it a forgiving board for first-time updaters. Check on Amazon
What the Update Actually Writes: Inside the Flash Chip
Understanding what physically happens during an update makes the guide’s cautions feel less like superstition and more like engineering. The BIOS lives on a small flash-memory chip soldered to the board. When you run the update, the board erases blocks of that chip and writes the new firmware into them, in sequence, then verifies what it wrote. The processor’s earliest instructions at power-on come from this chip, which is why a half-written chip is such a fundamental problem: there is no lower layer to fall back on, no operating system to reinstall, because the code that would load an operating system is the thing that is missing.
Two design features soften that picture on many boards. The first is a protected boot block — a small region the updater does not erase, containing just enough code to initialise basic hardware and read a recovery file from USB. When an update fails but the boot block survives, the board can often be coaxed into this minimal recovery mode, which is why the failure-recovery advice in this guide emphasises patience and the manufacturer’s exact recovery procedure rather than panic. The second feature is redundancy: dual-BIOS boards carry two firmware chips and can switch to the intact one, either automatically or by a small board switch. If your board has it, the support page will say so, and knowing it before you update converts the whole exercise from a cliff edge into a managed risk.
The update also explains a behaviour that surprises people: your settings reset. Firmware settings are stored separately, in a small area of non-volatile memory, and a new BIOS version may organise that storage differently from the old one. Rather than risk misreading old values in new positions, the board discards them and starts from defaults. This is also why saved settings profiles exported to USB on one version frequently refuse to load on another — the profile is a map of a storage layout that no longer exists. Expect the reset, plan for it as Step 1 of this guide describes, and the post-update reconfiguration in Step 5 becomes a checklist instead of an archaeology dig.
One more component rides inside the firmware package: processor microcode, the low-level patch layer that corrects CPU behaviour and underpins many security fixes. When a changelog mentions microcode or a named vulnerability mitigation, the update is partly a processor patch delivered through the board. This is the strongest argument for occasionally updating a stable system — not for features, but when the changelog carries a security correction relevant to your processor. It is also why such updates occasionally change performance characteristics slightly in either direction: the thing being patched is genuinely part of how the CPU executes its work.
The Encryption Warning: BitLocker, TPM, and Your Recovery Key
One preparation step deserves its own section because the main sequence only touches it indirectly, and discovering it afterwards is miserable. If your system drive is encrypted with BitLocker — and many Windows installations enable it by default, especially on machines that arrived with Windows preinstalled — the encryption is bound to measurements of the system’s firmware state, held by the TPM security chip. A BIOS update can change those measurements. On the next boot, the system may conclude it is starting in an unexpected environment and demand the BitLocker recovery key before it will unlock the drive.
Nothing is lost when this happens — your data is intact, and the key restores access in a minute — but only if you have the key. Before updating, do three things. First, check whether your drive is encrypted at all; the setting is visible in Windows under device encryption or BitLocker management, and many owners genuinely do not know it is on. Second, if it is on, retrieve and save the recovery key somewhere that is not only on the encrypted drive itself: it is commonly stored in the Microsoft account used with the machine, and printing it or saving it to a phone is the belt-and-braces move. Third, consider suspending BitLocker protection for the update — a built-in option that temporarily stops the key checks without decrypting anything — and resume it after the update and a successful boot. Suspending is reversible and quick; decrypting the whole drive is neither, and is not necessary for this job.
The same logic applies, more mildly, to anything else bound to firmware state: some games’ anti-cheat systems, corporate VPN clients, and secure-boot configurations may notice the change. None of these are reasons to avoid an update you need. They are reasons the update belongs in a calm hour with your recovery key at hand, not in the last ten minutes before you need the machine for work.
Updating a Prebuilt or OEM Board: A Different Rulebook
Everything in this guide assumes a retail motherboard with a public support page. A desktop bought as a complete system from a large manufacturer plays by modified rules, and applying retail habits to it causes real harm. OEM boards are often built by the same factories as retail boards but carry the system maker’s own firmware, with its own version numbering, its own update utility, and a locked-down settings interface. The retail board that looks identical will have a support page whose BIOS files are not for your machine, and flashing one — if the updater even allows it — can strip features the system depends on or leave it unbootable.
For a prebuilt, the update source is the system manufacturer’s support page for your exact system model, and the update route is usually their own utility, sometimes delivered automatically through the maker’s support application or Windows Update. That is not a lesser path; OEM firmware updates delivered through Windows Update have been validated against the whole system configuration, which is a genuine advantage. The cautions that still apply are the universal ones: stable power, no interruptions, settings and recovery keys noted beforehand, and a changelog reason for updating at all. The cautions that change are about identity: confirm the system model precisely, and treat any forum advice that begins “this board is really a retail…” as a warning sign rather than a shortcut. Owners planning a CPU upgrade in a prebuilt should also check the system maker’s CPU support list, which is often far narrower than the socket’s technical capability — a limitation of the OEM firmware, not of the hardware.
Sequencing Update Day: A Worked Example With a New Processor
The most common real-world update is not a standalone event; it is act one of a CPU upgrade. Sequenced well, the two jobs interlock cleanly. Here is the order experienced builders use, with the reasoning at each joint. A week ahead, while the old processor is still installed and the machine is stable, read the board’s CPU support list and identify the exact BIOS version the new processor requires. Download that version — or the newest stable release above it — plus the previous version as a fallback, and save your current settings and your encryption recovery key as described earlier.
On the day, update first, with the old CPU still in place, following the main steps of this guide. Then boot the updated system fully into your operating system, still on the old processor, and use it briefly. This intermediate boot is the step impatient builders skip, and it is the one that localises faults: if anything misbehaves now, the cause is the firmware change, and you can address it — restore settings, or roll back — with a working machine. Only when the new firmware has proven itself do you power down and swap the processor, a mechanical job covered by the installation guides in this series. Fit the new CPU, expect a longer first boot while the board trains memory and recognises unfamiliar silicon, then enter setup and confirm the new processor is named correctly and all memory is present.
Notice what this sequence buys you: at no point are two variables changed at once, so every symptom has a short suspect list. The alternative order — CPU first, then discovering the board cannot start with it — is precisely the trap that CPU-less flash features exist to rescue, and it is avoidable in every case where the old processor is still in your hands. If you are selling the old CPU to fund the new one, sell it after upgrade day, not before. For the broader question of whether a given processor and board belong together at all, work through our guide to checking motherboard compatibility before ordering either part.
Verifying the Download Before It Touches the Board
Step 2 of this guide covers downloading from the manufacturer only. A final layer of diligence takes one minute and closes the loop: verify the file itself. Many support pages publish a checksum — a short string of characters computed from the file — or at minimum the exact file size. After downloading and extracting, compare what you have against what the page states, using the checksum utility built into your operating system if a checksum is offered. A mismatch means the download is incomplete or corrupted, and a corrupted file is one of the few update failures that is entirely preventable before it starts; most updaters verify the file’s internal integrity as well, but catching the problem on your desk beats catching it mid-flash.
While you are looking at the extracted contents, confirm the set makes sense: the firmware file itself, sometimes a separate renaming utility for the CPU-less flash feature, and a readme whose instructions match the procedure you are about to follow. If the readme describes a step this guide has not mentioned — an intermediate version to install first, a chipset driver to update beforehand, a specific setting to disable — the readme wins. Manufacturer notes for your exact model always outrank general guidance, including this page. File the whole folder, labelled with the version and date, alongside your settings record; on the day a future update appears, you will thank yourself for a download archive that explains its own history.
Reading a Changelog Like a Technician: Lines Decoded
Step 1 of this guide tells you to read the changelog; this section teaches you to hear what its compressed lines are actually saying. “Support for new-generation processors” is the headline act — the update adds the microcode and initialisation code for CPUs the board predates, and it is the line that matters on CPU-upgrade day. “Improved memory compatibility” usually means the memory training parameters have been widened: kits that previously failed to run at their rated profile, or refused to train at all, stand a real chance of working afterwards — which is why this line, boring as it looks, is the one most likely to fix a machine that is unstable with four sticks fitted.
“Update microcode” and references to named security advisories are the processor-patch lines discussed earlier in this guide; install those when they apply to your CPU, even on a stable system. “Improve system stability” is the vaguest line in the genre — it can mean anything from a corrected fan curve to a fixed sleep-state bug — and on its own it is not a reason to update a machine that behaves well. Finally, watch for lines that subtract: occasionally an update removes support for very old processors to make room in the firmware chip for new ones, and the notes say so explicitly. If your CPU is an early model on a long-lived socket, read for that line with real attention before installing a late BIOS, because the update that enables someone else’s new processor can, in rare cases, retire yours.
The Operating-System Upgrade Scenario: TPM and Secure Boot
A distinct wave of BIOS updates and settings changes arrived with operating systems that began requiring a TPM 2.0 security device and Secure Boot. Many boards from the preceding years contained the necessary hardware — a firmware-based TPM built into the platform — but shipped with it disabled, which left owners believing their machines were incompatible when they were merely unconfigured. If an operating-system upgrade is your reason for visiting the BIOS, the work is usually two settings rather than an update at all: enable the firmware TPM (it appears under different names on different platforms) and set Secure Boot to its standard mode with default keys.
Two cautions keep this scenario painless. First, enable the TPM before touching drive encryption, and if the drive is already encrypted, have the recovery key from the earlier section in hand — changing security settings can trigger the same recovery prompt as an update. Second, older systems configured in legacy boot mode may need their boot configuration converted before Secure Boot can engage, and forcing the setting first can leave the machine unable to find its operating system until the setting is reverted. Work in the order: record current settings, enable the firmware TPM, boot and confirm the system is happy, then address Secure Boot with your boot mode understood. Sequenced that way, the whole scenario is a settings exercise; sequenced carelessly, it becomes a troubleshooting session — and our boot loop guide is where that session would continue.
When to Stop Updating and Start Diagnosing
One pattern deserves a caution of its own: the owner who responds to an unstable machine by flashing BIOS version after BIOS version, hoping the next one holds the cure. It rarely works, and understanding why protects both your time and your board. Firmware bugs do cause instability, but they cause it consistently, from the version’s first day, in a pattern other owners of the same board also report. Instability that arrives months into a system’s life, worsens gradually, or changes character week to week almost always lives in the physical world — memory that is drifting, a power supply that is tiring, cooling that is clogging — and no sequence of firmware writes will repair a hardware decline.
The diagnostic discipline is to give each update exactly one chance, with a defined test. If a changelog names your symptom, install that version, restore your settings, and run the machine through the workload that provoked the fault, several times, across several days. Fixed is fixed; declare victory and stop. Not fixed is also information: the firmware hypothesis has been tested and discharged, and the correct next step is the substitution-and-isolation method in our motherboard testing guide, not another download. Each unnecessary flash carries a small risk and resets your settings and your baseline; a machine whose firmware changes weekly can never produce the stable comparison point that real diagnosis depends on. Update with a reason, test with intent, and let the board’s firmware be the most boring part of your system.
Frequently Asked Questions
Is it safe to update the BIOS?
It is routine when three conditions hold: the file matches your exact board model, power stays stable for the few minutes the write takes, and you let the board finish without interruption. The danger is concentrated in power loss mid-update, which is why a UPS or at least a calm, storm-free moment is recommended.
How long does a BIOS update take?
Usually a few minutes of writing and verification, plus restarts. The screen may stay dark during parts of it and the board may reboot more than once. Treat ten quiet minutes as normal before worrying; treat a machine that is still unresponsive after half an hour as a recovery situation.
Will a BIOS update delete my files?
No. The BIOS lives on the motherboard, not on your drives, and updating it does not touch your data. It does reset firmware settings — memory profiles, fan curves, boot order — which is why this guide has you photograph and save them first.
My board will not start with my new CPU. Can I still update?
Yes, if the board has a CPU-less flash feature: you prepare a correctly renamed file on a FAT32 USB stick and use the dedicated port and button with only power connected. Without that feature, the board needs a supported older CPU fitted temporarily to perform the update.
Should I install every BIOS update as it is released?
No. Update when the changelog gives you a reason: support for hardware you are installing, a fix for a problem you have, or a security correction. A stable system gains nothing from chasing version numbers, and every update carries a small interruption risk.
Can I go back to the older BIOS version?
Usually yes, by flashing the previous file with the same method, and manufacturers keep older versions on the download page. A few updates are marked as not downgradeable once installed, which the release notes state — one more reason to read them before, not after.
Can I skip BIOS versions and jump straight to the newest?
Usually yes: each release is a complete firmware image, not a patch on the previous one, so jumping several versions is normal. The exception is when the download page or readme states that a specific intermediate version, or a chipset driver update, must be installed first. Read the notes for every version between yours and your target — the requirement, when it exists, is stated there.
Will a BIOS update make my PC faster?
Not directly, and you should be suspicious of any claim that it will. An update can restore performance a bug was suppressing, enable a memory profile that was previously unstable, or add support for a faster processor you then install — but the firmware itself does not add speed to the hardware you already have. Update for support, fixes, and security, and treat any speed change as a side effect.
My USB stick is not recognised by the BIOS updater. What now?
Work the simple list: confirm the stick is formatted FAT32, that the firmware file sits at the root rather than inside a folder, and that you extracted it from the downloaded archive rather than copying the archive itself. Try a different, smaller, older stick if you have one — the firmware’s USB support is basic, and very large or unusual sticks occasionally defeat it — and use a rear-panel port rather than a front-panel one.
Should I update the BIOS before or after installing the operating system?
If the update is needed for your processor to be supported, it comes first — the machine may not run properly, or at all, without it. For optional updates, either order works, but updating before the OS install is tidier: the firmware is settled before drivers and encryption bind themselves to it, and you avoid the BitLocker recovery-key dance described in this guide.
Does updating the BIOS void the warranty?
Updating with the manufacturer’s own file and procedure is a supported, documented operation and does not void a board’s warranty. What endangers a warranty claim is damage from procedures outside the documentation — modified firmware files, third-party flashing tools, or physical modification. Staying inside the manufacturer’s instructions is both the safe technical path and the safe warranty path.