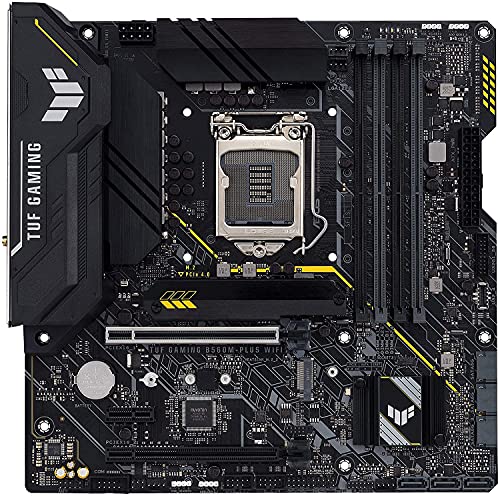
Working out how to fix a motherboard that will not POST starts with knowing what POST is: the power-on self-test, the board’s opening roll-call of its own hardware — processor, memory, graphics, boot device — that must pass before anything appears on screen. A system that will not POST may be completely silent, may spin fans with a black screen, or may light up and stop at one diagnostic LED; all three are ‘no POST’, and they have different likely causes. This guide orders the fixes safely and sensibly: observation first, external checks next, and hands inside the case only with the power off and the cable unplugged, reseating one thing at a time.
The encouraging truth first: most no-POST situations are not a dead motherboard. They are a cable that is not fully home, memory that is not quite clicked, a monitor listening on the wrong input, or a BIOS that does not yet know the processor. Work the steps in order and do not skip the embarrassing ones — the embarrassing ones are the common ones.
Disclosure: As an Amazon Associate, ilcastellomenu.com earns from qualifying purchases. Product links on this page may earn us a commission at no extra cost to you, and that support helps us keep testing and writing guides like this one.
How to Fix a Motherboard That Will Not POST: Read the Symptoms First
Your first tool is observation, and it is free. Press the power button and note exactly what happens. Total silence and no lights suggest power is not arriving or not being requested — the outlet, the supply’s rear switch, the front-panel power switch wiring. Fans spinning with no display suggests power is fine and the failure is in the roll-call: memory, graphics, or CPU initialisation. Lights that cycle and repeat suggest the board is retrying — a pattern covered in depth in How to Fix Motherboard Boot Loop. If the board has diagnostic LEDs, note which one stays lit; if it beeps, count the pattern. Your manual decodes both, and either can name the failing stage outright.
Also note when this started. A brand-new build that has never posted points at assembly or compatibility. A working PC that stopped after a move points at seating. A stop after a storm or outage points at the power supply. A stop after fitting a new CPU points at BIOS support. The history is half the diagnosis, so spend a minute on it before spending an hour on screws.
In this guide
Likely Causes, Most Common First
In rough order of how often each one is the real culprit in our experience of this fault:
- Memory not fully seated, or installed in the wrong slots for the configuration
- CPU power cable (top of the board) unplugged or not fully latched
- Monitor connected to the motherboard on a system with a graphics card (or CPU without integrated graphics)
- Front-panel power switch wired to the wrong pins, so the button does nothing
- BIOS version too old to recognise the installed processor
- Graphics card not fully seated or missing its power cables
- A short: stray standoff behind the board, or a trapped cable
- Failing power supply — fans may still twitch while voltages are out of spec
- Genuinely faulty memory stick, then, much less often, a faulty board or CPU
Step 1: External Checks — No Tools, No Opening the Case
Confirm the wall outlet with another device. Confirm the switch on the back of the power supply is on. Check the monitor: powered, set to the input the PC uses, cable fully inserted at both ends — and if the PC has a graphics card, the cable must be in the card’s ports, not the motherboard’s. A system can be posting perfectly and displaying into the void because the monitor is plugged into a disabled onboard port or watching HDMI 2 while the PC speaks on HDMI 1. Try a different cable or port if any doubt remains; cables fail quietly and often.
Disconnect USB peripherals except keyboard. A faulty or shorting USB device can stall a board early in POST, and stripping the audience to one keyboard removes that whole class in ten seconds. If the system now posts, reconnect devices one at a time, powering off between changes, to find the offender.
Step 2: The Power-Off Reseat Pass
Now open the case — correctly. Switch the power supply off and unplug its cable from the wall. Press the case power button once to drain residual charge. Touch grounded metal before handling parts. Then reseat, one at a time, testing between changes if you want certainty about which fix worked: each memory stick — release the clips, lift it out, inspect the contacts, and press it back until both clips snap on their own; the 24-pin main power connector; the CPU power connector at the top edge of the board, which needs its latch fully home; and the graphics card, out and back into its slot with a definite click, plus its power cables.
For a new build, this step also includes the classic assembly audit: front-panel power switch on the exact pins in the manual (the single most common new-build no-start); no extra standoff behind the board; memory in the manual’s recommended slots for the number of sticks fitted — for two sticks that is almost always the second and fourth slots from the CPU. The full assembly method, for reference, is How to Install a Motherboard.
Step 3: Reduce to Minimum Parts
If it still will not POST, strip the system to the minimum that can: motherboard, CPU and cooler, ONE memory stick in the manual’s first recommended slot, power supply, and graphics — integrated if the CPU offers it, otherwise the card. Unplug all drives, extra sticks, add-in cards, and case USB. This is still a power-off, unplugged operation for every change. A minimum system that posts convicts something you removed; reintroduce parts one at a time until the fault returns. A minimum system that does not post has narrowed the world to five suspects: board, CPU, the one stick, the supply, and BIOS support.
Swap the stick for another, and try the board’s other slots, before suspecting exotic faults — a single bad stick or one damaged slot produces exactly this picture, and both are cheap answers. The structured version of this whole method, including running the board outside the case to eliminate shorts, is laid out in How to Test a Motherboard.
Step 4: The BIOS Support Question
If the build pairs a newer processor with a board that may have shipped earlier, suspect the BIOS. The board’s CPU support list states the minimum BIOS version your processor needs; if the board predates it, the system will behave as if dead — fans, perhaps lights, no POST — because the firmware literally cannot initialise a CPU it does not know. The fix is an update, and if the board has a CPU-less flash feature, it can be done with no working processor at all. Because a BIOS update carries its own interruption risks, follow How to Update the BIOS on a Motherboard rather than improvising: correct file for the exact model, stable power, no interruptions.
Do not attempt the update as a guess on a system whose history does not fit — an established PC that stopped posting did not forget its CPU. BIOS support is a new-build and CPU-upgrade diagnosis, and forcing it into other stories wastes the one risky procedure in this guide.
Step 5: Substitute the Power Supply, Then Conclude
If minimum-parts testing still fails, the next suspect is the power supply, and the only honest home test is substitution with a known-good unit of adequate capacity — connected with the system off, tested, then removed the same way. Supplies fail more often than motherboards and mimic them perfectly, including the cruel variant where fans spin but a rail is out of tolerance. Never open a power supply to investigate: it is sealed for good reason, holds dangerous charge, and is a replace-not-repair component at this level.
If a known-good supply changes nothing, and memory has been swapped, and BIOS support is confirmed, then the evidence finally points at the board or, rarely, the CPU. Check the board’s warranty before shopping — and if replacement is the outcome, the pairings in Best Motherboards for Ryzen 9 5950x and its sibling lists are organised around confirmed CPU support, which is the trap this guide exists to disarm.
Prevention: Making No-POST a Stranger
Most no-POST stories are written at build time. Buy against the CPU support list, not the socket name. Choose boards with CPU-less BIOS flash when pairing across generations. Seat memory until the clips close themselves, and treat the CPU power cable as a checklist item, not an afterthought. Test-boot before closing the case and before cable-managing everything into permanence. And after any move or deep clean, expect the reseat pass — travelling PCs shake memory and cards loose with complete reliability.
New Build vs Working PC: Two Different Detective Stories
A no-POST on a new build and a no-POST on a PC that worked yesterday share a symptom and almost nothing else. The new build’s suspects are assembly and compatibility: seating, wiring, support lists, a BIOS older than the CPU. Do not let anyone sell you replacement parts for a new build until those are exhausted, because new parts are almost never faulty in the box — the base rate of dead-on-arrival boards is low, and the base rate of a missed connector approaches certainty over enough builds. The working PC’s suspects are change and decay: what moved, what was cleaned, what storm passed, what part has been ageing. Interrogate the calendar before the hardware.
The exception that crosses both stories is the upgrade: a working PC that stops posting the day a new processor, memory kit, or graphics card arrives is a new-build story wearing a working PC’s clothes. The new part’s compatibility and seating lead that investigation, and the old part — kept, not sold, until the new one proves itself — is the world’s best diagnostic tool, because swapping back splits the world in two: posts with the old part, or does not.
The Power Button Itself: Testing the Start Signal
When a system shows no life at all — no fan twitch, no light — one elegant test separates ‘the board will not start’ from ‘the board was never asked’. With the power supply connected but the system off, the front-panel power switch merely bridges two pins on the board’s header. A technician can bridge those exact pins briefly with a screwdriver tip to simulate the button — but this is a step to take only if you are confident you have identified the correct two pins from the manual, because bridging the wrong pins helps nothing. For most readers, the safer equivalent is re-seating the power-switch connector on its correct pins and trying a known-good case switch or the board’s onboard power button if it has one. If the system starts by any of these routes, your fault was a two-dollar switch or its wiring, and the motherboard was innocent all along — a verdict worth the ten minutes.
Keeping a No-POST Log (and Why Shops Love It)
Write down, in order: the symptom pattern (lights, fans, LED stage, beeps), the history (new build, moved, upgraded, storm), and each test with its result. Three lines per test, no essays. This log does three jobs: it stops you re-testing the same thing at hour two; it converts a forum post or support call from storytelling into evidence; and if the board goes in for warranty, it demonstrates a proven fault, which changes the conversation entirely. Diagnosis feels like tinkering from inside it, but it is actually an experiment series, and experiments deserve lab notes.
Beeps, LEDs, and Codes: Squeezing the Board’s Own Testimony
Before substituting a single part, extract everything the board is already telling you. If it has diagnostic LEDs, the stalled LED is the board naming the subsystem that failed its roll-call — memory most often, graphics next, processor rarely, boot device last. If it beeps, count precisely and look the pattern up in the manual for your model, because beep dialects differ by maker and guessing wastes the clue. If it has a two-digit display, write down the code it rests on across two or three attempts; a code that changes between attempts is itself information, pointing at marginal training or power rather than a hard failure. Photograph or film the startup if the sequence is quick — technicians do this without embarrassment, because a ten-second video reviewed slowly beats five live viewings remembered wrongly.
Then hold the testimony to the right standard: it localises, it does not convict. A memory LED means the memory stage failed, and the causes ranked by probability are still seating, settings, the sticks themselves, the slots, and only then the board or the processor’s controller. Work that ranking with the steps in this guide and the board’s own clue becomes the fastest route to the fix instead of a premature shopping list.
Two Short Case Studies in No-POST Diagnosis
The build that was one cable deep: a careful first-time builder, every part new, fans spinning, screen black, confidence draining. The board’s LEDs stalled at graphics. The card was reseated twice before the builder — following the order in this guide rather than instinct — checked the monitor end of the story and found the display cable in the motherboard’s port, the machine having been posting faithfully into an output its processor could not drive. Ninety seconds to fix, after an hour of reseating. The lesson is not carelessness; it is that the external checks are Step 1 because the base rates demand it, and skipping them feels efficient right up until it costs an evening.
The upgrade that needed permission: a working PC, a newer processor fitted with care, and then silence — fans, a light, nothing more. Every connector was audited twice before the owner checked the board’s CPU support list and found the new chip required a BIOS two versions newer than the board’s. The board offered CPU-less flashing; a prepared USB stick, ten patient minutes, and the machine posted on the first attempt afterwards. Note the shape of both stories: the fault was information, not hardware — a cable’s location, a firmware’s knowledge — and in both cases the expensive hypothesis (dead board, dead card) was the last one the evidence supported. That ordering, boring as it sounds, is the entire craft this guide teaches.
Knowing When to Stop: the Economics of Further Diagnosis
Home diagnosis has a rational stopping point, and naming it protects both your wallet and your weekend. Stop when the remaining tests require parts you do not own and cannot borrow, when the suspect list has narrowed to board-versus-processor with no way to separate them at home, or when you have repeated the same test three times hoping for a different result — that third repetition is the universe suggesting a bench, a shop, or a warranty claim. The value of everything before that point is real: you will hand any technician a machine whose cheap causes are already eliminated, with a log that proves it, and that is worth money off any diagnosis fee. Persistence past the point is not thoroughness; it is how a fixable machine becomes a collection of additionally disturbed connectors. The craft is in the ordering — and the ordering, followed honestly, includes knowing where your bench ends.
The Whole Method on One Page, to Keep Beside the PC
Tape this sequence to the inside of the case door, metaphorically or otherwise. Observe first: lights, fans, the LED stage, the beeps, and the history of when it started. Check the externals: outlet, supply switch, monitor input and cable, cable in the graphics card. Strip the peripherals to a keyboard. Then, power off and unplugged, reseat in order: memory, CPU power, main power, graphics card — testing as you go. Reduce to minimum parts and swap the memory stick. Ask the BIOS question only if the build or the CPU is new. Substitute the power supply before suspecting the board, and never open the supply. Conclude ‘motherboard’ only when known-good parts have eliminated everything else, and check the warranty before the catalogue.
Followed in that order, the method resolves the overwhelming majority of no-POST systems with nothing bought and nothing risked — and for the remainder, it produces the one thing a repair shop or a warranty desk actually needs: a short, honest account of what the machine does and what has already been proven not to fix it.
The Branching Flow: Answer These Questions in Order
The steps in this guide are a sequence; this section restates them as the branching flow a technician actually runs, because no-POST diagnosis is a tree, not a list. Start at the trunk. Question one: does anything happen at all when you press the power button — any light, any fan movement, any sound? If nothing at all happens, you are on the power-and-signal branch: outlet, supply switch, supply itself, front-panel wiring, and the manual start-signal test from this guide’s power-button section, in that order, and you do not leave this branch until something responds. A board that has never been asked, or never been fed, cannot be guilty of refusing.
If something happens, question two: does the sequence stop at a consistent point — the same LED, the same beep pattern, the same moment — every time? A consistent stop is good news disguised as bad: the board is running its self-test and reporting, so follow the testimony to its subsystem and work that subsystem with reseats and substitutions. An inconsistent stop — a different stage each attempt, or success one time in three — routes you to the instability branch: memory training and settings first (load defaults, one stick, slowest standard speed), then power-supply substitution, because marginal power and marginal memory settings are the two great producers of randomness at boot. Question three, for systems that pass the self-test but show nothing: is the display path proven? Monitor, input, cable, and the correct output socket — the graphics card’s, not the board’s, when a card is fitted — tested with parts you trust, before any internal conclusion is drawn. A remarkable share of “no-POST” cases end on this branch with every internal component innocent.
Question four closes the tree: with minimum parts fitted, a known-good supply substituted, memory swapped and reseated, BIOS support for the processor confirmed, and the display path proven — does it still refuse? Only a yes here earns the verdict this guide’s final step describes, against the board or the processor. The flow’s discipline is that each question must be answered with evidence, not impressions: “something happens” means you watched it happen, twice. Run the tree on paper if the case is stubborn; ticking branches off in ink is how professionals avoid re-testing the same suspect at midnight.
Event-Specific Branches: After an Update, a Cleaning, a Storm
The history question in this guide’s opening matters because certain events write their own suspect lists. Take them one at a time. After a BIOS update, a no-POST has a focused differential: settings were reset by the update, so a memory profile the old firmware tolerated may now block training — clear CMOS and retry at defaults before anything else; the update itself may have gone wrong, which is what the board’s recovery and CPU-less reflash features exist for; and, in the specific case where the update was performed for a new processor, confirm the fitted CPU is actually the one the new firmware supports. Resist reinstalling hardware on this branch until the firmware possibilities are exhausted, because they outrank everything else here.
After a cleaning, the suspect list is physical and short. Compressed air and good intentions unseat things: a memory stick rocked in its slot, a power connector lifted a millimetre, a front-panel wire pulled from its pin, a fan cable dropped across a header. The reseat pass is the whole remedy, performed with unusual thoroughness — and one addition: check for the screw, clip, or cable tie that the cleaning may have relocated into somewhere it can short or obstruct. After a move or a journey, the same list applies with the graphics card promoted to first suspect, because its weight makes it the component most likely to have crept in its slot in transit.
After a storm or a power cut, promote the power supply to the top of every list, ahead of the board, ahead of memory. Supplies absorb surges and fail partially in ways that imitate board death faithfully — a twitch, a light, a half-start. Substitution, which this guide reserves for its final step in the general case, moves to the front here; do not let a board be condemned on the testimony of a supply that has just been struck. If the machine was connected by network cable during the event, add the ports to your inspection: surge energy arriving by Ethernet can kill a network controller while sparing everything else, which produces the odd, specific symptom of a machine that posts perfectly and simply has no network — a local injury, not a dying board.
The Monitor That Cried Wolf: Display-Side False Alarms
A dedicated word for the branch of this tree that wastes the most hours, because it feels the most like a dead board: the machine is posting, and the screen is lying about it. Modern monitors have deep-sleep habits of their own — some take many seconds to wake on a new signal, some fail to notice a signal that arrives before they expect it, and some sit faithfully displaying an input you changed months ago. The protocol is boring and decisive. Give the system a full minute after power-on before judging. Set the monitor’s input manually to the exact port in use rather than trusting auto-detection. Try the monitor’s other input type if you have the cable — a machine tested over both HDMI and DisplayPort has had its display path genuinely tested, because the two paths fail independently.
Two cable gremlins deserve naming. A damaged or marginal display cable can pass a desktop’s signal and fail a boot screen’s, or the reverse, because the signal modes differ — which is why “the cable works on my laptop” does not acquit it. And a small number of bargain DisplayPort cables carry a wiring fault on one pin that can feed power back into the graphics card and produce exactly the fans-spin-no-picture picture this guide exists for; swapping the cable for a certified one has ended more than one long diagnosis. The meta-lesson is the one this guide opened with: the display path is part of the system under test, and it must be proven with known-good parts like everything else. The cheapest known-good display in most households is a television and the cable from another device — humble equipment, perfectly valid evidence.
Rare but Real: The Causes at the Bottom of the List
When the common causes are honestly exhausted, a short list of rare ones remains, and knowing them prevents both despair and premature verdicts. Bent socket pins belong here for builds where the processor was recently fitted or refitted: on sockets where the pins live in the board, a single bent pin can disable a memory channel or the graphics slot and present as a board that stalls at the corresponding LED. Inspection is by photograph and patience — power off, processor removed, strong light, phone camera zoomed — and repair is a specialist’s job, not a kitchen-table one; the home contribution is an accurate diagnosis, which saves the board from being replaced for a repairable injury.
The dead CMOS battery is rarer still as a no-POST cause, but on some boards a fully exhausted battery produces settings corruption at every cold start, which can present as a machine that posts only after several attempts or refuses until settings are re-entered. It costs almost nothing to test by replacement, and on an older machine it belongs on the list before any expensive conclusion. A power supply’s protection latch is the third: after a short or a severe transient, some supplies latch off and present as totally dead until they are unplugged and left for some minutes to reset — which is why this guide’s external checks include unplugging and waiting rather than merely switching off. Finally, the true rarity that keeps diagnosticians humble: two simultaneous faults, usually a tired supply and a marginal memory stick, each masking the other’s substitution test. The defence is the written log and the willingness, when single substitutions all fail, to substitute in pairs. It is uncommon. It is not unknown, and it is the honest end of the differential — the point where a shop’s bench, with its wall of known-good parts, earns its fee in a single afternoon.
The Two-Second Variant: Starts, Then Stops Dead
One symptom pattern deserves its own branch because its causes are so specific: the machine starts — fans spin up properly — and then cuts out completely after a few seconds, as if switched off at the wall. This is a protection shutdown, not a failed test, and the board is usually the hero of the story rather than the culprit. The first suspect is processor temperature protection: a cooler that is not actually in contact with the CPU — a missed peel of protective film on the cooler’s base, mounting posts not fully engaged, a bracket fitted backwards — lets the processor’s temperature rocket within seconds, and the board kills power to save it. The fix is mechanical and total: remove the cooler, inspect the contact surfaces (the thermal paste’s imprint tells the truth about contact at a glance), and refit by the book.
The second suspect is the power supply’s own protection: a short or an overload trips it, and it cuts output until reset — which is why a machine with this pattern often needs a minute unplugged before it will attempt another start. Hunt this branch with minimum parts and your eyes: a trapped cable, a standoff where none belongs, a drive power connector forced awry. The third suspect, a distant third, is a fan header the board insists on monitoring — some boards halt when the CPU fan reports zero speed, which is a settings matter once you can reach them and a wiring matter (fan on the wrong header) when you cannot. Two seconds of life, read correctly, is the board filing a precise report: something it watches crossed a line it will not negotiate. Believe it, and check the physical world first.
Diagnosing a Machine You Must Not Open
Some no-POST patients come with constraints: a machine under a seal-based warranty, a borrowed or employer’s PC, a system whose owner has forbidden disassembly. The method survives the constraint better than you might expect, because its early steps were always external. Observation, history, the display-path proof, outlet and supply-switch checks, peripheral stripping, and the monitor-and-cable substitution all happen outside the case and resolve a meaningful share of cases outright. Firmware-level moves that need no screwdriver — entering setup to load defaults, where the machine starts far enough to allow it — are also legitimately in bounds for most owners’ definitions of “not opening it”.
What you must not do is break a seal or a promise for the internal steps; the correct move at the boundary is documentation and handover. Record the symptom pattern, the history, and every external test with its result, and hand that record to whoever owns the next step — the warranty service, the owner, the shop. A sealed machine with a good diagnostic record gets repaired faster and argued about less than an opened machine with a story. Constraints do not end diagnosis; they define where your chapter of it ends, and a clean handover is a professional result, not a surrender.
Checking a Shop’s Verdict Before You Pay for a Board
If a repair shop concludes your motherboard is dead, you are entitled to the same evidence standard this guide applies at home — and a good shop will meet it without being asked twice. The questions are few. What did the minimum-parts test show? Which known-good parts were substituted — power supply and memory at minimum — and what changed? At which stage do the board’s own diagnostics stop? A verdict delivered with those answers is a verdict you can buy a board on. A verdict delivered as a shrug and a total, with no substitution performed, is a guess wearing overalls, and the rational response is a second bench opinion rather than a purchase.
This is not suspicion for its own sake; boards are the most over-diagnosed component in the machine precisely because their symptoms imitate everything, which is the fact this entire guide is built on. Shops know it, and the honest ones structure their bench fees around exactly that difficulty. Your log — symptom, history, tests, results — is what lets a second shop start where the first one stopped instead of billing you to repeat the journey. Diagnosis is a chain of evidence. Whoever holds the machine, insist the chain is unbroken, and the final link, guilty or not guilty, will be one you can trust.
Frequently Asked Questions
What does ‘will not POST’ actually mean?
POST is the power-on self-test the motherboard runs before loading the operating system: it checks the processor, memory, graphics, and boot devices in sequence. A system that will not POST never completes that roll-call, so nothing usable appears on screen — the failure is in hardware initialisation, not in Windows.
My fans spin but there is no display. Where do I start?
With the free checks: monitor input and cable, cable plugged into the graphics card rather than the motherboard, then — power off and unplugged — reseat the memory and confirm the CPU power connector is latched. Fans spinning tells you power exists; the fault is in the initialisation sequence, and memory seating leads that suspect list.
The PC is completely dead — no lights, no fans. Is the motherboard gone?
That pattern points at power delivery or the start signal first: outlet, supply switch, the supply itself, or the front-panel power switch wiring. A motherboard receiving no power is indistinguishable from a dead one, so test power before mourning the board.
Can a BIOS update fix a no-POST system?
Only in the specific case where the BIOS predates support for the installed processor — a new-build or CPU-upgrade scenario. Then yes, especially via a board’s CPU-less flash feature. For a PC that used to post with the same CPU, the cause is elsewhere and an update is not the fix.
Should I clear the CMOS?
It is a legitimate mid-list step: with the power off and unplugged, clearing CMOS (by the manual’s jumper or button method) resets firmware settings that can block POST after bad memory or overclocking changes. It erases your BIOS settings, so note them first if you can, and never do it as a substitute for the seating and power checks above.
When should I take it to a repair shop?
When minimum-parts testing with a substituted power supply and memory still fails, or when you have no known-good parts to substitute. A shop’s bench test isolates board versus CPU quickly, and costs less than replacing the wrong one on a guess.
Is a diagnostic POST card worth buying?
For a household with one PC, no — the board’s own LEDs, beeps, and the substitution method in this guide answer the same questions. For someone who maintains several machines, a POST card earns its small cost: it displays the firmware’s progress codes on any board, including boards with no LEDs at all, and it turns the board’s testimony into a number you can look up. Buy it as a workshop tool, not as a rescue for a single incident.
My PC posts only sometimes. What does intermittent no-POST mean?
It usually means a marginal condition rather than a dead one: memory settings near the edge of stability, a power supply weakening, a connector making imperfect contact, or a battery-backed settings problem on an older board. Work it as the instability branch of this guide’s flow — defaults first, one stick, supply substitution — and log the pattern of successes and failures, because the pattern (cold mornings only, warm restarts only) is the most diagnostic fact you own.
Can dust really stop a PC from posting?
Indirectly, yes. Heavy dust insulates components and can hold moisture; conductive grime in a slot or socket can disturb a connection; and a dust-choked fan can leave a processor overheating within seconds of startup on some systems. Dust is rarely the headline cause, but a filthy machine earns a careful clean — powered off, unplugged, fans held still — early in its reseat pass, because it muddies every other test.
The board’s lights turn on but the power button does nothing. What now?
Those lights are standby power — proof the supply is delivering its always-on trickle and the board is receiving it. The failure is in the start signal or the main power stage: check the front-panel power switch wiring against the manual, then run the manual start-signal test from this guide’s power-button section to separate a dead switch or wire from a board that will not answer. Standby lights are good evidence; they acquit the wall outlet and half the supply at a glance.
Should I remove the graphics card to test POST?
Only if your processor has integrated graphics to take over the display — otherwise the machine may be posting perfectly with no way to show you. If it does have integrated graphics, removing the card is a legitimate minimum-parts move that also removes the card’s power draw and slot connection from suspicion. If it does not, test the card by substitution or by proving the display path, and remember the fans-spin-no-picture pattern is as often the monitor’s story as the card’s.
Why did my PC stop posting after I moved it to a new room?
Movement and a new environment write two suspect lists at once. Physically, the journey can creep a heavy graphics card or a memory stick in its slot, so the reseat pass leads. Electrically, the new room means a new outlet and circuit — prove the outlet with another device and, if the machine behaves there, try it back on a different circuit before condemning any component. A surprising number of “dead after the move” machines were innocent on both counts and guilty only of a monitor left on the wrong input.
Is it safe to keep trying to start a PC that will not POST?
A few attempts for observation are fine and necessary. Dozens of rapid power cycles are not: they stress the power supply, give you no new information, and — if the cause is a short or a protection trip — repeatedly poke the very fault the protections exist for. Observe deliberately, note what you saw, power off and unplug between changes, and let each attempt be a test with a question attached rather than a hope repeated.
What does it mean if the PC posts with the board outside the case but not inside it?
It means the board is almost certainly innocent and the case installation is not: a stray standoff shorting the board’s underside, a trapped or pinched cable, or a front-panel wire on the wrong pins are the classic trio. Refit the board with the standoff pattern checked hole by hole, as the installation guide in this series describes, and the “fault” usually stays outside with the bench test’s good news.