Knowing how to assemble a desk properly is the difference between a workstation that feels solid for a decade and one that wobbles from week one. Most flat-pack and frame-and-top desks follow the same underlying logic — frame first, top second, hardware snug but not strained — and most assembly problems come from rushing the same few steps: tightening bolts fully too early, skipping the levelling, or forcing misaligned parts.
This guide takes you through the whole job in order: preparing the space and parts, building the frame square, attaching the top without splitting it, levelling and the all-important re-tightening pass, and then setting the desk up so cables and accessories do not undo your good work. It applies to straight desks, corner desks, and the frame of most sit-stand desks, whose lifting columns add a couple of extra steps covered below.
Disclosure: As an Amazon Associate, ilcastellomenu.com earns from qualifying purchases. Product examples below link to Amazon, where you can check current availability and specifications; this guide itself lists no fixed prices because pricing and bundles change frequently.
Before You Start: Space, Tools, and a Parts Audit
Assemble the desk in the room where it will live if you possibly can. Desks are awkward through doorways once built, and a desktop that fits the room may not fit the corridor turn. Clear a floor area a little larger than the desk’s footprint, and lay down a blanket or the flattened shipping box to protect both the floor and the desktop’s finish while you work.
Tools you will actually need
Most desks include an Allen key for their bolts, and for many models that plus a Phillips screwdriver is genuinely enough. A few additions make the job noticeably easier: a tape measure for centring and squaring, a spirit level (a phone level app works in a pinch), painter’s tape for marking positions, and a low-torque drill or electric screwdriver with the clutch set low — used carefully, it speeds up the long bolt runs without the over-tightening risk of full hand force on a ratchet.
Keep a small bowl or tray for screws and fittings. The single most common cause of a mid-build stall is a bolt that has rolled under the sofa.
Audit the parts before touching a bolt
Open everything and check the parts against the manual’s inventory list: panels, legs or frame sections, crossbars, and the hardware bags, which are usually letter-coded to the steps. Count the fasteners. Finding a missing cam lock now, while the desk is still a pile of parts, is a minor annoyance; finding it at step nine with a half-built frame is a genuine problem.
Inspect the desktop edges and corners for shipping damage, and check that pre-drilled holes are clean. If your desk choice is still ahead of you, the criteria in How to Choose a Desk will help you pick a design whose construction suits your confidence level — tool-light designs genuinely exist.
In this guide
Step by Step: How to Assemble a Desk So It Ends Up Square and Solid
The sequence below is the universal one. Your manual’s exact order wins where it differs — some designs attach legs to the top first and flip the desk — but the principles (finger-tight first, square the frame, then final-tighten in a pattern) apply to every design.
Step 1–2: Build the frame, finger-tight only
Assemble the leg and frame structure first: legs, side frames, and any crossbar or modesty panel, following the manual. At this stage, run every bolt in only until it is finger-tight plus a quarter turn. Leaving the joints slightly loose is not sloppiness — it is what lets the frame settle square in the next step. A frame fully tightened while slightly skewed locks the skew in permanently, and that is where most wobble is born.
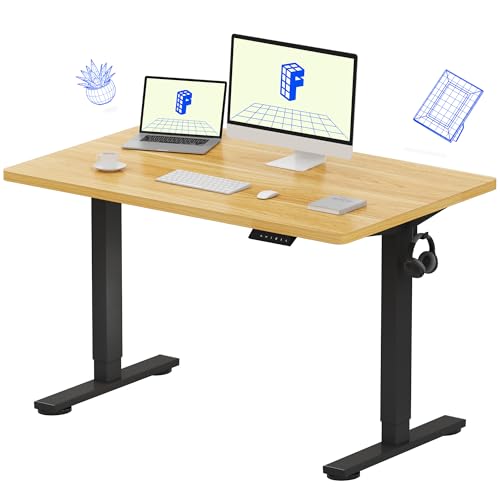
For sit-stand frames, this stage includes mounting the lifting columns to the feet and the crossbar between them. Keep the motor and control-box cables loose and out of the way for now; they are connected near the end.
Step 3: Square the frame before tightening
With the frame standing, check it for square. Measure the diagonals between opposite corners — equal diagonal measurements mean the frame is square. Nudge the frame gently until the diagonals match, and check that all feet sit flat on the floor without rocking. If one foot hovers, the frame is twisted; loosen the nearest joints, let it settle flat, and re-check.
Now tighten the frame bolts fully, working in a criss-cross pattern between opposite joints rather than finishing one corner completely before moving on. Pattern-tightening pulls the structure together evenly instead of racking it toward the first tightened side.
Step 4: Attach the desktop without splitting or shifting it
Lay the desktop face-down on your blanket if the design builds upside-down, or position it on the upright frame if it builds top-up. Centre it carefully: measure the overhang on each side and make them equal, and check the front edge is parallel to the frame. Painter’s tape markers on the underside help you hold position while you start the screws.
Drive the top screws in stages — start each one a few turns, then go around again to finish them — so the top pulls down evenly. With engineered boards, stop when the screw is snug; over-torquing strips the material and the joint will never hold properly afterwards. If you are building an L-shaped desk, join the two tops’ supporting frames before final-tightening either, so the corner alignment can still be adjusted; the layout trade-offs of that shape are covered in L Shaped vs Straight Desk.
Step 5: Flip, level, and fit the details
If you built upside-down, flip the desk with a helper — desktops are heavier and more awkward than they look, and dragging one across the floor snaps legs. Once upright in its final position, adjust the levelling feet (if fitted) until the desk does not rock and a level reads true in both directions. Many floors slope more than people realise, especially near walls.
Fit the finishing pieces now: cable grommets, trays, keyboard trays, end caps, and stick-on cable clips. For a sit-stand desk, mount the control box and handset, connect the motor cables fully, plug in, and run the desk through its full travel once, slowly, watching that no cable snags or stretches at full height.
The 24-Hour Re-Tightening Pass (Do Not Skip This)
Wood, engineered board, and metal joints all settle microscopically in the first day of use as the desk takes load and the room’s temperature evens out. Come back after a day or so of normal use and re-check every structural bolt with a quarter-turn mindset: most will be fine, a few will take a small extra turn, and those few are exactly the ones that would have become next month’s wobble.
Make the same check part of a twice-a-year habit, alongside checking levelling feet on hard floors. If wobble develops later anyway, the diagnostic guide at How to Fix a Wobbly Desk works through causes from loose hardware to floor problems in a safe order.
Common Assembly Mistakes
Four mistakes account for nearly all bad outcomes. First, fully tightening each joint as you go, which locks in misalignment. Second, assembling on carpet and then wondering why the desk rocks on the hard floor it moves to — build and level on the final surface type where possible. Third, forcing a bolt that will not start: cross-threaded bolts feel ‘tight’ while holding almost nothing, so back out and restart any bolt that resists early. Fourth, skipping the manual’s handedness — many legs, trays, and side panels are left/right specific, and a swapped pair often ‘almost fits’ in a way that only becomes obvious at the last panel.
A quieter mistake is discarding the spare hardware and the manual. Keep both, plus the included Allen key, taped in an envelope under the desk; future moves and re-tightening become far easier.
From Assembled to Set Up
A built desk is not yet a workstation. Position your monitor so its screen centre sits at a comfortable viewing distance, route power and data cables down the back leg or through the tray so nothing pulls sideways on a port, and leave a service loop — a little slack — in every cable so you can slide devices for cleaning. If you will work at this desk daily, it is worth following the ergonomic setup sequence in How to Set Up Ergonomically a Desk now, while everything is still easy to move, rather than retrofitting your posture around a fixed layout later. Buyers still comparing desks for a permanent home-office corner can cross-check sizes against Best Computer Desks for Home Office.
Working With Cam Locks and Dowels
Many flat-pack desks join panels with cam locks and wooden dowels rather than through-bolts, and this hardware has its own technique. A cam lock system works in three parts: a metal pin screwed into one panel, a dowel for alignment, and a circular cam in the mating panel that rotates to grip the pin’s head. Insert the pin fully, offer the panels together so the pin enters the cam’s opening, then turn the cam clockwise — usually about half a turn — until it firms up. The cam should tighten smoothly; forcing it past firm risks cracking the board around its housing, the one genuinely fragile moment in flat-pack assembly.
Dowels should be snug, not hammered: if a dowel will not enter by hand pressure, check for a blocked or mis-drilled hole rather than reaching for force. A drop of wood glue in dowel holes is a legitimate strengthener on desks you do not plan to disassemble, but skip glue on any joint you may need to undo for a house move — and never glue cam-lock joints, which are designed to release.
Assembling a Sit-Stand Frame: The Extra Steps
An electric sit-stand frame adds three jobs to the standard sequence. First, the lifting columns mount to the feet and the crossbar before the desktop goes on, and the two columns must be set to the same starting height — most frames self-level during the first reset, but starting them visibly even prevents a twisted first lift. Second, the control box mounts under the desktop, usually near the centre-back, with the handset at the front edge on your preferred side; mount both before the desk is loaded, while access is easy. Third, cable routing is part of assembly, not an afterthought: connect each motor cable to its column and the control box, then cable-tie the runs to the crossbar with deliberate slack loops, because these cables must travel through the desk’s full height range without ever pulling taut.
Finish with the controller’s initialisation — typically holding the down button until the desk settles at its lowest point — before placing any equipment on top. A frame that has been initialised, levelled, and load-tested empty will not surprise you under a full setup.
Protecting Floors, Walls, and the Desk Itself
Assembly day is when furniture gets damaged, usually in avoidable ways. Work on a blanket or cardboard, never bare hard floors: desktops slide during assembly, and a single grit particle under a sliding panel writes a scratch across the finish. Keep panels off their corners when standing them against walls — corners chip first and show most. When the desk goes upright, lift it vertically rather than pivoting it on two legs, which levers the leg joints sideways at exactly the angle they are weakest.
Finally, fit the felt pads or glides to the feet before the desk takes its final position, and check the wall behind: a desk pushed hard against skirting can mark paint, and a small gap is both kinder and better for cable drops. These are thirty-second habits that decide whether the desk still looks new in five years.
Troubleshooting the Build Itself
Even careful builders hit three classic mid-assembly problems, and each has a calm solution. A hole that does not align with its bolt usually means a panel is reversed or a left/right pair is swapped — stop, compare the panel against the manual’s drawing edge by edge, and flip it; holes are drilled to align in exactly one orientation, so misalignment is information, not a manufacturing error, nine times in ten.
The bolt that will not start, and the cam that will not turn
A bolt that refuses its first turns is either cross-threading or meeting a blocked hole. Back it out, clear the hole with a blast of air or a twist of a smaller screw by hand, and restart it with downward patience — the first two turns should be nearly effortless. A cam lock that will not rotate usually has its pin not fully seated: separate the panels, drive the pin home, and reassemble. Forcing a cam past resistance cracks the board around it, converting a two-minute correction into a permanent weakness.
If a part is genuinely defective — a split panel, a hole drilled in empty space — photograph it and contact the seller before improvising. Manufacturers replace panels routinely; they cannot replace one you have drilled yourself.
When the desk is built but something feels wrong
Run this acceptance check before loading the desk. All four feet grounded with no rock. Diagonals equal. Every bolt visited and snug. Drawers and trays travelling freely without scraping (a scraping drawer is a frame a few millimetres out of square — loosen, square, re-tighten). For a sit-stand frame: full travel up and down with no cable strain and no column shudder. Anything failing gets fixed now, while the desk is empty and the tools are out — the same fault under a full setup costs an hour of unloading first.
Assembling With a Helper Versus Alone: A Division of Labour
If you have a second person for the build, assign roles rather than both doing everything: one person holds and aligns, the other drives fasteners. Alignment is the job that suffers most in solo assembly, because you cannot simultaneously hold a panel square, keep a bolt presented to its hole, and turn the key — something always drifts. With a holder, every joint in the desk closes true, and the squaring step later becomes a verification instead of a correction.
The solo builder's compensations
Working alone, replace the missing hands with furniture and patience. Assemble the frame on its side on the floor wherever the design allows, letting gravity and the floor act as your holder and your square reference. Use clamps if you own them — a single clamp across a joint frees both hands for the bolt. Pre-start every bolt in its panel before joining panels, so each connection needs only a final turn while you hold alignment. And build in the desk’s final room at its final orientation, because the solo flip of a large desk is the one moment this guide recommends borrowing a neighbour for five minutes rather than improvising.
Teaching the skill forward
A last, underrated assembly tip: narrate the build to yourself as you go, or photograph each completed stage. When a later step contradicts your memory of an earlier one — a bracket facing the wrong way, a cable routed through the wrong gap — the photographs settle it without disassembly. The same photos become your reference for the desk’s first move or its eventual sale, when ‘how did this come apart?’ is the whole question. Five photos during assembly are the cheapest documentation a piece of furniture ever gets.
Reading the Manual Like an Assembler: Diagrams, Codes, and Orientation
Flat-pack manuals are written in a compressed visual language, and most assembly misery comes from misreading it rather than from bad furniture. The exploded diagram on the parts page is your map: every panel appears once, usually with a letter or number code that matches a sticker on the physical piece. Before touching a screwdriver, match every panel in the room to its code and lay the pieces out in diagram order. Panels that look identical often are not — one has an extra dowel hole, a finished edge on the opposite side, or a groove for a back panel — and the diagram is where those differences are declared.
Orientation is the silent trap. Many panels are symmetrical until they are not: a side panel drilled for drawer runners on one face, a desktop whose finished edge must face forward, legs whose cable holes belong at the back. Manuals signal orientation with small details in the drawings — the position of a hole, a shaded finished edge — and those details are easy to skim past. Adopt a rule: before fixing any panel, hold it against the diagram and name, out loud if necessary, which face is up, which edge is front, and which holes will be used. Ten seconds of naming prevents the classic hour-later discovery that a panel is upside down with six fittings already driven home.
Hardware has a language too. Cam locks, dowels, barrel nuts, and screws are drawn at the size ratio the manual assumes, and bags are usually lettered to match the steps. Tip each bag into its own small container — a muffin tray is the assembler’s classic — and never empty two bags into one pile because two screws look similar. They differ by a few millimetres of length, and the longer one driven where the shorter belongs can punch through a finished surface, the single most visible injury a new desk can suffer.
Tightening With Judgement: Torque, Sequence, and the Stripped-Hole Rescue
More flat-pack furniture is killed by enthusiasm than by neglect. Engineered board holds a screw by the friction of compressed fibres, and every fitting has a point — reached sooner than most people expect — where one more quarter-turn stops adding grip and starts destroying the hole. Tighten until the joint closes and the screw resists firmly, then stop. The power driver’s clutch, set low, is a better judge than a determined wrist, and finishing the last turn by hand teaches you what correct resistance feels like for the next forty fittings.
Sequence matters as much as force. When a joint has several screws, or a frame has four legs, snug everything finger-tight first, let the structure find its square, and only then tighten in a diagonal pattern — opposite corners in turn — so no side is pulled out of line by its neighbour. This is the same logic wheel fitters use, and for the same reason: even clamping keeps panels flat against each other instead of cocked at a closing angle that later reads as wobble or a drawer that binds.
When a hole strips anyway
A stripped hole in particleboard is recoverable. The field repair is a wooden matchstick or a sliver of dowel glued into the hole, trimmed flush when dry, giving the screw fresh material to bite. A hole that has torn out a crater needs the void filled with wood filler or a two-part repair putty, cured fully before re-drilling a pilot. Where a joint must carry real load — a leg bracket, a modesty panel corner — a threaded insert converts the repair into an upgrade: the insert’s coarse outer thread grips the board, and a machine bolt does the clamping, removable without further damage. Keep a stripped hole in perspective: one rescued fitting among dozens is normal furniture life, not a failed build.
The Fiddly Sub-Assemblies: Drawer Slides, Trays, and Modesty Panels
The main frame of most desks goes together in satisfying large moves; the sub-assemblies are where afternoons are lost. Drawer slides are the chief culprit. Each slide separates into a cabinet member and a drawer member, joined by a small release lever, and the pair for the left side is a mirror of the right. Fit the cabinet members first, perfectly level and at identical heights, using the drawer front’s desired reveal as your reference; a slide mounted two millimetres proud on one side produces a drawer that closes with a twist and rubs forever. Extend the slides fully before offering the drawer up, engage both sides simultaneously, and listen for both catches clicking — a drawer seated on one side only feels almost right and derails under load.
Cable trays and modesty panels share a different trap: they are fitted late, in cramped space, often working upward against gravity with the desk already upright. If the manual allows it, fit the tray while the desktop is still inverted on the floor, when you can see every hole and drive every screw squarely. A modesty panel fitted under tension — pulled to reach its last hole — will drum and buzz faintly when the desk is bumped; loosen, let it hang in its natural position, and tighten in sequence so it rests rather than strains.
Keyboard trays deserve a caution of their own. Their runners must be parallel within a hair, or the tray develops a stiff spot mid-travel that no amount of wax fully cures. Measure the runner spacing at front and back before fixing, and test the tray’s full travel before the desktop goes on and access disappears. Ten minutes of geometry here saves the daily irritation of a tray that has to be jiggled home.
Missing, Damaged, or Mystery Parts: A Calm Decision Tree
Sooner or later a box arrives with something missing, damaged, or left over, and the assembler’s response decides whether it costs a day or a month. Work in order. First, re-audit against the parts list with the pieces physically in hand — a remarkable share of missing parts are under the packaging, inside a hollow leg, or pre-fitted by the factory in a way the manual mentions once, in a footnote. Second, check whether the missing item blocks the structure or merely completes it: a missing drawer knob stops nothing, while a missing cam lock stops the joint it serves and everything built on it.
If a part is genuinely absent, photograph the parts page, the empty space in the packaging, and the desk’s current state, then contact the seller before improvising. Manufacturers ship single fittings quickly when the request names the manual’s part code; vague descriptions produce vague parcels. Hardware-store equivalents are a sound shortcut for standard screws and dowels — match thread, length, and head style exactly — but cam locks and proprietary brackets come in near-identical sizes that differ by a millimetre and do not interchange, so those are worth waiting for.
Damaged panels call for a judgement about where the damage lives. A chipped rear corner that will face the wall forever is a candidate for a touch-up and a discount conversation; a cracked desktop corner at a clamp point is structural and should be replaced before assembly, not discovered under a monitor arm in month three. And the leftover-parts puzzle at the end: one or two spare screws are commonly included deliberately. A whole unused bracket is not a spare — it is a step you skipped, and the manual’s final diagram will show you where it lives.
The Flip, the Carry, and the First Load Test
Many desks are assembled upside down, and the moment of turning one over is when solo assemblers do the most damage — a leg catches the floor, the frame racks as one side lifts before the other, and joints that were snug are suddenly strained. The safe solo technique is to roll the desk onto its back edge first, letting the legs point horizontally, then continue the roll so the legs come down under control, rather than lifting the whole weight vertically and hoping. With a helper, lift by the frame, never by the desktop’s overhanging edges, and agree the route and the resting place before the first lift, not mid-carry in a doorway.
Once upright, load the desk the way an engineer commissions a structure: progressively. Start with the surface empty and perform the wobble checks from the assembly guide — diagonal pushes at each corner, a firm lean on the front edge. Then add equipment in weight order, PC and monitors first, and repeat the corner pushes after each addition, because a frame that is silent empty can creak under asymmetry. Leave the heaviest single item for last and place it deliberately over support, as the load-planning section of our desk-choosing guide recommends.
Then give it a week of ordinary use before declaring victory. Screws bed into board, carpets compress, and levelling feet settle; the re-tightening pass described earlier in this guide exists precisely for this settling. A desk that passes its first week with a snug frame, aligned drawers, and silent joints has effectively finished assembling itself — everything after that is maintenance, not construction.
Taking It Apart Again: Disassembly, Moving, and Reassembly Without Tears
The desk you assemble today will very likely be disassembled within its life — for a house move, a room change, or a sale — and ten minutes of foresight now decides whether that day is routine or ruinous. Photograph the assembled desk from underneath before the equipment goes on: the cable routing, the bracket positions, and the tray mounting are all visible then and never again. Keep the manual, the spare fittings, and the correct Allen key together in a labelled bag taped under the desktop or filed with your household papers; the key that fits your desk is never the one in the toolbox when you need it.
Disassembly reverses assembly with two extra rules. Cam locks have a limited number of turns in them before the cam’s grip weakens, so note which joints are cammed and consider replacing tired cams at reassembly rather than trusting them a third time. And label every panel and its hardware as it comes off — painter’s tape on the underside, a small bag per joint — because the manual’s diagram, helpful as it was, will not tell you which of four identical-looking screws came from the leg that must not wobble.
Transport panels flat, separated by blankets or the original cardboard, edges protected first because edges chip in vehicles, not in rooms. On reassembly, expect one pleasant surprise and one chore: the chore is that old holes are slightly looser, so tighten by feel and rescue any spinner with the glued-dowel method rather than force; the surprise is how fast it goes. A desk you built once is a desk you understand, and the second build, labels and all, usually takes a third of the first.
Assembly in Difficult Conditions: Small Rooms, Solo Builds, and Low Light
Manuals assume a clear floor, a helper, and daylight. Real assemblies happen in a bedroom with the bed pushed to the wall, alone, at nine in the evening. Adapt deliberately. In a small room, assemble the frame in its final position rather than building elsewhere and performing an impossible carry; if the desktop must be fitted vertically and lowered, rehearse the move with the bare panel before any hardware is attached. Protect the wall behind the work zone with the flattened shipping box — panels pivot further than you expect, and the box that delivered the desk makes an excellent sacrificial surface.
Solo builders should recruit the room. A wall is a third hand for holding a side panel upright while the first two fittings go in loosely; a stack of books is a height-adjustable prop for a crossbar; painter’s tape holds a screw to a driver and a bracket to a panel for the seconds your hands are elsewhere. Work in shorter sessions than your patience suggests: assembly errors cluster in the last tired half-hour, and a desk paused overnight at a natural stage — frame square, desktop still off — loses nothing, while a rushed final stage can cost a stripped hole and a spoiled evening. Keep the floor lit and the hardware containers inside the light; hunting a dropped cam lock by phone torch is the universal sign to stop for the day.
After the Last Screw: Paperwork, Spares, and the Desk’s Own File
Assembly ends; record-keeping begins, and it takes five minutes that future-you will bless. Photograph the completed underside, the controller and motor labels if the desk is a sit-stand model, and the parts page of the manual. Save the receipt and the manual together — a photo album on your phone named for the desk is enough — because every warranty conversation, spare-part order, and resale listing will ask for exactly these artefacts, and the model number is always on the label you can no longer reach behind the drawers.
Register the warranty if the maker offers registration, and note its end date somewhere you will see it; sit-stand mechanisms in particular reward claims made inside the window rather than a month after it. Keep the spare fittings and the assembly key in their labelled bag, and keep one more thing: a note of anything that went wrong during the build — the rescued hole, the slightly proud slide — because that note is the first page of the desk’s maintenance history, and the person who fixes the wobble in three years, very possibly you, will start exactly there.
Gear for This Guide
Two verified examples at opposite ends of assembly complexity — a simple four-leg home-office desk and a tool-light compact design — plus a deeper gaming desk whose cable features are fitted at the detail stage.

SHW Mission 48-Inch Home Office Computer Desk
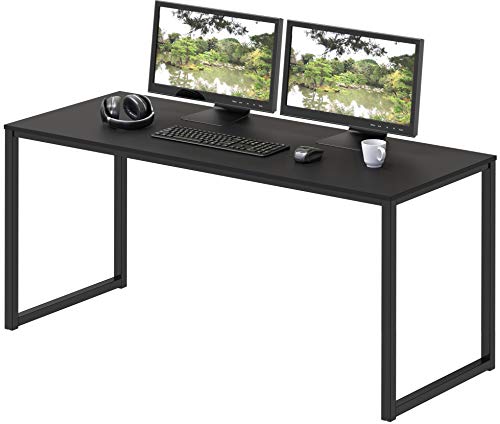
A straightforward frame-and-top design that follows the classic sequence in this guide: legs and frame first, top centred and screwed down in stages. SHW Mission 48-Inch Home Office Computer Desk — Check on Amazon

Furinno Simplistic Easy Assembly Computer Desk
An easy-assembly compact desk with a keyboard tray, representative of tool-light designs where the parts audit matters most because fittings are few and specific. Furinno Simplistic Easy Assembly Computer Desk — Check on Amazon

Mr IRONSTONE Deep Gaming Desk
A gaming desk whose cup holder, headphone hook, and cable features are fitted at the finishing stage, after the frame is square and level. Mr IRONSTONE Deep Gaming Desk — Check on Amazon
Frequently Asked Questions
How long does it take to assemble a typical desk?
A simple four-leg desk usually takes one person well under an hour. Corner and L-shaped desks, and sit-stand frames with motors and control boxes, take longer because there are more joints to square and cables to route. Rushing is counterproductive: the squaring and re-tightening steps are what make the desk feel solid.
Can one person assemble a desk alone?
Usually yes, with two exceptions: flipping a large desk after upside-down assembly, and manoeuvring a wide desktop onto the frame without shifting it. Both are safer and easier with a second pair of hands for five minutes. Everything else is one-person work with the parts laid out within reach.
Why does my new desk wobble even though I tightened everything?
The usual causes are a frame tightened while slightly out of square, an uneven floor that levelling feet have not compensated for, or one cross-threaded bolt that feels tight but is not clamping. Loosen the frame joints, let it settle flat on the floor, re-square, and pattern-tighten again before suspecting a defect.
Should I use a power drill to assemble a desk?
A drill or electric screwdriver on a low clutch setting is fine for running bolts in and speeds the job up, but do final tightening by hand. Engineered board strips easily, and a stripped fixing holds poorly forever after. Hand-finishing also lets you feel a cross-threaded bolt before it does damage.
When should I connect the cables on a sit-stand desk?
After the frame is fully built and the desk is upright. Mount the control box and handset, connect motor cables, then run the desk slowly through its full height range once while watching every cable for snagging or stretching. Leave slack loops so cables are never taut at maximum height.
How long should assembling a typical desk actually take?
For a straightforward flat-pack computer desk, an unhurried first-timer should expect one to two hours including the parts audit and the final levelling; a sit-stand frame with cable management usually runs longer, mostly in the routing and controller setup rather than the bolting. Treat any much shorter personal best with suspicion — speed in assembly is usually purchased with skipped checks that bill you later. If you are still on the floor after twice the estimate, the productive move is to stop, re-read the manual’s diagram for the current step, and look for an orientation error, which accounts for most stalls.
Should I use a power drill or stick to the supplied Allen key?
Use the drill for running screws most of the way in open, forgiving material, with its clutch set low, and finish every fitting by hand so your wrist learns the resistance that means tight. Never let a drill have the final word in particleboard, and never use an impact driver on furniture at all. The supplied key is slow but honest; the sensible division of labour is drill for travel, hand for judgement.
Can I assemble a desk on carpet?
You can, and the carpet protects the panels nicely, but it lies to you about level and squareness: legs sink unevenly, panels rock on the pile, and a frame that feels square on carpet may not be. Do the structural tightening on the hardest floor available, or on a sheet of board over the carpet, and reserve the carpet for the final position — then recheck the levelling after a few days, once the pile has compressed under the feet.
Is it safe to flip a large desk upright by myself?
It depends on the desk’s weight and your honesty about it. The roll-over technique — onto the back edge first, then down onto the legs — keeps the load manageable for most flat-pack desks, but a solid-wood top or a wide executive desk is a two-person lift regardless of technique. The test is control: if at any point the desk would fall rather than be lowered, you need the second person. Furniture is patient; wait for help rather than catching a falling frame with a wrist.
What do I do if two pre-drilled holes do not line up?
First assume orientation, not manufacture: rotate the panel, check its mirror, and compare against the diagram, because a misaligned hole pattern is the classic signature of a panel fitted backwards or swapped with its twin. If orientation is provably right, loosen every neighbouring fitting so the structure can shift — a panel pulled by its other joints often sits a few millimetres from where its free position would be. Only after both checks should you conclude the drilling is off, and at that point photograph it and contact the seller rather than drilling fresh holes in a panel you may need to return.
The desk is built but a drawer or door will not sit straight — where do I start?
Start with the carcass, not the drawer. Check the frame for square by measuring both diagonals of the opening; if they differ, the whole structure is racked slightly and no drawer adjustment will fully hide it, so loosen the frame fittings, square it, and re-tighten in sequence. Only then adjust the drawer itself — most slides have small slotted holes for vertical fine-tuning — and make one change at a time, testing the full travel after each, because drawer alignment punishes random tweaking and rewards patience.
The Bottom Line
Audit the parts, build the frame finger-tight, square it by its diagonals, pattern-tighten, attach the top in stages, level it, and re-tighten after a day of use. That sequence — not strength or speed — is what makes an assembled desk feel like furniture instead of flat-pack.
Related Guides
Next steps after the build: fix any wobble, set the desk up ergonomically, and browse compact options if space is tight: