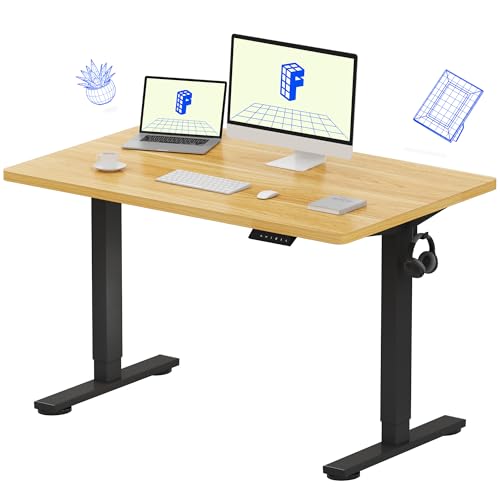
Learning how to set up a desk ergonomically pays off faster than almost any other workspace change, because the setup — not the furniture alone — decides the posture your body holds for hours. A desk, chair, and screen that are each excellent can still combine into a setup that strains your neck, shoulders, and wrists if their heights and distances disagree with each other and with you.
This guide sets the workstation up in the order professionals use: chair first, then desk height relative to the chair, then screen position, then keyboard and mouse, then the smaller items — feet, lighting, and accessories. Each step builds on the last, and most of it costs nothing but ten minutes and a tape measure. Work through it in sequence rather than adjusting things at random.
Disclosure: As an Amazon Associate, ilcastellomenu.com earns from qualifying purchases. Product examples below link to Amazon, where you can check current availability and specifications; this guide itself lists no fixed prices because pricing and bundles change frequently.
How to Set Up a Desk Ergonomically: Start With the Chair
Every other measurement keys off your seated position, so the chair comes first. Sit back in the chair with your feet flat on the floor, knees at roughly a right angle or slightly more open, and the seat supporting your thighs without pressing behind the knees. Set the seat height to make that happen before you touch anything else — if your feet dangle, everything downstream (desk height, screen height) will be calculated from a floating position and will be wrong.
Lumbar support and seat depth
Adjust the backrest so its lumbar curve meets the small of your back and lets you sit upright without effort. If the chair has adjustable lumbar height or depth, tune it until you can work for twenty minutes without sliding into a slouch. Seat depth should leave a small gap — roughly two or three fingers — between the seat edge and the back of your knees.
If your chair lacks adjustment, a small cushion at the lower back and a rolled towel are legitimate interim fixes. The principles behind these settings are unpacked in Desk Ergonomics Explained, which is worth reading once so the adjustments in this guide make sense rather than feeling like rules.
Armrests: support without shrugging
Set armrests so your forearms can rest on them with shoulders completely relaxed — if the rests push your shoulders upward, they are too high; if you lean sideways to reach one, it is too low or too far out. Many people do better removing armrests entirely when they collide with the desk edge and force the chair too far back from the keyboard.
In this guide
Step Two: Set the Desk Height Against Your Elbows
With the chair set, sit at the desk and let your upper arms hang naturally, elbows bent at about a right angle. Your forearms should rest level on the desk surface — or float just above your keyboard — without your shoulders rising or your wrists bending upward to reach. That elbow height is the anchor for the whole setup.
Working with a fixed-height desk
If the desk is too low, raise the chair until your elbows are right, then support your feet on a footrest or a stable box so they are not dangling — never solve a low desk by perching. If the desk is too high and the chair cannot rise enough without your feet leaving the floor, a footrest becomes essential rather than optional, and a keyboard tray can lower the typing surface independently. The underlying numbers are worked through in What is the Ideal Desk Height.
Desks chosen for people who struggle with standard heights are a category of their own; if you are shopping again, Best Desks for Short People and the tall-user equivalent collect designs with lower and higher ranges respectively.
Working with an adjustable or sit-stand desk
If your desk adjusts, set its seated height to your elbow measurement exactly, save it to a memory preset if it has one, and set a standing preset using the same elbow rule while standing. The desk should move without your monitor wobbling excessively; persistent shake at standing height usually traces back to levelling or an overloaded top, and the stability fixes in How to Fix a Wobbly Desk apply to adjustable frames too.
Step Three: Position the Screen
Screen placement drives neck posture more than any other single factor. The top of the visible screen should sit at or slightly below eye level, so your gaze angles gently downward, and the screen should be far enough away that you can read text without leaning in — roughly an arm’s length for typical desktop monitors, a little further for large or ultrawide displays.
Height, distance, and tilt
Raise the monitor on its stand, a riser, or an arm until the top-of-screen rule is met; most stock stands sit too low, which is why monitor arms are the most common ergonomic upgrade. Tilt the screen slightly upward so its face is perpendicular to your line of sight. Dual screens should be arranged by use: if one dominates, place it directly ahead and the second angled beside it; if both are equal, centre the seam — though many people find an off-centre primary kinder to the neck.
A single quality arm like the Ergotron LX in the gear section below handles screens up to ultrawide sizes and makes these micro-adjustments a one-hand job instead of a re-stacking-books job.
Glare and lighting
Position the screen perpendicular to windows where possible; a screen facing a window fights reflections, and one with a window behind it puts bright light in your eyes. Task lighting should fall on your documents, not on the screen. A monitor light bar or a shaded desk lamp angled away from the display keeps the desk pool of light comfortable without screen glare.
Step Four: Keyboard, Mouse, and the Things Your Hands Touch
Your keyboard should sit directly in front of you, centred on the part of the screen you use most, close enough that your elbows stay near your body while typing. The mouse belongs right beside it at the same height — reaching forward or far sideways for a mouse is one of the most common sources of shoulder ache, and one of the easiest to fix by simply moving it closer.
Wrist posture while typing
Aim for wrists that float level while typing rather than resting bent on a hard desk edge. A wrist rest is for pauses between typing bursts, not a pillow to plant your wrists on while reaching for keys — planted wrists plus reaching fingers is a strain pattern. If your desk edge is sharp and you rest forearms on it, an edge pad or simply pulling the keyboard further onto the desk so forearms are supported solves the pressure point.
Laptop users working long hours should treat the laptop as a screen only: raise it to eye height and add an external keyboard and mouse. A laptop’s fixed screen-keyboard relationship makes good neck and wrist posture simultaneously impossible.
Phone, documents, and the secondary zone
Keep frequently used items — phone, notebook, reference documents — within the arc you can reach without leaning. A document holder between keyboard and screen keeps reading material at screen height and distance, which matters for anyone transcribing or marking up. Items used weekly belong in a drawer or shelf, not in your forearm zone.
Step Five: Feet, Standing, and Movement
Feet flat and supported is the foundation the whole chain rests on. If your correct chair height leaves your feet unsupported, a footrest restores the foundation; the angled, textured kind encourages small position changes through the day, which is a feature, not a gimmick.
If you stand for part of the day
Standing is a posture change, not a cure-all: alternate in modest blocks rather than standing all day, wear supportive footwear or stand on an anti-fatigue mat, and keep the same elbow and screen rules — your standing presets should reproduce your seated geometry, just taller. Deciding whether standing belongs in your routine at all is the subject of Standing Desk vs Regular Desk, and choosing between desk mechanisms is covered by Electric vs Manual Standing Desk.
Build movement into the setup
No posture, however perfect, is meant to be held for eight hours. The ergonomic setup’s real job is to make your default position neutral so that the position changes you do make — standing, walking, stretching — start from a good baseline. Set a timer rhythm that suits your work, and let the setup serve it.
A Ten-Minute Ergonomic Audit Checklist
Run this audit after any change of chair, desk, or screen. Feet flat and supported. Knees at roughly ninety degrees with a small gap behind them. Lumbar curve supported. Elbows at about ninety degrees, shoulders relaxed, forearms level. Screen top at or just below eye level, about an arm’s length away, no glare. Keyboard centred, mouse adjacent at the same height. Wrists floating level while typing. Frequent items within easy reach. If every item checks out, the setup is ergonomically sound — remaining discomfort is then a question of breaks, workload, or a specific issue worth individual advice rather than more furniture.
Setting Up for Two: Shared Desks and Hot Desks
Everything in the main sequence assumes one body. A desk shared between two people of different heights breaks that assumption, and the ergonomic answer is adjustability at the points of difference: a chair that re-sets quickly, a desk whose height can change (ideally with memory presets), and a monitor arm that repositions in seconds. Agree a reset ritual — each user leaves the desk at a neutral state — because shared equipment drifts toward whoever adjusted it last.
Where adjustability is limited, compromise at the chair and the footrest rather than at the screen: the taller user sets the desk-side geometry, the shorter user raises the chair and adds foot support, and the monitor arm splits the difference in screen height with a quick pull. It will never be perfect for both, but a deliberate compromise beats an accidental one.
Special Cases: Standing-Only, Drafting, and Creative Work
Some workstations break the standard template legitimately. A standing-only bench for workshop-style tasks — packing, soldering, inspecting — sets its surface at standing elbow height permanently and adds a tall stool for perching rather than sitting; the elbow rule survives, only the chair changes. Drafting and drawing work traditionally uses a higher, sometimes tilted surface, because the work is viewed at arm’s length and worked with the whole forearm; a tilt-top or a desk riser at the back edge reproduces it.
Creative work with pen displays follows screen logic, not paper logic: the display is both screen and work surface, so it sits low and tilted like a drawing board while a second, conventionally placed monitor carries the reference material. In each case the method of this guide still applies — find the posture the task demands, set the furniture to meet the body’s joints in that posture, and verify with the audit checklist.
When to Revisit the Setup
An ergonomic setup is not a one-time achievement. Re-run the audit whenever you change a chair, desk, screen, or keyboard; whenever a new ache appears and persists for more than a few days; and at least once a year regardless, because chair gas lifts sink, monitor arms droop on their pivots, and your own habits migrate your equipment slowly out of position. The audit takes ten minutes. Treat it as maintenance, like cleaning the PC’s filters — small, scheduled, and far cheaper than the problem it prevents.
Ergonomics for Laptop-First and Multi-Screen Workers
Two modern setups deserve their own notes because they defeat the standard template in specific ways. The laptop-first worker who docks at a desk should treat the docked laptop as a desktop: lid closed or screen raised to monitor height, external keyboard and mouse at elbow level. The failure mode to avoid is the half-docked setup — laptop open at desk level as a second screen below the main monitor — which puts a permanent downward tilt in the neck for anyone who actually reads it. If the laptop screen must be used, raise it beside the main screen at the same height, not below it.
Three screens and ultrawides
With three monitors, the centre screen owns the straight-ahead position and the side screens angle inward like a cockpit; resist placing a frequently used screen fully to one side, because sustained neck rotation is the three-screen injury pattern. Ultrawide monitors solve the seam problem but introduce a subtler one: their edges sit far in the peripheral field, so windows you read all day should live in the centre third, with reference material at the edges. In both layouts the audit still rules — screen tops at eye level, distance set so centre-screen text reads without leaning — but distance grows with screen width, so measure it from the centre screen and your eyes, not from habit.
The peripheral audit: headsets, tablets, and paper
Finish the setup by auditing what else competes for your posture. A tablet used for hours belongs on a stand at near-screen height, not flat on the desk bending your neck forty degrees. A phone used for calls belongs on speaker or a headset if calls are long, because a handset cradled on a shoulder is an ergonomic fault with a dial tone. Paper documents for transcription belong on a holder at screen height between keyboard and monitor. Each peripheral placed by the same rules as the main screen is one less daily strain the main setup gets blamed for.
The Setup for Standing-Heavy and Hybrid Days
Workers who split the day between desk work and other locations — workshops, meetings, site visits — should set the desk up for the work done at it, not for the day as a whole. If the desk hosts two hours of focused screen work between other duties, optimise it ruthlessly for those two hours; the variety the ergonomics literature wants is already built into such a day, and the desk’s job is purely to make its segment neutral.
Quick-reset habits for hybrid workers
Hybrid workers share desks with their own past selves: the chair left low by yesterday’s perching, the monitor swung aside for a video call. Build a thirty-second reset ritual at the start of each desk session — chair height, screen position, keyboard centred — performed the way a pilot runs a checklist, without relying on noticing discomfort first. Discomfort is a lagging indicator; the ritual is a leading one.
Where the desk has memory presets or a marked tape line for screen height, use them. The best ergonomic setup for a hybrid worker is the one that can be restored in seconds, because a setup that takes ten minutes to restore will, in practice, be restored never.
Eyes: the forgotten ergonomic organ
The audit in this guide covers the body’s frame, but the eyes have their own ergonomics, and they fail quietly. Follow the distance and height rules for the screen, then add the visual ones: increase text size until you stop leaning in (leaning is the body reporting that the text is too small), match screen brightness roughly to the room so the display is neither a lantern nor a cave, and rest your gaze at distance periodically — the eye’s focusing muscle holds a posture just as the neck does, and it needs position changes too. Blink rate falls during concentrated screen work; conscious breaks in visual effort are the eye’s version of standing up.
Arranging the Surface in Reach Zones
Ergonomics is usually taught as posture, but half of its daily effect comes from geography: where things sit relative to your hands. Divide the desktop into three zones. The primary zone is the arc your forearms sweep with your elbows at your sides — keyboard, mouse, notebook, phone if you use it hourly. The secondary zone is a full arm’s extension without leaning: the water bottle, the reference book, the second device. Everything else belongs in the third zone, reached by standing or rolling the chair, and the honest test of your layout is how often you find yourself leaning, twisting, or stretching for something that statistics say belongs closer.
Leaning is the posture killer nobody logs. A printer reached for twenty times a day, a phone docked beyond the monitor, a drawer that forces a sideways bend — each is a small load, and small loads repeated asymmetrically are precisely how one shoulder and one side of a back end up complaining while the other stays silent. Audit your own desk by frequency for a single working day: tally every reach on paper, then re-zone the surface by the tally rather than by tidiness. The result often looks less symmetrical and photographs worse, and feels dramatically better by Friday.
Height is a zone too. Items used constantly should live between elbow and shoulder height on any shelving beside the desk; files stored above shoulder height or below knee height are fine for archives and wrong for daily tools. If your storage forces daily items into bad zones, the storage is the ergonomic problem, and no chair adjustment will compensate for a layout that makes your spine do the fetching.
Light, Glare, and the Visual Half of Ergonomics
A desk can be perfectly postured and still exhaust you through your eyes. The screen should sit perpendicular to windows where possible, so daylight comes from the side rather than from behind the screen — where it silhouettes the display into a dim cave — or from behind you, where it reflects off the surface into your face. If the room gives you no choice, blinds that diffuse rather than merely darken, and a matte screen surface, do more for comfort than any brightness setting.
Match screen brightness to the room rather than to a number. In a bright room a dim screen forces squinting and a forward head drift that undoes your careful monitor height; in a dark room a blazing screen produces the contrast glare that ends evenings with a headache. The practical test is a page of ordinary text: it should read as calmly as paper on the same desk. A small bias light behind the monitor, washing the wall with soft light, reduces the contrast between screen and dark room and is one of the cheapest comfort upgrades a night worker can make.
Glasses wearers have a specific geometry. Progressive and bifocal lenses read through their lower portion, so a screen set at the standard height for single-vision eyes forces the head to tilt back to find the reading zone — a classic cause of neck ache that gets blamed on the chair. The fix is a lower screen, sometimes noticeably lower, so the eyes drop through the lens naturally while the head stays level. If you wear progressives, set your monitor by this rule rather than the generic one, and mention your desk work at your next eye examination: occupational lenses ground for screen distance exist precisely for this setup.
Left-Handed, Tall, and Petite: Adapting the Standard Setup
Most ergonomic diagrams quietly assume a right-handed person of average height, and everyone outside that sketch has to translate. Left-handed mouse users should mirror the whole primary zone, not just swap the mouse: the keyboard’s number pad pushes a centred keyboard’s letter keys left of the body’s midline for right-handers, and the mirror problem lands on left-handers who keep a standard layout. A compact keyboard without a number pad centres the letters for both hands and is the single easiest fix for shoulder drift in either direction.
Tall users run out of adjustment at both ends: chairs at maximum height still leave knees high, desks at standard height force a hunch that no monitor riser can cure because the keyboard itself is too low. The honest solutions are structural — a height-adjustable desk used mostly at the top of its range, or a fixed desk raised on blocks or longer legs — and a footrest is the wrong tool here, since the problem is space, not support. Tall users should also check knee clearance depth, not just height: long femurs need the modesty panel and cable tray pushed well back.
Petite users face the inverse trap, usually solved badly by sitting on a cushion, which raises the body without raising the feet’s support and slides the sitter forward all day. The correct chain is: desk low enough or chair high enough for the elbows, then a footrest that gives the feet a firm, angled platform at the resulting height, then a screen lowered to match the slightly reclined posture a footrest encourages. Every element is cheap; it is the order that matters, and the order is why this guide starts at the chair and works outward.
Movement by Design: Timers, Transitions, and Realistic Sit-Stand Rhythms
A sit-stand desk only changes your day if the transitions actually happen, and willpower is a poor mechanism for them. Design the rhythm into the environment instead. Anchor position changes to events that already punctuate your work: stand for calls, sit for deep writing, stand again for the first task after lunch. Event-anchored changes survive busy weeks in a way that a beeping timer, silenced by Thursday, does not. If you do use a timer, set it for the transition, not the posture — the prompt is to move, and the movement itself, even sixty seconds of walking for water, is much of the benefit.
New standers should ration ambition. The first week of standing all morning typically ends with sore feet, an aching lower back from locked knees, and a quiet decision that standing is not for them — when the actual error was dosage. Build up in short bouts across the day, shift weight often, unlock the knees, and let a mat take the hardness out of the floor. The goal across a day is variety, not a standing total to brag about; a day of unbroken standing is just a different fixed posture, and fixed is the thing ergonomics is against. Our comparison of standing and regular desks goes deeper into who benefits and how the evidence actually reads.
Movement also belongs inside the seated hours. Keep one object you need — the water bottle’s refill, the printer, the notebook for the next task — far enough away that fetching it requires standing. It feels inefficient and is deliberately so: the desk setup that removes every reason to move has optimised the wrong variable. Ergonomics at its best is friction placed thoughtfully, removing it where it injures and keeping it where it keeps you human.
Measure Yourself: The Five Body Numbers Worth Writing Down
Generic setup advice uses population averages; your setup should use you. Five measurements, taken once with a tape and a helper, personalise every recommendation in this guide. Popliteal height — floor to the crease behind your knee, seated — sets the chair height your feet can support. Seated elbow height — seat surface to the underside of your relaxed elbow — added to the chair height gives your personal desk height. Eye height above the seat sets the screen’s target. Hip width plus a hand’s breadth sets the minimum chair and legroom width. Thigh length, seat front to knee, tells you how much desk depth your legs will occupy underneath.
Take the measurements in the shoes you actually work in, at the end of a normal day rather than first thing — bodies are measurably taller in the morning and slightly compressed by evening, and you work the whole range. Write the numbers down with the date. They change slowly, with age, fitness, and footwear, but a five-year-old set is still a better starting point than a chart’s average, and having them transforms chair and desk shopping from guesswork into comparison: every listing’s adjustment range can be checked against your five numbers in seconds.
Share the numbers when you share the desk. A partner or a hot-desking colleague with different measurements will need different settings, and the fastest shared-desk routine is each person knowing their own chair height, desk height, and screen position as three memorised figures. Label the chair’s adjustment points if it helps. Shared setups fail through vagueness — roughly where it was — far more often than through the hardware.
When Good Setup Is Not Enough: Pain, Persistence, and Escalation
Ergonomics reduces load; it does not diagnose. If discomfort persists for weeks despite a careful setup — or arrives with numbness, tingling, weakness, pain that wakes you at night, or symptoms travelling down an arm or leg — the desk has done what it can and the next step is a clinician, ideally one who asks about your work in detail. Bring information, not just symptoms: photographs of your setup, your five body measurements, and a short log of when symptoms appear relative to tasks. That record, which takes minutes to assemble from this guide’s audits, routinely saves an appointment’s worth of guesswork.
Beware the product spiral in the meantime. The market’s answer to persistent pain is an endless sequence of purchasable objects — a different mouse, a split keyboard, a cushion, a brace — each plausible, each occasionally right, and collectively a way of spending months treating a problem that may be medical, workload-related, or simply a task design issue no object fixes. A reasonable rule: one round of sensible setup correction, honestly audited, then professional eyes if the problem persists. Braces and supports in particular should be worn on advice, not on hope, since immobilising a joint that needs movement can deepen the underlying trouble.
Also audit the work itself before blaming the furniture. Deadline compression, unbroken video-call blocks, and a workload that has quietly doubled all present as physical symptoms at a desk that has not changed. Ergonomics includes the organisation of the day — breaks that exist on paper but are never taken are a management fact, not a posture fact — and the most ergonomic purchase some people can make is a calendar that defends the pauses this guide keeps recommending.
Keeping the Setup Honest: The Quarterly Fifteen-Minute Recheck
Setups drift. Chairs sink a centimetre as gas lifts age, monitor arms droop a degree under their own pivots, a new laptop arrives thinner than the old and the screen drops, a thicker rug appears under the chair and the foot geometry changes. None of it announces itself; all of it accumulates into the vague sense that the desk used to feel better. A quarterly recheck, run against the audit checklist earlier in this guide, catches drift while it is still a two-minute correction.
Time the recheck to something you already do quarterly, and photograph the setup from the side at each pass. The photographs are the diagnostic gold: posture creep — the slow migration of the screen closer, the chair higher, the user perched further forward — is invisible day to day and obvious across four dated pictures. Adjust one thing at a time when you correct, live with it for a week, and note the change; simultaneous corrections teach you nothing about which one mattered, and the notes become the setup’s history.
Households and offices that take this seriously often keep a one-page setup card per person: the five body numbers, the chair and desk settings, the screen height and distance, and the date of the last recheck. It sounds bureaucratic until the day a desk is replaced, a chair is borrowed, or a back starts complaining in a new home office — and the card rebuilds a known-good setup in ten minutes instead of a month of re-discovery.
Sound, Air, and Temperature: The Background Conditions
Ergonomics textbooks stop at the chair, but the room keeps voting. A desk beside a working radiator produces a warm side and a cool side, and the body quietly rotates toward comfort all afternoon, undoing symmetrical setup work. A desk in a draught from a door or a fan does the same in reverse. When you choose where the desk lives — and when you audit a setup that mysteriously will not stay comfortable — check the thermal map of the spot across a whole day, including the hour the sun reaches it, before blaming the furniture.
Noise is a posture issue in disguise. In a loud room you lean toward the screen, raise your shoulders against the distraction, and take fewer calls at a relaxed distance. Headphones solve the audio and add their own load on the neck if they are heavy, which is why call-heavy workers should count headset weight as an ergonomic specification, not an accessory detail. Air quality finishes the trio: a stuffy room degrades concentration in a way that feels exactly like bad ergonomics — heavy head, restlessness, the urge to perch and fidget — and a window opened on schedule outperforms a new cushion for some desks. Set up the room, not just the workstation, and the workstation’s settings finally stay set.
Gear for This Guide
Three verified accessories that solve the most common setup problems found above: screen height, foot support, and glare-free task light.

Ergotron LX Monitor Arm
A single-monitor arm for flat, curved, and ultrawide screens up to 34 inches, letting you set screen height, distance, and tilt exactly — and reclaim the desk space the stock stand occupied. Ergotron LX Monitor Arm — Check on Amazon
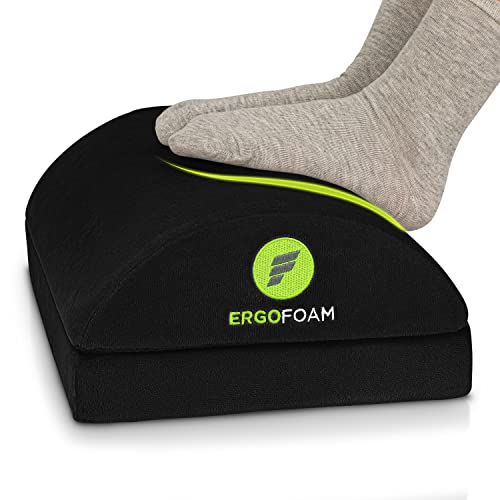
ErgoFoam Foot Rest for Under Desk
An adjustable high-density foam footrest that restores foot support when correct chair height leaves shorter legs dangling, with an angled surface that encourages position changes. ErgoFoam Foot Rest for Under Desk — Check on Amazon

BenQ ScreenBar Plus e-Reading LED Monitor Light Bar
A monitor-mounted light bar with a desktop dial that lights your documents without screen glare and without consuming desk surface — the tidy answer to the lighting step. BenQ ScreenBar Plus e-Reading LED Monitor Light Bar — Check on Amazon
Frequently Asked Questions
What should I adjust first, chair or desk?
Always the chair. Your seated position — feet supported, knees and lumbar right — defines your elbow height, and elbow height defines the correct desk and screen positions. Adjusting the desk first means calculating from a posture you are about to change.
How high should my monitor be?
The top of the visible screen at or slightly below eye level, roughly an arm’s length away, tilted slightly up toward your face. If you wear progressive or bifocal lenses, a slightly lower screen often works better because you view through the lower part of the lens.
Is a footrest really necessary?
Only when your feet cannot rest flat and supported at the chair height your elbows require — a common situation for shorter users at standard-height desks. In that case it is not an accessory but the missing foundation of the setup; dangling feet distort everything above them.
How long should I stand at a sit-stand desk?
Alternate in modest blocks and build up gradually; posture variety matters more than any specific ratio. Keep the same elbow and screen geometry standing as seated, use a mat, and sit back down before standing itself becomes a strain — the goal is change, not endurance.
My setup follows the checklist but my shoulders still ache. What now?
Check the two most-missed items: mouse distance (reaching sideways is the classic shoulder culprit) and armrest height pushing your shoulders up. Then look at workload factors — long unbroken sessions defeat any setup. Persistent pain deserves individual professional advice rather than more equipment.
I wear progressive lenses. Where should my screen actually go?
Lower than the standard advice suggests. Because the reading portion of a progressive lens sits low, your screen’s main text area should sit low enough that you read it with your head level and your eyes dropped, rather than tilting your chin up to find the lens zone. In practice that often means the top of the screen around eye level or slightly below, and the screen a little closer than usual. Test with a full page of text at your working size: if your chin rises, lower the screen; if you are nodding down constantly, raise it slightly. Your optician can also supply occupational lenses ground specifically for screen distance.
Is a standing mat worth it if I only stand in short bouts?
Yes, and arguably it matters more for short-bout standers, because you are the user who will quietly stop standing if the floor punishes you. A mat’s job is not luxury cushioning; it removes the hardness signal that makes standing feel costly, and it encourages the small weight shifts that keep standing comfortable. Choose one thin enough that the chair still rolls over its edge without a fight, and bevelled so it is not a trip edge in the seated hours.
My desk is shared with my partner, who is much taller. What actually needs to change between users?
Three settings carry almost all of the difference: chair height, desk height if it adjusts, and screen height. Keep a written card for each of you with those three numbers, and make the changeover a thirty-second ritual rather than a negotiation. What should not be shared without thought is the footrest position and the keyboard zone — a taller partner’s pushed-back keyboard silently wrecks the shorter user’s shoulder geometry. If the desk cannot adjust, the shorter user usually adapts better with chair height plus a footrest than the taller user adapts to a low desk, because a hunch cannot be footrested away.
How close is too close for a large monitor?
Too close is when you turn your head, rather than your eyes, to read the corners, or when you find yourself leaning back to take in the whole screen. For large and ultrawide displays the practical answer is usually more distance than a shallow desk offers, which is why big screens pair so naturally with monitor arms that reclaim the back of the desk. If text feels small at that distance, scale the interface up rather than pulling the screen in — scaling is free, instant, and reversible, while a too-close screen taxes your neck every hour of every day.
Do I really need an external keyboard if I work on a laptop?
If the laptop is your main machine for long days, yes — because a laptop welds the screen and keyboard into one object, and no single position suits both your eyes and your hands. Either the screen is right and your hands are cramped and high, or the keyboard is right and you spend the day looking down into your own lap’s direction. An external keyboard, with the laptop raised on a stand as a screen, separates the two problems and lets each be solved on its own terms. It is the highest-value ergonomic purchase most laptop workers ever make.
How long should it take before a corrected setup feels normal?
Give any real change two weeks. Your body has adapted to the old arrangement, including its faults, and a correct setup initially feels strange in exactly the places it is helping — the shoulders sit somewhere new, the screen is further than habit wants. Judge the change by symptoms at the end of the working day and by the end of the second week, not by the first morning’s unfamiliarity. If a change still feels wrong after a fortnight of honest use, revert that one element and keep the rest; ergonomics is iteration, not obedience.
The Bottom Line
Chair first, elbows as the anchor, screen at eye level and arm’s length, keyboard and mouse close, feet supported, light without glare. Run the ten-minute audit whenever anything changes, and treat movement — not any single perfect posture — as the long-term goal.
Related Guides
Go deeper with the ergonomics explainer and ideal-height guide, or browse desks designed around these principles: