Disclosure: As an Amazon Associate, ilcastellomenu.com earns from qualifying purchases. Links to Amazon on this page are affiliate links; they cost you nothing extra. Listing details such as price and availability change often, so check the current Amazon listing before you buy.
Learning how to overclock a graphics card safely means accepting the deal up front: you are trading a small amount of extra performance — typically a few percent — for extra heat, extra noise, and a real, if manageable, set of risks. Done conservatively, with small steps, temperature monitoring, and stability testing at every stage, GPU overclocking is a well-understood hobby. Done greedily, it is a fast route to crashes, corrupted driver installs, and in the worst case a damaged card. This guide teaches the conservative version.
Read the honesty box before anything else. Overclocking can void your warranty: policies differ by manufacturer and region, and while many brands tolerate software overclocking within the card’s own limits, physical modifications, BIOS flashing, and damage caused by tuning are commonly excluded from cover. Overclocking also raises power draw and heat, which stresses the card’s cooling and your power supply. If your card is new, expensive, or your only card, the correct amount of overclocking may be zero — modern cards already boost aggressively on their own, and the few percent available is rarely worth real risk. That is not a disclaimer to skip; it is the actual advice.
Before you touch a slider: risks, warranty, and heat
Understand the three costs. First, warranty: check your card maker’s policy. Software overclocking with the manufacturer’s own tools within factory voltage limits is the lowest-risk form; raising voltage, flashing a different BIOS, or removing the cooler moves you firmly into ‘at your own risk’ territory, and this guide does not cover those. Second, heat: every extra watt becomes heat your cooler must shed, and sustained high temperatures age components and fans faster. Third, stability: an overclock that survives a benchmark may still crash a specific game an hour in, and an unstable overclock can corrupt a driver installation or, rarely, game files being written during a crash.
The conservative philosophy is simple: take the free, safe wins first (better fan curve, raised power limit within the card’s own allowance), make small clock increases one at a time, test thoroughly after each, and stop at the first sign of trouble rather than chasing the last few megahertz. Your baseline from How to Test a Graphics Card — stock scores and temperatures, recorded before you begin — is what tells you whether any of this helped at all.
In this guide
What you need
- MSI Afterburner (works with all brands) or your vendor’s tool — AMD owners can tune directly inside Adrenalin’s Performance > Tuning panel.
- A monitoring tool such as HWiNFO64 or GPU-Z to watch temperature, hotspot, clocks, and power.
- A repeatable benchmark (3DMark or Superposition) and your most demanding game for stability checks.
- A current driver, and a note of your stock benchmark score and peak temperature.
- Good case airflow. Overclocking a card that already runs hot in a stuffy case is polishing a problem; fix cooling first with How to Fix Graphics Card Overheating.
Step 1: Raise the power limit and set a sane fan curve
The safest ‘overclock’ on a modern card barely counts as one. GPUs boost dynamically until they hit a power or temperature limit, so simply raising the power limit slider to its maximum allowed value — still within the envelope the manufacturer built into the card’s BIOS — lets the card hold its own boost clocks longer. Pair it with a slightly more assertive custom fan curve: fans ramping a little earlier keeps temperatures, and therefore boost clocks, steadier, at the cost of a little noise. Many users find this step alone captures most of the practical gain with none of the instability, and it is where conservative tuners should consider stopping.
Step 2: Core clock in small steps
- Run your benchmark once at current settings and record score and peak temperature.
- Raise the core clock offset by a small increment (+15 to +25 MHz is a typical step size).
- Re-run the benchmark. Watch for artifacts — flashing textures, speckles, geometry glitches — as well as crashes. Record the new score and temperature.
- Repeat while stable. When you hit instability (a crash, artifacts, or a driver reset), back off by two steps, not one — the edge of stability moves with temperature and game, so leave margin.
- Confirm the final setting with at least 30 minutes of your most demanding real game, not just the benchmark.
Keep voltage alone. The core voltage slider is where risk concentrates: extra voltage raises heat steeply for tiny gains and is the setting most likely to shorten a card’s life. A conservative overclock uses stock voltage, full stop. If a guide elsewhere tells you to unlock voltage and push it, understand that it has left the ‘safely’ brief this article is written to.
How to overclock a graphics card safely: the memory step
Memory overclocking is separate from core overclocking and must be tuned separately, after the core is settled, so you always know which change caused a problem. Raise memory clock in modest increments and benchmark after each — and watch the score, not just stability. Modern GDDR memory has error correction: push it too far and it will not crash, it will silently correct errors and get slower, so a run that scores lower than the previous one means you have passed the useful limit even if nothing glitched. Memory errors can also show as subtle sparkle artifacts. As with the core, back off from the first sign of trouble and verify in a real game; memory that is benchmark-stable can still misbehave in a specific title.
Stability testing and temperature limits
Your acceptance test for any overclock is boring reliability: the benchmark passes repeatedly, your hardest game runs for a long session without a flicker, and temperatures settle at a level your cooler sustains without screaming. Know your card’s temperature behaviour from its spec and reviews, watch the hotspot sensor as well as the headline GPU temperature, and treat a rising-over-time temperature curve as a fail even if nothing crashes. If the PC will be used by others, or for work you cannot afford to lose mid-session, the professional choice is to save the overclock as a profile you enable for gaming rather than a permanent state — both Afterburner and Adrenalin support profiles.
Also remember the interaction with drivers: driver updates can reset tuning profiles to stock without warning, and a profile that was stable on one driver can be marginal on another. After any driver change (see How to Update Drivers on a Graphics Card), re-verify before assuming your old settings still hold. And keep perspective on the prize: if your total gain across all this careful work is a few percent, that is a normal, successful outcome — the difference between tiers of card, as How to Choose a Graphics Card explains, is far larger than any safe overclock.
Common mistakes
- Copying someone else’s numbers. Every chip is different (‘the silicon lottery’). A forum user’s offset is a starting hint, not a promise; your card may do more or less.
- Tuning core and memory simultaneously. When it crashes — and at the limit, it will — you will not know which slider to blame.
- Testing for two minutes. Instability loves the 40-minute mark of a gaming session. Short tests prove almost nothing.
- Chasing benchmark scores into heat. If the fans are unbearable or temperatures keep climbing, the overclock is costing more than it pays.
- Forgetting to save a stock profile. Always keep a one-click return to factory settings. It is your undo button for every experiment.
When to stop (or not start)
Stop conditions are part of the method: artifacts at stock settings (that is a fault, not a tuning problem — see the testing guide), temperatures you cannot control, a power supply already near its sensible limit given the draw discussed in Graphics Card Power Consumption Explained, or a card under a warranty you are not willing to risk. Likewise, laptops and small-form-factor PCs with constrained cooling are poor candidates. There is no shame in the stock profile: it is the configuration the manufacturer validated, and modern boost algorithms already extract most of what the silicon offers.
Understanding what the sliders actually do
Modern GPUs do not run at one fixed speed; they boost dynamically, juggling clock speed against temperature, power, and voltage limits many times per second. Your core-clock ‘offset’ slider does not set a speed — it shifts the whole voltage-frequency curve upward, asking the card to run a little faster at each voltage point until a limit intervenes. This is why the power-limit raise in Step 1 often matters more than the offset: if the card was already power-limited, a bigger offset changes nothing until the ceiling lifts, and why cooling is an overclocking upgrade in its own right — a cooler card simply lives higher on its own curve. Memory offset sliders similarly shift memory speed, with the error-correction behaviour described earlier acting as your honesty meter. Grasping this model prevents the classic beginner confusion of stacking large offsets on a card that was never allowed to use them, then blaming the silicon.
It also explains diminishing returns. The top of the curve is where voltage — and therefore heat — rises steeply for each small step of frequency. Manufacturers already harvest most of the easy performance; what remains for you is the expensive end of the curve, which is the deep reason safe overclocking yields a few percent rather than a transformation. Anyone promising dramatic gains from sliders alone is either raising voltage aggressively (leaving the ‘safely’ brief), describing an unusually power-limited stock configuration, or selling something.
A conservative tuning log (worked example)
| Stage | Change | Result to record |
|---|---|---|
| Baseline | Stock profile | Benchmark score, peak temp, fan speed |
| Power | Power limit to max allowed; fan curve adjusted | Score/temp again — often a small gain already |
| Core +25 MHz | Core offset only | Pass/fail, artifacts?, score, temp |
| Core +50 MHz | Core offset only | Pass/fail, artifacts?, score, temp |
| First instability | — | Back off two steps; long game session to confirm |
| Memory steps | Memory offset in small steps, separately | Stop when score stops improving, even if stable |
| Final validation | Saved profile | 1 hour hardest game + benchmark re-run; record final numbers |
Keep a log exactly like this — settings, scores, temperatures, and what failed where. The log is what makes the process an experiment rather than a gamble: when a crash arrives in week three, you can see which setting was marginal, and when a driver update resets your profiles, you can rebuild the known-good configuration in minutes instead of re-deriving it. It also enforces the one-variable-at-a-time rule in practice, because a log with two changes in one row is visibly sloppy even to its author.
Undervolting: the other direction, briefly
Many experienced tuners now prefer undervolting to overclocking: persuading the card to hold its stock (or near-stock) clocks at lower voltage, cutting heat, noise, and power draw — sometimes so effectively that sustained boost actually improves in a warm case. It uses the same tools, the same incremental discipline, and the same stability testing, pointed the other way, and it carries the gentlest risk profile of any tuning because nothing is being pushed beyond specification. If the honest appeal of overclocking was ‘a better-behaved card’ rather than a bigger benchmark number, undervolting is very likely the technique you actually wanted — explore it with the same logging rigour, and the same saved stock profile as your way back.
Profiles for real life: gaming, quiet, and stock
The mature end-state of careful tuning is not one heroic overclock but a small library of profiles, each honest about its purpose. A gaming profile carries your validated core and memory offsets with the assertive fan curve. A quiet profile drops the power limit, keeps stock clocks, and softens the fans for late-night or shared-room sessions — in many games the frame-rate cost is invisible while the acoustic difference is enormous. And the stock profile, untouched, remains your diagnostic gold standard: the configuration to return to the moment anything misbehaves, so that ‘is it the overclock?’ is a question you answer by clicking once rather than wondering for a week. Both major tuning tools save and hot-swap profiles easily; the discipline is in building them deliberately, validating each, and naming them like you mean it. This is what ‘overclocking as a hobby’ looks like when it grows up — less leaderboard, more instrument panel.
Seasonal and situational adjustments
An overclock validated in a cool room in spring can be marginal in a summer heatwave, because the card’s thermal headroom — the resource your tuning spends — shrinks as ambient temperature rises. Experienced tuners either validate in the worst conditions they expect, leave a deliberate margin below the edge for exactly this reason, or keep a ‘summer’ profile a step softer. The same logic applies to dust: a cooler slowly filling with dust across six months is a slowly shrinking thermal budget, and a profile that was stable in a clean case can fray in a dirty one. Treat instability that ‘appears from nowhere’ as information about conditions before blaming the silicon: check temperatures, check the dust, check what else changed. The silicon is usually the last thing that changed, and the first thing beginners accuse.
Knowing the difference between unstable and broken
An unstable overclock misbehaves under load and behaves perfectly at stock settings — that reversibility is its defining trait and your most important diagnostic. A broken card misbehaves at stock too: artifacts on the desktop, crashes with no tuning applied, errors that follow the card into another machine. The moment symptoms survive a return to the saved stock profile, stop tuning entirely; you have left overclocking’s jurisdiction and entered fault diagnosis, where the correct tools are the testing method and, if warranted, the returns process. Conflating the two states wastes weeks — people re-tune broken cards and RMA healthy ones with equal enthusiasm. Your stock profile and your baseline log are what keep the boundary bright: one click, one benchmark, and you know which side of it you are standing on.
A note on factory-overclocked cards and ‘already tuned’ silicon
Many partner cards ship with a factory overclock — a modest, manufacturer-validated lift applied to the reference design, covered by the warranty, and achieved with the partner’s larger cooler. Owners of such cards sometimes assume the tuning work is done, or conversely that the card is used up and has nothing left. Neither is quite right. The factory overclock is conservative by commercial necessity — it must survive every customer’s case and climate — so the usual headroom story applies, discounted somewhat: expect a little less remaining room than on a reference-clocked model, not zero. The more useful observation is that a factory-overclocked card demonstrates the correct philosophy in product form: a small, tested, warranted margin, sold honestly. Emulate it. Your own tuning should aim to be exactly as boring — small, tested, logged, reversible — and if a forum thread makes boring sound like failure, remember that the manufacturer’s engineers, who know the silicon best, chose boring too.
What success actually looks like
Calibrate your expectations with a realistic portrait of a finished, conservative tune. The benchmark score rises by a small single-digit percentage. The demanding game that averaged a frame rate just under your monitor’s refresh now sits just on it, with frame-time consistency improved more than the average suggests. Temperatures rise slightly but plateau; the fans work a little harder and remain civilised. Nothing crashes, this week or next season, because you left margin for the summer and the dust. If that portrait sounds underwhelming compared with forum legend, measure the legend by the same standard — a screenshot of a benchmark run at settings that crash in real games is not performance, it is photography. The conservative tune’s unglamorous numbers are the ones still true in six months, and truth that lasts is the entire point of doing this safely.

Gear mentioned in this guide
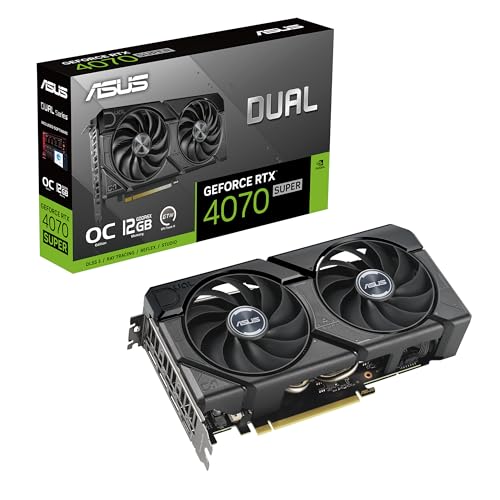
Two well-cooled partner cards of the kind that tolerate modest tuning gracefully. Overclocking never requires buying a new card — it is a free experiment on the one you own, done carefully.
- ASUS Dual GeForce RTX 4070 Super EVO OC Edition 12GB — Check on Amazon
- XFX Speedster SWFT210 Radeon RX 7700 XT 12GB — Check on Amazon

The physics underneath the sliders: voltage, frequency and heat
Every overclocking result in this guide becomes easier to predict once you see the triangle the sliders are really adjusting. A GPU can switch faster — higher frequency — when it is given more voltage, because the transistors need a stronger push to change state reliably in less time. But power consumption rises steeply with voltage, much faster than it rises with frequency alone, and all of that power leaves as heat through a cooler of fixed ability. That is why the first part of any overclock feels free and the last part feels punishing: early steps ask for small voltage increases and deliver real gains, while later steps demand large voltage and cooling costs for a few final megahertz. It is also why two cards of the same model finish in different places. Each chip’s minimum stable voltage at a given frequency is slightly different — the silicon lottery again — so a settings file copied from a forum is a starting suggestion, never a promise.
Heat closes the loop. As temperature rises, chips leak more current and boost algorithms pull clocks back, so an overclock validated in a five-minute burst can quietly undo itself in a long session as the card warms. This is the practical reason the main steps insist on realistic, sustained testing. You are not testing whether the card can touch a number; you are testing whether it can live at that number, in your case, in your room, for the length of your longest session. Everything else in overclocking is commentary on that single question.
Memory overclocking in depth: the gains and the trap
The main guide covers the memory step briefly; it deserves a fuller warning because memory behaves differently from the core. Graphics memory includes error detection and correction behaviour that can mask instability instead of crashing. Push memory too far and the card may keep running while quietly re-sending data that failed checks — and performance goes down even as the reported clock goes up. This negative scaling is the signature trap of memory overclocking, and it catches people who judge by stability alone.
Avoid it by testing performance, not just survival, at every memory step. Use the same fixed benchmark scene from our graphics card testing guide and record the score at each increment. While the score rises with the clock, you are gaining. When the score flattens, you have reached the useful limit even if the card seems stable. When the score falls while the clock rises, errors are being corrected at a cost — back down to the last step that improved the score, then back down one more for margin. Also watch for visual artefacts specific to memory trouble: flashing textures, sparkles, or geometry stretching in busy scenes. Core instability tends to crash the driver or the game; memory instability tends to corrupt the picture first. Knowing which symptom belongs to which slider halves your troubleshooting time, because you adjust the offender instead of starting over.
Bandwidth is not everything: when memory speed stops mattering
Memory overclocking helps most when the workload is bandwidth-starved: high resolutions, heavy texture traffic, and some compute tasks. At lower resolutions or in games limited by the core or the CPU, extra bandwidth sits unused and the honest gain is zero. This is why memory results vary so much between reviews of the same card. Test in the games and at the resolution you actually play; a memory overclock that shines in a synthetic bandwidth test and does nothing in your titles is heat without benefit, and the sensible move is to leave memory at stock and keep the thermal headroom for the core.
One overclock does not fit every game: working with profiles
Stability is not a property of the card alone; it is a property of the card plus a workload. Different games stress different parts of the chip — one hammers the core with heavy shaders, another streams textures relentlessly, a third holds the card at maximum power for hours — so an overclock that survives your whole benchmark suite can still fall over in one particular title. The mature response is not to abandon tuning but to organise it. Keep your fully validated settings as the global profile. If one game objects, create a per-game profile one or two steps more conservative and apply it only there, rather than detuning everything you play for the sake of the strictest title.
Record, in the tuning log described earlier in this guide, which game set the limit and how. Over months that log becomes a map of your specific chip: you will learn whether your card is core-limited, memory-sensitive or temperature-limited, and every future adjustment gets faster. Profiles are also the honest way to handle ageing. A card that needed slightly gentler settings in year three than in year one is not failing; it is a machine settling, and a profile system lets you accommodate that in minutes instead of rediscovering it crash by crash.
Recovery skills: getting back from a bad setting without panic
Sooner or later every tuner applies a setting the card dislikes. What separates a hobby from a headache is knowing the recovery paths cold, before you need them. If the screen freezes or the driver resets during a game or benchmark, the setting failed but the system usually recovers on its own: the driver restarts, the tuning tool’s values may persist, so reopen the tool and step back immediately rather than relaunching the game to check. If the display stays black but the PC is running, give it a full minute — drivers sometimes recover slowly — then restart the machine properly. Tuning tools apply settings at startup only if you told them to; if a bad overclock is being reapplied every boot and crashing the desktop, start Windows in Safe Mode, where the tuning tool does not load, and uninstall or reset it from there. Your settings live in the tool, not in the card’s permanent firmware, in normal software overclocking — which is precisely why the software approach in this guide is the safe one for most owners.
After any recovery, return to your last logged stable settings, not to stock-plus-guesses, and note the failed step in the log with the symptom it produced. A log of failures is as valuable as a log of successes: it draws the map of where your chip’s cliff edge is, so you stop paying visits to it. And if a card begins crashing at settings that were stable for months — including at completely stock settings — stop tuning and start diagnosing. New instability at stock is a hardware or power story, not an overclocking story, and the testing and overheating guides linked from this article are the right next reads.
Older cards, small cards and laptops: where the rules tighten
The method in this guide assumes a desktop card with a capable cooler and a power supply with headroom. Three categories deserve extra restraint. Older cards may have dried thermal paste and tired fans, so their thermal ceiling arrives sooner; clean and inspect first, validate temperatures at stock, and accept smaller gains — an ageing card’s best tune is often an undervolt that restores its original boost behaviour rather than a push beyond it. Compact and low-profile cards, built for small cases, have small coolers and strict power limits by design; tune them for efficiency and noise, not records. Laptop GPUs are the tightest case of all: they share heat pipes and a power budget with the CPU inside a sealed chassis you cannot improve, the tuning tools available are more limited, and the cost of heat is paid by the whole machine including its battery. On a laptop, undervolting for cooler, quieter sustained performance is usually the only adjustment worth making, and even that should be validated across your longest sessions, not a benchmark burst.
In all three categories the sequence from the main guide still protects you: change one variable, in small steps, test realistically, log everything, and keep a known-good profile you can return to. The steps do not change; only the size of the prize and the nearness of the ceiling do.
When a crash is not the overclock: power supplies and other impostors
Not every crash during tuning is the GPU objecting to its settings. Overclocking raises the card’s power draw and sharpens its load changes, and a marginal power supply may reveal itself exactly then: the PC restarts outright rather than freezing, protection trips during scene transitions when load swings hardest, or the system that was stable at stock becomes erratic only at raised power limits. Treat a whole-system restart under load as a power question first, not a clock question. Return to stock settings and run the same workload; if restarts persist at stock, stop tuning entirely and investigate the power supply, its cables and its age, using the guidance in our power consumption explainer. An overclock can be the messenger that exposes a tiring PSU, and shooting the messenger by endlessly lowering clocks leaves the real fault in the machine.
Other impostors deserve a mention. An unstable CPU or memory overclock elsewhere in the system will happily crash games and blame the GPU, which is why experienced tuners change one subsystem at a time and return everything else to stock while GPU tuning is in progress. A failing drive can produce freezes that look like driver crashes when a game streams assets. Even a loose display cable has ended tuning sessions. The discipline is always the same: change one variable, test, and when behaviour contradicts your change, widen the suspect list instead of pushing the same slider harder.
Tuning for different goals: competitive play, quiet rooms and longevity
The best settings depend on what you are optimising for, and naming the goal first prevents the common error of copying a benchmark-chaser’s tune into a machine with a different job. For competitive play, the prize is not peak frame rate but consistent frame rate: a slightly conservative tune that never thermally throttles mid-match beats an aggressive tune that fades in the third game of the evening. Validate with long sessions, cap frames at a rate the tune can hold indefinitely, and favour stability margin over the last few percent. For a quiet room — a shared space, a bedroom, recording or streaming with a microphone nearby — the winning tune is usually an undervolt with a gentle fan curve, accepting stock-level performance in exchange for a machine you cannot hear; measure success with your ears at your chair, not with a benchmark. Our guide to fixing GPU fan noise covers the acoustic side of that bargain in full.
For longevity — a card you intend to keep for many years, or one already in its later life — the goal is minimum stress for the performance you need: modest power limits, temperatures kept well clear of the ceiling, fans spared constant maximum speed. In every case, write the goal at the top of your tuning log. When a forum thread tempts you with someone else’s numbers, the written goal reminds you what your machine is for, and most temptation evaporates. Overclocking done well is not a contest; it is fitting the card to its owner.
Re-validating after change: drivers, seasons and new games
An overclock is validated against a moment in time, and time does not hold still. Three kinds of change justify a calm re-check rather than blind trust. A major driver update can shift how boost and power management behave, occasionally moving a borderline tune across the line in either direction; after such an update, run your standard validation scene once before assuming your profiles are still sound. The seasons change your cooling: a tune proven in a cool spring room may run meaningfully hotter in late summer, and cards that throttle or destabilise only in heat are a classic summer complaint — the seasonal notes earlier in this guide expand on this. And a new flagship game can stress the card in a pattern none of your older titles used, which is why one crashing game on a long-stable tune deserves a per-game profile rather than disbelief.
Re-validation is quick when your groundwork exists: one logged benchmark scene, one demanding game, twenty minutes. That is the dividend of the method this guide teaches — small steps, written records, known-good profiles. The owners who fear driver updates and new games are the ones tuning by memory and superstition. With a log and a test scene, change is just another data point, and your card stays tuned to the machine and the year you actually have.
Keeping good records when you share the machine
Shared PCs undo more overclocks than silicon does. One person tunes, another updates the driver, a third installs a different tuning tool that loads its own profile at startup, and soon nobody knows which settings are live or why the card behaves as it does. If more than one person uses the machine, agree on a single tuning tool, a single profiles folder and a shared log — even a plain text file on the desktop — where every change is written with a date and a name. Set the known-good profile as the one that loads at boot, and treat experiments as sessions that end by returning to it. This sounds bureaucratic for a home PC, but it takes seconds per change and it prevents the uniquely frustrating fault where the hardware is fine, the settings are fine, and only the humans have lost track of both. When something does go wrong, the log answers the first question of all troubleshooting — what changed — instantly, instead of by committee.
The ten-minute rule for calling a tune finished
Call a tune finished only when three things are true at once: it has survived your longest realistic session without a single error, its temperatures and fan noise are numbers you are content to live with every day rather than merely impressed by once, and it is written in the log with the exact settings and the date. If any one of the three is missing, the tune is still an experiment, and experiments belong in sessions you choose — not underneath a ranked match, a client render or a family movie night. That small ceremony, ten minutes of validation and writing, is what turns overclocking from a recurring gamble into a one-time improvement you make and then forget about, which is the state every well-tuned PC should reach.
Keep that finished profile exported or screenshotted somewhere outside the tuning tool as well, so a reinstalled application or a rebuilt Windows installation cannot take your known-good settings with it.
Frequently asked questions
Does overclocking void my graphics card’s warranty?
It depends on the manufacturer, the region, and what you did. Software overclocking within the card’s built-in limits using vendor tools is often tolerated, but damage attributed to overclocking, voltage increases, BIOS flashing, and physical modification are commonly excluded. Check your specific brand’s policy before you start, and assume the risk is yours if the policy is ambiguous.
How much performance will I actually gain?
Typically a few percent — occasionally approaching a tenth in favourable cases with power-limit and tuning combined. It smooths frame rates slightly; it does not move you up a card tier. If you need a large jump, you need a different card, not a bigger overclock.
Is overclocking safe for the card’s lifespan?
A conservative, stock-voltage overclock with controlled temperatures has a modest effect at most. Sustained high temperatures and raised voltage are what age hardware. This is why the method here caps the ambition: small steps, stock voltage, strict temperature discipline.
Why does my overclock pass benchmarks but crash in games?
Benchmarks are short and uniform; games vary load, memory patterns, and duration, and heat soaks in over time. The fix is to back off one or two steps from the benchmark-stable setting and validate with long sessions in your most demanding game.
Should I overclock a brand-new card?
Our advice: enjoy it stock through its early life, record baselines, and revisit tuning later if curiosity persists. Early on, the warranty is most valuable, the card is fastest relative to current games it will ever be, and the few percent matters least.
Does overclocking help more at 1080p or at 4K?
Usually at higher resolutions, because that is where the GPU is most often the limiting factor, so extra GPU speed converts directly into extra frames. At 1080p with modest settings, many systems are limited by the CPU or reach the monitor’s refresh ceiling, and an overclock adds little you can use. The exception is high-refresh 1080p competitive play, where every frame counts and the GPU may well be the limit at the settings you choose. Test in your own games at your own settings; the answer is empirical, not theoretical.
Will overclocking wear out my fans faster?
Indirectly, it can. An overclock that raises temperatures usually raises fan speeds and run-time at those speeds, and fans are wear parts with bearings that age with use and heat. The effect is modest if you keep temperatures sensible and use a fan curve that rests at low load, and it is one more reason the guide favours efficient tunes — an undervolted card often runs its fans slower than stock while performing the same. Listen to your fans when you test; a change in their sound over the months is information, not just noise.
I bought a card that was used for mining. Should I overclock it?
Validate first, tune later, and expect the tuning headroom to be the least interesting thing about the card. Mining cards often ran memory hard and fans constantly, so inspect and soak-test thoroughly at stock using the testing guide, check fan behaviour and memory temperatures, and live with the card for a few weeks before touching a slider. Many ex-mining cards turn out to have been undervolted by careful operators and work perfectly; the point is to establish that yours is one of them before asking anything extra of it.
Is it worth overclocking if I use my PC for work as well as games?
Only with profiles, and only if the work tolerates the experiment. A crash in a game costs a match; a crash during a render, a stream to an audience or a long computation costs real output. Keep a stock or undervolted profile for work sessions, apply your tuned profile for play, and never validate a new overclock on a day when the machine owes you a deadline. Separated that way, the two uses stop interfering with each other.
The bottom line
Safe overclocking is a discipline, not a dare: stock voltage, small steps, one variable at a time, long stability tests, strict temperature limits, and a saved stock profile as your undo button — with honest acceptance that the reward is a few percent and the warranty risk is real. If that trade still appeals, you now know how to do it carefully. If it does not, a well-cooled card at stock settings, chosen well using graphics card buying guide, is the genuinely smart build.