Learning how to clean a CPU cooler properly takes about twenty minutes: power the PC off and unplug it, remove the side panel, blow the dust out of the fin stack with short bursts of canned or electric air while holding the fan blades still, wipe the blades with a lightly dampened cloth, and only remove the cooler from the CPU if you also plan to replace the thermal paste. Done once or twice a year, that routine keeps temperatures and noise where they were on the day the cooler was installed.
Dust is a slow problem — temperatures creep up a degree at a time until one summer day the fans are suddenly loud under loads they used to handle quietly. This guide covers air towers and AIO radiators, what you can safely clean in place, and the point at which a full removal and repaste (see How to Install a CPU Cooler) is the better job. If noise is what sent you here, How to Fix a Loud CPU Cooler diagnoses the non-dust causes too.
Disclosure: As an Amazon Associate, ilcastellomenu.com earns from qualifying purchases. Product examples below link to Amazon, where you can check current availability and specifications; this guide itself lists no fixed prices because pricing and bundles change frequently.
What You Need and the Safety Rules
Power off and unplug — every time
Shut down fully, switch the PSU off, and pull the power cable before the side panel comes off. Press the power button once with the cable out to drain residual charge. Cleaning feels harmless compared with swapping parts, but you will be putting hands, cloths and air nozzles millimetres from fans and headers, and a surprise fan spin-up can nip fingers and flick dust into places it should not go. Unplugged is the rule for everything in this guide.
Gather the right tools
You need canned air or a mains-powered electric duster, a soft paintbrush or anti-static brush, microfibre cloths, cotton buds, and isopropyl alcohol for fan blades and (only if removing the cooler) for old thermal paste. Avoid a household vacuum cleaner inside the case: its nozzle builds static charge, its suction can overspin fan bearings, and it pulls at cables. A vacuum is fine on removable case dust filters once they are out of the PC and away from components.
Hold the fans still while blowing
A blast of air across a free fan spins it far beyond its rated speed, which wears the bearing and can generate a small back-voltage through the header. Pin each fan gently with a finger or a cable tie while you blow through it. This one habit is the difference between cleaning a cooler and slowly damaging it.
In this guide
How to Clean a CPU Cooler in Place, Step by Step
Most cleanings should happen with the cooler still mounted. Removing it means new thermal paste and a full remount, so save that for when it is actually needed.
Step 1: Expose the cooler and remove loose dust
Take the side panel off and, if your case has them, slide out the intake dust filters and clean those separately — clogged filters starve the cooler no matter how clean it is. With the brush, sweep loose dust off the top of the fin stack, the fan frames and the motherboard area around the socket, working it toward the bottom of the case where you can lift it out with a cloth. Do the sweeping first so the air blasts that follow are moving settled dust out, not just relocating it.
Step 2: Blow out the fin stack
Working from several angles, blow short bursts through the fins in the direction of normal airflow, then a few bursts against it to dislodge the mat that forms on the intake face. On dual-tower coolers, unclip the middle fan if it removes easily — the space between the towers is where dust mats thickest. Keep a canned-air can upright and use bursts rather than a continuous blast, which chills the can and weakens the stream. Electric dusters do not have that problem but are stronger, so keep a little more distance from delicate fins.
Step 3: Clean the fan blades
Dust caked on blades unbalances the fan and adds a low rumble at speed. Wipe each blade, front and back, with a microfibre cloth very lightly dampened with isopropyl alcohol, rotating the fan by hand as you go. Cotton buds handle the hub and the corners of the frame. The blades should end up smooth and evenly coloured; grey felt left on the leading edges means the job is half done. While the panel is off, wipe the case fans and the GPU fans the same way — they share the same air.
Step 4: Radiators and AIO-specific cleaning
An AIO’s radiator clogs exactly like a fin stack, usually on the face the fans blow into. If the fans mount against the case, dust mats between fan and radiator where you cannot see it; every year or so it is worth removing the radiator screws, easing the assembly out, and blowing the mat away properly. Check the tubes and fittings visually while it is accessible — any crust, discolouration or dampness at a fitting means the cooler is at end of life and should be replaced, not cleaned. Never open an AIO loop; it is a sealed unit with no user-serviceable parts.
When Cleaning Means Removing the Cooler
The signs that a repaste is due
If temperatures stay high after a thorough in-place clean, the thermal paste has likely dried out — common after three to five years, sooner on coolers that were mounted with a very thin application. Removal means unscrewing in a cross pattern, twisting the cooler gently to break the paste seal rather than pulling straight up (a straight pull can yank an AMD CPU out of its socket with the cooler), cleaning both surfaces with isopropyl alcohol, and remounting with fresh paste following How to Apply Thermal Paste with a CPU Cooler.
Cleaning a removed heatsink properly
Off the PC, a heatsink can be cleaned far more aggressively: compressed air through the fins from both sides, a brush between the heat pipes, and a wipe of the base plate. Do not wash a heatsink under a tap unless the fan is removed and you can guarantee it dries completely — trapped water in fin joints is worse than the dust was. Let any cleaned part sit until bone dry before it goes back near a motherboard.
What not to do
Do not use a pressure washer, a leaf blower at close range, or a metal tool to scrape between fins — bent fins restrict airflow permanently. Do not oil a noisy fan bearing as a ‘cleaning’ step unless the fan is a known serviceable design; most PC fans are sealed, and the honest fix for a grinding bearing is a replacement fan. And do not clean a PC that is running ‘just to see the dust move’ — the unplug rule has no exceptions.
Keeping It Clean Longer
Filters, placement and pressure
A case with filtered intakes and slightly more intake than exhaust airflow (positive pressure) keeps dust out remarkably well, because air leaks out of the seams instead of in. Keep the PC off carpet and off the floor where possible, and clean the filters monthly — they are the two-minute job that makes the twenty-minute job rare. Our case shortlists at Best PC Cases for Airflow Under 50 and Best PC Cases for Dust prioritise exactly these filter and airflow features.
A realistic schedule
Filter check monthly, in-place cooler clean every six months in a typical home, yearly for a filtered case in a low-dust room, and a repaste only when temperatures say so. Pets, carpets and smoking shorten every interval. If a clean no longer restores the temperatures you remember, work through How to Fix CPU Overheating before assuming the cooler itself has failed — and if a replacement is genuinely due, Best CPU Coolers for Gaming and Best CPU Coolers for Ryzen 7 5800x are sensible shortlists to start from.
Cleaning the Rest of the Cooling System While You Are In There
A CPU cooler does not work alone, and a cleaning session that stops at the fin stack leaves half the problem in place. These are the companion jobs, in descending order of impact.
Case fans and intakes
Every case fan gets the same blade-wiping treatment as the cooler fan, and every intake gets its filter washed or blown out. A front intake caked in dust starves the cooler no matter how clean the cooler is; a clogged bottom intake does the same for the power supply and graphics card. While the brush is out, clear the rear exhaust grille and the top vents. The goal is a case whose airflow path is as clean as the cooler at the end of it.
The graphics card and power supply
Graphics card fans and their fin stacks collect the same dust and are cleaned the same way — blades held still, short air bursts, no vacuum nozzle near the board. The power supply’s intake grille (usually filtered, underneath the case) needs its filter cleared; do not open the power supply itself, ever — it contains capacitors that hold charge and is not a user-serviceable part. A soft brush around its exterior vent is the entire job there.
Seasonal and Environmental Adjustments
How often ‘twice a year’ really means depends on where the PC lives. Adjust the schedule to the environment rather than the calendar.
Homes with pets, carpets and workshops
Pet hair is the aggressive case: it mats filters in weeks and wraps fan hubs. In a pet home, monthly filter checks and a quarterly cooler clean are realistic, and a case with easily removable filters earns its keep. PCs in workshops, garages or smoking environments should be cleaned more often still, and their owners should expect paste and fans to age faster. The compensating good news: these are also the environments where cleaning produces the most dramatic temperature improvements, because there was the most performance being stolen.
Reading your own temperatures as the schedule
The most reliable cleaning schedule is a number, not a date. Note your CPU’s temperature under a repeatable load — the same game scene, the same render — when the system is clean. Recheck occasionally. A creep of five degrees or more with no hardware or software change is dust asking for attention, wherever you are in the calendar. This turns maintenance from a chore you remember into a measurement you respond to, and it catches the clogged filter in the month it happens rather than the season after.
Deep Cleaning a Removed Cooler, Step by Step
When a repaste is already planned, the cooler comes off — and that is the moment for the thorough clean an installed cooler cannot get. Here is the full procedure, in order.
Strip, blow, brush, inspect
With the cooler removed (twist to break the seal, per the repaste guide) and the fans unclipped and set aside, work the fin stack with compressed air from both faces until nothing more emerges, then brush between the heat pipes and along the base plate’s edges where dust cakes hardest. Wipe the base to bright metal with isopropyl alcohol as part of the repaste preparation. Inspect while it is bare: bent fins can be gently straightened with a plastic tool, a fan with a cracked blade or a gritty bearing should be replaced now rather than remounted, and heat-pipe joints should show no corrosion or weeping. A cooler that fails this inspection was about to fail in service — catching it on the bench is the entire point of the exercise.
Fans on the bench: the full treatment
Off the cooler, each fan gets its blades wiped front and back, its frame and hub cleaned with cotton buds, and its cable inspected for nicks where it passed a sharp fin edge. Spin the fan by hand: it should rotate smoothly and silently, coasting evenly to a stop. A fan that grinds, wobbles or stops abruptly has a bearing at the end — replace it on the bench, where the job takes two minutes, instead of in the case next month. Note the fan’s model and size in your build records while it is in your hand; the day a replacement is needed, that note is the difference between ordering and guessing.
Reassembly standards
Remount with fresh paste and the cross pattern, exactly as a new installation, because that is what it now is. Before the side panel goes on, run the machine open briefly: watch every fan start, listen for the cable you rerouted differently this time, and confirm temperatures settle. A deep clean that ends with verification is maintenance; one that ends with hope is a ritual. Log the date and the load temperature you measured — the baseline that tells you when this whole procedure is next due, as the main guide’s scheduling section describes.
Gear for This Guide
The examples below come from our Creators-API-verified product pool and illustrate the cooler classes discussed in this guide. They are examples, not a ranked list — use the criteria in this article to judge any model, including newer revisions.
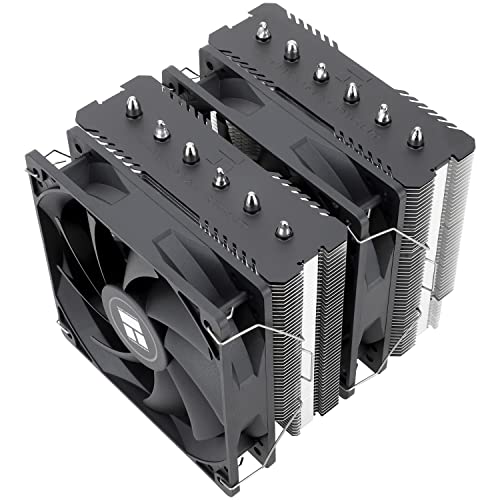
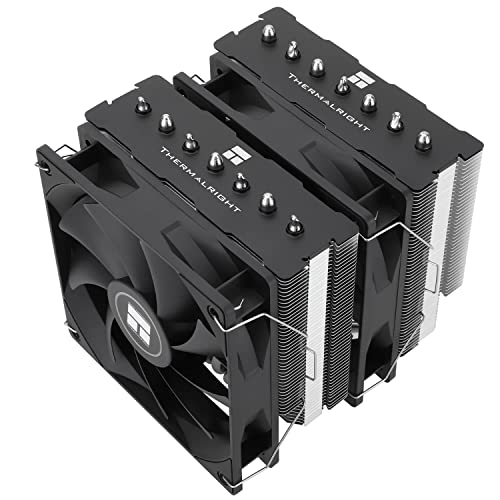
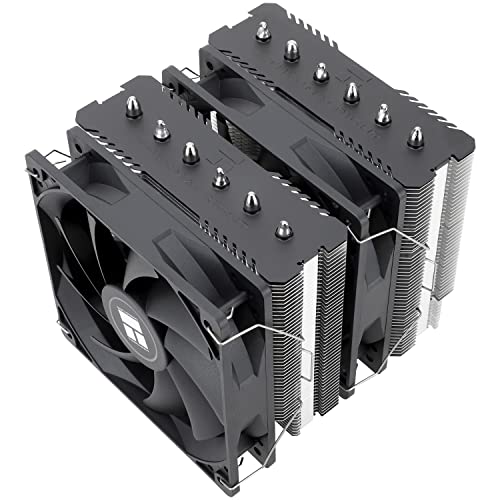
Thermalright Peerless Assassin 120 SE
A dual-tower, dual-fan design like this one shows why unclipping the fans first matters: dust mats form between the two fin stacks where a cloth cannot reach until the fans are off. Thermalright Peerless Assassin 120 SE — Check on Amazon
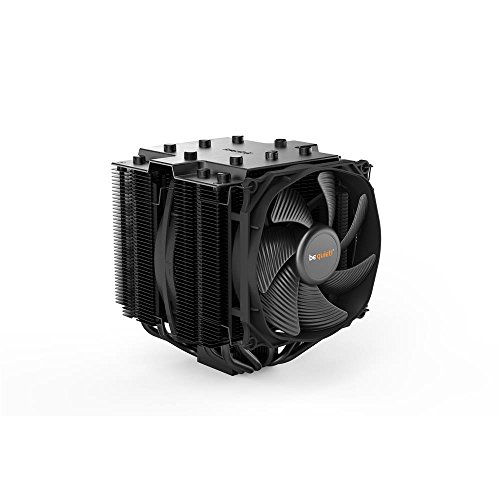
be quiet! Dark Rock Pro 4
Large fin stacks with tight spacing hold dust deep between the fins; short bursts of air from both sides, rather than a vacuum at the surface, are what clear them. be quiet! Dark Rock Pro 4 — Check on Amazon
how to clean a CPU cooler: The Short Version
Unplug, hold the fans still, blow the fins out, wipe the blades, and keep the filters clean so the deep clean stays rare. Twenty minutes twice a year is the entire maintenance contract of an air cooler.
First, Prove That Dirt Is Actually Your Problem
Cleaning is cheap and safe, but it is not magic, and an hour spent dusting a machine whose real problem is a failing fan or a dried-out paste joint is an hour wasted. Dirt announces itself in a specific pattern: temperatures that have crept upward gradually over months rather than jumping in a day, fan speeds that have risen to match, and a visible grey felt of dust on the leading edges of the fin stack and the intake side of any radiator. Compare that with the signatures of other faults. A sudden temperature jump after moving the PC suggests a shifted mount. One fan that rattles, wobbles visibly or spins far slower than its twin suggests a bearing, not dust. Temperatures that are fine in games but spike instantly under a heavy all-core load point at the paste joint or mounting pressure, because dust limits sustained heat removal, not instant heat transfer.
Take three quick readings before you open the case: idle temperature after ten minutes of doing nothing, temperature under your usual heaviest load, and the CPU fan speed at that load. Write them down. After cleaning, repeat the identical test in the same room conditions. A thorough clean of a genuinely dirty cooler typically returns several degrees and a clearly lower fan speed; if your numbers do not move at all, you have learned something valuable — the problem lives elsewhere, and the overheating diagnostics in the wider cooling guides, starting with fan behaviour and paste condition, are your next step rather than a second, harder clean.
The torch test for fin stacks and radiators
Shine a phone torch through the fin stack from the back while you look from the front. A clean heatsink shows light through most of its depth. A clogged one shows a shadowed mat on the intake face even when the fins look acceptable from the side, because dust accumulates where the air first slows down, deep between the first few millimetres of fins. Radiators clog the same way, with the added trap that the dust mat forms between the fan and the radiator core, invisible until the fan comes off. If you clean only one thing thoroughly, clean that hidden intake face; surface dust on exposed edges is cosmetic by comparison.
Cleaning by Cooler Type: Where Each Design Hides Its Dirt
Low-profile and downdraft coolers in small cases
Downdraft coolers pull air in through the top and push it down through a shallow, dense fin stack, and in a small case that intake is often a perforated panel a few millimetres above the fan. The dust cake forms on top of the fins, under the fan, exactly where a blower cannot reach without removing the fan first. Most low-profile fans unclip or unscrew independently of the heatsink, so remove the fan, lift the mat away with a soft brush working from the centre outward, and clean the fan blades separately. While the fan is off, clear the motherboard area beneath and around the socket as well: downdraft designs scatter loosened dust across the board rather than exhausting it, and the voltage-regulator heatsinks nearby collect their share.
All-in-one liquid coolers and their radiators
An AIO’s heatsink is its radiator, and it deserves the same fin-by-fin attention as any tower, with two additions. First, check both faces: the fan side hides the worst mat, as described above, and push-configuration fans must come off to reach it. Second, use the access to inspect the rest of the loop. Run a dry finger along every fitting and the pump block’s seams; you are feeling for the crusty residue or dampness that betrays a slow weep. Wipe the tubes down and look for kinks that cleaning-day handling may have introduced, especially where a tube bends near the block. Never immerse a radiator with its pump and cables attached, never pressure-wash one, and if you rinse a fully removed radiator under a tap — a legitimate deep-clean for a standalone unit — shake out the water, then give it a full day of air drying before it goes anywhere near power.
Passive and fanless heatsinks
Fanless coolers depend entirely on natural convection through widely spaced fins, and their enemy is not a dust mat but a slow, even coating that insulates every surface plus any obstruction of the rising warm air above them. Brush between the fins along their full depth, vacuum up what falls with the machine off, and then check the space above the cooler: a shelf, a case panel or a bundle of cables parked directly overhead can cost a passive build more performance than the dust did. These systems also reward a room-level thought — a fanless PC under a desk in a carpeted corner lives in a pocket of warm, dusty air, and moving it onto the desk is a cleaning measure too.
Stubborn Dirt: Smoke, Kitchen Grease and Workshop Air
Ordinary household dust is dry and lifts away with air and a brush. Dirt that has mixed with cigarette or vape residue, cooking vapour or workshop oil behaves differently: it sticks, it resists blowing, and smearing it with a dry brush just polishes it into the fins. For a cooler that comes out of such an environment, removal is not optional — this is the deep-clean scenario where the heatsink leaves the board. With the fan removed and set aside (fans and motors do not get washed), a removed air-cooler heatsink can be washed in warm water with a drop of washing-up liquid, worked between the fins with a soft bottle brush, rinsed thoroughly and dried completely — a day in a warm room, or an hour in a very low oven-free airing cupboard, before remounting with fresh paste. Isopropyl alcohol on a cloth handles greasy fan blades and the coldplate. Set expectations honestly: nicotine-stained fins may stay discoloured after they are functionally clean, and that is fine. You are restoring airflow, not preparing a showpiece.
Prevention in these environments is about filtration and placement more than cleaning frequency. A case with proper intake filters, kept on a desk rather than the floor and away from the direct line of cooking or smoke, can stretch the deep-clean interval from months to years. If the environment cannot change, accept a rhythm of frequent light cleans — five minutes with a brush and blower monthly — because sticky dirt that is disturbed often never gets the chance to bake into the mat that demands a full strip-down.
Straightening Bent Fins and Other Small Repairs
Fins bend. A slipped screwdriver, an over-enthusiastic brush or a fingernail during installation folds a few of the thin aluminium plates, and a folded patch blocks its share of the airflow channel. Straightening is delicate but simple: work with a thin, flat, non-metal tool if you have one — a plastic spudger, a toothpick, an old loyalty card’s edge — and ease each fin back toward parallel from its base, a little at a time, supporting the neighbouring fins with your other hand. Never lever against the heat pipes, and stop if a fin cracks rather than flexes; a missing fin costs almost nothing thermally, while a torn channel torn wider by force costs more. Radiator fins are thinner and more fragile than tower fins, so use an even lighter touch there, and accept small imperfections. Perfection is not the goal — an open channel is.
While the cooler is accessible, attend to the other small hardware that cleaning day reveals. Fan screws and clips loosen over years of thermal cycling and vibration; snug them by hand. Rubber fan mounts perish and crumble, and replacing them kills the mysterious buzz that no amount of dust removal would have fixed. A fan cable that has crept into contact with a blade or a fin edge will tick forever until someone reroutes it — that someone, today, is you, and the fix takes ten seconds with the machine open in front of you.
The Post-Clean Verification Ritual
Reassemble, then resist the urge to judge the job by the first minute’s temperatures. Boot, let the machine idle for ten minutes while the operating system finishes its startup work, and confirm every fan you disturbed spins and reports a sane speed. Then run the same load you measured before cleaning, for the same duration, and compare the three numbers you wrote down: idle temperature, load temperature, load fan speed. Improvement in load temperature with lower fan speed is the signature of success. Improvement at idle alone means little, because idle is limited by fan curves and room temperature more than by fin cleanliness.
Finish by starting the log that makes the next clean smarter. One line in a notes file — date, what you cleaned, the before-and-after numbers — tells you in a year whether your interval is right. If temperatures return to pre-clean levels in three months, your environment demands a shorter cycle or better filtration. If two years pass with no drift, you have been cleaning more often than your home requires, and you can relax the schedule with evidence rather than guilt. Either way, the machine’s own data, not a generic calendar, sets the rhythm — the same principle behind the maintenance approach in the best CPU coolers for gaming roundup’s long-term picks, where easy-clean designs earn their place over a product’s whole life, not its first week.
Cleaning Someone Else’s Machine Without Creating New Problems
Cleaning a PC for a family member, a friend or a customer adds responsibilities the solo job does not have. Photograph the interior before you touch anything, including fan orientations, cable routes and which header each fan uses; a machine that returns running hotter because one fan went back reversed is a real and common outcome of a well-meant clean. Note the pre-clean temperatures with the owner’s typical workload if you can, and be conservative: clean in place unless removal is clearly justified, because every removed cooler is a paste job, a mounting risk and a set of small parts that can go missing in someone else’s home. Agree in advance what you will do if you find a failing fan, a cracked mount or a cooler that was already barely attached — surprises inside neglected machines are normal, and deciding who pays for a replacement fan is easier before the discovery than after it.
Finally, hand the machine back with information, not just cleanliness. Tell the owner what you found, what the temperatures were before and after, and the one habit that will help most in their specific home — usually moving the case off carpet, or clearing the intake side, or simply knowing that the filters exist and slide out. A five-minute explanation converts a one-off favour into years of slower dust accumulation, and it costs you nothing but the breath to say it while the side panel is still off and the evidence is visible.
A Room-by-Room Cleaning Calendar That Matches Real Homes
Generic advice says clean every six months, but homes differ more than PCs do. Use your environment, not the calendar on a website, to set the rhythm. A PC in a hard-floored, pet-free room with filtered case intakes may need attention once a year, and the torch test will confirm the fins are still open. The same PC on carpet in a room with two shedding dogs can load its intake face in eight weeks. A workshop or garage machine breathes abrasive dust that wears fan bearings as it coats fins, so it earns both frequent light cleans and a shorter expected fan life. A student machine that moves between homes each term deserves a clean at every move, because transport shakes settled dust from every surface in the case down into the fin stack and power supply.
Season matters within the same home, too. Spring and autumn bring open windows and pollen; summer brings the highest room temperatures of the year, which is when a marginal dust load stops being cosmetic and starts costing fan speed and noise. The smartest single date for an annual deep clean is the start of the hot season: the machine enters summer with open fins, clean filters and verified temperatures, and any weakness you find can be fixed while it is still an observation rather than a shutdown during a heatwave. Pair the clean with the other seasonal checks — fan curves still sensible, cables still clear of blades, the log updated — and one afternoon a year covers nearly everything this guide asks of you.
Teaching the machine to tell you when it is dirty
Most monitoring tools can log temperatures and fan speeds, and some motherboards will alert when a fan fails outright. Use them passively: if you notice the fans working audibly harder at a familiar task, that change in sound is data. Fan speed at a fixed load is effectively a dust gauge, because the control loop asks for exactly the airflow the fins can no longer provide at low speed. When the machine sounds busier month after month at the same job, the fins are loading up, whatever the calendar says. Conversely, a machine that sounds exactly as it did a year ago is telling you its heatsink is still breathing freely — believe it, spot-check with the torch, and spend your Saturday on something else.
Fan Blades Deserve Their Own Five Minutes
Builders blast the heatsink and ignore the blades, yet a fan’s blades carry their own dust load, and it matters in two ways. A caked leading edge changes the blade’s shape enough to reduce the air it moves at a given speed, and an uneven coating unbalances the rotor, adding the vibration and hum that owners often blame on bearings. Wipe each blade on both sides with a lightly dampened cloth or a cotton bud for the corners near the hub, turning the fan slowly by hand. Work around the full circle rather than cleaning the three blades you can reach; an unevenly cleaned fan can end up less balanced than a uniformly dirty one. While each fan is in your hand, spin it gently and listen. A healthy bearing spins down in a smooth, silent glide. A dry or worn one chatters, ticks or stops abruptly, and no cleaning restores it — note that fan for replacement and you have converted a vague future noise complaint into a planned, inexpensive part swap.
Hub stickers and centre caps deserve a word of restraint. Peeling a fan’s hub sticker to add oil is a folk remedy that sometimes buys a sleeve-bearing fan a few extra months, but it voids any warranty, risks contaminating the bearing with the very dust you just removed, and on modern fluid-dynamic and magnetic bearings there is no oil reservoir to top up at all. For a cooler still under warranty, a noisy fan is a claim, not a project. For an old fan out of warranty on a cooler you love, treat oiling as a deliberate experiment with a replacement already identified, not as maintenance — and never let oil anywhere near the fin stack or coldplate, where it becomes a permanent dust magnet that undoes today’s entire job.
One habit ties all of this together: clean on evidence, verify with numbers, and write down what you found. A cooler maintained that way rarely surprises you, and when temperatures do move one day, your own log will tell you whether you are looking at dirt, wear or something new — which is the difference between a ten-minute fix and a weekend of guessing.
Start the log today, even if the entry is a single line.
Frequently Asked Questions
How often should I clean my CPU cooler?
In a typical home, an in-place clean every six months and a filter check monthly keeps temperatures stable. Filtered cases in low-dust rooms can stretch to yearly; homes with pets or carpets should shorten the interval. Let temperatures be the referee — a slow creep upward under the same workload means dust is winning.
Can I use a vacuum cleaner inside my PC?
It is not recommended. Vacuum nozzles build static charge, and their suction can overspin fan bearings. Use canned air or an electric duster with the fan blades held still, plus a soft brush. A vacuum is fine on removable dust filters once they are out of the case and away from components.
Do I need to remove the cooler to clean it properly?
Usually not — blowing out the fin stack and wiping the blades in place handles normal dust. Remove the cooler only when you also intend to replace the thermal paste, because removal breaks the paste seal and a remount with fresh paste is then mandatory. The removal and repaste method is in How to Apply Thermal Paste with a CPU Cooler.
Why did my fans get louder after cleaning?
Check three things: a cable now touching a blade, a fan clipped back loosely, or dust you loosened settling into a bearing that was already worn. If the noise is a grind that follows one fan, that bearing was near the end and cleaning merely revealed it — replacement fans are standard sizes and inexpensive.
Can I wash a heatsink with water?
It is risky and unnecessary. Water trapped in fin joints dries slowly and completely drying a heatsink is hard to verify. Compressed air and a brush achieve everything water would, without the risk. If a heatsink is ever washed, the fan must be removed first and the part left until bone dry before it goes near a motherboard.
Does dust really change temperatures that much?
Yes — a dust mat on the intake face of a fin stack can block a large share of its airflow, and clogged case filters starve the whole system. Several degrees and a clearly louder fan under load are typical before-and-after differences, which is why cleaning precedes hardware replacement in How to Fix CPU Overheating.
Can compressed air damage a CPU cooler or its fans?
Used carelessly, yes, in two specific ways. Spinning a fan with an air jet can drive it far beyond its rated speed, which stresses the bearing and can generate voltage back into the motherboard header — hold every fan still with a finger while you blow it out. And a can of compressed air tilted or inverted sprays propellant that freezes on contact, which can shock-cool a hot heatsink or leave residue on a coldplate. Keep the can upright, use short bursts, and let the machine cool fully before you start. An electric blower avoids the propellant problem entirely and is the better tool if you clean machines often.
My temperatures did not improve after a thorough clean. What next?
Treat the clean as a diagnostic result: airflow through the fins is now known-good, so the bottleneck sits in one of three places. Check that every fan actually reaches its expected speed under load, because a dying fan can look clean and still move little air. Check the paste joint and mounting pressure next, especially if load temperatures spike instantly rather than climbing gradually. Finally, check the air supply itself — a clean cooler breathing through clogged case filters or a blocked intake has gained nothing. Work through them in that order and change one thing at a time, retesting as you go.
Is it safe to clean a cooler with the PC running so I can see the dust move?
No. A running machine adds spinning blades, live headers and moving air that blows loosened dust deeper into power supplies, slots and connectors — the opposite of removal. It also tempts you to reach past fans that can catch a brush, a cable or a fingertip. Everything in this guide works better with the machine off, unplugged and still: dust falls down and out instead of circulating, fans can be held safely, and you can take the time the job actually needs.
Should I clean a brand-new cooler before installing it?
A light inspection, yes; a deep clean, no. New coolers arrive with machining residue, loose fin dust from the factory and occasionally a stray piece of packaging foam lodged in the stack. Blow through the fins once, check the coldplate is spotless and free of its protective film, and wipe the base with isopropyl alcohol if you see fingerprints or residue. That is the whole job. Washing a new heatsink or scrubbing its fins adds risk without benefit, because there is no accumulated dirt to remove — save the thorough work for the cleans that have something to clean.
Does cleaning the cooler void its warranty?
Ordinary cleaning — blowing out fins, brushing dust away, wiping fan blades, even removing the cooler and remounting it with fresh paste — is normal maintenance and does not void a cooler’s warranty. What can void it is modification and damage: bending or cutting fins, opening a sealed liquid loop, submerging a pump, or snapping a mount through force. If a fan fails while the cooler is under warranty, claim the fan rather than repairing it yourself. Keep the receipt and the box until the warranty expires, and photograph anything that looks like a defect before you clean it, so the evidence survives your good intentions.
When in doubt, the manufacturer’s support page for your exact model states what counts as normal maintenance — a two-minute check that protects a warranty worth far more than the clean itself.
Related Guides
Keep exploring with these guides and roundups from the same CPU-cooling collection: