The short answer to how to apply thermal paste with a CPU cooler is: power the PC off and unplug it, clean both surfaces with isopropyl alcohol, place a pea-sized dot of paste in the centre of the CPU’s heat spreader, lower the cooler straight down, and tighten the screws evenly in a cross pattern so pressure spreads the paste into a thin, complete layer. That is genuinely all there is to it — the rest of this guide explains why that works, when a different pattern suits a larger CPU, and the few mistakes that actually change temperatures.
Thermal paste exists because two ‘flat’ metal surfaces are not flat at a microscopic level. The paste fills the air gaps between the CPU heat spreader and the cooler base; air is a terrible heat conductor and metal-to-metal contact through a thin paste film is far better. If you are fitting a whole cooler rather than just repasting, follow this guide alongside How to Install a CPU Cooler; if temperatures sent you here, check How to Fix CPU Overheating after the repaste if things do not improve.
Disclosure: As an Amazon Associate, ilcastellomenu.com earns from qualifying purchases. Product examples below link to Amazon, where you can check current availability and specifications; this guide itself lists no fixed prices because pricing and bundles change frequently.
Safety and Preparation Come First
Power off and unplug before anything else
Shut the PC down, switch the power supply off, and pull the power cable out before opening the case or touching the cooler. Press the case power button once with the cable removed to drain residual charge, and ground yourself on the case’s bare metal. Repasting means unplugging fan cables, unscrewing mounting hardware and leaning over the socket — none of that happens in a plugged-in machine. If the PC was just running, give the cooler a few minutes: a heatsink fresh off a gaming session can be uncomfortably hot.
What you need
Thermal paste (the tube included with almost every cooler is fine), isopropyl alcohol at 90% or higher, lint-free cloths or coffee filters, cotton buds for edges, and a Phillips screwdriver. Work on a clear surface and keep the paste tube capped between uses — grit in paste is worse than no technique at all. If the cooler is new, its base may have paste pre-applied under a plastic cover; in that case you need nothing but the cleaning supplies, and you should not add your own paste on top of the pre-applied layer.
Removing the old cooler without drama
Unplug the fan cable, unscrew the mounting screws in a cross pattern, then twist the cooler gently side to side to break the paste seal before lifting. Never pull straight up with force: on AMD sockets especially, dried paste can grip hard enough to pull the CPU out of the socket with the cooler, bending pins. Warm paste releases more easily, which is one reason to run the PC for a few minutes before shutting it down for a planned repaste.
In this guide
Cleaning: The Step That Actually Matters
Strip both surfaces to bright metal
Dampen a lint-free cloth with isopropyl alcohol and wipe the CPU heat spreader until no grey residue transfers to the cloth. Do the same for the cooler base. Cotton buds clean the paste that squeezes out around the spreader edges — keep it off the socket and motherboard, not because standard paste is conductive (most is not), but because grit and fibres in the socket are a real problem. Let the alcohol flash off for a minute before applying fresh paste; it evaporates completely and leaves nothing behind.
Inspect while everything is visible
With the cooler off, look at the old paste pattern before you wipe it away: it is a free diagnostic. A complete, even imprint means the mount was good. A dry patch on one side means uneven screw pressure last time; paste pooled at the edges with a bare centre means too little was used or the base is notably convex. Also check the cooler base for the forgotten plastic film — it happens on new coolers more often than anyone admits, and no paste technique compensates for it.
How to Apply Thermal Paste With a CPU Cooler: Patterns and Amounts
Every pattern debate reduces to one goal: after mounting pressure, a thin layer covering the area of the spreader above the CPU die, with no air pockets.
The pea / centre dot: the default that works
For the square heat spreaders on mainstream Intel and AMD desktop CPUs, a single dot about the size of a pea (roughly 4–5mm across) at the centre is the most reliable method. Mounting pressure spreads it outward in a circle that covers the die area completely. It is nearly impossible to get wrong, which is why it is the recommendation for a first build. If you lift the cooler to check and find the spread stopped well short of the edges above the die, use a slightly larger dot next time — spreader sizes vary.
When to use an X, a line, or five dots
Large spreaders — high-end desktop and workstation CPUs with rectangular or oversized lids — can leave the corners dry with a centre dot. For those, a thin X corner-to-corner, or five small dots (centre plus four quadrants), distributes paste before pressure does its work. Elongated dies under a rectangular spreader suit a short line along the long axis. What matters is matching the method to the spreader footprint, not loyalty to one pattern: on a mainstream square spreader, all of these perform within measurement noise of each other when the mount is even.
Spreading by hand, and why most builders skip it
Some builders spread paste with a gloved finger or a plastic card into a uniform film before mounting. It works, but it risks trapping tiny air bubbles and introducing fibres or skin oils, and it makes the layer thickness depend on your card technique. Pressure-spreading from a dot is more repeatable. The exception is liquid metal compounds, which must be spread by hand with their own applicator — but liquid metal is conductive, corrodes aluminium heatsinks, and belongs in expert delidding projects, not in a standard cooler install. Keep it out of a normal build entirely.
How much is too much — and too little
Too little is the real failure mode: dry patches above the die can cost many degrees. Too much standard paste is mostly harmless — the excess squeezes out at the edges and makes a mess to clean next time, but the layer between the surfaces stays thin because mounting pressure sets the thickness. Aim for the pea, err a fraction large rather than small, and never stack a second application on top of old paste ‘to top it up’. Old and new paste do not blend into a better layer; remove, clean, reapply.
Mounting So the Paste Ends Up Right
Lower straight down, tighten in a cross pattern
Once the cooler touches the paste, do not lift it again to peek — lifting and reseating traps air and ruins the layer; if you must check, clean everything and start over. Start both (or all four) screws a few turns, then tighten alternately in a cross pattern, a little at a time, until each reaches its stop. Even pressure is what turns your dot into a uniform film. The full mounting sequence, including backplates and fan fitting, is in How to Install a CPU Cooler.
Verify with temperatures, not hope
Boot into the BIOS and watch idle temperature settle for a few minutes, then run a heavy load in the OS. Compare with what you had before the repaste: a successful repaste on dried-out paste typically restores several degrees and, just as noticeably, slower and quieter fan behaviour. If temperatures are worse, the cause is almost always mechanical — film left on, a screw not home, or far too little paste — and a careful remount fixes it. The relationship between paste, mounting and the cooler’s rated capacity is explained further in What is TDP for CPU Coolers.
Common Paste Mistakes
Using toothpaste, or nothing, 'temporarily'
Household substitutes dry out, pump out or corrode within days, and running with no paste at all leaves the air gap the paste exists to fill. A cooler run dry even briefly will thermal-throttle the CPU to protect it. Wait for real paste; every cooler box includes some.
Reusing the old layer after reseating
Each mount needs a fresh application. A disturbed layer has air channels worked into it, and pressing it back down does not heal them. The two minutes of cleaning is the cheapest temperature insurance in the whole build.
Buying exotic paste expecting miracles
Between mainstream pastes, differences on a correctly mounted cooler are small — a degree or two. Mounting quality, cooler size and case airflow each matter more, which is why the shortlists in Best CPU Coolers Under 100 group coolers by class rather than by bundled paste. Spend effort on the mount, not the tube.
Paste Types and What the Tubes Actually Contain
The paste aisle looks more complicated than it is. Nearly everything sold for CPU coolers belongs to one family, and the differences that matter are about handling, not heroics.
Standard compounds: silicone and ceramic
Mainstream pastes suspend thermally conductive particles — ceramic, zinc oxide, aluminium or carbon formulations — in a silicone base. They are electrically insulating, chemically gentle to both copper and aluminium cooler bases, stable for years, and forgiving to apply. Every cooler bundles one, and the performance spread across reputable brands is small. When a cooler’s base is aluminium, this compatibility matters: some specialist compounds react with aluminium, which is one more reason the bundled tube is the sensible default.
What to avoid in a normal build
Liquid metal is the outlier: a gallium alloy that must be painted on by hand, conducts electricity, corrodes aluminium, and can migrate. Its legitimate home is delidding and extreme overclocking with expert handling and conformal protection of the socket area. Thermal pads and graphite sheets are a different category — reusable and clean, but generally a step behind good paste in performance, and sized products that suit laptops and GPUs better than desktop cooler mounts. For the job this guide covers, a standard compound, correctly applied, is the complete answer.
Diagnosing a Mount From Its Paste Imprint
Every removal is a free inspection. Before you wipe the old paste away, read it — the imprint records exactly how the last mount behaved.
What the patterns mean
A complete, thin, even imprint across the spreader means the last mount was good, and if temperatures were still poor, the problem lives elsewhere — cooler capacity, case airflow or fan settings. A dry island in the middle means too little paste or a strongly convex base concentrating pressure at the edges. Paste squeezed heavily to one side means uneven screw torque — one corner was tightened first or hardest. A thick, glossy layer that looks barely compressed means a screw never reached its stop. Each pattern names its fix, and the fix is applied on the remount you are already doing: correct quantity, cross pattern, screws to their stops, film confirmed absent.
Photograph before you wipe
Take a photo of the imprint before cleaning. If the remount does not improve temperatures, the photograph lets you compare mounts and reason about what changed, instead of relying on memory of a grey smear you wiped away. Experienced builders do this reflexively; it costs four seconds and turns troubleshooting from folklore into evidence — the same discipline recommended when a system overheats and the cause is not obvious, where our guide on How to Fix CPU Overheating starts from measurements rather than guesses.
Paste and the Rest of the Cooling Chain
Paste is one link. Understanding its size in the chain stops both over-investment in exotic tubes and under-investment in the mount itself.
Where the degrees actually are
Rank the influences on CPU temperature honestly: cooler size and class first, case airflow second, mounting quality and paste application third, paste brand a distant fourth. That ordering is liberating. It means the builder who cleans carefully, applies a plain pea of bundled paste and tightens evenly has captured nearly everything available at the interface — and that the remaining budget belongs to the cooler itself, chosen by the method in How to Choose a CPU Cooler, or to keeping the existing cooler clean per How to Clean a CPU Cooler. Paste done right disappears from the story, which is exactly what a good interface should do.
Special Surfaces: Delidded Chips, Direct-Die and Laptops
The mainstream method assumes a standard heat spreader. Three situations modify it, and each is worth understanding even if you never attempt them — because they explain the rules the mainstream method follows.
Why direct-die changes the rules
Some processors and most laptop chips expose the bare silicon die instead of a metal spreader. Silicon is fragile, the die area is small and rectangular, and there is no lid to forgive uneven pressure — a tilted mount can crack a die corner. Paste application there demands full, thin coverage of the die (a spread or line method, not a dot that might leave a corner dry), absolute evenness in tightening, and often a foam dam or careful quantity control to keep squeeze-out off the surrounding substrate. This is specialist territory: the mainstream builder’s takeaway is simply why spreader-equipped desktop CPUs are so forgiving — the lid exists to make the interface robust, and the pea method works because the lid does its job.
Laptops and pre-applied paste
Laptop repasting follows the same chemistry with tighter tolerances and warranty implications — many machines are not designed for user service, and opening them is a decision, not a step in this guide. Where paste is pre-applied by a cooler maker under a protective cover, respect the engineering: that layer was metered by machine to a consistent thickness, and adding your own paste on top of it makes the interface worse, not better. Use one system or the other — factory layer untouched, or surfaces cleaned bare and your own application. Hybrid interfaces are how good coolers acquire bad reputations.
Storing Paste and Knowing When a Tube Is Done
A tube of paste outlives several builds, but not forever, and not in any drawer condition.
Shelf life and separation
Paste separates in storage: the silicone carrier can weep from the solids, leaving the first squeeze watery and the rest dry. Store tubes capped, tip down or horizontal, away from heat. If a stored tube’s first extrusion is oily liquid, express a little onto a cloth until the consistency turns uniform and matte before applying any to a CPU. Paste that has dried to putty in the tube, or that smells strongly chemical in a way it did not when new, has finished its service — replace it. The cost of a fresh tube is trivial against the cost of a mount you cannot trust, and a suspect interface announces itself only in temperatures, after the build is closed and the afternoon is gone.
Gear for This Guide
The examples below come from our Creators-API-verified product pool and illustrate the cooler classes discussed in this guide. They are examples, not a ranked list — use the criteria in this article to judge any model, including newer revisions.
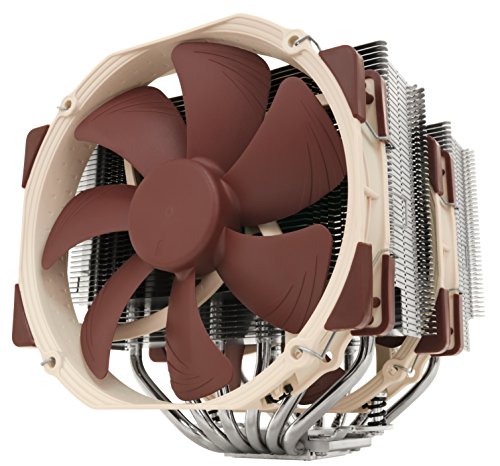
Noctua NH-D15
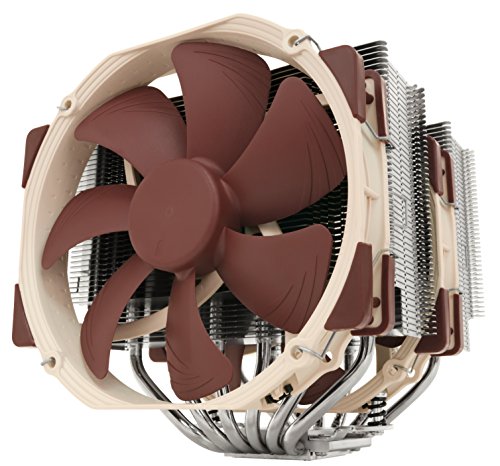
Flagship kits like this one include a full tube of quality paste — enough for several applications — which underlines the point of this guide: the paste in the box is rarely the weak link, the application is. Noctua NH-D15 — Check on Amazon

Thermalright Phantom Spirit 120SE
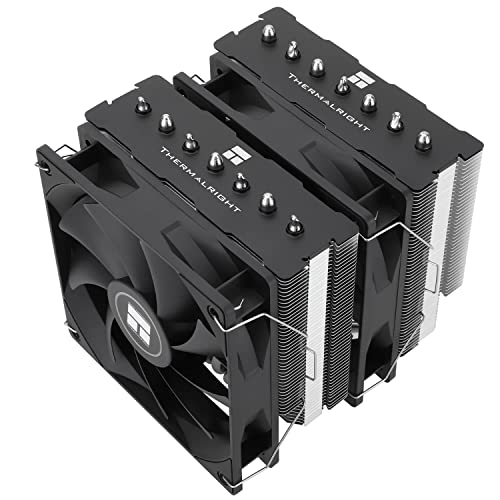
A modern seven-heat-pipe tower whose sprung mounting screws show why pattern anxiety is overblown: even, firm mounting pressure does most of the spreading work for you. Thermalright Phantom Spirit 120SE — Check on Amazon
how to apply thermal paste with a CPU cooler: The Short Version
Clean surfaces, a pea of paste, straight down, cross pattern. Technique debates are decoration on those four steps — get them right and your temperatures will show it.
A Complete Repaste, Walked Through on a Five-Year-Old Gaming PC
Theory is easier to trust when you watch it work on a real machine, so here is a representative job from start to finish: a gaming PC built five years ago, never opened since, whose owner reports the fans have grown louder every year and whose processor now touches its thermal limit in long sessions. The cooler is a mid-range tower, the paste is whatever was pre-applied at the factory, and nothing is broken — this is the ordinary ageing job most repastes actually are.
Before a screwdriver comes out, the baseline gets recorded: after ten idle minutes the package sits in the mid-40s, and twenty minutes of a repeatable game scene pushes the hottest core to the high 90s with the CPU fan near maximum. Those numbers matter because they define success. With the machine off, unplugged and cooled for half an hour — paste releases far more willingly from a warm-but-not-hot joint, and this one is stone cold, so patience will be needed — the side panel comes off and the fan is unplugged first, so no cable strains while the tower is handled. The mounting screws are loosened in the cross pattern, a few turns each, until the springs are fully unloaded. Then the moment of technique: the cooler does not get pulled straight up. Five-year-old paste bonds like weak glue, and a straight pull can tear an AMD processor out of its socket with the chip stuck to the coldplate, bending pins in the process. A gentle twist, a few degrees each way, breaks the bond’s shear strength instead, and the tower lifts away with a soft release rather than a rip.
The imprint tells the story before any cleaning happens. Paste covers most of the heat spreader but has pumped out toward the edges and dried pale and cracked in the centre — the classic signature of thousands of heat cycles squeezing a ageing compound away from exactly where the cores sit. The coldplate shows the mirror image. Both surfaces get cleaned with isopropyl alcohol and lint-free wipes, working from the centre outward, until a fresh wipe comes away unstained; the old material is brittle and flakes, so care is taken that no crumb falls into the socket area or onto the motherboard. Fresh paste goes on as a single pea-sized dot at the centre — this processor has a conventional square heat spreader with the die beneath its middle — and the cooler is lowered straight down, screws started by hand, then tightened in the cross pattern to the spring stops. Fan reconnected, panel on, and the identical test runs again: idle unchanged, because idle is governed by fan curve and room air, but the loaded hottest core now sits in the low 80s with the fan audibly lazier. The paste did that — not by being exotic, but by replacing a dried, pumped-out joint with a continuous one.
What this example teaches that a pattern chart cannot
Notice what did not matter: the brand of the new paste, the exact dot diameter within reason, and any spreading by hand. Notice what did: breaking the old bond safely, reading the imprint before destroying the evidence, cleaning until the wipe stayed clean, and verifying against a baseline recorded before the job. That ordering — measure, release, read, clean, mount, verify — is the transferable skill. It works identically on a brand-new build’s first mount, where the imprint check happens after your first test run rather than after five years.
Sizing the Amount to the Processor in Front of You
Most amount advice silently assumes a mainstream desktop heat spreader, and quietly fails everywhere else. Scale the dose to the surface. A small laptop or console-style exposed die, perhaps a centimetre across, needs a dot the size of a grain of rice, applied with extra care because there is no heat spreader to forgive excess — surplus paste squeezes directly onto the substrate and the tiny components surrounding the die, where a non-conductive compound is merely messy but a conductive one is a genuine hazard. Mainstream desktop spreaders take the familiar pea. Large high-end desktop and workstation spreaders, which can be half again as wide in both dimensions, spread a central dot too thin at the corners; a short line, an X, or five small dots — one centre, four toward the corners — distributes material across the wider plate, and the mounting pressure finishes the job. The principle underneath every pattern is the same: you are supplying enough compound to fill microscopic voids across the whole contact area after compression, and no more. If paste wells out around the edges in quantity after tightening, the dose was too large, whatever the pattern was called. If the imprint later shows a dry corner, it was too small or the mount was uneven. Let the imprint, not internet folklore, calibrate your hand for the next job.
Working Conditions: Temperature, Light and Time
Paste is a material, and materials behave differently with temperature. A tube stored in a cold garage or used in an unheated room in winter is noticeably stiffer: it dispenses reluctantly, sits in a proud blob that resists spreading, and tempts you to add more to compensate. Warm the closed tube in your hands or let it sit in the room for an hour and it returns to its intended consistency. The reverse problem appears in hot climates, where a thin compound can slump and spread further than expected under pressure — another argument for the conservative side of dosing. None of this requires special equipment; it requires knowing that the blob on the spreader is behaving the way it is partly because of the room it is in.
Light deserves a mention because paste work is inspection work. You cannot judge a cleaned coldplate, spot a crumb of old compound on a socket edge, or read an imprint under the dim glow of a case’s own lighting. Put a lamp or torch where it rakes across the surfaces at an angle; residue and scratches show up in raking light that vanish under flat illumination. And give the job its time. A repaste compressed into ten hurried minutes before a game night is how coolers get mounted on crooked brackets and fans get left unplugged. The work itself is twenty unhurried minutes — schedule thirty, and spend the surplus on the verification test rather than on admiring the cable routing.
When the Patient Is a Graphics Card, Not a CPU
Sooner or later every confident repaster looks at a loud graphics card and wonders. The technique transfers, but three differences deserve respect. First, the die is exposed: there is no heat spreader, the silicon sits directly under the coldplate, and uneven screw pressure can crack a die corner rather than merely making a poor joint — the cross pattern and partial turns matter more here, not less. Second, a graphics card’s cooler also touches memory chips and voltage regulators through thermal pads of specific thicknesses, and disturbing the cooler disturbs them. Pads that tear, stick to the wrong side or get replaced with the wrong thickness leave memory hotter than before you started, even as the core improves. Measure or research the pad thicknesses for your exact card before opening it, or leave the card alone. Third, warranty terms on graphics cards are stricter and stickers over screws are still common in some regions, so the decision to open one is partly legal, not merely technical. A CPU repaste is routine maintenance; a graphics card repaste is a small project, planned like one.
If Temperatures Are Still Bad After a Careful Repaste
Work this sequence in order, changing one variable per test. First, confirm the fans: every fan spinning, spinning the right way, and reaching expected speeds under load — a repaste cannot outrun a fan plugged into the wrong header and idling while the chip cooks. Second, confirm the mount by the imprint method: remove, photograph, and read the spread; a dry corner or a thick, uncompressed blob tells you the bracket stack or standoff height is wrong, and no pattern change fixes geometry. Third, confirm the cooler’s capacity honestly against the processor’s sustained power draw with power limits as they are actually set in your BIOS — a chip allowed to draw workstation power under a cooler chosen for its box label will run hot with a perfect paste joint. Fourth, look at the air supply: case intake, filters, and the temperature of the air the cooler breathes, remembering a graphics card can pre-heat that air substantially. Only after all four should you suspect the paste itself — a counterfeit, separated or decades-old tube — and by then you will have earned the suspicion with evidence. This is the same ordered thinking that makes the best CPU coolers for overclocking perform as reviewed: the compound is one link in a chain, and chains are diagnosed link by link.
Spills, Skin and Disposal: The Unglamorous Safety Page
Standard pastes are low-hazard materials, but treat them with ordinary workshop respect. Keep compound off your skin where practical — wash hands after the job, both because some formulations contain metal oxides you do not need on your sandwich and because skin oils are themselves a contaminant you have just cleaned off two precision surfaces. A spill on the motherboard wipes up with isopropyl alcohol and patience; a spill into a socket is the serious version, and prevention is the only good strategy: apply paste with the processor either in its socket with the cooler ready to mount immediately, or on the bench with the socket covered, never hovering a loaded applicator over exposed pins. If compound does reach socket contacts, do not power the board, do not poke at pins with anything metal, and take it to a technician with an ultrasonic cleaner rather than improvising. Liquid-metal compounds raise every one of these stakes — they are conductive, they attack aluminium, and they belong only in the hands of users who have read their specific warnings — which is why they are a specialist choice, not a recommendation that belongs in a general guide. Used wipes and dried compound go in household waste, not the sink; the quantities are tiny, but metal-bearing pastes do not belong in waterways.
Burn-In, Curing and Other Paste Myths Examined
A few persistent claims deserve a calm verdict. Some older compound families genuinely specified a curing period of many thermal cycles before reaching full performance, and the advice survives as folklore applied to everything. Most modern pastes perform at or near their best from the first mount, with any settling effect worth a degree or so across the first days of heat cycles — real, but small enough that you should never accept a bad mount today on the promise that curing will rescue it next week. The related claim that you must stress-test immediately to “set” the paste is harmless but unnecessary; normal use provides all the heat cycles a joint needs. What is true is that the first verification test should run long enough — twenty to thirty minutes — for the whole cooler to heat-soak, because a five-minute test flatters every mount, good and bad alike. Judge the job at equilibrium, not at first impressions, and re-check once after a week of ordinary use if you want the settled figure for your records.
The myth that more exotic automatically means better deserves the same treatment. Independent testing consistently shows a spread of only a few degrees between reputable compounds under identical mounts, while a poor mount with a premium paste loses to a good mount with bundled paste by a far wider margin. Spend your attention budget on cleaning, dosing and even pressure — the variables with leverage — and let the tube be the one that came in the box or the one your local shop stocks from a known maker. That is not settling; it is allocating effort where physics pays it back.
Teaching Your Hands: Practice Mounts and Cheap Confidence
If you have never applied paste before, the best investment in the whole job is one practice mount. Use the stock cooler you are replacing, or the new cooler before its final installation, and perform the entire sequence on your actual processor — apply, mount, tighten fully, then remove and read the imprint. The paste for the practice run costs pennies, and what it buys is calibration: you see exactly how your dot spreads under your cooler on your chip, whether your cross-pattern tightening is even, and how the release feels when you twist a fresh joint apart. Clean both surfaces, apply the real dose informed by what the practice imprint showed, and mount for keeps. Builders who have done one practice mount stop guessing about amounts entirely, because they have watched their own hardware answer the question.
The practice habit scales beyond beginners. A new cooler design, a new socket generation or a first liquid-metal-adjacent experiment all reset your intuition a little, and a dry run on the bench exposes surprises — a bracket that only fits rotated, a screw that bottoms early — while they are still free to fix. Professionals test-fit assemblies as a matter of routine, not insecurity. The difference between a stressful first build and a calm one is rarely talent; it is the number of steps the builder has already rehearsed before the moment those steps counted.
Frequently Asked Questions
What should I do before removing a cooler to repaste?
Shut the PC down, switch the power supply off and unplug the power cable, then drain residual charge by pressing the case power button once. Let a hot heatsink cool for a few minutes. Only then open the case and start unscrewing. This order is not optional — repasting involves hands and tools around the socket.
Is the paste included with a cooler good enough?
Yes. Every reputable cooler ships with competent paste, and the difference between bundled paste and exotic aftermarket compounds on a correct mount is a degree or two. Mounting quality matters far more. Spend your effort on cleaning the surfaces and tightening in a cross pattern, not on shopping for paste.
Can I just add more paste on top of the old layer?
No. Old paste that has been mounted, heated and disturbed is full of air channels and dried patches; adding fresh paste on top does not heal it. Remove the cooler, clean both surfaces to bright metal with isopropyl alcohol, and apply a fresh pea-sized dot. The two minutes of cleaning is the cheapest temperature insurance in the build.
What is the best pattern: dot, line, X or spread?
For mainstream square heat spreaders, a centre dot is the most reliable because mounting pressure spreads it evenly with no technique required. Large rectangular spreaders suit an X or five dots. Hand-spreading works but risks bubbles and fibres. On a given CPU, all correct methods land within measurement noise of each other — even pressure matters more than pattern loyalty.
Is thermal paste electrically conductive?
Standard pastes are not — they are ceramic- or silicone-based and electrically insulating, so a small squeeze-out is a mess, not a short circuit. The exception is liquid metal compounds, which are conductive and corrosive to aluminium; they belong in expert projects only and should never be used in a normal cooler installation.
How often should thermal paste be replaced?
Only when evidence says so: temperatures creeping up after dust has been ruled out, or any time the cooler is removed for any reason. Quality paste under a good mount commonly lasts three to five years or more. Calendar-based repasting of a healthy system adds risk (a disturbed mount) without benefit.
Can I mix two different pastes if I run out mid-job?
Do not layer one compound over another to stretch a nearly empty tube. Different pastes use different oils and fillers, and a mixed joint can separate, pump out early or simply perform unpredictably — and you will never know which variable to blame when you read the imprint later. If you genuinely cannot finish the mount, stop, clean both surfaces fully, and wait until you have one tube of one compound. A delayed build is an inconvenience; a mystery joint is a troubleshooting debt you repay with interest.
Does paste expire if the tube has been opened?
Slowly, yes. The carrier oils gradually separate from the filler, especially in a tube stored nozzle-down in a warm place, and the first squeeze may emerge oily or gritty. Knead a metal tube gently, or discard the first small extrusion from a syringe and inspect what follows: good paste is smooth, uniform and holds its shape. If it stays separated, stringy or grainy, replace it. An unopened tube stored cool and sealed lasts for years; an opened one deserves inspection, not faith, every time it comes out of the drawer.
My cooler came with a pre-applied paste patch. Should I replace it with my own tube?
Use the pre-applied patch with confidence. It is metered by the manufacturer to the right amount for that coldplate, applied in clean factory conditions, and made of a reputable compound — its only enemies are damage and contamination. Inspect it before mounting: if the patch is intact, unmarked and has not collected dust or a fingerprint, mount on it exactly as it came. If it is scratched, smeared or touched, then clean it off completely and apply your own. The sin is not choosing either source; it is mounting on a damaged patch or, worse, adding your paste on top of it.
How long does a tube of paste last once I start using it for practice mounts too?
Far longer than most people expect. A typical small syringe holds enough compound for somewhere between half a dozen and a dozen mainstream desktop mounts, depending on how generous your doses run and how much is lost to cleaning wipes. Practice mounts and the occasional remount barely dent it. The practical limit is not quantity but age and storage: keep the cap on, store the tube at room temperature away from radiators and sunny windowsills, and inspect the extrusion each time as described earlier. For most builders a single tube serves several builds across several years, which is another reason the premium-tube debate matters so little — the cost per mount is trivial either way.
Should I repaste a brand-new prebuilt PC just to be safe?
Almost never. A new prebuilt’s paste joint is fresh, factory-metered and covered by the machine’s warranty, and its temperatures in reviews and in your first weeks tell you whether it works. Repasting it gains at most a degree or two in the typical case, risks a mounting mistake, and on some systems complicates warranty claims on the cooling assembly. Repaste when there is evidence — temperatures clearly worse than the same model achieves elsewhere, or a cooler you are removing anyway for another upgrade. Maintenance driven by measurements serves the machine; maintenance driven by anxiety only serves the anxiety.
Record the result either way, so the next decision starts from your machine’s own history.
That habit — measuring first, changing one thing, measuring again — is worth more than any single product choice in this entire guide, and it transfers to every cooling job you will ever do.
Apply it to the paste question in front of you today, and the temperatures will usually explain themselves.
Related Guides
Keep exploring with these guides and roundups from the same CPU-cooling collection: