Disclosure: As an Amazon Associate, ilcastellomenu.com earns from qualifying purchases. The product mentions in this guide are editorial: we link only to items that genuinely fit the topic, and a link never changes what we recommend checking, comparing, or avoiding.
Learning how to connect a monitor to a laptop takes most people under ten minutes: plug a video cable from the laptop into the screen, switch the screen to the right input, and choose whether the external display mirrors or extends your desktop. The variations that cause confusion are all in the ports — HDMI, USB-C, Thunderbolt, and older connectors all carry video differently, and a laptop’s USB-C socket may or may not support a display at all. This guide untangles the port question first, then walks through the connection and the Windows and macOS settings.
You will also find the fix list for the classic problems — no signal, a blurry picture, a screen capped at a low refresh rate — and advice on docks for one-cable desks. If you are still choosing the screen itself, Best External Monitors for Laptop gathers the panels that pair best with portable machines, including USB-C models that charge the laptop over the same cable.
How to Connect a Monitor to a Laptop: Identify Your Ports First
Look at your laptop’s edges and name what you see. An HDMI port is the simplest case: one HDMI cable to the monitor and you are done, though older HDMI versions cap high resolutions at low refresh rates. A USB-C port is the ambiguous one. If it is a Thunderbolt port (marked with a lightning symbol) it always carries video. A plain USB-C port carries video only if it supports DisplayPort Alt Mode — check the laptop’s specification page for that phrase, because the port gives no visual clue. Mini DisplayPort, found on older machines, connects to DisplayPort or, with an adapter, HDMI.
On the monitor side, prefer a matching digital connection: DisplayPort or HDMI for most screens, or USB-C input on newer monitors, which is the elegant option — a single USB-C cable can carry the picture, charge the laptop, and connect the monitor’s USB hub at once, if both devices support it. The full capability comparison between the two main cable standards is in HDMI vs DisplayPort. Adapters between digital standards are cheap and reliable; the traps are analogue conversions and bargain cables that cannot carry the bandwidth a 4K or high-refresh screen needs.
In this guide
What You Need
The list is short, but the cable deserves a moment of suspicion: it is the component most likely to silently limit your new screen. If you are connecting at 4K or above 60Hz, use the cable that came with the monitor where possible, or a certified replacement of the right standard.
- The monitor, its power cable, and its stand or mount assembled.
- One video cable matched to both devices: HDMI, DisplayPort, or USB-C with video support.
- Adapters only if needed, digital-to-digital (for example USB-C to DisplayPort).
- Optionally, a docking station for a permanent desk with multiple peripherals.
- Five to ten minutes, plus a restart budget if drivers misbehave.
Step by Step: The Connection and Display Settings
Order matters less than completeness here, but this sequence avoids the usual false alarms.
- Place the monitor, connect its power cable, and switch it on. Connect the video cable firmly at both ends — push until it seats; USB-C and HDMI plugs half-in are the leading cause of ‘it doesn’t work’.
- If the monitor shows ‘no signal’, open its input menu and select the port you used. Auto-detect usually handles this, but not always.
- On Windows, press Windows key + P and choose Extend for a second workspace, or Duplicate to mirror — Extend is right for almost every desk. On a Mac, the external screen extends by default; change it under System Settings, Displays if you need mirroring.
- Set the external screen to its native resolution: Windows Settings, System, Display, with the external screen selected; macOS System Settings, Displays. Text should snap into sharpness immediately at the native setting.
- Arrange the layout: drag the display rectangles so moving the mouse between screens feels natural, and choose which screen is the main display (where the taskbar and new windows live).
- Check the refresh rate in advanced display settings and raise it to the panel’s supported rate if it defaulted lower — a common quirk with HDMI connections.
- Decide the lid behaviour: Windows lets you close the laptop lid and keep working on the external screen (set under Power options, ‘choose what closing the lid does’); a Mac needs its power adapter connected for closed-lid mode.
One-Cable Desks: USB-C Monitors and Docking Stations
If you dock and undock daily, the connection you want is a single cable. Two routes get you there. A USB-C monitor with power delivery acts as its own dock: one lead carries picture and charging, and the monitor’s USB ports take your keyboard receiver and accessories. A separate docking station suits multi-monitor desks or monitors without USB-C: the dock stays permanently wired to screens and peripherals, and the laptop connects with one Thunderbolt or USB-C lead. The dock options by use case are rounded up in Best Docking Station for Multiple Monitors.
Whichever route you choose, confirm the charging wattage suits your laptop — a high-performance machine under a weak charger drains slowly while plugged in, which looks exactly like a battery fault. Also confirm the dock or monitor supports your target resolution and refresh rate on your operating system: multi-display support over a single cable differs between Windows and macOS on some hardware, a limitation buried in spec sheets and worth the two minutes it takes to check. For MacBook pairings specifically, Best Monitors for Macbook Pro flags the combinations known to behave well.
Troubleshooting: No Signal, Blurry Text, and Wrong Refresh Rates
No signal: reseat the cable, select the input manually, then test with a different cable and, if possible, a different device. If the laptop has both HDMI and USB-C, try the other port — you may have discovered that your USB-C socket does not carry video. Blurry text on an otherwise working screen almost always means a non-native resolution or an overscan setting: set the exact native resolution, and on the monitor, look for an aspect or scaling option set to ‘just scan’ or ‘1:1’ rather than a zoom mode. The picture-quality walk-through in How to Adjust a Monitor covers the remaining sharpness and colour settings.
A screen capped below its advertised refresh rate is a bandwidth story: an older HDMI port or cable, or a dock sharing its capacity with a second display. Connect directly with DisplayPort or a quality USB-C lead to test. A screen that sleeps randomly or drops out points at the cable first, power settings second, and the systematic version of this hunt lives in How to Fix a Monitor with No Signal. Flicker after connecting is usually a refresh-rate or cable issue too, covered by the flickering guide in the related links.
Getting the Ergonomics Right Once It Works
A connected screen at the wrong height is a half-finished job. Raise the external monitor so its top sits near eye level, and if you also use the laptop’s own screen, lift the laptop on a stand beside it and type on an external keyboard — otherwise the laptop screen drags your posture down to its level. Keep the external screen directly in front of you if it is your main display, with the laptop off to the side as the secondary, reference screen.
Match brightness between the two screens so glancing across does not feel like stepping between rooms, and set the same night-light schedule on both. If you take the laptop away regularly, teach your operating system your preferred arrangement once — both Windows and macOS remember per-monitor layouts and will restore them when you reconnect, provided you use the same ports or dock each time. That small consistency is what turns a ten-minute setup into a ten-second one, every morning.
Choosing the Right Cable Length and Quality
Cable length is a quiet performance specification. Video standards assume reasonably short runs; very long or very cheap cables are where high resolutions and refresh rates go to flicker and die. For a desk, buy the shortest cable that reaches with comfortable slack — typically well under two metres — from a reputable maker, rated for the standard your devices use. The cable bundled with the monitor is a known-good starting point; keep it even if you buy a longer one, because it is your reference in every future troubleshooting session.
Quality signals are certification and specification, not thickness or gold plating theatre. For HDMI at demanding modes, look for the certified speed class; for DisplayPort, a cable rated for the HBR level your resolution needs; for USB-C, a cable explicitly rated for video (DisplayPort Alt Mode) and for the charging wattage you expect, since many USB-C leads are charge-and-data only. A drawer of unlabelled cables is a future afternoon of confusion — label yours at both ends with tape the day they are installed.
Using a TV or a Second-Hand Screen as Your Monitor
A television connects exactly like a monitor — HDMI in, input selected — and for media and casual work it can serve well. Expect three differences: TVs often apply picture processing that adds input lag (find and enable the TV’s game or PC mode), their pixel density at desk distance is lower than a monitor’s, and text rendering can look softer because TVs arrange subpixels differently. For a spare-room desk or a media-first setup those are fair trades; for eight hours of documents, a real monitor earns its shelf space.
Second-hand monitors are a genuinely good idea with a five-minute inspection: run solid colour screens to hunt for pixel faults and uniformity problems, check every port you intend to use, and confirm the stand or VESA mount is complete. Panels age gracefully; the inspection exists to catch the exceptions while the seller is still in the conversation.
Audio, Webcams, and the Peripherals on the Screen
Many monitors carry speakers, a headphone jack, USB ports, and occasionally a webcam, all fed by the same connection chain — but only if the chain carries them. HDMI and DisplayPort bring audio to the monitor’s speakers automatically once you select the monitor as the output device. The monitor’s USB ports, however, work only when a USB connection (often the same USB-C lead, or a separate USB upstream cable) links monitor to laptop; a screen showing a picture over HDMI alone has dead USB ports, a confusion that fills support forums. Wire the upstream cable once and the monitor becomes the hub it was designed to be.
Power, Sleep, and the Settings That Make It Feel Native
A connection is finished when the desk behaves the same every morning, and three settings decide that. First, wake behaviour: set the laptop to wake from keyboard and mouse input so a closed or tucked-away machine answers without a lid-lifting ritual. Second, sleep policy for the external screen: align the display timeout with your working rhythm so the monitor is not dark every time you return from coffee, and not glowing all night either. Third, audio routing: decide deliberately whether sound belongs to the monitor’s speakers, your headphones, or a desk setup, because operating systems cheerfully reroute audio to a newly connected screen and leave owners wondering why the room went quiet.
Colour and brightness deserve the same one-time deliberation: enable the same night-light schedule on the laptop and the external screen, match brightness by the white-document test, and if the monitor offers a USB-C connection with charging, confirm the laptop reports charging at its expected rate rather than merely ‘connected’. Each of these is a two-minute setting; together they are the difference between an external monitor and an external-monitor lifestyle, which is the actual product you were buying.
Travelling With the Setup: Hotel Desks and Borrowed Screens
The connection skill travels well. In a hotel room, the television is an HDMI cable away from being your evening screen — carry a compact HDMI lead and you own a big display for films and a second workspace for tomorrow’s presentation, with the TV’s input button being the only negotiation required. In clients’ offices, the meeting-room screen is the same handshake at larger scale: arrive with both an HDMI lead and a USB-C option in the bag, because the room’s cabling was installed for a laptop generation that may not be yours, and the two minutes saved are the meeting’s first impression.
The habit underneath both is the one this guide began with: name the ports before you need them, carry the cable that answers the commonest case, and treat every new screen as a thirty-second configuration rather than a project. Laptop owners who internalise that stop seeing external monitors as peripherals and start seeing them as weather — available everywhere, pleasant when dressed for.

Adapters, Hubs, and the Fine Print That Decides Whether They Work
The adapter shelf is where laptop-to-monitor plans most often go quietly wrong, because adapters that look identical do different jobs. A USB-C to HDMI adapter may carry video only, video plus limited charging, or — in the case of cheap unbranded units — a signal that collapses at higher resolutions. The specification that matters is the video standard the adapter passes and the maximum resolution and refresh rate it states in numbers, not the photograph of a glowing 4K logo. Buy adapters that print their limits plainly, keep the packaging until the setup has survived a week, and treat an adapter that runs hot enough to be uncomfortable to hold as an adapter auditioning for replacement.
Hubs multiply the same question across every port they offer. A hub that promises a monitor output, several USB ports, card readers, and charging through one laptop socket is dividing one connection’s bandwidth and power budget among all of them, and the compromises appear exactly where the fine print lives: the monitor output may be capped at a lower refresh rate when the hub is busy, or laptop charging may slow while drives are attached. None of this makes hubs bad — a good hub is the heart of a one-cable desk — but it means the hub, not the monitor, is the component whose specification sheet deserves your closest reading.
Daisy-chaining deserves a plain explanation because it is often promised where it cannot work. Some DisplayPort monitors can pass the signal onward to a second monitor, so one laptop cable feeds two screens in a chain. The requirements are strict: the laptop’s output must support the transport feature that carries multiple streams, the first monitor must have a DisplayPort output as well as an input, and the total bandwidth must cover both screens. HDMI does not offer this trick in normal consumer gear. If your plan depends on a chain, verify each link by model number before ordering, because a chain with one non-supporting link is simply a second screen that will never light.
Wireless Displays and When the Cable Is Still the Answer
Most modern laptops can send their picture wirelessly to a compatible television or streaming stick, and for showing photographs, slides, or a film on a big screen across the room, the convenience is genuine. The costs are latency and consistency: the pointer trails your hand by a fraction that is invisible in a slideshow and maddening in a spreadsheet, compression softens fine text, and a busy home network can introduce stutters that a cable never produces. Judge wireless by the job. Presenting and playing media forgive its weaknesses; eight hours of document work exposes all of them.
There is one work scenario where wireless earns a permanent place: the screen you consult rather than work on. A wall-mounted display in a shared space showing a dashboard, a calendar, or a build status board does not need pointer precision, and a cable run across the room may be impractical or unwelcome. Even there, test the arrangement through a full working day before committing, because a wireless display that drops its connection overnight and greets the team with a pairing screen each morning will be quietly unplugged within a month.
For your main external monitor, the cable remains the recommendation this guide will not soften. It carries the full resolution and refresh rate your screen was bought for, it wakes when the laptop wakes, it works in hotel rooms and offices where you control nothing about the network, and it fails — on the rare occasions it fails — in ways you can diagnose with a swap. Wireless is a feature to enjoy where it fits, not the foundation of the desk you depend on. Readers setting up a Mac laptop in particular will find the tested pairings in our roundup of external monitors for MacBook Pro helpful for seeing which connection styles recur.
Display Settings Deep Dive: Scaling, Orientation, and Night Modes
Connecting the cable earns you a picture; the display settings earn you a comfortable one. Scaling is the first setting to visit. On the external screen, choose the scaling that makes text the size you would choose in a printed document — not the smallest you can decipher. Laptop screens and external monitors usually want different scaling values because their sizes and pixel densities differ, and both operating systems allow each display its own setting. Spend one honest minute here: months of squinting are usually traceable to a scaling choice made by default in the first five minutes and never revisited.
Orientation and arrangement complete the geometry. If the external screen stands to the left of the laptop, drag its rectangle to the left in the arrangement diagram, at the height that matches the physical shelf or stand, so the pointer crosses between screens at the point your eyes expect. A mismatch of a few centimetres in the diagram becomes a pointer that snags on an invisible step dozens of times a day. If you rotate a screen to portrait for documents, set the rotation in the same panel and confirm the laptop’s own screen stays landscape — the settings are per-display, and applying rotation to the wrong rectangle is a rite of passage best performed while calm.
Night and reading modes belong to the same visit. Both systems offer a warmer colour temperature after dark, and the setting should be applied consistently to laptop and external screen or the pair will disagree visibly every evening. Note that the monitor may have its own low-blue-light mode in its menu; running both the computer’s and the monitor’s versions stacks the effect into an orange murk. Choose one layer — usually the operating system’s, because it follows a schedule — and leave the monitor’s picture mode in its neutral setting so the two devices stay in agreement.
Charging, Battery Health, and Living on One Cable
A one-cable desk where the monitor or dock also charges the laptop is the arrangement most users are actually buying when they shop for USB-C connections, and it deserves an honest account of its trade-offs. The convenience is real: arrive, connect one cable, and screen, peripherals, and power all arrive together. The first check is wattage. If the monitor or dock supplies notably less power than the laptop’s own charger, the machine may charge slowly under load or even lose charge during heavy work while reporting that it is plugged in. Compare the supplied wattage in the specifications against your laptop maker’s stated requirement before assuming the single cable replaces the brick.
Battery habits on a permanently plugged-in laptop are the second consideration. Modern laptops manage this well, many offering a charge limit setting that holds the battery near eighty percent during desk-bound weeks, which meaningfully slows the wear that comes from sitting at full charge in a warm chassis. If your laptop offers such a setting and it lives at a desk, enable it; if you travel often, disable it before trips rather than living with the reduced runtime. Either way, run the machine on battery occasionally — a battery exercised gently ages better than one that has not discharged in a year.
Keep the original charger in the travel bag, permanently. The one-cable desk tempts owners to leave the brick plugged into the dock and pack the laptop alone, which works until the first trip taken in a hurry. A charger that lives in the bag, a spare video cable beside it, and the desk’s single cable that never travels are what separate a setup that feels effortless from one that periodically strands its owner in a hotel room with a laptop, a television, and no way to introduce them.
A Calm Diagnostic Sequence for the Five Classic Symptoms
When a laptop-to-monitor connection misbehaves, the symptom usually belongs to one of five families, each with a first move that costs nothing. No picture at all: confirm the monitor is set to the input the cable actually occupies, because auto-switching fails often enough that manual selection is the professional’s first check. Picture at the wrong resolution or refresh rate: inspect the cable and any adapter, since the operating system is usually reporting honestly what the chain can carry. Blurry text at the right resolution: visit scaling and the monitor’s sharpness setting before suspecting the panel. Flicker: lower the refresh rate one step as a bandwidth test. A screen that sleeps and will not wake: look to the monitor’s deep-sleep setting and the laptop’s power plan before replacing anything.
Run the sequence in order and change one thing at a time, because the second classic failure of home diagnostics is fixing the fault and never learning which change fixed it — knowledge you will want when the fault returns in a new room. A known-good cable, borrowed from the monitor’s own box or a television, is the single most valuable diagnostic tool in the whole sequence: swapping it in divides every mystery into cable-side and device-side in under a minute. This is why the guide keeps insisting you retain the cable the monitor shipped with, however humble it looks.
Know the point at which the sequence ends and evidence takes over. If a tested cable, a direct connection with no dock or adapter, correct input selection, and current drivers still produce no picture, the remaining suspects are the laptop’s port and the monitor itself, and both are warranty conversations rather than home repairs. Arrive at that conversation with your notes — what was tried, in what order, with what result — and you will find support moves quickly when the elimination work is already done and documented.
Two Laptops, One Desk: Sharing a Monitor Gracefully
Households and hybrid workers increasingly park two laptops at one desk — a work machine and a personal one — and expect the same monitor to serve both. The civilised arrangement gives each machine its own input on the monitor and its own cable that stays plugged in, so switching computers is a press of the monitor’s input button rather than a cable transplant behind the desk. If the monitor has a built-in KVM, the keyboard and mouse can follow the picture automatically; without one, a small USB switch performs the same handover for the peripherals. What does not work gracefully is one cable passed back and forth daily: connectors wear, ports loosen, and the ritual’s friction guarantees the second laptop gradually stops being used at the desk at all.
Set expectations about settings when two machines share a screen. Each computer remembers its own resolution, scaling, and arrangement for the monitor, which is a blessing, but the monitor’s own menu settings — brightness, colour temperature, input labels — are shared, so a gaming-tuned evening preset on the personal machine becomes the work machine’s morning surprise unless you use the monitor’s per-input or per-preset memory where offered. Agree on a neutral shared preset, label the inputs in the monitor’s menu if it allows it, and the shared screen stops being a negotiation.
Power and sleep complete the arrangement. Two laptops connected to one monitor can confuse its auto-input switching, which may jump to whichever machine wakes first — including a personal laptop waking at midnight to update itself and lighting the desk. Turn off auto-switching and select inputs deliberately, and set the monitor’s sleep timer so an idle input does not leave it glowing. Shared hardware rewards small explicit rules; write them on a note inside a drawer if two people use the desk, and the setup will outlast both laptops.
The Borrowed and Travel Kit: Cables Worth Carrying
A small travel kit converts any borrowed screen into a workstation and weighs less than the laptop’s charger. Its contents, refined by hard experience: one USB-C to HDMI adapter rated plainly for high resolutions, one straight HDMI cable of modest length, and — if your laptop charges by USB-C — the confidence that your existing charger covers power. With those two video items you can address televisions, hotel screens, office monitors, and most projectors. Add a mini DisplayPort adapter only if your machine or your regular destinations actually use that port; kits grow by accretion into bags of adapters for interfaces nobody has met in years.
Test the kit at home before it travels, on your own monitor, at the resolution you will want abroad. An adapter that works at home will work in the meeting room; an adapter first unwrapped in the meeting room is a gamble taken in front of an audience. After each trip, the kit returns to the laptop bag rather than the desk drawer, because a kit that migrates is a kit that will be at home on the day it is needed elsewhere. This is the same drawer discipline as the cleaning cloths and the spare cable: small objects earn their keep by being where the system expects them.
While travelling, one setting repays learning in advance: how your operating system mirrors versus extends, and the keyboard shortcut or menu path that switches between them. Presentations want mirroring, desk work wants extension, and the change is always requested thirty seconds before you are due to begin. Practise the switch twice at home and it becomes a reflex; discover it live and it becomes the part of the trip you remember.
Accessibility and Comfort Settings Worth Configuring Once
An external monitor is also an accessibility tool, and the connection visit is the right moment to configure what your eyes and hands actually need. Text scaling can be set independently and generously on the external screen — there is no virtue in the smallest readable size, and a larger interface on a large screen is the combination that reduces end-of-day eye fatigue most reliably. Pointer size and speed deserve the same honesty: a pointer that crosses a wide external display needs a higher speed than the laptop’s own screen suggests, and both systems let you enlarge the pointer and add a locating aid that briefly highlights it on a key press.
Colour filters and contrast settings live one level deeper and help more people than their placement suggests. If colour vision makes certain charts or status lights ambiguous, the operating system’s colour filters apply to the external display exactly as to the built-in one — another reason to prefer the computer’s settings layer over the monitor’s menu, which would need reconfiguring per device. High-contrast themes, reduced transparency, and reduced motion all travel across the cable for free, because they are properties of the signal, not the screen.
Finally, arrange the physical desk for the body you have: the external screen at a height that does not ask your neck to choose between it and the laptop, the laptop raised on a stand if it remains a working second screen, and an external keyboard and mouse as the primary controls whenever the laptop is docked. The monitor connection is the moment these decisions are cheapest to make, because everything on the desk is already moving.
What to Do When Only One of Your Screens Can Be the Good One
Many laptop desks are asymmetric by necessity: a fine external monitor beside a modest laptop panel. Rather than apologising for the smaller screen, assign roles that flatter both. The external monitor takes the primary work — documents, editing, anything colour-sensitive or dense. The laptop screen becomes the communications and reference deck: messages, music, a calendar, the document you are transcribing from. Roles end the constant window-shuffling that makes mixed setups feel makeshift, and they let the laptop’s panel do work its specifications genuinely suit.
Set the arrangement in software to match the physical one precisely, including which screen the taskbar or dock calls home, and disable any setting that mirrors content across both. Then go one step further and tune each screen’s brightness to the same perceived level in your room’s light, because a dim laptop beside a bright monitor makes the pair feel cheaper than either is. The asymmetry that remains after roles and matching is not a flaw in the setup; it is the setup, designed rather than endured.
When the laptop is eventually replaced, this division of labour is what survives: the monitor, the stand, the cables, and the habits transfer to the new machine in an afternoon. That continuity is the deepest argument for connecting an external monitor well in the first place — the screen becomes the stable centre of a desk whose computers come and go.
Gear for This Guide
Two pool products cover the two connection upgrades readers ask about most: a Thunderbolt dock for a permanent one-cable desk, and a portable USB-C screen for a second display anywhere.
CalDigit TS3 Plus Thunderbolt 3 Dock — A Thunderbolt dock with a DisplayPort output, laptop charging, and a full spread of USB and expansion ports. Connect screens and peripherals to it once; afterwards the laptop joins the whole desk with a single cable. Check on Amazon

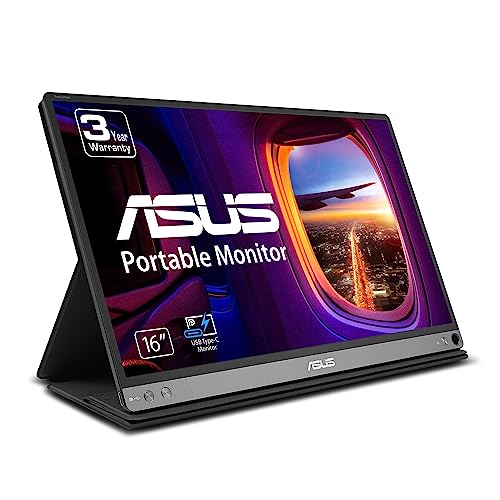
ASUS ZenScreen MB16AC 15.6-Inch USB-C Portable Monitor — A slim 1080p portable screen that runs over a single USB-C connection and folds into a smart case. The simplest way to give a laptop a genuine second display at a kitchen table, a client site, or a hotel desk. Check on Amazon
Frequently Asked Questions
Why does my USB-C port not send a picture to the monitor?
Because not every USB-C port carries video. The port must support DisplayPort Alt Mode or be a Thunderbolt port; a USB-C socket intended only for data and charging looks identical and stays dark with a monitor attached. Check the laptop’s specifications for ‘DisplayPort Alt Mode’ or a Thunderbolt symbol beside the port. If your port lacks video, use HDMI if fitted, or a dock designed for your machine — and note that simple USB-A-to-video adapters rely on special driver-based graphics, a last resort with visible compromises.
Can I connect two external monitors to my laptop?
Often yes. Routes include two separate video ports, a Thunderbolt port driving a dock with two display outputs, or one screen per port type (HDMI plus USB-C). The limits are the laptop’s graphics configuration and, on some Mac models, an explicit cap on external display count that varies by chip. Our dual-monitor setup guide walks through the checks in order; the short version is to confirm the display count in your model’s specification before buying the second screen.
What is the difference between Extend and Duplicate?
Extend treats the external screen as extra space: different windows on each display, mouse travelling between them. Duplicate shows the same image on both, which suits presentations and teaching. For desk work Extend is almost always what you want. Windows switches with Windows key + P; macOS arranges it in Displays settings, where unticking ‘mirror displays’ gives you the extended desktop.
Why is the picture on my external monitor blurry?
Nearly always a resolution mismatch: the laptop is sending something other than the panel’s native resolution, and the screen is scaling it. Set the exact native figure in display settings. If it is already native, check the monitor’s own scaling mode is not zooming, and on Windows confirm the scaling percentage is a standard value. A poor analogue (VGA) connection can also soften an image — use a digital cable wherever the ports allow.
Do I need to install drivers for a monitor?
For the display itself, almost never: monitors are plug-and-play, and the operating system’s own drivers handle them. What does matter is the graphics driver — an outdated one can cause missing resolutions, capped refresh rates, or undetected screens, so update it if a new connection misbehaves. Optional manufacturer utilities add niceties like on-screen controls from the desktop, and an ICC colour profile from the manufacturer’s site can improve colour accuracy for photo work.
Can I use my laptop with the lid closed and just the monitor?
Yes, on both systems. On Windows, set ‘when I close the lid’ to ‘Do nothing’ in power options while plugged in. On a Mac, connect the power adapter and an external keyboard and mouse, close the lid, and the external screen becomes the sole display. Ventilation is the one caution: some laptops breathe through the keyboard deck, so if yours runs hot closed, leave the lid ajar instead.
Why does my external monitor turn off when I close the laptop lid?
Because the default power setting tells the laptop to sleep when the lid closes. On Windows, set ‘when I close the lid’ to ‘Do nothing’ for plugged-in use in the power options. On a Mac, closed-lid operation requires the power adapter and an external keyboard and mouse; wake the setup by clicking the mouse or pressing a key. Check ventilation afterwards — a laptop that runs hot with its lid closed is asking to be left ajar.
Can I charge my laptop through the monitor connection?
With USB-C, often yes: many USB-C monitors deliver power upstream to the laptop over the same cable that carries the picture, provided the monitor’s power-delivery wattage meets your laptop’s needs. Check both specifications — a demanding laptop under a modest monitor supply will hold its charge rather than gain it under load. HDMI and DisplayPort connections do not charge; a laptop on those cables keeps its own power adapter, which is normal and harmless.
Can I connect a monitor to a laptop that has only USB-A ports?
Not directly for video, because ordinary USB-A ports do not carry a display signal. The practical routes are a USB graphics adapter or a docking station with its own display chip, which creates a picture over USB-A using the laptop’s processor. These work respectably for documents, dashboards, and a second reference screen, but they add latency and consume processing power, so they are a poor foundation for gaming or video editing. Treat them as a way to give an older laptop a useful extra screen, not as an equivalent of a true video output.
Why does my laptop fan get loud when an external monitor is attached?
Driving more pixels is real work, and on many laptops connecting an external screen wakes the dedicated graphics chip or pushes the integrated graphics into a higher power state, which the fans then service. The effect grows with resolution and refresh rate. It is usually normal rather than a fault, but you can soften it: give the laptop ventilation room rather than a closed shelf, avoid driving a high-refresh screen at full rate for silent office work if your machine offers the choice, and keep the laptop’s vents dust-free so the cooling system works at its designed efficiency.
Will an external monitor drain my laptop battery faster?
Yes, measurably, when you work away from power: the graphics hardware drives two displays, and the external screen’s backlight is fed by its own supply but the signal work is the laptop’s. Expect a noticeable reduction in runtime compared with the laptop screen alone at the same brightness. For mobile work, lowering the external screen’s demands — a modest resolution, a standard refresh rate — and dimming the laptop’s own screen if you are mostly reading the external one both return real minutes.
My external monitor works, but the laptop screen goes black when I close the lid. Is that a fault?
No — it is the default behaviour on many machines, which treat a closing lid as a request to sleep. If you want to work with the lid closed and only the external screen lit, change the lid action in the power settings to do nothing when plugged in, and make sure the laptop can breathe: some models vent partly through the keyboard deck and run warm with the lid shut under load. Keep the machine on a hard surface and check its temperature behaviour during your first long session in that arrangement.
Does the order I plug cables in matter when connecting?
Rarely, but when a connection refuses to establish, sequence is a free variable worth changing. The reliable order is: monitor powered on and set to the right input, cable connected at both ends, then wake or start the laptop. This lets the laptop detect a live, listening display as it initialises its outputs. If a screen is detected at the wrong resolution, a restart of the laptop with everything connected usually renegotiates the full capability of the chain more completely than hot-plugging does.
The Bottom Line
Connecting a monitor to a laptop is a five-minute job once the port question is answered honestly: confirm video support, use a cable that can carry the resolution you paid for, set the native resolution and full refresh rate, and arrange the layout to match your desk. The result — a proper screen, at eye level, with room to work — is the single most felt upgrade in any laptop setup.
Build from there with the guides below: dual screens when one stops being enough, adjustment when the picture can be better, and the cable comparison when you are ready to squeeze the best from the ports you have.
Keep the cable that came with the monitor even after upgrades: in every future ‘it stopped working’ moment, that known-good lead is the fastest diagnostic instrument you own.
Related Guides
Keep going with these related guides and roundups from the same desk-setup cluster: