Disclosure: As an Amazon Associate, ilcastellomenu.com earns from qualifying purchases. The product mentions in this guide are editorial: we link only to items that genuinely fit the topic, and a link never changes what we recommend checking, comparing, or avoiding.
Learning how to fix a monitor with no signal starts with one reassuring fact: the ‘no signal’ message is the monitor telling you it is alive and listening — the fault almost always lives in the chain between the computer and the screen, not inside the panel. A sleeping source, a wrong input selection, a cable seated at ninety percent, or a port without video support account for the overwhelming majority of cases. This guide works through the causes in the order you should check them: fastest and most common first, nothing opened, nothing risked.
You will need only your existing cables, a second cable or device if available for swaps, and ten methodical minutes. By the end you will either have a picture or a precise idea of which link in the chain is guilty — knowledge that makes any support call or replacement purchase a short one. The connection fundamentals in How to Connect to a Laptop a Monitor are the companion read.
How to Fix a Monitor With No Signal: First, Read the Symptom Precisely
Three different symptoms get reported as ‘no signal’, and they point in different directions. If the monitor shows its ‘no signal’ or ‘check cable’ message and then sleeps, the panel works and no valid video is arriving. If the screen is completely black with no message and no backlight, suspect power or the panel itself. If the computer seems off — no fan, no lights — the monitor is innocent entirely. Note also when it happens: never worked (a setup problem), stopped suddenly (a cable, update, or hardware event), or intermittent (almost always a cable or connector).
Also separate ‘no picture at all’ from ‘picture on the wrong screen’. In dual setups and laptop docks, the image may be happily displaying on a screen you are not looking at — the laptop panel, or the other monitor. Glance at every attached display before troubleshooting the ‘dead’ one; this guide has been embarrassed by that check often enough to put it first. The multi-screen context is covered in How to Set Up Dual a Monitor.
In this guide
Likely Causes, Most Common First
- The monitor is set to the wrong input (HDMI 1 while you are plugged into HDMI 2).
- A cable is not fully seated at one end — the classic, especially USB-C and HDMI.
- The computer is asleep, off, or its output is disabled after an update or lid event.
- The cable itself has failed or cannot carry the mode being requested.
- The port in use does not carry video (plain USB-C without DisplayPort Alt Mode).
- A dock, adapter, or KVM in the chain has failed or lost power.
- Graphics driver problems after an update, leaving outputs undetected.
- Genuinely failed hardware: a dead port, GPU output, or monitor input — the rarest cause.
Step by Step: The Safe Fix Order
Work down this list without skipping; each step eliminates a whole family of causes, and the early steps fix most cases outright.
- Confirm power everywhere: monitor power light on, computer actually running (fans, keyboard lights), and any dock’s power supply connected. Wake the computer with keyboard input and give it thirty seconds.
- Select the input manually. Open the monitor’s menu and choose the exact port your cable uses. Do not trust auto-detect today.
- Reseat both ends of the video cable. Unplug, inspect for bent pins or debris, reconnect firmly until seated. If it is USB-C, flip the connector over and try again.
- Restart the chain in order: monitor off, computer fully shut down (not sleep), monitor on, then computer on. Watch for any boot logo on the external screen — a logo that appears then vanishes points at drivers or OS settings, not hardware.
- Simplify the chain. Remove docks, adapters, and switches: connect the computer directly to the monitor with one cable. If the picture returns, reintroduce links one at a time until the culprit identifies itself.
- Swap the cable for a known-good one, and if the monitor has another suitable input, swap ports too. Fault follows the cable: replace the cable. Fault stays with a port: that port (or its version limits) is the story — see HDMI vs DisplayPort for version ceilings.
- Try another source: a different laptop, a console, anything with a matching output. A monitor that lights for another source is healthy; the problem is your computer’s output or drivers.
- On the computer, update or reinstall the graphics driver from the manufacturer’s site, and check display settings for a detected-but-disabled screen (Windows Display settings, Detect button; macOS Displays, Option-click Detect).
- If a picture appears only at low resolution or the screen drops when modes rise, suspect bandwidth: a cable or port version capping the requested mode. Test at a modest resolution to confirm, then upgrade the weak link.
Special Cases: Laptops, Docks, and Dual Screens
Laptop no-signal cases have two extra suspects. The first is the USB-C port that carries no video — indistinguishable by eye, settled only by the specification sheet; if yours lacks DisplayPort Alt Mode, use HDMI or a proper dock and stop negotiating with the port. The second is the lid-and-power dance: some laptops will not light an external screen on battery with the lid closed, or after a sleep they consider final. Connect power, open the lid, wake fully, and troubleshoot from an awake machine. Docking stations add their own firmware and power variables; the dock roundups in Best Docking Station for Dual Monitors note which models behave best with which laptops.
Dual-screen setups fail asymmetrically — one screen dark, one fine — which is diagnostic gold: swap the two cables at the computer end. If the darkness moves, the port or cable path is guilty; if it stays, the dark screen’s input or the screen itself is. And check the arrangement settings before assuming death: an OS that has disabled a display shows exactly this symptom with perfectly healthy hardware throughout.
When to Seek Repair or Replacement
Escalate beyond this guide when: the monitor shows no power light with a known-good outlet and cable; the panel shows a picture from no source on any input with any cable; you can see physical damage, smell burning, or hear buzzing from the unit (unplug it and stop); or the computer produces no picture on any display including its own. Those are hardware verdicts, and the correct next step is the warranty, not a screwdriver — monitors contain capacitors that hold charge, and nothing in this guide requires or permits opening the case.
Before any replacement purchase, write down what the swaps proved: which source, cable, port, and input combinations failed. That note prevents buying a monitor to fix a cable, and it is exactly what a support agent will ask. If the verdict is genuinely the panel, the replacement shortlist in Best Monitors for Home Office and the selection method in Monitor Buying Guide will close the loop quickly.
Prevention: Making ‘No Signal’ Rare
Most no-signal events are born at setup time. Use cables rated for the modes you run, keep them strain-free with slack at both ends, and avoid yanking connectors sideways. Label which input your main machine uses so a borrowed console does not leave the selector changed. Keep graphics drivers current through the manufacturer’s own updater rather than random driver sites. And when you rearrange the desk, reconnect and test before the cable tidy-up makes everything hard to reach — the fault you can see is the fault you can fix in a minute.
The Cable Drawer Audit: Building a Known-Good Spare Kit
Every fix in this guide accelerates when you own a reference kit: one known-good HDMI cable and one known-good DisplayPort or USB-C video cable, each labelled, each tested in calm times rather than suspected in a crisis. The kit costs little and converts the swap tests from errands into minutes. Add the cable that shipped with your monitor — manufacturers bundle a lead they know carries the panel’s full mode — and retire any cable that has ever been ‘probably fine’ into a box marked accordingly, because intermittent cables are repeat offenders and desks accumulate them like pens.
While auditing, inspect the cables you keep: connectors should sit straight, jackets uncut, and no cable should live under chair-caster traffic or bent at a hard angle behind the monitor. The best no-signal prevention ever devised is a boring cable path with slack, installed once and left alone — a principle the desk setups in Best Cable for Monitors illustrate across dozens of configurations.
No Signal After a Move, an Update, or a Storm: Pattern-Matching the Trigger
The event before the fault is the best clue you own. After a desk move: mechanical causes rule — reseat everything, suspect the cable that got stretched, and check the input selector that got pressed in transit. After a system or driver update: configuration causes rule — detection settings, driver versions, and modes reset to defaults. After a power cut or storm: protect first (unplug if anything smells or sounds wrong), then test the monitor on another source and the computer on another screen, because surges injure the ends of chains rather than the middle, and a surge strip that sacrificed itself can look exactly like a dead monitor until you bypass it.
Writing the trigger into your support message, if it comes to that, routinely halves the resolution time. ‘No signal since Tuesday’s update, works on my laptop, fails on the desktop over both cables’ is a diagnosis wearing a sentence’s clothes — and it is assembled entirely from the checks in this guide.
Intermittent Signal: The Fault That Comes and Goes
A screen that works on Mondays and sulks on Thursdays is not haunted; it is marginal — a connection operating exactly at its limit, where temperature, cable position, and mode decide each day’s verdict. Intermittence has three usual authors. The connector author: a plug or port worn enough to need a particular angle, cured by reseating, slack, or retiring that port. The bandwidth author: a chain that passes the desktop but drops under a game’s higher mode, cured by the cable or port upgrade the mode demands. The thermal author: a dock or adapter that works cold and fades warm, cured by ventilation, repositioning, or replacement of the overheating link.
Diagnose intermittence by logging it like weather: note the mode, the hour, what changed, and what restored it. Patterns convict authors faster than any single test, because the fault must be caught in the act and intermittence rarely performs on demand. When the log points at a link, replace the link rather than negotiating with it — marginal connections do not heal, they schedule their next absence for a worse moment.
No Signal on a Brand-New Monitor: The First-Hour Protocol
A new monitor that shows no signal deserves a calmer protocol than panic, because first-hour faults are overwhelmingly configuration, and the return window rewards method over speed. Begin with the boring trinity from this guide — power confirmed, input selected manually, cable reseated — using the cable from the box rather than any veteran from the drawer, since the bundled lead is the one pairing the manufacturer guarantees. Connect the simplest possible chain: one computer, one cable, no dock, no switch. If the panel lights, add your complexity back one link at a time and the guilty link will introduce itself politely.
If the simplest chain stays dark, test the panel against a second source before concluding anything: a console, another laptop, anything with a matching output. A new panel that lights for no source on any input, with its bundled cable, has earned its exchange — photograph the setup, keep every accessory together, and make the call while the retailer’s window is wide open. A new panel that lights for the second source has acquitted itself, and your computer’s port or driver inherits the investigation, with the steps above as its itinerary.

The Diagnostic Flowchart in Prose: Answer Four Questions in Order
Every no-signal fault answers four questions, and asking them in order is faster than any amount of random swapping. Question one: does the monitor show anything at all — its own logo, its menu, a no-signal message in its own words? A screen that displays its menu has a living panel and a working power supply, and the fault lives downstream in the signal chain. A screen that shows nothing at all, not even a menu, has a power or panel story, and no cable swap will fix it. This single observation halves the search space, which is why it comes first and why the guide’s opening section insisted on reading the symptom precisely.
Question two: did it ever work in this exact configuration? A setup that worked yesterday and fails today has a changed variable — a cable disturbed, an update installed, a port reassigned — and the detective work is about finding what changed. A setup that has never worked in this configuration has a compatibility or selection story: the wrong input chosen, a port that does not carry video, an adapter facing the wrong way. The two stories have almost disjoint cure lists, and confusing them is how owners spend an afternoon applying yesterday-fixes to a never-worked problem.
Question three: does the fault follow the monitor, the source, or the cable when each is swapped in turn? This is the substitution method the whole guide runs on, and it needs one known-good component to anchor it — the spare cable, the television, the laptop that can visit the desk. Question four, asked only when the first three point inward: is the remaining suspect under warranty, and have you recorded the evidence? Owners who arrive at question four with notes from the first three rarely stay there long, because support can act on a diagnosis in a way it cannot act on a description of darkness.
Port-by-Port: The Inputs Nobody Suspects
Ports fail and mislead in characteristic ways, and walking them beats suspecting them. On the monitor side, confirm the input selection matches the physical socket in use — auto-detection is a convenience that fails silently, especially when another source is also connected and sleeping. On the computer side, the classic trap is the motherboard’s video output on a machine with a dedicated graphics card: the motherboard port sits invitingly beside the USB sockets, accepts the cable perfectly, and on many systems carries no signal at all because the graphics card has superseded it. The card’s outputs live lower, in the expansion slots, and moving the cable down a few centimetres has resurrected more apparently dead PCs than any repair in history.
Graphics cards add their own subtlety: multiple outputs of mixed versions, where one port may be an older standard that caps or refuses certain signals, and occasionally a port damaged by a past yanked cable. If one output fails while its neighbours work with the same cable and screen, believe the evidence and use the neighbour — a single dead port is an inconvenience, not a dying card, though it deserves a note in case siblings follow. Laptop ports carry the mirror-image trap: a USB-C socket that fits the cable beautifully but was never wired for video, sitting beside an identical socket that was. The manual’s port diagram, consulted once, ends that guessing permanently.
Docks concentrate every port trap into one box. A dock’s display outputs depend on the dock’s chips, the cable feeding it, and the laptop’s mode of connection, and a dock that drove a screen happily at one resolution may refuse another after any element changes. When a dock sits in a failing chain, remove it and connect directly before suspecting anything else — the direct connection is the control experiment, and its result divides dock stories from device stories in one step.
The Boot Sequence Tells a Story: Reading the First Ten Seconds
Watch the first ten seconds after power-on the way a mechanic listens to an engine, because the timing of a failure is a diagnosis in itself. A monitor that shows the computer’s opening logo and early screens, then loses the picture as the operating system loads, is telling you the hardware chain works and the software’s chosen settings — resolution, refresh rate, or a driver in trouble — are what the screen cannot accept. The cures live in safe modes, driver reinstalls, and display settings reset at low resolution, not in cables. Conversely, a monitor that never shows even the opening screens, while its menu works, points back to the physical chain and port selection, because the earliest boot picture is the simplest signal a computer makes and any honest connection carries it.
A screen that works after a restart but not after sleep is narrating a power-management story: a monitor whose deep-sleep setting makes it slow or deaf to wake signals, a graphics driver that renegotiates badly, a dock that drops its displays when its own power state changes. These faults are cured in settings menus, one change at a time, with the deep-sleep option on the monitor as the first suspect to try. A screen that works cold but fails warm, or fails after hours of use, is telling a heat or failing-component story, and that story’s ending is usually a warranty or replacement conversation conducted with your dated notes as evidence.
Record the narration while it is fresh: what appears, when it vanishes, what the indicator lights do, and what changed most recently in the setup. Ten seconds of observation, written down, will do more for a support call — or for your own reasoning a week later when the fault returns in a new costume — than an hour of unrecorded swapping.
No Signal in Special Setups: Capture Cards, Switches, Consoles, and Projectors’ Cousins
Chains with intermediaries fail at the intermediary’s terms, and each common device adds its own clause. A KVM switch that shares one monitor between two computers can lose a machine when its USB and video switching fall out of step, or when one computer’s sleep behaviour confuses the switch’s detection; the cure is usually to switch away and back with both machines awake, and to consult the switch’s own per-port limits before blaming the screen. Capture devices pass the signal onward while taking their copy, and their pass-through ceiling becomes the chain’s ceiling — a console set beyond it may show nothing at all rather than a reduced picture, which makes the capture unit the first suspect whenever a recording setup goes dark.
Consoles bring their own discipline: they remember their last output settings, so a console moved from a 4K television to a desk monitor may attempt a signal the monitor declines, presenting as no signal on a healthy chain. The console’s safe-display reset procedure — a specific power-button sequence each platform documents — exists for exactly this move, and learning it is part of owning a console that travels between screens. The same logic applies to any source moved between displays of different capabilities: the source’s memory is a link in the chain, and resetting it is a legitimate diagnostic step, not an admission of defeat.
The general rule covers every special setup: enumerate the chain’s links in writing, identify each link’s limits and memory, and test by removing links until the chain is a source, a cable, and the screen. A fault that survives the minimum chain lives in one of those three; a fault that vanishes was the removed link, and it can be reintroduced alone to confirm the verdict before money is spent replacing it.
Building the Household’s Known-Good Kit
Every technique in this guide leans on one humble asset: components whose health is not in question. Assemble the kit deliberately rather than hoping it exists during a fault. Its heart is one video cable of each type your household uses, bought or verified good, labelled, and kept in a known place — not in the general cable drawer where good and dubious cables interbreed. Add a note of which of the home’s screens and sources are the reliable test partners: the television that accepts anything, the laptop whose output is beyond suspicion. The kit’s total cost is a cable or two; its value is measured in troubleshooting sessions that end in minutes.
Verify the kit occasionally, because a spare cable that has itself failed — lent out, kinked behind a desk, chewed by the household’s smallest resident — silently corrupts every future diagnosis built on it. Once a season, or whenever the kit is used, confirm the spare still carries a full signal at your main screen’s native settings. A known-good kit is a maintained instrument, not a drawer of good intentions, and its maintenance is the cheapest reliability the desk owns.
Finally, write the desk’s working configuration on the same note that holds the kit’s location: which source uses which port, at what resolution and refresh rate, through which dock. When a no-signal morning arrives — and the honest prediction is that one eventually will — the note converts it from an investigation into a restoration, because you will know exactly what working looked like and can rebuild toward it link by link.
Preventing the Sequel: Habits That Keep the Signal
Most no-signal events are not random; they are the harvest of small physical and administrative neglects, and the prevention list is correspondingly plain. Seat cables fully and support them so their weight does not lever them out of their sockets over months. When you move a desk, disconnect cables by their plugs rather than by pulling the cable, because the damage from a yanked connector often announces itself weeks later as an intermittent fault. Keep one input per source and label the monitor’s inputs in its menu where it allows, so the next person to use the desk — including future you, tired, at midnight — selects correctly on the first try.
Administratively, treat updates as events worth a morning-after glance: after a major system or driver update, confirm the display wakes from sleep and shows its native settings before the day depends on it. Keep the graphics driver from a source you trust and resist stacking utilities that promise to optimise displays, since each adds a layer that future troubleshooting must excavate. None of this is exciting, and all of it together is why some desks simply never have this fault twice.
The deepest prevention is the documented desk: the settings journal, the labelled cables, the known-good kit, the note of what working looks like. No-signal faults feed on undocumented setups, where every investigation starts from zero. A documented desk starves them — the fault still occurs, but it occurs inside a system that can name its own parts, and named parts get fixed in minutes.
Intermittent Signal Revisited: The Wiggle Test and the Heat Test
The fault that comes and goes deserves its own method, because random swapping cannot catch what is not currently failing. Two provocations expose most intermittents. The wiggle test: with a picture displayed, gently flex each cable near its connectors and along any suspect bend, watching for the picture to flicker or drop. A fault that answers to a specific flex has located itself to a connector or a cable section, and the cure is replacement of that cable, not tighter seating — internal conductor damage does not heal. Perform the test gently; you are interrogating, not injuring.
The heat test addresses the other family: faults that arrive after the setup has run for hours, or on warm afternoons, and vanish by morning. Heat expands connectors, stresses tired solder joints, and pushes marginal power supplies over their edge. Note the pattern honestly — time-to-failure after a cold start is diagnostic gold — and improve ventilation around the suspects while you gather it. A dock or monitor that fails at the third hour daily is confessing to a thermal story, and that confession, dated and timed, is what a warranty claim needs to succeed on the first attempt rather than the third return.
Keep intermittents out of the spare kit’s gene pool: any cable implicated by the wiggle test leaves the household’s trusted stock permanently, labelled as faulty if it stays in the building at all. The commonest way intermittents survive for years is by migrating between desks, acquitted at each by a fault that refused to perform during testing.
When the Answer Is a New Monitor: Carrying the Diagnosis Into the Purchase
Occasionally the flowchart ends at replacement, and even then the diagnosis should travel with you into the purchase, because a fault understood is a specification earned. If the old screen died young, weight warranty length and the maker’s service reputation higher in the new choice. If the fault was really a chain mismatch — a port that never carried what the computer sent — the new screen’s input specification is the headline act. If the desk outgrew the screen, the troubleshooting was merely the announcement, and the buying guides take over with the diary of your hours as the brief.
Before the old screen leaves, extract its remaining value honestly: a monitor with a working panel but a dead input may serve for years on its surviving input at another desk, and a truly dead screen should go to electronics recycling rather than landfill, through the retailer or municipal scheme your area provides. Record the new screen’s arrival with the first-week inspection from the buying guides, connect it with the known-good kit, and write its working configuration into the journal the day it works — not the day it fails.
That closing habit is the whole troubleshooting philosophy in miniature: every fault, fully processed, leaves the desk more documented and more resilient than it found it. Owners who work this way stop experiencing display problems as random misfortunes and start experiencing them as maintenance with unusually clear instructions. Readers at the replacement stage will find the current field compared in our home office monitor roundup and the gaming roundups, depending on which desk the new screen must serve.
A Note on Safety and the Limits of Home Diagnosis
Everything in this guide is deliberately external: cables, ports, settings, substitutions, and observations. A monitor’s interior contains components that can retain a hazardous charge long after unplugging, and no diagnostic prize inside the casing is worth an amateur’s expedition. If the flowchart’s honest conclusion is an internal fault, the safe and correct action is a professional’s bench or a replacement — not a screwdriver. The same restraint applies to power supplies and to any cable with damaged insulation, which should be retired, not taped and returned to service behind a desk where nobody watches it.
Observe the same caution at the wall: test outlets with a known device rather than with improvised methods, keep liquids away from the chain you are handling, and power everything down before reseating connections in cramped power strips. Troubleshooting is a calm, dry, well-lit activity performed in the right order; the moment it stops being those things, stop with it. The screen will keep until tomorrow, and the diagnosis will keep with it — written down, as this guide keeps recommending, in the journal that makes tomorrow’s session start where today’s left off.
Gear for This Guide
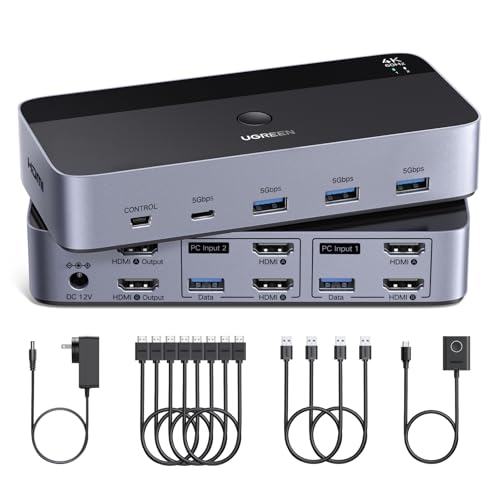
One pool product earns a mention in this guide: a KVM switch, because switches and docks are links in the chain this guide teaches you to test — and a quality one removes itself from suspicion.
UGREEN HDMI KVM Switch for 2 Monitors and 2 Computers — A powered KVM for sharing two monitors between two computers. If your no-signal hunt convicts an ageing switch or a passive adapter chain, a proper powered unit like this is the replacement that stays out of future troubleshooting guides. Check on Amazon
Frequently Asked Questions
Why does my monitor say ‘no signal’ when everything is plugged in?
Because ‘plugged in’ and ‘connected’ differ. The usual gaps: the monitor is listening on a different input than the one cabled; the plug is a millimetre from seated; the computer is asleep or its output was disabled; or the port you chose (notably plain USB-C) carries no video at all. The step-by-step order in this guide closes each gap in turn, and in practice the input selector and the reseat fix the majority of cases within two minutes.
My monitor works with one device but not my PC. What is wrong?
The monitor and cable are proven, so suspicion moves to the PC: its port, its driver, or its settings. Try the PC’s other video output if it has one; check whether the display is detected but disabled in display settings; update the graphics driver from the GPU maker’s site. If the PC lights no external screen at all and its own display also misbehaves, the graphics hardware itself enters the frame and a repair conversation begins.
Can a cable cause ‘no signal’ even if it worked yesterday?
Yes — cables fail at connectors, especially ones that hang under tension, get rolled over by chair casters, or are plugged and unplugged daily. Internal conductors fatigue invisibly. This is why the swap test outranks inspection: a cable can look perfect and carry nothing. It is also why prevention means slack, gentle bends, and keeping one known-good spare cable in the desk drawer.
The screen shows the boot logo then goes black. What does that mean?
Good news disguised as bad: the hardware chain works, because the low-level boot image got through. The failure begins when the operating system loads its graphics driver and display configuration — so the fault lives in drivers, resolution settings beyond the chain’s bandwidth, or a corrupted display profile. Boot into safe mode or a low-resolution mode, reinstall the graphics driver cleanly, and set a modest resolution before raising it again.
Is it safe to hot-swap monitor cables?
HDMI, DisplayPort, and USB-C are designed to be connected and disconnected while equipment is powered, and hot-swapping is a normal part of the troubleshooting in this guide. Do it gently, by the plug body, without forcing angles. The exceptions are common sense: never open the monitor or computer case as part of signal troubleshooting, and if anything smells burnt or shows damage, power everything down and stop.
My second monitor stopped being detected after an update. How do I fix it?
Updates occasionally reset display configurations or replace graphics drivers with generic ones. First, force detection in display settings. Second, install the current driver from your GPU manufacturer’s site rather than the operating system’s generic. Third, reseat the dock or cable chain — updates sometimes coincide with a disturbed connection rather than causing the fault. If the screen returns, note the driver version that works before the next update cycle.
Why does my monitor lose signal when I bump the desk?
A connector is living on the edge of contact — most often a cable without slack being tugged sideways, or a worn port. Reseat firmly, add slack so the cable hangs rather than pulls, and route it so desk movement does not reach it. If one port wobbles visibly, retire it from daily duty and use another input. Intermittence that follows movement is mechanical until proven otherwise, and it is good news: mechanical faults are cheap, findable, and permanent once fixed.
Why does my monitor get a signal only after I restart the computer?
Because something in the chain fails to negotiate on wake or on first boot but succeeds on a warm restart — classically a dock or adapter with slow handshaking, a driver that initialises late, or a monitor whose input detection sleeps too deeply. Mitigations in order: update the dock’s firmware and the graphics driver, disable fast-startup features that blur the line between sleep and boot, and set the monitor’s input manually rather than trusting auto-detect. A chain that needs one restart is announcing a marginal link; the log-and-replace discipline in this guide will name it.
Can a power strip or outlet cause a no-signal fault?
Indirectly, yes: a monitor on a failing strip may power its light but not its inputs properly, and a computer browning out under load can drop its video output while appearing alive. The elimination test costs nothing — monitor and computer plugged directly into wall outlets for one session. If the fault vanishes, the strip was the author, and replacing it is both the fix and a small act of protection for everything else that was plugged into it.
The monitor says no signal but the computer sounds like it is running normally. Where do I start?
With the monitor’s own menu. If the menu displays, the panel and its power are healthy, and the fault is in the signal chain — start at input selection, then the cable’s seating at both ends, then the specific port on the computer, remembering the motherboard-versus-graphics-card trap if it is a desktop. If the menu does not display, the story is power or panel: check the power cable’s seating, the outlet with a known device, and the monitor’s power indicator behaviour before touching any video cable.
Can a Windows or system update really cause no signal?
Yes, through the driver and settings layer rather than by breaking hardware. An update can replace a graphics driver with one that mishandles a particular screen, reset display settings to a combination the monitor declines, or change sleep behaviour so a screen stops waking. The signature is timing — the fault arrives with the update and the boot screens still show. The remedies are equally software-shaped: roll back or reinstall the graphics driver, start in a low-resolution safe mode to reset the display settings, and check the power settings the update may have re-defaulted.
My monitor works with my laptop but not my desktop. What does that prove?
It acquits the monitor and, if you used the same cable, the cable — and it indicts the desktop’s side of the chain: its port selection, its graphics configuration, or its settings. Work the desktop’s outputs one by one, confirm the cable is in the graphics card rather than the motherboard, and if the machine has both integrated and dedicated graphics, check which the system is using. A source-side fault confirmed by a working substitute is the substitution method doing exactly its job.
Is it worth repairing a monitor that gets no signal on any source?
First confirm the diagnosis is the monitor’s — every source, known-good cables, menu behaviour recorded. A screen whose menu will not display and whose power behaviour is abnormal has an internal fault, and the repair question becomes economic: the age of the panel, the cost of assessment, and the price of an equivalent replacement. Screens within warranty should always travel that route. Older screens with a confirmed internal fault are rarely economical to repair professionally, though a reputable shop’s assessment fee, credited toward a repair, can be worth paying when the panel is large or specialised.
Why does my second monitor lose signal when the first is turned off?
Because in many chains the first monitor is not merely a display but a link: in a daisy-chain the second screen’s signal passes through the first, and some docks and switches behave similarly. Turning the first off breaks the path. The remedies are architectural — feed each screen from its own source output where ports allow, or accept the dependency and power the pair together. Discovering the dependency is itself the fix’s hard half, and your chain diagram, drawn once, will show it at a glance.
The Bottom Line
A ‘no signal’ monitor is rarely a dead monitor. It is a chain with one weak link — an input selector, a half-seated plug, a sleeping source, a tired cable, a port that never carried video — and the fix order in this guide finds that link by elimination, safely, in minutes. Work the steps, trust the swaps, and let the evidence, not the anxiety, decide when a repair or replacement is genuinely due.
Label your inputs and keep the spare cable: the next no-signal event at this desk should last three minutes, and most of them will be the input selector.
Related Guides
Keep going with these related guides and roundups from the same desk-setup cluster: