Learning how to fix a loud mechanical keyboard starts with identifying which sound you actually hate, because ‘loud’ is usually four sounds stacked: switch clicks, bottom-out clack, spring ping, and case echo — plus stabiliser rattle for seasoning. Each has a different cure, most are cheap, and none require replacing the keyboard until you have tried the desk-level fixes that cost nothing.
Work in the order this guide presents: environment first, then technique, then reversible mods, then component changes. If the board is brand new and the noise is a design trait — a clicky board in a shared bedroom — the honest fix may be an exchange rather than a project, and Mechanical vs Membrane Keyboard will help you judge whether a different board type suits the room better.
Disclosure: As an Amazon Associate, ilcastellomenu.com earns from qualifying purchases. Product details and availability can change; check the retailer listing before you buy.
Diagnose the noise before you treat it
Type slowly, one key at a time, and listen. A sharp click synchronised with registration on every key means clicky switches — that sound is the product working as designed. A clack at the bottom of each press is bottom-out: your fingers driving the stem into the housing. A metallic ringing after release is spring ping. A hollow boom underneath everything is the case and desk amplifying all of it. Rattly, ticky large keys are stabilisers asking for lubricant.
Record a short phone video and play it back; recordings exaggerate exactly the frequencies housemates complain about and give you a before-and-after reference for each fix. Also test the board on a towel for thirty seconds. If the towel transforms the sound, your biggest problem is the desk, and the cheapest section of this guide is about to solve it.
Set expectations honestly: a mechanical board can be made civilised, even quiet, but a clicky-switch board cannot be made silent without changing the switches. Knowing which category you are in prevents spending money on foam to fix a sound that lives in the switch design.
In this guide
Fix 1: the desk and room (free, and often enough)
A desk mat is the highest-value noise purchase in all of keyboarding: a few millimetres of dense material under the board decouples it from the desk, which otherwise acts as a sounding board. A folded towel proves the principle tonight; a proper mat makes it permanent and tidy. The boards in Best Keyboards for Typing are often pictured on mats for exactly this reason — it is standard practice, not decoration.
Move the board off hollow desk sections and away from walls that reflect sound straight back at you, and consider what is under the desk — a board above a resonant drawer unit sounds louder than the same board over solid floor. In shared rooms, a keyboard at the far side of the desk from the door or bed measurably changes who hears what.
Finally, look at the surface the board sits on: hard feet on hard laminate is the loudest combination in the house. Rubber feet, a mat, or even the board’s own tilt feet set down instead of up (which also changes case resonance) all shift the sound before you spend anything on the keyboard itself.
Fix 2: your typing technique
Most bottom-out noise is force, not hardware. Mechanical switches register partway down their travel, so the final portion of each press — the part that makes the clack — is optional. Practising lighter typing, letting the switch register without slamming to the bottom, can cut a board’s volume dramatically and reduces finger fatigue as a bonus. Tactile switches help here because the bump tells your fingers the press has registered; that feedback loop is detailed in Keyboard Switch Types Explained.
This takes a week or two of conscious effort and then becomes habit. Typing tests with a deliberate ‘float’ technique — never fully bottoming out — are the training ground. Be patient with spacebar and Enter, which most people strike hardest and which carry stabilisers that amplify heavy hits.
If lighter typing feels impossible because your switches are very light and you crash through them, slightly firmer switches are a legitimate component fix — and on a What is a Hot Swappable Keyboard, a five-minute experiment rather than a new keyboard.
Fix 3: O-rings, keycaps, and the easy component tweaks
O-rings — small rubber rings slipped onto each keycap stem — cushion the cap’s landing and soften bottom-out clack. They are cheap, reversible, and slightly change feel, shortening travel a touch and softening the landing; some typists love them, others find them mushy. They do nothing for click mechanisms or spring ping, which is why diagnosis came first.
Keycaps change sound more than most people expect: thicker PBT caps generally produce a deeper, less sharp tone than thin ABS, and taller profiles resonate differently from low ones. If you were planning a keycap upgrade anyway, sound is a legitimate selection criterion — the considerations in How to Choose a Keyboard cover cap materials in buying terms.
Case foam and plate foam are the next rung: sheets of damping material inside the case absorb the hollow echo that makes boards sound cheap and loud. Many boards ship with some fitted; adding or upgrading it is a common mod, and pre-cut options appear in Best Foam for Keyboards. Opening the case is a comfort-level decision — check warranty implications first, work disconnected, and keep screws organised.
Fix 4: lubricate switches and stabilisers
Scratchy switches and pinging springs are friction and resonance problems, and lubricant is their direct cure — the full method is in how-to-lubricate-switches-on-a-keyboard. For noise specifically, spring treatment matters most: a light oil application stops the metallic ring that makes a board sound broken even when it is merely dry. Stabilisers are the other half: thicker lubricant on stabiliser wires kills the rattle on spacebar, Enter, Shift, and Backspace, the keys everyone hears.
Sequence matters. Lube is most effective after the desk and technique fixes, because those reveal how much noise actually lives in the switches. Many owners discover the board they were about to lube for three hours only needed a mat and stabiliser grease — a twenty-minute job.
If your switches are not removable and the board is soldered, in-place lubing through the stem is a partial option, but weigh effort against outcome honestly; at some point the switch-swap path — available only on hot-swappable boards, per hot-swappable-vs-soldered-keyboard — becomes the rational route to a quieter board.
Fix 5: change the switches or the board
When the noise is the switch family itself — clickies in a shared space, or scratchy budget linears — changing switches is the definitive fix. Silent switches, with dampened stems, are the mechanical world’s purpose-built answer and transform a board’s manners while keeping its layout and your muscle memory. On a hot-swappable board this is an evening; on a soldered board it is a new keyboard decision wearing a disguise.
And sometimes the board is simply the wrong tool: a hollow, high-profile board in a small shared flat may never reach the quiet of a low-profile silent build or a membrane board. There is no hobby shame in that verdict. Sell or gift the loud board to someone with a room of their own and buy for the room you have — the selection method in keyboard-buying-guide bakes environment in from the start.
Before replacing, run how-to-test-a-keyboard on the loud board: if it is healthy, it has resale or hand-me-down value, and your notes on exactly what noise bothered you become the spec sheet for its replacement.
Prevention: buying quiet next time
Choose switch family for the room first, case construction second: gasket-mounted, foam-filled cases with silent or tactile switches are the quiet recipe, and it is far easier bought than retrofitted. Read sound-focused reviews with recordings, remembering that microphones flatter or exaggerate — use them comparatively, not absolutely.
If you share space unpredictably — sometimes alone, sometimes not — a hot-swappable board is the flexible answer: lively switches for solo sessions, silent switches a swap away when the house fills up. Flexibility is the recurring theme of quiet keyboarding, because rooms change more often than keyboards wear out.
How to fix a loud mechanical keyboard in a shared home, room by room
Shared homes turn keyboard noise into diplomacy, and the fixes rank differently when the audience is a sleeping baby, a partner on calls, or a housemate through a thin wall. For the sleeping-baby scenario, impact sounds are the enemy and distance is the first tool: a door, a different room for late sessions, and silent switches as the permanent answer, because no mat fully civilises a clicky board at midnight.
For the partner-on-calls scenario, the microphone is the true audience: it sits closer to your keyboard than your partner does and loves exactly the frequencies keyboards produce. Moving the microphone nearer your mouth and further from the board, lowering its gain accordingly, and choosing a desk position that puts a monitor between keyboard and mic can matter more than any board modification — audio geometry before keyboard surgery.
For thin-wall neighbours, low-frequency thump through the desk and floor is the carrier, which is why decoupling — mat, soft feet, a board not resting on a resonant hollow desk — outperforms switch changes for that specific complaint. Diagnose whose ears, through what medium, and the fix selects itself.
The quiet build: combining fixes into a system
Individual fixes add; systems multiply. The reference quiet build layers them deliberately: silent switches remove impact at the source, factory or hand lubrication removes friction noise, a foam-filled gasket case absorbs what remains, PBT keycaps deepen the residual tone, and a desk mat decouples the whole from the furniture. Each layer handles the frequencies the others miss, which is why the result is quieter than any single intervention’s promise.
Build the system in diagnostic order rather than all at once — desk, technique, stabilisers, then switches and case — testing after each layer with the same recording setup. You will likely stop before the final layer, because most boards cross the ‘quiet enough for this room’ line earlier than expected, and the remaining budget is better kept than spent silencing a problem that no longer exists.
Document your layers as you go. A quiet build you cannot describe is a quiet build you cannot reproduce on your next board, and the recipe — switch, lube approach, case treatment, caps, mat — is genuinely valuable knowledge earned over evenings of testing.
When loud is a feature: protecting the sound you love
A necessary counterweight: many owners love their board’s voice and share space with no one it troubles. For them, this guide’s diagnostic half remains useful — knowing which element makes which sound lets you tune toward the sound you want, removing rattle and ping while keeping a crisp, deliberate clack. Quiet and character are different axes; the goal is a board with no sounds you did not choose.
Tuning toward character uses the same toolbox in the opposite direction: firmer keycaps for a sharper report, a less damped case for resonance, switches chosen for their voice as much as their feel. The hobby’s sound vocabulary — thock, clack, marbly — exists because owners sculpt these qualities intentionally, and a well-tuned loud board is as much a craft object as a silent one.
The only illegitimate loud board is the accidental one: loud in ways its owner dislikes, in a room it does not suit. Everything in this guide exists to move boards out of that category — in whichever direction their owners actually want.
Room acoustics: the half of loudness that is not the keyboard
Rooms amplify selectively. Bare walls, hard floors, and a desk against a corner build a small echo chamber that flatters every impact sound your board makes; soft furnishings, curtains, and a rug absorb exactly those frequencies. If your board is dramatically louder at home than it was in the shop, the room changed, not the board — and the cheapest decibels in this entire guide may be a rug and a bookshelf rather than anything with a switch in it.
Test the theory in one minute: type the same passage in your usual spot and then in the softest room in the house, recording both. The difference is your room’s contribution, quantified by ear. Owners planning a dedicated office should treat that experiment as design input — soft surfaces near the desk are acoustic treatment, whether or not anyone calls them that.
Volume etiquette for calls and streams
If your keyboard shares a microphone with your voice, your audience hears a mix you never hear yourself — so audition it: record a call-length sample of you typing and talking, and listen as your audience does. Many typists discover their board is twice as present on recordings as in the room, because microphones sit close and compressors lift quiet sounds toward the voice. Fixes scale accordingly: microphone closer to you, gain lower, board further from the mic, and the card or app’s noise tools as the last layer, not the first.
Streamers with loud beloved boards face the honest trade in its purest form: the board’s voice is part of the show for some audiences and a tax on all of them. A silent board for streaming hours and the characterful board for private play — trivially swapped if both are hot-swappable ecosystems — is not hypocrisy; it is wardrobe, and professionals dress for the room.
A maintenance rhythm for a quiet board
Quiet decays. Lubricant migrates, stabilisers dry, keycaps loosen microscopically, and a board tuned silent in January can be merely quiet by December. Build a light rhythm: a stabiliser check and desk-mat clean each season, a listening pass with fresh ears twice a year, and lubricant attention only where a specific sound has returned. Maintenance by symptom keeps the board quiet without turning quiet into a second hobby.
Keep the before-and-after recordings from your original fixes. They are the calibration that tells you whether a returning sound is new loudness or old loudness newly noticed — a distinction ears alone, adapting daily, are notoriously bad at making. Data, even phone-recording data, beats nostalgia in both directions.

Measuring loudness before treating it: your ears, your phone, your room
Treatment without measurement is how owners spend money in the wrong order, so begin by capturing the sound you are actually trying to change. Record thirty seconds of your normal typing and thirty seconds of your fastest typing on your phone, placed first at your own head position and then where the affected listener sits — the next room’s doorway, the partner’s side of the bed, the desk your microphone occupies. Play both back. Owners are routinely surprised in both directions: boards that feel loud at the fingers are modest at a distance, and boards that feel civilised produce a sharp, carrying tick on a recording that the typist’s own ears had edited out.
Name the components of what you hear, because each has a different cure and a different price. The main downstroke note is the board’s voice and the hardest to change fundamentally. A metallic ringing that lingers after the press is spring or plate resonance. A rattle confined to the large keys is stabilisers. A hollow boom underneath everything is the case and the desk acting as a sounding board. Write the ranking down — loudest offender first — because the fix order in this guide, and any sane fix order, follows the ranking, not the catalogue of available products.
Repeat the recording after each fix, same passages, same phone positions. Sound memory is the least reliable sense you own, and the recordings are the only honest before-and-after you will get. They also protect you from the placebo of effort: a fix that took an evening feels effective, and the recording will confirm or deny it without caring about your evening.
The desk as an instrument: surfaces, mats, and what the board sits on
The desk fix deserves deeper treatment than its usual one-line mention, because the desk is an amplifier with opinions. A keyboard sits on four small feet, and every keystroke’s energy that does not become sound in the air becomes vibration in the desk — where a large, hollow desktop, especially one with modesty panels and drawers, can resonate like a drum skin. The same board on a solid desk, a filled desk, or a desk against a wall sounds like three different products. Before buying anything for the board, experiment with what is under and around it: a folded towel as a temporary mat to preview what a desk mat will do, the board moved off a hollow section of desktop, soft furnishings or a rug in a bare room that is currently returning every sound to you doubled.
Desk mats work through mass and decoupling, and their differences are practical rather than mystical: a thick, dense mat under the whole board and mouse area changes the sound most and the typing feel slightly — some typists notice a softer landing they love, others a deadness they do not — while a thin mat changes mostly the resonance. If your desk is shared with a monitor on a stand, note that the stand’s feet transmit their own vibration; isolating the board sometimes reveals the monitor was part of the orchestra. Diagnose the desk as a system before spending on the board as a component.
Room treatment is the same idea at larger scale, and it is why the identical setup is a problem in a spare bedroom with bare walls and no problem in a furnished study. You do not need studio treatment; you need the ordinary softness of lived-in rooms — curtains, upholstery, books, a rug — interposed between the board and the people it disturbs. In a rented or temporary space, even a blanket over a nearby hard surface during late sessions is a legitimate, effective, free fix, and there is no rule that a solution must be purchasable to count.
Typing technique, trained deliberately: the two-week drill
Technique fixes fail when they are advice and succeed when they are practice, so treat the lighter touch as a skill with a drill rather than a resolution. The skill has two parts: actuating without bottoming out, and releasing without letting the key snap back. Both are trainable because both are timing, and timing responds to slow, attended repetition. Spend five minutes a day for two weeks typing a familiar passage at half speed, concentrating only on stopping each press at the moment of actuation — on a tactile switch the bump tells you where that is; on a linear, you are training your fingers to a depth, which is harder and takes the full fortnight.
Measure the drill with your recordings, not your impressions: record the same passage on day one and day fourteen, at normal speed, and compare. Most typists find a real but partial improvement — technique quiets the strokes they control and leaves the spacebar, struck by a thumb with its own habits, nearly unchanged. That is a normal and acceptable outcome. Technique is one layer of the fix, not the whole of it, and the drill’s second benefit is diagnostic: the strokes that resist training tell you exactly which keys need a mechanical fix instead, which is information worth two weeks by itself.
A caution against overcorrection: typing that hovers anxiously above the keys, afraid to land, trades noise for fatigue and errors. The goal is a press that lands softly, not a press that apologises. If your hands tire during the drill, you are holding tension, not learning touch — slow down, shake them out, and let the skill arrive at the speed motor learning actually works.
O-rings and dampers, examined without enthusiasm or scorn
O-rings — small rings fitted around keycap stems to cushion the bottom of the stroke — are the most argued-about cheap fix in the hobby, and both camps overstate. What they genuinely do: shorten the final travel slightly and mute the hard plastic-on-plastic landing, which is a real component of the sound on boards whose owners bottom out firmly. What they cannot do: change the switch’s own sound, quiet the upstroke, or fix stabiliser rattle, case resonance, or spring ping. Owners who buy them for the wrong component conclude they do nothing; owners who buy them for the landing conclude they are miraculous. Both are reporting accurately on different boards.
Fitting them is a keycap-off job with two practical notes. Thickness is a choice, not a detail: thicker rings shorten travel more and mute more, at a growing cost to feel, so start thin. And the spacebar and other stabilised keys deserve a test fitting first, because a ring that changes a long key’s landing unevenly can make its sound worse, not better. Judge the result on your recordings across a full day of typing — O-rings change feel subtly enough that first impressions, in either direction, regularly reverse by evening.
Alternatives in the same family — switch pads, films, and silent switches themselves — attack neighbouring components, and the comparison in this guide’s switch section applies: the further the fix sits from the switch’s moving parts, the less it can do and the less it can harm. O-rings sit far out, which is why they are a safe experiment and a limited one, and why they belong early in a fix sequence rather than as its conclusion.
Foam, tape, and case mods: the middle tier of intervention
Between the free fixes and the switch-level ones sits the case tier: foams that fill the hollow space inside the board, tape applied to the circuit board’s underside to change its resonance, and gaskets or mounting changes on boards designed for them. The shared principle is that a keyboard case is a small room and its emptiness is an instrument; filling and damping that space lowers and softens the board’s voice without touching how any key feels. For boards with a genuinely hollow, booming character, this tier delivers the largest change per unit of effort in the whole guide.
The tier’s discipline is reversibility and patience. Add one material at a time, record, and live with it a day; foam combinations interact, and a board stuffed with everything at once that sounds worse has taught you nothing about which layer to remove. Watch internal clearances — batteries in wireless boards need their space and their safety respected, and foam should never be packed against a battery or a charging circuit. Work with the board disconnected, keep every screw accounted for, and photograph the interior before you change it, because the photograph is the only reliable map home.
Know this tier’s ceiling too: it treats the case’s contribution, which your diagnostic recording already ranked. If your ranking put the switch’s own voice first, foam will polish a sound you still dislike, and the honest next step is the switch tier — quieter switches, or the lubrication path covered in the switch lubrication guide — rather than a third layer of foam bought in hope.
Silent switches and the endgame: when changing switches is the answer
Silent switches replace the landing with engineered damping inside the switch itself — soft pads that meet the stem at both ends of travel — and they are the deepest quieting available short of changing technology entirely. Their honest costs should be weighed with the same clarity as their benefits. The damped landing feels softer and, to some typists, less precise; the upstroke quieting varies by design; and a full set is a real purchase plus, on a soldered board, a real project. Judge them by a sample installed in your own board on real letter keys for a full week, not by a single press in a shop — silent switches are the category where first impressions mislead most, in both directions.
A hybrid strategy serves many owners better than a full conversion: silent switches on the letter and number keys that produce most of the sound, your preferred switches retained where their feel matters most and their volume matters least. Boards are not required to be uniform, and a board tuned by zones — quiet where the typing lives, characterful where it does not — is a legitimate endgame that pure strategies miss. The spacebar, once again, deserves individual judgement: it is the loudest key on most boards and the one whose feel owners are most protective of, in either order.
If even silent switches in a damped case leave the board too loud for its room, the remaining answer is technological, and it is not a defeat: the scissor and membrane boards discussed in the mechanical and membrane comparison exist at a quietness mechanical designs approach but rarely match. Some desks need that answer. Recognising it after working the tiers honestly is not giving up on a board; it is the diagnosis completing itself.
Keeping it quiet: the maintenance rhythm for a hushed board
Quiet is not a state a board achieves once; it drifts. Lubricant migrates and thins, stabilisers dry and begin to tick, foam compresses, screws relax a fraction, and a board tuned to a hush in January can be merely average by December without any single thing breaking. The countermeasure is a rhythm rather than a rescue: a quarterly five-minute listen, recorded the same way as your original diagnostic, with the spacebar and Enter auditioned individually; a stabiliser touch-up when a tick appears rather than at the next overhaul; a case-opening inspection annually, or when the recording tells you the voice has changed character.
Keep the tuning notes with the board — what foam, where, which switches run silent, when the stabilisers were last treated — because a quiet board is a recipe, and recipes held in memory fade exactly when they are needed. If you replace the board, the notes transfer: your next board’s quieting starts from your proven recipe instead of from the beginning of this guide, and the whole project that took a month the first time takes an afternoon. That, ultimately, is what the fixes in these pages are building — not a silent keyboard, but an owner who knows where their keyboard’s sound lives and how to govern it.
The household negotiation: agreeing what fixed means
Many loud-keyboard projects are secretly negotiations, and they go better when the success criterion is agreed before money is spent. ‘Quieter’ is not a criterion; ‘inaudible through the bedroom door during a call’ is, and so is ‘acceptable at the dining table’. Agree the test — the room, the door, the hour, the activity — and let your recordings be judged against it by the person who raised the problem, not by the person who performed the fixes. This protects both parties: the fixer from an endless project chasing an unspoken standard, and the listener from being told a board is fixed while it still reaches the pillow.
If the agreed test cannot be met after the tiers are honestly worked, the negotiation has its answer ready: the board moves desks, the typing moves hours, or the board changes technology — decided as a household logistics question rather than as a verdict on anyone’s hobby. Most households, in practice, settle two tiers earlier than they feared, somewhere around a mat, a technique drill, and a set of stabilisers that finally stopped ticking. The fixes work. The negotiation is how the household knows they have worked, which is a different and equally necessary thing.
The spacebar, given its own clinic at last
Every loud-board investigation ends at the spacebar, so give it a dedicated pass. It is the largest key, struck by the strongest digit, on the longest stabiliser, over the case’s biggest hollow — a perfect storm of every noise source in this guide at once. Diagnose it in isolation: press it at its centre and at each end, slowly and at typing speed, and listen for which component speaks. A tick at one end is that end’s stabiliser. A boom at the centre is case and cap. A rattle across the whole stroke is a loose fit somewhere in the assembly, and it will not be cured by treating any single other key.
Treat it in the same isolation, one intervention at a time, because the spacebar is where owners most often apply four fixes at once and learn nothing. Stabiliser treatment first if the tick leads; foam or a different cap if the boom leads; a switch change last and only if the stroke’s own voice offends. Judge each on a recording of real sentences, not of spacebar solos — in real typing the spacebar’s noise is judged by the company it keeps, and a spacebar that sounds dramatic alone can sit perfectly in the mix, and vice versa.
Travel, hotels, and other people’s houses: the portable quiet kit
A board quieted for home may still be loud abroad, because foreign rooms are bare, desks are hollow, and neighbours are closer. The travelling quiet kit is small: a mat or its improvised equivalent, a typing technique already trained, and the knowledge of which of your board’s settings — backlight aside, some boards offer a quieter actuation mode or a second profile — suit shared spaces. In a hotel, the folded towel under the board is not an embarrassment but the oldest trick in this guide, and it works on a hollow hotel desk exactly as it does at home.
If you regularly type in libraries, trains, or shared workspaces, be honest about the arithmetic: the portable fixes shave the sound, they do not transform it, and a genuinely quiet travel board — the second-board strategy this site describes elsewhere — may be the real answer. Judge by the strictest room you regularly type in, not the average one, because loudness complaints, like most complaints, are issued by the worst case.
When the loud one is not yours: a diplomatic appendix
Some readers arrive at this guide as the listener, not the typist — a partner, a parent, a colleague with a loud board in earshot. The fixes here still apply, but the delivery matters as much as the decibels. Bring a recording rather than an adjective, propose the cheap experiments as experiments rather than as corrections, and offer the desk-level fixes — a mat makes an unusually tactful gift — before ever mentioning switches or boards. Most typists have no idea how their board sounds from your chair; your ears are behind the keyboard’s least flattering angle, and the typist’s are behind its most.
And if you are the typist who has been approached, receive it as data rather than criticism: the listener has just given you the one measurement you cannot take yourself, which is your board’s sound in its real audience. Work the tiers, agree the test, and let the recordings arbitrate. Households and offices that handle the loud keyboard this way usually discover the problem was two fixes deep, and that the argument about it lasted longer than the repair.
The quiet board’s buying list, for the next purchase
Everything learned fixing this board becomes the specification for the next one, so write it while it is fresh. If your case boomed, the next case is damped, gasket-mounted, or famously solid. If your stabilisers ticked, the next board’s are factory-tuned, and you will test them in the shop with the four-press method. If your switches’ voice was the offender, the next set is chosen from the quiet families, tasted in your own case. If your room was the offender, the next purchase is not a board at all but the room’s softness, bought once and benefiting every sound the room will ever host.
This is the deepest sense in which a loud keyboard is fixable: even when the board itself is replaced, the diagnosis survives it, and the replacement is bought with a precision no review could have given you. Keep the notes, keep the recordings, and the next board starts quiet — which is where this guide, having travelled from free fixes to final ones, is content to leave you.
The five-minute version, for the reader recording a call tomorrow
If the deadline is tomorrow’s call rather than a month of evenings, here is the guide at emergency length. Put something thick and soft under the board — a folded towel tonight, a mat when you can. Type the drill’s first lesson immediately: press to actuation, not to the desk, and let the spacebar be struck by a relaxed thumb rather than a jabbing one. Move the microphone closer to your mouth and further from the board, and enable whatever noise suppression your call software offers; the geometry of the microphone is a fix in itself. Mute between contributions, as a courtesy that costs nothing. Those four moves, none of them a purchase, routinely convert a board from a complaint into a non-issue for one important call — and they buy you the calm to work the real tiers afterwards, in order, with recordings, at the pace the problem actually deserves.
One emergency measure deserves its own sentence because it is so often forgotten: borrow silence. A spare membrane board, a laptop’s own keyboard angled toward you, even a colleague’s quieter desk for the length of one call — none of these fixes your board, but all of them fix the call, and confusing the two problems is how a manageable evening becomes a panic purchase. Solve the call with whatever is at hand. Solve the board with this guide, afterwards, in order.
Gear mentioned in this guide
The products below are examples referenced in this guide. They were verified through the Amazon Creators API product pool for this site; use them as concrete reference points for the features discussed, not as a ranked list.
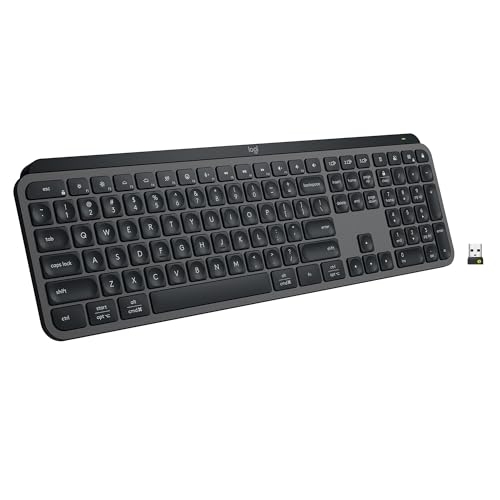
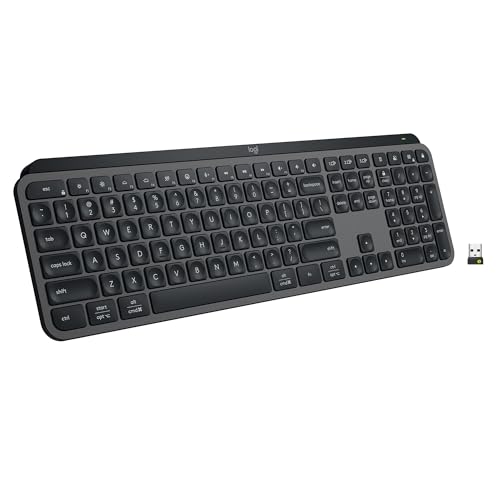
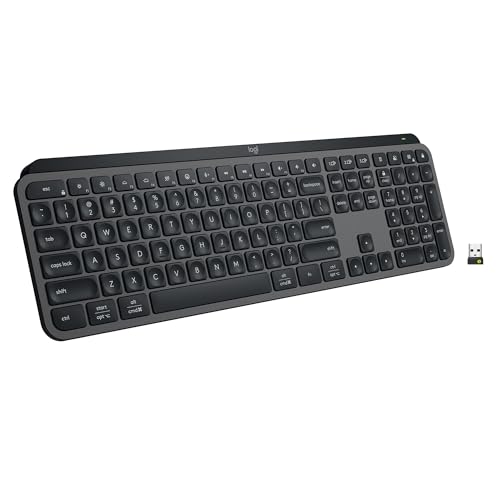
- Logitech MX Keys S Wireless Keyboard Low Profile Fluid Precise – Graphite — Check on Amazon
- CORSAIR K70 CORE RGB Mechanical Wired Gaming Keyboard – QWERTY NA – Black — Check on Amazon

Frequently asked questions
What is the single most effective quiet fix?
For most boards, a desk mat plus stabiliser lubrication — the mat kills desk amplification and the grease kills rattle, the two loudest non-switch sounds. If your switches are clicky, no fix outranks changing them, because the click is the design.
Do O-rings really help?
They soften bottom-out clack noticeably and are cheap and reversible, at the cost of a slightly softer, shorter-feeling press. They do nothing for click mechanisms, spring ping, or case echo, so match them to the noise you diagnosed.
Can foam inside the case void my warranty?
Opening a keyboard can affect warranty terms depending on the manufacturer. Check the policy first; many boards have user-accessible cases, but if the board is new and noisy by design, an exchange may serve you better than a mod.
Are silent switches worth it?
In shared spaces, emphatically yes — they remove the impact sounds at the source while keeping mechanical feel. The landing is slightly padded, which most users adapt to within days and many come to prefer.
Why does my spacebar sound worse than other keys?
The spacebar is large, hollow, struck hard, and stabilised by a wire bar — every noise factor at once. Stabiliser lubricant, a firmer strike technique, and sometimes a foam spacebar insert tame it; it is the most-fixable loud key on the board.
Should I just buy a membrane keyboard for quiet?
If near-silence is the top priority and typing feel is secondary, a membrane board is a legitimate, inexpensive answer. If you value mechanical feel, a silent-switch build gets you most of the quiet without giving the feel up.
Related Guides
Keep exploring with these guides and roundups from the same desk and audio cluster: