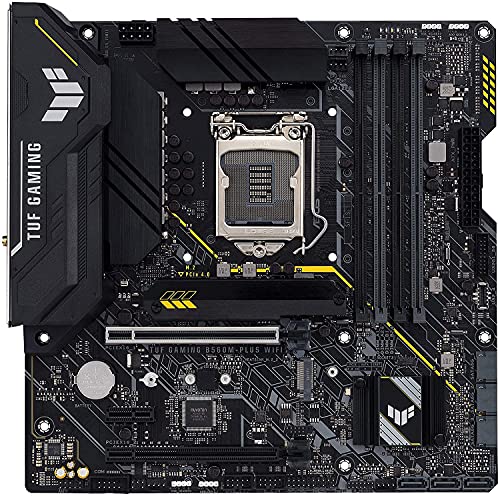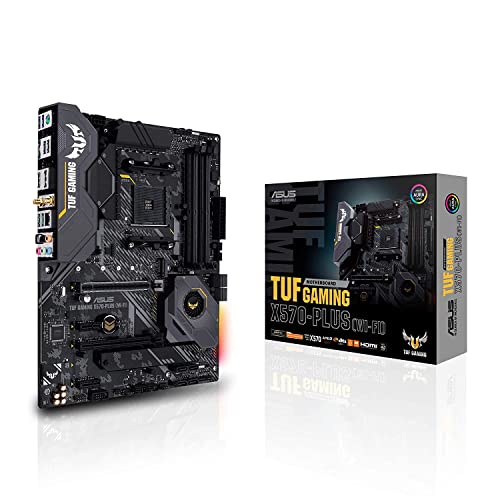
Learning how to choose a motherboard is really about learning what the board has to agree with: your processor, your memory, your case, and the way you actually use the PC. Get those four agreements right and almost any reputable board will serve you well. Get one of them wrong — a socket that does not match your CPU, memory the board cannot run, a board too large for the case — and the build stops before it starts. This guide walks through the decision in the order experienced builders make it, so by the end you can read any spec sheet and know in a minute whether a board belongs on your shortlist.
The short version is this: pick your CPU first, because the CPU dictates the socket and narrows the chipset choices. Then decide how much expansion and connectivity you honestly need, pick a form factor that fits your case and your plans, confirm the memory generation matches the sticks you own or intend to buy, and only then compare extras like Wi-Fi, audio, and rear-panel ports. Features you will never plug anything into are the easiest money to waste in a whole build, and features you need but skipped — a second M.2 slot, enough fan headers — are the most annoying to live without.
Disclosure: As an Amazon Associate, ilcastellomenu.com earns from qualifying purchases. Product links on this page may earn us a commission at no extra cost to you, and that support helps us keep testing and writing guides like this one.
Step 1: Start With the CPU, Because It Chooses the Socket
Every motherboard is built around one CPU socket, and a processor physically fits only the socket it was designed for. AMD’s recent desktop chips use the AM4 or AM5 sockets, while Intel’s recent generations use LGA1700 and its successors. A board and CPU from different socket families cannot be paired at all — there is no adapter and no workaround — so the very first line on any board’s spec sheet, the socket, is a pass-or-fail check against the processor you have chosen.
Even within one socket, support is not automatic across generations. A socket can live through several CPU generations, and an older board may need a BIOS update before it recognises a newer chip. Manufacturers publish a CPU support list for every model, naming each supported processor and the minimum BIOS version it requires. Checking your exact CPU against that list takes two minutes and prevents the classic dead-on-arrival build where everything is connected correctly but the board simply does not know the processor yet. If you are still deciding between processors, our roundup of Best Motherboards for Ryzen 5000 Series shows how the pairing logic works across a whole CPU family.
In this guide
Step 2: Pick a Chipset That Matches How You Will Use the PC
The chipset is the board’s traffic controller, and its tier decides things like how many high-speed ports and storage devices the board can support, whether CPU overclocking is allowed, and how many USB ports run at full speed. Entry chipsets cover everyday computing and gaming perfectly well. Mid-range chipsets add more storage and connectivity headroom. Flagship chipsets exist for overclockers, multi-GPU experiments, and builders who want every expansion option open. If the term itself is new to you, our explainer on What is a Motherboard Chipset breaks down what the chipset actually does all day.
A practical way to choose is to count what you will connect in the next three years: storage drives, USB devices, capture gear, extra fans. If the mid-tier chipset covers that count with a slot or two to spare, the flagship tier buys you nothing you will feel. Builders consistently overspend here because chipset marketing emphasises ceilings — maximum lanes, maximum ports — that a single-GPU gaming or office PC never approaches.
Step 3: Choose a Form Factor That Fits the Case and the Plan
ATX is the standard full-size board, with the most expansion slots and the roomiest layout. Micro ATX trims a few slots and usually costs less, while Mini-ITX squeezes a complete system onto a tiny square for small-form-factor builds, typically with a single expansion slot and two memory slots. The case decides the largest board it accepts, and the board decides how much you can add later, so these two parts should be chosen together rather than in isolation.
Bigger is not automatically better. A Micro ATX board in a mid-tower case leaves money for a faster graphics card, and most gaming PCs use exactly one expansion slot for the GPU and nothing else. Where size genuinely matters is cooling and cabling: very compact boards crowd headers and connectors together, which makes a first build fiddlier. We compare the two mainstream sizes directly in ATX vs Micro ATX Motherboard, and the full family gets its own dedicated explainer in this series.
Step 4: Confirm the Memory Generation and Capacity
Motherboards support exactly one memory generation — DDR4 or DDR5 — and the two are not interchangeable: the notch in the stick is in a different place, so the wrong generation will not even seat. This single decision ties your board, your memory kit, and often your CPU platform together for the life of the build, which is why we devoted a full comparison to DDR4 vs DDR5 Motherboard. If you are carrying memory over from an older PC, that kit effectively chooses the platform for you.
Beyond generation, check the slot count and the board’s maximum supported capacity. Four slots let you start with two sticks and add two more later; two-slot boards mean a future upgrade replaces the kit entirely. Also check the supported memory speeds on the manufacturer’s list. Boards can run memory faster than the base specification through profiles like XMP or EXPO, but the qualified-vendor list tells you which kits the maker has actually tested at those speeds.
How much memory should the board plan for?
For gaming and general use, a two-stick kit in the board’s first recommended slots is the sweet spot, leaving the door open on four-slot boards. Content creation, virtual machines, and heavy multitasking justify planning for the board’s higher capacity ceiling from the start, because replacing a full kit later costs more than buying the capacity once. Whatever you choose, run memory in matched pairs from a single kit — mixing individual sticks bought separately is a common source of instability that looks like a faulty board.
Step 5: Count the Connections You Actually Need
Work through a simple inventory before comparing boards. Storage: how many M.2 NVMe drives and SATA drives will you install now, and in two years? Expansion: a graphics card, and realistically anything else — a capture card, a sound card, extra networking? Cooling: how many case fans and, if you use one, a liquid-cooling pump header? Front panel: does your case have a USB-C port, and does the board have the matching internal header to make it work? That last one is a classic gotcha — a case port with no header to plug into stays dead forever.
Rear-panel I/O deserves the same honesty. Count your permanent USB residents — keyboard, mouse, headset dongle, external drive, printer — and make sure the board covers them without a hub, with the port speeds your fastest devices can use. Builders shopping for a home server or media box should weight port counts and low-power behaviour more heavily than gaming features when they compare boards.
Step 6: Decide on Wi-Fi, Audio, and Networking Before You Buy
Built-in Wi-Fi and Bluetooth cost a modest premium over the same board without them, and adding them later with an expansion card or USB adapter is clunkier and often slower. If the PC will live anywhere without an Ethernet run, buy the Wi-Fi version of the board. If it sits next to the router permanently, wired Ethernet is faster and the non-Wi-Fi board saves money. The same logic applies to upgraded onboard audio: fine for most headsets and speakers, while dedicated audio hardware remains the step up for serious recording work.
Wired networking is mostly settled — gigabit Ethernet is standard and 2.5-gigabit is common on mid-range boards — but check it if you move large files to a NAS or have internet service faster than gigabit. These small spec lines are cheap to verify now and expensive to retrofit later.
Step 7: Check Power Delivery If You Will Push the CPU
The voltage regulator modules, or VRMs, feed clean power to the processor. For a stock CPU doing everyday work, the power delivery on any reputable board is adequate. Where it starts to matter is sustained all-core workloads — rendering, compiling, long simulations — and overclocking, where weak VRMs throttle the CPU or run hot. You do not need to memorise phase counts; the practical check is that boards aimed at high-core-count chips and overclocking, like those in Best Motherboards for Overclocking, carry larger heatsinks over the power stages, and that is the visual cue to look for.
Be honest about your intentions here. Many buyers pay for flagship power delivery ‘just in case’ and never overclock, while the money could have gone to storage or a better cooler — and a good cooler matters more in daily use. Buy the VRM headroom when your workload or hobby genuinely demands it, not as insurance against a hypothetical.
Common Mistakes When Choosing a Motherboard
The most expensive mistake is the socket or memory-generation mismatch, because it is a total non-starter rather than a compromise. Second is buying by chipset tier instead of by the connections you counted: flagship boards impress on paper while missing the one header your case needs. Third is forgetting the physical build — a board so large it leaves no room to route cables, or a compact board whose connectors hide under a big graphics card. Fourth is ignoring the BIOS question on older stock: a board manufactured before your CPU launched may need an update first, so prefer models with a USB BIOS-flash feature that works without a supported CPU installed, or buy from a seller who updates boards before shipping.
Finally, do not let the board consume budget that belongs to parts you will feel every day. The motherboard enables performance; with rare exceptions it does not create it. A sensible mid-range board paired with a stronger GPU, more storage, or a quieter cooler produces a better PC than a flagship board surrounded by compromises.
How to Choose a Motherboard: A Quick Decision Checklist
Run through this list against any board you are considering, in order. Each item is a yes-or-no gate; a single no sends you back a step rather than into a return process.
- Socket on the spec sheet matches my CPU exactly, and my CPU appears on the board’s support list.
- Memory generation (DDR4 or DDR5) matches the kit I own or plan to buy.
- Form factor fits my case, with the slot count my expansion plans need.
- M.2 and SATA counts cover my drives now plus at least one future addition.
- The board has an internal header for every front-panel port on my case, including USB-C.
- Wi-Fi decision made deliberately: built in, or confirmed unnecessary.
- Rear USB count covers my permanent devices without a hub.
- If the board may need a BIOS update for my CPU, it offers CPU-less USB BIOS flashing.
Reading a Spec Sheet Without Fear: the Lines That Matter
A motherboard spec sheet runs to dozens of lines, but a buyer needs perhaps twelve of them. In order: socket; chipset; memory generation, slot count, and maximum capacity; form factor; M.2 slots with their sizes and PCIe generations; SATA ports; the rear-panel USB breakdown by speed; networking (Ethernet speed, Wi-Fi generation if fitted); audio codec tier if you care about onboard sound; internal headers, especially USB-C for the case front panel; fan and pump headers; and any BIOS-flash feature. Everything else on the sheet is either standard across boards or relevant to a niche you would already know you belong to.
Two reading habits protect you. First, distrust the marketing summary and read the detailed specifications tab — the summary says ‘USB 3.2’ while the detail reveals how many ports actually run at the fastest tier. Second, download the manual for any board you are close to buying and look at the board diagram: it shows where connectors physically sit, which is information no bullet list conveys. A board whose only internal USB header hides under where your graphics card will live is a board you want to discover on paper, not at the bench.
Finally, treat review coverage as a cross-check rather than a verdict source. A good review of your specific model will confirm or deny the spec sheet’s implications — VRM behaviour under load, BIOS maturity, quirks like a shared M.2 slot — and two independent reviews agreeing on a quirk is worth more than either alone.
Matching the Board to Three Common Builds
The esports gaming build: a mid-range processor, one fast graphics card, one NVMe drive, a headset. Almost any mainstream-chipset board in either ATX or Micro ATX serves this perfectly; spend the board budget line on the Wi-Fi variant if the desk lacks Ethernet, and stop there. The creator build: more cores, two or three NVMe drives for projects and scratch, many USB devices, possibly capture hardware. Here the chipset’s lane budget and the board’s port counts become real specifications — count them against the desk you actually have. The quiet home-office build: integrated graphics, one drive, absolute stability. Entry boards shine here; money saved on the board buys silence — a better case and fans — which this user will appreciate every single day.
Notice what none of these builds needed: the flagship chipset, the extreme power delivery, the fourth M.2 slot. Matching is the skill; the checklist earlier in this guide is how you practise it, and the worked examples here are the same thinking at three budgets. If your build does not resemble any of the three, decompose it into theirs — most real builds are a creator’s storage with a gamer’s graphics, or an office machine with one creator habit — and spec the board for the strictest of its parents.
When to Buy the Board in the Build Order
Buy the motherboard after the CPU and memory are decided but before the case is finalised, because the board’s form factor constrains the case and its headers must match the case’s front panel. In practice the parts arrive together; the ordering advice is about decisions, not deliveries. Decide CPU, then board and memory as a pair (the generation check binds them), then case against the board’s size, then storage and cooling against the board’s slots and headers. Following that decision order makes incompatibility structurally difficult rather than merely checked-for.
One timing trap deserves mention: platform transitions. When a new socket generation launches, early boards carry early BIOS versions and launch pricing, while the outgoing platform drops in price with mature firmware. Neither is automatically right — but knowing which side of a transition you are buying on is part of choosing well, and it is free to know.
Budget Allocation: What the Board Should Cost in a Balanced Build
A useful sanity check is proportion. In a balanced build, the motherboard typically claims a modest slice of the total — enough to buy the mainstream chipset tier from a reputable maker with the connections you counted, and not so much that the graphics card, processor, or storage visibly suffered to fund it. When a parts list shows a flagship board beside a mid-range GPU, the list is almost always improvable by moving money downhill into the parts that render frames. When it shows the cheapest board in the catalogue beneath a top-end processor, the opposite question applies: does this board’s power delivery and support list genuinely honour that CPU, and will its maker support it with BIOS updates for the platform’s life? Extremes in either direction are where builds go wrong; the middle of the board market is large, competitive, and good precisely because most builders live there.
There is one deliberate exception to the proportion rule: the long-platform build. If you are buying early in a socket’s life intending to upgrade the CPU once or twice on the same board, the board is a multi-build investment and earns a larger share — better power delivery, the connectivity ceiling you will grow into, the flash features that make future CPU swaps painless. The exception works because the board’s cost is amortised across builds; applied to a machine that will be replaced whole, it is just overspending with a story attached. Know which build you are making, and let the proportion follow.
Finally, hold a small reserve in the budget for the board’s entourage: the extra fan splitter, the USB header adapter, the longer SATA cable the layout demands. Every build discovers one of these; the builders who planned for the category shrug, and the builders who spent to the last unit on the board itself wait a week for a two-dollar part.

Gear for This Guide
The products below come from our verified listings pool and are mentioned because they genuinely fit this topic, not because they are the newest or the most expensive option.
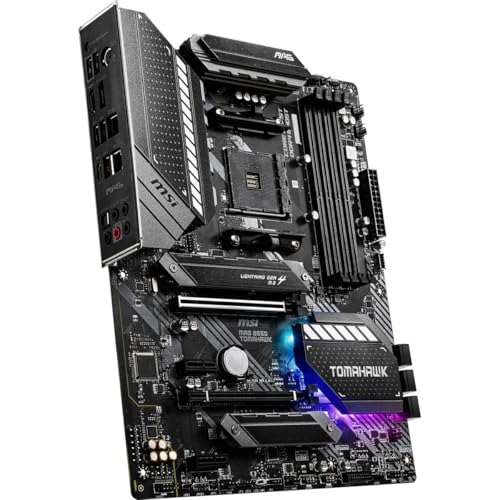
- MSI MAG B550 Tomahawk Gaming Motherboard — a full-size ATX example of the balanced mid-range pattern this guide recommends — enough expansion and storage headroom for most gaming and creator builds without flagship pricing logic. Check on Amazon
Look Past the Board: Firmware Support and the Manufacturer Behind It
Two boards can share a chipset, a socket, and nearly identical port counts, yet age very differently. The difference is firmware support. A motherboard is not finished when it ships; its BIOS receives updates that add support for newer processors on the same socket, fix memory compatibility quirks, patch security issues, and occasionally unlock features the hardware always had. When you choose a board, you are also choosing how seriously its manufacturer maintains that update stream, and for how long.
Practical research takes ten minutes. Open the support page for the exact model you are considering and look at its BIOS download history. A healthy pattern is a steady cadence of releases across the board’s first two or three years, including updates whose descriptions mention new CPU support and improved memory compatibility. A board whose last update is eighteen months old, on a socket that is still receiving new processors, is telling you something about its future. Also check the driver page: chipset, LAN, audio, and Wi-Fi drivers should be current for the operating system you plan to run, not stranded on an older release.
Related to firmware is a feature worth seeking out deliberately: a way to update the BIOS without a compatible CPU installed. Different brands give it different names, but the function is the same — you load the update onto a USB stick, plug it into a marked rear port, press a small button, and the board updates itself using standby power alone. This matters most when you pair a board manufactured early in a socket’s life with a processor released later. Without that feature, the board may not start with your CPU, and your only routes are borrowing an older processor or paying a shop to flash it. With it, the problem is a ten-minute inconvenience. If you are buying early in a platform’s life, treat CPU-less flashing as close to essential; late in a platform’s life, when boards ship with mature firmware, it is merely nice insurance.
Support quality also shows up in documentation. Download the manual before you buy — every reputable manufacturer posts it — and read the pages on memory slot population order, lane sharing, and header locations. A clear manual with a proper board diagram is a proxy for the whole ownership experience, because you will return to that document at build time, at upgrade time, and on the one stressful evening when the machine will not start. If the manual is vague about which M.2 slot shares bandwidth with which connector, expect the support forum experience to be vague too.
Internal Headers: The Connections You Only Miss When They Are Absent
Buyers obsess over the rear panel, which they can see in product photos, and neglect the internal headers, which they cannot. Yet it is the headers that decide whether your case’s front ports work, whether your fans are controllable, and whether a lighting accessory becomes a weekend project or a five-minute plug-in. Read the header list on the spec sheet as carefully as the rear I/O list.
Start with the front-panel USB headers. Modern cases commonly offer a USB-C port on the front, and that port is dead unless the board provides the matching internal header — a distinct connector from the rectangular header that serves front USB-A ports. Boards at lower tiers sometimes omit the USB-C header entirely, which is invisible in glamour photos and very visible the first time you plug a phone into a lifeless front port. Similarly, count the USB 2.0 internal headers if you plan to fit accessories that use them for control signals, such as some liquid coolers, fan controllers, and internal displays; these devices quietly consume headers that spec-sheet summaries rarely total up.
Fan and pump headers deserve the same arithmetic. Each header typically drives a small group of fans through a splitter, so the count on the board should exceed the count of fan groups you plan: case intake, case exhaust, CPU cooler, and possibly a dedicated pump header for liquid cooling, which is rated for higher current and often defaults to full speed. Also note where the headers sit. A fan header stranded behind the graphics card or at the board’s far corner turns cable routing into a knuckle-scraping exercise, and this is the sort of detail a manual’s board diagram reveals instantly.
Lighting headers split into two incompatible families — the older four-pin 12-volt RGB style and the newer three-pin 5-volt addressable style — and plugging one into the other is one of the few wiring mistakes that can genuinely damage hardware. If lighting matters to you, confirm the board carries the header type your fans and strips use, in the quantity you need. If lighting does not matter to you, the same paragraph still earns its keep: knowing the two standards exist explains half the confused forum threads you will ever read on the subject. Finally, small headers with outsized value include the TPM header on boards without a built-in module, the temperature sensor header some boards offer for tying fan curves to a probe, and the clear-CMOS jumper location — you will want it reachable, not buried under a two-slot graphics card.
Lane Sharing, Worked Through One Realistic Example
The compatibility guide in this series covers lane sharing as a concept; here is what it feels like as a buying decision. Imagine a mainstream ATX board with three M.2 slots, six SATA ports, and a second full-length PCIe slot you intend to use for a capture card. The headline numbers suggest you can fill everything at once. The manual’s lane-sharing table — the page most buyers never open — tells the real story: the third M.2 slot borrows its bandwidth from the second PCIe slot, so filling that slot disables your capture card’s home; two of the SATA ports switch off when the second M.2 slot runs in NVMe mode; and the top M.2 slot takes its lanes directly from the CPU while the others route through the chipset, sharing one upstream connection among themselves.
None of this makes the board bad. It makes the board a set of trade-offs, and trade-offs are only a problem when they ambush you after purchase. The buying habit that protects you is simple: before ordering, list every device you will install in the first year — drives, cards, capture gear — and trace each one through the manual’s sharing table. Ten minutes with that table converts the spec sheet’s optimistic totals into your build’s actual capacity. If the trace shows a collision, you have three honest options: drop a device, rearrange which slots the devices occupy (sometimes a different combination avoids the shared group entirely), or step up to a board whose chipset provides more chipset-side lanes. What you should not do is assume the collision will not matter; a disabled SATA port announces itself at the worst possible moment, usually while you are installing the drive you bought to solve a storage shortage.
Lane literacy also reframes the chipset tiers from Step 2 of this guide. The flagship chipset’s real product is not speed — your graphics card and primary drive run on CPU lanes on both tiers — it is lane abundance on the chipset side, which is what lets a workstation board host many drives and cards simultaneously without the sharing table becoming a logic puzzle. Buyers with one GPU and two drives will never touch that abundance, which is precisely why the mid-tier board serves them identically in practice.
Choosing for a Second-Hand Purchase: What Changes
Everything above assumes a new board with a warranty. The used market changes the weighting, and since motherboards are among the most commonly resold components, the differences are worth spelling out. A used board’s value depends heavily on its entourage: the I/O shield, Wi-Fi antennas, M.2 screws and standoffs, and SATA cables that shipped in the box are small, cheap, and disproportionately annoying to replace. A listing that shows the original box with its accessories is worth more than a bare board at the same asking figure, and a seller who cannot confirm the accessories should be priced as if they are missing.
Inspect, or ask for photographs of, three areas. First, the CPU socket: on Intel-style sockets the pins live in the socket itself and a single bent pin can disable a memory channel or a PCIe lane, so a clear close-up photograph is a reasonable request; on AMD-style sockets the pins are on the processor, and the board-side check is instead for debris or damage in the socket holes. Second, the board’s edges and corners, where cracks from careless case fitting and overtightened screws begin. Third, the area around the primary PCIe slot, which carries the mechanical stress of heavy graphics cards for years.
Firmware diligence matters more, not less, on a used board. Confirm the model and hardware revision from the listing, then verify on the manufacturer’s page that the revision supports your CPU and check which BIOS version that support requires. Ask the seller what processor they ran; a board that spent its life running your exact CPU family has, in effect, already passed the compatibility test you care about. Finally, weigh the platform’s remaining life honestly: a used board on a mature socket with a strong upgrade path to a higher-tier used CPU can be the smartest money in a build, while a used board on a dead-end socket is only a bargain if the price reflects that its next upgrade is a full platform change. If you are comparing candidates, the shortlist method in our best motherboards for gaming roundup shows how the same criteria apply when boards are ranked side by side.
Three More Builds, Matched Honestly
The main guide matched boards to an esports build, a creator build, and a general family PC. Three further scenarios round out the picture, because each one inverts a default assumption.
The home server that never sleeps
A file server, media server, or home-lab box runs around the clock at low load, and its board priorities flip accordingly. Expansion slot count matters less than SATA port count and the chipset’s support for many drives; a second Ethernet port or a fast one matters more than gaming audio; and features like Wake-on-LAN and the ability to power back on automatically after an outage move from trivia to requirements. Power efficiency at idle — a property of the whole platform, influenced by the board’s firmware options — will shape the machine’s running cost more than any benchmark. Buyers assembling this kind of machine often do better with a board marketed for workstations or even a previous-generation mainstream board than with a current gaming model.
The living-room PC that must be quiet and invisible
Here the form factor decision dominates everything else, and it is driven by furniture, not performance. A Mini-ITX board in a compact case fits the space, but the constraints cascade: two memory slots mean buying the capacity you will finish with, not the capacity you will start with; a single PCIe slot means the graphics card is the only card the machine will ever hold; and fan-header count matters acutely because a small case’s cooling is a carefully balanced system of few fans. The board features that earn their keep are built-in Wi-Fi and Bluetooth — a living room rarely offers a tidy Ethernet run, and wireless controllers and keyboards are the machine’s main input devices.
The hand-me-down build for a younger sibling or a parent
This build’s defining feature is that its maintainer is you, remotely, forever. Choose the board that minimises future support calls: a mainstream chipset with a long update history, CPU-less BIOS flashing so a future processor upgrade cannot strand the machine, clear diagnostic LEDs that a non-technical owner can photograph and send to you, and front-panel headers that match the case so nothing on the front is mysteriously dead. Raw capability barely matters; legibility does. It is the one scenario where paying slightly more for the board with the better manual and the saner layout is unambiguously correct.
Power Delivery Terminology, Decoded Honestly
Step 7 introduced the VRMs — the voltage regulators that convert the power supply’s output into the precise, rapidly adjustable voltage the processor consumes. Around that simple job has grown the most inflated vocabulary in motherboard marketing, and since boards at every tier advertise phase counts prominently, a buyer benefits from knowing what those numbers do and do not promise.
A phase is one channel of power delivery: a set of components that takes turns supplying current, so that several phases interleaved behave like a smoother, cooler-running supply than any one could alone. More genuine phases generally means each works less hard, runs cooler, and delivers cleaner voltage under heavy sustained load — the conditions created by a high-core-count processor rendering, compiling, or running scientific work for hours. This is real engineering, and on boards intended for flagship processors it matters.
The inflation enters through counting methods. Some advertised totals sum every regulator on the board, including those feeding memory or integrated graphics, presenting the combined figure as if it all served the CPU. Others use components called doublers that split one control signal between two channels — a legitimate design with real benefits, but not identical to the same number of independently controlled phases. And some designs simply parallel two channels per phase, which improves current capacity without changing the control structure at all. Three boards can therefore all claim the same headline number with three meaningfully different implementations underneath.
The practical reading method is to ignore the headline and look for corroboration. Heatsinks over the regulator area — substantial, finned metal rather than a decorative cover — indicate a design meant to shed real heat. Independent reviews that measure regulator temperatures under a sustained flagship-CPU load are worth more than any specification. And context disciplines everything: a mid-range processor at stock settings draws a fraction of what these designs can supply, so for the majority of builds the honest conclusion is that any reputable board’s power delivery is sufficient, and the phase-count arms race is a flagship-CPU concern. Spend your scrutiny there only if your processor and workload genuinely live at that end of the range; otherwise, let headers, slots, and firmware support — the things you will actually touch — decide between boards.
Frequently Asked Questions
Should I choose the motherboard or the CPU first?
Choose the CPU first. The processor decides the socket, and the socket plus your budget decides which boards are even candidates. Choosing a board first and then discovering your preferred CPU needs a different socket is the most common planning mistake new builders make.
Does a more expensive motherboard make my PC faster?
Not by itself, in any way you would notice in games or everyday apps. A better board can enable features — overclocking support, faster storage, more connectivity — and can sustain boost behaviour on high-end CPUs under long workloads, but frame rates and application speed come from the CPU, GPU, memory, and storage you plug into it.
How long should a motherboard last?
Physically, a good board commonly outlives the build around it. Practically, its useful life is set by its socket: when you eventually want a CPU from a newer socket family, the board is replaced at the same time. Buying a socket early in its life, with several CPU generations ahead of it, stretches that lifespan considerably.
Do I need built-in Wi-Fi on the motherboard?
Only if the PC will not have a wired Ethernet connection, or if you rely on Bluetooth peripherals and want the tidiest setup. Built-in Wi-Fi is the cleanest way to get both, and the price difference over the same board without it is usually smaller than buying a good add-in card later.
What is the difference between the chipset and the socket?
The socket is the physical connector the CPU plugs into — it decides which processors physically fit. The chipset is the board’s supporting logic that manages ports, storage, and expansion, and its tier decides which features the board offers. A given socket usually pairs with several chipsets at different feature levels.
Can I reuse my old motherboard with a new CPU?
Only if the new CPU uses the same socket and appears on the board’s CPU support list, possibly after a BIOS update. Check that list on the manufacturer’s page for your exact board model before buying the processor, not after.
How many fan headers do I actually need?
Count fan groups, not fans: a group of two or three case fans on a splitter counts as one header. Most builds need three to four headers in total — CPU cooler, front intake group, rear/top exhaust group, and optionally a pump or a second intake group. Fewer than three headers on a board will force compromises or a separate controller; more than five is convenience, not necessity.
Does the brand of motherboard matter?
Less than the model does. Every major manufacturer ships excellent boards and mediocre ones in the same generation, sometimes on the same chipset. Brand differences show up mainly in BIOS layout, support-page quality, and warranty handling. Judge the specific model’s manual, update history, and header layout, and treat brand loyalty as a tiebreaker rather than a criterion.
What is BIOS flashback, and should I require it?
It is the ability to update the BIOS from a USB stick without a working CPU or memory installed, using a dedicated rear port and button. Require it when you are pairing a board with a processor released after the board was manufactured, or when you cannot borrow an older CPU. On a mature platform where boards ship with current firmware, it is useful insurance rather than a requirement.
Should I pay extra for PCIe 5.0 support?
Only with a specific device in mind. Current graphics cards do not need it, and the storage that uses it serves workloads — sustained multi-gigabyte transfers, heavy scratch-disk work — that most builds never run. Treat PCIe 5.0 slots as a longevity bonus on a board you are buying for other reasons, not as a reason to climb a price tier by themselves.
Is it worth buying a board with more memory slots than I will fill?
Four slots earn their place if your workload grows — creators and virtual-machine users often double their memory within a board’s life, and empty slots make that a five-minute upgrade. For a gaming or general build whose memory needs are stable, a two-slot board with the right capacity from day one is equally sound; the slots you never fill are not a loss.