Learning how to check compatibility of a motherboard before you buy is the cheapest skill in PC building: every check in this guide is free, takes minutes, and prevents the returns, dead builds, and quiet performance losses that come from parts that almost fit. Compatibility is not one question but a stack of them — socket, chipset support list, memory generation, physical size, storage interfaces, power connectors — and a build only works when every layer agrees. This guide walks the stack in order, for the two situations builders actually face: picking a board for parts you have chosen, and checking a board against parts you already own.
The golden rule underneath everything: trust the manufacturer’s support lists over any retailer’s ‘compatible with’ badge. The board maker’s CPU support list and memory qualification list are tested, model-specific documents. A store’s compatibility filter is a database guess. When the two disagree, the support list wins, every time.
Disclosure: As an Amazon Associate, ilcastellomenu.com earns from qualifying purchases. Product links on this page may earn us a commission at no extra cost to you, and that support helps us keep testing and writing guides like this one.
Check 1: Socket and the CPU Support List
The socket is the first gate: your processor must physically match the board’s socket family — AM4, AM5, LGA1700, and so on. But passing the socket gate is not enough, because a socket outlives individual CPU generations. The decisive document is the board’s CPU support list on the manufacturer’s site, which names every supported processor and the minimum BIOS version each one needs. Find your exact CPU model on that list. If it is absent, the pairing does not work, whatever the socket suggests. If it is present but needs a BIOS newer than the board may ship with, plan for an update — ideally choose a board with a CPU-less flash feature so the update is possible without a borrowed processor.
Worked example of the trap: a shopper pairs a late-model Ryzen chip with an early AM4 board because ‘both are AM4’. The board’s support list ends two generations earlier. The parts fit together perfectly, power on, and show nothing — a build that looks broken and is actually just unsupported. The reverse error exists too: assuming an older board cannot run a newer chip when a BIOS update added it. Only the list settles it. For pairings already worked out by platform, browsing Best Motherboards for Ryzen 7 5800x shows what a confirmed-compatible shortlist looks like.
In this guide
Check 2: Memory Generation, Slots, and the QVL
Memory compatibility has three layers. Generation: the board takes DDR4 or DDR5, never both, and the stick physically will not seat in the wrong generation’s slot. Configuration: check slot count against your plan, and whether a future upgrade means adding sticks or replacing them. Speed: the board’s qualified vendor list (QVL) names memory kits tested to run at their rated speed on that board. A kit not on the QVL will usually still work at standard speeds, but if you are buying fast memory specifically for its rated profile speed, the QVL is your evidence it will get there.
Capacity ceilings matter for workstations: each board lists a maximum total memory, and populating all four slots at high speed is harder for the memory controller than two slots — a real consideration for stability-focused builds. If reusing an existing kit is the plan, the generation check alone may decide your whole platform, a fork we explore in DDR4 vs DDR5 Motherboard.
Check 3: Physical Fit — Board Size, Case, and Cooler
Form factor compatibility runs both directions: the case must accept the board’s size, and the board’s layout must accept your other parts. A case lists the largest board it takes; fitting a smaller board is always fine, fitting a larger one is impossible. Then check the cooler: large air coolers overhang memory slots and the top expansion slot on some boards, so cooler makers publish height and clearance figures, and board makers publish keep-out dimensions. Check the graphics card’s length against the case, and on compact boards, whether a thick card will cover headers or SATA ports you need.
This is also where small-form-factor builds earn their reputation: on Mini-ITX, every millimetre is negotiated. If your build leans compact, Motherboard Form Factors Explained lays out exactly what each size gives up, and our head-to-head comparison of the two settles the mainstream size question. And remember the invisible fit check — the case’s front-panel USB-C port needs a matching header on the board, or it will never work.
Check 4: Storage Interfaces and Lane Sharing
Count your drives against the board’s M.2 slots and SATA ports, then read the manual’s fine print about lane sharing: on many boards, populating a particular M.2 slot disables one or two SATA ports, or reduces the graphics slot’s lane count, because the chipset has a fixed pool of lanes to divide. This is not a defect — it is arithmetic — but it ambushes builders who add a third drive and lose a fourth. The manual’s block diagram and storage notes state exactly which combinations share, so check your full drive plan against it, not just today’s drives.
Also confirm the M.2 slots’ supported lengths and keying match your drives, and whether each slot runs at the PCIe generation your drive expects. A fast drive in a slower slot still works — PCIe is backward compatible — it simply runs at the slower speed, which matters if the drive’s speed was the point of buying it.
Check 5: Power Supply Connectors and Capacity
Compatibility includes the power supply you already own. Check it provides the board’s CPU power connector — most modern boards want an 8-pin, some add a second for high-end chips — and that older supplies are not missing connectors the board requires. Then sanity-check total capacity against the whole system, graphics card included: the board itself draws little, but it is the distribution point for everything else. A supply that was adequate for an old build may lack both the connectors and the headroom for a new platform plus a modern GPU.
While you are on power, note the board’s fan and pump headers against your cooling plan. A board short on headers means splitters or a hub; knowing that before the build beats discovering it with the cooler mounted. Cooler choices deserve the same published-clearance check against the specific board you pick.
Check 6: Operating System and Feature Support
Modern Windows versions expect certain firmware features — TPM 2.0 (usually provided by the CPU as firmware TPM) and Secure Boot — and boards from the last several years provide both, sometimes needing a BIOS switch enabled. If you plan to install Windows 11 on an older platform, verify the board’s support page lists Windows 11 drivers and that firmware TPM exists for your CPU. Linux builders should check the board’s network and audio chips against their distribution’s support, since the newest controller chips occasionally lag in driver support.
Feature compatibility is the last layer: if your plan needs Thunderbolt, a specific number of USB ports at a specific speed, or ECC memory for a home server, those are per-model facts to confirm on the spec sheet, never assumptions from the chipset tier. Server-flavoured builds are a good example — the boards in Best Motherboards for NAS were shortlisted on exactly these per-model details.
How to Check Compatibility of a Motherboard in Five Minutes
Here is the whole method compressed, the way to run it on any board-and-parts list before money moves:
- Find the CPU on the board’s official CPU support list; note the minimum BIOS version.
- Confirm memory generation matches your kit, and find the kit (or its speed and timings twin) on the QVL.
- Confirm the case accepts the board’s form factor, and the cooler clears the board’s layout.
- Count M.2 and SATA against your drives, then read the lane-sharing notes for your exact combination.
- Confirm your power supply has the board’s CPU power connector and capacity for the whole build.
- Confirm front-panel headers match your case, and OS/driver support matches your plans.
If a check fails
A failed check is information, not disaster — it is far better found now than at the build bench. Usually the fix is a sibling model: the same board with a different chipset tier, the Wi-Fi variant, the larger form factor. This is why you check before buying, and why How to Choose a Motherboard treats these gates as the selection process itself.
The Compatibility Checks People Forget
Beyond the headline gates sit the checks that ambush experienced builders. Front-panel audio and USB headers have quietly changed across generations; a case from an older build may carry connectors your new board arranges differently. The CPU cooler’s mounting kit is platform-specific — a cooler bought for one socket may need a different bracket for another, and ‘the cooler is compatible’ means the bracket exists, sometimes in a separate box you must request. Graphics-card thickness matters on compact boards, where a three-slot card can cover the only slot or header you needed. And the power supply’s age matters: very old supplies may lack the low-load behaviour modern platforms expect at idle, producing sleep and wake strangeness that masquerades as board faults.
None of these appear on a retailer’s compatibility badge. All of them appear in manuals — the board’s, the case’s, the cooler’s — which is why this guide keeps returning to primary documents. Compatibility is not a vibe; it is a paper trail.
Checking Compatibility When Upgrading Only the Motherboard
The board-only upgrade is the strictest compatibility exercise, because everything else stays: your CPU must be on the new board’s support list, your memory generation must match its slots, your cooler bracket must fit its socket, your case must accept its form factor, and your power supply must offer its connectors. Miss one and the ‘simple board swap’ becomes a platform rebuild at platform prices. Work the six checks in this guide against the candidate board with your existing parts named explicitly — not ‘DDR4’ but your exact kit, not ‘my CPU’ but its exact model — because support lists are written in exact models.
Also plan the software side of a board swap: a new board presents new hardware identities to the operating system, which usually adapts, but driver preparation and, on Windows, licence reactivation are real possibilities to be unsurprised by. Back up before the swap, as with any surgery.
Using Compatibility Tools Without Being Used by Them
Online part-picker tools are genuinely useful as a first pass: they catch socket clashes, generation mismatches, and wattage absurdities quickly, and they total a build’s price honestly. Their limits are equally real: they cannot see physical clearance inside your specific case, they lag BIOS support-list updates, and they know nothing of lane-sharing fine print. The professional workflow uses both layers — the tool for speed, the manufacturer’s documents for truth — and treats any disagreement between them as a question to resolve in the documents’ favour before money moves.
A final habit that costs nothing: search for your exact board model plus your exact CPU model together. Builders document pairings obsessively; if a combination has a known quirk — a BIOS version requirement, a memory-training foible — someone has written it down. Five minutes of that reading is the cheapest compatibility check in this entire guide.
Compatibility Across a Whole Upgrade Path
Single-build compatibility is a snapshot; experienced builders also check the film. A board bought today will meet future parts: a faster memory kit, a larger drive, a next processor within the same socket. Some of those future checks can be run now. Does the board’s support list already cover the processor you might upgrade to, or would it depend on BIOS updates the maker is still releasing — and does the maker’s history suggest they will keep coming? Does the memory ceiling leave room for the capacity you might want, in the slot configuration that keeps speeds high? Do the lane-sharing notes leave a workable home for the second NVMe drive you can already imagine? None of this argues for buying the flagship; it argues for reading the same documents with a longer lens, so the board you choose is compatible not only with the build on your desk but with the two builds it will become.
The reverse discipline applies to the parts you will carry forward. Your case, power supply, cooler, and storage are the board’s future colleagues; a board chosen with their limits in mind — the case’s size ceiling, the supply’s connectors, the cooler’s bracket ecosystem — keeps the whole fleet compatible across the next swap. Compatibility, practised at this level, stops being a pre-purchase checklist and becomes the quiet architecture of a machine that upgrades gracefully for a decade.
Three Compatibility Autopsies: What Went Wrong and When It Was Knowable
Case one: the processor that fit but would not start. A builder paired a late-generation chip with an early board on the same socket, assembled carefully, and got fans with no display. The support list, checked after the fact, showed the chip required a BIOS the board’s stock predated — knowable in two minutes before purchase, fixable only because the board happened to offer CPU-less flashing. Lesson: the socket is a shape, not a promise; the list is the promise. Case two: the memory that ran at half its story. A fast kit, bought for its headline speed, installed in a board whose qualified list topped out below it; the system ran, quietly, at base speed for a year before the owner noticed. Nothing was incompatible in the fit sense — the incompatibility was between expectation and evidence, and the QVL had contained the truth all along. Lesson: compatibility includes performance promises, not just physical fit.
Case three: the drive that evicted another drive. A third NVMe SSD went into a board whose lane-sharing notes — page thirty-something of the manual — stated that its slot shared lanes with two SATA ports in use by the owner’s archive drives, which vanished from the system like a haunting. The fix was a different slot and an apology to the drives. Lesson: the fine print is not fine; it is the document. All three builders were competent. All three faults were documented before purchase. That is the entire argument of this guide, told in the only form that sticks: other people’s afternoons.
Keep the autopsies in mind as a reading posture. Every document this guide sends you to — support list, QVL, manual notes — was written because some manufacturer watched a thousand builders hit the same wall. Reading them is not pedantry; it is inheriting experience you do not have to buy.
A Note on Regional and Revision Quirks
Two final wrinkles reward the careful. Board revisions: manufacturers occasionally revise a model mid-life — same name, small changes underneath — and support documents are kept per revision, with the revision printed on the board and its box. When a support list or manual seems to contradict your board, check that you are reading your revision’s documents before concluding anything; a remarkable number of ‘the list is wrong’ stories end at a revision suffix. Regional variants exist too, most visibly in bundled Wi-Fi regulatory configurations, and they share support lists in most respects but not all. Neither wrinkle is common enough to fear or rare enough to ignore; both dissolve the moment you work from the exact model-and-revision string, which is, fittingly, the first check this guide taught and the note it ends on.
One Last Habit: the Screenshot Folder
Here is a closing practice borrowed from builders who never seem to have compatibility disasters: for every build, keep a folder — screenshots or PDFs — of the exact support-list page showing your processor’s line, the QVL page showing your memory kit, the manual’s lane-sharing notes, and the board’s layout diagram. Save them on the day you order, named by board model. The folder takes four minutes to make and pays out for the machine’s whole life: at the first upgrade, the first troubleshooting session, the first warranty question, the documents are already gathered and known to be the right revision’s. Compatibility checking, done this way, stops being an event and becomes a record — and records, unlike memories of product pages, do not quietly update themselves into different facts.
It is a fitting place to end, because the whole method of this guide is really a single idea wearing six checks: replace assumptions with documents while the replacing is free. Do that, and the motherboard — the part everything else must agree with — becomes the most predictable purchase in the build instead of the riskiest.

Gear for This Guide
The products below come from our verified listings pool and are mentioned because they genuinely fit this topic, not because they are the newest or the most expensive option.
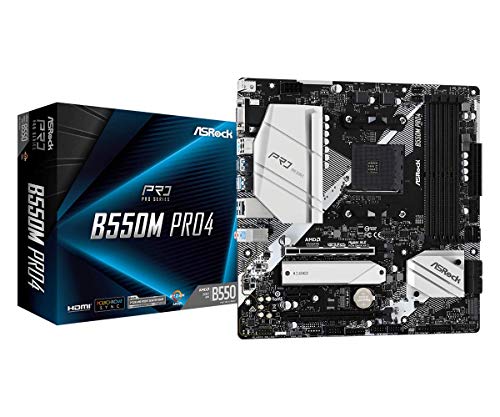
- ASRock B550M Pro4 Micro ATX Motherboard, AMD AM4 Ryzen 3000-5000, DDR4 4733+ — a Micro ATX example whose published support lists make the checks in this guide easy to practise: AM4 socket, DDR4 slots, and dual M.2 on a compact board. Check on Amazon
The Graphics Card Checks That Appear on Nobody’s List
The six checks in this guide treat the graphics card lightly, because electrically it is an easy guest: any modern board’s primary slot accepts any modern card. Physically, though, the graphics card is the largest, heaviest, most space-hungry component in the build, and its compatibility failures are mechanical. Check them explicitly. First, length against the case: measure from the rear slot brackets to the first obstruction — a front radiator, a drive cage, a cable grommet wall — and compare against the card manufacturer’s stated length, remembering that power connectors on the card’s end, where fitted, need their own clearance beyond the card’s body.
Second, thickness against the board’s layout. Cards are described in slots — two, two and a half, three — and a thick card covers the slots beneath it entirely. On a board whose second slot you intended for a capture card, a network card, or a sound card, a three-slot graphics card silently deletes that plan. Relatedly, check what else lives in the shadow zone: M.2 slots under the graphics card are normal and fine, but a front-panel header or fan header buried under a long card becomes a connector you plug in once, before the card goes in, and never comfortably reach again. Third, slot speed and lane arrangement: confirm the primary slot runs at full width from the CPU, and if you are among the few planning two cards or a card plus a high-bandwidth expansion device, read how the board divides lanes when multiple slots are populated — some boards split the primary slot’s lanes in half to feed a second slot, which is a fair trade only when you know you are making it.
Finally, the support question: very long, heavy cards benefit from a support bracket or stand, and some cases and boards accommodate them better than others. None of this appears in any compatibility database, because none of it is about the board and card agreeing electrically. It is about the build agreeing geometrically — and geometry, checked with a tape measure against two spec sheets, is the most reliably predictable compatibility of all.
Cooler Compatibility, Taken Apart Properly
Check 3 of this guide asks whether the cooler clears the board’s layout. That single line conceals four separate checks, each with its own failure story. The first is mounting: the cooler must support your socket, and “support” is a hardware fact, not a hope. Coolers ship with brackets for the sockets current at their manufacture; a cooler carried forward from a previous build may predate your new socket entirely. Manufacturers commonly sell or provide the needed mounting kit separately, but the time to discover that is while ordering, not at the build bench with the processor already seated. Check the cooler maker’s page for your exact socket, and order the kit in the same breath as the board.
The second check is the backplate and the case. Many coolers bolt through the board to a plate behind it, and the case needs a cutout in the motherboard tray large enough to fit that plate with the board installed — or you will be removing the board to change coolers forever after. The third check is clearance in two directions at once: tall memory sticks collide with wide tower coolers that overhang the slots, and tall VRM heatsinks beside the socket collide with coolers from the other direction. Cooler makers publish clearance diagrams with millimetre figures; memory makers publish stick heights; the board’s manual gives the socket’s surroundings. Three documents, five minutes, one avoided return. The fourth check applies to liquid cooling: radiator thickness plus fan thickness against the case’s top or front mounting space, and the pump’s power connector against the board’s headers — most boards provide a dedicated pump header rated for the higher current, and confirming it exists is a compatibility check, not a luxury.
Notice the pattern: cooler compatibility is a four-way agreement between cooler, socket, board layout, and case, which is why it generates a disproportionate share of build-day surprises. It is also entirely checkable in advance, from published dimensions, without owning any of the parts. If you are speccing a compact build, pair this section with our motherboard form factors explained guide, where the same millimetre discipline is applied to whole boards and cases.
Which BIOS Will a Boxed Board Actually Ship With?
Check 1 ends with a minimum BIOS version, and a careful reader asks the obvious follow-up: how can you know what version is inside a sealed box? You often can, and the methods are worth knowing because this single unknown causes more failed first boots than any other compatibility gap. Start with the box itself: many manufacturers print a sticker stating the BIOS version or, more usefully, a declaration that the board is ready for a named processor generation. Retailers photograph these stickers, and listing images that show them are worth more than the listing’s compatibility badge. Next, the serial number: on many brands it encodes the manufacture date, and a board made well after your processor’s launch almost certainly shipped with supporting firmware, while old stock made before it almost certainly did not. Manufacturer support forums and documentation explain each brand’s date encoding.
Then use the human channels. Ask the retailer directly — reputable sellers check warehouse stock and will often confirm the sticker or even update the board before dispatch as a service. Read recent buyer reviews and forum posts for your exact model, sorted by date: a run of “worked with my new CPU out of the box” reports from the last few months is real evidence about current stock, while identical reports from two years ago describe a warehouse that no longer exists. And hold the insurance policy in reserve: a board with CPU-less BIOS flashing, discussed in our guide to choosing a motherboard, converts this entire unknown into a ten-minute procedure. When the BIOS version genuinely cannot be verified in advance, that feature is the difference between a risk and a non-issue — weight it accordingly while the board is still a line in a shopping cart.
Beyond the Box: Operating Systems, Peripherals, and Legacy Needs
Compatibility checking usually stops at the components inside the case, but a board also has to agree with everything outside it. Operating system support is the broadest layer. Windows requirements around TPM and Secure Boot are covered in Check 6; the equivalent diligence for Linux is checking the board’s specific chips — the Wi-Fi and Bluetooth module, the Ethernet controller, the audio codec — against the kernel’s support, because Linux compatibility lives at the level of individual controllers, not board models. A board whose wireless module is a model the current kernel supports only through out-of-tree drivers is a board that will break its own Wi-Fi on some future update; five minutes on a hardware database prevents years of that. The same chip-level check serves anyone running a less common operating system or a hypervisor for a home lab, where passthrough behaviour and IOMMU grouping — documented by communities for popular boards — decide what the machine can do.
Peripherals deserve a pass of their own. Count your USB devices not just by plug but by type: a board rich in USB-A but offering a single USB-C may mismatch a desk that has gone the other way. Legacy needs are the classic trap in this layer — a true parallel or serial port for workshop equipment, a PS/2 connector for a beloved old keyboard or for hardware that expects one, a PCI slot (not PCIe) for a specialised card from a previous decade. None of these are mainstream anymore, all of them still exist in the world, and each is a board-selection constraint that no amount of adapters fully fakes. If your work involves older instruments, industrial controllers, or point-of-sale hardware, state the legacy requirement first and let it filter the board list, because it will eliminate most of it instantly and save you reading the rest.
Audio and displays close the loop. A board’s rear audio jacks assume a speaker arrangement; a surround setup needs the full jack complement or an optical output, and a board with a stripped-down three-jack panel will not grow more. Display outputs on the board matter only with a processor that has integrated graphics — but in that configuration they are the whole story, and their count, type, and maximum resolution decide how many monitors the machine can drive without a graphics card, a common requirement in office and trading setups that is cheap to verify and miserable to discover late.
A Line-by-Line Audit: One Complete Parts List, Checked in Order
To see the method assembled, walk a realistic list through it. The build: a current-generation six-core processor, a mainstream-chipset ATX board, a 32-gigabyte two-stick DDR5 kit, one NVMe drive, a two-and-a-half-slot graphics card, a tower air cooler carried over from a previous machine, and a mid-tower case the builder already owns. Socket and support list: the processor appears on the board’s list from the second BIOS version onward; the retailer’s listing photo shows a current-generation-ready sticker, so the pairing passes, with the CPU-less flash feature noted as backup. Memory: generation matches; the kit itself is not on the QVL, but a kit with identical speed, timings, and chip configuration from the same maker is, so the risk is assessed as low and accepted knowingly — the distinction between “checked and accepted” and “never checked” being the entire point of the exercise.
Physical fit: the case accepts ATX; the graphics card’s length clears the front of the case with room for its power cables; at two and a half slots it covers the board’s third slot, which the builder confirms holds nothing in the plan. Cooler: here the audit earns its fee — the carried-over cooler predates the socket, and its maker lists a mounting kit for it, which goes on the order; its published clearance diagram clears the chosen memory’s height by a few millimetres. Storage: the single NVMe drive takes the primary slot, and the lane-sharing note confirms nothing else in the plan is affected. Power: the existing supply has the board’s required CPU power connector and comfortable capacity headroom. Operating system and features: firmware TPM present, Wi-Fi module supported by the builder’s Linux installation, rear audio matches the speaker setup. Total elapsed time for the audit: roughly twenty minutes, one mounting kit added to the order, zero surprises scheduled for build day. That is what compatibility checking is for — not anxiety, but a build that behaves like a formality.
Checking Compatibility When the Parts Arrive Months Apart
Most compatibility advice assumes a single shopping basket. Real builds are often assembled over months — a processor bought in a sale, a board later, memory when funds allow — and staggered buying changes what the checks must accomplish. The risk is not that parts disagree; it is that by the time the last part arrives and the disagreement surfaces, the first part’s return window has closed. Manage that risk deliberately. Buy the components that must agree most intimately — board, processor, and memory — as close together as you can, and test them as a bench combination the moment all three are in hand, even if the case and graphics card are still weeks away. A minimum-parts bench test on the board’s box, as described in our motherboard installation guide, converts three separate purchases into one verified platform while every receipt is still young.
Sequence the rest by testability. Storage and graphics cards can be verified in minutes in any working machine, so they tolerate early purchase. Cases and coolers are verified with a tape measure against published dimensions, which never expires. The dangerous purchases to make early are the ones whose compatibility depends on a document that can change: a board bought for a processor you will buy next season may need a BIOS update by then — fine, if the board has CPU-less flashing — and a memory kit bought for a board you have not chosen yet is a gamble on a generation that the eventual board might not even use. When a sale tempts you out of sequence, run the six checks for the parts you own against the parts you merely intend, and write down the assumptions the purchase depends on. A staggered build with its assumptions documented is a plan; without them, it is a pile of boxes hoping to agree.
Open-Box and Refurbished Boards: Compatibility Includes the Box Contents
A discounted open-box or refurbished board can be fully compatible electrically and still fail you on contents. The accessories that ship with a board are part of its compatibility story: the Wi-Fi antenna is not an optional garnish but the component that makes the board’s wireless reach usable; the I/O shield is model-specific and cannot be substituted from another board; M.2 screws and standoffs are small enough to vanish from a returned box and specific enough to matter on install day. Before buying anything less than factory-sealed, confirm the listing’s contents against the manual’s package list, and price any missing antenna or shield as a separate purchase you will actually have to make. A board returned because its first owner discovered a compatibility failure is also a small warning in itself — another reason the bench test, within the return window, matters more for an open-box purchase than for any other.
The Reverse Direction: Checking a Board You Already Own
Every check in this guide also runs backwards, and for many readers that is the actual task: not choosing a board, but interrogating the one already in the case about a part they want to add. The documents are the same — support list, QVL, manual — but the questions invert. Not “does this board fit my case” but “what is the fastest processor this board will ever take, and is the upgrade worth it”. Not “does this kit match the board” but “what is the largest, fastest kit this board has proven itself with”. Run the inverted checks before shopping for an upgrade part, and let the answers decide whether you are shopping for a component or for a platform. It is the cheapest possible outcome of compatibility checking: discovering that the honest upgrade is no upgrade, while the discovery is still free.
Frequently Asked Questions
How do I know if a CPU is compatible with a motherboard?
Two gates: the CPU’s socket must match the board’s socket, and the exact CPU model must appear on the board’s official CPU support list, with a BIOS version your board can run. The support list is the authority — if the CPU is not on it, treat the pairing as incompatible.
What is a memory QVL and should I care?
The qualified vendor list is the board maker’s record of memory kits tested to work at their rated speeds on that board. Memory not on the list usually still works at standard speeds, but for fast kits bought for their profile speed, the QVL is your evidence. For a stability-first build, buy from the list.
Can I use DDR4 memory on a DDR5 motherboard?
No. The generations use different slot keying, voltages, and signalling, and a DDR4 stick will not physically seat in a DDR5 slot. Each board supports exactly one generation, which is why the memory you own can dictate the platform you buy.
Will any ATX case fit any ATX motherboard?
Essentially yes for the board itself — ATX mounting is standardised — but still check cooler height, graphics card length, and whether the case’s front-panel connectors have matching headers on the board. Fit is more than the mounting holes.
Does using an M.2 drive disable anything?
On many boards, yes: populating certain M.2 slots disables specific SATA ports or shares lanes with the graphics slot. The manual’s storage and lane-sharing notes describe your exact model. Check them against your full drive plan before buying.
Is a retailer compatibility checker enough?
It is a useful first filter and nothing more. Retail databases lag BIOS updates and miss lane-sharing and clearance issues. Verify the final pairing against the manufacturer’s CPU support list, memory QVL, and manual — the three documents this guide is built on.
Will my old CPU cooler fit a new socket?
Only if the cooler maker supports that socket with a mounting kit. Socket hole patterns change between generations, so a cooler that fitted your previous board may need new brackets — usually available from the cooler manufacturer, sometimes free on proof of purchase. Check the cooler maker’s socket list before ordering the board, and order any kit at the same time.
How do I check whether a graphics card physically fits my build?
Compare three published numbers against your case and board: the card’s length against the case’s stated maximum (leaving room for end-mounted power connectors), the card’s slot thickness against the slots and headers it will cover on the board, and the case’s expansion-slot count against the card’s bracket. All three figures are on the manufacturers’ spec pages; no database aggregates them for you.
The CPU is on the support list, but my board’s BIOS is older than the required version. What are my options?
Three, in order of convenience: update the BIOS using your current compatible processor before swapping; use the board’s CPU-less flash feature if it has one; or have a retailer or repair shop perform the update. What will not work is installing the new processor first and hoping — a board that does not recognise a CPU generally cannot start far enough to update itself by the normal route.
Does it matter which specific Wi-Fi or Ethernet chip a board uses?
For Windows users, rarely. For Linux users and home-lab builders, it can decide whether the board works at all: support for network and wireless controllers varies by chip model, not by board brand. Check the exact controller models — listed in the board’s detailed specifications — against your operating system’s hardware support before buying.
Can two parts be individually compatible with the board but incompatible with each other?
Yes, and it is the subtlest class of problem in this guide: a wide cooler overhanging tall memory, a thick graphics card covering a needed slot, a second M.2 drive disabling the SATA port your third drive uses. Parts agree with the board one-to-one yet collide as a system. The defence is the assembled audit — checking the complete list as a system, as the worked example in this guide does, rather than approving each part in isolation.