Knowing how to assemble a gaming chair properly is the difference between a chair that feels rock-solid for years and one that wobbles and squeaks within a month. Most gaming chairs share the same architecture — casters, gas lift, base, seat, backrest, armrests — and the job takes one person roughly 30 to 60 minutes with the included Allen key. This guide gives the safe order of operations, the torque habits that prevent future problems, and the checks to run before your first sit.
Disclosure: As an Amazon Associate, ilcastellomenu.com earns from qualifying purchases. Product links on this page may earn us a commission at no extra cost to you. Prices and availability change on Amazon, so check the product page for the current details before you buy.
Before You Start: Space, Parts and Tools
Clear a soft, flat area — a rug or the flattened shipping box protects both the floor and the upholstery. Unpack everything and lay the parts out: seat cushion, backrest, five-star base, five casters, gas lift cylinder, telescopic cover, tilt mechanism (sometimes pre-fitted under the seat), two armrests, side covers, a bag of bolts in several sizes, and the Allen key. Count the bolts against the manual’s parts list now, not mid-build; a missing bolt found early is a quick message to the seller, while one found at the last step means disassembling your progress.
Keep the bolts sorted by size in a tray or mug. Gaming chairs typically use two or three bolt lengths, and using a long bolt where a short one belongs can poke through upholstery or fail to clamp properly. If your chair shipped with thread-locking compound already on the bolt tips, that is normal — it helps resist the loosening that causes the issues covered in How to Fix a Squeaky Gaming Chair.
A note on the gas lift
The gas lift is a sealed, pressurised cylinder. Handle it by its outer tube, do not hit the button on top with tools, and never attempt to open, cut or heat it. It only ever needs to be pushed into the base and the mechanism — no force beyond firm hand pressure and your body weight once assembled. If a lift arrives visibly damaged or leaking oil, stop and contact the seller for a replacement rather than installing it.
In this guide
Step-by-Step: How to Assemble a Gaming Chair in the Right Order
- Push the five casters into the base sockets until each clicks or seats firmly; they are a press fit and should not wobble.
- Insert the gas lift, wide end down, into the centre hole of the base. Slide the telescopic plastic cover over it if supplied. Do not remove the protective cap on the lift’s top button until the manual tells you to.
- Attach the tilt mechanism to the underside of the seat if it is not pre-fitted: align the front of the mechanism with the front of the seat, insert all four bolts finger-tight first, then tighten in a cross pattern.
- Fit the armrests to the seat underside or sides, finger-tight at first so you can set their width evenly once you can sit in the chair.
- Lower the seat (with mechanism) onto the gas lift so the lift’s tip enters the mechanism’s centre hole. Sit on the seat gently and shift your weight to seat the connection.
- Attach the backrest: align its brackets with the seat’s rear brackets, start all bolts by hand, then tighten evenly, alternating sides. Fit the plastic hinge covers last.
- Add the lumbar and head pillows, then do a final pass over every bolt with the Allen key until snug.
The finger-tight-first rule is the whole secret. Bolts started by hand cannot cross-thread, and parts that are loosely assembled can be aligned before they are clamped. The backrest step is the only one where a second person genuinely helps — one to hold the backrest upright and aligned, one to start the bolts — though resting the chair on its side on a soft surface works solo.
Tightening Bolts So the Chair Stays Quiet
Tighten in a cross or alternating pattern, a few turns at a time per bolt, rather than fully tightening one bolt then moving on. This pulls parts together evenly and prevents the twisted, under-clamped joints that later show up as creaks or the sideways pull described in How to Fix a Gaming Chair that Leans. Snug means firm resistance with the short end of the Allen key in your palm — you are clamping metal brackets, not torquing a cylinder head, and over-tightening can strip threads in the captive nuts.
After the first week of use, re-check every bolt. New chairs ‘settle’: foam compresses, brackets seat, and bolts that were tight on day one can be a quarter-turn loose on day seven. That single ten-minute re-check prevents most early squeaks and wobbles. Many experienced builders repeat the check every few months as part of the routine in How to Clean a Gaming Chair, since the chair is already being inspected then.
Fitting the Armrests, Pillows and Covers
Set armrest width so your elbows rest naturally without shrugging or reaching outward; on many chairs the mounting slots allow an inch or so of lateral play, which is what the finger-tight stage is for. Height comes later during final adjustment — for now, set both sides to the same notch so the chair looks and feels symmetrical.
Lumbar pillows sit at belt-line height, in the curve of your lower back, not under your shoulder blades. If the pillow has straps, route them so they do not cross the recline hinge. Head pillows should meet the back of your head when you lean back; if yours sits too high, check whether the straps can run through the headrest cut-outs, a common design on racing-style chairs like those in Best Gaming Chairs for Back Support.
The First-Sit Safety Checks
- Rock gently in every direction: the chair should feel planted, with no clunk from the base or lift connection.
- Test the height lever: the seat should rise smoothly when unweighted and lower slowly under your weight.
- Recline gradually to full lock and back; the mechanism should engage without grinding or sudden drops.
- Roll across your floor type and spin the chair; every caster should swivel freely.
- Listen: a faint foam creak is normal, but metallic clicking usually means a bolt needs another quarter-turn.
If the seat feels tilted or the chair pulls to one side from the very first sit, do not ‘wear it in’ — re-check the mechanism orientation (its front marker must face the seat front) and the backrest bolt pattern. A mechanism installed backwards is the single most common assembly error and produces exactly that crooked feel.
Common Assembly Mistakes to Avoid
Rushing the bolt order is mistake number one, followed by discarding the spare bolts and the manual — spares exist because casters and bolts are the parts you may replace years later. Keep the Allen key too; it is the exact size for future tightening. Another classic error is removing the gas lift’s top cap early and pressing the button during handling, which can extend the lift unexpectedly. Finally, do not assemble on a hard floor without protection: dragging a steel base across laminate during the build can scratch the floor before the chair is ever used. If you are pairing the chair with a new surface, How to Set Up a Gaming Desk covers arranging the whole station once the chair is built.
Assembling Specific Chair Styles: What Changes
Most gaming chairs follow the sequence in this guide, but a few designs rearrange the steps. Chairs with integrated armrest brackets mounted to the backrest (rather than the seat) want the backrest fitted before final armrest alignment, and their manuals say so — follow the manual over any generic guide when they disagree, because bracket geometry varies. Chairs with a separate seat plate and pre-assembled mechanism skip the mechanism step entirely; your job reduces to base, lift, seat and backrest.
Footrest models add a sliding frame under the seat that must be fitted before the mechanism bolts are fully tightened, or it binds. Massage and USB-equipped chairs add a cable that routes from the lumbar pillow down to a power source; route it loosely with slack for the recline’s full travel, and never pinch it in the backrest brackets during assembly — a pinched cable is the most common cause of ‘the massage worked once’ complaints.
Rocker and floor chairs are a different species: no gas lift, no casters, just a folding frame and sometimes a pedestal. Their assembly is minutes long, and the safety checks reduce to confirming the frame locks open positively and the pedestal bolts are snug.
After the Build: The First-Week Checklist
A chair is not finished when it first stands up; it is finished after its first week of settling. Foam compresses to your shape, brackets seat into their final positions, and bolts that were snug on day one reveal which ones intend to wander. Schedule the re-check when you build the chair — put it in your phone — because nobody remembers a week later without a prompt.
During that first week, also validate your choices: armrest width set during assembly often wants a notch of change once you have played real sessions, and the lumbar pillow’s strap routing may need one experiment. Small refinements now are free; the same refinements discovered in month three feel like flaws. Keep the manual, spare bolts and Allen key in a labelled bag in or under the desk — the chair’s own service kit.
If anything feels structurally wrong in week one — a lean, a clunk, a mechanism that slips — contact the seller while the chair is new and the conversation is easy. Manufacturers replace parts readily on fresh chairs with clear descriptions and a photo; the same conversation a year later is a warranty negotiation.
Tools Beyond the Allen Key: What Helps and What Hurts
The included Allen key is genuinely sufficient, but two additions make the build kinder. A ratcheting screwdriver with the correct hex bit speeds the long finger-tight phase without the stripped-thread risk of a power drill — the ratchet’s feedback keeps you honest about torque in a way a motor never will. A small tray or magnetic dish for bolts ends the ancient ritual of the rolling bolt vanishing under furniture.
What hurts: power drills and impact drivers, which strip engineered threads in seconds; adjustable wrenches substituted for the correct key, which round bolt heads into future problems; and lubricants applied ‘while I’m here’ to new bolts, which can defeat the thread-locking compound the factory applied and invite the loosening you will later chase as squeaks.
Lighting deserves a mention: assembly happens at floor level, often under the chair itself, and a lamp or headtorch aimed at the work prevents the classic error of starting a bolt at an angle you could not see. Cross-threaded bolts are born in bad light more often than in bad factories.
Finally, keep the packaging until the first-sit checks pass. Boxes flatten for storage, and a chair that must go back travels infinitely better in its original foam than in improvisation. The ten minutes of storage is insurance on the whole purchase.
Troubleshooting the Build: When Parts Fight Back
A bolt that will not start is usually alignment, not damage: loosen its partners, wiggle the bracket until the bolt drops in by hand, and only then reach for the key. Forcing the first bolt is how cross-threading happens, and a cross-threaded captive nut turns a thirty-minute build into a support ticket. Patience at bolt one is the cheapest skill in flat-pack furniture.
Holes that seem not to line up on the backrest are the second classic: the brackets are often sprung slightly inward or outward by design, and gentle pressure — or a helper’s hands — closes the gap. If a hole is genuinely absent or misplaced, photograph it and contact the seller before drilling anything; a drilled chair is an unreturnable chair, and manufacturing errors are the seller’s problem to solve.
A gas lift that sits proud of the base socket usually just needs the seat fitted and your weight applied, exactly as the main guide describes. A lift that arrives with its cap missing and the button exposed should be handled with extra care during the build, and its first extension test done with the seat fitted and nobody’s face anywhere near the column’s line. Respect the part and it is perfectly safe; rush it and it startles, which is how careless moments happen.
Reading the Manual Like an Engineer
Assembly manuals reward a particular reading style: read the whole document once before touching a part, the way you would read a recipe before cooking. The overview tells you the build’s shape — which subassemblies exist, where the awkward step hides, and which bolts belong to which stage — and prevents the classic error of confidently building step one in a way step six forbids.
Pay special attention to orientation diagrams: front markers on mechanisms, left and right armrests that look identical until they are not, and backrest brackets whose handedness only matters at the final bolt. Mark left and right parts with painter’s tape the moment you identify them; future steps will thank present you.
Where the manual and this guide differ, the manual wins for your specific chair — bracket geometry and bolt specs are model property. Where the manual is silent — tightening patterns, settling checks, the first-week routine — this guide’s habits fill the gap, because they are properties of furniture in general rather than of any one model.
Ergonomics of the Build Itself: Save Your Back
Assembling a chair is a half-hour of floor work, lifting and twisting that deserves the same respect as any manual task. Build on a surface that lets you kneel comfortably, keep the heavy parts — seat and backrest — close to your body when lifting, and never lift the assembled chair by its armrests or backrest alone; the base and frame are the handles the structure trusts.
The flip from upside-down build to upright chair is the build’s heaviest moment. Solo builders should use the staged method from the desk guide’s philosophy: tip onto a padded edge, walk the chair down in stages, and never catch a falling chair with an outstretched arm. Chairs are replaceable in a way shoulders are not.
Take the build in daylight or good light, unhurried, with the floor protected and the parts laid out like a cockpit. Every experienced builder’s secret is the same unglamorous one: the build goes well because the preparation did.
Storing the Leftovers: A Small System
Every build ends with a residue: spare bolts, the Allen key, the manual, sometimes spare casters or caps. Give them a permanent home the day of the build — a labelled zip bag taped under the desk, or a drawer section reserved for the setup’s paperwork — because their value is entirely in being findable in year three, in the dark, mid-repair.
Photograph the bag’s contents and the chair’s model plate (usually under the seat) into the same phone note as your adjustment settings. When a part fails years later, that note converts a forensic investigation into a two-minute message to the manufacturer with model, date and part all present.
The same system scales to the whole battlestation: one note, one bag, one drawer for everything the setup will ever need to be maintained. Assembly day is when the system is cheapest to start, because everything is already in your hands.
The Break-In Timeline: What Changes in the First Month
A newly assembled chair is not a finished chair; it is a chair at the start of a month of small changes, and knowing the timeline stops you mistaking normal settling for defects. In the first three days, the foam does most of its early compression: the seat develops the beginnings of your sitting shape, and the backrest’s padding relaxes from its shipping flatness. Chairs feel firmer on day one than they ever will again, which is why showroom judgements mislead.
By the end of week one, the mechanical settling arrives: brackets have seated against each other under real loads, and the bolts that intended to wander have begun to. This is the re-check the main guide schedules, and it is not optional housekeeping — a quarter-turn found now is a squeak, a lean and a worn socket prevented later. Expect to find one or two bolts that take a small turn and the rest snug; a bolt that takes a full turn or more deserves a note in the chair’s file and a second look at the next check.
Weeks two to four are the quiet phase: casters free up as their bearings run in, the tilt mechanism’s new stiffness softens into its working feel, and the recline lock develops the positive engagement it will keep. Noises that belong to this phase are soft and diminishing — foam sighing, trim settling. Noises that grow, sharpen or arrive with movement in a joint are not break-in; they are the early chapters of the troubleshooting guides, and they are cheapest to address while the chair is new and the seller’s goodwill is warm.
Ergonomic and Mesh Chairs: Where the Build Differs
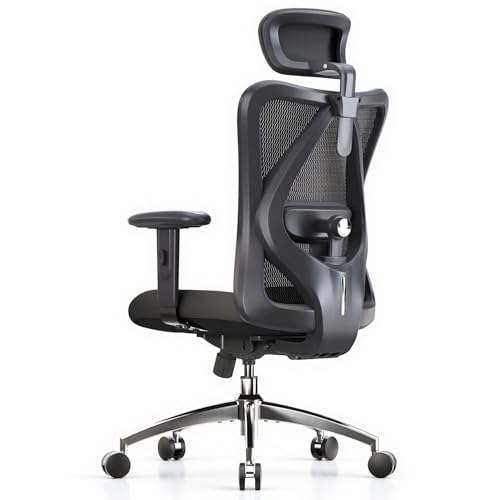
This guide’s sequence describes the classic racing-chair architecture. Ergonomic-leaning chairs rearrange it in ways worth knowing before you open the box. The tilt mechanism is often integrated with a seat-depth slider and a tension assembly that must be fitted as one unit, and the backrest may carry the lumbar mechanism inside it, adding a cable or a linkage that routes through the seat — route it loosely, never pinched, exactly as you would a massage chair’s power lead.
Mesh chairs add their own rules. The mesh panel arrives pre-tensioned in its frame, and that frame is structural: never rest the chair’s weight on the mesh during the build, and never use the backrest frame as a lever to align bolts. Headrests on ergonomic models often clip or slide onto the backrest rather than strapping on, and their rails have a definite front and back — a headrest that will not slide is usually a headrest being offered up backwards.
Armrest design diverges most. On ergonomic chairs the rests may mount to the backrest or to a shared under-frame rather than to the seat, which changes the order: the manual may want the backrest fitted before the rests can be aligned at all. Follow the model’s own sequence when it conflicts with the generic one. The generic order is a default for chairs that match the classic architecture, not a law for chairs that do not.
The Defect Decision Tree: Your Fault, Their Fault, or the Design
Some builds stall, and the useful skill is deciding whose problem the stall is. Work the tree in order. First: does the bolt start by hand when its partners are loose? If yes, the stall was alignment — your technique, now fixed, costs nothing. If a bolt will not start by hand in an empty, correctly aligned hole, inspect the hole: a captive nut visibly off-centre, a thread crossed from the factory, or a hole that was never tapped are manufacturing defects, and they are the seller’s to solve.
Second: is a hole missing entirely, or drilled somewhere the bracket cannot reach? Photograph it next to the manual’s diagram and stop. Drilling your own hole converts the seller’s defect into your modification, and modified chairs are unreturnable chairs. Third: are two parts mirror images that should not be, or identical that should be mirrored? Wrong-part packing happens; a photo of both parts side by side resolves the support conversation in one message.
What the tree protects is your leverage. A chair assembled exactly by the book, with defects documented before any improvisation, is a chair the seller must repair, replace or refund. Every shortcut taken before documenting — the forced bolt, the drilled hole, the bent bracket — transfers the cost of their defect to you. Patience is not just a building virtue here; it is a financial one.
Building on Real Floors: Carpet Pile, Hardwood and Slopes
The main guide tells you to build on a soft, flat surface. Real rooms offer variations, and each one changes the build slightly. On deep carpet pile, casters pressed into the base will feel seated when they are only resting in the pile’s grip; after fitting each one, lift the base and tug the caster downward to confirm the press fit has genuinely engaged, because a caster that pops out under its first rolling load usually does so under a seated player.
On hardwood or laminate, the risk runs the other way: the build itself can mark the floor before the chair ever rolls. Work on the flattened shipping box or a rug, and never slide the base across the floor to reposition it — lift it. Steel bases are heavy enough to score a finish in one dragged inch. On visibly sloped floors — common in older houses — accept that the finished chair may roll gently toward the low side and that its first-sit checks should be read with the slope in mind: a chair that feels level-relative-to-the-room may simply be agreeing with the floor.
Wherever you build, finish with the chair on the surface it will actually live on, ideally on its mat if it will use one. Casters behave differently on pile, board and mat, and the first-sit safety checks only mean something on the real surface.
Witness Marks: The Two-Minute Trick That Catches Loose Bolts Early
Borrow a habit from machinery maintenance: when a structural bolt is tightened to its final snug, draw one short line with a paint pen or permanent marker across the bolt head and onto the bracket beside it. The line takes two seconds per bolt. Months later, a glance tells you whether any bolt has rotated — a broken line is a bolt that has moved, found by eye in seconds rather than by working the whole set with a key.
Witness marks change the maintenance rhythm this batch recommends. The quarterly bolt check becomes a visual sweep first: unbroken lines everywhere means the joints have held, and only broken lines need the key. On chairs with hinge covers, mark the bolts before the covers go on and note the marked ones in the chair’s file, so you know which covers are worth removing at each check.
Complete the documentation habit with three photographs taken at the end of the build: the parts layout before you started (proof of what arrived), the chair’s model plate under the seat (the number every future parts order needs), and the finished chair at your desk (the baseline every later wear comparison wants). Stored in the same phone note as your adjustment settings, they turn any future support conversation into a short one.
Chairs With Electronics: Massage, Speakers, Heat and Lights
Powered chairs add a second assembly discipline on top of the mechanical one: cabling that must survive the chair’s full range of motion. Fit the mechanical build first, completely, and only then route power. The cable from a lumbar massage unit or backrest speakers travels through the recline hinge’s neighbourhood, and it needs slack for the deepest recline you will ever use, plus a margin — test by reclining fully with the cable routed and watching for any point where it pulls taut or folds sharply.
Anchor the cable with the clips or ties provided, keeping it off the floor where casters patrol. A cable under a caster is a cable being cut slowly, and the failure arrives mid-session weeks later. If the chair uses a removable power bank, decide its home during assembly: a pocket or bracket that leaves the bank reachable for charging without unthreading the whole route, and clear of the tilt mechanism’s moving parts.
Powered extras also change the first-sit checks. Test every function at every recline angle, not just upright — a speaker that crackles only at full recline is telling you its cable is being pinched exactly there. Bluetooth speakers should be paired and checked for interference from the chair’s final position, beside the tower and monitor, rather than in the middle of the room where you built it. And keep the charging lead’s manual with the chair’s paperwork: proprietary connectors are the spare parts nobody can improvise later.
The Two-Person Build: Dividing the Job Properly
The main guide notes that the backrest step is where a second person genuinely helps. A full two-person build, divided well, is faster and safer than a solo one — but only if the roles are explicit. One person is the holder: their job is alignment, supporting parts at the correct angle and keeping them still. The other is the fitter: their job is bolts, started by hand, tightened in pattern. Mixing the roles mid-step is how brackets get clamped crooked — the holder adjusts while the fitter tightens, and the joint freezes mid-adjustment.
Agree the vocabulary before you start: ‘hold’ means freeze exactly as you are, ‘ease left’ means a small movement, and either person can call a stop without argument. The backrest is the test case: the holder presents it square to the brackets and holds it against gravity; the fitter starts all four bolts by hand, confirms the backrest sits evenly, and only then tightens in alternation while the holder maintains position until the last bolt is snug.
The flip to upright is the second two-person moment. Lift from the base and the seat frame — never by the armrests or the top of the backrest — and agree the path before lifting, including where the chair will be set down. Two people lifting a chair they have not discussed dropping is the classic way a finished build acquires its first damage, and its builders their first injury, in the final ten seconds.
Reassembling a Chair That Has Lived: Moves, Storage and Second Builds
Chairs get disassembled for house moves, room changes and resale, and the second build differs from the first in predictable ways. Bolts that have lived under load for years may resist: work them out slowly with the correct key, and if one is truly seized, a small amount of penetrating oil on the thread — kept well away from upholstery — and ten minutes of patience beats force, which rounds heads and snaps bolts in their captive nuts. A bolt that comes out with damaged threads should be replaced, not refitted; hardware assortments in the chair’s thread size are a small, permanent addition to the service kit.
Inspect while the chair is apart, because disassembly is the one time every joint is visible. Bracket holes that have worn oval, a mechanism socket polished bright by movement, casters with flat spots from storage — each is a finding that costs little to address now and much to rediscover assembled. Foam also tells its story unloaded: a seat cushion that does not recover its shape on the floor overnight has given its best years already.
Reassembly follows the original sequence with one addition: expect the settling re-check to matter more, not less. Old joints that were stable for years have been disturbed, and threads re-cut their paths. Re-check bolts after the first day as well as the first week, and run the full first-sit safety checks as if the chair were new — after a rebuild, in every way that matters, it is.
Torque Feel: Learning What Snug Actually Is
Every instruction in this batch leans on one word — snug — and new builders reasonably ask what it feels like. Calibrate your hands before the build using a spare bolt and any scrap of wood or the chair’s own packaging inserts: run the bolt in until it seats, then feel the exact moment resistance changes from the easy turning of a travelling thread to the firm, rising resistance of a clamping joint. Snug lives just past that transition — the point where the key asks for deliberate pressure rather than a flick of the fingers, and well before the point where your forearm starts working hard.
Under-tightened joints announce themselves later as movement: a faint click when you sit, a bolt that takes another half-turn at the first-week check. Over-tightened joints announce themselves immediately and worse — a thread that suddenly goes loose as it strips, a bolt head that rounds, a bracket that bows. The asymmetry is the lesson: an under-tightened bolt is a five-minute correction, while an over-tightened one is a damaged captive nut and a support conversation. When in doubt, stop at snug and let the first-week re-check find anything that settled; that check exists precisely so day-one caution is safe.
Two habits keep your torque honest across a whole build. First, always finish a bolt with the short end of the Allen key in your palm rather than levering on the long end — the tool’s geometry is itself a torque limiter designed by the manufacturer. Second, tighten in the cross pattern in two passes: a first pass to firm on every bolt, a second to snug. The second pass is where evenness comes from, and evenness is what keeps the finished chair silent and level.
Assembling in a Small Room: Staging When Space Is Tight
The main guide assumes a cleared floor area, which small bedrooms and studio flats cannot always provide. The small-room build is a staging exercise: the chair will occupy its final position from the start, so build it there, in place, and let the room’s furniture be the walls of your workshop. Lay the parts out on the bed or desk in build order rather than on the floor — a vertical inventory you can reach without crossing the room, and one that keeps bolts off a floor where a dropped one can vanish under furniture it would take longer to move than the build itself.
Sequence matters more when you cannot walk around the chair. Fit the casters and lift to the base first and position the base exactly where the finished chair will stand; every later stage lowers parts onto that anchor rather than carrying assemblies across the room. The backrest, the build’s most awkward lift, can be done with the seat assembly resting against the desk edge at working height instead of on the floor, sparing both your back and the wall paint.
Accept one constraint honestly: the flip and the final checks need the chair’s own footprint plus your kneeling space, and if the room cannot give you even that, build in a hallway or landing and wheel the finished chair in — which is why the measuring guide insists on checking the route. A chair assembled in comfort and rolled ten feet beats a chair assembled in a cupboard, every time.
Gear for This Guide
You do not need to buy anything to follow most of this guide, but the items below are the ones that genuinely come up again and again in this topic. Each one is a current, widely sold model rather than a placeholder pick.

Homall Gaming Chair
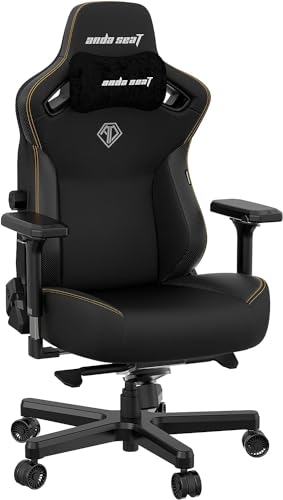
The Homall chair is a typical example of the classic racing-style design this guide describes: bolt-on armrests, a separate tilt mechanism and strap-on lumbar and head pillows, all assembled with the included Allen key in well under an hour. Check on Amazon

GORILLA GRIP Chair Mat for Carpet Floors
Lay a mat like this Gorilla Grip one down before the first-sit checks if your setup sits on carpet — casters roll truer on it, which makes it easier to tell whether any wobble is the chair or just deep pile. Check on Amazon
Frequently Asked Questions
How long does it take to assemble a gaming chair?
Most models take 30 to 60 minutes for one person working steadily. Chairs with pre-fitted tilt mechanisms are at the fast end; chairs with separate armrest brackets and hinge covers take a little longer.
Can one person assemble a gaming chair alone?
Yes. The only awkward step is holding the backrest aligned while starting its bolts. Laying the chair on its side on a rug, or propping the backrest against a wall, makes it manageable solo.
Why does my new chair feel like it leans?
Usually the tilt mechanism was mounted facing backwards, or the backrest bolts were tightened fully one side at a time, twisting the brackets. Loosen, realign and re-tighten in an alternating pattern — the full diagnostic is in How to Fix a Gaming Chair that Leans.
Should I keep the box and spare parts?
Keep the spare bolts, the Allen key and the manual for the life of the chair, and keep the box at least until the return window closes. Spares make year-three repairs trivial.
My gas lift will not extend. What should I check?
Confirm the protective cap was removed from the lift’s top button and that the height lever’s cable or paddle actually presses the button. If the lift still does not respond, contact the seller — do not open or strike the cylinder.
Should I add thread-locking compound to the chair’s bolts?
Only if the chair did not already have it and the manual suggests it. Many chairs ship with compound pre-applied to the bolt tips; adding more, or adding lubricant of any kind, can change how the joint behaves. If a specific bolt repeatedly loosens despite correct tightening, that is a thread problem to raise with the manufacturer, not a glue problem.
The casters will not push into the base. What am I doing wrong?
Usually nothing — the press fit is deliberately tight. Seat the base on a soft surface, align the caster stem squarely with the socket, and press down firmly with the heel of your hand, or stand the base up and use your body weight through the socket. Never hammer a caster in; a cracked socket is a far bigger problem than a stiff fit.
My chair feels different after a month. Did I assemble it wrong?
Almost certainly not. The first month is break-in: foam compresses to your shape, brackets seat, and bolts need their scheduled re-check. Feel that improves or stabilises is normal. Feel that worsens — a growing lean, a new clunk, a sinking lift — is a fault to diagnose, not break-in to accept.
A bolt from my chair’s first build is seized solid. How do I remove it safely?
Use the exact hex key size, seat it fully, and turn slowly with steady pressure. If it will not move, apply a drop of penetrating oil to the exposed thread, wait ten minutes, and try again. Never use an impact driver on a seized chair bolt — the captive nut inside the frame will spin or tear out, converting a stuck bolt into a structural repair.
How do I know if I have over-tightened a bolt during assembly?
The warning signs arrive in order: resistance rises normally, then the bolt suddenly turns more easily — that easing is the thread stripping — or the bracket visibly bows toward the bolt. Stop the moment tightening stops feeling like clamping and starts feeling like forcing. If a thread does strip, do not keep turning and hope; note which joint it is and contact the manufacturer, because a captive nut or bracket replacement is a small part, while a joint assembled on a stripped thread will work loose in service and damage the surrounding holes.
The Short Version
Assemble in order — casters, lift, mechanism, armrests, seat, backrest — start every bolt by hand, tighten in a cross pattern, and re-check all bolts after the first week. Respect the gas lift as a sealed pressurised part: push it into place, never open it. Do that and the chair should feel solid and quiet from day one.