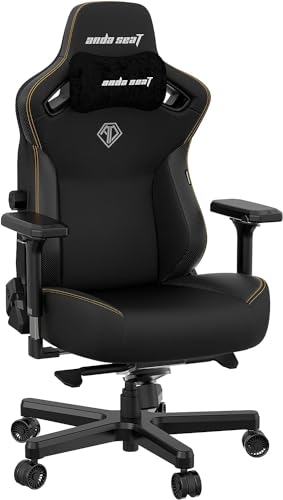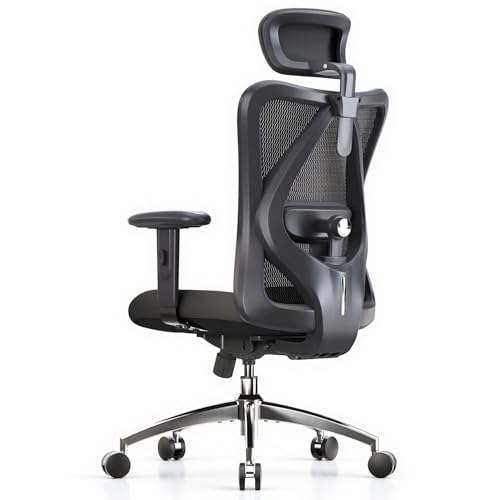
Knowing how to adjust a gaming chair is worth more than most upgrades: a mid-priced chair set up correctly will feel better in hour three than an expensive chair left at factory settings. The adjustments form a chain — seat height first, then depth and tilt, lumbar, armrests, backrest angle and headrest last — because each one changes what ‘correct’ means for the next. Follow the order in this guide and finish with a chair that fits you instead of the other way round.
Disclosure: As an Amazon Associate, ilcastellomenu.com earns from qualifying purchases. Product links on this page may earn us a commission at no extra cost to you. Prices and availability change on Amazon, so check the product page for the current details before you buy.
The Adjustment Order Matters: How to Adjust a Gaming Chair Step by Step
- Set seat height so your feet rest flat on the floor with thighs roughly level.
- Set seat depth (on chairs that offer it) so two or three fingers fit between the seat edge and the back of your knees.
- Set the tilt tension so the chair supports gentle rocking without pushing you forward or letting you fall back.
- Position lumbar support at belt-line height, firm enough to fill the curve of your lower back.
- Set armrest height so your elbows rest with shoulders relaxed, then width and depth so your arms sit naturally.
- Set backrest recline to roughly 95–110 degrees for desk play, and place the headrest where it meets your head only when you lean back.
Work through the list at your desk, in your normal playing position, with your monitor already set up. Adjusting a chair in the middle of the room and then wheeling it to a desk of a different height is why many people feel their setup is never quite right. If the desk itself is new, How to Set Up a Gaming Desk puts the whole station in the right order.
In this guide
Seat Height and Depth: The Foundation
Seat height is correct when your feet are flat, your knees are at roughly 90 degrees (or a touch more open), and there is no pressure under your thighs. Too high and the seat edge presses into your thighs, restricting circulation and making your feet hunt for support; too low and your knees ride above your hips, tipping your pelvis backwards into a slouch. If your desk forces a higher seat than your legs want, the fix is a footrest, not dangling feet — see the gear section.
Few gaming chairs offer sliding seat depth, which is why choosing the right size up front matters — the method is in How to Measure for a Gaming Chair. If your chair’s seat is slightly too deep, a thicker lumbar pillow has the side effect of pushing you forward and shortening the effective depth, a legitimate workaround. If it is too shallow, nothing fixes it; that chair simply does not fit, which is the core lesson of How to Choose a Gaming Chair.
Tilt Tension and Recline: Movement Is a Feature
The tilt tension knob — usually the round dial under the front of the seat — sets how hard the chair pushes back when you lean. Correct tension lets you rock gently with a small shift of weight and holds you without effort at any angle in the range. Too stiff and you will stop reclining entirely and sit bolt upright all session; too loose and the chair feels like it is tipping you out. Adjust it in small turns, testing with your normal lean, and re-check it after changing recline habits or gaining a heavier winter hoodie — tension is calibrated to body weight.
For mouse-and-keyboard gaming, a recline around 100 degrees with the tilt unlocked for micro-movement is the sweet spot for most people: upright enough for aim and typing, open enough to unload the spine. Controller and racing-rig play can go deeper. Whatever angle you choose, your eyes should meet the middle-to-upper third of your monitor without tilting your head — if you are looking up or down, adjust the monitor, not your neck. The posture science behind these numbers is laid out in Gaming Chair Ergonomics Explained.
Lumbar Support and Headrest Placement
Lumbar support belongs at the height of your belt line, where your spine curves inward. Built-in mechanisms adjust with a dial or lever — raise or lower until the pressure sits in that curve, then set depth so it feels like a firm hand supporting you, not a fist pushing you forward. With a loose pillow, sit on the chair, lean back and slide the pillow until it fills the gap; if it keeps migrating, its straps may need routing differently or the pillow may simply be too thin for your curve.
The headrest’s job is rest, not posture: it should contact the back of your head or the top of your neck when you recline, and stay clear of your head when you sit upright. A headrest that pushes your head forward while upright is set too low or too far forward — raise it, or accept it as a recline-only feature. Players with existing back trouble will find model-specific support notes in Best Gaming Chairs for Back Pain, and the general principles in Best Gaming Chairs for Back Support.
Armrest Setup for Mouse, Keyboard and Controller
Set armrest height so your forearms rest lightly with shoulders completely relaxed — if your shoulders shrug up, the rests are too high; if you lean sideways to reach one, it is too low. Both rests should match unless your desk setup is genuinely asymmetric. For keyboard-and-mouse play, angle the right rest slightly inward (on 4D armrests) so your mouse arm tracks naturally, and set depth so the rests do not hit the desk edge before your chair is close enough.
Controller players sitting further back can raise the rests a touch and angle both inward to cradle the elbows. Whatever your input, your wrists should stay neutral and floating or lightly resting — armrests support elbows and forearms, not wrists, and resting your wrists on a hard edge while your hands work is a fast route to discomfort.
A One-Week Dial-In Routine
Do not expect perfection on day one. Make one change at a time and live with it for a full session; changing three things at once leaves you unable to tell which change helped. Keep a short note on your phone — ‘lumbar up one notch, better’ — and within a week the chair will converge on your settings. Bodies also adapt: support that feels intrusive on day one often feels invisible by day four, which is adaptation, not the chair changing.
Revisit the settings when anything else changes: a new desk height, a monitor arm that moves your screen, or a switch between work and gaming chairs. And if adjustments stop holding — a lever that slips or a chair that sinks — that is a hardware issue, not a settings issue; the sinking-chair causes are covered by the same safe checks in How To Fix A Gaming Chair That Leans.
Common Adjustment Mistakes
The classic errors: setting the seat so high your feet dangle because it ‘feels commanding’; cranking lumbar depth to maximum because support must be good; locking the tilt rigid and sitting frozen for hours; and setting armrests to desk height so your shoulders live next to your ears. Each feels fine for ten minutes and punishes you in hour three. Movement is the through-line of good setup — a chair adjusted to let you shift, rock and vary your posture beats a ‘perfect’ static posture held all day.
Adjusting for Different Games and Tasks
One chair serves many postures, and serious players keep mental presets. For competitive mouse-and-keyboard play: seat height set precisely, tilt nearly locked or lightly tensioned, recline around 100 degrees, armrests level with the desk — the stable platform configuration. For controller and story games: recline deeper, tilt free, lumbar depth slightly increased, armrests angled in — the lounge configuration. For work and study: the most upright setting, lumbar at its firmest, screen-side posture.
Switching presets takes under a minute once you know your chair’s controls, and the difference in comfort across a mixed evening is larger than most hardware upgrades deliver. If your chair has memory features — a tilt lock with several positions, a lumbar dial with detents — learn their landmarks by touch so adjustments happen without breaking immersion or workflow.
Racing and flight players with wheel or stick setups should set the chair for the rig, not the desk: pedals dictate leg angle, the wheel dictates arm reach, and the chair’s job is to hold that geometry without creeping — casters that roll under braking force are the enemy, which is why rig players often swap to glides or lock the chair against the desk.
When Adjustment Is Not Enough: Fit Problems vs Setting Problems
Learn to distinguish a chair that is set wrong from a chair that is wrong. Setting problems change when you adjust: the ache moves, eases or intensifies as you work through this guide’s order. Fit problems are invariant — the seat is too deep at every setting, the headrest lands on your shoulder blades at every height, the bolsters pinch at every recline angle. No dial fixes geometry the chair does not have.
The honest response to a fit problem is to change the geometry you can: a thicker lumbar pillow to shorten a deep seat, a seat cushion to raise a short player, a footrest to complete a high setup. If two or more dimensions are wrong after workarounds, the chair does not fit you, and returning or replacing it is not defeat — it is the correct ergonomic decision, made with the measurements in this batch’s measuring guide.
Persistent pain deserves the same honesty. A well-adjusted, well-fitting chair removes chair-caused strain; pain that survives a correct setup and a week of adaptation has another cause, and a clinician will find it faster than a product page will.
Fine-Tuning: The Adjustments Within the Adjustments
Once the main order is set, the refinements begin. Seat tilt angle — separate from recline on better mechanisms — can tip the seat pan a degree or two forward for task work or back for play, changing thigh pressure without touching height. If your mechanism offers it, experiment in single-degree steps; the effect is subtle and cumulative, like saddle height on a bicycle.
Armrest angle is the most under-used refinement on 4D chairs: angling both rests a few degrees inward matches the natural path of forearms toward a keyboard far better than parallel rests do, and angling only the mouse-side rest is a legitimate asymmetric setup for players who live on the mouse. Symmetry is a default, not a doctrine — your body is the referee.
Headrest depth, where it adjusts, should place the pillow’s contact at the skull’s curve rather than the neck’s — too low and it becomes a wedge that pushes the head forward, the single most counterproductive setting in the whole chair. When in doubt, raise it or remove it for a session and compare; a headrest you never miss was never helping.
Keep a record of your final settings — phone photo of dial positions, a note of notch numbers. Chairs get borrowed, moved and deep-cleaned, and settings get lost. The record turns a rediscovery project back into a thirty-second restoration.
Adjusting Around Injuries, Braces and Bodies That Differ
Players adjusting around a recovering injury should treat the chair as part of the environment their clinician describes: if you have been told to keep a knee at a certain angle or a back supported in a certain way, set the chair to the letter of that advice and let the games adapt, not the reverse. This guide’s defaults are for uninjured bodies; instructions from a professional who has examined yours outrank any article, including this one.
Pregnancy changes the geometry too: seat depth effectively shortens, lumbar position migrates, and recline habits change month by month. The chair’s adjustability earns its keep precisely here — re-run the full adjustment order rather than nudging single settings, because the relationships between settings have all shifted at once.
Players with significant left-right asymmetry — an old shoulder injury, a leg-length difference — should abandon symmetry as a target. Armrests at different heights, a cushion under one side, a footrest under one foot: the chair serves the body that exists. Ergonomics fitted to an imaginary average body helps no one who actually sits down.
Adjusting the Chair to the Monitor, Not the Room
Players often set the chair by feel in open floor, then wheel it to a desk where the geometry changes completely. The correct reference is always the final playing position: chair at the desk, screens live, game running. Set the monitor’s height after the chair, not before — the chair defines where your eyes are, and the screen must come to them, never the reverse.
If the monitor cannot reach your eye line on its stand, that is an equipment fact, not a posture instruction: a shelf, a stack of books as a prototype, or a monitor arm closes the gap. Necks are not adjustable monitor stands, and treating them as such is how good chairs get blamed for bad screens.
Multi-monitor players should set the chair for the primary screen and angle the secondaries to meet the seated position, resisting the urge to centre the chair between two screens. Your spine’s centreline belongs on the display you aim at; everything else in the setup is furniture arranged around that line.
Seasonal and Clothing Adjustments Nobody Mentions
Settings drift with the calendar in ways nobody warns you about. Winter layers add effective body width and change how bolsters and armrests meet you; a chair dialled in during summer’s t-shirts can feel a size smaller in January’s hoodie. The fix is not a new chair but a seasonal pass through the adjustment order, widening what can be widened and noting that the summer settings return with the weather.
Footwear does the same at the other end: thick-soled shoes raise your effective popliteal height, so a chair set barefoot sits subtly wrong when you play in trainers. Pick the footwear you game in most, set the chair for it, and let the other footwear accept the small compromise — or keep a footrest whose height absorbs the difference.
Even time of day plays a small part: bodies are measurably a little taller in the morning and a little more compressed by evening, and players who set a chair at noon sometimes find the evening session’s headrest a fraction low. These are small effects, but noticing them is what separates a dialled-in setup from a merely adjusted one.
Teaching Your Hands the Controls
A chair’s controls should be operable blind, mid-game, without breaking posture: the height lever, the recline release, the tilt lock. Spend one session deliberately practising each control’s location and direction until your hands own the map. Players who must look down and hunt for a lever simply stop adjusting, and unadjusted adjustability is decoration.
This fluency matters most for the tilt lock and tension, the controls of posture variety. The healthiest habit this guide can install is not a setting but a reflex: unlock, lean, shift, relock, a dozen times an evening, without thought. Chairs support bodies best when bodies keep moving, and controls you can work blind are what make movement effortless enough to happen.
If a control is stiff, vague or slipping, that is hardware feedback, not user error — levers should engage positively and hold. A mechanism that will not hold its settings is entering the territory of this batch’s troubleshooting guides, and it should be dealt with while the chair is young and its warranty is warm.
Unknown Controls: Identifying What Every Lever and Knob Does
Chairs arrive from previous owners, office clearances and marketplaces without manuals, and their controls are a small mystery of levers, paddles and knobs. Identify them empirically, one at a time, with a rule that keeps the experiment safe: change one control, observe exactly one consequence, and never test an unknown control while leaning your full weight into the chair’s motion. Work unseated first where you can — press the seat down with your hands while working a lever and watch whether the lift responds.
The common layouts cover most chairs. A single lever under the right side of the seat is almost always the height control, lifting it engages the gas lift’s valve. A second lever or a paddle usually locks or frees the tilt; if the chair suddenly rocks after you move something, you have found it. The large round knob under the front of the seat is tilt tension on the great majority of mechanisms — turning it toward the plus or the heavier marking stiffens the rock. A dial on the backrest itself, where fitted, drives the built-in lumbar; a knob on the side of the seat may be a seat-depth slider’s lock or a lumbar depth control, and five seconds of gentle experimentation separates the two.
Two cautions belong to the method. Never force a control that resists beyond firm hand pressure — stiffness usually means the mechanism must be unweighted to move, so stand, adjust, sit, test. And once you have mapped your chair, write the map into your settings note with a photograph of the underside; the next owner, or your future self after a year of not thinking about it, will be grateful the archaeology was done once, properly.
The In-Session Reset: Micro-Adjustments Across a Long Night
The main adjustment routine sets your chair once, correctly. Long sessions then spend that correctness slowly: muscles fatigue, you migrate forward in the seat, the recline you set at hour one is not the recline your back wants at hour four. The answer is not a better initial setting but a habit of micro-adjustment — small, deliberate changes made on a rhythm rather than in response to discomfort, because discomfort is a lagging indicator that arrives after the strain it reports.
Build the reset into natural breaks: between matches, at loading screens, when you stand for a drink. Each reset takes twenty seconds. Sit back fully so the lumbar support re-engages. Shift the recline by a few degrees in either direction — direction matters less than change. Work the tilt through its range twice. Drop your shoulders consciously and check that the armrests are still carrying your elbows rather than your elbows hunting for the armrests. Once an hour, stand entirely for a minute; no chair adjustment substitutes for leaving the chair, and the guides in this batch are unanimous on the point.
Players who adopt the reset usually report the same discovery: the chair they were preparing to replace was mostly a chair being sat in statically. Settings are a starting position, not a solution, and the players who stay comfortable for years are the ones adjusting in small increments forever — which is why controls you can work blind, covered elsewhere in this guide, matter as much as the ranges they command.
Adjusting Around Headgear: VR Headsets, Glasses and Headphones
Modern players wear equipment on their heads, and the chair’s upper half has to accommodate it. VR headsets make the sharpest demand: their rear head straps and battery packs occupy exactly the space a headrest wants to fill, so a proud headrest pillow pushes the headset forward and breaks its seal against your face. For VR sessions, remove the head pillow entirely or slide it to its lowest position, and favour a slightly deeper recline than your desk setting, since VR play loads the neck differently — you are looking around a world, not at a fixed screen, and support belongs behind your shoulders rather than behind your skull.
Over-ear headphones argue with high, wide headrests in a quieter way: the headband’s arc meets the pillow when you lean back, nudging the cups off their seal. The fix is placement, not force — drop the pillow so its top edge meets the curve of your neck below the headband’s line, and let the headrest do its resting job in the gaps of your gear rather than against it. If you alternate between headset and speakers across an evening, note both pillow positions in your settings record; they will differ by an inch and that inch is the whole comfort story.
Glasses change the geometry at one remove: they set a preferred screen distance and a slight downward gaze, especially for players in progressive lenses, which means the chair’s recline and the monitor’s position must be agreed together. The audit in the ergonomics explainer is the tool — run it wearing the glasses you game in, because a chair adjusted bare-eyed and then used through lenses is adjusted for a person who does not exist.
Two Players, One Chair: Running a Two-Preset System
Shared chairs fail on adjustment friction: the chair fits whoever set it last, and the other player either suffers or wages a daily war of levers. The households that make sharing work treat the chair as a two-preset instrument. Each player runs the full adjustment order from this guide once, properly, and records their settings in the shared note — not approximately, but as countable facts: height lever results measured as seat height from the floor, armrest notches counted from the bottom, lumbar dial turns counted from fully soft, recline found by a marked reference.
Physical marks beat memory. A small dot of paint pen or a strip of tape at each player’s armrest notch and lumbar position turns a two-minute negotiation into a twenty-second reset, and the reset ritual — height, armrests, lumbar, pillow swap — becomes part of sitting down, like adjusting a car’s mirrors. Pillows are the one component worth duplicating: two lumbar pillows of different thicknesses, one per player, stored on the chair’s back or the desk, because pillow support is the least shareable geometry on the chair.
Accept the system’s one honest limit: seat depth and chair size cannot be preset away. If two players differ enough that one needs a footrest at the shared chair’s lowest height, the footrest lives at the desk permanently and the taller player simply ignores it. Sharing succeeds on the adjustments that move, and routes around the ones that do not — which is the entire philosophy of adjustment applied to two people.
Posture for the Camera: Settings for Streaming and Long Calls
A chair used on camera or in long video calls is adjusted for two audiences: your spine and the lens, and the lens has opinions. It reads recline generously — a few degrees of extra recline that feels like nothing reads as slouching on screen — so your streaming preset usually sits a touch more upright than your private one, with the lumbar support carrying the posture your muscles would otherwise have to perform. Set it deliberately as its own preset rather than faking alertness for three hours, which is how streamers end broadcasts with headaches they blame on the game.
Headrest and pillow placement also read on camera: a pillow sitting high pushes your head forward of your shoulders in profile and shortens your neck on screen, so drop it to the neck curve as the headgear section describes, whether or not you wear a headset. Armrest height shows too — rests set too high shrug your shoulders visibly toward your ears, the universal on-camera tell of a bad setup, and the one viewers will diagnose in chat before you feel it yourself.
None of this outranks comfort across a long broadcast; it refines it. Build the camera preset from your correct settings with the two or three visual corrections applied, save it in your record beside the others, and switch as deliberately as you switch scenes. Your future VODs — and the back that has to carry the next one — will both show the difference.
The Floor Factor: Readjusting When the Surface Changes
Adjustment advice quietly assumes the chair rolls and tilts on the surface it was adjusted on, and changing that surface changes the chair. Deep carpet resists casters, which effectively locks the chair’s position and adds a subtle drag to every tilt movement; players who adjust on a hard floor and then move the chair onto pile often conclude the tilt tension has stiffened, when what stiffened is the whole chair’s willingness to move. A chair mat restores the original behaviour — one reason mats appear throughout this batch — and any move onto or off a mat deserves a fresh run through the adjustment order.
The mat itself adds a small height: its thickness raises the chair relative to the desk by a few millimetres, and a thick carpet mat compresses under the casters by a similar amount in the other direction. These are tiny numbers with real consequences at the margins — feet that were flat can find themselves light on the floor — so treat a mat change like a desk change and re-check seat height first, before touching anything else.
Sloped floors are the extreme case: on a floor that falls away in one direction, the chair’s tilt and swivel acquire a preferred direction, and no tension setting fully compensates. Set the chair for the slope you have — often a slightly firmer tension and a deliberate parking orientation — and accept the floor’s vote, or move the station. Adjustment can negotiate with many things, but gravity’s local direction is not one of them.
Adjustment Drift: Auditing Settings That Wander
Settings do not only get changed by people; they change themselves. Armrest height mechanisms held by friction or notches wear microscopically with every lean, lumbar dials get knocked by clothing and blankets, and tilt tension springs relax almost imperceptibly across years. The result is adjustment drift: a chair that was correct in spring is subtly wrong by autumn, with no single moment of change to blame, and an owner who concludes their body has changed when really the chair has.
The audit that catches drift takes five minutes quarterly, ideally on the same day as the bolt and cleaning checks this batch schedules. Work the adjustment order and compare each setting against your record — not against your memory of the record, which drifts on the same schedule as the chair. Seat height measured from the floor with a tape. Armrest notches counted. Lumbar dial turns from a known end stop. Recline compared against the wall mark or photograph in your file.
Distinguish drift from failure while you audit. A setting that has moved but holds its new position when reset is drift — normal, correctable, done. A setting that will not hold — an armrest that sinks under arm weight within a session, a lumbar dial that spins free, a tilt lock that releases with a click — is a mechanism at end of life, and no audit rhythm fixes it; that chair needs the manufacturer’s parts channel or an honest replacement conversation.
Keep the audit findings in the same note as the settings themselves. Two consecutive audits showing the same armrest drifting tells you the mechanism is wearing on a schedule you can now predict, and a part ordered calmly in advance beats a part ordered after the armrest gives way mid-match. Adjustment, like everything else in this batch, rewards the owner who treats it as a rhythm rather than an event.
Setting the Chair for a Wheel, Pedals and Flight Stick
The main routine adjusts a chair for a desk. A wheel or flight stick changes the machine the chair belongs to, and the settings change with it. Pedals move your feet from the floor to a working position some distance ahead, which means seat height is now judged by pedal geometry: your legs should reach the pedals with knees still bent, able to apply full braking pressure from the leg rather than by bracing your back into the seat. A chair set too high makes braking a calf exercise; too low folds your hips past comfort within a stint.
Recline earns a different setting under pedal load. Braking force pushes you into the backrest, so a slightly firmer tilt tension and a recline a few degrees more open than your desk setting keep the chair from rocking when you stamp on the pedal — the rock that costs lap time is the one that moves your hands on the wheel at the braking zone. If your wheel clamps to the desk, check armrests against the clamp and the wheel base’s silhouette: rests that collide with a quick-release or a shifter get lowered, angled away, or removed for the session, in that order of preference.
The lumbar support’s job also changes: under repeated pedal load it is a brace, not a cushion, and most players prefer it a touch firmer and exactly at belt height, verified by a few hard pedal presses rather than by sitting still. Headrests, by contrast, usually come off or drop away — sim players move their heads constantly, checking mirrors and apexes, and a pillow that argues with that movement becomes a distraction with a strap.
Save the result as its own preset in your record, because you will switch between desk and rig settings often enough that re-deriving them weekly is a tax on every race night. The switch, practised, takes under a minute — which is the difference between a rig you use daily and a rig that slowly becomes furniture you walk past.
The Chair’s Other Job: Settings When the Desk Goes Up
In a sit-stand household the gaming chair spends part of its life parked, and how it is parked and restored is an adjustment topic in its own right. Park it deliberately: pushed to a consistent spot, clear of the desk’s travel path and of the cable bundle’s swing, at its seated height rather than left raised or lowered at random. A chair parked in the desk’s descent zone will eventually meet the desk, and the meeting damages armrest pads and desktops with complete impartiality.
The return to sitting is where the discipline pays. Because the chair was parked rather than borrowed, its settings should be exactly where you left them — which makes any change you find on return a finding, not an annoyance: drift, a housemate, a pet with ambitions. Run the twenty-second version of the order — height, lumbar contact, armrest level — as you sit, the way pilots run a shortened checklist on a familiar aircraft.
Players who stand for work and sit for gaming often discover their two modes want different chairs’ worth of settings: the gaming preset sits a little lower and more reclined than the work preset, because evening bodies are tired bodies. Record both presets, mark them if your chair allows it, and let the switch be a ritual that separates the workday from the session. The chair becomes the punctuation mark in the room’s day — which, for an object you spend this many hours in, is a reasonable ambition.
Gear for This Guide
You do not need to buy anything to follow most of this guide, but the items below are the ones that genuinely come up again and again in this topic. Each one is a current, widely sold model rather than a placeholder pick.

ErgoFoam Foot Rest for Under Desk
If your desk height forces your seat higher than your legs prefer, this dense-foam ErgoFoam foot rest restores the flat-foot foundation without lowering the chair — it can also be flipped over to work as a gentle rocker for restless feet. Check on Amazon

Razer Iskur V2 X Ergonomic Gaming Chair
Razer’s Iskur V2 X is a good study in adjustment done right: a built-in lumbar curve shaped into the backrest, wide seat and adjustable recline, so the key settings are structural rather than relying on loose pillows staying in place. Check on Amazon
Frequently Asked Questions
How high should a gaming chair be set?
High enough that your feet rest flat on the floor with your knees at about 90 degrees and no pressure under your thighs. If your desk needs the chair higher, add a footrest rather than letting your feet dangle.
Why does my lower back still ache in a good chair?
Usually the lumbar support is at the wrong height — it should sit at belt line — or the seat is too deep, forcing you to slouch forward away from the backrest. Work through the adjustment order in this guide before blaming the chair.
Should the tilt be locked or free while gaming?
Free, for most people. A correctly tensioned free tilt lets you make small posture changes constantly, which is healthier than any single locked position. Lock it only for specific tasks where stability matters to you.
How often should I re-adjust my chair?
Whenever your setup changes — new desk, new monitor position, different footwear or floor — and once a few months in, because foam settles and your preferences drift. A two-minute pass through the order keeps everything honest.
My chair keeps sinking slowly. Is that an adjustment problem?
No — a chair that sinks under weight has a failing gas lift or a lever that is engaging the lift valve. Keep using the height lever normally and contact the manufacturer about a replacement lift; never open the cylinder yourself.
My tilt tension knob spins but nothing changes. Is it broken?
Possibly the knob has stripped on its shaft, or the mechanism’s spring has reached the end of its adjustment. Test unweighted: rock the empty chair by hand while turning the knob through its full range. If resistance never changes, the mechanism needs the manufacturer’s attention — tension mechanisms are not user-serviceable, and forcing the knob only damages the shaft further.
Should my armrests slide under the desk or stop at its edge?
Either is correct if your elbows rest at desk height with relaxed shoulders. Sliding under suits players who sit close and use the desk surface as forearm support for part of the session; stopping at the edge suits players who let the rests carry their arms fully. The wrong answer is rests that collide with the desktop and force the chair — and you — further from the screen than your eyes want.
A child uses my chair for homework. Should I readjust it every time?
Adjust the two things that matter at their scale — seat height, with a footrest or a firm cushion under their feet if they cannot reach the floor, and the lumbar pillow’s position — and leave the rest. The two-preset method in this guide applies: mark their settings with tape and yours beside them, and the swap becomes a thirty-second ritual instead of a daily compromise where the chair fits nobody.
Why does my chair feel perfect for the first hour and wrong by the third?
Because the setting is static and you are not. Muscles fatigue, you migrate forward in the seat, and the recline that suited a fresh back stops suiting a tired one. The in-session reset in this guide — small recline changes, a tilt worked through its range, a minute standing each hour — is the designed answer; a chair adjusted once and never touched again is only adjusted for hour one.
The Short Version
Adjust in order — height, depth, tilt tension, lumbar, armrests, recline, headrest — at your desk, one change at a time, and give each change a full session before judging it. The goal is not one perfect posture but a chair that supports you while you move. Ten minutes of methodical setup pays off in every session that follows.