Knowing how to install a CPU cooler is mostly about preparation and patience: with the PC powered off and unplugged, you fit a backplate and mounting bars to the motherboard, apply a small amount of thermal paste, lower the cooler on squarely, tighten its screws in a cross pattern a little at a time, then connect the fan cable before the side panel goes back on. Done in that order, the job takes most builders fifteen to thirty minutes and needs no force anywhere.
This walkthrough covers both air towers and all-in-one liquid coolers, in the order that avoids the classic mistakes — paste on the socket, a forgotten fan cable hidden under a heatsink, or screws cranked down on one side first. If you are still choosing the cooler itself, start with How to Choose a CPU Cooler; if the cooler is already bought, confirm the brackets match your board with How to Check Compatibility of a CPU Cooler before you open the case.
Disclosure: As an Amazon Associate, ilcastellomenu.com earns from qualifying purchases. Product examples below link to Amazon, where you can check current availability and specifications; this guide itself lists no fixed prices because pricing and bundles change frequently.
Before You Start: Safety and What You Need
Five minutes of setup prevents nearly every installation problem.
Power off, unplug, and ground yourself
Shut the PC down fully, switch the power supply off at its own switch, and pull the power cable out of the wall or the PSU. Press the case power button once with the cable out to drain residual charge. Then touch a grounded metal object — the unpainted inside of the case works — before handling components, and repeat whenever you walk away and come back. Never work inside a plugged-in PC, and never install a cooler with the system in sleep mode: fans and headers can be live.
Tools and supplies to gather
You need the cooler’s box (brackets, screws, backplate, fan clips and the included tube or sachet of thermal paste), a Phillips screwdriver — a long-shaft magnetic one makes tower screws far easier — isopropyl alcohol and a lint-free cloth if you are replacing an old cooler, and a small dish for screws. Work on a table with good light, keep the motherboard manual open at the fan-header diagram, and photograph the current setup before unplugging anything if this is an upgrade.
Decide: install inside the case or on the bench
In a new build, fit the cooler while the motherboard is still out of the case whenever the cooler is large — access to backplate and screws is far better. For an upgrade in an existing system, most towers and AIO blocks can be fitted in place provided the case has a motherboard-tray cutout behind the socket for the backplate. If there is no cutout, the board has to come out; do not try to hold a loose backplate in place with one hand while tightening with the other.
In this guide
How to Install a CPU Cooler, Step by Step
The sequence below is for a typical tower air cooler; the liquid-cooler variations follow in the next section.
Step 1–2: Fit the backplate and mounting bars
If the cooler uses its own backplate, hold it against the back of the motherboard so its posts pass through the four holes around the socket, then thread the standoffs or nuts from the front to hold it in place. Some AMD installations reuse the motherboard’s stock backplate and simply unscrew the two plastic retention brackets on the front — keep those brackets and screws in a labelled bag, because the stock cooler needs them if it ever goes back on. Next, screw the two mounting bars across the standoffs in the orientation the manual shows for your socket; the bars are often handed or offset, so match the diagram exactly rather than eyeballing it.
Step 3: Clean the CPU and apply thermal paste
On an upgrade, wipe the old paste from the CPU heat spreader with isopropyl alcohol and a lint-free cloth until the metal is bright, and clean the cooler’s base the same way. On a new build the spreader is already clean. Apply a pea-sized dot of paste at the centre of the spreader — the mounting pressure will spread it. Large-spreader CPUs can take a thin X or five-dot pattern instead. Technique, quantities and the myths around both are covered in depth in How to Apply Thermal Paste with a CPU Cooler; the short version is that slightly too much is harmless and too little is the real risk.
Step 4–5: Lower the cooler on and tighten in a cross pattern
Peel the protective film from the cooler’s base — forgetting this plastic sheet is the single most common cause of ‘my new cooler is worse than the old one’. Lower the cooler straight down onto the CPU so the mounting screws meet the bars, and do not slide it around once it touches the paste. Start each screw a few turns, then tighten in a diagonal cross pattern, a half-turn at a time, until both screws reach their hard stop. The pattern spreads pressure evenly so the paste layer ends up thin and uniform, and it avoids flexing one corner of the socket.
Step 6: Fit the fans and connect the cable
Clip the fan (or fans) to the fin stack in the orientation that blows air toward the rear of the case — the fan frame usually has an arrow marking airflow direction. Route the fan cable to the motherboard header labelled CPU_FAN, not a case-fan header: most boards refuse to boot, or warn loudly, when no fan is detected on CPU_FAN. A two-fan cooler uses the included splitter so both fans share that one header. Tuck the cable so it cannot droop into the fan blades, then check that tall memory still seats fully beside the front fan — if the fan has to ride a few millimetres up the stack to clear a DIMM, that is normal and expected.
Installing an All-in-One Liquid Cooler: The Differences
The cold-plate end of an AIO installs almost identically to an air cooler. The radiator is the extra work.
Mount the radiator and fans first
Decide the radiator position before fitting the block: top-mounting as exhaust is the common default, front-mounting as intake can help CPU temperatures slightly at the cost of warmer air for the graphics card. Screw the fans to the radiator in the right orientation for that position, then mount the radiator to the case. Keep the tube runs relaxed, with no sharp bends, and avoid a layout where the top of the radiator sits below the pump — trapped air collects at the highest point, and you want that point to be the radiator, not the pump.
Connect pump and fan headers correctly
The pump needs constant power: connect it to the header your motherboard manual designates (often AIO_PUMP or CPU_OPT), or to CPU_FAN with that header set to full speed / PWM mode as the cooler maker instructs. Radiator fans go to CPU_FAN so their speed follows CPU temperature. If the kit includes a controller hub, it typically needs a SATA power connector and a USB header for lighting and screen features. Double-check every connector before the first boot, because a running pump with stopped fans — or the reverse — is a configuration mistake the temperatures will reveal within minutes.
First Boot: Verifying the Installation
Check temperatures and fan behaviour in the BIOS
Boot into the BIOS/UEFI setup first, not the operating system. A correctly mounted cooler shows an idle temperature that settles rather than climbs, and the CPU fan RPM reads in the hundreds-to-thousands rather than zero. Let it sit for a few minutes: a steadily rising idle temperature means poor contact — usually the film left on the base, a screw not fully home, or far too little paste. Shut down, unplug, and remount rather than hoping it settles.
Set a fan curve and stress-test briefly
In the BIOS or the board maker’s software, choose a quiet fan profile, then boot the OS and run a few minutes of heavy load — a game, a render, or a stress utility. Watch that temperatures plateau instead of creeping, and listen: rattles mean a cable touching a blade or a fan clipped loosely. If load temperatures are far above what reviews show for your cooler class, remounting with fresh paste fixes the overwhelming majority of cases. Persistent problems after a careful remount point elsewhere — our troubleshooting guide How to Fix CPU Overheating works through those causes in safe order.
Common Installation Mistakes
Tightening one side fully before starting the other
This tilts the base, squeezes paste out on one side and leaves an air gap on the other. Always start both screws, then alternate in a cross pattern. The same rule applies to the four screws on AIO cold plates.
Mounting the fan backwards
A reversed front fan fights the case airflow and can cost several degrees while adding noise. Check the arrow on the fan frame: air should travel front-to-back in a standard case, matching the rear exhaust. While you are in there later in the year, How to Clean a CPU Cooler covers keeping the fin stack dust-free so the install keeps performing.
Forgetting the CPU_FAN header or the film
The two classics. A fan plugged into a case header leaves CPU_FAN empty and triggers boot warnings; the clear film on the base quietly insulates the CPU from the heatsink. Make both a physical checklist item: film off, cable on CPU_FAN, then power up. Builders shortlisting a replacement after a failed old cooler can compare classes in Best Coolers for CPU and the AM4-specific picks in Best CPU Coolers for Am4.
Orientation, Airflow Direction and Cable Routing Done Properly
A cooler can be mounted firmly, pasted perfectly, and still underperform because of how it sits in the case’s airflow. These details take two minutes during installation and are awkward to fix later.
Align the cooler with the case's airflow path
In a conventional case, air enters at the front and bottom and leaves at the rear and top. A tower cooler’s fans should push air front-to-back, handing heat directly to the rear exhaust. Mounting a tower rotated 90 degrees — possible on some sockets — makes it fight that path or dump heat at the graphics card or power supply. AIO radiators follow the same logic: a top-mounted radiator exhausts with the case’s natural rise of warm air; a front-mounted one intakes cool air for the CPU at the price of pre-warmed air for everything else. Neither is wrong; choose deliberately, set the fans to match, and write down what you did for the day you troubleshoot.
Route cables before the final tightening
Fan cables, pump cables and any RGB or USB leads for a pump-block screen should be routed and loosely dressed before the cooler is fully tightened down, because access only gets worse. Keep cables out of the fin stack’s airflow, away from fan blades by a clear margin, and off hot VRM heatsinks. Use the motherboard’s cable channels and the case’s tie points rather than letting leads drape. A cable that droops into a fan weeks later — they migrate with heat cycles — announces itself as a rattle that sends owners hunting for failing bearings.
Removing an Old Cooler and Upgrading In Place
Most installations are replacements. The removal half of the job has its own technique, and doing it well protects the CPU and board you are keeping.
Break the seal, protect the socket
Warm paste releases more easily, so run the PC under light load for a few minutes before shutting it down for the swap — then shut down, switch off and unplug as always. Unplug the fan cable, unscrew in a cross pattern, and twist the cooler gently to break the seal before lifting. On AMD’s pin-grid sockets, a cooler pulled straight up can extract the CPU with it; the twist is not a flourish, it is the safeguard. If a CPU does come out stuck to a cooler, slide it sideways off the base — never pry between chip and heatsink — and inspect every pin before reseating it.
Clean, inspect, and keep the old parts
Clean the spreader to bright metal and inspect the socket area while access is perfect: dust in the socket surround, a bent pin, a tired-looking VRM heatsink pad. Bag the old cooler’s brackets and screws together and label them; sockets change slowly and a complete old cooler is a useful spare or a future budget build. If the old cooler failed rather than merely aged, note how — a dead fan, a dried pump — because the replacement choice should answer the failure, not repeat it.
A Final Pre-Boot Checklist
Run this list physically, finger on each item, before the power cable goes back in. It takes ninety seconds and catches the entire classic-error catalogue.
The seven checks
One: protective film removed from the cooler base. Two: mounting screws tightened in a cross pattern to their stops, cooler immovable by hand. Three: fan or fans clipped firmly, oriented to blow toward the rear exhaust. Four: fan cable on CPU_FAN; pump cable on its designated header for liquid coolers. Five: memory modules fully seated and clear of the front fan. Six: no cable able to droop into any fan. Seven: radiator (if fitted) screwed evenly, tubes unstressed, highest point of the loop at the radiator rather than the pump. Then power up into the BIOS and watch idle temperature settle and RPM read sensibly before booting the operating system — the verification step that turns an installation into a confirmed installation.
Torque, Pressure and Why Evenness Is the Whole Game
Everything in installation technique reduces to one physical goal: a thin, uniform paste layer under even pressure. Understanding why makes the steps self-explanatory.
What the cross pattern actually does
When the first screw bites, the cooler tilts microscopically toward that corner. If that screw is driven home before the opposite one starts, the tilt sets: paste squeezes away from the tight corner, pools at the loose one, and the base contacts the spreader unevenly — a few degrees lost and a mount that can rock. Alternating in a cross pattern keeps the base descending parallel to the spreader, so pressure builds uniformly and the paste film ends up the same thickness everywhere. Spring-loaded screws then cap the force at the designed value, which is why they have hard stops and why ‘a little extra for luck’ is both impossible and undesirable. The pattern feels fussy the first time and obvious forever after: it is the same reason wheel nuts and cylinder heads are tightened in sequence, scaled down to a part you can hold in one hand.
Signs of a good mount before you ever boot
A correctly mounted cooler does not rock when you grip it firmly and try — gently — to twist it. Its screws all reached their stops with similar resistance. The fan spins freely with no cable near the blades, and the assembly’s weight feels supported rather than hung. If any of those fail, fix them now, on the bench, rather than after the temperatures report them. Installation quality is visible before it is measurable, and the two-minute inspection is the cheapest diagnostic in the whole build.
Gear for This Guide
The examples below come from our Creators-API-verified product pool and illustrate the cooler classes discussed in this guide. They are examples, not a ranked list — use the criteria in this article to judge any model, including newer revisions.
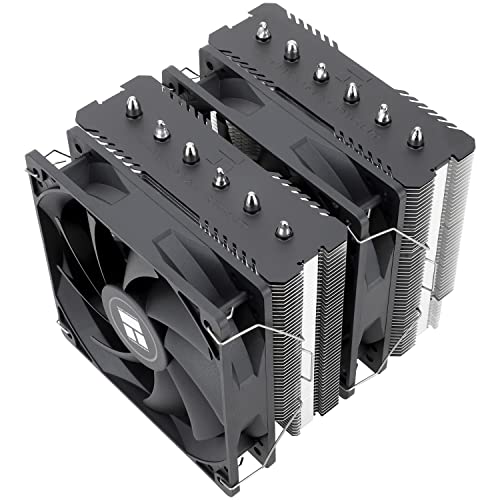
Thermalright Peerless Assassin 120 SE
A dual-tower cooler with six heat pipes and twin 120mm PWM fans — a good example of the most common modern install: backplate, two mounting bars, spring screws, then fans clipped on last. Thermalright Peerless Assassin 120 SE — Check on Amazon

Cooler Master Hyper 212 Black II
The long-running single-tower design shows the simpler end of installation, with a compact mounting kit that suits first-time builders and cramped cases. Cooler Master Hyper 212 Black II — Check on Amazon
how to install a CPU cooler: The Short Version
Preparation, paste, even pressure, fan cable — in that order, with the power cable out of the wall from first to last. Installations fail on forgotten films and forgotten headers, not on technique, so use the checklist every time.
Reading Your Specific Cooler Before You Touch the Board
Every cooler family mounts a little differently, and the five minutes you spend with your particular model’s manual before starting will save the half hour other builders lose to a bracket installed upside down. Lay the mounting hardware out in the order the manual uses it, and identify each piece by name: backplate, standoffs, mounting bars, spring screws, fan clips, splitter cables. Makers often include hardware for two or three socket families in one bag, which means a third of the metal in front of you does not belong in your build at all. Separating the parts for your socket from the parts for the others — and putting the others back in the box immediately — prevents the classic mid-install confusion where a standoff of almost the right height gets used because it was the one within reach.
Check two orientation details on paper before anything is fitted. First, which way the cooler body sits relative to the memory slots: on many boards a wide tower only fits with its fan overhanging the slots, and a few only fit rotated, so confirm the manual’s intended orientation for your socket rather than assuming front-to-back. Second, where the fan cable exits. You want it to leave the cooler on the side nearest the CPU_FAN header, with enough slack to route neatly and no tension pulling sideways on the connector. Deciding this now, with the cooler in your hands, is trivial; discovering it after the heatsink is torqued down means choosing between an ugly cable draped over the fins and a full remount.
Dry-fit everything that can be dry-fitted
Assemble the bracket stack once without the motherboard involved: backplate, standoffs and bars together on the desk, so your fingers learn how the threads engage and how much resistance is normal. Spring-loaded screws should compress smoothly; thumb screws should spin freely until they seat. If a thread feels gritty or cross-threaded on the desk, it will feel far worse at arm’s length inside a case, and a replacement screw requested now costs a day while the same discovery mid-build costs the whole evening. Clip the fans onto the heatsink once as well. Wire clips are fiddly by design, and practising the motion without a motherboard underneath removes the risk of a slipping clip scratching the board or pinging into the case to be found by a fan blade later.
What Changes on AMD and Intel Sockets
The broad sequence — backplate, bars, paste, cooler, fans — is shared, but the details that catch people out are platform-specific. Many AMD boards arrive with a stock backplate that aftermarket coolers reuse, held in place only by the plastic retention brackets screwed into it. When you remove those brackets, the backplate is free to fall behind the motherboard, so either work with the board flat, keep a finger on the backplate through the case’s CPU cutout, or remove the board entirely. Builders who miss this spend an awkward ten minutes fishing a metal plate out from behind a mounted motherboard. Some AMD coolers also mount with a latch-and-hook mechanism inherited from older designs; these need firm, even downward pressure and a patience-testing alignment of the second hook, and they reward seating the cooler before the board goes into a cramped case.
Intel’s recent sockets use an independent loading mechanism with a sprung frame that presses the processor into the socket, and that frame means the surface you are mounting to is already under engineered pressure. Two practical consequences follow. First, never open that lever with a cooler half-fitted or use the cooler’s screws to pull a warped-feeling assembly flat — if the cooler does not sit level by hand pressure alone, something in the bracket stack is wrong. Second, standoff height is socket-generation-specific even within the Intel family; a kit spanning several generations includes subtly different spacers, and using the taller set on a shallower socket leaves the coldplate hovering a fraction above the chip on a thick bed of paste, a mount that boots, idles normally and then runs inexplicably hot under load. Match the spacers to your exact socket name, not to the brand.
Laptops, prebuilts and other people’s machines
If you are fitting a cooler inside an OEM prebuilt rather than a custom build, add three checks before ordering or starting. Proprietary motherboards sometimes use non-standard hole spacing or a backplate bonded to the board, either of which defeats a standard mounting kit. The case may lack a CPU cutout entirely, turning a bracket swap into a full motherboard removal. And the front-panel and power connectors may be proprietary blocks routed exactly where a tall tower wants to be. None of this makes the upgrade impossible, but it moves the job from a thirty-minute swap to a planned afternoon, and knowing that before the side panel comes off is the difference between a project and a mess.
Scenario Walkthroughs: Three Installs That Differ
The mid-tower gaming build, board already in the case
This is the standard install and the one where the case’s CPU cutout earns its keep. Work with the case laid on its side so gravity holds the backplate against the board instead of dropping it into the gap. Fit the memory before the cooler if the front fan will overhang the slots — reaching the slot clips under a fitted tower ranges from annoying to impossible. Route the fan cable down the back of the motherboard tray where the layout allows, and leave the graphics card out until the cooler is torqued and cabled; the open slot gives your hand room to work and removes any chance of leaning on the card while you reach a stubborn screw. Only refit the card once the cooler has passed a gentle rock test: a correctly mounted tower does not shift, creak or tilt when you press its top corner firmly.
The small-form-factor build where order is everything
In a compact case, installation order matters more than technique. The cooler, memory and M.2 drive usually go onto the board before the board goes into the case, because once the board is in, the power supply or its shroud will block the very screws you need. Connect the tiny front-panel leads and the fan cables while the board is still on the desk if the headers will sit under the heatsink. Plan the radiator position, if you are using liquid, before the board goes in as well: in many small cases the radiator and its fans must be fitted to the case first, the board second, and the pump block last, threading the tubes through a gap that only exists in that order. Accept that cable management happens during assembly, not after it — there is no “after” space to stuff surplus cable into.
Swapping coolers on a working machine you cannot afford to break
When the PC is a work machine that must run tomorrow, change the risk profile. Back up anything irreplaceable first, not because cooler swaps are dangerous but because any open-case work carries some risk and the backup costs nothing. Photograph the existing cable routing and fan orientation before removing anything, so the machine can be returned to its exact previous state. Keep the old cooler, its brackets and a tube of paste together until the new installation has survived a week of real use, not just a first boot. And schedule the swap for a time when a stripped screw or a missing bracket is an inconvenience rather than a deadline disaster — the same patience the best CPU coolers for overclocking demand in tuning, applied to logistics.
After the First Boot: The First Week With a New Cooler
A successful first boot proves the mount is not catastrophically wrong; the first week proves it is right. Thermal paste settles in its first heat cycles, spreading microscopically as it warms and cools, so temperatures a few degrees better on day three than on day one are normal and not a sign you should remount to chase them. What should not change is the pattern: note your idle temperature, your gaming temperature and the fan speed both required, then glance at them whenever you happen to open a monitoring tool during the week. A mount problem announces itself as a widening gap between the coolest and hottest cores under load — one corner of the coldplate making poor contact lets the cores beneath it run far hotter than their neighbours — or as temperatures that creep upward day by day, which suggests a screw backing out, a fan cable slipping off, or, with liquid, a pump losing its prime to an air bubble that a gentle tilt of the case, as the troubleshooting guides describe, can move along.
Retightening is rarely needed on a properly torqued mount and should not become a ritual: spring screws are designed to hold their set pressure, and repeated fiddling risks disturbing a good paste joint. The exception is after moving house or transporting the PC any distance, when a two-minute check that the tower has not shifted and every fan still spins is cheap insurance. Keep the leftover brackets, the spare fan clips and the manual in the motherboard box rather than a random drawer. The next person to open this machine — quite possibly you, three years from now, mid-upgrade — will thank you for a parts kit that is complete and findable.
Accessibility and Confidence: Making the Job Easier on Yourself
Most installation difficulty is ergonomic, not technical. Work at a table where you can sit with the case at elbow height rather than crouching over it on the floor, and put a lamp where it shines into the case rather than relying on ceiling light that your own head shadows. A magnetic parts tray or even a row of small bowls keeps screws sorted by step, which matters because cooler hardware includes near-identical screws of two lengths and mixing them up is the most common unforced error in the whole job. If your grip strength or dexterity makes spring screws genuinely hard, choose your moment and your tools accordingly: a long-handled screwdriver with a proper Phillips head gives leverage and alignment that a stubby multi-tool cannot, and there is no rule that the whole install happens in one sitting. The paste does not care if you break for tea between fitting the brackets and lowering the cooler.
Finally, give yourself permission to stop and reseat. New builders often push through a mount they suspect is crooked because removing the cooler feels like failure. It is the opposite: a remount costs ten minutes and a pea of paste, while a bad mount costs weeks of unexplained temperatures and noise. Professional builders remount without ceremony whenever contact looks uneven. The only genuinely bad installation is the one you knew was wrong and left alone.
Installing With a Helper, and Knowing When to Get One
Most cooler installations are one-person jobs, but a second pair of hands transforms two specific moments. The first is lowering a large dual-tower onto a vertical motherboard in a standing case, where you must simultaneously align two or four screw threads, keep the coldplate from skating across the paste, and hold a screwdriver. A helper who simply holds the cooler steady and level while you start the first two screws removes the hardest coordination problem in the entire procedure. The second is any install where the backplate will not stay put: a helper’s finger through the case cutout, pressing the plate home while you fit standoffs from the front, converts a frustrating juggling act into a thirty-second step. Ask before you start rather than mid-install with paste already spread and a cooler dangling from one hand.
There are also installs where the right call is to hand the job to a shop, and recognising them is competence, not defeat. A cooler swap on a machine with a bonded OEM backplate, a liquid cooler with tubing runs threaded through a fully built showcase system, or any install on a machine whose downtime would cost real money if a screw stripped — these carry risk out of proportion to the labour involved. A technician with the board-level tools and spare hardware on the shelf absorbs that risk for a modest fee. Everything else in this guide, though, sits comfortably within a careful first-timer’s reach, and the satisfaction of a machine that boots cool and quiet because you mounted it well is a genuine part of why people build their own PCs at all.
Recording What You Did for the Next Upgrade
Spend the last two minutes of the job writing down what future-you will need: the cooler model, the socket kit you used, which spacers were correct for this socket, the fan header each cable went to, and the fan curve settings you settled on. A note in the motherboard box or a photo of the BIOS fan page on your phone both work. Builds live for years and memory does not; the builder who documented the install removes the cooler in half the time, orders the right bracket for the next platform without guesswork, and restores a working fan curve after a BIOS reset instead of rediscovering it by ear over a week of annoying revving. It is the least glamorous step in this entire guide and, hour for hour, the one that saves the most time across the life of the machine.
What to do with the stock cooler you removed
Do not throw the stock cooler away, even if you never intend to use it again. It is the perfect diagnostic spare: if your new cooler, its fan or its pump ever misbehaves, refitting the stock unit for an evening separates a cooling fault from a processor or motherboard fault in a single test. It is also the cooler a future buyer of your CPU will expect in the box, and the one that keeps a spare-parts build alive. Clean its base, coil its cable, and store it in the new cooler’s box, labelled, alongside the brackets you did not use. Five minutes of tidiness now buys you a troubleshooting tool for the entire life of the processor.
Frequently Asked Questions
Do I need to remove the motherboard to install a CPU cooler?
Only if the case has no cutout behind the CPU socket for backplate access, or the cooler is so large that working inside the case is impractical. Most upgrades and many new builds can be done with the board installed. In a fresh build, fitting a large cooler on the bench before the board goes in is simply easier.
How much thermal paste should I use?
A pea-sized dot at the centre of the heat spreader for mainstream CPUs — roughly 4–5mm across. Mounting pressure spreads it. Large workstation spreaders suit an X or five-dot pattern instead. Too little is the real risk; a modest excess just squeezes out harmlessly. Full technique is in How to Apply Thermal Paste with a CPU Cooler.
Which header does the CPU fan plug into?
The motherboard header labelled CPU_FAN. Boards monitor that header and warn or refuse to boot if no fan is detected there. An AIO’s pump goes to the header the manual designates (often AIO_PUMP or CPU_OPT) set as instructed, with the radiator fans on CPU_FAN so they follow CPU temperature.
My new cooler performs worse than the old one. What did I miss?
Almost always one of three things: the clear protective film is still on the cooler’s base, a mounting screw is not fully tightened in the cross pattern, or too little paste was used. Power off, unplug, remove the cooler and check — the paste imprint will show you which. Remount with fresh paste.
How tight should the mounting screws be?
Tighten in a diagonal cross pattern, a little at a time, until each screw reaches its hard stop — sprung mounts are designed to bottom out at the correct pressure. Do not force beyond the stop, and never fully tighten one side before starting the other, which tilts the base and ruins the paste layer.
Can I install a cooler with the PC upright?
You can, but laying the case on its side is easier and safer: gravity helps you lower the cooler straight down without sliding it across the paste, and dropped screws land in the case rather than rolling under the motherboard. Take the extra minute.
Should I install the cooler before or after putting the motherboard in the case?
Either order works in a roomy mid-tower with a generous CPU cutout, and fitting the cooler on the bench is easier on your hands and your back. In a small case, the cooler almost always goes on first, because the power supply and case walls block screwdriver access later. The exception is a very tall, heavy tower in a case you must carry or tilt repeatedly during the build: fitting it last reduces the time the board spends supporting that weight while being moved around.
One mounting screw will not catch its thread. What should I do?
Stop and back the others out rather than forcing it. A screw that will not start usually means the bracket stack is slightly misaligned, a standoff is the wrong height, or the cooler is sitting a fraction off-centre. Loosen every screw to finger-loose, reseat the cooler flat with hand pressure, and start each screw by hand for its first full turn before any tool comes out. If one still refuses, remove the cooler and inspect that thread and standoff directly — cross-threading a bracket by force turns a five-minute pause into a replacement-parts problem.
How do I know the protective film is really off the coldplate?
Look at the base under a bright light at an angle before you apply paste: bare metal shows a machined or mirror finish with visible milling marks on many models, while film adds a glossy, slightly soft reflection and usually a printed warning or a coloured pull tab. Run a clean fingertip across it — film feels like smooth plastic, metal feels like metal. If you only discover the doubt after mounting, check temperatures: a film-forgotten install idles noticeably warm and climbs extremely fast under load, and the fix, while annoying, is simply a remount done properly.
Is it normal for temperatures to differ between the first boot and a week later?
Small differences are normal in both directions. Paste settles through its first heat cycles and may improve contact slightly, while dust filters load up, room temperatures change and Windows finishes background indexing work that kept the processor busy in its first days. What matters is the pattern under a load you can repeat: run the same game or render for the same length of time and compare like with like. A stable or slightly improving result means the mount is sound. A steady climb across the week means something is moving, clogging or failing, and that is the moment to open the case and look.
Keep that repeated-load habit: it is the simplest health check a self-built machine can have.
Related Guides
Keep exploring with these guides and roundups from the same CPU-cooling collection: