Learning how to organize cables on a gaming desk is a one-afternoon project with a permanent payoff: no cables in your leg space, nothing dangling behind the desk, and upgrades that take minutes instead of an archaeological dig. The method is always the same — power strip mounted off the floor, cables routed in labelled bundles along fixed paths, and slack managed deliberately. This guide walks the full process, including the special case of height-adjustable desks.
Disclosure: As an Amazon Associate, ilcastellomenu.com earns from qualifying purchases. Product links on this page may earn us a commission at no extra cost to you. Prices and availability change on Amazon, so check the product page for the current details before you buy.
The Principle: One Power Source, Fixed Paths, Managed Slack
Every tidy desk you have ever admired follows the same architecture. All power comes from one strip mounted under the desk or inside its tray, so power cables are inches long instead of trailing to a wall socket. Data cables travel along one or two fixed routes — usually the desk’s rear edge and down one leg — held by clips, sleeves or a raceway. And slack is not hidden randomly but coiled and stored in one place, the tray, so any cable can be freed in seconds.
Decide your architecture before touching a cable. If your desk lacks a tray, an under-desk basket or adhesive raceway creates the same structure — the desks in Best Desks for Cable Management show how manufacturers build it in. Everything else in this guide is just executing the plan neatly.
In this guide
What You Need
- A power strip with enough outlets for the whole station, ideally with a switch
- An under-desk cable tray or basket, or an adhesive raceway channel
- Velcro ties (not zip ties — you will re-open these bundles) in two sizes
- Adhesive cable clips for the rear edge and leg route
- A braided cable sleeve for the one bundle that must travel visibly, such as down a leg
- A label maker or masking tape and marker — future you is the customer
Total cost is small and mostly reusable for life. Avoid the temptation of novelty gadgets; the six items above have organised more desks than every Kickstarter cable gadget combined.
Step by Step: How to Organize Cables on a Gaming Desk
- Power down and unplug everything. Pull every cable out and lay the desk bare — half-measures from a connected start never converge.
- Mount the power strip under the desk near its centre-rear, or in the tray, with its switch reachable from your chair.
- Place equipment in its final positions first (see How to Set Up a Gaming Desk) — cable routes depend on where things live.
- Plug in and route power cables first, one device at a time, coiling each cable’s excess in the tray and securing with a velcro tie.
- Route display and USB cables along the rear edge with clips, keeping them in their own bundle parallel to the power bundle, not twisted through it.
- Bundle the drop to the floor — usually power strip to wall socket, plus ethernet — inside a sleeve down the desk leg nearest the socket.
- Label both ends of every cable you would struggle to identify by sight: monitors especially, since their power and display leads are twins.
Work device by device and test each one powers on before moving to the next. Discovering a dead cable after the whole desk is bundled means unbundling; discovering it mid-process means swapping one lead.
Slack, Service Loops and the Standing-Desk Problem
Every device needs a service loop: enough slack that you can pull the monitor forward to reach its ports, lift the keyboard off the desk, or slide the tower out for cleaning, without unplugging anything. Loops live in the tray or hang in a gentle curve behind the desk — never stretched taut, never pooling on the floor. Taut cables strain ports and pull plugs out during play; floor pools collect dust, feet and chair casters.
Height-adjustable desks add one non-negotiable test: the bundle between desk and floor (and between desk and tower, if the tower sits on the floor) must have enough length for the desk’s full raised height, while not dragging at its lowest. Route that bundle as a single sleeved drop with a generous curve, then run the desk through its full range twice before trusting it — the failure mode is a cable going taut at full height and unplugging your monitor mid-game, a scenario Standing Gaming Desk vs Seated flags for new standing-desk owners.
Wireless Where It Helps, Wired Where It Counts
Cable management is partly a purchasing philosophy. A wireless mouse and headset remove two of the most mobile cables — the ones that drag, snag and cross your leg space. Keyboards can go wireless for a cleaner surface, accepting occasional charging. But keep the monitor, tower power and ethernet wired: those cables never move, carry the most consequence if they drop, and disappear into the tray architecture perfectly well.
Charging cables deserve a fixed home too: one short USB lead anchored at the desk’s edge with a magnetic clip or a small dock, instead of a rotating cast of cables pulled from drawers. Consistency is what keeps a tidy desk tidy — every cable has an address, including the temporary ones.
Keeping It Tidy: The Five-Minute Rule
Desks do not get messy in a day; they accumulate one ‘temporary’ cable at a time. The defence is a rule: any new device gets routed properly on the day it arrives, using the tray and the spare clips you kept, and any removed device’s cable leaves the desk the same day. Players who follow How to Clean a Gaming Chair on a schedule often pair the two chores — chair and cables on the same maintenance afternoon.
Once a year, or at any major upgrade, repeat the full strip-down. Cables you no longer own devices for will be hiding in the tray — they always are — and a fresh pass restores the system to its day-one clarity. If you are rebuilding the whole station anyway, How to Assemble a Gaming Desk covers fitting the tray and routing the first cables while the desk is still upside down, which is the easiest moment of all.
Cable Lengths: The Hidden Half of Tidy
Most cable mess is length error, not effort error. A display cable a foot too long becomes a coil that will not stay coiled; a USB lead six inches too short forces a diagonal route across the desk’s back that crosses every other bundle. When you do the full strip-down, measure each run along its intended route — rear edge, down to the tray, up to the device — and replace the worst offenders with leads sized to the run plus the service loop. Correctly sized cables almost organise themselves.
Keep a small stock of the lengths your desk actually uses, labelled, in the tray or a drawer. The next peripheral then inherits a correct cable instead of whatever came in its box, and the system survives upgrades. This is also the moment to retire mystery cables: if a lead in the tray connects to nothing you own, it leaves. Trays accumulate orphans with the reliability of a physical law.
Ethernet deserves a special mention: a single flat or slim cable routed along the wall and up the desk leg replaces the Wi-Fi anxiety of competitive play and disappears visually better than any other lead, because it never moves and can be clipped flat along skirting.
Troubleshooting a Desk That Will Not Stay Tidy
If your desk re-messes itself within weeks, diagnose the system rather than your character. The usual causes: no fixed home for charging cables, so they colonise the surface; a tray too small for the station’s real cable count, so bundles migrate out; one device — often a work laptop — that docks and undocks daily with its leads trailing. Each has a structural fix: a dedicated charging dock at the desk’s edge, a bigger tray, a proper docking station with a single connection.
Charging is the number-one recidivist. Solve it once with a small dock or a magnetic cable anchored where devices actually land, sized for the household’s real devices, and the daily tide of leads stops. The second recidivist is the ‘temporary’ gaming accessory — a wheel, a drawing tablet, a VR headset — whose cable lives wherever it was last dropped. Give each a hook or shelf and a coiled lead that stays with it.
Tidy is a property of systems with an address for everything. When everything has an address, tidiness is just things going home.
Safety and Sanity Around Power
Cable management is aesthetic until it is electrical, so a few safety disciplines belong in this guide. Do not daisy-chain power strips — one strip, plugged directly into the wall, sized for the station’s load. Do not run power cables under rugs or through pinch points like door hinges and desk edges where insulation wears invisibly. Replace any cable or strip with a damaged jacket, a loose plug or a history of intermittent power; intermittent power is a fault announcing itself, not a personality quirk.
Heat is the other boundary: coils of power cable under load should be loose, never tight bundles, and strips should sit where air reaches them — not buried under the tray’s cable mass with no ventilation. A strip with a switch you can reach is also a safety device: one motion kills the whole station in an emergency or a thunderstorm, which is why this guide mounts the switch within reach of the chair.
Surge protection is worth its small premium for a station carrying a PC and multiple monitors, and it belongs at the same single point as everything else: the one mounted strip. Protection scattered across three strips in three sockets protects arithmetic, not equipment. One architecture — for tidiness, for upgrades and for safety alike.
None of this requires an electrician; it requires only refusing the three temptations of every messy desk: chaining strips, hiding damage, and burying heat. Tidy and safe are the same system viewed from two sides.
The Fifteen-Minute Monthly Pass
Full reorganisation is annual, but a fifteen-minute monthly pass keeps the system honest between deep cleans. Dust the tray’s contents — cable mass collects dust exactly like every other horizontal surface, and a vacuum brush over the tray keeps it from becoming insulation. Check the sleeved drop for new additions that never got routed: a charger that ‘temporarily’ joined the bundle three weeks ago is this pass’s usual catch.
Test the service loops: pull each monitor forward, slide the tower out, lift the keyboard — every device should move as designed without a tug of war. Loops tighten themselves over months as cables settle and get nudged; restoring them is a minute’s work now or an unplugging accident during a future upgrade.
Finish by evicting one thing. Every desk accumulates at least one cable, adapter or device per month that no longer earns its place; a standing eviction habit keeps the tray’s population at the station’s real size. Tidiness maintained in fifteen-minute instalments never becomes the weekend project everyone dreads — which is, in the end, the entire strategy of this guide.
Cable Management for Specific Devices
Monitors are the cable system’s divas: each brings power and display leads that look identical and behave differently, which is why this guide labels both ends. Route display cables with their connector limits in mind — they dislike sharp bends at the plug and being the load-bearing member of a bundle. Give each monitor’s leads their own gentle curve from tray to screen, especially on arms that move.
VR headsets and their link cables defy fixed routing by design; give them a dedicated hook and a coiled lead that lives with the headset, deployed for sessions and retired after. Wheels, tablets and other occasional devices follow the same rule: the cable belongs to the device, stored with it, never annexed permanently into the desk’s bundles.
Consoles visiting the desk — a dock that appears for weekends — deserve one pre-routed spare HDMI and power lead waiting in the tray, labelled. Guests plug into the system in two minutes instead of draping cables across it, and they unplug just as cleanly. Hospitality, in cable terms, is a spare labelled lead.
Tools and Materials: What the Professionals Actually Use
Professional installers’ kits look boring for a reason: velcro ties in bulk, a quality label maker, adhesive clips rated for the surface, braided sleeving in two diameters, and a small stock of cables in graduated lengths. The glamour items — magnetic everything, bespoke machined channels — appear in photographs far more than in installations, because the boring kit solves ninety-five percent of desks completely.
Two upgrades from the boring kit do earn their place. A tray with a lidded or high-sided design contains the coil mass better than open baskets when the station is large. And heat-shrink or printed labels outlast tape flags in the tray’s warm, dusty environment — a small thing, until the day you are identifying a monitor lead by torchlight.
Buy the kit once, in quantity, and keep the surplus in the tray itself. Cable management fails socially when the right tie is in another room; it succeeds when every material the system needs lives within arm’s reach of the desk it serves.
The Psychology of the Tidy Desk
Players keep desks tidy when tidiness is the path of least resistance — when the tray is reachable, the ties are at hand, the dock is where the phone lands anyway. Design for your laziest self and the system survives your busiest month. Design for your most virtuous self and it survives until Tuesday.
This is why this guide keeps prescribing addresses over efforts: a cable with an address returns itself; a cable relying on your discipline wanders. The tidy desk is not a character trait. It is a small piece of urban planning, executed once, maintained in minutes, and enjoyed every time you sit down and see a surface instead of a nest.
A Worked Example: One Desk, Start to Finish
Picture a typical station: tower on the desk’s right, two monitors on arms, keyboard, mouse, speakers, a headset dock and a console that visits. The strip mounts under the rear centre. Tower power drops six inches into the tray. Each monitor’s power and display leads curve from the tray up the arm’s channel, labelled at both ends, with the service loop hidden behind the screens. Keyboard and mouse leads — if wired — run the rear edge in the data bundle; the speakers’ thin leads join them, while the speakers’ power brick sits in the tray where its heat can escape.
The headset dock’s USB lead takes the short route to the tower’s front panel area via one clip under the desk’s edge, because it is plugged and unplugged often and should not require tray archaeology. The console’s spare HDMI and power leads wait coiled in the tray’s left end, labelled, for weekend duty. One sleeved bundle leaves the desk: strip to wall, ethernet beside it, down the right leg, clipped flat.
Total visible cable from the chair: essentially none. Total time to swap a monitor: four minutes, because its leads are labelled and its loop is real. That is the worked example’s whole point — the system is unremarkable component by component, and remarkable only in aggregate, which is what organisation means.
Two PCs, One Desk: KVM Switching Without the Nest
A second PC — a work laptop, a streaming rig, a partner’s machine — doubles a desk’s cable population and adds a category the single-PC system never meets: cables whose job is to be switched. The KVM switch or dock that shares your monitors and peripherals between machines becomes the desk’s second hub, and it should be placed with the same deliberateness as the power strip: fixed under the desk or at its rear edge, reachable for its button or its cables, with every lead to it routed and labelled by machine. The nest that dual-PC desks are famous for is almost always a switch placed wherever it landed on day one, with cables arriving from two directions at whatever length they happened to be.
Route the two machines as two systems sharing a border. Each PC keeps its own bundle to the switch; the switch keeps one bundle to the monitors and one to the shared peripherals. When a cable fails or a machine is upgraded, you should be able to unplug one system’s entire bundle at the switch and lift it away without touching the other’s — the test of whether the architecture survived contact with the second PC. Label at the switch with the machine’s name, not its position, because positions change at every upgrade and names do not.
Power discipline doubles in importance: two machines on one strip is a load and a confusion problem, so give the second system its own strip, switched separately, mounted beside the first. The player who can power down the work machine entirely — strip off, switch parked on the gaming PC — owns a desk with modes. The player whose two systems share one strip owns a desk that is always half-awake and wholly tangled.
The Desk Far From the Socket: Room-Scale Routing
This guide’s architecture assumes a wall socket within a cable’s honest reach. Rooms disagree: the only good desk position can be metres from the nearest outlet, across a doorway or along a wall the cables must travel. Room-scale routing is the same discipline at a larger radius. Choose one path — along the skirting board is almost always the right one — and commit every cable that must cross the room to that path, inside a raceway or under cable covers where feet cross it. Three cables taking three different routes across a room is not three problems; it is a room that can never be cleaned, rearranged or walked through safely at night.
At crossings, protect mechanically: a floor cord cover where the path crosses a walkway, never a cable under a rug, where it will be stepped on invisibly for years, overheating its insulation and fraying toward failure while presenting a trip ridge besides. At the wall, the extension question must be answered honestly — a single quality extension lead, run permanently along the skirting to a strip at the desk, is a legitimate installation; a chain of adapters and a bargain multi-way trailing across the floor is the thing safety sections exist to prevent. One extension, properly rated, properly routed, is the ceiling of the acceptable.
Wireless earns a fresh hearing at room scale: the printer, the speakers’ receiver, the second screen used for chat — devices whose data can cross the room through the air remove the longest cables from the plan entirely. Judge each candidate by the cable it deletes. A room-scale route designed once, with its path fixed and its crossings protected, becomes invisible infrastructure — which is the whole ambition of cable management, expressed at the scale of the room rather than the desk.
Numbering vs Naming: Label Systems That Survive Upgrades
Labels fail in a predictable way: they describe where a cable went on the day it was labelled, and the setup outgrows the description. ‘Monitor’ becomes a lie the day a second monitor arrives; ‘PC USB’ becomes archaeology after the upgrade. Two labelling philosophies survive contact with time, and choosing between them deliberately beats the improvised handwriting most desks wear. The naming system labels by function and device identity — the specific monitor’s name, the device’s own name — and works while your setup is small enough that names stay unique. The numbering system labels cables with numbers at both ends and keeps the map in the setup note: cable 7 is whatever the note says it is today, and when cable 7 is re-purposed, the note changes and the labels stay true.
Numbering wins at scale and across upgrades, because it separates the cable’s identity from its job. It also enforces the documentation habit this batch keeps recommending: the map in the note is the setup’s wiring diagram, and the player who keeps one can hand their entire cable system to a future self — or a helpful partner — without a word of explanation. Naming wins on immediacy for the three or four cables you touch monthly, which is why mature setups hybridise: names for the daily cables, numbers for the infrastructure.
Whichever system you choose, label both ends of every cable that disappears into a bundle, tray or wall route — the end you can see is never the end you are hunting — and use labels that survive handling: a label maker’s tape or a flag tie, not ink on masking tape that dries, fades and falls into the tray. A label system is a promise to your future self; make it in materials that keep promises.
Overhead VR: Ceiling Pulleys and Their Cable Rules
A tethered VR headset adds the one cable in the setup that must move in three dimensions, and the pulley systems that suspend it from the ceiling are cable management in a new axis — with rules of their own. The pulleys’ anchors must be placed for your actual play space, centred on where you stand rather than where the desk is, and the cable’s path from the PC to the first pulley should be as short and as protected as any other fixed run: along the wall or ceiling edge, never dangling across the room’s walking lines at head height when the headset is off.
Slack is the system’s whole engineering problem, and it is solved in the set-up, not during play: enough cable in the pulley loop that you can crouch, turn fully and take your largest step without the cable ever becoming the limit, and no more than that, because excess cable is weight on the headset and a tangle waiting at the pulleys. Test the extremes of your movement deliberately during installation — the cable should be a rumour at the edge of your awareness in every direction, or the routing needs another pulley or a different anchor.
When the session ends, the cable needs its address like everything else in this guide: a hook beside the headset’s home where the loop parks, off the floor, out of the caster paths. VR cables die by being run over and by being stepped on in their parked coils, and they are among the most expensive single cables in the setup. The pulley system manages the cable while you play; the parking hook manages it the other twenty-three hours, and both halves are the system.
The Quick-Disconnect Desk: Designing for Rearrangement
Some desks move — between rooms, between walls as seasons and households change, or simply aside for cleaning and events. A moving desk should be designed with a border: a single point where the desk’s cable system meets the room’s, so the move is one disconnection rather than a teardown. In practice the border is the power strip’s lead and the ethernet cable, plus any lead to a device that does not live on the desk. Everything else — every device, every bundle — belongs to the desk and travels with it, which is the strongest argument for the one-strip architecture in this guide: a desk whose power is one plug is a desk that can be unplugged, moved and restored in minutes.
Design the border deliberately. The strip’s lead should reach the socket from the desk’s likely positions with the excess coiled at the tray, not stretched; the ethernet run should have a coupler or a service loop at the desk’s leg so the room’s cable stays with the room. Label the border cables on both sides of the disconnect, because after a move, in a new orientation, even the owner cannot tell the desk’s lead from the room’s at a glance.
Test the system once when you build it: unplug the border, move the desk two metres, restore it, and time yourself. If the exercise takes more than a few minutes or produces a single mystery cable, the border is not finished. Desks that move easily get moved — for cleaning, for guests, for the room’s next idea — and desks that do not, fossilise around their own cabling. The quick-disconnect is what keeps a setup young.
The Foot Zone Audit: What Your Feet Already Know
Every cable guide judges a desk from above; your feet judge it from below, continuously, and their report is worth collecting formally. Sit in your playing position and inventory the foot zone by feel: your feet should meet the floor, the chair’s casters, and nothing else. What they commonly meet instead is the power strip that slid off its mount, the coil of excess cable that migrated out of the tray, the tower’s leads taking a shortcut across the leg space, and the footrest buried under all three. Each object in the foot zone is a cable decision that failed quietly, and most were tidy the day they were installed.
The audit takes two minutes and a torch. Restore the strip to its mount — with screws or its tray, not adhesive pads that creep and let go in summer heat. Re-coil the migrants into the tray with their service loops intact. Re-route anything crossing the leg space along the desk’s rear where it belonged. Then sit again and let your feet deliver the verdict: a foot zone that is empty is not a luxury, it is the physical signature of a cable system whose addresses are all being kept.
Schedule the audit with the monthly pass from this guide, because the foot zone degrades on exactly that rhythm — one nudged strip, one cable pulled through for a temporary device and never returned. Your feet will always know first. The audit is simply the habit of asking them before the tangle announces itself to your eyes.
Cables on Monitor Arms: Routing for Screens That Move
Monitor arms free the desk and complicate its cables, because every lead to an arm-mounted screen must serve two positions — the screen where it sits and every point along the arm’s travel. Route display and power leads along the arm itself, using the clips or channels most arms provide, with the slack engineered at the right joint: the loop belongs at the arm’s elbow and base, sized so the screen reaches its furthest position — pulled toward you, rotated to portrait, raised to standing eye line — with the cable never taut and never so loose that it drapes onto the desk at the nearest position.
Test the extremes during installation, not during the first game that needs them: swing each screen through its full envelope slowly, watching its cables the whole way, and correct any point where a lead pulls against a connector. A cable that goes taut at full extension does not announce itself politely; it unplugs a monitor mid-session or, worse, levers the screen’s port under load for months before failing. The five minutes of swinging is the entire insurance.
Where several arms share a desk, give each screen’s leads their own path down to the tray rather than bundling the screens together at the rear edge — arms move independently, and a shared bundle makes every adjustment a negotiation with the other screens’ cables. Independence is the principle the whole guide runs on, applied at the joint: what moves separately must be cabled separately.
When a Cable Fails: Finding the Dead One in a Tidy System
Sooner or later a device goes dark, and the tidy desk pays its dividend or collects its debt. In an unmanaged nest, a dead cable means an hour of tracing with your hands and a rising suspicion of every device in the chain. In a managed system, the diagnosis is a procedure: read the label at the device end, read the matching label at the hub end, and substitute a known-good spare of the same type — which you own, because the cable-length section of this guide had you stock the lengths your desk uses. Three minutes, and the fault is convicted to a cable, a port or a device with evidence rather than vibes.
Work the substitution in the right order: spare cable first, because cables fail more than ports and ports more than devices. If the spare restores the device, retire the dead cable immediately — cut it or bin it, but do not coil it back into the drawer ‘in case’, because a known-dead cable in the spares stock is a future diagnosis poisoned at the source. Mark genuinely suspect-but-unproven cables with tape and a date, and let them earn their way back to trust or out of the house at the next annual strip-down.
Log the failure in the setup note the way the chair guides log their squeaks: date, cable, symptom, verdict. Cable systems, like chairs, develop biographies, and the owner who knows that the long display lead has failed twice in two years is an owner who replaces the route, not just the cable, at the next upgrade. Tidiness was never the point; this — a system that can be diagnosed in minutes, by its owner, in the dark, mid-session — was the point all along.
Renters’ Cable Management: No Screws, No Trace
Renters face the one constraint this guide’s standard architecture ignores: the desk and the walls cannot be drilled, screwed or permanently altered. The architecture survives translation. The power strip mounts to the desk itself — which you own — with clamp-on tray baskets that grip the desktop’s edge or the frame, or with heavy-duty hook-and-loop straps around a leg or rail. Adhesive cable channels run along the desk’s rear and down its leg, chosen in the removable kind whose strips release cleanly, and tested first under the desk where a failure of the adhesive’s promise will not be visible from the door.
The wall is replaced by the desk as the system’s anchor: everything routes on the furniture, and the single border cable to the socket travels along the skirting inside a floor cord cover that simply lies in place, held by its own weight and the room’s geography. When the tenancy ends, the whole system lifts away in an afternoon and the room shows nothing — which is also, not coincidentally, exactly the quick-disconnect design this guide recommends for desks that move between rooms. The renter’s constraint and the mover’s virtue are the same design wearing two names.
One caution belongs to adhesives generally: they creep in heat and let go without ceremony, usually at 2 a.m., usually dropping a loaded tray. Anything heavy — the strip, a brick-style power supply — gets a mechanical mount to the desk, clamp or strap, and adhesives are reserved for the light work of guiding individual cables. Deposit-safe never has to mean fragile; it has to mean reversible, and clamps reverse perfectly.
Gear for This Guide
You do not need to buy anything to follow most of this guide, but the items below are the ones that genuinely come up again and again in this topic. Each one is a current, widely sold model rather than a placeholder pick.

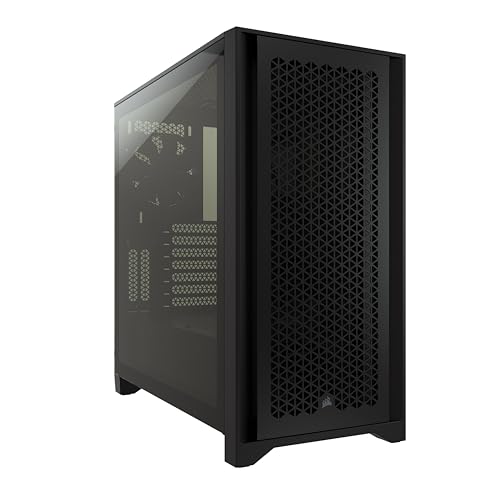
CORSAIR 4000D AIRFLOW PC Case
Good cable management starts inside the case: Corsair’s 4000D Airflow routes cables behind a dedicated channel with a cover, so the leads emerging from your tower are already a tidy bundle before the desk routing even begins. Check on Amazon

NZXT H5 Flow PC Case
NZXT’s H5 Flow takes the same philosophy — wide cable channels and intuitive routing behind the motherboard tray — which means fewer stray leads crossing your desk’s rear edge. Check on Amazon
Frequently Asked Questions
Are zip ties or velcro ties better for desk cables?
Velcro, almost always. You will re-open bundles every time you change a peripheral, and velcro re-opens without tools and without cutting anything near your cables. Reserve zip ties for permanent installs you truly never touch.
How do I hide the cables of a desk that is not against a wall?
Route everything to one leg inside a sleeve, then run a floor cord cover from that leg to the wall socket. A single managed crossing looks intentional; five loose cables look like a spill.
Can cables be bundled together safely?
Yes — power and data cables bundled in parallel for desk-length runs is normal practice. Avoid coiling power cables tightly while under load (heat), and keep coils loose in the tray instead.
My cables are too short to route neatly. What then?
Replace the worst offenders with correctly sized leads — display and USB cables come in many lengths. A cable that only reaches by cutting diagonally across the desk back will defeat every other effort.
How often should I redo my cable management?
A full strip-down once a year or at major upgrades, with same-day routing for anything new in between. The system maintains itself if new cables never get a ‘temporary’ pass.
Can I run desk cables under a rug or carpet to hide them?
No — this guide advises against it without qualification. A cable under a rug is stepped on thousands of times invisibly, its insulation flexing and heating under load in a way it was never designed for, and it creates a trip ridge besides. Run the cable along the skirting in a raceway, or across the walkway inside a proper floor cord cover that is built to be walked on. Hiding a cable and protecting it are different jobs, and only the second one is safe to skip the first for.
How do I manage cables on a glass desk where everything is visible?
Treat visibility as the design brief rather than the problem: cables become part of the furniture, so they must be few, straight and deliberate. Use a single sleeve in a colour matched to the frame for the drop, keep every run parallel to an edge, and mount the strip and tray tight to the frame’s lines so the silhouettes read as structure. Glass desks punish improvisation and reward the one-strip architecture more than any other surface — there is nowhere for a second system to hide.
How do I hide the cables for a desk that sits in the middle of the room?
Accept that the drop is visible and make it a single, deliberate line: everything routes to one leg, sleeved, and from the leg’s foot a floor cord cover runs to the wall in as straight a line as the room allows. A freestanding desk with one clean umbilical reads as designed; the same desk with three cables wandering to two sockets reads as temporary. Some players add a slim floor-standing raceway or place a rug so the cord cover crosses beneath it — the cover, not the bare cable, is what goes under a rug, and only where the rug is flat and the traffic light.
My power strip’s switch is unreachable under the desk. What is the fix?
Move the strip, not yourself: remount it at the tray’s end nearest your usual side, with the switch facing outward and downward where a hand naturally probes, and test the reach from your chair before refitting anything else. If the strip cannot move, a switched outlet at the wall end of its lead or a strip with a remote foot switch achieves the same control honestly. A switch you cannot reach is a safety feature you do not have, so this is worth the twenty minutes it takes to correct.
The Short Version
Mount the strip under the desk, route power then data in separate velcro-tied bundles along the rear edge, store slack in the tray, sleeve the single drop to the floor, and label everything. Give new devices a proper route on day one. One afternoon of method buys you a desk that stays clean by default.