Learning how to check the health of an SSD takes about five minutes and answers the question every drive owner eventually asks: how much life does this drive have left, and is it showing early signs of trouble? Unlike hard drives, SSDs wear in a measurable, predictable way as data is written, and they continuously report their own condition through a telemetry system called SMART. This guide shows how to read that report on Windows, macOS and Linux, what the important attributes mean, and what to do with the answers.
Disclosure: As an Amazon Associate, ilcastellomenu.com earns from qualifying purchases. Links to Amazon on this page are affiliate links; they cost you nothing extra. Listing details such as price and availability change often, so check the current Amazon listing before you buy.
The mindset to bring is monitoring, not anxiety. A healthy SSD reports its wear level as a percentage, counts any errors it has corrected, and tracks its temperature — and for most users the numbers will show a drive with years of life remaining. Checking once or twice a year, and whenever you buy a used drive or suspect a problem, is enough. It is also the essential first step before cloning an old drive onto a new one, as How to Clone to an SSD explains: cloning a dying source faithfully copies its damage.
How to check the health of an SSD: what SMART actually reports
SMART — Self-Monitoring, Analysis and Reporting Technology — is the drive’s own flight recorder. The controller continuously logs how many terabytes have been written, how many hours the drive has powered on, how many spare blocks remain in reserve, whether any uncorrectable errors have occurred, and the temperatures it has experienced. Health utilities read these counters and translate them into a plain verdict, usually a percentage: 100 percent means a drive in as-new wear condition, and the figure counts down as the rated write endurance is consumed.
Two points keep this in perspective. First, the percentage measures wear consumed, not a probability of failure — a drive at 60 percent health has used 40 percent of its rated writes and will ordinarily keep working for a long time. Second, drives can also fail suddenly from electronics faults that no wear counter predicts, which is why health monitoring complements backups rather than replacing them. Anyone whose backup routine needs attention will find purpose-built options in our Best Hard Drives for Backups roundup; the cheapest insurance is still a second copy of anything irreplaceable.
The endurance figure behind the percentage is TBW, the terabytes-written rating discussed in What is TBW on an SSD. Health tools typically show both the percentage remaining and the raw terabytes written so far, which lets you estimate your personal write rate — divide total written by the drive’s age — and project how many years the remaining endurance represents at your pace. For typical desktop use the answer is usually a decade or more, which reframes most health checks from worrying to merely confirming.
In this guide
Checking health on Windows
The quick built-in check
Windows offers a coarse verdict without any downloads. In Settings, go to System, then Storage, then Advanced storage settings and Disk & volumes; select the drive’s properties and Windows shows an estimated remaining life percentage and temperature for SSDs that report them. A command-line equivalent exists too: running wmic diskdrive get status reports a simple OK or Pred Fail per drive. These built-ins are blunt — OK versus not-OK — but they catch a drive the system itself believes is failing.
The detailed check: CrystalDiskInfo and maker utilities
For the full SMART picture, CrystalDiskInfo (the companion to the CrystalDiskMark benchmark used in How to Test the Speed of an SSD) displays health percentage, temperature, power-on hours, total terabytes written (listed as Total Host Writes), and every raw attribute, flagging anything abnormal. Download it only from the official site. Equally good — and better for firmware — are the manufacturers’ own utilities: Samsung Magician, WD Dashboard, Crucial Storage Executive, Kingston SSD Manager and their peers show the same health data for their drives plus firmware-update checks and, on some, diagnostic scans. If you own drives from several brands, CrystalDiskInfo is the single pane of glass; if you own one brand, its own tool is the richer choice.
While the utility is open, note four figures: health percentage, total writes, power-on hours, and the highest temperature recorded. Screenshot or note them with the date. Health data is most useful as a trend — a drive whose error counts climb between checks is telling you something a single snapshot cannot.
Checking health on macOS and Linux
On macOS, open About This Mac (or System Settings on newer versions), go to the storage/system report, select Storage under the hardware section, and the report shows a SMART status of ‘Verified’ for the internal drive. That single word is all Apple exposes natively. For percentages and write totals, a utility such as DriveDx reads the full SMART data on internal and (with the right drivers) external drives. Note that USB enclosures often block SMART data entirely; if a tool reports nothing for an external drive, the enclosure is usually the reason, not the drive.
On Linux, the smartmontools package is the standard: install it, then run sudo smartctl -a /dev/nvme0n1 (or the appropriate device) for a complete report, or use the GNOME Disks utility, which shows a graphical SMART summary including temperature and power-on time. NVMe drives report a particularly clean summary: a ‘Percentage Used’ figure, data units written, power cycles, and an error log count — everything this guide discusses, in one short block.
The attributes that matter, in plain language
| Indicator | What it means | What should concern you |
|---|---|---|
| Health / Percentage Used | Wear consumed against the drive’s rated write endurance | A low percentage on an old drive is normal ageing; a percentage falling fast means a write-heavy workload — see the TBW explainer |
| Total Host Writes (TBW used) | Lifetime terabytes your computer has written to the drive | Compare with the model’s rated TBW; rapid growth points at a runaway writer (logging, caching, or a misbehaving app) |
| Available Spare | Reserve blocks held to replace worn-out ones; starts at 100% | Any significant consumption means real wear events have occurred; spare falling toward its threshold is a replace-soon signal |
| Media / Data Integrity Errors | Uncorrectable errors the controller has logged | Anything above zero deserves attention: back up now and monitor closely |
| Unsafe Shutdowns | Power losses while the drive was working | A rising count suggests power problems; occasional counts after crashes are common and less worrying |
| Temperature / Warning Time | Current heat and time spent above safe thresholds | Sustained high temperatures shorten life and cause throttling; see the slow-speeds guide for cooling fixes |
| Power-On Hours & Cycles | How long and how often the drive has run | Context figures — useful when judging a used drive, rarely alarming alone |
Raw attribute names vary by brand, and some legacy SATA attributes (like ‘Wear Leveling Count’) need brand-specific interpretation. The universal shortcut is the overall health percentage plus a scan for anything the utility has highlighted — utilities colour or flag abnormal values precisely so you do not need to memorise attribute tables.
What to do with the results
A drive at high health with zero integrity errors needs nothing but your usual backups — recheck in six to twelve months. A drive at middling health (say half its endurance used) with no errors is ageing normally; start planning its eventual replacement in the sense of knowing what you would buy — the criteria in How to Choose an SSD and the current shortlist in best SSDs for PC — not in the sense of urgent shopping. A drive showing integrity errors, shrinking spare capacity, or a health percentage dropping noticeably between checks is giving you fair warning: back up immediately, then replace it on your schedule rather than its own, and clone to the replacement while the old drive still reads reliably.
A special case is the newly purchased used drive. Check its health before trusting it with anything: a low price on a drive that has already consumed most of its endurance, or that logs integrity errors, is no bargain. The five minutes with a health utility is the entire due-diligence process, and it is non-optional for second-hand storage. The same goes for a drive destined for a NAS, where it will run around the clock — the models in our best SSDs for NAS roundup are rated for that duty, and a health check confirms the specific unit you received starts life clean.
Habits that keep an SSD healthy longer
- Leave free space. A drive kept 20–25 percent empty spreads writes across more blocks (reducing wear per block) and performs better. Chronic fullness is the most common self-inflicted SSD ailment.
- Keep it cool. Use motherboard heatsinks where provided, keep case airflow sane, and do not bury an external drive under papers on a warm desk.
- Never defragment an SSD. Defragmentation is a hard-drive ritual that only adds writes. Modern operating systems know this and run light TRIM maintenance instead — leave them to it.
- Confirm TRIM is enabled. TRIM lets the OS tell the drive which blocks are free, keeping write performance and wear-levelling efficient. It is on by default on current Windows, macOS and Linux installs; the health utilities above can confirm it.
- Keep firmware reasonably current. Check the maker’s utility a few times a year; updates occasionally address wear, sleep and error-handling bugs. Back up before updating, as with any firmware change.
- Protect against power loss where it matters. A laptop battery already does this for portables; for a desktop doing critical work, a small UPS removes the unsafe-shutdown class of events entirely.
Notice what is not on the list: there is no need to minimise ordinary writes, avoid using the drive as a scratch disk for normal work, or perform rituals like ‘resting’ it. SSDs are built to be used; the realistic lifespan question — explored in How Long do Ssds Last — is measured in years of normal service, and the habits above are about not squandering that margin, not about wrapping the drive in cotton wool.
Reading a health report: a worked example
Imagine a three-year-old 1TB drive reporting: health 92 percent, total host writes 48TB, power-on hours 9,600, available spare 100 percent, media errors 0, unsafe shutdowns 14, current temperature 41°C. Reading it like a technician: the drive has consumed 8 percent of its rated endurance in three years, so at this pace the remaining budget spans decades — wear is a non-issue. Zero media errors and untouched spare capacity say no NAND distress has occurred. Fourteen unsafe shutdowns across three years matches a history of occasional crashes and one memorable power cut; noted, not alarming. Temperature is comfortable. Verdict: this drive needs nothing but its usual backups and another check next year.
Contrast a second report: health 71 percent but falling six points since the last check six months ago, writes up 90TB in that interval, spare at 96 percent, media errors 3. The percentages alone would not demand action; the trend does. Something is writing furiously — the investigation (task manager’s disk column, the sync client’s logs) usually finds a culprit application — and the first media errors have appeared. Verdict: back up today, find the runaway writer, and plan replacement within months rather than years. Same tool, same five minutes; the skill is reading trend and errors over headline percentage, which is why dated notes from previous checks are worth keeping.
Health checking drives in special situations
A drive you are about to buy used
Ask the seller for a CrystalDiskInfo screenshot showing health, writes and power-on hours, and treat refusal as information. On receipt, run your own check before migrating anything: confirm the figures match what was represented, confirm zero media errors, and only then trust it. A drive with high hours but low writes (a former display or server-pull unit) is a different proposition from one with low hours and enormous writes (a former plotting or cache drive); the second has spent its life in the wear dimension that matters.
A drive about to become a NAS or server drive
Baseline it first: record health, writes and temperature at installation, because ‘is this drive declining?’ is unanswerable later without a starting point. NAS-rated drives report the same SMART data; the difference is the duty they are built for, not the telemetry. Recheck on the NAS’s own schedule — most NAS operating systems surface SMART status in their storage dashboards and can alert on changes, which is the correct way to monitor a box whose whole purpose is to be ignored.
An external drive
As the main guide notes, many USB bridges hide SMART entirely. Workarounds: check the drive internally before enclosure installation, choose enclosures that advertise SMART or UASP passthrough, or accept the blind spot for portable duty (where the data should be a copy anyway) while keeping internal drives — the ones holding originals — fully monitored.
What health data cannot tell you
Honesty about limits completes the skill. SMART does not predict controller failures, firmware bugs, or the power surge next summer; it does not see a laptop drop coming; and its percentages are estimates built from counters, not oracle readings. A drive at 100 percent health can die tomorrow, and a drive at 40 percent can serve for years — the figures describe wear consumed, and wear is only one of mortality’s causes. This is not a reason to skip monitoring: wear is the one cause that is both common and forecastable, and catching it converts an emergency into an errand. It is a reason to hold the doctrine this guide repeats — monitoring plus backups, never monitoring instead of backups.
It is also worth knowing that health reporting quality varies by maker. Some brands expose rich, standardised data; others report a minimal set or use proprietary attribute layouts that generic tools misread, occasionally showing alarming raw numbers that the maker’s own utility interprets as normal. When a generic tool and the manufacturer’s tool disagree, believe the manufacturer about their own attributes — and when both agree something is wrong, believe them quickly.
Setting a reminder rhythm (and what to do between checks)
Health checking fails as a habit when it depends on remembering, so tie it to something that already happens: the twice-yearly clock change, a birthday, the same weekend you clean the case fans. Between checks, the drive needs nothing from you — no maintenance utilities, no optimisation rituals, no write-avoidance anxiety. The operating system’s built-in TRIM scheduling is the only background care an SSD asks for, and it runs itself. If a check ever does surface a warning, the response sequence is fixed and worth memorising now, while it is hypothetical: back up first, investigate second, replace on your schedule third. Panic is not a step; it is what the sequence exists to prevent.
Raw values versus normalised scores: reading SMART without being misled
Every SMART attribute shows you at least two numbers, and confusing them is the most common beginner mistake. The normalised value is the maker’s own score, typically starting at 100 or 200 and counting down toward a failure threshold as the attribute worsens. The raw value is the underlying count — actual reallocated blocks, actual power-on hours, actual degrees. Thresholds apply to the normalised score, not the raw count, which is why a raw value that looks enormous can be perfectly healthy: some attributes pack several measurements into one raw field, so a temperature attribute might encode current, minimum and maximum readings as one long string of digits that alarms anyone who reads it as a single number.
The practical rules follow from that. Judge an attribute by its normalised score’s distance from its threshold and by whether the raw count is growing between your checks, not by the raw count’s absolute size on one afternoon. A reallocated-block raw count of twelve that has been twelve for a year is a settled scar; a count of two that was zero last month is a trend, and trends are what health checking exists to catch. This is also why screenshots matter: a single report is a photograph, but two reports six months apart are a story, and the story is what you act on.
Vendor differences add one more wrinkle. Makers are free to define many attributes their own way, and the same attribute number can mean different things on different brands — or be reported in different units, with some drives counting writes in gigabytes and others in 32-megabyte units. When a number looks absurd, check the drive maker’s own utility, which always interprets its own attributes correctly, before concluding anything. Cross-brand comparisons of raw SMART figures are apples-to-oranges more often than the tidy tables suggest.
The quiet signals: unsafe shutdowns, temperature history and error logs
Beyond the headline percentage, three quieter signals reward attention. The unsafe shutdown count records every time the drive lost power without warning — a crash, a held power button, a tripped breaker. A rising count does not damage the drive by itself, but it explains corrupted-file mysteries and, on some models, correlates with the second signal worth watching: media and data integrity errors, the controller’s own log of times it could not return correct data. That counter should be zero for a drive’s whole life; any movement there outranks every other number on the page and means backups first, questions later.
Temperature history is the third. Many drives record their maximum-ever temperature and time spent above certain thresholds. A drive that has lived at high temperatures — common for sticks sandwiched under graphics cards or in fanless enclosures — ages its NAND faster, because stored charge leaks more quickly from hot cells. You cannot undo past heat, but you can change the drive’s future: a heatsink, a slot move, or better case airflow, followed by a note in your log to see whether the maximum stops climbing. Our guide to fixing slow SSD speeds covers the cooling side of that work in detail.
Finally, look for a device self-test log if your tools expose one. Many drives can run a short or extended internal test on command and record the outcome; a passed extended test on a drive whose other numbers look borderline is reassuring evidence, while a failed one settles arguments. Run the short test during any health check where something already looks off — it costs a couple of minutes and asks the controller to grade its own homework.
When the report says healthy but the machine disagrees
It happens often enough to deserve a name: the green-report problem. The health tool says the drive is fine, yet the machine freezes during copies, throws file errors, or occasionally fails to see the drive at boot. SMART is a prediction system built on the failure modes the maker chose to track; it cannot see a flaky cable, a marginal slot, a firmware bug triggered by your particular sleep settings, or a file system quietly corrupting itself for software reasons. A clean bill of health narrows the search — it does not end it.
Work the disagreement systematically. Swap the cable and slot before suspecting the drive, because connectors fail more often than NAND does. Test the drive in an enclosure or a second machine; behaviour that follows the drive is the drive, behaviour that stays with the machine is the machine. Check the maker’s site for firmware updates mentioning stability or your exact symptom. And run the drive manufacturer’s own diagnostic rather than a generic tool, since it can read proprietary logs the generic ones cannot see. If the drive misbehaves in two machines on current firmware, you have a warranty conversation regardless of what any percentage says — makers know their own prediction system has blind spots, and a clear symptom log is persuasive evidence.
Keep notes as you go: dates, symptoms, what changed. A drive that freezes ‘sometimes’ is hard to help; a drive that freezes during large writes when warm, in two different machines, with the error log attached, is a case anyone can act on. That same log is what turns a support exchange from a script-reading exercise into a replacement.
Health checks for drives that live in arrays, pools and servers
A drive inside a RAID array, a Storage Spaces pool or a NAS does not present its health the way a lone desktop drive does, and waiting for the array software to complain is waiting too long — arrays typically notice a drive only when it starts failing reads, which is late in the story. Learn where your platform exposes per-drive SMART data: NAS operating systems show it per bay, Linux’s smartmontools can query drives behind most controllers with the right device flags, and Windows pool users may need the drive maker’s utility with the disk temporarily examined on its own. The quarterly rhythm from earlier in this guide applies per drive, not per array.
Arrays add one metric of their own: consistency between members. Drives bought together, written together, should age together. When one member’s written-bytes or spare-block figures drift far from its siblings, that drive is your candidate for pre-emptive replacement at the next convenient moment — during a calm weekend, with the array’s redundancy intact, rather than during a rebuild when a second failure would be fatal. Rebuilds are the most stressful hours of a drive’s life, and sending a suspect drive into one is how single failures become data loss.
Scrubbing deserves a mention here too. Most array platforms can read every block on a schedule and compare parity or mirrors, surfacing unreadable sectors while redundancy can still repair them. Enable it monthly, read its reports, and treat a scrub that finds errors as a health event for the specific drive involved — then go and look at that drive’s own numbers with fresh eyes.
Building your own action thresholds, in writing, before you need them
Health data only helps if you decide in advance what you will do with it; otherwise every worrying number starts an argument with yourself that the busier, more optimistic voice usually wins. Write a short personal policy — three or four lines in the same place you keep your health screenshots. Something like: any media-error count above zero means replace at once; health percentage below a fifth remaining means order the replacement this week; reallocated blocks growing between two consecutive checks means the drive leaves boot duty and becomes a scratch disk; temperature maximum still climbing means fix cooling before anything else.
Your thresholds can differ — a drive holding only game installs deserves a looser policy than the drive holding the family archive — and that is the point: the policy is per role, decided calmly, in advance. Pair it with the one rule that outranks all thresholds: backups are verified before any drive is retired, demoted or trusted less, because a demotion shuffle is itself a moment when data moves and mistakes happen. With a written policy, a health check stops being a source of vague anxiety and becomes what it should be — a five-minute reading that ends in either ‘all fine’ or a specific, already-decided action. If replacement does come, our guide on choosing an SSD will help you pick the successor deliberately rather than in a hurry.
Checking a drive you cannot install yet: enclosures, docks and passthrough limits
Sometimes the drive you need to check is not in a machine — it is a spare, a return candidate, or a drive pulled from a dead laptop. A USB enclosure or dock is the obvious bridge, but what health data survives the crossing depends on the bridge chip. Many enclosures pass SMART through using the SAT translation standard, and good tools know how to ask for it; others block it entirely, and a few pass through NVMe admin commands only on specific chipsets. If your tool shows nothing, the enclosure — not the drive — is the first suspect, and the maker’s utility is even more likely to be blocked than a generic one.
The reliable workarounds are simple. Test suspect drives in a real slot when the verdict matters: a desktop’s spare M.2 or SATA port reads everything natively. If an enclosure is all you have, choose one with a well-documented chipset and current firmware, and treat a ‘no data’ result as ‘not tested’ rather than ‘healthy’. Note, too, that a drive checked over USB and then installed internally deserves a fresh baseline once installed, because the numbers you could not see over USB — full attribute sets, error logs, temperature history — become visible, and the baseline should come from the complete picture.
Health checking on a schedule for people who will not remember: automation that helps
The reminder rhythm described earlier in this guide fails for one predictable reason: it depends on a human remembering a boring task. The fix is to let the machine do the remembering. Most NAS platforms and server operating systems can run scheduled SMART tests and email or notify you only when something changes — a failed self-test, a new error, a threshold crossed. On a desktop, the maker’s utility often includes a scheduled check or at least a status icon; on Linux, the smartd daemon exists precisely to watch attributes in the background and complain loudly when one degrades. Set any of these up once and health checking stops being a chore you perform and becomes an alarm you respond to.
Automation has one trap: an alarm nobody reads is worse than none, because it manufactures confidence. Route the notifications somewhere you actually look — the email you check, the chat app you live in — and test the route once by triggering a harmless report. Then, when a real alert arrives, your written action thresholds from earlier in this guide take over: you already know what a media error means and what a falling percentage triggers, so the alert produces a decision instead of a research project. Ten minutes of setup buys you the one thing manual checking never guarantees — that the check actually happens, every time, for the whole life of the drive.
The health check as part of selling, donating or returning a drive
A documented health check protects you on both sides of a handover. Selling or donating a drive, run the maker’s secure erase first, then save a final health report showing the drive’s hours, writes and clean error state; sharing that report with the recipient is honest dealing and settles later arguments about what condition the drive was in. Returning a drive under warranty, the same report — plus your symptom log if the drive misbehaved despite clean numbers — is the evidence that moves a support case forward. Makers see thousands of vague ‘it is slow’ claims; a dated report with a specific failing attribute or a repeatable symptom gets a different quality of attention.
Receiving a drive deserves the mirror-image habit. Before any second-hand drive is trusted, read its full report yourself rather than accepting a screenshot, because screenshots can be of any drive, including a healthier sibling. Check that the serial in the software matches the label on the drive, that the power-on count and hours make sense together, and that total writes sit comfortably against the endurance figure for that model — the judgement our explainer on how long SSDs last works through in full. Five minutes of scepticism at the door is cheaper than a forensic exercise later.
Workload rate and the enterprise numbers hiding in consumer reports
Some tools report a figure borrowed from the enterprise world: workload rate, the terabytes per year a drive is rated to absorb in service. It is worth understanding because it reframes the percentage you have been watching. A consumer drive’s health percentage assumes a consumer workload; the same physical drive in a write-heavy role — a cache drive, a surveillance recorder, a busy build server — consumes its rating on a completely different calendar. If your written-bytes-per-year is several times what a typical desktop produces, do not be reassured by comparisons to typical desktops: judge the drive against its own rating and your own measured rate, and shorten your check interval to match the pace at which its numbers actually move.
You can measure your own rate from two health screenshots: total bytes written now minus total bytes written at the last check, divided by the months between. That one subtraction converts health checking from fortune-telling into arithmetic — you can project, roughly, when the drive reaches its rated endurance at your current pace, and plan a replacement into a convenient season instead of an inconvenient week. Drives rarely oblige projections exactly, but a plan built on your measured rate beats a plan built on a forum average every time.
What to save, where to save it, and for how long
A small act of organisation makes every future health check more valuable: keep one folder, named for the machine, holding every health screenshot and report with the date in the filename, plus a one-line note of anything that changed since the last one — new drive fitted, firmware updated, role changed from boot drive to storage. Store that folder anywhere except only on the drive it describes; a copy in your normal backups or cloud folder is fine. Five years of those files weigh almost nothing and answer questions nothing else can: when a symptom started, whether a number moved before or after a change, and how fast a drive has truly been ageing in your hands rather than in theory.
When a drive is finally retired, keep its last report with the folder. The next drive starts a new baseline, and the old one’s history remains as the comparison that teaches you your own habits — how much you really write in a year, how hot your case really runs a drive, how long your drives actually last. That self-knowledge, accumulated quietly, is the difference between guessing at storage decisions and knowing.
Teaching someone else to read the report
If you look after machines for family or a small team, the most durable thing you can leave behind is not a checked drive but a person who can check the next one. Walk them through it once, on their own machine, with their own drive’s report: here is the percentage and what it counts down from, here is the error number that must stay at zero, here is the screenshot folder, and here is the short list of findings that mean ‘call me today’ rather than ‘mention it at Christmas’. Write those triggers on the same note as the thresholds — three plain lines beat a lecture, and a lecture is forgotten by February.
People maintain what they understand, and storage fails quietly in exactly the machines nobody feels ownership of. Ten minutes of teaching converts your quarterly reminder from a favour you owe everyone into a habit a household shares — and the drives, which cannot speak for themselves, get heard a great deal more often.
One page, once a quarter: the whole discipline on an index card
Everything in this guide compresses into a routine small enough to write on an index card and tape inside a desk drawer. Open the health tool. Read the percentage, the error count and the temperature. Compare all three with last time, not with the internet. Screenshot, date, file. If anything moved the wrong way, follow the threshold you wrote down when you were calm. That is the entire practice, and its smallness is its strength: a check that takes five minutes happens four times a year for a decade, while a thorough afternoon audit happens once and is fondly remembered. Drives do not need your vigilance in bulk. They need it in rhythm.
A closing habit: pair every check with one backup glance
End each quarterly check with a thirty-second look at your most recent backup — its date, its destination, its success message. Health data and backups protect the same thing from different directions, and glancing at both together, four times a year, is the cheapest insurance review a home system ever gets.
Gear mentioned in this guide
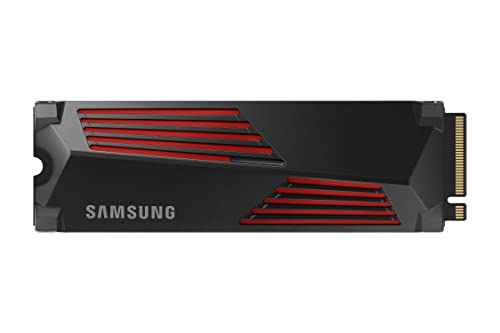
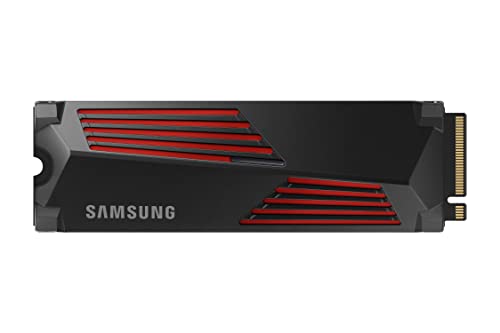
Samsung SSD 990 PRO with Heatsink 1TB — a flagship drive whose maker utility (Samsung Magician) is a model example of clear health and firmware reporting. Check on Amazon

WD Red SN700 1TB NVMe SSD — a NAS-rated NVMe drive built for continuous duty — the class where health monitoring matters most. Check on Amazon

WD Red SA500 1TB SATA SSD — a NAS-rated SATA drive; a reminder that health checking applies to SATA drives exactly as it does to NVMe. Check on Amazon
Frequently asked questions
How often should I check my SSD’s health?
Twice a year is plenty for a healthy drive, plus whenever circumstances change: after buying a used drive, before cloning from an old one, when performance drops, or when the system starts throwing disk errors. Health checking is monitoring, not maintenance — the drive looks after itself between checks.
My SSD health is at 85 percent. Should I replace it?
Not on that figure alone. It means 15 percent of the rated write endurance is consumed — typically years of remaining life at ordinary write rates. Replace a drive when it logs integrity errors, its spare capacity starts draining, health falls steeply between checks, or it approaches very low percentages, and always back up regardless.
Can SSD health be improved or reset?
No. Wear is physical and the counters are honest. Nothing legitimately restores consumed endurance; tools claiming to ‘repair’ health percentages are at best cosmetic and at worst scams. What you can do is slow future wear: keep free space available, find and stop any runaway writer, and keep the drive cool.
Why does my external SSD show no health data?
Most USB enclosures and adapters do not pass SMART data through to the computer, so utilities see nothing. Test the drive internally (or in an enclosure known to support SMART passthrough) if you need its health report. The drive itself is almost certainly fine — the bridge chip is the blind spot.
What is a normal amount of writes per year?
Typical home and office use writes roughly 5–30TB a year depending on habits — creators and heavy downloaders write more. Compare your drive’s total writes against its age to get your rate, then compare that rate with the model’s TBW rating to project remaining life.
Does a health check slow down or harm the drive?
No. Reading SMART data is a trivial query the controller answers instantly, with no writes involved. Run it as often as curiosity dictates; it is the least invasive diagnostic in computing.
My drive’s health dropped 1 percent in a month. Is that normal?
It depends entirely on your write volume. A percent of a several-hundred-TBW budget is several terabytes of writing; if you were ingesting video or installing large games all month, it is simply accounting. If your use was light, a falling percentage is a clue worth chasing — something is writing on your behalf.
Do I need to check the health of a brand-new SSD?
A quick baseline check is smart: confirm 100 percent health, zero errors, and near-zero power-on hours and writes. A ‘new’ drive showing significant hours or writes is not new, and the first week is when that discovery is easiest to act on.
The bottom line
Five minutes with a health utility tells you your SSD’s wear percentage, lifetime writes, spare capacity and error history — everything needed to distinguish a drive with a decade left from one asking to be replaced. Check a couple of times a year, act on errors rather than on percentages alone, and keep backups regardless: monitoring predicts wear, but only a second copy protects against surprise.