Learning how to clone to an SSD means copying your entire existing drive — operating system, programs, settings and files — onto the new drive so the computer boots from the SSD exactly as it did before, only faster. It is the right approach when your current system works well and you simply want it on better hardware. This guide covers the preparation, the cloning itself on Windows and macOS, the first boot, and the fixes for the handful of problems that occasionally appear.
Disclosure: As an Amazon Associate, ilcastellomenu.com earns from qualifying purchases. Links to Amazon on this page are affiliate links; they cost you nothing extra. Listing details such as price and availability change often, so check the current Amazon listing before you buy.
Stop and back up before anything else. Cloning writes to the new drive, and although the source drive is only read, the process involves disk tools where one wrong selection can erase the wrong disk. Make a separate, verified backup of irreplaceable files on a third device — an external hard drive is ideal, and the options in our Best Hard Drives for Backups roundup are built for exactly this role. Cloning is a convenience; the backup is the insurance. Never treat the clone itself as your only copy until it has booted successfully and you have checked your files.
How to clone to an SSD: what cloning does and does not do
A clone copies partitions, not just files. A bootable Windows or macOS drive contains several partitions — a small EFI or recovery partition, the main system volume, sometimes a manufacturer recovery image — and a proper clone reproduces all of them in the right order with the right identifiers so the firmware can boot the new drive. This is why you cannot simply drag your files across in Explorer and expect the SSD to start the machine: file copying is fine for data drives, but a boot drive needs the partition-level copy that cloning software performs.
Cloning also differs from imaging. An image is a compressed file that stores a drive’s contents for later restoration; a clone is a direct drive-to-drive copy ready to boot immediately. Imaging suits backup strategies; cloning suits upgrades. Most good tools do both, and the distinction matters only in choosing the right menu option — you want ‘clone disk’, not ‘backup disk’, for an upgrade.
Finally, cloning copies your system’s problems along with its virtues. If Windows is unstable, infected or cluttered beyond redemption, a fresh install on the new SSD — the other path described in How to Install an SSD — will serve you better than faithfully reproducing the mess at higher speed.
In this guide
Before you clone: the preparation checklist
- Back up irreplaceable data to a separate device and verify the backup opens. Non-negotiable, as above.
- Check capacities. The used space on your source drive must fit on the SSD. Most tools can clone a large drive to a smaller SSD if the actual data fits, shrinking the main partition — but leave comfortable headroom rather than cloning onto a drive that will be nearly full on day one.
- Check the source drive’s health. Cloning a failing drive can stall or copy corrupt data. Run a quick health check first (see How to Check the Health of an SSD); if the source is dying, prioritise copying individual irreplaceable files before attempting a full clone.
- Connect the SSD. In a desktop, install it in its slot or bay — the physical steps are in how to install an SSD. In a single-bay laptop, connect the new SSD externally with a USB adapter or enclosure matched to its type (SATA or NVMe — they are different adapters).
- Plug laptops into mains power. A clone can take a while; a flat battery mid-clone is an avoidable failure.
- Note your BitLocker or FileVault status. Encrypted drives can be cloned by most modern tools, but you may be prompted for the recovery key at first boot. Have it available before you start.
Also decide now what happens to the old drive afterwards. Common plans: keep it as an internal data drive, put it in a USB enclosure as portable storage, or keep it untouched for a week as your rollback before wiping it. Deciding in advance prevents the classic error of formatting the old drive during setup and then discovering the clone has a problem.
Choosing cloning software
You do not need to buy anything in most cases. SSD manufacturers provide capable cloning tools free with their drives — Samsung’s Data Migration, Crucial’s edition of Acronis, Western Digital’s Acronis build and similar utilities from other brands handle a standard clone well and are the simplest route when your new drive matches the brand. Independent tools such as Macrium Reflect, Clonezilla and Rescuezilla cover cross-brand jobs, unusual partition layouts and Linux systems. Roundups like our Best Software for Cloning Hard Drives exist because the tool choice matters less than using whichever tool carefully and verifying the result.
Whatever you choose, download it only from the maker’s official site, and confirm it supports your situation: NVMe targets, GPT partition style, and cloning to a smaller drive if that is your case. Avoid random ‘free clone’ utilities from download portals — disk tools run with full access to every file you own, and provenance matters.
The cloning process, step by step (Windows)
- Install and launch the cloning tool. Select the clone (not backup/image) function.
- Choose the source disk — your current boot drive. Identify it by model name and capacity, not by drive letter alone.
- Choose the destination — the new SSD. Stop and double-check here. Everything on the destination will be erased. Confirm model and capacity again before proceeding; this is the step where the backup you made earns its keep.
- Review the proposed partition layout. If the SSD is larger, let the tool expand the main partition to use the extra space (or expand it later in Disk Management). If the SSD is smaller, confirm the tool is shrinking the main partition and that all partitions still fit.
- Start the clone and let it finish without using the machine. Duration ranges from minutes for a small, fast source over NVMe to an hour or more for a large drive over USB.
- When the tool reports success, shut the machine down fully. Do not simply reboot with both drives still set up as before — proceed to the first-boot steps below.
On macOS the shape is the same with different names: connect the new drive (formatted as APFS with a GUID Partition Map via Disk Utility if the tool asks for a prepared target), use a tool such as Carbon Copy Cloner or SuperDuper to copy the system volume, and the tool will handle the bootable structure. Apple’s own migration approach — installing macOS fresh on the new drive and migrating during setup — is the officially blessed alternative and works well when the clone tools hesitate.
The first boot from the cloned SSD
The cleanest first boot removes ambiguity. If you cloned internally in a desktop, either disconnect the old drive temporarily or enter BIOS and set the new SSD as the first boot device. If you cloned via USB on a laptop, swap the drives now: remove the old drive, install the SSD in the bay, then power on. Booting once with the SSD as the only system drive lets Windows or macOS settle its boot configuration on the correct disk without any chance of the loader chaining to the old drive.
Expect the first boot to take a little longer than usual while the system reconciles hardware identifiers. Once at the desktop, verify the essentials: your files are present, a couple of key applications open, the drive letter and capacity look right, and Disk Management shows the SSD as the disk containing the C: volume. Check the drive’s reported health and run a quick speed sanity check if you like — How to Test the Speed of an SSD shows how, and a healthy clone should perform at the drive’s class speed, not the old drive’s.
Only after several days of normal use should you repurpose the old drive. Wipe it deliberately (a full format is fine for a drive staying in your hands), then use it for backups or bulk storage. Until that probation period passes, the old drive is your undo button.
Troubleshooting clone problems
The cloned SSD will not boot
First, confirm the firmware is actually trying: set the SSD first in boot order, and check the boot mode is UEFI (not legacy/CSM) for a GPT clone. If the tool offers a ‘fix boot problems’ or boot-repair function, run it with only the SSD connected. Cloning again with a different tool fixes a surprising share of stubborn cases, because tools differ in how they handle EFI partitions. As a last resort, a clean install plus file restore from your backup remains available — which is why the backup came first.
The clone fails partway or reports read errors
Read errors point at the source drive. Run a health check and a file-system check (chkdsk on Windows) on the source, then retry. If errors persist, the drive may be failing: copy irreplaceable files off individually first, then attempt the clone again, accepting that some damaged files may not survive. This is precisely the scenario the preparation checklist is designed to catch early.
The new partition is smaller than the SSD
Some tools clone partitions at their original sizes, leaving unallocated space. On Windows, open Disk Management, right-click the main volume and choose Extend Volume to absorb the free space. On macOS, Disk Utility can grow the APFS container. No data is at risk in this operation, though the standing advice applies: you already have your backup.
Windows asks for a BitLocker recovery key
This is expected behaviour when the boot hardware changes under an encrypted system. Enter the recovery key you noted during preparation; Windows should then boot normally and reseal to the new drive. If you did not record the key, check your Microsoft account’s device page, where keys for personal machines are commonly stored.
After the clone: finishing touches
With the system running from the SSD, a few small tasks complete the job. Confirm TRIM is enabled (on Windows, modern systems enable it automatically for SSDs; the health guide shows how to verify). Re-run your backup routine so the new drive is now the thing being protected. If the old drive becomes internal storage, give it a clear label so future-you never mistakes it for a boot drive during maintenance. And enjoy the difference: the machine you cloned is the same in every detail except the one that mattered — it now reads and writes at SSD speed, whether the drive you chose came from our Best Ssds for PC shortlist or elsewhere.
Cloning to a smaller SSD: making the maths work
Cloning a 1TB hard drive’s contents onto a 500GB SSD sounds impossible until you separate capacity from content: what must fit is the data, not the source’s size. If the big drive holds 300GB of actual files, a competent tool shrinks the main partition and clones happily onto the smaller SSD. Prepare by auditing what consumes the source — disk-usage visualisers make this a five-minute job — and evicting the obvious ballast first: old game installs, the downloads folder’s archaeology, virtual machine images you forgot existed. Every gigabyte removed before cloning is a gigabyte the clone does not have to move, so the cleanup pays twice: the clone fits, and it finishes sooner.
If the data genuinely exceeds the target, split the job: clone the system partitions and your working files to the SSD, and leave bulk media on the old drive, which stays in the machine (or an enclosure) as the archive tier. Most cloning tools let you exclude or relocate large data folders, and operating systems happily keep libraries on a second volume. The result — fast system drive, capacious archive — is the configuration many people would choose from scratch anyway.
Cloning encrypted, dual-boot and Linux systems
Encryption changes the choreography, not the possibility. BitLocker-protected Windows drives clone successfully with mainstream tools, but expect to suspend protection before cloning or to provide the recovery key at the new drive’s first boot, after which protection reseals to the new hardware. FileVault Macs are typically handled by the Mac-native tools or by Apple’s migrate-during-install path. The rule is simply to know your encryption status and have keys recorded before starting — discovering mid-process that a key exists but is unrecorded is the one cloning delay that is entirely self-inflicted.
Dual-boot and Linux systems clone at the disk level just as single-boot systems do, with one extra caution: the boot loader’s configuration may reference the old drive’s identifiers, so the first boot deserves the same ‘new drive alone’ discipline, and a boot-repair from the distribution’s live USB is occasionally needed to repoint it. Clonezilla and Rescuezilla, being platform-agnostic, are the usual tools here. If that paragraph reads as unfamiliar territory, it is a fair signal to clone with a knowledgeable friend on call rather than alone at midnight.
Sector-by-sector and other advanced options, explained plainly
Cloning tools offer modes whose names intimidate unnecessarily. The default ‘intelligent’ copy moves only used blocks — fast, and correct for healthy drives. ‘Sector-by-sector’ (or forensic) copy duplicates every block including empty space: slow, target must be at least the source’s size, and genuinely needed only for failing drives being imaged for recovery or for exotic file systems the tool cannot interpret. If your situation is a normal upgrade, the default is right and the advanced checkbox is a trap for the anxious. Similarly, ‘SSD optimisation’ or alignment options should simply be on — modern tools set them automatically when the target is flash.
One advanced situation does deserve the slow path: cloning from a drive that is beginning to fail, where the goal is rescuing data rather than performing an upgrade. There, imaging tools that can skip bad areas and return to them gently (the strategy of dedicated recovery imagers) preserve the most data, and the clone-if-it-boots mindset gives way to copy-what-can-be-copied-first. That scenario starts, as everything in this guide starts, with the backup — ideally one that already existed before the drive began to fail.
Keeping the old drive as a fallback: the two-week rule
Experienced upgraders observe a probation period: the old drive stays exactly as it was — unformatted, un-repurposed — for at least a week or two of normal use after a successful clone. The clone may boot perfectly and still harbour a subtle issue that only Thursday’s unusual workload reveals; with the old drive intact, the remedy is a ten-minute drive swap, not a recovery project. Label the old drive with the clone date (tape and a marker beat memory), store it safely if it is out of the machine, and only after the probation passes put it to its next job.
When the probation ends, repurpose deliberately: internal bulk storage, an enclosure-based portable, or a dedicated backup target are all good second careers. Wipe it with intent when you do — partly for tidiness, mostly so that no future boot-order confusion ever starts the machine from a stale system image and leaves you wondering which copy of your life you have been editing.
Cloning a drive that is already failing: rescue first, migrate second
Everything in the main cloning walkthrough assumes a healthy source drive. A failing source changes the priorities completely: the goal stops being a bootable copy and becomes rescuing the most data with the fewest possible reads of a dying device. Every pass over damaged areas stresses the drive further, so the order of operations matters. Image the drive once, sector by sector, to a file or a spare disk — tools built for this, such as ddrescue on Linux, read the easy areas first, log exactly where the bad regions are, and only then go back and retry the difficult sectors with increasing persistence. A normal cloning tool, by contrast, may grind on the first bad patch it meets until the drive gives up entirely.
Work on the image, never on the original, once you have it. Mount the rescued image or clone from it to the new SSD, run file-system checks against the copy, and recover files from there. If the drive is clicking, disappearing from the system, or accumulating new read errors between attempts, stop and weigh professional recovery: for irreplaceable data — family photos with no other copy — a lab’s one careful pass beats five hopeful ones at home. And if the data does have other copies, the calculus flips: skip the rescue theatre, install fresh on the new SSD, and restore from backup. Knowing which situation you are in before you start is the whole skill.
Warning signs that change the plan
- The source drive vanishes and reappears, or the clone stalls at the same percentage repeatedly.
- Health tools show rapidly growing reallocated or pending sector counts between checks.
- Copy speeds collapse to near zero on ordinary files, not just large ones.
- The drive makes any new mechanical noise — clicking, buzzing or repeated spin-up attempts.
The Mac path: cloning on Apple silicon and modern macOS
Cloning a Mac has changed more in the last few years than cloning a Windows PC has in a decade. On modern macOS versions the system volume is a sealed, signed snapshot, and the old idea of a bit-for-bit bootable clone no longer works the way it did. Current tools such as Carbon Copy Cloner and SuperDuper build a bootable copy by replicating the data volume and letting Apple’s own utilities construct the system side, and on Apple silicon machines the result depends on the internal drive being functional, because the boot process itself starts there. An external clone of a modern Mac is best thought of as a complete, restorable copy of your data and apps — not as a drive you can simply run the machine from forever if the internal storage dies.
The practical Mac workflow is therefore: attach the new SSD in a fast USB or Thunderbolt enclosure, use the cloning tool’s guided task to copy everything, then test by actually starting up from the copy (holding the power button on Apple silicon to reach startup options) before you rely on it. If you are replacing an internal drive in an older Intel Mac with a removable disk, the classic clone-and-swap still applies, and the first-boot checks from the main guide — activation, licences, cloud sign-ins — apply unchanged. On any Mac, also expect to re-authorise some software: many licences fingerprint the hardware, and a new drive can look like a new machine to them.
One more Mac-specific note: Time Machine and a clone are not interchangeable. Time Machine gives you versioned history and painless migration to a new machine; a clone gives you an immediately usable copy of a working system. People who depend on their Mac for work often keep both, on separate drives, because they protect against different failures.
Disk signatures and identity collisions: why two identical drives confuse a system
A clone is so faithful that it copies identifiers most users never see: the disk signature or GUID, partition identifiers, and file-system UUIDs. Leave both the original and the clone attached to a Windows machine and Windows may take the clone offline automatically, reporting a signature collision — alarming the first time you see it, but actually the system protecting you from two disks claiming to be the same one. The fix is simply to bring the drive online in Disk Management if you intend to use it as extra storage, which assigns it a fresh signature, or better, to disconnect the original before the first boot from the clone, as the main walkthrough advises.
Linux has the parallel issue with duplicate file-system UUIDs: a boot configuration that mounts partitions by UUID can pick the wrong twin when both are present. The rule across platforms is identical — a clone and its source should not live in the same running system until one of them has been deliberately repurposed, wiped or re-identified. This is also why the finishing step of renaming volumes matters: labels are how you, not just the operating system, tell the twins apart at a glance in a list of disks.
For dual-boot machines the identity question doubles, because each operating system keeps its own boot entries pointing at specific partition identifiers. Clone carefully, boot each system once with only its expected drives attached, and confirm both still start before you wipe anything. Ten unhurried minutes here prevent the classic weekend lost to a machine that boots into the wrong system — or none.
Verifying a clone beyond ‘it boots’
A clone that reaches the desktop has passed the first test, not the last. Spend twenty minutes on deeper verification while the original drive is still untouched and re-cloning costs nothing. Open your most important applications rather than just looking at their icons: load a large project in your editor, scrub through a video timeline, open the photo library and scroll a year back. Sign-ins are the next checkpoint — cloud storage, mail and any software with hardware-tied licences — because a clone that boots but logs you out of everything is a half-finished migration you want to discover today, not mid-deadline.
A short verification routine
- Confirm the new drive reports its full expected capacity and the partitions match the plan.
- Run a health check on the new SSD and save the baseline figures somewhere safe.
- Open and save a file in each critical application, then reboot and confirm the change persisted.
- Check that scheduled backups now target the new drive, not the retired one.
- Confirm sleep, wake and shutdown all behave — power quirks occasionally trace back to a drive the system talks to differently.
If anything fails these checks, you still own a perfect fallback: the untouched original. That is the entire point of verifying before wiping. A clone is only finished when the new drive has survived real work, a reboot, and a backup cycle — at which point the old drive can be promoted to its next job with a clear conscience.
Cloning as an ongoing backup habit, not a one-off event
Many people meet cloning during an upgrade and never use it again, which wastes its best trick. A scheduled clone to a drive kept in an enclosure is one of the simplest disaster-recovery setups a home user can maintain: if the internal drive dies on a workday morning, you swap or boot from last night’s clone and lose hours, not weeks. The catch is discipline about what a clone is not. It carries no history — a file deleted and then cloned over is gone from both copies — and it faithfully copies corruption and malware along with everything else. That is why a clone complements, rather than replaces, a versioned backup such as Time Machine or a file-history system.
A workable rhythm for a home machine looks like this: versioned backups run automatically and continuously, and a manual clone is refreshed after any big change — a major system update, a new drive, a software stack you would hate to rebuild. Label the clone drive physically with the date of its last refresh; an undated clone invites false confidence. Store it away from the computer, because a clone sitting permanently attached shares the computer’s fate in any theft, spill or power event. Used this way, cloning stops being an upgrade chore and becomes the fastest recovery tool you own — which is exactly how the administrators who clone deployment images every week think about it. If you need a spare drive for this duty, the models in our guide to the best SSDs for PC all make dependable clone targets.
Cloning across the network and into virtual machines
Cloning does not have to happen with both drives in the same chassis. Most capable cloning and imaging tools can write the copy across a home network to a drive attached to another machine, or save the whole disk as a single image file on a NAS and restore it later. That indirection is slower — a busy wireless link will stretch a job that takes half an hour over a cable into several hours — but it solves real problems: a laptop with one bay and no enclosure, a desktop you would rather not open, or a migration you want to rehearse without touching the working machine. Use a wired connection whenever you can, and remember that an image file is also a backup in its own right, so the detour is rarely wasted effort.
Virtual machines add one more variation. Cloning a physical system into a virtual disk — physical-to-virtual, in the jargon — lets you keep an old machine’s entire environment alive inside a window on its replacement, which is a graceful way to retire hardware that runs one irreplaceable legacy program. The clone usually needs its storage controller drivers adjusted to boot virtually, and licensing may object to the new virtual hardware, but as a read-mostly archive of a working setup it beats a box of unsorted files. Conversely, a virtual machine’s disk can be written out to a physical SSD when a workload graduates to real hardware. Both directions use the same imaging tools; only the destination format changes.
What to do when the target SSD is the same size, but not quite
Two drives both sold at the same nominal capacity are rarely the same number of bytes. Makers round differently, some reserve more spare area than others, and a replacement drive can be a few hundred megabytes smaller than the original despite wearing the same label. Most cloning tools handle this gracefully when the data itself fits, by shrinking the last partition slightly — but only if that partition can be shrunk, and a nearly full source partition leaves no room to manoeuvre. This is the most common reason an apparently equal-size clone refuses to start, and it is worth checking before you begin: compare the exact byte counts in your disk tool, not the rounded gigabytes on the boxes.
The workarounds are simple once you see the problem. Freeing a few gigabytes on the source usually unblocks the proportional resize. Shrinking the main partition yourself, in advance and by a deliberate margin, gives the cloning tool an easy job instead of a borderline one. And if the tool offers an option to adjust partitions manually, setting the layout explicitly beats hoping the automatic proportions guess what you wanted. The same-size trap also explains a mystery from the troubleshooting section: a clone that ‘lost’ a sliver of capacity at the end of the disk has usually just absorbed this rounding difference, not suffered a fault.
Handing the machine back: accounts, peripherals and the forgotten details
When the cloned machine belongs to someone else — a parent, a partner, a small business — the migration is not finished when it boots; it is finished when they can work. A short handover routine prevents the slow drip of ‘since the upgrade…’ complaints. Sit with the machine once, together if you can, and walk the checklist of things cloning occasionally unsettles: Wi-Fi and printer connections, the default browser and its saved sessions, cloud folders that may have paused syncing, fingerprint or PIN sign-in that some systems ask you to re-enrol after a hardware change, and any scheduled task or backup that pointed at the old drive letter.
Also hand over the paperwork, in the loosest sense: tell them which drive is which now, where the old drive is and how long you are keeping it as a fallback, and what you saved where. If you kept a health baseline of the new drive, mention that it exists. People forgive a migration almost anything except surprises, and the fifteen minutes spent closing these loops is what separates an upgrade that feels professional from one that merely worked. Then set a date — two weeks is the rule used earlier in this guide — after which the old drive gets wiped or repurposed, and put that date in a calendar rather than trusting memory.
Estimating the real time a clone will take, before you commit an evening
The progress bar’s estimate is a guess built on the first minutes of the job, and it routinely lies in both directions. A more honest estimate starts from three numbers: how much data is actually used on the source (not its total capacity, unless you chose a sector-by-sector copy), the slowest link in the path, and the source drive’s condition. A spinning hard drive reading at its real-world mixed rate, a USB 2.0 enclosure, or a wireless network hop can each become the bottleneck that sets the true pace — the destination SSD’s speed is rarely the limiting factor in the whole operation. Work it through roughly: divide the used gigabytes by the bottleneck’s megabytes per second and you will land closer than any progress bar does in its first ten minutes.
Build slack into the plan rather than optimism. Cloning late in the evening with a hard stop — a laptop needed for travel in the morning — is how people end up interrupting a copy at ninety percent, which helps no one: most tools restart from zero, and a half-cloned target is neither fish nor fowl. Start when the machine can be left alone for twice your estimate, keep it on mains power, and disable sleep so an unattended machine does not pause the job to save electricity. If the estimate comes out at many hours for a healthy setup, treat that itself as diagnostic information — something in the chain is far slower than it should be, and finding it first is faster than enduring it.
Protecting the one copy you cannot replace during the move
There is a short window in every migration when your data’s safety depends entirely on you not making a mistake: the old drive holds the only complete copy, the new one holds an unverified copy, and both are attached to the same machine with tools open that can erase either. Slow down inside that window. Before any clone, label the drives in the software by serial number or capacity, not by drive letter, because letters shuffle. Double-check the direction of the copy — source and destination — out loud if necessary; every cloning tool will happily overwrite a full drive with an empty one if you point it backwards, and it will ask only once, in a dialog people click through by reflex.
The deeper protection is a separate backup that exists before the migration starts and survives it untouched. Cloning is a move, not a backup, and a move deserves a safety net precisely because it concentrates risk into one sitting. If you do not have that net, the honest options are to make one first — even a simple copy of the irreplaceable folders to any external drive — or to accept, knowingly, that a bad afternoon could cost real data. Most data loss in home migrations is not caused by failing hardware; it is caused by a confident click in the wrong row of a disk list. The tools in our roundup of the best hard drives for backups exist for exactly this safety-net role.
Keeping notes: the migration log you will thank yourself for
Professionals who move systems every week keep a one-page log per migration, and home users benefit from the same habit scaled down. Record the date, the source and target drives with their serial numbers, the tool and settings used, how long the copy took, and anything odd that happened along the way — a dialog you did not expect, a partition you resized, a licence that needed re-activating. Photograph or screenshot the final partition layout. That page takes five minutes to write and answers, months later, the questions that otherwise become mysteries: which drive is the original, what was changed during the move, and whether a quirk you are seeing now began at the migration or arrived later on its own.
Gear mentioned in this guide
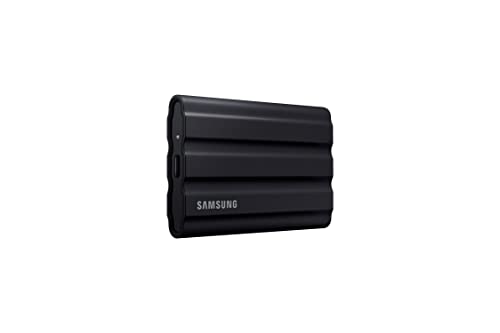
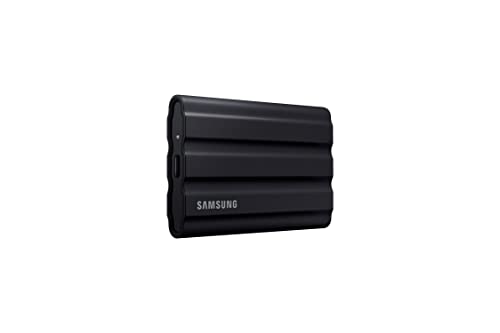
Samsung T7 Shield Portable SSD 1TB — a rugged portable SSD that makes an ideal separate backup target before you clone — the insurance this guide insists on. Check on Amazon

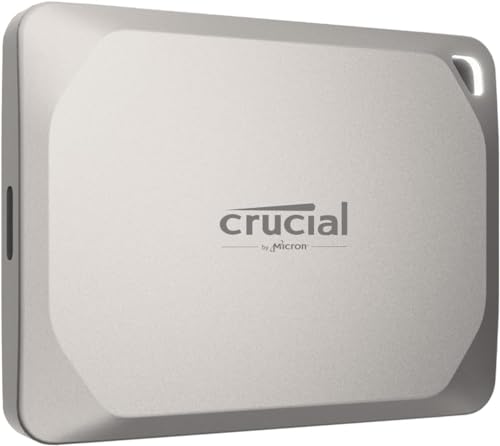
Crucial X9 Pro for Mac 1TB Portable SSD — a compact external SSD well suited to holding a Mac backup or a cloned data set during a swap. Check on Amazon
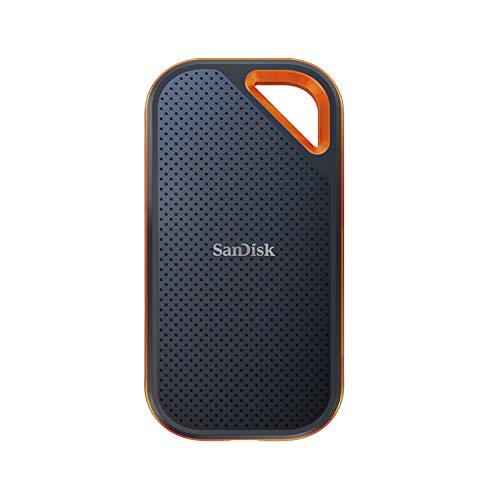
SanDisk Extreme PRO Portable SSD 1TB — a fast USB portable drive for staging backups and large file moves around an upgrade. Check on Amazon
Frequently asked questions
Can I clone a larger hard drive to a smaller SSD?
Yes, provided the data actually used on the source fits on the SSD with room to spare. Most modern cloning tools shrink the main partition automatically. If the source is nearly full, clear space first — cloning onto a drive that starts life almost full hurts its performance.
Will cloning copy my programs and settings too?
Yes. A clone is a partition-level copy, so applications, settings, accounts and files all come across, and the machine boots into what is effectively the same system on faster storage. Licensing tied to hardware IDs occasionally needs reactivation, but that is the exception.
How long does cloning take?
Anywhere from ten minutes to over an hour. The variables are how much data exists, the speed of both drives, and the connection — an internal NVMe-to-NVMe clone is fast, while cloning to a drive on a USB 2.0 adapter is painfully slow. Use the fastest connection you have.
Is cloning or a clean install better?
Cloning is better when your system is healthy and your time is valuable — everything comes across untouched. A clean install is better when the system is unstable, infected or years into accumulated clutter. Cloning a broken system just gives you a faster broken system.
My laptop has only one drive bay. How do I clone?
Connect the new SSD externally with a USB adapter or enclosure matched to its interface (SATA and NVMe adapters differ), clone to it, then physically swap the drives. After the swap, the old drive can go into the same enclosure and serve as external storage.
Do I need to format the new SSD before cloning?
No. Cloning tools overwrite the destination entirely, partitions included, so a blank or previously used SSD is fine as a target. Just be certain you have selected the right destination, because its existing contents will be erased.
Can I clone only Windows and leave my files on the old drive?
Effectively yes: clone the system partitions plus the user folders you want, and keep bulk data on the old drive as a second volume. Most tools allow partition-level selection. The machine then boots from the SSD while the old drive serves as the archive — a layout many upgraders keep permanently.
The clone finished but the SSD shows less space than expected. Why?
The tool likely copied partitions at their original sizes, leaving the remainder unallocated. Extend the main volume into the free space in Disk Management (Windows) or Disk Utility (macOS). Nothing is missing; the space is simply unassigned.
The bottom line
Clone in this order: back up to a third device, check health and capacity, connect the SSD properly, clone with a reputable tool while double-checking the destination, boot once from the SSD alone, and keep the old drive untouched for a few days as your rollback. Followed calmly, the process moves your whole digital life onto faster storage in an afternoon, with the machine at the end feeling unmistakably quicker and reassuringly identical everywhere else.