Knowing how to install an SSD is mostly a matter of preparation: the physical job takes ten minutes with a screwdriver, and the software side is a short sequence of initialising, formatting or cloning. This guide covers desktops and laptops, M.2 NVMe and 2.5-inch SATA drives, and both scenarios — adding a second drive for storage and replacing your boot drive. Follow the safety steps first and the whole job is well within a first-timer’s reach.
Disclosure: As an Amazon Associate, ilcastellomenu.com earns from qualifying purchases. Links to Amazon on this page are affiliate links; they cost you nothing extra. Listing details such as price and availability change often, so check the current Amazon listing before you buy.
One rule before anything else: back up your data first. Installation itself does not threaten the files on your existing drive, but you will be opening the machine, handling small screws near a motherboard, and possibly moving the old drive around. A current backup turns any mishap — a dropped drive, a wrong click in Disk Management, a static mishap — from a disaster into an inconvenience. Copy irreplaceable files to an external drive or cloud storage, verify the copy opens, and only then pick up the screwdriver. If your plan is to move Windows onto the new SSD, read How to Clone to an SSD before you start, because cloning is easiest while both drives are connected.
What you need before you start
- A Phillips screwdriver — a small PH0 or PH1 suits most laptop and M.2 screws; desktops vary.
- The SSD itself, plus its mounting screw for M.2 (often included with the motherboard, sometimes with the drive) or a SATA data cable for a 2.5-inch drive in a desktop.
- An anti-static habit — work on a hard surface, touch a grounded metal object (or the PC’s metal chassis with the power supply plugged in but switched off) before handling components, and handle drives by their edges.
- A backup of anything you cannot afford to lose, verified before you open the case.
- Your motherboard or laptop manual (PDF is fine) showing slot locations, supported drive lengths, and any slot-sharing rules.
- Optional but useful: a USB-to-SATA adapter or enclosure if a laptop has only one drive bay and you intend to clone.
Check slot sharing before you install, because it catches people out. On many motherboards, populating a particular M.2 slot disables one or two SATA ports, and on some boards an M.2 slot shares bandwidth with a PCIe slot. The manual states which ports are affected. Knowing this in advance prevents the classic confusion where a previously working hard drive ‘disappears’ after an SSD install — nothing is broken, the port is simply disabled by design. Readers weighing which drive to buy in the first place will find the selection logic in How to Choose an SSD.
In this guide
How to install an SSD in a desktop: M.2 NVMe
- Shut the PC down completely, switch the power supply off at the back, and unplug it. Press the power button once to drain residual charge.
- Open the case and locate the M.2 slot you intend to use — for a boot drive, prefer the slot wired directly to the CPU if your manual identifies one, usually the topmost slot near the processor.
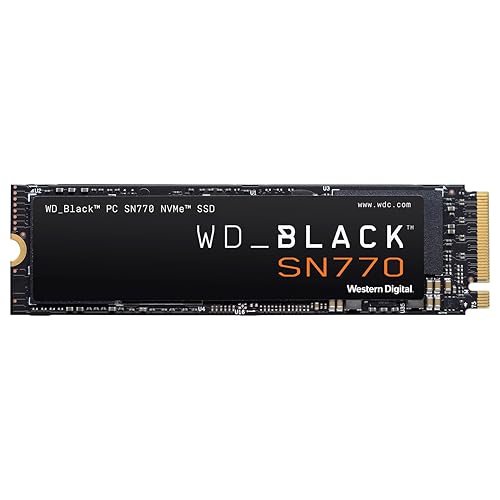
- Remove the motherboard heatsink if the slot has one (typically one to three screws), and confirm the standoff is positioned for your drive’s length — 2280 is the common standard, meaning 22mm wide and 80mm long.
- Insert the drive into the slot at roughly a 30-degree angle, gold contacts first, with a gentle push until it seats. Do not force it; if it resists, check the notch alignment.
- Press the free end down onto the standoff and secure it with the small screw. Snug, not tight — these screws strip easily, and over-tightening can damage the drive’s PCB.
- Replace the heatsink if the slot had one, peeling any protective film from its thermal pad first. If your drive came with its own heatsink, use one or the other, not both stacked.
- Close the case, reconnect power, and boot into the BIOS/UEFI to confirm the drive is listed. Then continue to the setup section below.
A note on protective film: both motherboard heatsinks and some drives ship with plastic film over the thermal pad. Leaving it in place insulates the drive instead of cooling it, a mistake that shows up later as unexplained throttling — the subject of How to Fix Slow SSD Speeds. Peel it, every time.
How to install an SSD in a desktop: 2.5-inch SATA
- Power down and unplug as above. Find a free 2.5-inch bay, or a 3.5-inch bay with an adapter bracket; many cases also have mounting points behind the motherboard tray.
- Slide or screw the drive into place. Orientation does not matter for an SSD — there are no moving parts — so mount it wherever cable routing is cleanest.
- Connect the SATA data cable from the drive to a free SATA port on the motherboard. Use a port you have confirmed is not disabled by M.2 slot sharing.
- Connect a SATA power lead from the power supply to the drive. The L-shaped connectors only fit one way; never force them.
- Boot to BIOS/UEFI, confirm the drive appears, close up, and proceed to setup below.
If the drive does not appear in BIOS, work through cables first: reseat both ends of the data cable, try a different SATA port and a different power lead, and confirm the port is enabled in setup. The structured diagnosis in How to Fix an SSD that is Not Detected covers this methodically for both SATA and NVMe.
How to install an SSD in a laptop
Laptop designs vary more than desktops, so your model’s manual or a teardown for your exact model is essential. The common patterns are: a 2.5-inch bay behind a bottom panel or a dedicated hatch; one or two M.2 slots behind the bottom panel; or, in the thinnest machines, soldered storage with no upgrade possible. Confirm which pattern you have before buying anything — the form-factor tour in SSD Form Factors Explained explains what you are looking at.
- Shut down (not sleep), unplug the charger, and if the battery is removable, remove it. Many modern laptops let you disable the internal battery in BIOS first — do so if offered.
- Remove the bottom panel screws, noting that lengths may differ by position; keep them organised. Pry the panel gently with a plastic tool, working around the clips.
- For a 2.5-inch drive: disconnect the old drive’s connector or caddy, transfer any caddy or bracket to the new SSD, seat it, and reconnect. For an M.2 drive: remove the single retaining screw, slide the old stick out at an angle, insert the new one the same way, and refit the screw.
- Before closing up, reconnect power temporarily and boot to BIOS to confirm detection. It is far easier to reseat a drive now than after the panel is back on.
- Refit the panel, boot normally, and proceed to setup.
Handle the ribbon cables and battery connectors inside laptops with care; they are the fragile part of the job, not the SSD. If a connector has a locking flap, lift the flap rather than pulling the cable. And if your laptop is under warranty, check the maker’s policy — most allow storage upgrades, but a few seal the chassis, and it is better to know before the first screw turns.
Setting up the new drive in Windows, macOS and Linux
A brand-new secondary drive is blank and unformatted, so the operating system will not show it in Explorer or Finder until you initialise it. On Windows, open Disk Management, where the new disk should trigger an initialise prompt: choose GPT for any modern system (MBR only for very old hardware or drives under specific legacy constraints), then create a simple volume, assign a letter, and format as NTFS. On macOS, open Disk Utility, select the drive itself (not a volume), erase it as APFS for internal use or exFAT for a drive shared with Windows, with GUID Partition Map as the scheme. On Linux, tools such as GNOME Disks or gparted handle the same GPT-plus-format sequence, with ext4 as the usual internal choice.
If this drive is replacing your boot drive, you have two paths. The clean-install path: install the operating system fresh from a USB installer, then restore your files from backup — best when the old system was misbehaving or you want a truly clean start. The clone path: copy the old drive wholesale to the new one so the machine boots exactly as before, covered step by step in how to clone to an SSD. Either way, once the system boots from the new SSD, set it first in the BIOS boot order and keep the old drive disconnected for the first successful boot, so there is no ambiguity about which disk the loader came from.
After setup, run the drive maker’s utility once to check for a firmware update and to confirm the drive reports healthy — the fuller health routine lives in How to Check the Health of an SSD. Then copy a large file across and watch it complete; a clean large transfer plus a healthy status report is your practical sign-off that the install is good.
Installing an SSD in a PlayStation 5 (brief version)
The PS5 accepts an M.2 PCIe 4.0 NVMe drive with a heatsink in its expansion bay. Power the console fully off and unplug it, remove the side cover, unscrew the bay cover, move the spacer to the position matching your drive’s length, insert the drive at an angle, screw it down, refit the bay cover and the console cover, and power on — the console will offer to format the drive. Sony’s requirements are specific about size and cooling, and the models in our best SSDs for PS5 roundup are selected to meet them, which is the easiest way to avoid a fit or speed mismatch.
Common installation mistakes and how to avoid them
- Skipping the backup. The one unforgivable shortcut. Back up first, always, even for a ‘simple’ second-drive install.
- Losing or over-tightening the M.2 screw. Keep a small dish for screws, and tighten until snug only.
- Leaving thermal-pad film in place. It turns a heatsink into a blanket and causes throttling under load.
- Forgetting slot-sharing rules. A vanished SATA drive after an M.2 install is almost always a disabled port, not a dead drive.
- Initialising the wrong disk. In Disk Management, double-check sizes and model names before clicking anything — initialising or formatting the wrong drive is the one software mistake with real consequences.
- Closing the laptop before a test boot. Confirm BIOS detection with the panel off; it saves a second teardown.
After installation: verifying the job properly
A drive that appears and formats is installed; a drive that performs at its class speed is installed well. Spend five minutes on verification and you close the job with evidence instead of hope. First, confirm the link: many motherboard BIOS screens and utilities report the PCIe generation and lane width an NVMe drive has negotiated — it should match the slot’s specification (x4 at the expected generation), because a drive seated slightly imperfectly or placed in a secondary slot can negotiate x2 and halve its ceiling without any other symptom. Second, run a quick benchmark and compare with the class ceilings in the speed-testing guide; a result in the expected band ends the matter.
Third, check alignment and mode on Windows systems cloned or installed from older media: the partitions of an SSD should be correctly aligned (modern installers and cloning tools handle this automatically, but a system migrated from a hard-drive-era image occasionally is not, and misalignment quietly taxes both speed and endurance). The drive maker’s utility reports alignment status on many models. Fourth, confirm the operating system recognises the device as an SSD — Windows should schedule TRIM optimisation rather than defragmentation for it, and if it does not, that misidentification is worth correcting before it becomes a maintenance habit.
Installing a second SSD: storage-only additions
Adding a drive purely for storage is the gentlest version of this job — no cloning, no boot order, no operating system involvement beyond formatting. The physical steps are identical, and the decisions are organisational: which data lives where. A common and sensible layout keeps the operating system and applications on the original drive, moves the game library or media collection to the new one, and points backup software at whichever arrangement keeps two copies of important files on two physical devices. In Steam and most launchers, adding a library folder on the new drive and moving installs across is a built-in feature, not a reinstall.
Name the new volume clearly at format time — ‘Games’, ‘Media’, ‘Projects’ — because six months from now, a drive letter alone will not remind you what you intended. If the second drive is an older, slower model (a SATA drive joining an NVMe system, say), put the read-mostly, capacity-hungry data on it and keep latency-sensitive work on the faster drive; the two-tier pattern costs nothing and plays to both drives’ strengths.
Working inside prebuilt PCs and warranty notes
Prebuilt desktops from large manufacturers add three wrinkles: cramped cases with proprietary layouts, power supplies with exactly the connectors the original configuration needed and no more, and the occasional warranty sticker theatre. Check for a free SATA power lead before assuming a 2.5-inch drive can be powered; if none exists, an M.2 slot (if present) avoids the problem entirely, since M.2 drives draw power from the slot. Photograph the interior before you move anything — proprietary cable routing is much easier to restore from a picture than from memory.
On warranties: in many jurisdictions, opening a PC and upgrading storage cannot void a warranty on unrelated components, whatever the stickers imply, but rules vary and manufacturer policies differ. If the machine is new and expensive, a quick look at the maker’s upgrade policy is worth the two minutes. Keep the original drive untouched until the new setup has run happily for a week; if the machine ever goes in for service, the option to return it to factory configuration is worth more than the old drive’s resale value.
Disposing of or repurposing the old drive safely
The old drive’s afterlife deserves one deliberate decision. Repurposing it internally as bulk storage or in a USB enclosure as a portable is the popular path; before either, wipe it properly — a full format for a drive staying in your household, and the manufacturer’s secure-erase utility if it will leave your hands, because a quick format does not actually remove data from flash in a forensically meaningful way. Selling or recycling a drive without a secure erase is handing your file history to a stranger.
If the old drive failed or is failing, skip repurposing entirely: a drive that has shown errors has retired, whether or not it still spins up for one more copy. Extract any data not already backed up, then recycle it through an electronics-waste channel. Drives hold no hazardous drama for household disposal rules in most places, but the data on them deserves the same seriousness as the hardware.
Reading the motherboard manual like an installer, not a browser
Most installation trouble is decided before a screwdriver comes out, in the ten minutes spent with the motherboard or laptop manual. The page you need shows the storage layout: which M.2 slots support NVMe, which support SATA, which share bandwidth with other devices, and which slot the maker recommends for a single drive. On many boards the top M.2 slot connects directly to the CPU and offers the full lane count, while lower slots route through the chipset and may run slower or disable SATA ports when populated. Installing into the wrong slot rarely breaks anything, but it can quietly halve your speed or make an existing drive vanish, which then looks like a faulty new drive.
Laptop manuals matter just as much. Some models hide the M.2 slot under a ribbon cable or the battery; others have a second, shorter 2230 slot intended for a small drive alongside a 2280 main slot. The service manual — usually a separate PDF from the user guide — shows screw locations, panel clip positions and the order panels come off. Download it to your phone before you start so you are not balancing a half-open laptop while searching the web with greasy fingers.
A five-minute pre-flight checklist
- Confirm the slot type, protocol and maximum drive length for the exact slot you will use.
- Check whether populating that slot disables any port or slot you currently rely on.
- Note the standoff position for your drive’s length and move it before the drive is in your hand.
- Identify whether your drive needs a heatsink or thermal pad in this machine, and whether one is already fitted to the slot cover.
- Back up anything irreplaceable on the machine, even though a storage install should not touch existing data.
Handling the hardware: static, screws and the small parts that stop jobs
SSDs are far hardier than spinning drives, but the connector edge and the exposed chips on a single-sided stick still deserve respect. Work on a clean, hard surface rather than a bed or carpet, touch a grounded metal object before handling the drive, and hold sticks by their edges. If you have an anti-static wrist strap, use it; if not, simply avoid shuffling around in socks and keep the drive in its anti-static bag until the moment it goes in.
The M.2 mounting screw is tiny, easy to drop and surprisingly easy to over-tighten. The drive should sit flat and secure, not bowed. If the stick bends when the screw is snug, something is wrong — usually the standoff is the wrong height or a thermal pad is too thick. Newer boards increasingly use tool-free latches or rotating clips instead of screws; learn how yours releases before applying force, because the plastic latch is the most fragile part of the whole job. Keep a small magnetic parts tray or a strip of tape on the desk for screws: the five minutes an M.2 screw spends lost in carpet is a rite of passage you can skip.
For 2.5-inch drives, the fiddly part is cable routing. SATA data cables with locking latches release with a squeeze, not a yank, and right-angle connectors exist precisely for tight bays. Route cables so they do not rest against fan blades or block the side panel, and leave a little slack rather than pulling a cable drum-tight across sharp drive-cage edges. In laptops, ribbon cables are the real hazard: most use a tiny flip-up locking bar on the connector. Lift the bar, slide the ribbon, never pull the ribbon itself.
BIOS and UEFI checks that save a second teardown
Before you close the case, power the machine on with the panels still off and enter the firmware setup. You are checking three things. First, the new drive appears in the storage list with the correct model name and capacity — if it does not, reseating it now costs a minute instead of a second full teardown. Second, the SATA mode is AHCI rather than a legacy IDE mode or an unexpected RAID setting, since changing that mode later on an existing Windows install can stop the system booting. Third, for NVMe drives, confirm the slot is configured for PCIe/NVMe operation rather than a SATA-only mode some boards still expose.
While you are in the firmware, glance at the boot order even if you are only adding a storage drive. Some boards helpfully promote a new blank drive or shuffle the order after hardware changes, and the machine then reports no bootable device despite your system drive being untouched. Knowing the order was correct before you closed up separates a two-minute fix from a panic. If your board offers a firmware update that specifically mentions storage compatibility and your drive is not detected, that update is worth doing — carefully, on stable power, following the maker’s instructions exactly. Our troubleshooting walkthrough for an SSD that is not detected covers the full sequence if the drive still refuses to appear.
Secure Boot and CSM settings occasionally matter too. A very old system set to legacy CSM mode may not boot from an NVMe drive even though it can see it as storage, because NVMe booting was designed for UEFI. If you are installing an NVMe boot drive into an older desktop, set the firmware to pure UEFI mode before installing the operating system, not after.
Thermal pads, heatsinks and airflow: fitting cooling that actually helps
Many motherboards ship with heatsink covers for the M.2 slots, and many drives ship with their own. Using both at once is a common mistake: stacked thermal pads make the assembly too thick, the cover screws will not sit properly, and the drive can end up bowed or poorly contacted. Choose one solution. If you use the motherboard cover, peel the protective film off its thermal pad — a step so often forgotten that it deserves bold type in every manual — and remove any pre-applied heatsink from the drive only if the drive’s warranty terms allow it, which most now do.
Pad thickness matters. A pad that is too thin never touches the controller; too thick and it flexes the stick. If you replace a pad, match the original thickness, typically around a millimetre, and cover the controller and NAND packages without draping material over the connector edge. In laptops, clearance is tighter still: a drive that fits bare may not fit with even a slim heatsink once the bottom panel is on, and a graphene label or thin copper shim is often the most cooling the chassis allows. Never force a panel closed over a drive; pressure on the stick can crack solder joints over time.
After the machine is reassembled, cooling is verified, not assumed. Run a large file copy while watching the drive temperature in a monitoring tool. Brief peaks are normal; temperatures that climb and then cause copy speeds to fall off a cliff mean the drive is throttling and the cooling arrangement needs a rethink. The checks in our guide to fixing slow SSD speeds will help you tell throttling apart from other causes.
Installing into awkward machines: small-form-factor PCs, consoles and old laptops
Compact machines compress every difficulty. In a small-form-factor desktop the M.2 slot may sit under the graphics card, meaning the card comes out first — support it as you release the slot latch, and note which power cables it uses before unplugging them. Some mini PCs mount the drive on the underside of the board or beneath a daughterboard, so photograph each layer as you remove it; a phone photo per step is the cheapest reassembly insurance there is.
Older laptops bring different constraints. A machine with only a 2.5-inch bay can still take an SSD happily, but check the bay height: most accept the common 7mm drive, while a 15mm enterprise drive will not fit, and a loose 7mm drive in a 9.5mm bay needs the spacer many drives include. Machines with optical drives offer a second option — a caddy that replaces the DVD drive with a bay for another disk — which is an excellent home for the old hard drive as bulk storage while the SSD takes the main bay.
Game consoles are the most prescriptive installs of all. The PlayStation 5, covered briefly earlier in this guide, demands a specific interface generation, a heatsink within strict dimensions, and formats the drive on first boot. Handheld PCs use short 2230 drives and often hide the slot under shielding and battery cables; work slowly, disconnect the battery first, and never pry near the battery pack. In every awkward machine the principle is the same: the install is easy, the access is the job, and patience with clips, ribbons and tiny screws is the whole skill.
Desktop drive bays, rails and caddies: mounting a 2.5-inch drive properly
Desktop cases offer more mounting variety than first-time installers expect. Many cases have dedicated 2.5-inch sleds behind the motherboard tray or on top of the power-supply shroud; older cases expect the drive to ride in a 3.5-inch bay using an adapter bracket; tool-less rails click into some bays while others want four small screws through the sled. A drive left dangling by its cables will usually work — SSDs have no moving parts and do not care about orientation — but it can short against the case, strain its connectors, and will definitely rattle loose during the next move. Mount it properly while the case is open; it takes two extra minutes.
Screw choice matters more than it looks. Drive mounting screws are short for a reason: an over-long screw driven into the side of a 2.5-inch drive can reach internal components. Use the screws supplied with the case or drive, start each one by hand, and stop at snug. If your case uses rubber-grommet rails inherited from the hard-drive era, they still work fine for an SSD — the vibration damping is unnecessary, but the tool-less convenience is real.
Plan the bay position around cable reach and airflow rather than habit. A sled behind the motherboard tray keeps the front of the case clean and the SATA cable run short on most boards, while a shroud mount shows the drive off through a window if that matters to you. Either way, connect both cables before sliding a sled fully home in tight cases, because fingertip room disappears quickly once neighbouring hardware is back in place.
Recovering from small disasters: dropped screws, stuck panels and broken clips
Almost every experienced builder has a story about the screw that vanished into the power supply shroud. The recovery rules are calm ones. Stop, switch the power supply off at its own switch, and never shake an assembled machine like a piggy bank. A magnetic pickup tool or a piece of tape on a screwdriver retrieves most strays; a screw that has genuinely fallen inside the power supply housing — visible through the grille — means that screw stays there or a professional retrieves it, because opening a power supply is one job home installers should never do. Prevention is better: work over a tray, and magnetise your screwdriver tip lightly so screws ride the tool instead of your luck.
Stuck side panels usually yield to technique rather than force. Most panels slide backwards a centimetre or two and then lift away; if one refuses, check for a forgotten thumbscrew at the rear and for cables pinched along the edge. Plastic front panels release from one corner with a steady pull near a clip point — prying at the middle of a span is how clips snap. If a clip does break, the panel will usually still seat on its remaining clips, and makers sell replacements for popular cases.
Laptop clips demand the same patience. Use a plastic spudger or an old credit card along the seam, working around the perimeter and letting each clip pop in turn. If the base resists at one point, there is almost certainly a hidden screw — often under a rubber foot or inside the optical-drive bay. Forcing a base past a hidden screw cracks the very plastic you are trying to preserve. When in doubt, stop and re-check the service manual’s screw map against the machine in front of you.
Dual-boot and multi-drive installs: keeping each system in its lane
If the machine will run two operating systems, the cleanest installation order is to fit both drives first, then install each system with only its own drive’s bootloader in play. The belt-and-braces method — physically disconnecting the other drive while installing — still prevents the classic accident where the second system’s installer writes its boot files onto the first drive, leaving you unable to boot either system if that drive is ever removed. It costs ten minutes and removes an entire category of future confusion.
After both systems are installed, choose your boot drive in the firmware and use the firmware’s one-time boot menu to reach the other system, rather than chaining bootloaders together. Keep each system’s recovery media on hand, labelled by drive. And whatever the operating systems, give the drives clear volume labels — names like WinSys, LinuxSys and SharedData prevent the most expensive mistake in multi-drive machines: formatting the wrong disk in a moment of confidence. That discipline pairs naturally with the guidance in our walkthrough on cloning to an SSD when you are migrating an existing system rather than starting fresh.
After the first week: the follow-up checks nobody does
A successful boot on day one is not quite the end of an installation. Drives and systems settle, and a short follow-up routine a week later catches the small problems while they are still small. Start with the physical side: if the machine is a desktop, power it down, open the panel you last closed, and confirm the M.2 screw or latch is still snug, SATA cables are fully seated at both ends, and no cable has drifted into a fan’s path as things warmed and cooled. In a laptop, check that the bottom panel sits flush all the way around — a panel bowed near the drive bay means something inside is thicker than the space allows, and that pressure should be relieved now, not discovered as a cracked board in a year.
Then do the software pass. Open your health-monitoring tool and save a screenshot of the drive’s starting statistics: power-on hours, total bytes written, temperature range and spare-block counts. That baseline is gold later, because every future question — is it wearing fast, running hot, slowing down — is answered by comparison against the drive’s own youth, not against strangers’ drives on a forum. While you are there, confirm the operating system still reports the drive at its full negotiated link speed and generation, and that scheduled optimisation (TRIM) is enabled for it.
Finish with the human checks. Make sure your backup routine actually includes the new drive — backup jobs configured months ago may only cover the old disk, leaving your newest data unprotected precisely because the install felt routine. If you cloned, confirm the old drive’s fate is decided rather than drifting: wiped and repurposed, kept as a labelled fallback for a defined period, or stored. And if the machine belongs to someone else, tell them what changed and where their files now live. More storage confuses people when a drive letter or library path moved; a two-sentence note prevents a week of misplaced saves. With that, the install is genuinely finished — hardware seated, firmware aware, software verified, backups covering the new layout, and a baseline recorded for the drive’s whole working life.
Keeping a photographic record of the build
The phone photos suggested for awkward machines deserve to become a habit for every install. Photograph the interior before you touch anything, each connector before you unplug it, and the finished layout before the panels go back on. Those images settle arguments with your future self: which slot the drive originally occupied, which SATA port the old drive used, whether that cable always crossed the fan header. They also document the machine’s condition if you ever need warranty support or sell the system on.
Store the photos with the machine’s other records — the health baseline screenshot, the firmware version you left installed, the date of the upgrade. Five minutes of record-keeping turns the next upgrade, repair or troubleshooting session from archaeology into a lookup, and it is the habit that most clearly separates a careful installer from a lucky one.
A note on torque and touch
One small discipline ties the whole job together: everything you tighten should be snug, never forced, and everything you handle should be touched by its edges rather than its contacts or chips. Screws that resist are usually cross-threaded, connectors that resist are usually misaligned, and panels that resist are usually hiding one more fastener. Resistance is information. The installer who treats it that way finishes with hardware intact, and that patience — more than any tool — is what makes an installation boring in the best possible sense.
Gear mentioned in this guide
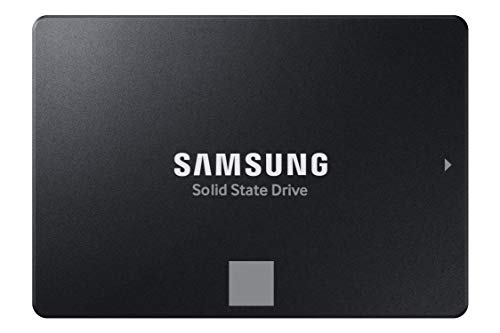
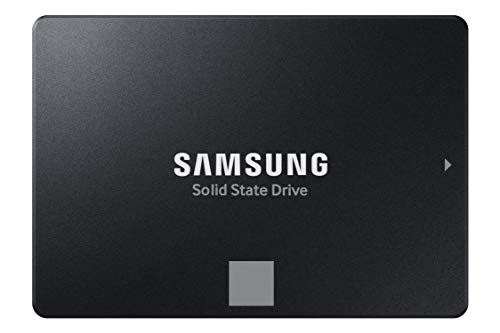
Samsung 870 EVO 1TB SATA SSD — the classic 2.5-inch SATA upgrade used in countless laptop and desktop refreshes, from the verified pool. Check on Amazon

Crucial P3 Plus 1TB NVMe SSD — a straightforward M.2 2280 PCIe 4.0 drive typical of a first NVMe install. Check on Amazon

WD_BLACK SN850X 1TB NVMe SSD with Heatsink — an example of a drive that arrives with its heatsink fitted — the pattern PS5 owners should look for. Check on Amazon
Frequently asked questions
My new SSD does not show up in Windows. Is it broken?
Almost certainly not. A blank drive must be initialised and formatted in Disk Management before Explorer shows it. If it does not appear in Disk Management either, check BIOS detection first, then reseat the drive or cables — our detection guide works through the full sequence.
Do I need to change anything in BIOS after installing an SSD?
Usually only the boot order, and only when the new drive should become the boot drive. NVMe drives need no special mode on modern boards; on older boards, confirm the storage mode is AHCI rather than legacy IDE for a SATA SSD.
Can I install an SSD without reinstalling Windows?
Yes — cloning copies your existing installation to the new drive, and the machine boots from it as if nothing changed. A clean install is the alternative when you want a fresh start. Both paths are covered in the setup section above.
Is installing an SSD in a laptop risky?
The SSD itself is robust; the risks are the fragile ribbon cables, differing screw lengths and static. Work slowly, follow your model’s manual, back up first, and it is a routine job. If the storage is soldered, however, no install is possible at all — check before buying.
Which M.2 slot should I use on my motherboard?
For a boot drive, the slot connected to the CPU (often labelled M2_1) gives full bandwidth without chipset contention. Check the manual for slot sharing: some slots disable SATA ports or run at reduced width when other hardware is present.
Should I update the SSD’s firmware after installing?
It is worth checking once with the manufacturer’s utility. Firmware updates occasionally fix detection, sleep or performance issues. Back up first, apply only the update for your exact model, and never interrupt power mid-update.
Do I need to remove the battery before installing an SSD in a laptop?
If the battery is removable, yes — take it out. If it is internal, shut the machine fully down and, where the BIOS offers it, use the battery-disconnect or service mode setting. The goal is a machine with no live power while connectors are being handled.
My motherboard has two M.2 slots. Does it matter which I use for a second drive?
It can: slots differ in PCIe generation, lane width and sharing rules, and one may disable SATA ports the other does not. For a boot drive use the primary CPU-connected slot; for a storage drive, any slot is fine, but read the sharing table so the new drive does not silently disconnect an existing one.
The bottom line
Installing an SSD is a preparation game: back up, confirm the slot and the screws, seat the drive gently, verify it in BIOS, then initialise or clone. Do those things in that order and the upgrade that transforms a computer’s feel is also one of the least risky jobs in PC maintenance. Take your time on the first one — by the second, you will wonder why you ever hesitated.