Few upgrade moments are as deflating as learning how to fix an SSD that is not detected the hard way — you installed everything carefully, and the new drive simply does not exist as far as the computer is concerned. The reassuring truth is that an undetected SSD is rarely a dead SSD. The causes are overwhelmingly mundane: a drive that needs initialising before Windows will show it, a slot that does not speak the drive’s protocol, a disabled port, an unseated connector, or a BIOS setting. This guide works through them in the safe order — software visibility first, then settings, then physical checks — so you fix the actual cause instead of randomly reseating things.
Disclosure: As an Amazon Associate, ilcastellomenu.com earns from qualifying purchases. Links to Amazon on this page are affiliate links; they cost you nothing extra. Listing details such as price and availability change often, so check the current Amazon listing before you buy.
Work through the sections in order and resist skipping ahead. Each stage eliminates a family of causes, and the stage where the drive first becomes visible tells you what was wrong, which is valuable knowledge for the next upgrade. If your data matters and the undetected drive is an old drive containing files (rather than a blank new one), the caution doubles: do not initialise or format anything when prompted until you have read the data-safety note in the final section — those prompts are for blank drives, and clicking through them on a drive with data can destroy its partition table.
How to fix an SSD that is not detected: first, find out where it vanishes
‘Not detected’ happens at three different levels, and each level points at different causes. Level one: the drive appears in BIOS/UEFI and in Disk Management but not in Explorer or Finder — this is not a detection problem at all, just an uninitialised or unformatted blank drive, fixed in two minutes at stage one below. Level two: the drive appears in BIOS but not in the operating system — a driver, port or OS-level issue. Level three: the drive does not appear even in BIOS — a physical, protocol or firmware-level issue: seating, slot compatibility, power, or a genuinely faulty drive. Spend sixty seconds establishing your level before touching anything; it halves the search space instantly.
To check the BIOS level, restart and enter setup (commonly Del or F2 during boot), then find the storage or NVMe configuration page listing connected drives. To check the OS level on Windows, open Disk Management (right-click Start) and look at the lower pane’s disk list — not the volume list at top. On macOS, Disk Utility’s View menu must be set to ‘Show All Devices’ or external and unformatted drives hide in plain sight. Note your level, then start at the matching stage.
In this guide
Stage 1: Initialise and format a blank drive (Level one)
A brand-new SSD ships without a partition table or file system, so Windows Explorer and Finder ignore it by design — this is the single most common ‘not detected’ report and it is not a fault. On Windows, open Disk Management: a new disk normally triggers an ‘Initialize Disk’ prompt automatically. Choose GPT (the modern standard; MBR only for legacy hardware), click OK, then right-click the unallocated space, create a New Simple Volume, accept the defaults, assign a drive letter and format as NTFS. The drive appears in Explorer immediately. The full setup walkthrough, including macOS and Linux equivalents, is in How to Install an SSD.
Two traps live here. First, the data trap: if this ‘blank’ drive is actually a used drive or your old drive that stopped appearing, do not initialise it — initialising writes a new partition table and can make existing data hard to recover. Skip to the later stages and the data-safety note. Second, the wrong-disk trap: Disk Management lists all drives together, so verify model and capacity before initialising or formatting anything, every time. These two minutes of care are the difference between a setup step and a disaster.
Stage 2: Settings, ports and drivers (Level two)
- Slot sharing (desktops): populating an M.2 slot often disables specific SATA ports. If a SATA SSD vanished when you installed an M.2 drive, move its cable to a port the manual says stays live. Conversely, some boards disable an M.2 slot when certain PCIe slots are filled. The manual’s sharing table is the authority.
- BIOS storage mode: for a SATA SSD, the SATA mode should be AHCI, not IDE/legacy and not a RAID mode you did not intend. For NVMe on older boards, confirm the slot is enabled and not set to a SATA-only mode where the board offers the choice.
- CSM and boot mode: on some boards, NVMe drives only appear with CSM (Compatibility Support Module) disabled and pure UEFI mode active. If an NVMe drive is invisible in BIOS on an older board, this setting is a prime suspect.
- Windows Storage Spaces and drivers: a drive claimed by Storage Spaces will not show as a normal disk. Also check Device Manager for unknown storage devices; on fresh Windows installs with certain NVMe controllers, installing the chipset or controller driver makes the drive appear.
- Drive letter conflicts: occasionally a formatted drive is detected fine but letterless, hence invisible in Explorer. In Disk Management, right-click its volume and assign a letter.
After any BIOS change, save and reboot fully rather than warm-restarting if the board offers the distinction; some storage settings only apply on a cold initialisation. And if the machine is a laptop whose drive vanished after an update, check the laptop maker’s support page for a storage firmware or BIOS update addressing exactly that symptom — it is a known pattern on some models, and the fix is theirs, not yours.
Stage 3: Physical checks — seating, cables, protocol (Level three)
Power down completely, unplug, and open the machine. For an M.2 drive: remove the retaining screw, slide the drive out, inspect the gold contacts and the slot for debris or damage, then reinsert at a 30-degree angle with a firm, even push until fully seated before pressing it down and refitting the screw. A surprising share of ‘dead’ M.2 drives were simply a millimetre short of seated. While it is out, verify the fundamentals from SSD Form Factors Explained: the drive’s length matches the standoff, and — critically — the drive’s protocol matches the slot. An NVMe stick in a SATA-only M.2 slot will never be detected, and no setting can change that; the manual’s protocol line is decisive.
For a 2.5-inch SATA drive: reseat both connectors, then swap in a known-good SATA data cable (these fail more often than drives do), try a different motherboard SATA port, and try a different power lead from the supply. For any drive type: try the drive in a second machine or a USB enclosure/adapter if available. A drive that appears elsewhere was never faulty — your slot, cable or settings were. A drive that appears nowhere, on a known-good connection, with the correct protocol, has earned its faulty verdict.
Also confirm the obvious that embarrassment hides: in a desktop, is the modular power supply’s SATA cable plugged into the PSU itself? In a laptop, did the drive’s connector or caddy fully engage? And if the board has multiple M.2 slots, try another slot — individual slots can be disabled by configuration or, rarely, be defective, and a slot swap distinguishes a dead slot from a dead drive in one move.
Special cases: PS5, external drives and after-clone disappearances
In a PlayStation 5, an undetected expansion drive is almost always a specification miss: the console requires PCIe 4.0 NVMe at a minimum speed with a heatsink, within strict dimensions, and silently ignores drives that do not qualify. Compare your drive against Sony’s requirements — or sidestep the whole question with a model from the vetted Best Ssds for Ps5 list — and ensure it is fully seated in the bay with the spacer at the correct position for its length.
External drives that vanish are usually a cable, port or enclosure story: try the supplied cable (charge-only USB cables carry no data at all), a different port directly on the machine rather than a hub, and, for DIY enclosures, opening the case to reseat the stick on its connector. If the drive inside the enclosure is your old boot drive after a swap — the situation How to Clone to an SSD creates — remember it may need a letter assigned or, on Mac, ‘Show All Devices’ enabled before it presents itself.
A newly cloned system that boots from the old drive instead of the new one is not a detection failure: both drives are detected, and the firmware is simply following its boot order. Enter BIOS, set the SSD first (or disconnect the old drive for the first boot), and the clone takes over as intended.
When the drive really is faulty — and the data-safety note
Conclude a drive is faulty only after it fails to appear on a known-good connection of the correct protocol in a second system, or in BIOS after reseating and slot swaps. New drives failing out of the box are uncommon but real; the remedy is the retailer’s replacement process, and your receipt plus a note of the tests you ran will speed it. For a drive still under warranty but out of the return window, the manufacturer’s RMA is the path — check its health history first if it ever was visible, using How to Check the Health of an SSD, because a drive that logged mounting errors before vanishing was telling its story in advance.
If the undetected drive holds the only copy of important data, stop experimenting at the point where software stages have failed. Do not initialise, do not format, do not run repair tools that write to the disk, and do not repeatedly power-cycle a drive that clicks, heats abnormally or smells of electronics. Professional data recovery is expensive but effective precisely when the drive reaches them unmolested by well-meant fixes. And let the episode set a permanent habit: any data that exists in only one place is data you have decided, in advance, to lose eventually — the backup options in Best Hard Drives for Backups exist so that a vanished drive is ever only an inconvenience, never a loss.
Drive detected in BIOS but Windows setup cannot see it
A specific variant deserves its own paragraph because it strands people mid-install: the BIOS lists the NVMe drive, but the Windows installer shows an empty drive list. The usual cause is a missing storage controller driver for that platform — certain Intel systems with RAID-mode controllers (VMD) are the classic case, where the installer needs the controller driver loaded from USB before any drive appears. The maker’s support page for your exact laptop or board provides the driver and the two-minute ‘load driver’ step. The alternative, switching the controller from RAID/VMD mode to AHCI/NVMe mode in BIOS, also works but changes how the machine manages storage, so follow the platform maker’s guidance rather than experimenting — and note that changing modes on an already-installed system can prevent it booting, which is why this fix belongs to fresh installs.
The mirror-image case — Windows sees the drive but the BIOS boot list does not — is almost always a boot-mode artefact: the drive holds data perfectly well, but the firmware will only boot it in the mode (UEFI versus legacy/CSM) matching how its system partition was created. Match the mode to the installation, or let a cloning tool’s boot-repair align them, and the phantom problem dissolves.
Intermittent detection: the drive that comes and goes
A drive that appears on Monday and vanishes on Wednesday is diagnostically different from one that never appeared, and kinder: total protocol mismatches do not heal overnight, so intermittency points at marginal contact, heat, power or firmware. Work it in this order. Reseat the drive and, for SATA, replace the data cable — cables with a fatigued connector are the single most common intermittent culprit in desktop storage. Check the drive’s temperature history in its health data; a drive that vanishes only under load or after hours of running is describing a thermal or power problem. Update the motherboard BIOS and the drive firmware if the pattern matches known issues (makers’ changelogs mention ‘intermittent detection’ in so many words). And try the drive in a second slot or machine: intermittency that follows the drive is the drive; intermittency that stays with the slot is the board.
Do not live with intermittency once identified. A connection that drops under load will eventually drop during a write that matters, and a drive developing an electronic fault gives its clearest warnings early. Whatever the root cause turns out to be — cable, slot, firmware or drive — fix it while the symptom is still a puzzle rather than a post-mortem, and let the episode refresh your backup discipline: the correct emotional response to a vanishing drive is gratitude that it warned you.
A note on RAID, Storage Spaces and other drive-hiding software
Some invisibility is intentional, arranged by software doing its job. A drive absorbed into a Windows Storage Space disappears as an individual disk by design. A drive in a motherboard RAID array presents as the array, not itself. Intel and AMD platform drivers can claim drives under their management utilities. Before concluding a drive is undetected, ask whether any of these layers exists on your system — particularly on a machine you did not build, or one that has passed through other hands. The drive is not missing; it is employed. Releasing it (which destroys the space or array it belongs to) is a deliberate act with data consequences, so identify first, and only release when you are certain nothing you need lives in the arrangement.
Prevention: making the next install boring
Every cause in this guide is preventable at purchase or install time, and the checklist is short enough to tape to the workshop wall. Verify protocol and length in the manual before ordering. Photograph the slot area before changing anything. Seat M.2 drives at an angle with a deliberate push, and feel for the full insertion. Keep the motherboard manual’s sharing table in mind whenever the storage population changes. Test-boot before closing the case. And keep a known-good SATA cable and a USB enclosure in the parts drawer — between them they convert most future ‘dead drive’ panics into five-minute experiments. Detection problems are rarely about broken hardware; they are about skipped verifications, and verifications are cheap precisely when they feel unnecessary.

Detected but not bootable: the drive the firmware sees and still will not start
A distinct cousin of the vanishing drive deserves its own diagnosis: the SSD appears in the firmware’s storage list, yet the machine refuses to boot from it, sometimes reporting no bootable device at all. Detection and bootability are separate tests. The firmware sees hardware through its storage controllers; it boots through boot entries — small records, stored in the motherboard’s memory, that point at a specific partition on a specific drive. Those entries can be lost when a motherboard battery dies, when firmware is updated or reset, when a drive is moved between machines, or when a cloning operation leaves the entry pointing at a partition that no longer matches. The drive is healthy, the system on it is intact, and the machine simply has no directions to it.
The recovery ladder runs from gentle to involved. First, use the firmware’s one-time boot menu and select the drive or its boot manager entry directly — if the system starts, the problem was the entry, and the fix is to set the correct default once you are in. Second, check that the firmware is in the mode the system was installed under: a Windows installation created in UEFI mode will not boot under a legacy compatibility mode, and vice versa, and a firmware reset can flip that setting silently. Third, if the entry itself is gone, the operating system’s own recovery environment can usually rewrite it — Windows’ startup repair from installation media, or a manual bootloader repair for the determined. Only after all three should you suspect the drive’s data, and even then the test is to read the drive from another system, where a ‘non-bootable’ drive typically mounts as a perfectly ordinary disk full of intact files. Our walkthrough on cloning to an SSD covers the boot-entry traps that follow a migration, which is when this fault most often appears.
The view from macOS and Linux: same fault, different windows
The staged diagnosis in this guide is written in Windows vocabulary, but the logic is universal and the other platforms have their own windows onto the same facts. On a Mac, the equivalent of the firmware check is the startup manager and, once any system is running, Disk Utility’s device view — which, crucially, can be toggled between showing volumes only and showing the physical devices beneath them; an external SSD that ‘vanished’ is often present as a device whose volumes failed to mount. Apple’s recovery environment offers the same view when the internal drive is the suspect, and a drive absent even there has failed the platform’s version of the BIOS test: the fault is physical, electrical or the drive itself.
On Linux, the kernel’s own messages are the diagnostic goldmine. A drive that enumerates appears in the block-device listing; one that half-appears — seen by the controller, failing to answer — leaves a trail of errors in the system log that names the link, the resets and the timeouts. Live media is the Linux user’s equivalent of a second machine: boot from a USB stick and the suspect drive can be examined without the installed system complicating the picture. Across all three platforms the staged order holds — is it seen by the firmware, seen by the operating system, seen but unmounted, or seen by nothing at all — and each stage still points at its own short list of causes. Learn the stages once and you can troubleshoot a silent drive on any machine you will ever own.
Enclosure mysteries: when the bridge chip is the whole story
An SSD in a USB enclosure adds a translator between the drive and the computer, and translators have failure modes of their own. The commonest is protocol mismatch, already covered in this guide’s prevention thinking but worth naming as a detection fault in its own right: an enclosure built for SATA M.2 drives renders an NVMe stick invisible, perfectly and completely, and the reverse pairing fails the same way — the computer is not malfunctioning, it is faithfully reporting that nothing it can speak to is attached. The second is power: a drive that enumerates on a desktop’s rear ports may vanish on a laptop’s hub, because the enclosure and drive together ask for more than that port offers, and marginal power produces the cruellest symptom in this entire guide — intermittent detection that changes with the cable, the port and the phase of the moon.
Work an enclosure case by stripping variables. Shortest known-good cable, directly into the computer, no hub. Then the bare drive in a real slot or a second, known enclosure, which splits the world cleanly: if the drive appears, the first enclosure or its cable was the fault; if it does not, the drive itself moves to the top of the list. Note the enclosure’s chipset if you can — some older bridge chips mishandle modern high-capacity drives or specific sleep commands, and a firmware update for the enclosure, of all things, occasionally resurrects a ‘dead’ drive. The drive is the suspect everyone photographs; the ten-dollar bridge in the plastic shell is the culprit nobody suspects, and in enclosure cases it should be interviewed first.
Slot-sharing in practice: three vanishing acts with mundane endings
Because slot-sharing causes a particular flavour of confusion — a working drive disappears the day a new one arrives — it rewards worked examples. Case one: a builder adds a second M.2 drive and the older SATA SSD vanishes from Windows. The motherboard, it turns out, retires two of its SATA ports when that M.2 slot is populated; the SATA drive is healthy, cabled to a now-dead port, and moving its cable to a live port resurrects it in seconds. Case two: a new NVMe drive is itself invisible, because the slot it chose shares lanes with a graphics slot configured in a way that disables it; the manual’s table, consulted late, names the supported combinations, and the other slot works immediately. Case three: a drive appears in the firmware but not in the operating system after a second drive is installed, because the two drives are a clone pair with identical signatures and the system has taken one offline for its own protection — a software courtesy that looks exactly like a hardware death until Disk Management explains it.
The moral is not that boards are treacherous; it is that detection problems which begin with a change are usually caused by the change, and the change’s documentation is the manual’s sharing table. Before reseating anything for the third time, ask what else the new hardware touches. Our guide to installing an SSD includes the pre-install checks that prevent all three cases, and they take less time than any one of the rescues.
Building the warranty case: evidence that ends arguments
If the stages in this guide convict the drive itself, the last task is paperwork, and it is worth doing like a professional. Record the drive’s model and serial from its label, the firmware version if any tool ever saw it, and a dated log of your tests: which machines, which slots, which enclosures, what each one reported. Photograph the drive in a known-good slot if you can. That file converts a warranty exchange from a negotiation — where ‘it does not work’ meets ‘have you tried turning it off and on’ — into a verification the maker can complete in minutes. Makers’ support teams see thousands of cases where the board, the cable or the slot was the true culprit; a customer who has demonstrably eliminated those earns a different conversation, and usually a faster replacement.
Two cautions belong here. Do not open the drive, ever: there is nothing serviceable inside, the warranty dies with the seal, and the data-recovery specialists who might one day read its chips prefer their patients unopened. And if the drive holds the only copy of anything that matters, say so before authorising any replacement — a warranty swap exchanges hardware, not data, and the old drive will not come back. Recovery first, replacement second, in that order, always. A drive that dies detected by nothing can still often be read by a lab; a drive that has been exchanged cannot.
The drive that shows the wrong size, zero bytes or a RAW partition
A drive can be detected and still be lying about what it is, and each lie has its own meaning. A capacity of zero bytes, or a media type reported as no media, usually means the controller is alive but cannot reach its NAND — the drive’s brain has survived its memory, which is a hardware failure in nearly every case, and the data path runs through professional recovery or not at all. A wildly wrong capacity — a fraction of the real size, or a suspiciously round tiny number — can mean a counterfeit drive finally confessing, a firmware fault, or an enclosure misreporting; test the bare drive in a real slot before believing any of it. A correct capacity with a partition marked RAW is the gentlest of the three: the drive and its partition table are readable, but the file system on that partition is damaged or foreign to the operating system, and the data beneath is very often intact.
For the RAW case, the discipline is absolute: do not accept any offer to format, initialise or repair in place, however helpfully the operating system phrases it. Image the partition or read it with recovery tools that work read-only, extract the files to another drive, and only then rebuild the partition fresh. Detection problems endanger hardware; RAW problems endanger data, and the danger almost always arrives disguised as a helpful dialog with a single button. The button can wait a day. The data, once formatted over, cannot come back at all.
After the power event: surges, outages and the drive that vanished overnight
When a drive disappears immediately after a power cut, a surge, a lightning storm or a tripped breaker, treat the timeline as evidence and widen the suspect list beyond the drive. The same event that silences an SSD may have damaged the power supply’s output on one rail, a port on the motherboard, or the cable run — which is why the staged tests matter even more here: a drive that enumerates happily in a second machine has acquitted itself, and the investigation should move to the wounded system before a replacement drive is sacrificed to the same faulty rail. Conversely, a drive that is silent everywhere after a surge has likely taken the hit itself, and its warranty conversation should mention the event honestly — some makers exclude power damage, and discovering that early beats discovering it at the counter.
Prevention for the next event is unglamorous and effective: a functioning surge protector between the wall and the machine, a battery backup for any system whose work justifies it, and — the step everyone skips — backups that are not all inside the same box on the same circuit. Power events are the one cause in this guide that can kill the drive, the machine and the attached backup in the same second. Geography is the only fix for that, and it is cheap: one copy, somewhere else, on a different circuit or in a different building.
Helping someone else: the remote diagnosis script
Sooner or later this fault arrives by telephone — a parent, a friend, a colleague whose drive has vanished and whose description of the problem is ‘it’s just not there’. A calm script beats improvisation. Establish first where ‘there’ is: the desktop, the file explorer, the disk list, or the firmware — four different problems wearing one sentence. Then establish what changed: new drive, moved machine, update, power cut, nothing at all. Then walk the safest checks in order — a restart, the disk management view, a different cable or port if they have one — and stop them, kindly but firmly, before any initialising, formatting or case-opening they are not equipped for. Half of remote support is preventing the helpful dialog click described above.
Know when to stop the call and start a visit. If the drive is absent from the firmware, if anything smells burnt, if the data is irreplaceable, or if the machine is a laptop under warranty, the correct remote diagnosis is ‘do nothing further, I am coming over’ — or, for the irreplaceable case, ‘do nothing further, we are calling a recovery service’. A vanished drive keeps almost all of its options for days. It loses them in minutes, usually to kindness and a screwdriver. Your calm is the most valuable tool on the call.
The prevention habit that makes this guide unnecessary
Every case in this article shares a root: a change was made, or an event occurred, and nobody wrote down what the system looked like before. The antidote is a five-minute record made while everything works — a photograph of the firmware’s storage screen, a screenshot of the disk list with every drive’s model and letter, a note of which slot and port each drive uses. With that baseline, a future vanishing becomes a comparison instead of a mystery: you know what should be there, in what order, attached to what. Without it, you are reconstructing a machine from memory at the exact moment memory is least reliable, which is when something has just gone wrong.
Make the record once, keep it with the machine’s other documents, and update it whenever storage changes. It is the least technical advice in this entire guide and, in the author’s experience, the advice whose absence has cost the most weekends. Detection faults will still happen — hardware sees to that — but they will happen to a person holding a map.
A decision tree you can say out loud
When the machine is open and the drive is silent, run the whole diagnosis as a spoken chain, because saying it prevents skipping. Is the drive in the firmware list? If yes, the hardware path works — go to the operating system’s disk view and ask why it is not mounting: uninitialised, offline, RAW, or signature-collided, each with its own safe remedy in this guide. If the drive is not in the firmware list, ask what changed since it last appeared, and test the three physical suspects in order of effort: the connection, the slot or port, and the drive in another machine. If it appears in the other machine, the first system owns the fault. If it appears nowhere, on known-good power and connections, the drive has given its answer, and the conversation turns to warranty and data. Four questions, in that order, resolve the overwhelming majority of cases — and the discipline of the order is what keeps a fixable mounting problem from being ‘treated’ with a format, or a dead drive from being blamed on a cable for a week.
The ten-minute rule for opening a working machine
One final piece of judgement: a detection fault on a machine that contains your only copy of important data deserves ten minutes of thinking before ten seconds of screwdriver work. Photograph the current state. Write down the symptoms exactly. Confirm what the backups cover. The drive is not going anywhere, and nearly every way this situation gets worse involves haste — the initialised disk, the forced connector, the static-zapped board, the warranty voided by curiosity. Slowness is a feature in this repair. The professionals are not faster than you because their hands move quickly; they are faster because they never have to undo anything.
What a healthy detection sequence actually looks like
It helps to have seen normal once, in slow motion, so that abnormal has something to be compared against. Power on: the firmware enumerates its storage within the first seconds, and the drive’s model name appears in the list with its full capacity. The boot manager reads its entry, finds the system partition, and hands over. The operating system mounts the volumes, assigns the letters it remembers, and the drive settles into the background noise of a working machine — visible in every disk tool, boring in every log. Every fault in this guide is that sequence interrupted at a specific frame, and every diagnosis is really the question ‘which frame?’ asked patiently. If you take nothing else from these pages, take the sequence: firmware sees it, boot finds it, system mounts it. Name the frame where yours stops, and you have named your problem precisely enough for any guide, forum or technician to finish the job.
A closing word on the drives that come back
Most vanished drives come back. They return when a cable is moved to a live port, when a signature collision is forgiven, when a boot entry is rewritten, when a ten-dollar enclosure is replaced — ordinary endings that rarely make it into the stories people tell, because ‘it was the slot-sharing table’ lacks drama. Let that encourage you. The silent drive in front of you is statistically a healthy drive in a confusing situation, and the staged, patient method in this guide exists to find the confusion before anyone reaches for the drastic tools. Work the stages, protect the data, write down what it was. The next vanishing — yours or someone you help — will be shorter for it.
Gear mentioned in this guide
Samsung 870 EVO 1TB SATA SSD — a reference SATA drive for the swap test: if a known-good drive like this is also invisible, the slot, cable or settings are at fault, not the drives. Check on Amazon

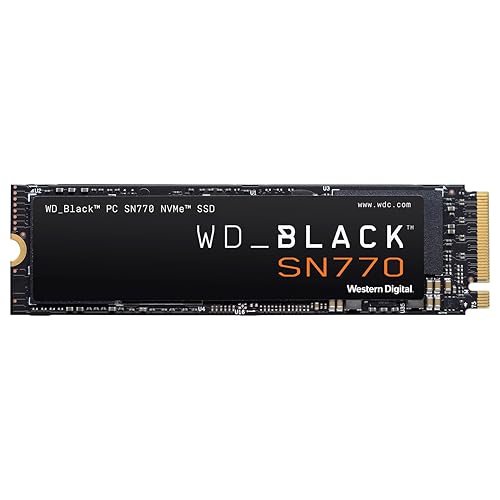
WD_BLACK SN770 1TB NVMe SSD — a reference M.2 NVMe drive for slot testing — its behaviour in a second slot or machine isolates drive faults from system faults. Check on Amazon
Frequently asked questions
My new SSD shows in BIOS but not in Windows. Why?
Because it is blank. Windows Explorer only shows formatted volumes; open Disk Management, initialise the disk as GPT, create a volume and format it, and it will appear. This is normal behaviour for every new drive, not a defect.
Why is my M.2 SSD not detected at all?
The three usual causes are an unseated stick (reseat it at an angle with a firm push), a protocol mismatch (an NVMe drive in a SATA-only slot can never be detected — check the manual), and BIOS settings such as CSM being enabled on older boards. Work through stage three of this guide in order.
My SSD disappeared after I installed another drive. What happened?
Almost certainly slot sharing: on many motherboards, using an M.2 slot disables specific SATA ports, or a PCIe card disables a slot. Your drive is fine — move its cable to a port the manual lists as unaffected.
Disk Management asks me to initialise a drive that has my files on it. Should I?
No. Initialising writes a fresh partition table and can make existing data difficult or impossible to recover. That prompt is only safe for genuinely blank drives. For a data-bearing drive that vanished, work through the settings and physical stages, and consider professional recovery if the data is irreplaceable.
Can a BIOS update fix an undetected SSD?
Sometimes — board makers occasionally add or fix NVMe compatibility in BIOS updates, and laptop makers have shipped updates for drives vanishing after sleep. Check your board or laptop support page. Update carefully, on stable power, following the maker’s instructions exactly.
How do I know if the SSD or the slot is dead?
Cross-test: put the suspect drive in another slot or machine, and put a known-good drive in the suspect slot. Whichever side the invisibility follows is the faulty side. A drive invisible everywhere on correct-protocol connections is faulty; a slot that hides every drive is the problem.
My SSD is detected but shows the wrong capacity. Is it faulty?
Usually not: a drive cloned from a smaller one shows the source’s partition size until you extend the volume into the unallocated space, and a drive partitioned as MBR cannot use space beyond 2TB — converting to GPT fixes that case. Check Disk Management’s view of the full disk before suspecting hardware.
Can a dead CMOS battery cause an SSD to vanish?
Indirectly, yes: a failed battery resets BIOS settings to defaults, which can restore a storage mode or CSM setting incompatible with your drive’s configuration. If detection problems arrive alongside a clock that forgets the time, replace the battery and re-apply your storage settings.
The bottom line
An undetected SSD is a diagnosis, not a verdict: establish the level where it vanishes, initialise if it is blank, correct the settings and sharing rules, then reseat and cross-test the hardware — in that order. Most drives reappear at stage one or two, nearly all the rest at stage three, and the few that do not have genuinely failed, with your data protected throughout by the golden rule: never initialise or format a drive whose contents you cannot afford to lose.