Disclosure: As an Amazon Associate, ilcastellomenu.com earns from qualifying purchases. Product examples below link to Amazon, where you can check current availability and specifications; this guide itself lists no fixed prices because pricing and bundles change frequently.
Learning how to clean a gaming mouse properly takes about fifteen minutes, a soft cloth, and a little patience — and it pays off every single session afterwards. Skin oil, dust, snack residue and desk grit build up on the shell, work their way into the scroll wheel and button seams, and coat the sensor lens until tracking starts to feel vague and clicks start to feel sticky. A mouse that felt crisp when it was new rarely wears out as fast as it gets dirty, so cleaning is the cheapest performance upgrade in your entire setup.
This guide walks through a safe routine for wired and wireless gaming mice alike: a light weekly wipe-down, a deeper monthly clean for the wheel, seams and sensor, and the mistakes that damage coatings, switches and mouse feet. Nothing here requires opening the mouse or voiding a warranty. If your pointer is already misbehaving, clean first and troubleshoot second — our companion guide on How to Test a Gaming Mouse shows how to check whether cleaning actually fixed the tracking.
How to Clean a Gaming Mouse: What You Need
You do not need a specialist kit. Two microfiber cloths (one for cleaning, one dry for finishing), a can of compressed air or a hand blower, wooden or plastic toothpicks, cotton swabs, and a small bowl of water with a single drop of mild dish soap cover almost everything. Isopropyl alcohol at 70 percent is useful for stubborn grime on hard plastic shells, but treat it as a spot cleaner rather than a bath, and keep it away from rubberized grips and printed logos, which it can soften or fade over time.
Set up on a clean, flat surface with good light, because most of what you are removing is only visible at an angle. Unplug a wired mouse completely, and switch a wireless mouse off and remove its battery or charging cable. Cleaning a connected mouse invites accidental clicks, dragged files and changed settings, and moisture near a live USB connector is a risk with no upside. If your mouse has removable weights or a magnetic top shell, take those parts off now so you can clean them separately.
In this guide
Step 1: Dry Dust and Debris Removal
Start dry, because adding liquid to loose dust just makes mud that smears into seams. Hold the mouse upside down over a bin and tap the base gently to dislodge crumbs from around the sensor and mouse feet. Work a dry toothpick or the corner of a folded cloth along the seam between the top shell and the base, the groove around the scroll wheel, and the split lines beside the main buttons. These channels are where debris collects first, and they are the usual source of a gritty-feeling click.
Use short bursts of compressed air to blow out the wheel well and the sensor cavity, holding the can upright and a few inches away so no propellant sprays onto the lens. Long blasts can drive dust deeper or chill the plastic, so patience beats pressure. Finish this stage by wiping the whole shell with a dry microfiber cloth; you will be surprised how much of the dull, grey film on a well-used mouse is simply loose dust that lifts off without any liquid at all.
Step 2: Wipe Down the Shell and Buttons
Dampen — do not soak — a microfiber cloth in your soapy water, wring it until it is barely moist, and wipe the top shell, sides and buttons with light circular motions. The goal is to lift the film of skin oil that makes a mouse feel slippery and look shiny in patches. Pay extra attention to where your thumb and ring finger rest, and to the main click surfaces, where oil transfer is heaviest. Rinse the cloth, wring it again, and repeat until it comes away clean.
Dealing With Sticky or Shiny Spots
A spot that stays tacky after soapy water usually responds to a cotton swab lightly dampened with 70 percent isopropyl alcohol, applied to that spot only and wiped dry immediately. Test any new cleaning product on an inconspicuous area of the base first. Never use bleach, ammonia-based glass cleaner, abrasive pads or paper towels: paper is surprisingly abrasive on soft-touch coatings, and harsh solvents can turn a matte shell glossy or make rubber grips swell and peel. If a rubber grip is already degrading and feels gummy no matter what you do, that is material breakdown rather than dirt, and no cleaning method reverses it.
Step 3: Clean the Scroll Wheel and Side Buttons
The scroll wheel gathers a dark line of compacted grime in its tread. Rotate the wheel slowly while holding a dry cotton swab or the edge of a toothpick against the tread, and the debris will peel away in satisfying strips. For the gap on either side of the wheel, use compressed air first, then a barely damp swab if residue remains. Avoid pushing liquid into the wheel well, because the encoder underneath does not enjoy moisture and excess fluid is a common cause of erratic scrolling afterwards.
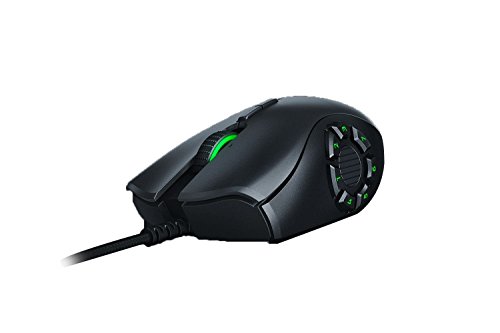
Side buttons and DPI buttons hide grime in their seams. Run a toothpick gently around each button’s perimeter, then press each button repeatedly while blowing air into the gap — this works loose particles out rather than in. If your mouse has a textured thumb rest or interchangeable side panels, as on the Razer Naga Trinity in the gear section below, remove the panels and clean them separately; the contact area underneath is a notorious dust trap that most owners never see.
Step 4: Clean the Sensor Lens and Mouse Feet
Turn the mouse over and inspect the sensor lens under bright light. A fingerprint or a film of dust on the lens is one of the most common causes of jitter and inconsistent tracking, and it is also the easiest fix in this entire guide. Breathe on the lens lightly or use a dry cotton swab with almost no pressure, rolling the swab rather than scrubbing. The lens sits slightly recessed, so a swab reaches it safely; never poke it with a toothpick or anything metal, and never use alcohol here unless the manufacturer explicitly recommends it.
Mouse feet — the PTFE skates on the base — should be smooth, pale and intact. Wipe them with your damp cloth to remove the grey buildup that adds scratchy friction, and check the edges for peeling. Feet that are torn, curled or worn through to the plastic underneath will drag no matter how clean they are, and replacement feet are an inexpensive, widely available fix. While the mouse is upside down, also clear dust from around the power switch, the wireless receiver storage slot and the charging contacts on wireless models. A clean, full-size pad such as the SteelSeries QcK listed below keeps the feet gliding and slows down how quickly they wear.
Step 5: Clean the Cable, Receiver and Mouse Pad
A cleaning session that stops at the mouse misses half the system. Wipe a braided or rubber cable down its full length with the damp cloth — cables drag across desks and floors and carry a surprising amount of grime back onto your hand position. For wireless mice, wipe the USB receiver’s contacts area with a dry cloth and make sure the receiver sits close to the pad, ideally on a short extension, which also helps if you have been reading up on How to Fix Mouse Lag in Games.
Finally, clean the mouse pad itself. A cloth pad can be hand-washed with mild soap, rinsed thoroughly and air-dried flat; a hard pad just needs a wipe. A dirty pad re-contaminates a clean mouse within days and adds inconsistent friction that feels exactly like a sensor problem. If you are shopping for a fresh surface while yours dries, our roundup of the Best Mouse Pad for Gaming covers the main sizes and materials. Let everything dry fully before reconnecting — ten patient minutes now prevents the sticky, just-cleaned feeling that makes people clean less often.
Common Cleaning Mistakes to Avoid
The classic errors are running a mouse under a tap, spraying cleaner directly onto the device instead of the cloth, soaking the wheel well, and using compressed air at point-blank range for long blasts. Submerging or heavily wetting a mouse risks the switches, the encoder and, on wireless models, the battery. Another frequent mistake is cleaning aggressively every week: soft-touch coatings and printed legends wear with friction, so a gentle routine done regularly lasts longer than a harsh deep clean done rarely. A light wipe weekly and the deeper routine in this guide monthly is the right rhythm for most players.
Also avoid disassembly as a cleaning method. Opening a mouse to reach internal dust voids warranties on many models, risks the ribbon cables and switch alignment, and is unnecessary for every problem described here. If clicks still misbehave after a thorough external clean, the cause is more likely a failing switch — see How to Fix Gaming Mouse Double Clicking — than dirt you cannot reach. And if grip rather than grime is your issue, How to Grip a Gaming Mouse explains how hand position changes how a mouse feels far more than its finish does.
Cleaning by Material: Matte Plastic, Gloss, Rubber and Fabric Cables
Different shells tolerate different treatment, and knowing yours prevents the classic cleaning injury: a mouse that works perfectly but looks worse than before you started. Matte hard plastic is the most forgiving surface in gaming — it shrugs off soapy water and the occasional alcohol spot-clean, and its main enemy is abrasion, which polishes it shiny in patches. Work with cloth, never with the scouring side of a sponge, and matte stays matte. Glossy shells are the opposite problem: they tolerate chemicals well but record every micro-scratch, so use the softest cloth you own, minimal pressure, and lift dust off with air before wiping rather than grinding it across the finish.
Rubberised and soft-touch coatings demand the gentlest regime of all. These finishes are thin polymer layers over hard plastic, and they respond badly to alcohol, heat and enthusiastic friction — each can accelerate the stickiness that ageing soft-touch is prone to. Soap, water, patience. If a soft-touch surface has already turned gummy with age, recognise that you are looking at polymer breakdown rather than dirt: cleaning will improve it slightly and temporarily, and the honest options are living with it, covering the grip zones with aftermarket grip tape, or replacing the mouse. Grip tape, incidentally, is also the preventive move for a new soft-touch mouse you intend to keep for years — it takes the wear so the coating does not have to.
Braided cables clean well with a damp cloth drawn along their length, and they repay the effort because the braid traps desk dust visibly. Rubber cables need only a wipe. Wireless charging contacts and the pogo pins on dock-charged mice deserve a dry cotton swab whenever charging becomes temperamental; a surprising number of ‘faulty dock’ reports are simply oxidised contacts. The underside’s product label and the small print around the sensor are worth a gentle pass too — not for vanity, but because the model and serial information printed there is what support will ask for if the mouse ever needs a warranty claim.
A Cleaning Schedule That Matches How You Play
Habits beat heroics. The schedule that works for most players has three tiers. After every session — ten seconds: a dry wipe of the shell with the cloth that lives on your desk, which removes the day’s oil before it sets. Weekly — two minutes: feet, sensor surround and wheel tread with a dry swab, plus a shake and tap over the bin. Monthly — the full routine in this guide, including the pad. Players in dusty rooms, players with pets, and players whose setup shares space with food should compress the weekly tier into twice a week; everyone else can relax into the standard rhythm and stop thinking about it.
Tie the tiers to events rather than the calendar and they will actually happen: the daily wipe to putting your headset down, the weekly check to your regular game-update day, the monthly deep clean to the first session of the month. It also helps to keep the kit together in one small box — cloths, swabs, toothpicks, blower — because a routine that requires hunting for supplies is a routine that gets postponed. The total annual cost of this discipline is an hour or two; the return is a mouse whose clicks, glide and tracking in year three feel like the mouse you unboxed.
When Cleaning Reveals a Real Problem
A proper clean doubles as an inspection, and it regularly surfaces faults that dirt was camouflaging. Feet worn through to their backing will not glide after any amount of wiping — replacement feet, matched to your model, restore the glide and protect the base. A wheel that still reverses or skips after its well is clean is telling you about its encoder. Buttons that still register twice after their seams are spotless are telling you about their switches. Treat the clean as the fork in the road it is: everything it fixes was maintenance, and everything it does not fix is diagnosis you no longer have to guess at.
Worked Example: Rescuing a Three-Year-Old Daily Mouse
Consider a realistic case: a wireless gaming mouse, three years old, used daily for work and play, whose owner describes it as ‘just tired’. The wheel feels gritty, the left click occasionally feels soft, the glide has turned scratchy, and tracking on flicks sometimes seems to hesitate. Nothing has been cleaned in over a year. This is the mouse this guide was written for, and its rescue follows the routine in order — which is itself the lesson, because the temptation is to jump straight to shopping for a replacement.
The dry stage alone produces a small pile of debris from the wheel well and button seams, and the toothpick lifts a dark ridge from the wheel tread that the owner did not know existed. The shell wipe takes two passes before the cloth comes away clean — three years of hand oil is a film, not a spot. The sensor lens, inspected under a lamp, shows the classic fingerprint smear, and the dry swab clears it in seconds. The feet are grey and rough at the edges but intact, so they are cleaned rather than condemned, and the pad goes into the sink for its own wash while everything dries.
The verdict after fifteen minutes: the wheel is crisp again, the soft click was debris in the seam and is gone, glide is restored to something close to the original feel, and the flick hesitation — the symptom that sounded most like a dying sensor — does not recur in the following week’s play. Total cost: nothing but time and supplies already in the house. The counterfactual is worth stating plainly, because it happens constantly: without the clean, this mouse was one frustrated evening away from being replaced by an identical-feeling new mouse, and its owner would have credited the new mouse with virtues that belonged to soap and a cotton swab.
The example generalises into a rule you can apply to every peripheral you own: no device gets a performance verdict until it has had a maintenance pass. Dirt is the great impersonator in gaming hardware — it plays sensor failure, switch failure and surface failure with equal conviction — and the clean is the cheapest interrogation there is. Only what survives it deserves a troubleshooting guide, a warranty claim or a replacement budget.
Cleaning Inside the Places This Guide Has Not Reached Yet
The main routine covers the shell, wheel, seams, sensor and feet, but a gaming mouse hides a few more dirt traps that only show up after months of use. The first is the underside channel around the sensor cavity. On many models the lens sits in a shallow recessed well, and that well collects a ring of compacted dust that a quick wipe across the base never touches. Work around the rim of the well with a dry cotton swab using a rolling motion rather than a dragging one, because dragging pushes the ring toward the lens instead of lifting it out. Finish with a short blast of air held at an angle, never straight down into the cavity, so debris exits the well instead of settling deeper onto the lens surround.
The second trap is the gap underneath the main buttons. When you press a click, the button cap flexes over a small void, and crumbs and hair migrate into that void through the split line at the front of the mouse. You cannot open the mouse to reach it, and you should not try, but you can clear most of it from outside: hold the mouse upside down, press and release the button slowly a few times so the moving cap pumps loose particles toward the opening, then blow air across the front split line while the button is held down. Repeat on the other button. This is also why a gritty or crunchy click often disappears after cleaning even though you never touched the switch itself.
The third trap is the charging contact area on wireless models with dock charging. The small metal contacts on the underside oxidise slowly and gather a film of skin oil, which shows up as a dock that needs wiggling before it starts charging. Wipe the contacts with a cotton swab barely dampened with isopropyl alcohol, let them dry fully, and wipe the matching pins on the dock the same way. Do not scrape the contacts with anything metal; the plating is thin, and a scratched contact oxidises faster than a dirty one.
Finally, look at the PTFE feet themselves under bright light. Cleaning restores a dirty foot, but it cannot restore a worn one. Healthy feet have a consistent matte white or black finish with rounded edges. Feet that look shiny in the centre, feel scratchy on a hard pad, or have a visible ridge you can catch with a fingernail are worn past the point where cleaning helps, and replacement feet are a consumable worth treating like tyres on a car: cheap, expected, and transformative when the old set is done. If you replace them, clean the recesses with alcohol first so the new adhesive bonds to plastic rather than to old glue residue.
Scenario Variations: Shared Desks, Pets, Travel and Humid Rooms
A mouse that lives on a shared or family desk gets dirty in a different pattern from a solo battlestation mouse. Expect more food residue, more mystery stickiness, and grime from hands that were not washed after snacks. For shared mice, shorten the deep-clean interval and pay extra attention to the scroll wheel groove and the thumb rest, where residue from several users layers up fastest. A quick alcohol spot-wipe of the main contact areas between users is reasonable; a full soak of any kind is not.
Pet hair changes the routine in one specific way: hair wraps around the scroll wheel axle and works into the sensor well far more than dust does, and it does not blow out with air because it tangles. Check the wheel well with a torch every few weeks if a cat or dog shares the room, and extract wrapped hair with tweezers pulled slowly outward, rotating the wheel as you go so you unwind rather than snap the strands. Hair left around the axle is a common hidden cause of a wheel that feels notchy on a mouse that is otherwise clean.
A mouse that travels in a backpack needs a different habit rather than a deeper clean. Lint and grit from the bag coat the feet and lens, so give the base a ten-second wipe when you unpack, every time, and carry the mouse in a hard case or at least a pouch so the wheel is not pressed against fabric for hours. Buttons held under constant pressure in a packed bag can also develop a temporarily vague feel that recovers after a day of normal use; clean first and judge later before assuming damage.
Humid rooms and coastal air add corrosion to the list. In those environments, wipe the shell dry rather than damp when you can, store the mouse off a cold desk surface that collects condensation, and expect the charging contacts and USB plug to need the alcohol swab treatment more often. If a wired mouse’s plug shows green or white corrosion at the edges, clean the outside only and retire the cable if the corrosion has reached the contact pins themselves.
The Mouse Pad Is Half the Cleaning Problem
Every gram of grit your mouse picks up came from somewhere, and most of it came from the pad underneath it. Cleaning the mouse while leaving the pad dirty is like washing a car and parking it under a leaking gutter: within a week the feet are loaded again. Cloth pads can be hand-washed in lukewarm water with a drop of mild soap, worked gently with your palms rather than a brush, rinsed until the water runs clear, and dried flat away from direct heat. You will be surprised how dark the rinse water is on a pad that looked merely dull.
Hard pads and glass pads need only a wipe, but they need it more often, because they have no fibres to trap debris away from the contact surface — everything on a hard pad stays exactly where the feet will run over it. A ten-second wipe before a session keeps a hard pad honest. Desk mats sit in between: vacuum them weekly, spot-clean spills immediately before they wick sideways, and wash them on the same schedule as a cloth pad.
Your mouse feet will tell you how well you are doing. If freshly cleaned feet feel scratchy again within days, the pad is the source, not the mouse. If glide stays smooth for weeks, your combined routine is working. Readers comparing pad options while they sort out a cleaning routine can look at our roundup of the best mouse pad for gaming picks, since pad material decides how much of this section applies to you at all.
Cleaning the Software Side: Profiles, Firmware and a Fresh Baseline
Physical cleaning has a digital counterpart that is worth doing on the same day, because the two together give you a true fresh baseline. While the mouse is unplugged and drying, open the manufacturer’s software and check for a firmware update; sensor and click behaviour genuinely change between firmware versions, and testing a freshly cleaned mouse on ancient firmware muddies your judgement of whether the cleaning helped. Export or screenshot your profile settings before updating anything, so a reset update cannot take your DPI stages and button binds with it.
This is also the moment to clear the accumulated clutter in your profiles: the five DPI stages you never cycle through, the game profiles for titles you uninstalled last year, the macro bound to a side button you press by accident weekly. A clean, minimal profile makes the post-clean test meaningful. If clicks feel different afterwards, you want to know it was the cleaning, not a debounce setting that changed during an update.
Finish by recalibrating surface tuning if your software offers it, on the freshly washed pad, at your normal desk position. Surface calibration done on a dirty pad bakes the dirt into the mouse’s idea of normal. Done in the right order — wash pad, clean mouse, update firmware, recalibrate — it gives you the closest thing to the mouse’s first-day behaviour that maintenance can deliver, and it costs nothing but the same fifteen minutes you were already spending.
Cleaning Day Workflow: The Full Routine in the Right Order
Order matters more than effort. Worked in the wrong sequence, cleaning redistributes dirt instead of removing it: wipe a shell before blowing out the seams and you push seam debris under the buttons; wash the pad after calibrating the sensor and your calibration describes a pad that no longer exists. The sequence that avoids all of this starts with the pad, because it takes longest to dry. Wash or wipe the pad first and set it aside, then do the mouse from driest to wettest — air and toothpick work, then the shell wipe, then wheel and seams, then sensor and feet — and let everything sit for ten minutes before reassembly and testing.
While things dry, use the pause productively. Check the cable along its full length for kinks and fraying near the strain reliefs, wipe the USB plug or receiver, and clear the desk area the pad will return to, since grit under a freshly washed pad defeats the wash. Players consistently skip the desk itself, then wonder why a clean pad feels gritty within days: the debris was never on the pad, it was under it, migrating up through the weave.
Finish with a two-minute functional check rather than assuming success. Click every button twenty times, roll the wheel through its full range in both directions, and draw slow circles and a slow diagonal on the clean pad while watching the cursor for catches. This closing test converts cleaning from a chore you hope worked into maintenance you verified, and it catches the classic own-goal — a cotton fibre left on the lens — while the swabs are still out.
Time the whole routine honestly and it lands between fifteen and twenty-five minutes depending on pad drying. That figure is worth knowing, because the players who clean quarterly instead of monthly usually cite a imagined hour-long ordeal. A twenty-minute task with a calendar reminder attached is a system; a vague intention to clean ‘when it gets bad’ is how mice reach the state described in the worked example elsewhere in this guide.
What Cleaning Cannot Fix: Setting Honest Expectations
Cleaning restores a mouse to its own best condition; it cannot improve on the condition the hardware is actually in. A switch that has worn to the point of double-clicking will still double-click on a spotless mouse — cleaning is step two of that diagnosis, not the cure, and our troubleshooting guide on how to fix gaming mouse double clicking picks up exactly where this one leaves off. Likewise, a sensor that skips on every surface after a careful lens clean is telling you about itself, not about your technique.
Rubberised coatings deserve a specific expectation. Once a soft-touch coating has gone sticky from age and heat, that stickiness is the material breaking down, not dirt sitting on it, and no solvent routine reverses it. Cleaning removes the grime layer and improves things temporarily, but a coating in chemical decline will re-tack within weeks. Recognising this saves players from escalating to harsher chemicals that accelerate the damage they are trying to undo.
The honest framing is that cleaning is diagnostic as much as cosmetic. A mouse that returns to feeling new after cleaning was a dirty mouse. A mouse that does not has given you clean information — pun intended — about wear, and that information is what tells you whether the next step is replacement feet, a switch repair, or a new mouse entirely. Either outcome is a successful clean.
Teaching Someone Else: Cleaning a Mouse You Do Not Own
Sooner or later you will be handed someone else’s filthy mouse — a teammate’s at a LAN, a younger sibling’s, a colleague’s on a shared workstation — and the etiquette and technique both shift. Ask before using alcohol on a stranger’s rubberised grips, because some coatings react badly and the mouse is not yours to experiment on. Stick to the dry steps and a plain damp wipe unless the owner waves you on, and you will fix ninety percent of what is wrong with it anyway: seam grit, wheel hair and a filmed-over lens account for nearly every complaint.
Workplace mice deserve a mention of their own. Shared office mice accumulate the same grime as gaming mice but are cleaned by nobody, because they belong to everybody. If you inherit a desk, the mouse clean is the highest-value five minutes of your first day: full dry pass, shell wipe, sensor swab. You will also learn something about the mouse’s health from the exercise — a worn foot or a sticky coating tells you whether to request a replacement now, while the request is a reasonable new-starter ask, rather than in six months when it sounds like a complaint.
The deeper point is that cleaning skill compounds socially. The player who can restore a mouse in fifteen minutes becomes the person teammates hand their gear to before tournaments, and the person who knows — from handling many mice at their dirtiest — which models age gracefully and which dissolve into sticky regret. That knowledge is genuinely hard to get any other way, and it starts with treating every grubby mouse you meet as a free lesson rather than a chore.
Gear for This Guide
The examples below come from our verified product pool and illustrate the product classes discussed in this guide. They are examples, not a ranked list — use the criteria in this article to judge any model, including newer revisions.

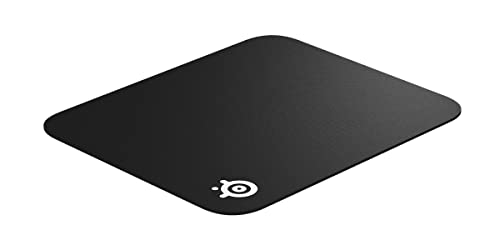
SteelSeries QcK Gaming Mouse Pad
A washable cloth pad is the other half of a clean tracking setup: a fresh surface keeps clean mouse feet gliding evenly and slows skate wear. SteelSeries QcK Gaming Mouse Pad — Check on Amazon

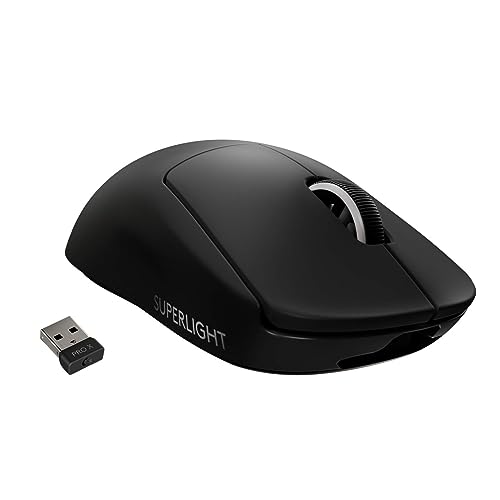
Logitech G305 LIGHTSPEED Wireless Gaming Mouse
A wireless mouse removes the cable from the cleaning equation entirely and its smooth shell wipes down in seconds, which makes the weekly routine easier to keep. Logitech G305 LIGHTSPEED Wireless Gaming Mouse — Check on Amazon
Frequently Asked Questions
How often should I clean my gaming mouse?
Wipe the shell and feet weekly with a dry or barely damp microfiber cloth, and do the full routine — wheel, seams, sensor and pad — about once a month, or sooner if clicks feel gritty or tracking feels inconsistent. Players who eat at their desk or have pets in the room should lean toward the shorter interval.
Can I use disinfectant wipes on a gaming mouse?
Occasionally, on hard plastic shells, a standard disinfectant wipe is unlikely to cause harm, but repeated use can dull soft-touch coatings and damage rubber grips. A microfiber cloth with a drop of mild soap achieves the same result more gently, so keep wipes as the exception rather than the routine.
Why does my mouse still feel slippery after cleaning?
That usually means the oil film needs a second pass with a freshly rinsed cloth, or the coating itself has worn smooth in the grip areas — a permanent change that cleaning cannot reverse. A cloth pad with more friction and a relaxed grip can compensate while you decide whether the mouse is due for replacement.
Is it safe to clean the sensor with alcohol?
Use a dry cotton swab first; most sensor films are dust and lift off without liquid. Only use alcohol if the manufacturer recommends it for your model, apply it with a swab rather than spraying, and let it evaporate fully before use. Never use abrasive tools on the lens.
My scroll wheel squeaks after cleaning. What happened?
A small amount of moisture likely reached the wheel mechanism, or debris shifted into the encoder area. Leave the mouse to dry for several hours, then roll the wheel repeatedly to work it clear. If the squeak persists after a full day of drying, blow the wheel well out with short bursts of air.
Should I clean a brand-new mouse?
A quick dry wipe is enough. New mice sometimes carry a light manufacturing film on the feet that wears off in the first days of use, which is why glide often improves slightly after a short break-in period on a clean pad.
Can I put my mouse feet in water to clean them?
Wiping them in place with a damp cloth is better. Removing feet usually destroys their adhesive and their precise thickness, and tracking height is calibrated around that thickness. If feet must come off, plan to fit replacements rather than refitting the old set.
Bottom line: unplug, start dry, wipe with a barely damp cloth, detail the wheel and seams with a toothpick and swabs, treat the sensor gently, and clean the pad too. Fifteen unhurried minutes once a month keeps clicks crisp and tracking honest — and tells you whether a ‘dying’ mouse was ever really dying at all.
Can cleaning fix a scroll wheel that jumps or scrolls the wrong way?
Often, yes. A wheel that skips or briefly reverses is usually an encoder reading through a layer of dust and hair rather than a failed part. Work through the wheel cleaning steps, rotate the wheel slowly through many full turns while blowing air into the well, and test again before shopping for a replacement. If the jumping survives a thorough clean, the encoder itself is wearing and cleaning has done its diagnostic job.
How do I clean a mouse with a honeycomb or perforated shell?
Perforated shells let debris fall inside, so add two habits: blow air outward through the holes from above the mouse rather than into them, and never use a damp cloth across the top, because moisture wicks through the holes onto the PCB. Clean the exterior with a barely damp swab worked hole by hole in the worst areas, and keep liquids away from the mouse entirely beyond that.
What should I do about a mouse cable that stays sticky after cleaning?
Braided cables pick up residue in the weave that a wipe cannot reach. Run the cable slowly through a microfiber cloth dampened with soapy water, pinching gently, then repeat with a plain damp cloth and a dry one. If a section stays tacky, the braid’s coating itself is degrading; a removable cable can be replaced, while a fixed cable in that state is a sign the mouse is entering its final phase.
Is it worth cleaning a mouse before selling or giving it away?
Yes, and do the digital half too: factory-reset the profiles, remove your binds and lighting settings, and unpair it from your receiver list if the software supports that. A cleaned, reset mouse is a genuinely nicer gift, and the reset protects you from the odd experience of your old DPI stages surprising the new owner mid-game.
Can I use a vacuum cleaner instead of compressed air?
A vacuum with a soft brush attachment works for loose surface dust and is arguably better than blowing debris deeper into seams, but keep it away from the sensor lens and never let a powerful vacuum nozzle sit directly over the wheel well, where the suction can stress the wheel assembly. Use air for the seams and lens area, vacuum for the shell and desk, and you get the best of both.
How do I get the smell out of a mouse that has absorbed years of desk life?
Odour lives in the same residue layer as the grime, so a thorough shell clean handles most of it. For a mouse that still smells after cleaning, leave it overnight in a closed box with an open container of bicarbonate of soda nearby — not on the mouse — which absorbs odours without chemicals near the coating. Persistent smell after that usually means residue inside the shell, which is beyond non-invasive cleaning.
Related Guides
Keep exploring with these guides and roundups from the same Gaming Mouse collection: