Disclosure: As an Amazon Associate, ilcastellomenu.com earns from qualifying purchases. Product examples below link to Amazon, where you can check current availability and specifications; this guide itself lists no fixed prices because pricing and bundles change frequently.
Knowing how to test a gaming mouse properly separates real problems from bad settings, dirty sensors and placebo. A structured test takes about twenty minutes: consistency checks for the sensor, click and switch tests for the buttons, a scroll-wheel workout, and a glide and cable check — each with a simple pass-or-fail standard you can repeat later to confirm a fix or compare a new mouse against your current one.
Run these tests when a mouse is new, when something starts to feel wrong, and after any cleaning or settings change. Speaking of which, always start from a clean baseline: the routine in How to Clean a Gaming Mouse removes the single most common cause of ‘sensor problems’, which is a dirty lens on a dirty pad. Test on the surface you actually play on, at the DPI and polling rate you actually use.
How to Test a Gaming Mouse: The Sensor Consistency Tests
The core question for any sensor is whether the same physical movement always produces the same cursor movement. Draw slow, straight lines in a paint program at your normal DPI: they should be smooth and even, without stair-stepping at moderate speeds or sudden jumps. Then draw fast flicks between two fixed points on screen — a simple aim-trainer or even two desktop icons works. If the cursor lands short or long unpredictably at high speed but behaves at low speed, the sensor may be hitting its tracking limits, or the surface may be defeating it.
The Return-to-Origin and Circle Tests
For a repeatable check, mark a start point, move the mouse a set distance against a ruler — ten centimetres is convenient — and note where the cursor stops; repeat five times in each direction. Consistent sensors stop within a small margin every time. Then draw slow circles: wobbles that appear at the same point in every circle suggest a dent, seam or pattern in your pad rather than the sensor, so rotate the pad and repeat before blaming the mouse. Spinning the mouse rapidly in a small circle in-game is the classic spin-out test; a sensor that loses tracking and snaps your view to the floor or ceiling is failing a test that any modern gaming sensor should pass, a point worth remembering when you compare sensor specifications.
In this guide
Testing Clicks, Switches and Buttons
Open a click-test page or a simple counter and click each main button one hundred times at a natural pace, then fifty times as fast as you can. Watch for two failure modes: missed actuations and double registrations, where one physical press counts twice. Double-clicking on a single press is the signature of a wearing switch and has its own repair ladder in How to Fix Gaming Mouse Double Clicking; catching it early in a test matters because it typically worsens gradually and players unconsciously adapt to it for months.
Test every side button, the DPI button and any extra controls the same way, and check for pre-travel and post-travel feel: buttons should actuate with a defined click, not a mushy squeeze, and should not fire when you merely rest a finger or squeeze the shell. Slam-clicking — the main button firing when you set the mouse down firmly after a lift — is a real flaw worth noting on a new mouse. Finally, hold each button down and drag: the press should stay registered through the whole movement without flickering, which matters for scoped aim and for moving windows alike.
Testing the Scroll Wheel and Middle Click
Scroll slowly through a long document one detent at a time. Each notch should move the page by the same amount, in the same direction, every time. Scroll back up just as slowly; wheels with encoder wear often jump, hesitate or briefly reverse direction, especially on the return. Then scroll fast: the wheel should track the acceleration without skipping chunks or bouncing back at the end of the flick. Finish with twenty middle clicks — the switch under the wheel is often the weakest on the mouse and the first to feel vague.
If your wheel fails the slow test but passes the fast one, debris in the wheel well is a likelier cause than a dead encoder, and the cleaning routine linked above addresses exactly that. If it fails both, and cleaning changes nothing, you are looking at hardware wear. Note the result either way; a written record stops you re-diagnosing the same fault every few months.
Testing Polling, Latency Feel and Connection Stability
Polling rate testers in the browser report how often your mouse is reporting; at 1000 Hz you should see readings clustered near that figure during steady movement, with the caveat that browser tools are approximate. More useful in practice is a stability check for wireless mice: play or test for several minutes with the receiver in its normal position and watch for micro-stutters, then repeat with the receiver on a short extension cable closer to the pad. A dramatic improvement tells you the problem is interference or distance, not the mouse — the same diagnosis path as How to Fix Mouse Lag in Games.
Latency itself is hard to measure without specialist tools, but consistency is not: repeated flicks to the same target should feel identical, with no occasional ‘heavy’ or delayed movement. If wired and wireless modes exist on the same mouse, test both; a mouse that is flawless wired and erratic wireless has a radio or receiver problem, not a sensor problem. Keep your DPI fixed during all of this — the method in How to Set DPI on a Gaming Mouse ensures you are testing the mouse, not your settings.
Testing Glide, Lift-Off and Ergonomics Over a Session
Numbers are only half the test. Check glide by pushing the mouse gently with one finger: it should start moving without a sticky jerk and coast evenly in every direction. Uneven glide points to worn or contaminated feet — inspect them against the light. Test lift-off distance by stacking thin cards under the mouse while moving it slowly; tracking should stop within a card or two of lift on most gaming mice, and a mouse that keeps tracking high above the pad will jitter every time you reposition it.
| Test | How to run it | Pass standard | If it fails |
|---|---|---|---|
| Line consistency | Slow straight lines in a paint app | Smooth, even lines, no jumps | Clean lens and pad; retest on a plain surface |
| Return accuracy | Five 10 cm moves each direction | Cursor stops within a small margin | Check surface, then sensor settings |
| Click integrity | 100 normal + 50 fast clicks per button | Every click registers exactly once | See the double-click repair guide |
| Wheel steps | Slow scrolling, one notch at a time, both ways | Equal steps, no reversals | Clean wheel well; then suspect encoder wear |
| Wireless stability | Several minutes of flicks at normal receiver position | No micro-stutters | Move receiver closer on an extension |
End with the test that actually decides ownership: play your main game for a full session and note hand, wrist and forearm comfort at the end. A mouse can pass every bench test and still be wrong for your hand size or grip — How to Grip a Gaming Mouse helps separate a technique issue from a shape issue. If you are benchmarking a potential replacement, run the identical sequence on it and compare records, not impressions; roundups organised by hand size are most useful once you know which of your measurements actually matter.
Building a Repeatable Test Routine You Can Reuse
The tests in this guide become far more powerful when they are a routine rather than an improvisation, because a routine produces comparable numbers across months and across mice. Fix the constants: same pad, same DPI and polling rate, same test applications, same distances. Write the results in a note you will actually keep — date, mouse, and one line per test. The first time you run it, the routine takes twenty minutes; by the third, ten, because the setup no longer needs inventing. That note is the document that turns a future ‘something feels off’ evening from an hour of guessing into a five-minute comparison against your own baseline.
Choose test movements that resemble your games. A tactical shooter player should weight the click-integrity and slow-tracking tests; a player of fast arena titles should weight the flick and spin-out tests; an MMO player should click-test every side button as rigorously as the main pair, because those buttons carry their rotation. Testing what you actually do is the difference between a benchmark and a diagnosis, and it is why generic review numbers, however precise, cannot tell you whether a mouse is right or failing for you specifically.
Testing a Mouse Before the Return Window Closes
A new mouse deserves a compressed version of the full routine in its first days, while returning it costs nothing but a trip. Run the bench tests the evening it arrives and specifically hunt the flaws that hide from casual use: slam-clicking when the mouse is set down hard, a wheel that reverses on slow upward scrolls, a side button that needs an unnatural squeeze, feet with a raised edge that scratches. Then play your main game for several sessions across the week, because shape and weight verdicts delivered in the first hour are notoriously reversed by the tenth.
Keep the packaging intact and the accessories together until the window closes, and photograph the mouse’s condition on arrival if it shows any blemish — small courtesies to your future self in a dispute. If the mouse fails a test, distinguish defect from preference honestly: a double-clicking switch is a defect at any age, while a shape your hand dislikes is a preference, and retailers treat the two differently. Either way, the written test results make the conversation short and factual, which is all you ever want from a returns process.
What Test Results Cannot Tell You
A final note of proportion. Bench tests measure consistency, integrity and connection quality superbly, and they measure nothing about whether a mouse makes you play better — that verdict belongs to weeks of ordinary use, and it is entangled with shape, weight and habit in ways no counter can separate. Players occasionally test a beloved mouse, find a theoretical flaw they never felt, and ruin a good relationship with a number. Use tests to find faults you can feel or faults that will grow — switch wear, wheel wear, connection drops — and let comfort and results arbitrate the rest. The mouse that passes every test and fits your hand is done being evaluated; play on it.
Worked Example: The Case of the ‘Dying’ Sensor
A troubleshooting story shows the routine earning its keep. A player’s mouse begins misbehaving in flicks: the view occasionally snaps downward mid-swipe, and slow tracking feels gritty. The mouse is fourteen months old, the forum consensus for these symptoms is sensor failure, and a replacement is already in a shopping cart. The tests, run in this guide’s order, tell a different story in about ten minutes.
The click and wheel tests pass perfectly — the switches and encoder are innocent. The line test is where the case breaks open: slow lines are clean on the left half of the pad and wobble at the same spot on the right half, every pass. Rotating the pad 180 degrees moves the wobble to the other side of the desk, which acquits the sensor entirely and convicts the pad: a worn, polished patch in its centre-right, invisible until tested for, where the surface texture has been abraded smooth by a year of exactly those flicks. The spin-out snaps, tested on a plain spare pad, vanish completely.
The resolution costs the price of a new pad and a sensor clean for insurance, and the replacement mouse leaves the cart. Three lessons generalise. First, the tests isolated the variable — mouse versus surface — in a way that playing never could, because play confounds them. Second, the most expensive hypothesis (a dead sensor) was the least likely, and the routine’s order — cheap and external first — is what protected the owner’s wallet. Third, the written baseline from the mouse’s first week made the pad’s guilt obvious, because the same tests had once passed on the same desk.
Keep this story in mind whenever a peripheral ‘suddenly’ degrades: sudden is usually a story about thresholds, not events. Wear accumulates silently until the day it crosses into visibility, and the day it crosses feels like a failure. Testing converts that feeling back into a measurement, and measurements, unlike feelings, point at pads.
Testing the Battery, Charging and Wireless Endurance Claims
Most mouse testing focuses on the sensor, but for a wireless mouse the battery system deserves the same rigour, because it is the part most likely to change your daily routine. Start with a simple endurance log: charge the mouse fully, note the date, and use it normally with your usual lighting and polling settings until it warns you or dies. Compare the real figure with the headline claim, remembering that headline numbers are usually measured with lighting off and polling at standard rates. A mouse that delivers most of its claim under your real settings is healthy; one that delivers half deserves scrutiny while it is still returnable.
Test the charging behaviour too. Time how long a short top-up — fifteen minutes on the cable — buys you in play, because that emergency-charge figure matters more in real life than the full-charge marathon. Check whether the mouse remains fully usable while charging wired, whether the cable is flexible enough that wired play during charging is genuinely comfortable, and whether the battery indicator in software reports in honest percentage steps or sits at full for days and then falls off a cliff.
Finally, test the wake behaviour. Leave the mouse idle for increasing intervals and note how it wakes: instantly on movement, only on click, or with a brief stutter as the connection renegotiates. Deep-sleep stutter after long idle periods is a real characteristic of some models and firmwares, and it is exactly the kind of thing a structured test catches in week one that casual use blames on your imagination for a year.
Testing Buttons Beyond the Main Clicks
The main clicks get all the attention, but a complete test covers every input the mouse offers, in the way you will actually use it. Side buttons should be tested for travel and placement under game conditions, not on the desktop: bind them to something you use constantly for a session and notice whether you can hit the rear button without also nudging the front one, whether either requires a grip shift, and whether the click point is consistent from different finger positions. A side button that is perfect in a shop and unreachable mid-fight is a failed test you want to discover at home, not in a ranked match.
Test the DPI button and any profile switch for accidental activation. During fast swipes and lifts, does your hand ever trigger them? An accidental DPI change mid-game feels like a sensor fault and gets misdiagnosed as one, so part of testing is learning whether the control layout suits your grip. Our guide on how to grip a gaming mouse explains why the same button placement can be safe for a palm grip and treacherous for a fingertip grip.
The cable deserves a test of its own on wired models. Drag is not only about weight; it is about how the cable exits the mouse and where it catches. Test with your real desk: run fast horizontal swipes and feel for the cable snagging on monitor bases, desk edges or pad corners, and check whether the strain relief at the mouse end flexes smoothly or transmits every tug straight to the shell. If you are comparing connection types more broadly, our wired vs wireless gaming mouse comparison covers how this trade-off plays out over months rather than minutes.
Building a Test Log You Can Trust
Memory is a terrible testing instrument. You will remember that a mouse felt ‘a bit off’ on Tuesday and forget the settings, the game and the surface that produced the feeling. A test log fixes this with almost no effort: a plain text file or notebook page where each test gets a date, the mouse settings in force, the surface used, and one or two sentences of result. Five lines per session is enough. What you are building is the ability to compare across days, which is when the truth appears.
Structure the log around repeatability. Use the same test map or aim trainer routine, the same in-game sensitivity, and the same pad for every session with a given mouse, and change only one variable between sessions. A log kept this way can answer questions casual use never can: whether the new firmware actually changed tracking feel, whether the replacement feet improved glide or just changed it, whether your accuracy dip is the mouse or your sleep schedule.
Keep the log honest by recording bad results with the same care as good ones, and by noting context that has nothing to do with the mouse — a different chair height, a wrist that aches, a game update that changed sensitivity scaling. Half of troubleshooting is eliminating the innocent, and a log full of context eliminates them in minutes instead of weekends.
Testing for the Games You Actually Play
Generic tests establish that a mouse works; genre tests establish that it works for you. A MOBA player should test rapid repeated clicking and small circular corrections over a long session, because that genre punishes switch fatigue and imprecise small movements. A tactical shooter player should test the opposite profile: long holds at low sensitivity, single deliberate clicks, and repeated 180-degree turns for consistency. An MMO player should test the side button grid under modifier keys, in a real rotation, at real speed.
Run each genre test long enough for fatigue to vote. Many mice pass a ten-minute test and fail at ninety minutes, when a slightly wrong shape or a slightly stiff wheel turns into a hand that aches and aim that quietly degrades. If a mouse is going to be your daily driver for years, the ninety-minute verdict is the one that matters, and no specification sheet can give it to you.
End with the test nobody schedules: the frustration test. Play something you are bad at, on a losing streak, tired. A mouse whose buttons you mis-hit when calm will be worse when tilted, and a shape that demands constant attention will demand it most when you have none to spare. The mice that survive this test are the ones still on the desk three years later.
Testing Lift-Off Distance and Landing Behaviour Properly
Lift-off distance gets one line in most test routines and deserves a full test of its own, because it governs every repositioning move you make. The stack test is the classic method: place the mouse on a stack of thin cards or discs on your pad, adding one at a time, and move it slowly after each addition. The height at which tracking stops is your lift-off distance in units you can compare between mice. What you want to know is not just the number but the character near the limit: a good mouse tracks consistently until it stops, while a poor one fades, stutters and half-tracks in the millimetre before cut-off, and that fade zone is where messy landings come from.
Then test the landing, which is the half of the move nobody measures. Lift the mouse mid-swipe at game speed and set it down while still moving, repeatedly, watching the cursor in a drawing app or aim trainer. A mouse with well-behaved lift and landing returns to tracking with the cursor where your hand expects it. One with landing wander throws the cursor a few millimetres sideways on touchdown, and over a match those millimetres become a background feeling that the mouse is ‘somehow imprecise’ that no amount of sensitivity tuning fixes.
Tilt behaviour belongs in the same test block. During hard swipes many players tilt the mouse slightly onto one edge without knowing it. Deliberately tilt yours a few degrees while tracking slowly: some sensors handle tilt gracefully, others skew the tracking axis so a horizontal hand movement produces diagonal cursor drift. If your style involves aggressive swiping on a low sensitivity, tilt behaviour is not a footnote — it is a core specification your own testing must certify.
Testing Click Feel Across the Whole Button
A main button is not one switch experience; it is a lever, and where your finger presses along it changes the force and sound. Test clicks at the front edge, the middle and near the split line, on both buttons. A well-made mouse feels consistent within a small variation; a poor one has a sweet spot at the front and a dull, heavy press at the back, which matters because your finger position migrates during play. If your grip style parks your fingers mid-button, a mouse tuned to feel crisp only at the tip will feel mushy to you all day.
Test pre-travel and post-travel deliberately. Pre-travel is the dead movement before the switch actuates; post-travel is the squash after it. Excess pre-travel makes clicks feel lazy in rapid-tap situations; excess post-travel makes them feel spongy and can encourage accidental double actuations on release. Neither appears on a spec sheet, and both are instantly obvious to a finger that tests for them slowly, ten clicks per position, eyes closed if it helps you concentrate on feel rather than sight.
Side-by-side asymmetry is the final check. Left and right buttons should feel like siblings. A noticeable difference in force or sound between them is common even on good mice, but a large difference is a quality signal worth weighing inside the return window, because it will not improve with use — switches settle slightly, but they do not converge.
Environmental Tests: Surfaces, Temperature and Interference
A mouse does not live in a lab, so test it in the conditions it will actually face. Run your tracking tests on every surface you realistically use: your main pad, the desk itself, a desk mat, a wooden table if you ever play away from your desk. Some sensors are surface snobs that are flawless on cloth and erratic on glossy wood; better to learn that at home than at a friend’s house. Note the results in your log per surface, because ‘works everywhere except the glass desk’ is a property of the mouse, not a mystery.
Wireless testing should include an interference pass. Run the mouse with your desk in its real state — phone nearby, wireless headset active, router where it lives, USB 3 devices connected — and then repeat a polling stability check. Then move the receiver closer on an extension cable and repeat. If stability improves dramatically with receiver position, you have learned the most valuable wireless lesson there is: most ‘wireless mouse lag’ is a receiver placement problem wearing a product problem’s clothes.
Temperature sounds exotic until you remember that hands sweat and rooms heat up. Test grip security and button feel at the end of a long warm session, not just at the start. Shells that feel perfectly textured with cool, dry hands can become skating rinks at hour two, and that is a test result — one that points toward grip tape or a different finish rather than toward a faulty unit.
Testing a Mouse You Cannot Return: Second-Hand and Final-Sale Units
Everything in this guide gets sharper when the return window does not exist. Buying second-hand, the test routine becomes an inspection you run before money changes hands, or immediately after with the understanding that the results inform negotiation and expectations rather than a refund. Prioritise the irreversible checks: switch consistency across both main buttons, wheel encoder honesty through slow full rotations, sensor behaviour on the slow diagonal, and battery health on wireless units, which you probe by asking the seller for a full-charge runtime account and then verifying the first charge cycle yourself.
Cosmetic wear is information, not just appearance. Shiny patches on the buttons map the previous owner’s grip and click positions; worn feet edges reveal whether the mouse lived on a hard pad; a cable kinked near the strain relief predicts where it will eventually fail. None of these disqualify a used mouse — feet and cables are consumables — but they price it. A mouse with honest wear and perfect switches is a better buy than a pristine mouse with a lazy right click, and your test routine is what tells them apart.
Clean before you judge. A used mouse arrives carrying its previous life in its seams, and half the ‘faults’ in second-hand gear are the dirt of another household. Run the full cleaning routine — it takes fifteen minutes — and then test. Judging a dirty mouse condemns good hardware; judging a clean one gives you the truth, whichever way it falls.
Finally, test the software relationship. Register the mouse, check firmware, confirm the software still supports the model, and verify that onboard profiles save correctly. A discontinued mouse whose software has vanished from the manufacturer’s site is a different product from the same mouse fully supported, and the time to discover which one you bought is the day it arrives.
Testing the Scroll Wheel as an Input, Not a Wheel
Gamers use the wheel as a button cluster in disguise — weapon swaps, jump binds, zoom steps — so test it as an input device, not as a way to read long documents. Bind it to something countable in a game or trainer and work through a hundred deliberate notches in each direction at playing speed. What you are feeling for is notch honesty: every physical detent should produce exactly one input, with no skipped notches at speed and no double inputs when you stop abruptly on a detent boundary. Wheels that feel fine while scrolling web pages often fail this test, because reading speed and gaming speed are different sports.
Then test the middle click as you actually use it — under a moving hand, mid-strafe, not parked on a desktop. Middle click force varies enormously between models, and a wheel that requires a heavy press will shift your aim every time you use it, because the press pushes the whole mouse. If your game binds anything important to middle click, this test is not optional; it is the difference between a bind you trust and a bind you avoid under pressure without knowing why.
Finish with the tilt test if your wheel supports side tilt. Tilt clicks are easy to trigger accidentally during hard horizontal swipes on some designs, and an accidental weapon swap mid-fight is the kind of fault that gets blamed on panic. Thirty hard swipes in each direction, watching for unintended inputs, settles the question in a minute.
What to Do With Test Results: A Decision Framework
Testing produces facts; you still need a framework that turns facts into a decision before the return window closes. Sort every finding into three buckets. Bucket one is defects: a switch that double-registers, a wheel that skips notches, a sensor that loses tracking on your main pad. Any single confirmed defect is a return or exchange on its own — do not talk yourself into living with a fault on day three that will annoy you for three years.
Bucket two is mismatches: the shape tires your hand at ninety minutes, the side buttons sit wrong for your grip, the cable drag fights your desk layout. Mismatches are not the manufacturer’s failure, but they are equally valid reasons to return a mouse, because fit is the product for a device you hold all day. The mistake is treating a mismatch as a personal failing to be trained away. Some mismatches yield to adjustment; a shape your hand hates rarely does.
Bucket three is preferences wearing the clothes of problems: a click sound you dislike, a lighting style, a software layout. These are real but weak reasons, and they fade fastest with familiarity. Let them break ties between two mice that pass buckets one and two, and no more.
Run the framework in order and write the verdict down while the evidence is fresh. If a mouse fails bucket one, stop testing and exchange it. If it fails bucket two after honest adjustment attempts, return it without guilt. If it passes both, keep it and stop reading mouse reviews for a year — the surest test of a good purchase is that you forget about the mouse entirely and think about the game.
Gear for This Guide
The examples below come from our verified product pool and illustrate the product classes discussed in this guide. They are examples, not a ranked list — use the criteria in this article to judge any model, including newer revisions.

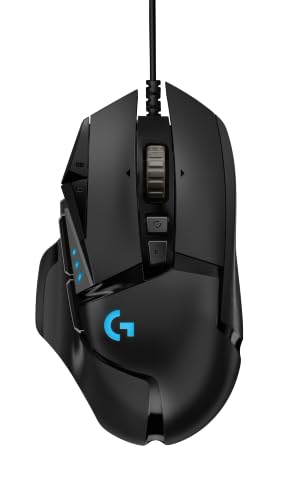
Logitech G502 HERO Wired Gaming Mouse
A good reference mouse for these tests: its sensor, switch feel and wheel give you a known-good baseline to compare a suspect mouse against. Logitech G502 HERO Wired Gaming Mouse — Check on Amazon

SteelSeries QcK Gaming Mouse Pad
Testing demands a consistent surface; a plain cloth pad removes pad pattern and wear from the list of variables while you diagnose. SteelSeries QcK Gaming Mouse Pad — Check on Amazon
Frequently Asked Questions
How long should testing a new gaming mouse take?
About twenty minutes for the bench tests in this guide, plus one full play session for comfort. Keep the results written down — they become the baseline that makes future troubleshooting fast.
My mouse fails the fast-flick test but feels fine in games. Should I worry?
If your games never demand movements that fast, it is a theoretical limit rather than a practical fault. Note it, and reconsider only if you move to faster-paced titles or lower sensitivities with bigger swipes.
Can software fix a mouse that double-clicks in tests?
Raising the debounce setting in the manufacturer’s software can mask early switch wear, sometimes for a long time. It is a legitimate first step, but treat it as buying time rather than a permanent repair.
Why do test results differ between my two mouse pads?
Sensor tracking depends on surface texture, colour and pattern. A pad with heavy printed graphics or a worn centre can produce measurably worse results, which is why testing should happen on the surface you actually play on — and why a plain spare pad is a useful diagnostic tool.
Is a polling-rate tester website accurate?
Close enough to confirm your mouse is reporting near its configured rate, but browser tools round and sample imperfectly. Use them to spot gross problems — a mouse stuck at a fraction of its setting — not to chase tiny deviations.
How do I test a mouse in a shop before buying?
You can judge shape, grip fit, click feel and wheel quality in hand, and those are legitimately the things tests cannot decide for you. Sensor and connection behaviour you must take on reviews and the return policy — which is why buying from somewhere with a fair window matters.
Bottom line: clean first, then test sensor consistency, clicks, wheel, connection and glide against written pass standards, and finish with a real session. A mouse that passes everything and fits your hand is not the problem — and now you can prove it.
How long should I test a new mouse before deciding to keep it?
Give it at least a week of normal use plus two or three deliberate long sessions, spread across the return window rather than crammed into the first weekend. First impressions mostly measure how different a mouse is from your old one; the verdict that matters is how it performs once the novelty fades and fatigue, grip habits and button placement have had their say.
Can software tests replace playing games?
No — they complement games. Software and browser tests measure polling stability, click registration and raw tracking behaviour objectively, which games cannot. But only games test button placement under pressure, shape comfort at ninety minutes, and whether you mis-hit the DPI button mid-fight. A mouse that aces the lab and fails your main title has failed the test that counts.
What is the single most revealing test for a sensor problem?
The slow diagonal. Move the mouse very slowly in a diagonal line across a large pad area, in a drawing program or aim trainer, and watch the trace. A healthy sensor draws a smooth, even staircase; a struggling one shows clumping, straightening of the line (angle snapping you did not ask for), or stretches where the cursor barely moves then jumps. It takes thirty seconds and exposes problems fast flicks hide.
Should I test with the cable as well as wirelessly?
Yes, if the mouse supports both. Testing wired separates the sensor from the connection: if a tracking complaint exists wirelessly and vanishes wired, you have isolated the problem to the wireless link, the receiver position or interference, and saved yourself from blaming the sensor. That single comparison is the most useful diagnostic a dual-mode mouse offers.
My mouse passes every test but still feels wrong in games. What now?
Trust the feeling and interrogate the fit rather than the electronics. Shape, weight distribution and button placement do not appear in sensor tests, yet they decide whether the mouse disappears in your hand or demands attention all match. Test a long session with your grip and posture deliberately reset, and if the wrongness persists, the honest conclusion is that this mouse does not suit your hand — a fit verdict, not a fault verdict.
How do I test whether my mouse is causing my inconsistent aim?
Run the same aim-trainer routine, same settings, on two different days and compare scores, then repeat with a second mouse if you have one. Inconsistency that follows you across mice and days is almost never the mouse; inconsistency that appears with one mouse and vanishes with the other is a genuine finding. The comparison, not any single session, is the test.
Is it normal for two mice with the same sensor to test differently?
Yes. The sensor is one component in a system that includes the lens, firmware, shell weight, feet and the manufacturer’s tuning choices, and each of those changes test results. Two mice sharing a sensor can differ in lift-off behaviour, smoothing feel and even tracking character. That is why this guide tests the whole mouse rather than trusting a shared spec to guarantee a shared experience.
How do I test a mouse in a shop when I cannot install anything?
You can learn more than you’d expect with bare hands. Check the click consistency along both buttons, feel the wheel’s notches through slow and fast rolls, lift the mouse repeatedly to judge its balance, and hold it in your real grip for a full minute to see where pressure builds. What the shop cannot tell you is sensor behaviour on your pad and ninety-minute comfort — which is exactly why a home return window still matters after a good shop test.
Should I retest my mouse after a firmware update?
Yes, briefly. Firmware can change debounce behaviour, lift-off handling and smoothing feel, so rerun your core checks — the slow diagonal, the click consistency pass and a polling stability look — and compare against your log. Two minutes of retesting after an update is how you catch a regression while rolling back is still an option, instead of wondering for months why the mouse feels subtly different.
Related Guides
Keep exploring with these guides and roundups from the same Gaming Mouse collection: