Disclosure: As an Amazon Associate, ilcastellomenu.com earns from qualifying purchases. The product mentions in this guide are editorial: we link only to items that genuinely fit the topic, and a link never changes what we recommend checking, comparing, or avoiding.
Knowing how to clean a monitor properly matters because modern screens are easier to damage than the glass televisions many of us grew up wiping with anything handy. Most computer monitors wear a delicate anti-glare or oleophobic coating over a soft plastic surface. The wrong cloth scratches it, the wrong spray dissolves it, and too much pressure can damage the panel itself. The good news is that a correct clean takes five minutes, needs only a proper microfiber cloth and, at most, a little distilled water.
This guide covers the safe method step by step: what to gather, how to handle dust versus fingerprints versus stubborn smudges, how to clean the stand and ports while you are there, and the mistakes that permanently cloud or streak a screen. It applies to IPS, VA, TN, OLED, glossy, and matte monitors alike, and to laptop screens with one or two extra cautions noted along the way. If your screen also suffers from dullness that cleaning does not fix, our notes in Best Monitors for Eye Strain explain which settings, rather than smudges, are usually responsible.
How to Clean a Monitor Safely: What You Need
You need very little, and the short list is the point. Gather two clean microfiber cloths — one for the main wipe, one dry for a final buff. Microfiber traps dust in its fibres instead of pushing it across the surface, and its softness protects coatings. Add distilled water if fingerprints are involved: tap water leaves mineral spots as it dries, while distilled water dries clean. That is the complete kit for ninety percent of screens. A can of compressed air helps for ports and stand crevices, and a soft brush suits keyboard-adjacent dust, but neither touches the panel itself.
Just as important is what to leave in the cupboard. Keep away window cleaners, all-purpose sprays, alcohol-based solutions unless the manufacturer explicitly approves them, paper towels, tissues, bath towels, and the hem of your shirt. Paper products are wood fibre and can micro-scratch coatings; household sprays contain solvents and ammonia that attack anti-glare layers, sometimes leaving a permanent cloudy patch that no later cleaning can undo. If a screen is genuinely greasy, the answer is patience and distilled water, not stronger chemistry.
- Two clean, dry microfiber cloths (washed without fabric softener, which leaves residue).
- Distilled water in a small spray bottle — sprayed onto the cloth, never onto the screen.
- Compressed air or a soft brush for the stand, vents, and ports (optional).
- Five unhurried minutes with the monitor switched off and unplugged.
In this guide
Step by Step: The Standard Clean
Work in this order and the job is uneventful, which is exactly what you want. The sequence moves from dry to damp, from the panel to the frame, and from least to most intervention, so you stop as soon as the screen is clean rather than doing the maximum by default.
- Switch the monitor off and unplug it. A dark screen shows dust and smudges clearly, a cool panel avoids streaking from fast evaporation, and unplugging removes any electrical risk if liquid strays.
- Let the panel cool for a few minutes if it has been running. Warm screens make water flash-dry and leave marks.
- Dry-wipe first. With the first microfiber cloth, wipe the whole screen in slow, light, overlapping passes. Use almost no pressure — the weight of the cloth is enough for dust. Work top to bottom so loosened dust falls away from cleaned areas.
- Check under good light. Angle a lamp or daylight across the screen. If only dust was the problem, you are done; buffing further only adds risk.
- Dampen for fingerprints. Lightly mist distilled water onto the second cloth until it is damp, never wet, and never spray the screen directly — liquid runs down into the bezel and electronics.
- Wipe smudges in small circles with the damp cloth, then immediately follow with the dry cloth in the same area to lift moisture before it dries into a tide mark.
- Finish with a dry buff. One final light pass with the dry cloth evens out any faint streaks. Inspect at an angle again before plugging back in.
Dealing With Stubborn Marks Without Damaging the Coating
Some marks resist the standard clean: dried drink splashes near a desk cup, greasy fingerprints from shared workstations, or the mysterious specks that appear in homes with candles or fireplaces. The safe escalation is time, not force. Lay the damp cloth over the spot for twenty or thirty seconds to soften the residue, then wipe gently. Repeat the soften-and-wipe cycle rather than pressing harder. Pressure is the one input a panel cannot forgive: pressing on an LCD can disturb the liquid crystal layer and leave a bright or dark blotch that never fully recovers.
For OLED and glossy screens, be extra conservative. Their surfaces show every micro-mark, which tempts people into over-cleaning; resist, and accept that a screen viewed at a raking angle under a lamp will always reveal more than it does in normal use. If a mark survives several gentle cycles and is invisible during actual work, leave it. Chasing perfection at an angle you never watch from is how coatings get ruined. Screens used in shared or public settings may have manufacturer-approved cleaning wipes listed in their manuals — that approval, specific to the model, is the only exception to the distilled-water rule.
Cleaning the Rest: Bezel, Stand, Ports, and Cables
While the panel is off, the rest of the monitor deserves two minutes. Wipe the bezel and back casing with the dry cloth; plastic casings tolerate a slightly damper cloth than the panel, but keep liquid away from vents and seams. Dust the stand and the desk area beneath it, since rising dust is what lands back on the screen. A monitor on an arm, like the setups in Best Monitors for Mounting, collects less desk dust and is easier to wipe behind — one of the quieter arguments for mounting.
Ports and vents need air, not cloth. Short bursts of compressed air, can held upright and at a distance, clear the HDMI and DisplayPort sockets and the ventilation slots. Never push a cloth or tool into a port. Cables can be wiped along their length with the dry cloth; check at the same time that connectors sit fully home, because a half-seated cable is a common cause of the intermittent faults covered in How to Fix Monitor Flickering. Finish by washing your microfiber cloths with plain detergent, no softener, and air-drying them so they are ready and grit-free next time.
How Often to Clean, and How to Keep the Screen Cleaner for Longer
Clean on evidence, not on a schedule. Dust weekly if your room demands it with a dry wipe; do a damp clean only when fingerprints or smudges are actually visible in normal use. Every unnecessary damp clean is a small extra wear on the coating, and every unnecessary handling is a chance to press too hard. Most home screens need a proper clean a handful of times a year; shared and family screens, especially touchscreens, need more.
Prevention stretches the interval. Keep drinks behind the screen’s plane rather than beside the keyboard, wash hands after eating before settling in, and discourage the universal habit of pointing at the screen with a fingertip — a cursor or a pencil held clear of the surface makes the same point. If your desk sits near a kitchen or a candle, a simple dust cover over the panel at night pays for itself in avoided cleans. Positioning also helps: the placement advice in Best Monitors for Working From Home covers light angles that make dust and glare less obvious in daily use.
Common Cleaning Mistakes That Permanently Damage Screens
The most damaging mistake is spraying any liquid directly onto the screen. It beads, runs to the bottom edge, and wicks inside the bezel, where it can stain the panel layers or reach electronics. Second is the paper towel: it feels soft, but its fibres are abrasive at coating scale, and the damage appears as a hazy patch that grows with every future clean. Third is the household glass cleaner, formulated for glass, not for coated plastic; its solvents can strip anti-glare treatment in a single enthusiastic session, leaving a shiny, reflective wound in the middle of a matte screen.
Fourth is scrubbing. Any sentence that includes ‘scrub’ should not be about a monitor. Fifth is cleaning a hot, running screen, which bakes streaks in and hides the dust you meant to remove. Sixth is using a cloth that has cleaned anything else first — a cloth carrying kitchen grit or desk debris is sandpaper with good intentions. Dedicated cloths, stored clean and used for nothing else, are the entire secret. If you have already made one of these mistakes and the damage is a visible patch rather than a smudge, no further cleaning will reverse it; at that point the realistic options are living with it or planning a replacement from roundups such as Best Monitors for Home Office
Special Cases: Touchscreens, Laptop Screens, and OLED Care
Touchscreens collect more grease and tolerate the standard method well, but check the manual: some carry manufacturer-approved wipe guidance because they are cleaned far more often. Laptop screens follow the same rules with two additions — support the lid from behind with your free hand so pressure does not flex the panel, and never close the lid on a cloth left over the keyboard, since point pressure in a closed laptop can mark the screen. MacBooks and other glossy portables show smudges readily; the damp-cloth cycle, patiently repeated, is still the whole answer.
OLED panels add one consideration beyond gentleness: their cleaning needs are identical, but their owners often clean more because perfect blacks reveal dust dramatically in a dark room. A dry wipe handles that dust; resist escalating to damp cleans for what is only visible in a darkened room at an angle. Whatever your panel type, the final habit is the same: clean rarely, gently, with the right cloth, and let a screen that looks clean in normal use be clean enough.
Cleaning in Shared, Family, and Office Settings
Shared screens live harder lives: more fingers, more sneezes, more mysterious marks of unknown origin. The method does not change, but the rhythm does — a quick dry wipe far more often, and a damp clean whenever the screen is visibly marked rather than on a calendar. Keep the dedicated cloths at the desk itself, in a drawer, because a cloth that requires a trip to another room will be substituted by a sleeve, and sleeves are how shared screens acquire their haze. In offices, check before using any provided cleaning product: facilities supplies are bought for desks and glass, not for coated panels, and the well-stocked cupboard is a genuine hazard to screens.
Touchscreen displays in kitchens and family spaces deserve one extra habit: clean after cooking sessions rather than before use, so grease films do not sit and harden. And teach the household the one rule that prevents most damage — point with the cursor, not with a finger. A screen nobody touches needs a fraction of the cleaning of a screen everybody touches, and no cloth, however good, fully reverses a year of enthusiastic pointing.
Storing Cloths and Knowing When a Mark Is Not Dirt
Your cloths are instruments; store them like instruments. Wash them regularly with plain detergent, never with fabric softener (which coats the fibres and smears screens), air-dry them, and keep them in a clean bag or drawer rather than loose on the desk gathering the very grit they exist to remove. Replace a cloth that has picked up something abrasive and will not wash clean — a cloth is cheap, a coating is not.
Finally, learn the marks that cleaning cannot fix so you stop trying: a bright or dark dot that never changes is a pixel fault, a spreading patch is coating or panel damage, and a uniform haze that returns within hours in a smoky or kitchen-adjacent room is the room, not your technique. Each has its own guide in the related links below, and each is cheaper to diagnose correctly the first time.
After Cleaning: Checking the Picture With Fresh Eyes
A clean screen is an opportunity disguised as a chore: with the panel off and then freshly lit, you are in the perfect position to run the five-minute health check most owners never do. Display a solid white screen and look for uniformity — patches, tints, a darkening corner. Display solid black in a dim room and look for bright spots and pixel faults. Run your usual content and confirm brightness and colour still feel like yours. Anything you find is documented while it is small, and small is when warranties and adjustments are still conversations rather than archaeology.
Finish the ritual by cleaning the rest of the battlestation the screen revealed: the keyboard that sheds crumbs toward the panel, the desk surface whose dust migrates upward, the window blind whose slats stripe your afternoon glare. Screens get dirty from their environments, and a clean panel in a dusty parish is a temporary victory. The owners whose monitors look new at year five are not cleaning more often — they are keeping a cleaner room around the screen and touching the panel itself as rarely as this guide prescribes.

Understanding What Is Actually on Your Screen
Most of what dulls a monitor is not one substance but a layered mixture, and each layer responds to a different touch. Loose dust sits on top and lifts away with a dry cloth or a gentle pass of air. Skin oil from fingertips forms the second layer — the rainbow smears that appear when the screen shows a dark scene — and it needs a barely dampened cloth to release. The third layer is the stubborn one: dried droplets from drinks, cooking vapour that drifted in from a kitchen, or the fine film that builds in a room with a fireplace or candles. Naming the layer before you start tells you which stage of the cleaning routine will do the work, and stops you pressing harder when the real answer was moisture, patience, or a second pass.
Where the grime gathers is also predictable, which makes inspection fast. The bottom bezel collects dust that the panel’s warmth draws upward in a slow convection loop. The corners hold fingerprints because that is where hands grip the screen to adjust its tilt. The area in front of a habitual sneezer, a coffee cup, or a desk fan develops its own local weather. A thirty-second inspection under a bright, angled light — a phone torch held to the side works well — reveals this map before you touch anything, and cleaning to the map is faster and gentler than scrubbing the whole panel uniformly.
It is equally useful to know what is not dirt. A faint, even haze that survives a careful clean may be the anti-glare coating itself ageing, or delamination beginning at an edge on an older screen. A single bright or dark dot that never moves is a pixel fault, not a speck. A soft shadow that shifts when you change viewing angle can be backlight unevenness. Cleaning harder will not fix any of these, and pressing on a coating that is already failing can turn a cosmetic haze into a visible patch. The inspection habit protects the screen twice: once from dirt, and once from being scrubbed for a fault it does not have.
The Chemistry, Kept Simple and Safe
Plain water does more cleaning work than the industry built around screen sprays suggests. Distilled water is the connoisseur’s choice because tap water can leave mineral spots as it dries, especially in hard-water areas, but the difference matters only if you let the screen dry wet. Wiped properly with a nearly dry finishing cloth, ordinary tap water leaves nothing behind. The rule that protects coatings is about concentration and contact: a cloth dampened with water, wrung until it feels almost dry, keeps liquid on the surface for seconds rather than minutes, and nothing pools at the bezel where it could wick inside the panel assembly.
Household chemicals fail on modern coatings for specific reasons worth understanding. Ammonia-based glass cleaners attack the anti-glare layer that gives matte screens their character, leaving cloudy patches that no later cleaning reverses. Alcohol at household concentrations can soften some coating adhesives and dull touchscreens’ oleophobic layer — the fingerprint-resistant finish that makes a touch surface feel slick — so a touchscreen cleaned with alcohol wipes gradually becomes a fingerprint magnet. Paper products and general-purpose kitchen sprays add abrasion and residue to the same problem. None of this makes cleaning complicated; it makes it narrow. Water, microfibre, and patience cover nearly every real case.
Commercial screen cleaners occupy a middle position. A reputable, alcohol-free and ammonia-free product used exactly as directed — sprayed onto the cloth, never onto the screen — is safe for most panels and can help with oily films that resist water alone. What you are paying for is convenience and a slightly better oil-cutting action, not a different category of clean. If you buy one, buy a small bottle, keep it with the cloths, and treat it as the second resort it is. Readers who have just cleaned a screen back to clarity often find it a good moment to revisit work monitor options only if the inspection revealed the panel itself, rather than its surface, is what has been disappointing them.
A Seasonal Deep-Clean Routine for the Whole Desk
The standard clean in this guide handles the panel; a seasonal routine, done perhaps twice a year, handles everything the panel lives among. Start with the screen powered off and cool, and work outward: panel first with the usual method, then the bezel and back with a separate cloth, because the back of a monitor accumulates a surprising blanket of dust that insulates the electronics and shortens nothing dramatically but helps nothing either. Vents deserve a soft brush and short bursts of air from outside inward — never a vacuum nozzle pressed to the casing, which can generate static and pull at fan bearings in nearby equipment.
Cables and the desk surface behind the screen are part of the same ecosystem. Dust that lives on the cable bundle migrates to the ports each time you reconnect something, and gritty ports make gritty connections. Wipe cables down while they are unplugged, check each connector for bent shielding or lint packed into a USB-C opening, and clear the desk’s rear edge where debris collects against the wall. Reconnect everything firmly afterwards and confirm the picture at full resolution and refresh rate, because a deep clean that ends with a half-seated cable has merely traded a dirty screen for a troubleshooting session.
Finish the routine with the cloths themselves. Microfibre that has cleaned a desk for months carries the grit it removed, and a gritty cloth is a fine sheet of sandpaper. Wash cleaning cloths separately in warm water without fabric softener — softener coats the fibres and turns the cloth into a smearing tool — then air-dry them and store them folded in a drawer or a sealed bag, never loose on the desk where they resume collecting the dust you hired them to remove. Retire a cloth when its edges fray or it stops lifting dust dry; cloths are consumables, and a fresh one costs less than the coating it protects.
Cleaning Around Children, Pets, and Food
Some desks live harder lives than others, and their cleaning rhythm should admit it. A family computer attracts small fingerprints at exactly screen height, often applied with jam. The safe response is frequency over force: a quick dry-cloth pass every few days removes fresh marks before they dry into the stubborn category, and a damp pass handles the rest. Teach the household the one rule that matters — cloths live in the drawer, paper towels never touch the screen — and even young cleaners can be trusted with the dry pass, which turns maintenance from a specialist task into a shared habit.
Pet hair behaves differently from dust because it carries static and clings to the panel’s warmth. A monitor in a room with a cat that sleeps behind it — drawn, inevitably, to the warmest spot in the house — will grow a felted layer around its vents and lower bezel. Brush the vents more often than the panel in such a room, keep the cat’s blanket off the monitor’s back if you can negotiate that, and expect the seasonal deep clean to matter more than the weekly wipe. Hair on the screen itself lifts easily with a dry cloth; hair inside vents is the part that quietly raises operating temperatures over a year.
Food and drink deserve a protocol rather than a scolding, because desks are where people eat. The damaging events are splashes that dry unnoticed and sugary films that attract dust into a paste. Wipe any visible splash the day it happens with the damp stage of the standard clean, and keep cups on the opposite side of the desk from the screen’s swing when you adjust it. A monitor that shares a desk with lunches will still last for years; it simply asks for the damp pass monthly instead of seasonally, which is a fair trade for a desk that serves a whole life rather than a showroom.
When Cleaning Reveals a Problem: A Triage Guide
Cleaning day doubles as inspection day, and a calm triage keeps small discoveries in proportion. If the marks vanish, the screen was dirty and the story ends. If a mark survives cleaning, hold a torch at a low angle: a surface scratch catches the light as a bright line and feels like nothing under a fingertip dragged gently across it, while a crack interrupts both light and touch and deserves professional assessment rather than continued use if it spreads. A bright dot visible on black and dark screens is a stuck or dead pixel; a soft, cloudy patch that appears mainly on white may be pressure damage or backlight unevenness, neither of which cleaning caused — cleaning merely gave you the clean background that made it visible.
Uniformity issues found this way sort into live-with-it and act-on-it piles by one test: do you see the fault during your normal content, or only on test patterns? A faint brightness falloff in one corner that films and documents hide completely is a live-with-it trait shared by a large fraction of all panels. A visible band across the middle of every spreadsheet is an act-on-it fault, and your dated photographs from inspection day become the evidence that makes a warranty conversation short. Record faults while the screen is clean, because a retailer can reasonably doubt a claim illustrated by a dirty panel.
The last triage branch is the screen that cleans up beautifully and still disappoints: colours that look tired, text that lacks crispness, a picture that feels dim even at full brightness. Those are panel-ageing or settings stories, not surface stories, and they route you to adjustment first and replacement second. Knowing which story you are in is the real yield of cleaning carefully — it converts a vague sense that the monitor is not what it was into a specific, solvable statement about coating, settings, or panel, each with its own honest next step.
Coatings Explained: Why Modern Screens Ask for a Gentler Hand
The surface you are cleaning is rarely bare glass. Most desktop monitors wear an anti-glare layer — a microscopically roughened finish that scatters reflections so a window behind you becomes a soft glow instead of a mirror image. That texture is exactly what makes the screen pleasant in a bright room, and it is also what traps skin oil in its fine structure and makes smears look worse on matte screens than on glossy ones. Understanding this explains the whole cleaning method: oil lodged in a textured coating needs moisture and dwell time to release, while force merely drives residue sideways and risks polishing the texture unevenly.
Touchscreens and glossy panels carry a different finish, an oleophobic coating engineered to let fingerprints wipe away easily and to feel smooth under a finger. It is a sacrificial layer by design: it wears gradually with use and faster with alcohol, abrasion, or aggressive wiping. When a phone or touchscreen monitor starts holding fingerprints it once shrugged off, the coating has thinned, and no cleaning restores it. Gentle habits early in a screen’s life are therefore worth more than any later rescue — the coating you preserve in year one is the easy cleaning you enjoy in year three.
A few screens, mainly older or specialised models, do present harder surfaces that tolerate more, but the safe assumption for any screen you have not researched is the gentle one. Water and microfibre cannot damage any coating in normal use, which is why this guide treats them as the default and everything stronger as an exception requiring a specific reason. When a manufacturer’s own care page is available for your model, read it once: a few makers publish coating-specific guidance, and their instructions outrank any general guide, including this one, where the two differ.
Cleaning the Screen You Rarely Think About: Phones, Tablets, and Second Displays
The habits transfer, with adjustments, to the other glass in your working life. Phones and tablets are touched constantly, carried everywhere, and cleaned against shirts in a way no monitor would tolerate — yet their oleophobic coatings are the most fragile of all. A proper microfibre pass once a week, with the same damp stage for stubborn films, keeps them clear without accelerating the coating wear that shirt fabric and pocket grit cause. The monitor routine’s real gift to your smaller screens is the drawer of clean cloths: once good cloths exist in the house, every screen gets cleaned properly almost by accident.
Second monitors and the household television follow the monitor method exactly, with two practical notes. Televisions sit higher and collect less skin oil but more cooking and fireplace film in open-plan rooms, so their rhythm leans toward the damp pass. A second monitor that mostly displays reference material still deserves the same inspection, because faults hide longest on the screen you look at least — a spreading uniformity problem on a secondary display is often discovered months late, outside every window that would have made it the manufacturer’s problem.
Laptop screens add a mechanical caution: the panel is thin, the lid flexes, and pressure applied to clean a stubborn spot transmits directly to the display. Support the lid from behind with your free hand, spread pressure across the cloth rather than a fingertip, and never clean a laptop screen with the machine resting half-open on a soft surface where the lid can bend. The chemistry is identical to a desktop monitor’s; only the structure underneath asks for more respect.
Building the Two-Cloth Kit and Keeping It Ready
Every routine in this guide reduces to a small kit that either exists in your drawer or does not. Assemble it once: two large, good-quality microfibre cloths — one designated for the damp stage, one kept strictly for dry finishing — a small spray bottle of plain water if you prefer misting the cloth to running it under a tap, and a soft brush for vents and bezels. Store the kit where the monitor lives, not in a distant cupboard, because the distance between intention and supplies is where cleaning schedules go to die. A kit within arm’s reach turns a noticed smear into a thirty-second fix instead of a postponed project.
Label the cloths if your household shares them, because a cloth borrowed for kitchen duty returns carrying grease and grit that no screen should meet. A small tag, a different colour for each role, or simply a house rule that screen cloths never leave the drawer all work. Replace the water in the spray bottle weekly if you use one — standing water in a warm room grows stale — and launder the cloths on the seasonal rhythm described earlier. The kit costs very little, occupies a corner of a drawer, and is the entire material difference between screens that stay clear for years and screens that slowly film over.
Finally, keep the manufacturer’s care note, or a photo of it, with the kit. Models differ in small ways — a coating that tolerates a specific cleaner, a warning about a textured finish — and the moment you need that detail is the moment a stubborn mark has you reaching for something stronger. Thirty seconds of reading at that moment protects the screen better than any product you could buy for it.
Gear for This Guide
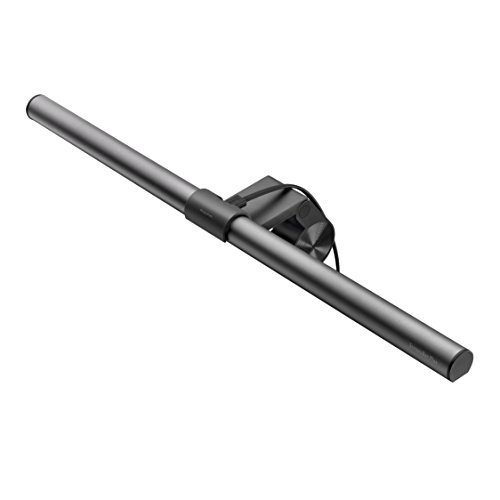
One pool product genuinely belongs in a cleaning guide: a monitor light bar, because the most common reason people think a clean screen still looks dull is poor desk lighting and reflections, not dirt. It mounts on top of the panel and lights the desk without shining into the screen.
BenQ ScreenBar Plus Monitor Light Bar — A space-saving LED bar that sits on top of the monitor and lights your desk with auto-dimming and adjustable tone, without screen glare. Useful after a clean if the picture still looks tired — the problem is often the room light, not the panel. Check on Amazon
Frequently Asked Questions
Can I use glasses cleaner or spectacle wipes on my monitor?
Only if the monitor’s manufacturer approves it for your model. Many spectacle products are safe for coated glass lenses but are not tested against monitor anti-glare coatings, and some contain solvents that cloud them. The universally safe answer remains a microfiber cloth with distilled water. If a wipe is marketed specifically for screens and your manual allows screen wipes, follow the manual — it outranks any general advice, including this guide.
What should I do about a scratch on the screen?
First confirm it is a scratch and not a dried residue line: a softened damp-cloth pass will shift residue and will not change a true scratch. Genuine scratches in the coating cannot be polished out safely — abrasives widen them — and scratch-removal compounds risk a larger cloudy patch. If the scratch is invisible in normal use, live with it. If it sits in your central view and bothers you daily, it is a warranty-or-replacement conversation, not a cleaning one.
Is it safe to use a small amount of dish soap?
It is an unnecessary risk. Soap leaves its own film that then needs removing, and formulations vary widely. Distilled water softens and lifts the grease in ordinary fingerprints perfectly well when given thirty seconds of contact. The only situation that tempts people toward soap — heavy shared-workstation grime — is better handled with the manufacturer-approved wipes made for commercial displays, used exactly as directed.
Why does my screen look streaky after cleaning?
Three causes cover nearly every case: the cloth was too wet, so water dried in tide marks; the water was from the tap, leaving mineral deposits; or the panel was warm, so moisture flashed dry unevenly. The fix is a fresh pass with a barely damp distilled-water cloth followed immediately by the dry cloth, on a cool screen. Streaks are a technique problem, not a damage problem, and they lift cleanly once the method is right.
How do I clean a monitor without microfiber cloths?
Honestly, wait until you have one. Microfiber is not a luxury accessory here; it is the tool the whole safe method depends on, because it is soft enough for coatings and traps grit instead of dragging it. Old cotton T-shirts are the least-bad improvisation — softer than paper products — but they smear more than they lift and can carry laundry residue. A proper cloth costs very little and lasts for years of cleans; it is the cheapest insurance in this entire guide.
Can compressed air damage a monitor?
Used correctly, no: short bursts, can upright, nozzle kept a sensible distance away, aimed at ports, vents, and the stand rather than blasted at the panel surface. The risks are tilting the can so liquid propellant sprays out, and holding it close enough to drive dust into seams. Never use a vacuum cleaner on a panel — static and suction are both unwelcome — and never blow with your mouth, which adds moisture droplets to the dust you were removing.
Can I use a screen-cleaning spray sold for monitors?
Dedicated screen sprays exist and many are simply purified water with marketing; used on the cloth rather than the screen, a reputable one is harmless. But it buys you nothing distilled water does not, and the category includes products with additives your coating never asked for. If you already own one, spray the cloth, lightly, and proceed as this guide describes. If you are buying, buy distilled water and better cloths instead.
How do I remove a dried drink splash without damaging the coating?
Soften it before you wipe it. Rest a cloth dampened with warm water over the spot for a minute or two, letting the moisture loosen the dried sugars, then lift with gentle circular motions and finish with a dry cloth. Repeat the softening rather than increasing pressure. Dried splashes feel alarming because they resist the first pass, but they are bonded to the surface by water-soluble residue, which means water and time — not force — are the correct solvents.
Can I clean a monitor that is still warm from use?
Wait until it cools. A warm panel evaporates moisture unevenly, which leaves streaks, and thermal contrast between a cool damp cloth and a warm screen is an unnecessary stress on coatings. Power the screen off, give it several minutes, and clean it cold — you also see dirt more honestly on a dark, cold screen, which improves the result for a second reason. The wait is short enough to fold into the time it takes to gather the cloths.
What should I do if liquid gets into the bezel or a port?
Stop, power everything off, and unplug the monitor. Tip the screen gently so gravity encourages liquid away from the openings rather than deeper in, blot what you can reach without probing inside, and let the unit dry fully — a day is not excessive — before powering it again. Do not use heat to speed drying. If the liquid was sugary or the amount was more than a few drops, a repair shop’s inspection is cheaper than a short circuit. Prevention is the damp-not-wet cloth rule this guide repeats, because a properly wrung cloth cannot deliver this accident.
How do I clean the screen of a monitor mounted high or on an arm?
Stabilise before you clean. Lock the arm if it has a lock, or brace the screen with one hand at its edge while the other wipes, using lighter pressure than a desk stand tolerates — a floating screen moves away from your hand and tempts you to push harder. Clean from the top down so loosened dust falls onto areas you have not finished yet. If the mount lets you tilt the panel face-up safely, gravity becomes your assistant and loosened debris falls clear instead of smearing sideways.
Why does dust return to my screen so quickly after cleaning?
Because the screen itself invites it. A powered panel carries a slight static charge and generates gentle warmth, and together they attract and hold airborne dust, especially in rooms with forced-air heating, open windows, or pets. You cannot eliminate the cycle, but you can slow it: keep the panel off when the desk is idle for long stretches, position the screen away from the direct path of a heating vent, and give the top bezel — where dust lands first — a dry pass when you notice it rather than waiting for the full routine.
The Bottom Line
Cleaning a monitor safely is a small skill with an outsized payoff: the right cloth, distilled water when needed, a cool dark screen, and a light hand. Everything else — the sprays, the scrubbing, the paper towels — belongs to the glass era and quietly destroys modern coatings. Keep two dedicated microfiber cloths in a drawer, clean on evidence rather than habit, and your screen will look new for the whole of its working life.
If cleaning revealed problems that are not dirt — flicker, dead pixels, a tired backlight — the troubleshooting guides linked below will help you tell a settings issue from a panel that is genuinely at the end of its life.
When in doubt, do less: a dry cloth, a light hand, and the patience to stop while the screen looks clean in the light you actually work in.
Related Guides
Keep going with these related guides and roundups from the same desk-setup cluster: