Knowing how to install a sound card correctly takes about fifteen minutes for an internal PCIe card and about two minutes for an external USB model — and most of the job is not the fitting, it is the preparation and the driver setup afterwards. This guide covers both paths safely: choosing the right slot, handling the card without harming it, connecting what needs connecting, and configuring Windows so the new card actually becomes your sound device.
Safety first, because internal installation means opening a PC: shut the computer down fully, switch off the power supply, and unplug it before opening the case. Never install hardware with the machine connected to mains power, and if anything inside the PC looks damaged, swollen, or unfamiliar, stop and seek help rather than improvising. External USB users skip the case work entirely — your section is the short one near the end.
Disclosure: As an Amazon Associate, ilcastellomenu.com earns from qualifying purchases. Product details and availability can change; check the retailer listing before you buy.
What you need before you start
For an internal card: a Phillips screwdriver, the sound card, its manual, good light, and a few minutes to download the current driver from the manufacturer’s site onto the PC beforehand — you may be briefly without sound mid-process, and having the driver ready removes the scramble. Check you have a free PCIe slot (most sound cards use a short x1 slot, though they fit longer slots too) and clearance from the graphics card so both can breathe.
Confirm the card matches the job you bought it for — if you are still deciding, How to Choose a Sound Card is the pre-read — and glance at the internal-versus-external trade-offs in Internal vs External Sound Card if there is any doubt, because installation day is the last cheap moment to exchange an unopened card.
Ground yourself before handling the card: touch a grounded metal object or the unpainted metal of the (unplugged) case, and handle the card by its edges and bracket. Static precautions need not be theatrical, but cards are electronics and deserve the ten seconds of respect.
In this guide
Step 1: prepare the PC and choose the slot
Shut down, switch off, unplug, then open the case per its manual. Locate your free PCIe slots — they run along the bottom half of the motherboard — and pick the slot that keeps the sound card away from the graphics card’s fans and heat where layout allows. Remove the corresponding blanking plate from the case’s rear by unscrewing or snapping it out as your case design dictates.
If you are replacing an old card, unplug any cables attached to it (front-panel audio headers and auxiliary power leads exist on some models), remove its bracket screw, and pull it straight out of its slot with even pressure. Keep the screw; you will need it for the new card.
Take a photo of the interior before you change anything. It is the cheapest insurance in PC building: if a cable gets knocked loose during installation, the photo tells you where it lived.
Step 2: seat the card and connect what it needs
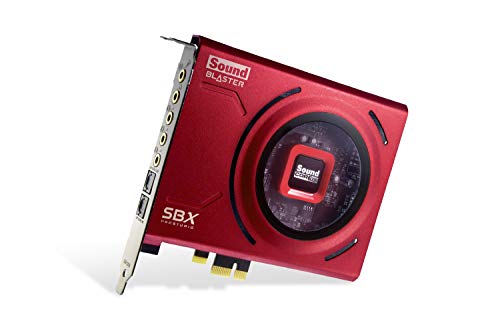
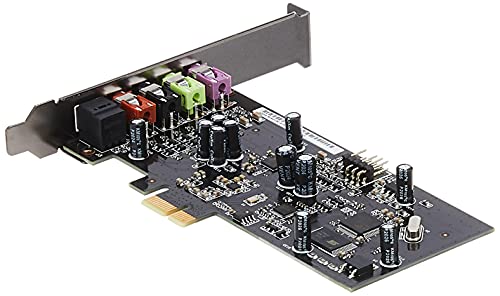
Align the card’s connector with the slot and its bracket with the case opening, then press down firmly and evenly with both thumbs until the connector seats fully — the bracket should sit flush against the case. Fit the bracket screw snugly. A half-seated card is the number one cause of the not-detected fault in How to Fix Sound Card Not Detected, so look along the slot and confirm no gold contacts remain visible.
Connect the extras your model requires: some cards take a front-panel audio header cable if you want the case’s front jacks routed to the new card; a few high-end models take an auxiliary power lead. The manual is authoritative here — fit what it specifies, route cables clear of fans, and leave everything else alone. Do not connect cables ‘because the plug fits’; headers that look similar can do different jobs.
Close the case, reconnect peripherals, plug in, and power on. Leave your headphones or speakers connected to your old output for the moment; you will move them once the new card is alive and configured.
Step 3: install drivers and make the card the default
Windows will often recognise the card with a basic driver; install the manufacturer’s current driver and control software anyway, because the features you paid for — surround processing, headphone gain, microphone tools — live in that package. Restart if prompted. Then open sound settings and set the new card as the default output and, if you will use it, the default recording device; a correctly installed card that is not the default is silent for the most common reason in this entire guide.
Plug your headphones or speakers into the new card’s outputs — using the manual’s port map, since multi-channel cards have several similar jacks — and play something familiar. Set the output format to a sensible default (the card’s control panel usually recommends one), disable any leftover enhancements on the old device you are no longer using, and confirm microphone input if the card will handle your voice.
Now do the configuration pass properly with How to Set Up a Sound Card: channel layout for your speakers, gain for your headphones, profiles for your main uses. Installation gets the card working; setup gets it working well, and skipping setup is how upgrades end up sounding suspiciously like the onboard audio they replaced.
Installing an external USB sound card instead
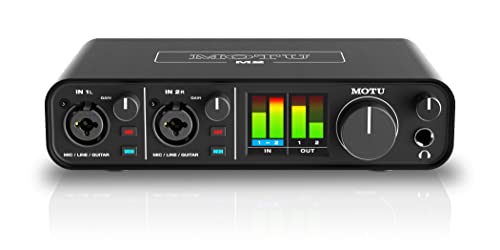
External installation is deliberately trivial: plug the unit into a USB port (directly into the computer, not through an unpowered hub, for stable power), let the operating system recognise it, install the manufacturer’s software if the model offers features through an app, set it as the default output and input, and connect your headphones, microphone, or speakers to the unit’s clearly labelled ports.
Console players follow the same shape: connect per the manual — some models support consoles over USB, others need an optical or 3.5 mm path — and set the console’s audio output accordingly. The desk-friendly external route is why Best USB Sound Cards for Gaming is such a popular category: the installation is the unboxing.
Whichever form you installed, finish with the listening verification in How to Test a Sound Card: known recordings, channel checks, microphone test, and a noise check at your normal volume with nothing playing.
Troubleshooting the first hour
Card not detected at all: reseat it (power off, unplug, press it home, refit the screw) and try a different slot if one is free — that sequence cures most cases, and the dedicated guide @@how-to-fix-sound-card-not-detected@@ works through the rest in safe order. Sound from the wrong device: check the default output in both Windows settings and the individual app, since games and voice apps often keep their own device selection.
Distorted or crackling sound: lower the output format to a standard setting, move the card’s slot away from the graphics card if interference tracks with gaming load, and update the driver before suspecting hardware. Front jacks silent: the front-panel header routes to whichever device it is cabled to — if you did not move that cable to the new card, the front jacks still belong to onboard audio, which is a wiring fact, not a fault.
Keep the motherboard’s onboard audio enabled during your first days unless it causes device confusion; it is a useful fallback and comparison point. Once the new card is proven, some users disable onboard in BIOS for tidiness — optional, and only when everything else is stable.
The bottom line on installing a sound card
Prepare, power off, seat firmly, install the real drivers, set the default device, then configure. Six unglamorous steps, in that order, account for nearly every successful installation and nearly every failure story told the other way round. Take the extra ten minutes on setup and verification, and your upgrade will sound like one.
After installation: the first listening session, structured
Treat the first session as a commissioning, not a celebration. Begin with the channel test so every output is proven to land where it should, then play one recording you know intimately at a moderate volume and listen for the specific improvements you bought the card for — a quieter background, fuller headphone drive, clearer positioning. Naming the expected improvements beforehand, ideally in writing, protects the session from the vague euphoria that makes every upgrade sound successful on day one.
Check the unglamorous paths in the same session: a microphone recording played back critically, a call in your usual voice app, a game for positional sanity, and a restart to confirm the card returns as the default device without persuasion. Commissioning is complete when the boring things work, because the boring things are the product.
If something disappoints, troubleshoot while the installation is fresh: reseating, defaults, formats, and driver versions are all easier to revisit today than in a month. The installation is not finished when sound appears; it is finished when sound appears correctly, everywhere you need it, after a reboot.
Installing for a shared or family PC
A shared PC adds configuration duties a solo machine escapes. Set the card as the default for the household’s main account, then check other accounts’ defaults if different people log in separately — audio defaults can be per-user, and the family’s second user is the one who will report that the expensive card ‘does nothing’. Save a simple note near the PC or in its documentation: which jack is headphones, which is speakers, and what the volume knob does. Shared machines run on notes.
Consider whose headphones the gain setting serves. A card set to high gain for one user’s studio headphones will greet the next user’s earbuds with hiss and a hair-trigger volume control. If the household’s headphones differ wildly, agree a default setting and teach the gain switch’s location as part of the machine’s basic literacy.
Finally, keep the onboard outputs connected or clearly labelled as the fallback. On a shared machine, a working fallback is the difference between a minor hiccup and a family outage when a driver misbehaves — resilience is a feature, and on shared machines it outranks elegance.
Installing alongside existing audio: keeping the old path alive
There is no rule that a PC must have one audio device, and keeping onboard audio enabled alongside the new card buys you options: a second output for a different room or user, an instant fallback when a driver misbehaves, and the comparison reference your testing needs. The cost is a longer device list in every menu — a small tax, paid in occasional mis-clicks, for genuine resilience.
If you do keep both, label them in the operating system’s settings where renaming is allowed, and note which physical jacks belong to which device on a card taped inside the case door or in your setup file. Future troubleshooting — yours or a technician’s — starts with knowing what is plugged into what, and installations are forgotten faster than anyone expects.
Laptops, small PCs, and other special cases
Small-form-factor desktops complicate internal installation with low-profile brackets and tight slot spacing: confirm your card ships with a low-profile bracket if your case needs one, and measure clearance against the graphics card before installation day rather than during it. Some compact cases route the only usable slot directly beneath a hot GPU — a position that argues, all by itself, for choosing an external unit instead.
All-in-one PCs and mini PCs generally close the internal question entirely: external is the answer, and the installation section for USB units is your whole guide. There is no shame in the external route at any size of machine; there is only the mild comedy of discovering a case has no slot after the card has been bought, which a two-minute specification check prevents.
The installation checklist, condensed
Driver downloaded. Slot confirmed free and clear. Power off, PSU off, unplugged. Card seated fully, bracket flush, screw snug. Required cables fitted per the manual — no improvisation. Case closed, peripherals reconnected. Manufacturer driver installed. New card set as default output and input. Outputs tested: channels, headphones, microphone. Setup pass completed; test pass recorded. Ten lines, in order, and an installation performed to that checklist is, empirically, an installation that works — because every common failure in this guide’s troubleshooting section is one of those lines skipped.
Before the case comes off: an inventory and a photograph
Good installations are won before the first screw turns. Assemble the whole cast on the desk and check it against the job: the card itself, its driver source identified in advance — downloaded from the maker, not entrusted to a disc or to luck — any internal cables the card needs, a screwdriver that fits the case screws properly, and a container for those screws, because a case screw lost in carpet is a rite of passage nobody needs twice. Confirm the slot you intend to use is genuinely free and genuinely the right type, by looking, not by remembering the motherboard’s layout from a build you did two years ago.
Then photograph the interior as it stands, in good light, before touching anything. The photograph is your undo button for every cable you will move and every connector you will second-guess at reassembly. Photograph the front-panel audio header, the existing card or its empty slot, and any cable routed near your work area. Professionals do this on machines they have serviced a hundred times, not from insecurity but from knowledge: memory is a liar under time pressure, and a photograph has never once misremembered which way a connector faced.
Finally, set the software stage before the hardware stage. Create a restore point or its equivalent, note your current audio device’s name and settings if you intend to keep it as a fallback, and decide now — not mid-installation — whether the onboard audio stays enabled as a backup path or is disabled to keep the device list clean. The guide’s later sections assume that decision was made deliberately; either answer is defensible, and drifting into one by accident is the only wrong version.
Static, screws, and the physical courtesies of working inside a PC
The card you are installing is an electronic device being handled in an open chassis, and the courtesies are simple and absolute. Work with the machine off and unplugged — not asleep, not ‘soft off’, unplugged — and press the power button once after unplugging to drain what remains. Ground yourself before touching components: touch the metal chassis while it is still plugged in and switched off at the wall if your setup allows that sequence, or use a wrist strap if you own one, and in any case handle the card by its edges and bracket, never by its components or its connector fingers.
Screw discipline sounds beneath an installation guide’s dignity until a screw drops into a power supply. Keep screws in the container, keep the container off the case’s edge, and never work with loose screws balanced on the motherboard tray. If a screw does escape into the machine, stop and retrieve it before power is ever applied — a loose screw is a short circuit looking for its moment, and its moment is always the first power-on. Magnetic screwdrivers are a convenience with one rule: they never go near the card’s or the drives’ sensitive areas casually, and in practice a plain, well-fitting driver plus a parts tray of the magnetic kind beats a magnetised tool for this job.
Lighting and patience complete the courtesies. A headlamp or a repositionable lamp aimed into the case prevents the shadow-work that causes cross-threaded screws and half-seated cards. And the work is done at the speed of the slowest connector: nothing inside a PC rewards force, and every connector you will meet in this installation yields to alignment and a firm, straight push, or it is telling you it is the wrong connector, the wrong orientation, or the wrong slot. Listen to it.
Slot choice in depth: lanes, neighbours, and the graphics card’s shadow
The slot decision deserves more than ‘use a free one’, because a modern PC’s slots are not interchangeable in practice. A sound card needs very little bandwidth — the smallest slot type is ample — but its neighbours matter. The graphics card is the loudest electrical neighbour in the machine and often the hottest; a slot that wedges the sound card directly against a graphics card’s fans or backplate invites both heat and the interference the purchase may have been made to escape. Prefer a slot with air around it, away from the graphics card where the layout allows, and check that the card’s bracket and any tall components clear the neighbouring hardware through the whole insertion, not just at the final seat.
Lane sharing is the subtler consideration. On many motherboards, populating certain slots changes how lanes are divided among others — a detail that matters to storage and graphics performance on some layouts and is documented in the motherboard’s manual, which is the authoritative source and worth the five minutes it takes to consult. Your sound card will not meaningfully tax any modern slot arrangement, but the slot you choose for it might, on paper, alter another device’s allocation. Check the manual’s lane table once, choose with knowledge, and never think about it again.
Physical fit closes the topic: confirm the card’s length against the case’s obstructions — drive cages, radiators, cable bundles — and confirm the rear bracket aligns with the case’s slot covers before the card is anywhere near the board. A card that fits the slot but not the case is a common parcel-return story, and it is entirely preventable by thirty seconds with a ruler during the inventory stage.
The front-panel header and other small cables that cause large confusion
Most installation confusion concentrates in the small cables, so meet them individually. The front-panel audio header is the classic: your case’s headphone and microphone jacks connect to a header that can serve only one master — the onboard audio or, on cards that provide the header, your new card. Decide which device should own the front jacks before you start, because the answer changes what you plug where, and because a front jack silently attached to a disabled onboard device is the single most common ‘my sound card broke’ report that is actually a cable in the wrong home. If your card lacks the header, the front jacks stay with onboard audio — a legitimate arrangement many owners use deliberately, front for convenience, card for the real listening.
Power, where a card needs it, is the second cable: some higher-end internal cards draw supplementary power through a standard connector, and a card starved of it may appear dead, appear in the system but produce nothing, or behave in ways that send diagnosis entirely the wrong direction. The manual states the requirement plainly; the installation sin is assuming. Third, any internal link cables or breakout boxes in premium packages have exactly one correct destination each, documented in the same manual — this is not the moment for the connector-that-fits philosophy, because in small audio cabling, several wrong connectors fit beautifully.
Route every cable you touch as if the case will be photographed for a judge: clear of fans, clear of the card’s own components, with slack enough to remove the card later without unplugging three other things. Future-you, performing the troubleshooting in the not-detected guide, will be grateful — and that gratitude is a design goal of a good installation, not a bonus.
External cards: the installation that is mostly decisions
An external card’s physical installation is a cable, which is exactly why its real installation is a set of decisions that internal cards make for you. Placement first: the unit lives on your desk within reach of its controls, which is its great advantage, so place it where your hand actually falls — not where the cable happens to reach on the first attempt. Buy the cable length the placement wants rather than letting a short cable exile the unit to the desk’s far corner, where its volume knob might as well not exist. Keep it clear of the monitor’s heat, off the top of a warm amplifier or PC exhaust, and stable: a light unit on a slick desk, dragged by a stiff headphone cable, will migrate and eventually fall, and a strip of reusable adhesive or a mat beneath it is a legitimate installation step.
Port choice matters more than it appears to. Connect the unit directly to the computer rather than through an unpowered hub when you can; audio devices are usually well-behaved hub citizens, but the direct connection removes a variable from every future troubleshooting session, which is worth more than the convenience costs. Note which port you used, because some systems treat the same device on a new port as a new device, with fresh settings — a quirk that has generated many false ‘it forgot everything’ reports.
Then the software decisions, which the setup guide covers in full: defaults, formats, gain. The installation is complete when the unit is placed, connected directly, recognised, and producing sound from the application you care about — and not one step earlier, however promising the little light looks.
The first power-on: a sequence, not a celebration
Reassemble loosely before you reassemble finally: side panel resting in place or held, not screwed, until the card has proven itself. Power on and go directly to verification, in this order. Does the system complete its start normally? Does the new device appear in the system’s audio settings and device lists, under its proper name? Set it as the default — the setup guide’s first step — and play a known stereo file while watching both channels behave. Touch nothing else until those three pass. A card that passes them has an installation that is fundamentally sound, and everything after is configuration.
If any of the three fails, resist the urge to fix it by reinstalling everything. The failure’s position in the sequence is the diagnosis: a system that starts abnormally points at seating and hardware; a device that never appears points at slot, power, and detection — the territory of the not-detected troubleshooting guide, which should be worked in its order rather than improvised around; a device that appears but stays silent points at defaults, mutes, and the front-panel header question from the previous section. Work the layer that failed. Then, when all three pass, power down once more if you need to finish the screws and cable dressing, and know that the job is done properly rather than merely done.
Installing on a shared, family, or work machine: the social layer
A sound card installed on a machine with other users inherits obligations a solo build never meets. Other people’s headphones, calls, and habits run through your new defaults now. Before you change the machine’s default output, tell its users what will change and what to do if their program goes quiet — which will happen, once, to someone, and will be remembered as the day you broke the sound unless you have briefed them. Keep the old path working if the machine’s users are not technical: onboard audio left enabled and labelled clearly in the settings is not untidiness, it is a fallback that a non-technical user can actually select when your card is being temperamental.
On a work machine, add permissions to the social layer: know whether you are allowed to install hardware and drivers at all, and whether IT would rather do it. A sound card is a small thing to have a policy conversation about, but the conversation is smaller before the installation than after it. And on any shared machine, write the one-page note — what was installed, what the default is now, how to choose the old device — and leave it where the machine’s users will find it. Installations are remembered socially by their documentation, long after their technical quality is taken for granted.
Documenting the installation so the next one is easy
Close the job with the five-minute record that every later session will thank you for. Note the card’s slot, the driver version and its source, the date, the front-panel decision, and any setting you changed from default and why. Photograph the final interior if cables were rerouted. Save the driver installer somewhere findable, labelled with the card’s name, because the day you need it again is the day the maker’s site will be at its least helpful. This record is also your warranty file and your troubleshooting baseline: the not-detected guide’s method leans on knowing what ‘working’ looked like, in versions and slots and settings, and ‘it worked when I installed it’ is not a baseline — the record is.
Then use the machine. The installation’s success is not the device list’s approval but a week of unremarkable sound: calls that connect, games that place their audio, music that starts when asked. When the week passes without an incident, delete nothing, change nothing, and let the installation become what every good installation becomes — invisible. The next card, years from now, will be installed by someone holding your notes, and they will do it in half the time and with none of the doubt. That someone is you, and the notes are the kindest part of the whole job.
Removing the old: what to do with the device you are replacing
Installations have a first act that guides skip: the departure of whatever held the role before. If an old internal card is coming out, its removal is this installation in reverse, with two courtesies added — photograph its connections before disturbing them, since the old card’s cabling is sometimes the new card’s map, and keep its screws and bracket with it, because a card separated from its hardware is a card that will never be conveniently reinstalled, sold, or lent. Store the removed card in an anti-static bag or its original box if you kept it; a card stored loose in a drawer of cables is a card being slowly retired by neglect, whatever your intentions.
The software departure matters as much. Uninstalling the old device’s drivers and control suite before the new card’s software arrives prevents the layered-control-panel confusion that generates a steady share of ‘the new card sounds wrong’ reports — two suites both believing they own the processing. The exception is the deliberate fallback: if the old path is onboard audio kept alive on purpose, its drivers stay, and the two devices coexist by design rather than by accident. Decide which story yours is before the screwdriver comes out, and let the decision, not inertia, write the software state.
Cable routing and airflow: the installation’s invisible quality
The difference between an installation and a good installation is mostly visible only in cables. Route the card’s neighbourhood with two goals: nothing touching a fan’s arc, and nothing resting against the card’s own components or the graphics card’s hot surfaces. Leave the card’s bracket screws firm but not strained, and leave every cable with the slack its connector wants — a cable under tension is a connector being slowly unseated by vibration and time, and it will choose the worst available moment to complete the job.
Airflow deserves one deliberate thought in a modern case, because the sound card often lands in the graphics card’s weather system. If the only available slot parks the sound card tight against a graphics card that exhausts into the case, temperatures around both rise and the sound card — a device with no cooling of its own — simply endures it. Where the layout offers any choice, give the card the slot with moving air and a gap. Where it offers none, note the arrangement in your installation record; if heat-shaped symptoms ever appear in the testing guide’s load session, you will already know the first variable to change.
Installing drivers like a professional: order, versions, and restraint
Driver installation has a professional method, and it is mostly restraint. Install the maker’s current driver for your exact model and operating system, from the maker’s site, once. Restart when asked. Then verify the device in the system’s own settings before opening the maker’s control suite, so that you know the foundation is sound before the furniture arrives. Resist installing every optional component in the package on the first pass: suites, updaters, overlays, and enhancements can each be added later when a named need appears, and a lean first installation is dramatically easier to troubleshoot than a maximal one, because every component not installed is a suspect already cleared.
Record the version you installed and keep the installer file. Driver pages change, versions vanish, and the installer that worked is a known-good artefact worth the small disk space it occupies. If a future update misbehaves, that file is your rollback, and having it turns a bad update from an incident into an inconvenience. The same restraint applies to updates generally: a working audio chain is not improved by novelty, and the professional habit is to update drivers for a reason — a fault, a needed feature, an operating system change — rather than on a schedule of hope.
Verifying beyond ‘there is sound’: the installation acceptance test
Sound emerging is the beginning of acceptance, not its end. Run the acceptance sequence while the case is still easy to open and the return window is wide. Every output you own, tested individually: rear, front if it was reassigned, digital if you use it. Every input, recorded once and listened to. Both channels, confirmed with material whose placement you know, because a swapped or missing channel can hide inside ‘there is sound’ for months. The volume control across its whole range, listening for the staging problems the setup guide describes. One reboot, one sleep-and-wake, one session of your most demanding application — the three transitions where installations quietly fail after passing their first hour.
Any failure found now is an installation finding, cheap to address with the machine open and the documentation fresh. The same failure found in a month is a troubleshooting project. That asymmetry is the entire argument for the acceptance test, and it is why professionals sign off installations with a checklist rather than a thumbs-up. When the sequence passes in full, close the case, tighten the screws you left loose, and write the record. The installation is now, in the only sense that matters, finished.
The laptop and small-form-factor footnote
Everything in this guide assumes a machine that opens, and an increasing share of readers own machines that do not — laptops, mini PCs, all-in-ones — where ‘installing a sound card’ means the external path and nothing else. That path’s installation is covered in the external section above, but one laptop-specific point deserves emphasis: a laptop’s port layout is a design constraint, not a preference. The external unit will share a side with power, displays, and docks, its cable will cross the desk’s working area, and its placement will compete with the laptop’s own footprint. Solve the geometry with the same deliberateness as the tower owner solves slots — a short cable run, a unit placed where the hand falls, a hub decision made consciously — because on a laptop, the installation’s physical layer is the whole installation, and its quality is decided entirely by these unglamorous choices.
Docking stations add one more consideration: a card connected through a dock becomes a device that vanishes when the laptop leaves, which is correct behaviour, but the system’s defaults will chase it each time unless they are set with the docked and undocked states both in mind. Configure both states deliberately during the installation, test undocking and redocking once, and the machine’s daily rhythm will be silent in every sense.
One last check that separates installations from good installations
Before the case is closed for the final time, perform the check that distinguishes a professional sign-off from a hopeful one: the cold restart, observed completely. Shut the machine down fully, wait, and start it while watching and listening for anything abnormal — a hesitation, a new sound from inside the case, a device that appears late or not at all. Then confirm the card is the default, play thirty seconds of something known, and record one sentence through the microphone if the card serves one. Installations fail at boundaries — power cycles, sleep, updates — far more often than they fail in steady state, and the cold restart is the boundary you can visit on demand, today, while the screwdriver is still out. A card that passes it, in a machine whose interior you photographed and whose record you wrote, is installed in the full sense of the word. Close the case. The job is done, and it is done properly.
File the installation record with the machine’s other papers — motherboard manual, purchase receipts, the setup notes that follow — rather than in a downloads folder or a chat with yourself. Paper-adjacent organisation sounds old-fashioned and behaves perfectly: the record is findable on the worst day, by whoever needs it, without a working computer to search on. On the worst day, that is the only kind of findable that counts.
Gear mentioned in this guide
The products below are examples referenced in this guide. They were verified through the Amazon Creators API product pool for this site; use them as concrete reference points for the features discussed, not as a ranked list.
- ASUS XONAR SE 5.1 Channel 192kHz/24-bit Hi-Res 116dB SNR PCIe Gaming Sound Card with Windows 10 Compatibility — Check on Amazon
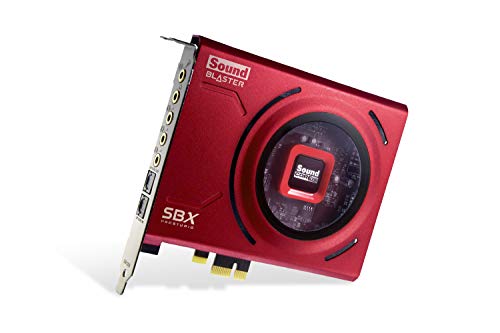
- Creative Sound Blaster Z SE Internal PCI-e Gaming Sound Card and DAC, 24-bit / 192 kHz, 116 dB SNR, ASIO, 600Ω Headphones Amp, Mic EQ, Discrete 5.1 / Virtual 7.1, Supports Dolby Digital Live, DTS … — Check on Amazon
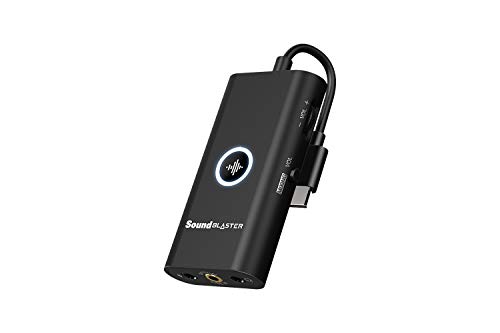
- Creative Sound Blaster G3 USB-C External Gaming USB DAC and Amp for PS4, Nintendo Switch, Ft. GameVoice Mix (Audio Balance for Game/Chat), Mic/Vol Control and Mobile App Control, Plug-and-Play — Check on Amazon
Frequently asked questions
Do I need to uninstall onboard audio drivers first?
No. Onboard and dedicated devices coexist; you simply choose the default. Remove old drivers only if you are replacing a previous dedicated card and its software conflicts, following that manufacturer’s guidance.
Which PCIe slot should I use?
Any free slot that fits — x1 cards work in longer slots too. Prefer a position with clearance from the graphics card for airflow and to reduce electrical interference, and confirm the connector seats fully in whichever slot you choose.
Why is there no sound after installing?
Most often the new card is not set as the default output device, in Windows or in the app you are using. After that, check the physical output jack you used against the manual’s port map, then the driver installation.
Can I install a sound card in a laptop?
Not internally — laptops lack the slots. Use an external USB sound card or DAC-amp instead; installation is plug, set default, and configure, and it moves to your next machine with you.
Should I disable onboard audio in BIOS?
Only optionally, once the new card is proven stable, and mainly to reduce device-list clutter. During installation and troubleshooting, leave onboard enabled as a fallback and comparison point.
What if the card is not detected in any slot?
Work through reseating, a different slot, BIOS settings that may disable slots when other hardware is present, and a test in another PC if available. A card undetected everywhere after those steps is a warranty conversation, documented with your test notes.
Related Guides
Keep exploring with these guides and roundups from the same desk and audio cluster: