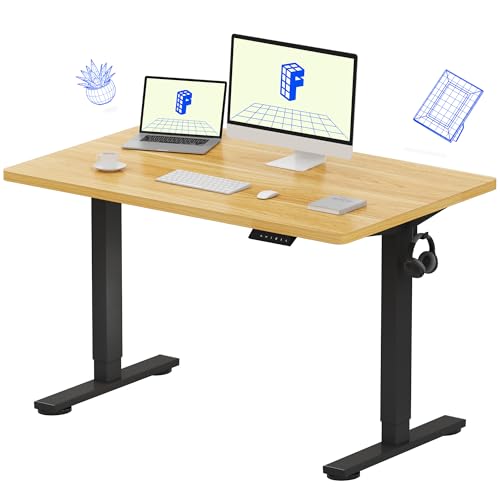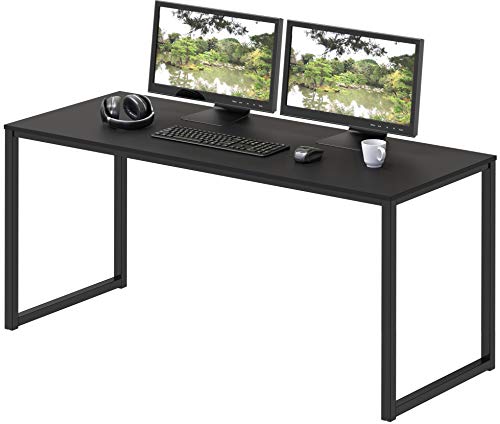
Knowing how to measure for a desk before you order one prevents the two most expensive furniture mistakes: a desk that physically fits the room but leaves no working space around it, and a desk that fits the room beautifully but cannot hold your equipment at a comfortable depth. Measuring is a twenty-minute job with a tape measure and some painter’s tape, and it answers every sizing question with your room’s real numbers instead of a product photo’s optimism.
This guide measures in the order that catches problems early: the room and its obstacles first, then the desk footprint including chair space, then the surface your equipment needs, then the vertical and delivery checks people forget until the desk is stuck in a hallway.
Disclosure: As an Amazon Associate, ilcastellomenu.com earns from qualifying purchases. Product examples below link to Amazon, where you can check current availability and specifications; this guide itself lists no fixed prices because pricing and bundles change frequently.
How to Measure for a Desk: Start With the Room
Stand in the room and identify the wall or corner the desk will occupy. Measure the full run of that wall in centimetres or inches, then subtract the things that share it: radiators and their clearance, skirting boards (which push the desk a centimetre or two off the wall), floor vents, sockets you must keep accessible, and door swing. The number left is your true maximum width — not the wall’s raw length.
Record the obstacles on a sketch
Draw a rough plan of the wall and floor area and mark every fixed feature: window positions and sill heights (a desk under a window must clear the sill or sit below it), socket locations, heating, and any slope or step in the floor. Note ceiling height only if you are considering tall shelving or a loft-style setup. This sketch becomes the reference for every later measurement, and it takes five minutes.
Photograph the space too. When you are later comparing a desk’s stated depth against a taped outline on the floor, a photo of the real corner settles arguments that memory loses.
Check the delivery route now, not on delivery day
Measure the narrowest points between the front door and the desk’s room: doorway widths, hallway turns, stairwell headroom. One-piece and pre-assembled desks fail here most often; flat-pack desks rarely do, because their largest panel is the desktop itself. Compare the desktop’s dimensions against your tightest turn — a long top that cannot make a corridor corner is a return waiting to happen. If assembly is ahead of you, How to Assemble a Desk covers building in the room itself, which sidesteps the moving problem entirely.
In this guide
Measure the Footprint: Desk Plus Chair Plus You
The desk’s footprint on the floor is only part of what it occupies. Add the chair’s zone behind it: the chair pulled up, the chair pushed back as you stand, and the space your legs need under the desk. A practical total depth for desk plus working chair zone is around a metre to a metre and a quarter; in tight rooms you can shave that with a compact chair that tucks fully under the desk, but you cannot eliminate it.
The painter's tape test
Tape the candidate desk’s outline on the floor at full size, including a second outline for the chair zone behind it. Live with the tape for a day: walk past it, sit in a chair inside it, open the door and drawers, and notice what the tape blocks. This simple test catches more sizing errors than any amount of arithmetic, because it measures the room as you actually use it.
Repeat the tape test for a second candidate size if you are between sizes. Buyers choosing between layouts as well as sizes will find the footprint discussion in L Shaped vs Straight Desk useful, since an L-shape’s corner changes how the chair zone works.
Depth: the measurement that decides comfort
Measure depth from the wall, remembering skirting pushes the desk slightly out. Then sanity-check that depth against your equipment: a monitor on its stand consumes the back portion, your keyboard needs its zone, and your forearms need support in front of it. Shallow desks around 50 cm deep work for laptops; most monitor setups want 60–80 cm. The sizing logic is expanded in How to Choose a Desk, which pairs these measurements with the buying decision.
Measure the Surface Your Equipment Needs
Inventory everything that will live on the desk permanently and measure the two big consumers precisely: your monitor setup’s total width (including the stand or stands) and your keyboard’s width. Laptop-plus-monitor users should measure the laptop open, since its screen is part of the layout. Add speakers, a lamp base, and any dock or hub that lives on top rather than under.
Width arithmetic, honestly done
Add the permanent items’ widths, then add working margin on both sides and between items — devices edge-to-edge across the whole desk is a layout that fails the first time you need to put down a notebook or a mug. Dual-monitor users consistently underestimate this; the layouts collected in Best Desks for Two Monitors show realistic widths for two-screen work.
If the arithmetic exceeds your wall’s true maximum width, your options are a monitor arm (which removes stand width and depth), vertical stacking, or accepting a smaller second screen — all cheaper decisions to make on paper than after delivery.
Height measurements: desk, sill, and you
Measure three verticals. The desk’s height against your seated elbow height — sit in your chair, elbows at a right angle, and measure floor to elbow; your desk surface should land close to that number. The window sill height if the desk sits beneath one. And the underside clearance of any candidate desk: crossbars and trays lower the usable knee height below the headline figure. The full reasoning is in What is the Ideal Desk Height.
Measure for the Extras: Storage, Cables, and Growth
If a drawer unit, PC tower, or printer shares the desk zone, measure those into the plan now. A desktop PC tower on the floor needs width beside your legs, ventilation clearance, and cable reach to the desk; on the desk, it consumes surface width permanently. Printers need their full depth with the paper tray open — a dimension almost everyone forgets.
Plan cable runs on the sketch: from socket to desk, and down from the desk’s back edge. A desk that must sit 30 cm from the nearest socket needs that cable run planned, ideally along the wall rather than across a walkway. Finally, leave a growth allowance if you can: the second monitor or the larger keyboard you buy next year should not invalidate this year’s measurements.
Turn Measurements Into a Shortlist
You now hold five numbers: true maximum width, workable depth, footprint including chair zone, surface width your equipment needs, and target height. Filter every candidate desk against all five before looking at style or features — a desk failing any one of them will annoy you daily. When two candidates both pass, choose by depth first, then height adjustability, then build quality.
Buyers working in genuinely small rooms should also look at how compact designs cheat the footprint rules with wall-mounting and folding surfaces; the current compact options are gathered in Best Desks for Small Spaces.
Measuring for Specific Desk Types
Different desk families ask for extra measurements beyond the core five. For an L-shaped or corner desk, measure both wall runs independently and the corner’s squareness — corners in older houses are often a degree or two off square, which a rigid L will announce by refusing to sit flush to both walls; knowing in advance lets you plan the small gap at the less visible wall. For a sit-stand desk, measure the vertical as well: at full height the desktop and everything on it must clear shelves, window sills, and sloped ceilings, and the raised screen’s top should not meet a wall cabinet.
For a desk with a hutch or shelving above, measure the wall height to the ceiling or picture rail and check the hutch’s depth against your monitor’s height — the classic failure is a screen too tall to sit under the shelf it was bought to accompany. For wall-mounted and folding desks, the key measurement is the wall itself: stud positions for the fixings, which a stud finder settles in minutes.
Measuring Your Equipment Precisely
Manufacturers’ dimensions are a starting point; your own devices deserve a tape measure, because stands and cables change the truth. Measure your monitor as a system: the stand’s footprint depth (front to back) is often larger than the screen’s stated depth suggests, and it is the stand that consumes your desk depth. Measure your keyboard with its cable’s exit in mind, your laptop open rather than closed, and your desktop PC’s case with its rear cable bend included — a tower that ‘fits’ a shelf exactly will not fit its own power and display cables.
Write the equipment’s total footprint as a rectangle: the width of everything side by side, and the depth of the deepest arrangement. Compare that rectangle, not the individual items, against candidate desktops. It is the rectangle you live with.
A Sample Measurement Sheet
Here is the whole method compressed into the sheet one buyer filled for a bedroom-office corner. Wall run available: 158 cm after radiator clearance. Depth from skirting: 75 cm maximum before the chair zone crowds the bed. Footprint with chair: 75 cm desk plus 85 cm chair zone, verified with tape for a day. Equipment rectangle: 118 cm wide (monitor on stand, laptop, speakers) by 55 cm deep (stand footprint plus keyboard plus forearm room). Seated elbow height: 66 cm. Delivery route: doorway 78 cm, one corridor turn, passed by flat-pack panels. Shortlist rule produced by the sheet: straight desk, 130–150 cm wide, 65–75 cm deep, height near 66–73 cm with chair adjustment covering the difference.
Notice what the sheet does: it converts a vague intention (‘a nice desk for the corner’) into five filters that any product listing can be tested against in seconds. That conversion is the entire skill this guide teaches.
Measuring Mistakes That Survive the Tape Measure
Some sizing failures happen despite careful measuring, because the wrong thing was measured. The first is measuring the room empty: a desk measured against bare walls meets a different room once the bed, wardrobe, and bookcase return, and the chair zone is always the first casualty. Measure with the room furnished, or add the furniture’s footprints to your sketch before trusting any number.
Forgetting the human measurements
The second failure is measuring only the room and the equipment, never the person. Two buyers with identical rooms and identical monitors can need different desks because one is 160 cm tall and the other 195 cm: their elbow heights, leg lengths, and chair sizes differ, and the desk must fit the body as precisely as the alcove. Always include seated elbow height and your chair’s full dimensions — width between armrests included — in the measurement sheet.
The third failure is precision theatre: measuring to the millimetre, then buying a desk whose stated dimensions are nominal. Manufacturers round, tops overhang frames, and feet splay. Build a tolerance of a centimetre or two into tight fits, and where a fit is genuinely tight — an alcove, a gap between furniture — favour the smaller candidate. A centimetre of air has never annoyed anyone daily; a centimetre of interference does.
Measuring for delivery and assembly, revisited
Finally, measure the build space, not just the route: a desk assembled in its room needs floor area for the panels laid flat and for you to walk around them, roughly the desk’s footprint plus a working margin on all sides. In a truly tight room, plan the assembly order so the desk is built close to its final position and rotated, not carried, into place. Five minutes of planning here prevents the special despair of a finished desk that cannot be turned around in its own room.
Measuring a Room You Do Not Have Yet
Sometimes the desk must be chosen before the room exists in your life — a move is coming, a lease is signed but the keys are not. Work from the floor plan if one exists, and distrust it gracefully: plan dimensions are nominal, measured wall-to-wall without skirting, radiators, or the small lies of older buildings. Shrink every plan measurement by a few centimetres in your planning and favour desks at the smaller end of your candidate range; the cost of a desk slightly small in a new room is trivial beside the cost of one that cannot pass the doorway of a home you have already moved into.
The cardboard mock-up method
When the stakes justify it — an expensive desk, a tight room, an irreversible built-in — graduate from tape to cardboard. Tape together boxes or sheets into the desk’s full footprint and approximate height, place the mock-up in the room, and live around it for two days. Cardboard reveals what tape cannot: how the desk’s volume feels, whether its height catches the window light, whether the chair’s swing truly clears it, and how the room’s traffic flows around a solid object rather than a floor outline.
It is an unfashionable, faintly ridiculous, completely decisive technique — the furniture equivalent of a dress rehearsal. Every professional space planner uses some version of it; the only reason home buyers do not is that nobody told them it was allowed.
Recording measurements so they survive the shopping trip
Write the five core numbers on a single card or phone note, with the equipment rectangle and your elbow height, and keep it where purchasing decisions happen. Measurements taken in January and reconstructed from memory in March are how desks arrive two sizes wrong. The sheet from this guide — wall run, depth, footprint with chair, equipment rectangle, elbow height, delivery route — fits on one screen. Photograph it next to the tape measure on the actual wall, and the numbers become unfalsifiable.
Measuring for Cables, Sockets, and the Invisible Furniture
One last category of measurement belongs on the sheet, because cables are furniture too — they occupy space, dictate placement, and refuse to stretch. Measure from your intended desk position to the nearest suitable socket, along the route the cable will actually travel (down, across, along the skirting), not as the crow flies. If the run exceeds a standard power strip’s lead, the desk’s position or the strip’s position must change on paper, now. Note also the height of the socket: a cable dropping from a high socket behind a desk behaves differently from one rising from floor level.
The monitor-arm and accessory allowances
Accessories consume measurements that the bare desk never mentions. A monitor arm’s clamp needs a thickness of desktop edge and a clear zone behind it for the clamp’s screw; a desk pushed flush to the wall may leave the arm’s swing nowhere to go. A cable tray mounted underneath needs depth below the top that drawers or crossbars may already own. A desk lamp’s base needs a corner of surface you may have allocated to a speaker. Add an ‘accessories’ line to the measurement sheet — clamp space, tray depth, lamp footprint — and check it against the candidate’s underside diagram and your surface rectangle. It takes two minutes and prevents the particular frustration of a desk that fits everything except the way you actually use it.
Measure the Route, Not Just the Room
Every measurement guide tells you to measure the destination; experienced furniture buyers also measure the journey. Walk from the street or the lift to the desk’s final position with your tape out and record the pinch points: the narrowest door opening with the door open at its real angle, the hallway turn where a long desktop must rotate, the stairwell’s ceiling height at the turn, the lift’s interior depth. A desktop is a rigid rectangle, and a rectangle’s ability to turn a corner depends on the widths of both corridors meeting there — the classic moving problem, and the reason some desks arrive in pieces whether you wanted flat-pack or not.
Record the route measurements on the same sheet as the room measurements, because they constrain the shortlist just as hard. A one-piece desk wider than your tightest turn is not a candidate, however perfectly it fits the alcove; its flat-pack twin with a separate top panel may be. If you are ordering a large or solid desk, ask the seller for the largest single component’s dimensions and its weight, and check both against your route and your carrying help. Discovering a route problem from the delivery driver, with the desk on the pavement, is the most expensive way to learn it.
Do not forget the last metre. The desk must not only enter the room but rotate into position, which needs a clear swing area roughly equal to its own diagonal. Rooms that will receive the desk already furnished — bed made, shelves up — sometimes need the rotation planned in reverse: measure whether the desk can be turned before the other furniture returns, and schedule the delivery accordingly.
Measuring Alcoves, Sloped Ceilings, and Walls That Are Not Straight
The tidy rectangles of product listings meet real rooms at the alcove, the attic slope, and the wall that waves gently along its length. Alcoves demand three width measurements — front, middle, and back — because alcove walls are rarely parallel, and the smallest of the three is your desk’s true maximum width. Measure height too: an alcove under a shelf or a sloping bulkhead may limit a sit-stand desk’s raised height or a tall monitor on a stand, and that limit only appears if you measure the ceiling of the space, not just its floor.
Sloped ceilings turn desk depth into a height question. A desk pushed under a slope is limited not by the floor footprint but by where your head, your screen, and a raised sit-stand surface meet the descending ceiling. Measure the height at the wall, then at the depth where the back of the desk will sit, then where you will sit — three points that draw the slope’s line and tell you whether a tall screen or a standing position survives. Attic rooms reward a cardboard mock-up more than any other space: tape and boxes at the desk’s true size reveal head strikes that arithmetic hides.
Walls themselves lie. Skirting boards hold a desk ten to twenty millimetres off the wall along its whole length, which matters for depth calculations and for cable plugs behind the desk. Walls bow, too, so a desk measured to fit flush may rock against a high spot; measure the wall’s straightness with a long level or a taut string if a flush fit matters. And measure from the skirting’s face, not the wall above it, because the skirting is what the desk will actually meet.
Measuring the Vertical Stack: Sills, Radiators, Sockets, and Shelves
Floor plans are flat; rooms are not. Above your desk’s footprint hangs a vertical world that the tape must visit. Window sills set a common trap: a desk slightly taller than the sill cannot sit flush under the window, and a sit-stand desk rising past sill height will collide with anything standing on it. Measure sill height and depth, and if the desk goes under a window, decide whether the surface should pass beneath the sill — capping the desk height — or stand proud of it, costing depth.
Radiators deserve measurement and respect. A desk hard against a working radiator traps heat behind it, warms the PC and the user’s legs unevenly, and in the case of a desktop tower parked beside it, bakes the machine all winter. Measure the radiator’s projection from the wall and plan the desk’s depth to leave an air gap, or choose the other wall. Sockets have a height as well as a position: a cable tray planned at exactly socket height, or a drawer unit parked over the only outlet, are collisions discovered by measuring vertically as well as horizontally.
Existing shelves, picture rails, and wall cabinets above the desk line limit monitor height, sit-stand travel, and tall desk lamps. Record the underside height of anything fixed above the footprint. The full vertical profile of the wall — skirting, sockets, radiator, sill, shelf — takes five minutes to sketch and is the difference between a desk that slots into a room and a desk that negotiates with it daily.
Measuring for Two: Shared Desks and Side-by-Side Working
A desk for two is not a desk for one, doubled. Each person needs their own full footprint — surface width for their equipment, legroom width for their chair, and push-back depth — and the two footprints must not borrow from each other, because borrowed space is where elbows, cables, and resentment accumulate. Measure the combined width as two complete workstations plus a small shared margin in the middle, and check the wall run can take it without either person ending up in front of a door swing or a radiator.
Legroom is where shared desks quietly fail. A central leg, a shared drawer unit, or a cable spine in the middle steals knee space from both users, and two chairs need to pass each other behind the desk or the room’s layout must give each person their own exit side. Measure the behind-desk corridor for two, not one. Also measure for asymmetry: partners rarely have identical setups, and the honest plan allocates width by equipment — the three-screen side gets more — rather than by a diplomatic half that fits neither.
Sit-stand sharing adds a vertical negotiation. Two people of different heights at one continuous surface need either independent desks butted together or a frank agreement about whose height the desk sits at, adjusted per shift. Measuring both users’ ideal heights — using the method in our desk height explainer — turns that negotiation into arithmetic before the purchase, which is where such conversations are cheapest. Couples shopping together will find complete two-person layouts among our home office desk picks, where shared widths are listed honestly.
Tools That Measure Better: Laser, Apps, and the Cardboard Method
The steel tape is honest but has limits: it sags over long spans, needs a second pair of hands for ceiling heights, and reads to the nearest millimetre only if you hold it dead straight. A laser measure removes the sag and the helper, giving long room dimensions and heights in seconds — worth borrowing for a whole-room project, and overkill for a single desk. Whichever you use, measure every critical dimension twice, ideally by two methods or from two directions; the measurement you only took once is the one that will be wrong, and it will be wrong in the direction that does not fit.
Phone measuring apps and room-scanning tools have become genuinely useful for the sketch stage: a scanned plan with approximate dimensions is a fine basis for a shortlist and for testing layouts on screen. Treat their numbers as drafts, not verdicts — small errors at the wall become large ones at the alcove — and confirm every dimension that a purchase depends on with a physical tape. The apps earn their keep in visualisation: seeing the desk’s footprint inside a true-scale room model catches proportion errors, like a desk that fits but overwhelms, earlier than any spreadsheet.
The undefeated champion remains cardboard. A taped outline on the floor shows footprint; a full mock-up — boxes and a board at the desk’s exact width, depth, and height — shows truth. Sit at the mock-up in your real chair. Put the monitor on it. Reach for where the drawers would be. Twenty minutes inside a cardboard desk has killed more bad purchases than any review, and it costs nothing but the packaging from the last delivery.
Manufacturer Numbers Versus Your Tape: Tolerances and Nominal Sizes
The dimensions on a listing are nominal, and nominal has a tolerance. Desks are commonly sold by rounded sizes — a top advertised at a round width may measure a centimetre or two less in the hand — and depth is sometimes quoted including a cable scallop or a rear overhang your wall will not use. When a fit is loose, none of this matters. When a desk must slot into an alcove with a centimetre to spare, nominal numbers are a gamble, so ask the seller for the exact measured dimensions of the largest panel, or buy where returns are painless and verify with your own tape on delivery day before assembly begins.
Height figures hide the most variation. A desk’s stated height may be to the top of the surface, the underside, or the top of a raised rear shelf, and for sit-stand models the range may be quoted with or without the desktop’s thickness and the levelling feet’s adjustment. When you compare your required height — derived from your seated elbow measurement — against a listing, establish which surfaces the numbers describe. A two-centimetre misunderstanding here is the difference between forearms that float and forearms that rest, and it is entirely avoidable with one question to the seller.
Second-hand listings multiply the uncertainty, because sellers measure quickly and describe generously. Ask for the three dimensions measured at the extremes — width across the back, depth including any bow or trim, height at the highest point — and a photograph of the tape in place for the one that matters most. Sellers who comply are telling you something about the desk’s life as well as its size.
A Second Worked Example: The Three-Metre Bedroom Wall
Consider a common case: a bedroom wall three metres long between a door frame and a wardrobe, a window on the adjacent wall, one radiator under the window, and a single occupant who works and games at the same desk. The wall run allows a desk up to about 160 centimetres wide once the door’s swing and a walking gap at the wardrobe end are respected — measured, note, at skirting level, where the wardrobe’s own plinth steals a centimetre the eye forgives and the tape does not.
Depth is decided by the chair’s push-back meeting the bed. The room’s depth from wall to bed edge allows the desk, chair, and a squeezed passage; a shallower desk buys passage at the cost of screen distance, so the plan chooses a mid-depth desk and recovers the viewing distance with a monitor arm, a decision the measurements make almost by themselves once written down. The radiator under the window rules out the window wall entirely — a conclusion reached on paper in minutes that would otherwise have been reached by a warm, unhappy month of sitting in rising heat.
The vertical pass adds the finishing constraints: the socket pair sits at one end of the wall run, so the PC and cable tray plan to that end; the picture rail above is high enough to ignore; the door opens against the desk’s end, so a doorstop joins the shopping list to protect the desktop’s corner. The final sheet for this room fits on an index card — width, depth, route, vertical notes, socket position — and it eliminates most of the catalogue in seconds, which is the entire purpose of measuring: not to find the desk, but to make finding it boring.
Measuring for the Desk You Will Want in Three Years
Measurements describe the room accurately and the future not at all, yet the desk must serve both. Before finalising a footprint, run three growth questions past your numbers. Will a second screen arrive — and does the width survive it, using the dual-monitor widths from our desk-choosing guide? Will the work change — a drawing tablet, a document camera, a hobby that needs a second zone? Will the room change — a partner joining the office, a child graduating from the kitchen table to a desk of their own in the same space?
Growth rarely needs a bigger desk bought today; it needs options preserved. A wall run measured honestly tells you whether a second desk can join later, whether the current desk can rotate ninety degrees to free the long wall, and whether the storage you are about to buy blocks the expansion you suspect is coming. Record those possibilities on the measurement sheet as notes, not numbers. The sheet then serves twice: once at this purchase, and again on the day the setup grows, when the person measuring the room from scratch will be grateful it is already done — because that person is you, and the room has not got any bigger in the meantime.
Gear for This Guide
Two verified examples that make the measurements concrete — a 48-inch home-office desk to tape out as a mid-size candidate, and a dual monitor mount that changes the surface arithmetic by removing stand footprints.

SHW Mission 48-Inch Home Office Computer Desk
A 48-inch straight desk that works well as your tape-test candidate: if this footprint plus chair zone fits your sketch, mid-size desks are in play; if not, you have learned it for the cost of some tape. SHW Mission 48-Inch Home Office Computer Desk — Check on Amazon

VIVO Dual Monitor Desk Mount
A dual-monitor desk mount for screens from 13 to 30 inches that removes both stand footprints from your surface-width arithmetic and lets the screens sit at the back edge — often the difference between a 120 cm and a 140 cm desk. VIVO Dual Monitor Desk Mount — Check on Amazon
Frequently Asked Questions
How much space should I leave behind a desk for a chair?
Plan roughly a metre to a metre and a quarter of total depth for desk plus chair zone in a comfortable setup. You can compress it with a chair that tucks fully under the desk and a shallow desk, but below that total, pushing back and standing up becomes a daily squeeze.
What is the minimum desk depth for a monitor setup?
Around 60 cm is the practical floor for a monitor on its stand plus a keyboard with forearm support; 70–80 cm is more comfortable and allows a notebook in front of the keyboard. A monitor arm relaxes the requirement by letting the screen sit at the very back edge.
How do I know if a desk will fit through my door?
Compare the largest rigid dimension — usually the desktop — against your narrowest doorway and tightest turn. Flat-pack desks are rarely a problem because panels travel flat; pre-assembled and one-piece desks are the risk. Measuring the route before ordering is the whole trick.
Should I measure with the skirting board in mind?
Yes. Skirting (baseboard) pushes the desk a centimetre or two away from the wall, which slightly reduces effective depth and can matter for cable drops and for desks that must align with adjacent furniture. Measure depth from the skirting face, not the wall.
My measurements fall between two desk sizes. Which do I choose?
Choose the smaller if the room is shared or multi-use and your equipment fits it with margin; choose the larger if this is a dedicated work room and your equipment arithmetic is anywhere near the smaller desk’s limit. Depth shortages are felt more than width shortages, so protect depth first.
How much space should I leave behind a desk for cables and plugs?
Plan for the plug, not the cable. A mains plug with its cable bending safely away from the socket needs roughly ten centimetres behind the desk, and a desk pushed hard to the skirting rarely leaves it. Either accept a small gap — invisible in practice, and good for airflow — or route power through a tray with a single lead to the socket, which concentrates the bend in one planned place. Measure your largest plug’s depth before deciding the desk can go flush; surge-protected strips with chunky adapters are the usual surprise.
Should I measure the room before or after choosing the desk style?
Before, always. Style choices made first quietly edit your measurements — you start measuring the room the desk needs rather than the room you have — and the shortlist then contains beautiful impossibilities. Measure the space completely, including the route and the vertical profile, and let those numbers disqualify styles on evidence. The styles that survive an honest measurement sheet are the ones you can choose between by taste, which is the only ground taste should ever have to defend.
How do I measure a room I am moving into but cannot access?
Work from the floor plan if one exists, but treat its dimensions as nominal — plans are drawn to wall centres or finished faces inconsistently, and a desk-critical alcove deserves suspicion. Ask the agent or seller for the specific measurements you need, at skirting level, with the doors’ swings noted; people will measure two or three numbers accurately if you ask precisely. If the purchase cannot wait for access, choose the desk whose footprint fits the most pessimistic version of every dimension, and keep the returns option alive until you have taped the real room.
Is a laser measure worth buying for one desk?
Borrowed, yes; bought, rarely. Its advantages — solo long measurements, ceiling heights, speed — matter most when you are measuring a whole room for several pieces. For one desk, a good steel tape and a helper for the long spans will produce every number you need, and the money is better spent on the cardboard-and-tape mock-up stage, which catches the errors no measuring tool can: the ones about how the desk feels to sit at.
What is the most commonly forgotten measurement?
The chair’s, by a distance. Buyers measure the desk’s footprint and forget that the working footprint includes the chair pushed back, the user standing to sit down, and the passage behind. The second most forgotten is vertical: the socket that lands behind a drawer unit, the sill the rising desk will strike. Both are on the measurement sheet in this guide precisely because they are the ones experience says you will skip — measure them anyway, especially because you are sure you do not need to.
Do I need to measure differently for a sit-stand desk?
Yes, in the vertical dimension. A sit-stand desk is a moving object, so measure its whole travel, not its resting height: the raised surface must clear window sills, shelves, and sloped ceilings at full extension, and anything standing on the desk — tall monitors, lamps, speakers on stands — rises with it and needs its own clearance at the top of the range. Check the floor too, because a desk that travels vertically also betrays an unlevel floor at height, wobbling more at standing height than seated. Measure the space as a column, not a footprint, and the moving desk will have no surprises left to give you.
Should I round my measurements up or down when comparing with a listing?
Round in the direction of safety, which depends on the dimension. For the space available, round down — the room is never bigger than your optimism. For the desk you are considering, round up — its true size is never smaller than the nominal figure suggests. When the two rounded numbers still leave a working margin, the fit is real; when they only fit unrounded, you are planning to discover the difference with a delivery driver watching.
The Bottom Line
Measure the wall honestly, tape the footprint including the chair, do the surface arithmetic with real device widths, check height against your elbows, and walk the delivery route. Twenty minutes of measuring replaces the most common and most expensive desk mistake: guessing.
Related Guides
Put the measurements to work with the choosing guide, the assembly walkthrough, and compact-desk picks for small rooms: