The first and most important step in how to recover photos from an SD card is to stop using the card immediately: remove it from the camera, do not take another photo on it, do not format it, and do not let any device ‘repair’ it. Deleted or corrupted photos are usually still physically on the card — what is gone is the index pointing to them — and every new write risks overwriting the data you want back. Once the card is set aside, recovery is a calm, read-only process: connect it to a computer through a card reader, run reputable recovery software that scans the card and saves recovered files to the computer’s drive (never back onto the card), and only return the card to service after it has been tested and reformatted.
Recovery succeeds far more often than people fear, especially for accidental deletions caught quickly. It fails mainly when the card kept being used, when it was formatted and refilled, or when the card is physically failing. This guide covers the software route step by step, the special cases (formatted cards, corrupted file systems, RAW files), and when to stop and use a professional service instead. The software options are compared in Best Recovery Software for Sd Cards.
Disclosure: As an Amazon Associate, ilcastellomenu.com earns from qualifying purchases. Product examples below link to Amazon, where you can check current availability and specifications; this guide itself lists no fixed prices because pricing and bundles change frequently.
Rule One: Stop Using the Card Immediately
Why continued use destroys recoverable photos
When a photo is deleted, the camera or computer typically removes its directory entry and marks its space as available; the image data itself remains until something new is written over it. A formatted card is similar — a quick format rebuilds the filing system but leaves most data in place initially. Every subsequent photo, video or file operation gambles with those unclaimed blocks. That is why the recovery advice everywhere starts identically: the moment you realise photos are missing, power the camera off, eject the card, and treat it as evidence. If the card is your only one on a trip, buy or borrow another card and keep shooting on that — do not ‘just take a few more’ on the problem card.
Protect the card while you work
Slide the full-size SD card’s lock tab to the locked position if it has one — many readers honour it as read-only. Handle a microSD by its edges and use a quality reader rather than a phone, because phones love to write indexes, thumbnails and database files to any card they mount. From here on, nothing writes to this card: not the recovery software (it saves elsewhere), not the operating system (decline any offer to format or repair the ‘damaged’ card that pops up — that offer is the enemy), and not you.
In this guide
How to Recover Photos From an SD Card With Software
Choose and set up the recovery tool
Use established recovery software — the category is compared in Best Recovery Software for Sd Cards, and reputable free tools handle straightforward deletions well, with paid versions adding polish and support. Install the software on your computer’s internal drive, never on the card. Connect the card via a reader; if the computer does not see it at all, work through How to Fix an Sd Card that is Not Detected first, because software cannot scan a card the system cannot mount — and do not format your way to visibility, since that trades recoverable data for a mountable card.
Scan, preview, and save — to a different drive
Select the card as the scan target and run the deep/thorough scan, which reconstructs files from their data signatures (JPEG and common RAW formats are well supported) rather than relying only on the damaged file index. A full scan of a large card takes a while; let it finish. Preview the found photos — good tools show thumbnails, and a photo that previews correctly will almost always open correctly. Then recover the selected files to a folder on your computer or an external drive. Saving recovered files back onto the same card is the classic beginner error: the writes land on the very blocks holding other photos still waiting to be recovered.
Verify before you celebrate or reuse anything
Open a sample of recovered photos at full size, including some from the end of the scan results, and confirm they are complete — a file that opens with a grey or garbled lower half was partially overwritten and is the honest limit of recovery for that image. Back up the recovered folder before doing anything else. Only when the photos are safe twice over should the card itself be dealt with: test it with How to Test the Speed of an Sd Card, and if it passes and the incident was a deletion rather than corruption, format it in the camera per How to Format an Sd Card before trusting it again.
Special Cases: Formatted, Corrupted and RAW
The card was formatted — is recovery still possible?
Often, yes, if it was a quick format and little or nothing has been recorded since: the data area is largely intact and deep-scan software reconstructs photos from signatures, though original filenames and folder structure are usually lost. A full/overwrite format, or a card that was formatted and then used for another shoot, leaves far less — recovery becomes partial and luck-based. Either way the procedure is identical and read-only, so trying costs nothing but time. Set expectations honestly with anyone whose photos they are: ‘good chance’ is not ‘guarantee’.
The file system is corrupted
If the card mounts but folders are garbled, files show absurd sizes, or the camera reports a card error, the data is usually present behind a broken index — deep-scan recovery is designed for exactly this. Resist utilities that offer to ‘repair’ the card in place by fixing its file system: a repair writes to the card and optimises for making it mountable, not for preserving your photos, and it can close off recovery avenues permanently. Recover first, repair (or retire) later; How to Fix a Corrupted Sd Card covers what to do with the card afterwards.
RAW files, video and burst sequences
Major RAW formats (CR2/CR3, NEF, ARW, RAF and others) are recoverable by signature in good tools, though previews may rely on the embedded JPEG inside each RAW file. Video is harder: large files are often fragmented across the card, and some recovered clips need a repair pass to play — specialised video-recovery tools exist for this. Burst sequences of JPEGs recover most cleanly of all. If the material is irreplaceable — a wedding, a birth, a once-only event — and the card is also physically suspect (clicking reader behaviour is not a thing for flash, but intermittent mounting, heat, or visible damage is), skip the DIY route and go straight to a professional recovery service; every power-on cycle of a failing card can reduce what they can save.
After Recovery: Preventing a Sequel
Build the habits that make recovery unnecessary
Copy cards to a computer the same day you shoot, keep two copies before formatting anything, and format cards only in the camera after the copies are verified. Rotate two or more cards rather than filling one giant card with a whole trip — the risk-spreading logic behind the picks in Best Sd Cards for Wedding Photography. Replace cards that have corrupted once, even if they test fine afterwards; a card is cheap and a reshoot is often impossible. Choose replacements with endurance and brand reliability in mind, as in How to Choose an Sd Card, and check a card’s expected service life honestly against How Long do Sd Cards Last.
What Recovery Software Is Actually Doing
Understanding the mechanism sets honest expectations and explains every rule in the procedure above.
Indexes, signatures and carving
A file system keeps a directory: names, locations, sizes. Deletion and quick formatting damage the directory far more than the data, which is why recovery works at all. A shallow scan reads whatever directory remains and resurrects its entries. A deep scan ignores the directory and carves: it reads the card block by block, recognising file signatures — every JPEG begins and ends with known marker bytes, and RAW formats have their own structures — and reconstructs files from the data itself. Carving explains the quirks you will see: recovered photos with generic names, timestamps from the file’s internal metadata rather than the shoot, and occasional fragments where a file was partially overwritten. It also explains why continued shooting is fatal: new data lands in the unclaimed blocks carving depends on.
Why some photos come back perfect and neighbours do not
Recovery is per-file luck governed by overwrite geography. A photo whose blocks were never reused returns bit-perfect; a photo half-overwritten by a later video returns as an image with a garbled lower half or not at all. Burst sequences written together tend to survive or perish together. This is why the honest report to give anyone is a probability, not a promise — and why the verification step in this guide samples files from across the scan results, not just the first successes. It is also why professionals facing a failing card go straight to a recovery service: their imaging hardware reads marginal flash more patiently than a consumer reader, and every amateur attempt spends some of the card’s remaining life.
Talking to the Owner of the Photos: Setting Expectations
Often the person performing the recovery is not the person whose memories are on the card. How the situation is explained matters almost as much as the scan settings.
Honest framing, in advance
Say three things before starting. First: the chances are genuinely good if the card was set aside quickly, and poor if it kept being used — and which case this is, is already decided by history, not by the software. Second: the process is read-only and cannot make things worse, so there is no risk in trying. Third: whatever comes back gets backed up twice before the card is touched again. That framing prevents the two failure modes of recovery conversations — false certainty beforehand and blame afterwards — and it models the habit that ends the story well: the backup routine from Best Sd Cards for Wedding Photography and the card discipline in How to Choose an Sd Card, adopted the same day, while the lesson is vivid.
Recovery Triage: Sorting the Recovered Pile
A successful scan returns hundreds or thousands of files with generic names. The rescue is not finished until the pile is sorted, verified and backed up — and that work has its own method.
From thousands of files to the photos that matter
Work in the recovery software’s preview first, starring the keepers before exporting everything — exporting a full card’s worth of fragments wastes hours and disk. Sort exported files by the timestamps in their internal metadata, which usually survives even when filenames do not, and the shoot reassembles itself into chronological order. Check the largest files individually: video and RAW files are where partial overwrites hide, and a file that opens is not necessarily a file that is whole — view at full size, scroll to the bottom of the frame, play clips to the end. Only when the keepers are verified do they get renamed, foldered and backed up twice. The triage is unglamorous and it is where recoveries are actually won: the scan finds candidates; the human decides what was saved.
What to do with a card that has been recovered from
The card itself now has a biography, and its future depends on how it failed. A card that suffered a pure accidental deletion and passes full testing may return to service after an in-camera format. A card that corrupted spontaneously carries a suspicion no test fully clears: demote it to transport and test duty, mark it physically, and never let it be the sole vessel for anything unrepeatable again. A card that failed physically is retired outright. Marking matters — an unmarked suspect card drifts back into the wallet and gets its second chance at the worst possible moment, which is how one failure becomes two stories with the same ending.
The Ethics and Legality Footnote Nobody Expects
Recovery skill occasionally surfaces other people’s data — a second-hand card, a found card, a client’s card with more on it than the job described. A short note on handling that well.
Other people's photographs
Recover only what you were asked to recover, look at nothing beyond what the task requires, and hand back or securely delete the rest. If you buy second-hand cards, format them before use and do not go browsing — the previous owner’s honeymoon is not a perk of the purchase. These are small courtesies with a professional core: the same discipline that makes you trustworthy with a client’s wedding card makes you careful with your own. Data recovery is a position of trust performed on people’s memories; the technique in this guide is the easy half of deserving it.
Gear for This Guide
The examples below come from our Creators-API-verified product pool and illustrate the card classes discussed in this guide. They are examples, not a ranked list — use the ratings and checks in this article to judge any card, including newer revisions.

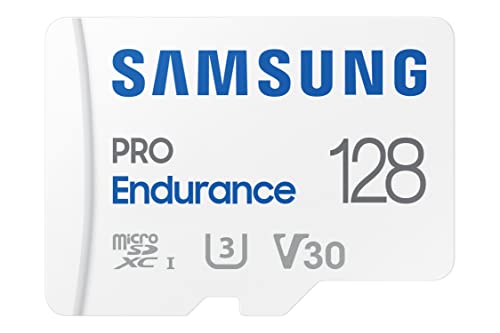
Samsung PRO Endurance 128GB microSDXC
Once your photos are safe, an endurance-rated card from a major maker is the right replacement for a card that has already failed you once — reliability is the feature that prevents a repeat of this guide. Samsung PRO Endurance 128GB microSDXC — Check on Amazon
how to recover photos from an SD card: The Short Version
Stop using the card, scan it read-only, save everything somewhere else. Recovery is usually possible and occasionally miraculous — but it is the backup habit you build afterwards that makes it unnecessary next time.
Before Software: Stabilise the Patient
Recovery begins with a principle borrowed from medicine: first, do no further harm. A card that has lost photographs is a scene, not a storage device, and everything you do before the recovery scan either preserves evidence or destroys it. Work through the stabilisation in order. Stop the host device from writing: remove the card from the camera rather than reviewing, deleting or formatting anything on it, because every camera operation — even browsing, which can update databases and thumbnails — writes somewhere. If the card was in a phone or a recorder, the same rule applies with more urgency, because those hosts write constantly in the background. Set the card’s write-protect switch if it has one, or use a reader that honours it, so that even the recovery computer cannot write by accident. Make the recovery attempt on a computer with enough free space to hold the card’s entire contents twice over, because the two artefacts you are about to create — a card image and the recovered files — both need room, and a recovery that stops halfway for lack of space can leave a worse mess than it found. Finally, decide the order of your attempts before you begin: image first, scan the image, and keep the physical card untouched in a safe place while you work. That discipline costs ten minutes and is the entire difference between a methodical recovery and a hopeful one.
The card image: your insurance policy
Serious recovery works on a bit-for-bit image of the card rather than on the card itself, and the reasons are practical, not precious. An image freezes the patient’s condition: however many scans you run, however many tools you try, the source never degrades, because flash that is failing can worsen with every read and a card on its last legs may only survive being read a limited number of times. An image also lets you pause — recovery of a large card can take hours, and life interrupts — and resume without re-stressing the hardware. Most good recovery tools can create the image or work from one; if yours cannot, dedicated imaging tools can, and the image file they produce becomes the patient for every subsequent step. Keep the image until the recovered photographs are verified, backed up and printed or delivered, because the image is the only road back if a later question arises about a file the first scan missed. Storage is cheap; the card’s contents, by the premise of this entire guide, are not.
Reading the Recovery Results Like a Professional
A finished scan presents you with a pile, not a verdict, and reading it well separates a good outcome from a misleading one. Expect three populations. First, files with their original names and folders, recovered through the surviving file system: these are your best citizens, usually complete and correctly dated. Second, files recovered by signature — the scanner recognised a photograph’s internal structure in the raw data — arriving with generated names, sometimes missing their metadata, occasionally truncated where a later write overwrote part of them. Third, fragments and false positives: partial images, thumbnails the camera stored separately, cached previews from editing software, which can look like bonus photographs and are sometimes the only surviving version of an image whose full file is gone — a thumbnail is a poor prize until it is the only one, at which point it is a treasure. Verify by opening, not by counting: a folder of a thousand “recovered” files that includes three hundred unopenable fragments is a worse result than eight hundred files that all open, and your report to the photographs’ owner should be in opened, viewable images. Check the beginning, middle and end of the recovered set, and check the specific photographs that matter most first, because recovery time is finite and priorities deserve to be served in order.
Videos and burst sequences: partial credit, honestly graded
Video files recover less gracefully than stills, because a video is a structure as well as a stream: its index may live at the end of the file, exactly where an interrupted recording never wrote it, leaving a full-size file that no player opens. Dedicated video-repair tools can often rebuild such files using a reference recording from the same camera — one more reason to keep a healthy sample clip from every device you own. Burst sequences of stills present the opposite pattern: each frame is independent, so a damaged region costs individual frames rather than the sequence, and the recovery conversation becomes about which moments survive. Report both patterns honestly to the owner: a wedding’s video may return as a repaired file with a missing minute, a burst may return missing its middle frames, and knowing precisely what came back — rather than a cheerful “mostly recovered” — is what lets people grieve the right losses and celebrate the real saves. The tools gathered among the best recovery software for SD cards differ most in exactly these edge cases, which is why trying a second tool on the image is standard practice when the first one’s results disappoint.
When the Card Is Physically Failing While You Watch
Some recoveries are races. A card whose controller is dying may read more slowly with every pass, throw errors that multiply, disconnect and reconnect, or grow warm in the reader — each a sign that the remaining reads are a finite resource to be spent deliberately. Spend them on the image, once, at the most careful settings your tool offers, rather than on exploratory scans of the live card. If the card disconnects repeatedly, a different reader and a powered, direct port are worth trying, and short sessions with rests are kinder than one long siege. Know the stopping rule in advance: when the hardware will no longer present itself to any reader, software’s turn is over, and the decision becomes whether the photographs justify a professional laboratory, where technicians can read the flash chips directly at a cost that only irreplaceable material rationalises. There is no shame in that referral and no heroism in cooking a dying card at your desk until even the laboratory’s road closes. Stabilise, image, and escalate on evidence — the same ladder as every other repair in this collection, climbed at the speed the patient dictates.
The Handover: Returning Photographs and Retiring the Card
A recovery ends with two deliveries. The first is the photographs, organised as honestly as they were recovered: the verified files in a clean folder structure, the partial and thumbnail-only saves in a clearly labelled second folder rather than silently mixed in, and a short note — for the owner, or for your future self — recording what was lost and what was saved, because memory revises recovery outcomes in both directions over time. The second delivery is a verdict on the card, and it should be unambiguous: a card that has required recovery does not return to critical service. It may live out a demoted life in a low-stakes device once it has been tested, or it may be retired outright, but it never again carries the only copy of anything. Write the verdict on its registry entry and on its case, physically, so the decision survives the drawer. Most lost-photograph stories, examined closely, contain a card that had already failed once and been forgiven; the handover is where that pattern goes to die.
Recovering for Someone Else: Care, Consent and Copies
Recovering another person’s photographs — a relative’s holiday card, a friend’s wedding, a client’s shoot — adds duties the solo job does not have. Get the story before the software: what happened, what has been tried since, and which specific images matter most, because the owner’s priorities should order your verification when time runs short. Agree what you will do with everything the card contains, not only the photographs they mentioned; cards hold more of a life than the errand describes, and the professional habit is to recover to a sealed folder, hand it over complete, and keep no copy of your own once the handover is verified. If the recovery fails, deliver that news with the same care as a success: what was attempted, what the card’s condition allowed, what a laboratory could still try and at what likely cost, so the owner can make the final decision with real information rather than with your embarrassment. People remember how a loss was handled long after they forget the technical details, and a recovery conducted with consent, privacy and honest reporting is a service even when the photographs themselves cannot come home.
Frequently Asked Questions
What is the first thing I should do when photos go missing?
Stop using the card immediately. Power the camera off, remove the card, and do not shoot, format or ‘repair’ anything on it. Deleted data remains on the card until overwritten, and every new write gambles with it. If you must keep shooting, use a different card. This single step decides most recovery outcomes.
Can I recover photos after formatting the card?
Often, yes — if it was a quick format and little has been recorded since. A quick format rebuilds the filing system but leaves most image data in place, and deep-scan software reconstructs photos from their data signatures, though filenames and folders are usually lost. A full overwrite format, or a card refilled with new photos, leaves far less to find.
Why must recovered files be saved to a different drive?
Because writing to the card during recovery overwrites the very blocks holding other photos still waiting to be found. Recovery software reads the card and writes its results to your computer or an external drive. Saving back to the same card is the classic beginner error and it destroys data mid-rescue.
My computer does not see the card at all. Can software still help?
No — recovery software can only scan a card the system can mount. Work through the detection steps in How to Fix an Sd Card that is Not Detected first (different reader, contacts, disk tools), and decline any prompt to format the card into visibility. If multiple good readers see nothing, the card’s controller has likely failed and a professional service is the remaining route.
Are RAW photos and videos recoverable too?
RAW formats from major makers are recoverable by signature in good tools, often previewing via their embedded JPEGs. Video is harder because large files fragment across the card; some recovered clips need a repair pass to play. JPEG sequences recover most cleanly. For irreplaceable material on a physically suspect card, skip DIY and go straight to a professional service.
The recovery worked. Can I trust the card again?
If the incident was an accidental deletion and the card passes a full speed and capacity test (see How to Test the Speed of an Sd Card), format it in the camera and return it to service. If the incident was corruption, be warier — a card that corrupts once without explanation has told you something. Demote it to unimportant duty or replace it; cards are cheap, reshoots are not.
How long does a typical recovery take?
Budget hours, not minutes, and let the card’s size and condition set the pace. Imaging a large card reads every byte it owns; scanning that image for file signatures reads them again; a big, modern card can occupy an evening between the two, and a struggling card stretches it further with retries. The saving grace is that almost none of that time needs you: set the image running, let the scan work unattended, and spend your own attention at the verification stage, where human judgement is the scarce resource. Start recoveries early in the day rather than at midnight before a deadline, because the one schedule a recovery reliably keeps is “longer than you hoped,” and photographs that waited this long deserve a process that is not itself rushed into errors.
Can I recover photographs from a card that was used again after the loss?
Partially, and the honest word is “some”. Every new file written after the loss lands in space the old photographs may still occupy, overwriting whatever it touches, so the recovery becomes a map of what the new use spared: often the earlier part of the old set survives while the later part is gone, or the reverse, depending on how the host allocated space. Run the recovery anyway — the prognosis is statistical, not hopeless, and even a heavily reused card commonly surrenders a meaningful fraction of its former contents. Then let the outcome teach the rule this guide opened with: the moment photographs go missing, the card’s career pauses. A card pulled immediately is a patient with excellent prospects; a card used for another week is an archaeological site, and archaeology recovers what it can.
Is free recovery software good enough, or do I need a paid tool?
Free tools are genuinely capable at the core task — scanning an image and extracting files by signature — and for a straightforward deletion or format accident they recover what the paid tools recover. Paid tools earn their money at the edges: friendlier triage of enormous result sets, better handling of fragmented video and proprietary raw formats, previews that let you verify before extracting, and support when the case is strange. The pragmatic order is to image the card once, try a reputable free tool on the image, and escalate to a paid tool — many of which scan free and charge only for extraction — only if the results disappoint. Because you are working on the image, escalation costs nothing but time; the patient waits, frozen, while the doctors consult.
The recovered photographs have wrong dates and names. Can that be fixed?
Mostly, yes, and the raw material for the fix usually survives inside the files. Photographs carry their capture time in their embedded metadata even when a signature recovery strips the file name and the folder, so sorting and renaming by that embedded time reconstructs the day’s order with free tools in minutes. Where metadata is missing too, the recovery order itself is a clue — files carved from the card often emerge roughly in the sequence they were written — and file sizes and neighbouring frames help place the orphans. Restore the chronology as best you can, keep the recovered originals untouched in their own folder, and treat your renamed, sorted set as a working copy: the archive of record should preserve exactly what the card surrendered, because a future, better tool may one day read more from it.
Should I try the card in the camera again “just to check” before recovering?
No. That check is the most expensive curiosity in recovery, because the camera will write to the card — updating its databases, possibly offering a format prompt one tired tap away from acceptance — and may overwrite exactly the regions your photographs occupy. The camera has already told you what it knows: the photographs are not visible through it. Everything further that can be learned will be learned from the image, on the computer, where the card is write-protected and the tools are stronger. Curiosity is a virtue in diagnosis and a vice at a scene; let the card rest until it reaches the reader, and let the reader be the next thing it ever meets.
How many recovery tools should I try before giving up?
Two or three reputable ones, run against the image, is a sensible ceiling for software efforts. Different engines carve differently — one may excel at your camera’s raw format, another at fragmented video — so a second attempt genuinely adds recoveries rather than merely repeating the first. Beyond three, returns diminish steeply and the decision changes character: the remaining road is a professional laboratory, judged on the value of what is missing rather than on hope. Keep every tool’s output in its own folder, because the union of three scans is your true result, and files one tool truncated another may have whole. Giving up on software is not giving up on the photographs; it is recognising which profession the problem now belongs to.
What if only the thumbnails of my best photographs survive?
Keep them, label them honestly, and do not let disappointment talk you out of them. A thumbnail is a small, low-resolution version of the image — inadequate for a wall print, entirely adequate for a screen, a message, a family archive’s record that the moment happened and what it looked like. Owners who initially dismiss thumbnail-only saves often return to them with gratitude once the alternative — nothing — has had time to settle. Preserve them at their recovered size without upscaling fakery, note in the handover which images exist only at this size, and let the owner decide their worth. In recovery, a partial save honestly labelled beats a perfect story every time.
Can a professional laboratory recover what software cannot?
Sometimes, because laboratories work below the level software can reach. When a card’s controller has died but its flash chips are intact, technicians can remove or interface with those chips directly and reconstruct the data from the raw contents — a process that bypasses the part that failed. It is slow, specialised and priced accordingly, and it cannot help when the flash itself is damaged or when the data was genuinely overwritten. The decision rule is the value of the material, assessed coldly: a business’s only records or a family’s irreplaceable event may justify it; a recoverable afternoon’s snapshots do not. Ask for an assessment and a success-based fee structure where offered, and send the card — never your only image of it, which you keep — with its story documented.
After a successful recovery, what should change in my routine?
Whatever the story of the loss indicts — and there is always an indictment. If the card failed, the rotation and registry were missing. If the format was accidental, the spent-and-fresh convention was missing. If the photographs existed only on the card for weeks, the offload-and-backup habit was missing. Fix the specific gap rather than resolving vaguely to “be careful,” because carefulness is not a system and the next incident will find the same open door. The most valuable sentence in any recovery is the one written afterwards, in the registry, naming the change that makes this the last recovery of its kind you ever perform. Everything else the software does; that sentence only you can do.
Write that sentence today, while the relief — or the loss — is still vivid enough to make it specific, and attach it to the card’s registry entry where the next incident, if one ever comes, will be forced to reckon with it.
Should I keep the card image after the recovery succeeds?
Keep it until the recovered photographs have survived their own probation: verified as opening correctly, backed up in their new home, and — for the images that matter — printed, shared or otherwise confirmed as the versions you need. Then the image has done its work and can be deleted to reclaim its considerable space, unless the card’s owner wants it retained as the archive of record. Deleting it on the day of the recovery, in a flush of tidiness, is the one unforced error left in the process; hard drives are patient, and a month of probation costs nothing but a folder you ignore until its review date arrives.
Can I recover photographs from a card that snapped or was water-damaged?
Software cannot, because software needs the card to present itself electronically, and physical damage usually ends that conversation. Laboratories are the only remaining road, and their prospects depend on whether the flash chip itself survived — a cracked card that spared the chip is a candidate; a card whose chip is fractured is not, by any method, at any price. Dry a water-damaged card gently and completely before any attempt, do not power a card that is still wet, and resist the folk remedies involving rice, freezers and ovens, which spend the laboratory’s chances on theatre. Package the card as it is, document what happened to it, and let the professionals assess it with clean hands and proper tools.
Why do recovered files sometimes open halfway and stop?
Because the file’s beginning survived and its continuation did not — a later write overwrote a middle or end segment, or the flash beneath it failed. Image viewers show the portion they can decode, which is why such files render as a perfect top half dissolving into grey or noise. Some repair tools can salvage more by rebuilding missing structure, and a second recovery engine may carve a more complete copy from a different reading of the same data, which is why the multi-tool pass on the image is worth its time before you settle. Accept the graded outcome for what it is: in a set of hundreds, a handful of half-files is a normal recovery’s texture, not a sign the process failed.
Keep those half-files in the labelled partial folder rather than deleting them in disappointment — a future tool, or a future owner’s lower stakes, may value a half photograph of a person who is gone far above the tidy nothing that pride would have kept.
Recovery, done properly, is as much about preserving those graded, partial, honest saves as it is about the clean victories.
Grade them by what survives, label them by what they are, and keep them with the same care as the perfect files — because in the economy of memory, an honest fragment outranks a flawless absence every single time.
Related Guides
Keep exploring with these guides and roundups from the same SD-card collection: