Disclosure: As an Amazon Associate, ilcastellomenu.com earns from qualifying purchases. Product examples below link to Amazon, where you can check current availability and specifications; this guide itself lists no fixed prices because printer pricing and bundles change frequently.
Knowing how to unclog a printer — meaning an inkjet with dried ink blocking its nozzles — starts with the printer’s own tools: print a nozzle check to see which colours are missing, run one head-cleaning cycle, check again, and repeat at most two or three times before letting the printer rest powered overnight. Most clogs clear within that sequence, because they are simply ink that dried at the nozzle openings during idle weeks. Stubborn cases respond to gentle manual methods for removable printheads, and a clog that survives everything is usually telling you the printer has sat too long or the ink itself is the problem.
This guide covers inkjets and tank printers. Laser printers cannot clog this way — if a laser prints faintly, work through How to Fix Faded Printer Prints instead.
Diagnose First: Confirm It Really Is a Clog — How to Unclog a Printer Safely
Missing lines, streaky photos and a colour that has vanished all look like clogs, but low ink, wrong paper settings and a nearly empty cartridge imitate them. Two minutes of diagnosis prevents an afternoon of unnecessary cleaning cycles.
Print the nozzle check pattern
Find ‘Nozzle Check’ in the printer’s maintenance menu or driver utility and print it. A healthy pattern shows unbroken grids or lines in every colour. Gaps in one colour point to that colour’s nozzles; gaps everywhere suggest either a severe clog or a supply problem. Keep this first print — comparing patterns is how you measure progress.
Rule out empty ink and wrong settings
Check ink levels before cleaning: a cleaning cycle cannot fix an empty cartridge, and it wastes the remaining colours’ ink trying. Also confirm the paper type setting matches the loaded paper — photo paper printed with a plain-paper setting looks washed out in a way that mimics partial clogs.
Clog versus damaged printhead
A clog improves, even slightly, after cleaning or rest. A damaged or electrically failed printhead produces a pattern that never changes at all, often with entire colour blocks permanently absent. That distinction matters: clogs are worth your time, failed heads usually are not on inexpensive printers.
In this guide
Step 1: The Built-In Cleaning Cycle, Used Correctly
Every inkjet ships with a head-cleaning utility designed for exactly this problem. It forces ink through the nozzles to dissolve and flush dried deposits. Used sparingly it is the safest and most effective tool you have; used endlessly it is an ink-disposal system.
Run one cycle, then check
Start the cleaning from the printer’s menu or the computer utility, let it finish completely, then print a fresh nozzle check. Compare against your first pattern: even partial improvement means the method is working and patience will finish the job.
Know when to stop
If two or three cycles produce no further improvement, stop. Each cycle consumes a noticeable amount of ink from all colours, and the waste-ink system absorbs it. Continuing rarely unclogs what three cycles could not — it just empties cartridges, which is how a free fix becomes a shopping trip.
The overnight rest trick
After your last cycle, leave the printer switched on and idle overnight. Ink sitting in the head slowly softens the dried plug, and the morning nozzle check frequently shows a fully restored pattern without another cycle. This is the single most underused step in unclogging, and support technicians recommend it for a reason.
Unclogging methods in safe order
| Method | When to use it | Ink cost | Risk |
|---|---|---|---|
| Nozzle check | Always, first | None | None |
| Cleaning cycle x1–3 | Gaps in the pattern | Moderate | None if limited |
| Overnight rest, powered | After cycles plateau | None | None |
| Damp towel (removable head) | Stubborn clog, manual permits | Low | Low if careful |
| Power flush (tank models) | Severe clog, tanks full | High | Low, but wasteful |
| Service or replace | No improvement at all | — | Avoid DIY disassembly |
Step 2: Gentle Manual Methods for Stubborn Clogs
If utilities and rest have not cleared the pattern, a few careful manual methods remain — all external, all reversible, and none involving disassembly. If your printhead is fixed inside the printer and the manual forbids removal, skip to the service discussion rather than improvising.
The damp paper-towel method (removable heads only)
Remove the cartridges and, only if the manual shows the printhead is user-removable, lift it out. Rest the nozzle plate on a folded paper towel dampened with warm distilled water for ten to fifteen minutes; dried ink wicks out and stains the towel. Repeat with a fresh towel until little ink emerges, dry the contacts area, reinstall, and run one cleaning cycle to re-prime.
Soaking the nozzle plate
For heads the manufacturer allows to be removed, a shallow bath of distilled water — just deep enough to cover the nozzle plate, never the electrical contacts — for a few hours softens severe deposits. Dry thoroughly before reinstalling; moisture on contacts can cause errors or damage. When in doubt about whether your model permits this, it does not: check the manual first.
What never to do
Never use compressed air into the nozzles, never poke them with pins, never use alcohol, window cleaner or solvents on the nozzle plate, and never force a fixed printhead out of its carriage. Each of these converts a clogged printer into a broken one. The safe-cleaning principles in How to Clean a Printer apply throughout.
Special Cases: Tank Printers and Long-Stored Machines
Refillable-tank printers and printers emerging from months of storage clog differently, and each deserves its own expectations.
Tank printers: check the lines, not just the head
On tank models, inspect the ink lines for air bubbles and confirm tank levels are above the minimum line — air in the lines starves the head and mimics a clog. Most tank printers offer a ‘power cleaning’ or ink-flush utility for severe cases; it works but consumes a lot of ink, so treat it as a last resort and ensure tanks are well filled first. The models in Best Ink Tank Printers for Home document these utilities clearly.
Printers stored for months
A printer unused for a season may need the full sequence twice: cycles, overnight rest, then a second round. If cartridges were left installed, their own outlet nozzles may also be dried; replacing an ancient cartridge is sometimes the actual fix. Set honest expectations — a printer stored for years in a hot garage may not recover, and its replacement should be chosen with Best Printers for Occasional Use in mind.
Colour-specific clogs
Often only one colour clogs — typically the least-used one. Print a page that exercises that colour between cleaning attempts (a colour test image works well) to draw fresh ink through those nozzles specifically, rather than relying on the all-colour cleaning cycle alone.
Preventing the Next Clog
Unclogging is a chore you can largely schedule out of existence. Clogs are a drying problem, and drying is a habit problem.
Print weekly, in colour
One colour page every week or two keeps every nozzle wet. Put a recurring reminder on your calendar until it becomes habit; this single practice, also central to How to Maintain a Printer, prevents the overwhelming majority of clogs.
Power behaviour and placement
Leave the printer plugged in and use its own power button, so its automatic maintenance can run. Keep it away from radiators, direct sun and heating vents, all of which accelerate drying at the nozzles.
Ink quality matters
Old, poorly stored or very cheap third-party ink clogs more readily and can deposit residues that cleaning cycles struggle with. If a clog follows a switch in ink brand, that timing is diagnostic information, not coincidence.
When to Stop: Repair, Replace, or Change Technology
Some clogs are messages. A printhead that never improves, on a printer that cost little, is the market telling you the repair economics do not work.
The honest cost calculation
Replacement printheads for inexpensive printers often cost a large fraction of a new machine, and fitting them is not always a user task. Price a comparable new printer before ordering parts — and if your printing is genuinely occasional, let the replacement be a laser, which cannot clog at all.
Professional cleaning
For higher-value photo printers, a service clean can be worthwhile, particularly where the head is a long-life component. Get the quote first, and ask what the service includes; a quote that approaches a third of replacement cost deserves scepticism.
Disposal of a truly dead printer
If you replace the machine, remove and recycle cartridges through a take-back scheme and wipe any stored network settings. Then set the new printer up with the weekly-print habit from day one, so this guide becomes one you never need again.
Clogs in Depth: What Is Actually Blocking the Nozzles
A nozzle is a microscopic channel, and the blockage in it is rarely a solid plug. Understanding what you are dissolving explains why the gentle methods work and the violent ones fail.
Dried ink is a gradient, not a cork
Ink dries from the nozzle opening inward, forming a gradient from crust to thickened ink to normal ink. Cleaning cycles and soaking work because fresh ink and water dissolve this gradient progressively — which is why partial improvement after one cycle is such a good sign: the process is underway and time is on your side.
Air locks masquerade as clogs
Sometimes nothing is dried at all: an air bubble in the line or head stops ink flow exactly like a blockage, typically after a cartridge change or after a tank printer ran below its minimum line. The cure is the printer’s priming or cleaning routine, which purges air — and the diagnosis matters because soaking a printhead does nothing for air.
Pigment inks clog differently
Pigment-based inks (common in black cartridges and photo blacks) carry solid particles and can settle and thicken in a printer that sits. Dye inks dissolve more readily. This is one reason a printer used for occasional text benefits from a weekly colour page: it exercises the dye colours that otherwise sit longest.
Why heat is the enemy twice over
A printer stored near a radiator or in a sun-warmed room dries its nozzles faster between uses, and a printer in a hot attic for a summer may dry beyond what home methods reverse. Placement is prevention: a cool, shaded shelf is a maintenance decision, not an aesthetic one.
A Realistic Recovery Timeline
Owners abandon recoverable printers because nobody tells them recovery is measured in days, not minutes. Here is the honest schedule for a significantly clogged machine.
Day one: utilities and patience
Run the nozzle check, two cleaning cycles with checks between, and one colour-heavy print. Then stop. Leave the printer on overnight. A large fraction of clogs that look hopeless at 6 p.m. print a perfect nozzle check the next morning, because the ink sat in contact with the blockage for twelve hours doing quiet chemistry.
Day two: repeat once, then manual methods
If the pattern improved but is incomplete, one more cycle often finishes it. If it has not moved at all, move to the manual methods for removable heads described in this guide, or accept the air-lock possibility and run the manufacturer’s priming routine if one exists. Improvement, however slight, is the signal to continue; total stasis is the signal to change approach.
Day three: the decision point
A clog that has not improved after two days of correct treatment, fresh supplies and manual soaking (where permitted) is telling you the head may be damaged or the deposits are beyond home chemistry. At this point the repair-versus-replace calculation in this guide applies, and further ink spent on cleaning cycles is money spent avoiding a decision.
Clog Risk by Printer and Ink Type: Setting Expectations
Not all inkjets clog alike, and walking in with realistic expectations for your specific combination prevents both panic and complacency. These are the patterns experienced owners recognise.
Integrated-head cartridge printers
On inexpensive printers where the printhead is part of the cartridge, a ‘clog’ is often simply an old cartridge — and replacing it replaces the head, curing the problem outright. This is the hidden virtue of the design: the most failure-prone component is disposable. If a fresh cartridge prints perfectly, no further diagnosis is needed or useful.
Permanent-head and tank printers
Tank and higher-end printers use long-life heads that are economical only if they survive — which they do, with regular use. Here, clogs are the tax on neglect, and the cleaning ladder in this guide is the payment plan. Owners of these machines should treat the weekly print as non-negotiable; the head’s replacement cost concentrates the mind wonderfully.
Pigment black and photo inks
Pigment inks, prized for crisp text and archival photos, settle and thicken faster in idle nozzles than dyes. A photo printer used monthly should expect a nozzle check as the opening move of every session — not as a sign of failure, but as the normal handshake between an idle pigment system and its owner.
Climate and season
Heating season dries indoor air and printer nozzles alike; clogs cluster in winter in heated homes and after summer storage in hot spaces. If your clogs arrive on a seasonal schedule, the cure is seasonal too: a standing weekly print reminder that survives holidays, and storage away from radiators the rest of the year.
What a Service Technician Would Do (and Charge For)
If your clog defeats this guide, the next step is a professional — and it helps to know what you would actually be paying for, so you can judge a quote and decide whether the machine justifies it.
The professional toolkit
A technician repeats your steps first — nozzle check, cleaning cycles, supply substitution — because a meaningful share of ‘dead’ printheads are misdiagnosed supplies. Beyond that, they bring ultrasonic cleaning baths for removable heads, manufacturer service modes that purge more aggressively than user utilities, and the experience to say ‘this head is electrically dead’ with confidence.
What the quote usually contains
Expect a diagnostic or labour charge plus parts if a head or pump component is needed. On an inexpensive printer, the total commonly approaches replacement cost — which is not sharp practice, just arithmetic: skilled time costs more than mass-produced hardware. Ask for the quote before authorising work, and ask what warranty the repair itself carries.
Making the call
Authorise service when the printer is a higher-value model, when its supplies are expensive and already bought, or when it does something its replacement cannot. Decline when the quote nears the price of a modern equivalent — and let the replacement choice be informed by the clog itself: chronic idle-clogging argues for a laser next time, in writing, on the shopping list.
Gear for This Guide
The examples below come from our verified product pool and illustrate the printer classes discussed in this guide. They are examples, not a ranked list — use the criteria in this article to judge any model, including newer revisions of these machines.

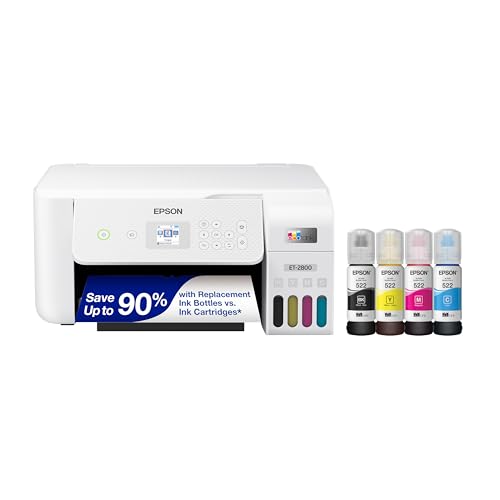
Epson EcoTank ET-2800
A representative tank printer: its maintenance menu exposes nozzle check, head cleaning and a stronger flush option, exactly the ladder of tools this guide climbs. Epson EcoTank ET-2800 — Check on Amazon

Canon Pixma iX6820
A representative cartridge inkjet with a user-accessible head area, illustrating why knowing whether your printhead is removable matters before attempting manual methods. Canon Pixma iX6820 — Check on Amazon
When Only One Colour Is Missing: Colour-Specific Clog Diagnosis
A nozzle check that shows one colour broken or absent while the others print cleanly is telling you something specific, and treating it as a general clog wastes ink on the colours that are fine. Each colour travels its own path from supply to nozzle, so a single-colour failure localises the problem: that colour’s cartridge or tank outlet, its feed line on tank models, its damper or filter where fitted, or its bank of nozzles. Start by confirming the supply itself — a colour can be “clogged” because its cartridge vent is blocked by the very tape tab that was supposed to be removed at installation, because a tank’s outlet has an airlock after a refill, or because the cartridge is simply emptier than its optimistic gauge claims. Reseat the supply, check vents and levels with your eyes rather than the software, and print the nozzle check again before running any cleaning cycle.
Yellow deserves a special note because it is nearly invisible on white paper in a nozzle check; owners regularly misread a missing yellow as a general paleness and chase the wrong colours. Hold the check sheet under bright light and look for the yellow pattern at an angle, or print a test image with a solid yellow block. Magenta or cyan failures announce themselves as dramatic colour casts — prints that come out greenish or red — while black failures show as washed-out text and grey that prints as a faint colour composite. If one colour returns gradually across two cleaning cycles separated by a rest, you are dealing with dried ink softening as expected; if a colour is entirely absent and utterly unchanged after the correct sequence in this guide, suspect the supply path or an electrical failure in that nozzle bank rather than a blockage, because dried ink almost always improves a little when it is going to improve at all.
Why Rest Works: The Overnight Method Explained and Used Properly
The most effective unclogging tool costs nothing and frustrates everyone: time. Inside a clogged nozzle sits a plug of ink whose solvent has evaporated, leaving pigment and resin in a dried film. A cleaning cycle pushes fresh ink against that plug for a few seconds, which wets its surface; given hours of contact, the fresh ink’s solvent slowly penetrates and softens the plug from the outside in, so the next gentle cycle can expel what brute repetition on day one could not. This is why the correct rhythm in this guide is cycle, rest, reassess — and why running five cycles back to back mostly converts your ink supply into the waste pad while the plug, denied soaking time, stays exactly as hard as it was.
Use rest deliberately. Run one cleaning cycle, print a nozzle check so you have a dated record of the starting state, then leave the printer powered on — powered, because the machine must be able to keep the head parked and sealed and to run its own micro-maintenance — in a normally warm room, undisturbed, for at least eight hours and ideally overnight. Cold rooms slow the softening, so a printer stored in an unheated space deserves a move to a warmer room for recovery attempts. In the morning, print the nozzle check first, before any further cleaning, and compare it against yesterday’s sheet square by square. Improvement, even partial, means repeat the rhythm once more rather than escalating to manual methods. Many heads written off as dead were simply never given a second overnight; patience is not a consolation strategy here, it is the mechanism by which the fix actually works.
Removable Heads, Fixed Heads and Built-In Heads: Know Which Risk You Hold
How boldly you may proceed depends on which of three architectures your printer uses, and identifying yours takes a minute with the manual. Some printers carry the printhead in the cartridge itself: every new cartridge is a new head, so a truly dead “clog” is cured by replacing the cartridge, and aggressive cleaning of a cartridge you will discard anyway carries little risk. Other printers use a removable head unit that the user can lift out by a latch, designed to be replaced as a part; these tolerate the gentle manual methods in this guide best, because you can work on the head over a tray, keep liquid away from the printer’s electronics, and inspect your progress directly.
The third design, a fixed head built into the machine and intended to last its life, demands the most restraint. It cannot be removed without tools and disassembly, its nozzles are serviced only in place, and flooding its surroundings with cleaning fluid risks the carriage electronics that share the space. On fixed-head machines — which include most tank printers — confine yourself to the built-in utilities, rest cycles, and at most the mildest damp-cloth contact with the head’s face exactly as the manufacturer describes, and accept an earlier move to professional service if those fail. Tank models add one more consideration: their ink travels through tubes, and an apparent clog can be an air bubble in a line after a refill or a long idle period, which the model’s ink-flush or tube-priming utility — distinct from head cleaning, and described in its manual — is designed to clear. Running head cleanings against an airlock wastes ink without touching the problem, so on a tank printer with a suddenly missing colour, check the tubes visually for gaps in the ink column before anything else. Owners comparing systems with this in mind will find the head-architecture discussion in our ink tank versus cartridge comparison a useful companion.
The Week After: Verifying a Recovery and Watching for Relapse
A successful unclog is not finished when the nozzle check turns clean; it is finished when the head stays clean through a week of normal use. Print something in full colour daily for the first few days — a photograph, a test image, anything that exercises every colour — because a head that recovered marginally can re-clog silently in its weakest nozzles, and daily exercise either confirms the recovery or catches the relapse while another rest cycle can still save it. Keep the dated nozzle checks from the episode together; if the same colour and the same region of the pattern keep failing across episodes, the head is telling you it has a permanently weak area, and your expectations and budget should adjust accordingly.
Use the recovery week to audit the causes honestly. Was the machine idle for a month? Was it switched off at the wall nightly, so its self-maintenance never ran? Did the clog follow a supply change, a refill, a move, or a hot spell in a sunny room? Each answer maps to a prevention in this guide, and applying the right one is the difference between an episode and a habit. Also note what the episode cost you in ink: cleaning cycles on some models are thirsty, and a printer that needs them monthly is quietly charging you for its own decline. That arithmetic — supplies consumed by maintenance, rising over time — is one of the clearest signals that the when-to-stop discussion in this guide has become personally relevant.
Methods From the Internet, Assessed Honestly
Search for unclogging advice and you will meet a menagerie of folk remedies. Some are harmless versions of legitimate methods: the damp paper-towel cradle under a removable cartridge is simply the manual soak with kitchen materials, and it works within its limits. Warm — never hot — distilled water soaks for removable cartridge heads are a recognised step, provided contacts stay dry and everything dries fully before reinstallation. Beyond that line, caution rises sharply. Blowing through cartridges with compressed air can rupture internal membranes and spray ink into places it should never be. Ultrasonic cleaners, beloved of forum posts, can delaminate the very nozzle plates they are meant to save and are not recommended by manufacturers for assembled heads. Steam, boiling water and hair-dryer heat warp plastics and cook ink into harder deposits than the ones you started with.
Household chemicals are the riskiest category. Window cleaner appears in countless anecdotes because some formulations contain solvents that soften ink, but formulations vary by brand and country, residues can attack head coatings, and a method that worked on one removable cartridge head can destroy a fixed head it floods. Ammonia, bleach and alcohol in uncontrolled strengths have no place inside a printer at all. The pattern to remember is that every damaging remedy shares a trait: it applies uncontrolled force, heat or chemistry to a component built to micrometre tolerances, in the hope of saving an hour. The methods in this guide are slower because they are calibrated to what the head can survive. A clog is an inconvenience; a dissolved nozzle plate is a replacement printer.
Clogs and the Paper Path: The Overlooked Partnership
Owners think of clogs as purely an ink problem, but the paper path is a silent partner in many recurring cases. A printer in a dusty environment draws fibres and room dust across the head’s face with every sheet, and a head that parks over a dirty capping station seals against contamination instead of sealing it out. If your clogs recur suspiciously fast after successful recoveries, widen the investigation: clean the paper path and trays as the cleaning guide describes, store the loaded paper covered or keep less of it loaded, and check whether the printer sits in a stream of dust from a doorway, a workshop or a pet’s favourite route through the room. Moving a printer two metres can end a clog cycle that chemicals could not.
Paper quality plays a subtler role. Very cheap, fibrous paper sheds lint at a rate quality stock does not, and heavily recycled stocks vary. If a household prints on bargain paper and fights constant nozzle trouble while a neighbour with the same printer model has none, the paper is a legitimate suspect worth a one-ream experiment. The same applies to the environment’s humidity: very dry heated rooms accelerate the evaporation that forms plugs, which is why clog frequency rises in winter in heated homes even when usage stays constant. None of this replaces the diagnosis and cleaning sequence in this guide — it explains the cases where that sequence works and yet the problem keeps coming home, and it points the fix at the room and the routine rather than at ever-stronger interventions on the head itself. For day-to-day prevention habits, our guide to choosing printer paper covers the stocks that treat printheads kindest.
A Worked Recovery: Four Days With a Stored Printer, Step by Step
Abstract sequences are easier to trust when you can watch one unfold, so here is a representative recovery, composited from the pattern these episodes follow. The printer is a cartridge inkjet that sat unused in a spare room for five months while its owner worked abroad. Day one, first power-on: the machine wakes normally, the installed cartridges report reasonable levels, and the first real document emerges with black text present but streaked, and colour so wrong that a photograph looks like a duotone experiment. The owner resists the urge to print the document repeatedly — each attempt would lay more patchy ink over the problem — and instead prints a nozzle check. The sheet shows black at roughly half strength with gaps throughout, cyan broken into dashes, magenta nearly solid, and yellow, examined at an angle under a bright lamp, almost entirely absent.
Diagnosis before treatment: the supplies are reseated, vents confirmed clear, and levels verified as genuinely sufficient, so the fault is dried ink, not installation. One cleaning cycle runs. The second nozzle check, printed immediately, shows black improved by perhaps a third, cyan marginally better, yellow still missing. This is the fork where most recoveries are lost: the impatient path runs four more cycles now, spends a visible slice of every cartridge, and arrives at a check barely better than this one. The patient path taken here instead leaves the printer powered on, parked and undisturbed overnight in the warm room. Day two’s first nozzle check — printed before any cleaning — shows yellow reappearing in patches and black nearly complete: the soak has done what force could not. One further cycle, another shorter rest of a few hours, and the day-two evening check shows all four colours present, with cyan still showing two thin gaps.
Day three is deliberately boring: no cleaning at all, just normal printing — a colour photograph, a few documents — because a head in this state often finishes recovering under gentle ordinary use as fresh ink flows through warmed nozzles. The day-three evening nozzle check shows cyan complete. Day four confirms with a final check and a real photograph examined for banding in the sky areas, where gaps announce themselves first. The episode’s total cost: two cleaning cycles, two sheets for checks per day, and three days of mostly waiting. The same printer, attacked aggressively on day one, would in the typical telling have consumed far more ink, possibly triggered a waste-ink warning, and still ended at the same day-four result — or at a damaged head if folk remedies had joined in. Keep your own dated checks during a recovery and you will see the same shape: slow, then suddenly better, then done. That shape is the signature of dried ink yielding to solvent and time, and recognising it is what keeps owners calm enough to let the method work.
One sentence worth taping to the printer itself: when in doubt, print the nozzle check first, because that single sheet tells you more about the state of the head than any amount of guessing, reprinting real documents, or repeating cycles on hope alone.
Frequently Asked Questions
How much ink does a cleaning cycle actually use?
It varies widely by model, from a small fraction of a cartridge on frugal designs to a startling amount on some older or photo-focused machines, because the cycle purges by pushing ink through the nozzles and wiping the excess away. Tank printers make the cost visible — watch the levels fall across repeated cycles — while cartridge models hide it until a supply runs low suspiciously early. This consumption is the practical reason this guide caps consecutive cycles and inserts rest between them: beyond the point where soaking is what the plug needs, additional cycles spend ink without buying progress, and the waste ink they generate fills the machine’s waste system, which has its own finite life.
A brand-new cartridge clogged immediately. What went wrong?
Usually nothing is clogged at all. The common causes are protective tape still covering the cartridge’s vent or contacts, a cartridge seated a fraction short of fully clicked in, or a printer that needs its cartridge-recognition or priming step completed after installation. Remove and reseat the cartridge slowly, inspect the vent area against the installation diagram, and run the model’s cartridge replacement routine from the menu rather than a cleaning cycle. If the cartridge is a compatible or refilled unit and the printer rejects or starves it from the first page, suspect the cartridge itself and test with a genuine one before condemning the printer — new-supply problems are supply problems until proven otherwise.
Can a clog cause permanent damage if I leave it?
A clog left for weeks usually remains recoverable; a clog left for many months in a warm room hardens progressively and can pass the point where home methods work, particularly on fixed-head machines. The greater risk of delay is behavioural: an owner who finally returns to the machine often attacks the hardened clog with repeated aggressive cleaning, which is where permanent damage — a worn head, a flooded carriage, an exhausted waste pad — actually happens. If you know a printer will sit unused, the protective move is to leave it powered in sleep mode where that is safe, or stored correctly switched off at its own button in a cool room, and to budget a patient recovery session, with rest built in, when it returns to service.
Is a replacement printhead worth fitting?
On models designed for user-replaceable heads, it can be: the head is a defined spare part, fitting follows the manual, and a successful swap restores a machine whose mechanics and electronics are otherwise sound. Weigh the part’s cost and your printer’s age honestly against a new machine, and remember that a printer old enough to need a head may soon need rollers or a waste-pad service as well. On fixed-head models, head replacement is a workshop job with workshop labour attached, and the economics rarely survive comparison with replacement unless the machine is a costly wide-format or business model. In both cases, only fit a head once you are sure the fault is the head — the colour-specific diagnosis earlier in this guide is what protects you from buying a head to cure an airlock.
How many cleaning cycles are too many?
More than three in a row without improvement is too many. Stop, rest the printer powered overnight, and reassess — further cycles mostly waste ink.
Can I use tap water to clean a clogged printhead?
Use distilled water. Tap water contains minerals that can deposit inside fine nozzles and create a new problem while solving the old one.
Why did only one colour stop printing?
Nozzles clog individually, and the colour you print least dries first. The nozzle check identifies the affected colour; colour-specific test pages help draw ink through it.
Will a new cartridge fix a clog?
Only if the clog is in the cartridge itself, which happens with integrated-head designs. On printers with a separate permanent printhead, a new cartridge alone rarely clears a true head clog.
My printer has been in storage for a year. Is it worth trying?
Yes — run the full sequence: fresh supplies if the old ones are ancient, cleaning cycles, overnight rests. Many stored printers recover; set a limit of a few days of attempts before deciding.
How do I stop clogs for good?
Print in colour weekly, leave the printer plugged in for its self-maintenance, keep it away from heat, and use decent ink. Or switch to a laser printer, which uses dry toner and cannot clog.
Can a clogged printhead damage the printer if I keep printing?
Printing with a severely clogged head mainly wastes paper and ink on bad output. However, repeatedly running dry nozzles during long jobs is not kind to the head. Diagnose with nozzle checks rather than printing real documents until the pattern is complete.
Does the colour of the clog matter?
Only diagnostically: the clogged colour is usually the one you print least. If black clogs while colours stay clear, your printing is colour-heavy and black sits idle — the weekly all-colour test page should include a solid black block to exercise it.
Are printhead cleaning kits and fluids worth buying?
For printers with removable heads, a simple kit is essentially the distilled-water method with convenient packaging — harmless if used as directed. Be sceptical of aggressive solvent claims, and never use any fluid inside a printer whose head is not designed to be removed.
Should I run the deep or power cleaning on my printer?
Most inkjet ranges offer two tiers: a standard cleaning and a deeper, thirstier power or intensive cleaning that purges far more ink in one pass. Reserve the deep tier for the situation it exists for — a clog that has survived two standard cycles separated by a proper overnight rest — and treat it as a once-per-episode tool rather than a repeatable step, because its ink cost and waste-pad cost are several times the standard cycle’s. After a deep clean, always rest the printer again before judging it; the same soaking logic applies, and many heads that look unchanged immediately after a power clean print a complete nozzle check the following morning.
The Bottom Line
Diagnose with a nozzle check, clean with the built-in cycle no more than three times, rest the printer overnight, and escalate to gentle manual methods only where the manual allows. Most clogs surrender to patience; the rest are a sign to change habits — or technology — rather than to keep flushing ink.
Related Guides
Keep exploring with these guides and roundups from the same printers collection: