Disclosure: As an Amazon Associate, ilcastellomenu.com earns from qualifying purchases. Product examples below link to Amazon, where you can check current availability and specifications; this guide itself lists no fixed prices because printer pricing and bundles change frequently.
Knowing how to clean a printer properly solves a surprising share of print-quality problems: streaks, smudges, faded patches and mystery lines are often dirt, not dying hardware. The safe routine is simple — power down, use a dry or barely damp lint-free cloth, clean the paper path and glass, run the built-in cleaning utilities, and never spray liquid directly inside the machine. This guide covers inkjet, laser and all-in-one models in that safe order, explains which parts you should never touch, and shows how a ten-minute monthly routine prevents most clogs and jams before they start.
If streaks persist after cleaning, work through How to Fix Faded Printer Prints next, and keep How to Maintain a Printer bookmarked for the longer-term schedule.
Before You Start: Safety and Supplies for How to Clean a Printer
Cleaning a printer is a low-risk job if you respect two facts: the machine contains hot and electrically sensitive parts, and several internal surfaces are damaged by the wrong cloth or liquid. Five minutes of preparation protects both you and the printer.
Power down and unplug
Turn the printer off and unplug it from the wall before opening any cover. On laser printers, wait at least thirty minutes after the last print job: the fuser unit runs hot enough to burn skin and stays hot long after the job finishes. Remove paper from all trays so sheets do not pick up dust while you work.
What you need
Gather lint-free microfibre cloths, distilled water, cotton swabs, a soft brush or a can of compressed air used in short bursts, and disposable gloves if you handle toner. Distilled water matters because tap water leaves mineral deposits on scanner glass and printhead contacts.
What to avoid
Never use paper towels (they shed fibres), abrasive pads, ammonia-based glass cleaner on coated scanner glass, or a vacuum cleaner inside a laser printer — ordinary vacuums can damage sensitive parts and scatter fine toner. Never spray any liquid directly into the machine; always apply it to the cloth first.
In this guide
Cleaning the Outside and the Scanner Glass
Start with the surfaces you touch. Dust on the exterior migrates inward every time a cover opens, and a smeared scanner glass reproduces its smudges on every copy and scan you make.
Exterior and control panel
Wipe the case, trays and control panel with a cloth lightly dampened with water. Pay attention to the paper input area, where paper dust accumulates fastest. Dry everything before reloading paper, because damp tray surfaces encourage sheets to stick together and misfeed.
Scanner glass and the white backing plate
Clean the flatbed glass with a cloth barely dampened with distilled water, then buff dry with a second cloth to prevent streaks. Hold the glass up to the light: the smudge you can see at an angle is the one printing onto your scans. Wipe the white plate on the underside of the lid as well — dirt there shows as grey shadows on copies.
The ADF glass strip
On all-in-ones with a document feeder, a narrow glass strip beside the main glass handles feeder scans. A single speck on this strip draws a straight vertical line down every scanned page. If your scans show a perfect line but flatbed scans are clean, this strip is the culprit — a point that also appears in Best Printers for Scanning buying advice because feeder quality varies so much.
Printer cleaning at a glance
| Area | How to clean | How often | Never do |
|---|---|---|---|
| Scanner glass | Distilled water on lint-free cloth, buff dry | Monthly | Ammonia cleaner on coated glass |
| Pickup rollers | Damp cloth, rotate by hand | Every few months | Solvents or abrasives |
| Inkjet printhead | Built-in cleaning cycle, max 2–3 runs | When nozzle check shows gaps | Remove a fixed printhead |
| Laser interior | Dry cloth, gloves, cooled fuser | Every toner change | Household vacuum inside |
| Paper path | Soft brush or short air bursts | After jams | Spray liquid into the machine |
Cleaning the Paper Path and Rollers
Paper dust is the invisible enemy inside every printer. It coats the rubber pickup rollers until they slip, and it settles in the paper path where it transfers onto prints as specks and smudges.
Pickup and feed rollers
Open the rear access door or remove the tray to reach the rollers. Wipe each roller with a cloth dampened with distilled water, rotating it by hand to clean the full circumference. If a roller looks shiny and glazed rather than matte, it may be worn rather than dirty — cleaning helps slipping, but a hardened roller eventually needs replacement.
Removing dust from the path
Use short bursts of compressed air with the can upright, or a soft brush, to clear dust from the paper path and tray cavities. Work debris out of the printer, not deeper into it. Many models also offer a roller-cleaning or paper-feed-cleaning utility in the maintenance menu that rotates the rollers while feeding a sheet — use it after manual wiping.
Cleaning the output area
Ink overspray and toner dust collect around the output slot. Wipe the area gently; on inkjets, a build-up of dried ink near the exit can drag on fresh prints and cause the smearing people often blame on the cartridges.
Cleaning Inkjet Printheads the Safe Way
Inkjet quality problems usually trace back to the printhead nozzles, where ink dries into partial blockages. The printer’s own utilities are designed for exactly this and should always be your first and second attempts.
Run a nozzle check first
Print the nozzle-check pattern from the maintenance menu before cleaning anything. The pattern shows exactly which colours and nozzle rows are missing, so you can judge whether cleaning helped instead of guessing from a photo print.
Use the cleaning cycle — sparingly
Run one head-cleaning cycle, then print another nozzle check. If gaps remain, run one more. Stop after two or three cycles: each cycle consumes significant ink, and endless cycling wastes more ink than the clog. If patterns are still broken, leave the printer powered on overnight — the next morning’s check often improves as ink softens the blockage. Our dedicated walkthrough, How to Unclog a Printer, covers the stubborn cases step by step.
The paper-towel method, with care
For removable printheads only, some owners rest the head on a folded paper towel dampened with distilled water to wick out dried ink. Follow your manual: if the printhead is fixed in the machine, do not attempt removal, and never use hot water, alcohol or force. When in doubt, stop — a damaged printhead costs more than a service visit.
Cleaning a Laser Printer Without Making a Mess
Laser printers contain loose toner — a fine powder that stains everything and should never be inhaled in quantity. The work is still straightforward if you go slowly and treat toner like powdered pigment.
Handling toner safely
Work in a ventilated room, wear gloves, and lay paper under the printer. Remove the toner cartridge and place it on the paper, away from bright light, which can damage the drum surface on cartridges with integrated drums. Wipe spilled toner with a dry cloth; cold water only if it reaches skin or fabric, since heat sets it.
Interior wiping and the transfer roller
With the printer unplugged and cooled, wipe accessible interior surfaces with a dry lint-free cloth. Do not touch the shiny drum surface with fingers — skin oils create permanent print defects. Many printers include a cleaning page or drum-cleaning mode in the maintenance menu; run it after manual cleaning to sweep remaining dust through.
Corona wires and laser window (where accessible)
Some models expose a corona wire with a built-in slider tab designed to be moved back and forth to clean it — use it only if your manual describes it. A dirty laser scanner window causes uniformly light prints across the whole page, one of the causes catalogued in How to Fix Faded Printer Prints.
How Often to Clean, and the Mistakes That Cause Damage
A light, regular routine beats an annual deep clean. Tie printer cleaning to events you already notice — a new cartridge, a paper jam, the first streak on an important document — and the machine rarely reaches crisis point.
A sensible cleaning schedule
Wipe the exterior and scanner glass monthly if you print weekly. Clean rollers every few months or at the first sign of misfeeds. Run an inkjet nozzle check whenever output looks off, and give any printer a gentle clean after a jam, since jam debris seeds the next one — see How to Fix Printer Paper Jams for the full jam routine.
Mistake: cleaning with the printer on
Moving carriages and live circuits make powered cleaning risky for you and the machine. The only powered steps are the software utilities, run with covers closed.
Mistake: overusing compressed air
Long blasts can drive dust into sensors and, if the can tilts, spray propellant liquid onto optics. Short, upright bursts, from a distance, every time.
Cleaning the Parts People Forget
Once the glass, rollers and paper path are done, a handful of overlooked areas still collect the grime that causes intermittent faults. None of them needs tools beyond what this guide has already used, and together they take five minutes.
The output tray and exit slot
Finished prints slide across the output area, and inkjet overspray plus paper dust build there into a film that can mark fresh pages. Wipe the tray and the surfaces around the exit slot with a dry or barely damp cloth. On printers that stack output face-up, this film transfers directly onto the printed side, which is why ‘mystery smudges’ so often trace back here.
Vents and fan intakes
Printers cool themselves through vents that slowly clog with household dust, especially in homes with pets. A soft brush across the vent slats — from outside the machine only — keeps airflow healthy. Overheating rarely announces itself clearly; it appears as intermittent shutdowns on long jobs, so this is cheap insurance for laser owners in particular.
Connectors and the rear panel
Dust in USB and Ethernet ports causes connection faults that masquerade as network problems. With the printer unplugged, brush the ports gently and reseat cables firmly when you reconnect. While you are at the back, confirm the rear access door is fully latched — a door a millimetre out of place can trigger persistent jam warnings.
The waste-ink area: know its limits
Inkjet printers park their printheads over absorbent pads that collect ink from cleaning cycles. These pads are a service item, not a user-cleaning item: when a printer reports its waste-ink pads are full, that is a manufacturer service message, not an invitation to open the machine. Note the message, and weigh service against replacement honestly, especially on an older, inexpensive model.
Cleaning After Specific Incidents
Some events call for an immediate, targeted clean rather than waiting for the monthly routine. Responding promptly to these four incidents prevents most long-term damage.
After a paper jam
A jam sheds fibres and sometimes toner or ink along the path. Once the sheet is out, inspect the full path with a torch, remove every fragment, and wipe accessible rollers before printing again. Skipping this step is why one jam so often becomes a week of jams — the debris from the first event causes the rest.
After a cartridge leak
If an ink cartridge leaks, power off, remove the cartridge, and blot — never wipe — pooled ink with a disposable cloth, working from the edges inward so you do not spread it. Let the area dry fully before installing a replacement. A leaking cartridge should not be reinstalled ‘to use it up’; leaks recur under pressure and the second incident is worse.
After a toner spill
Toner spills look catastrophic and clean up patiently: dry cloths, slow movements, no vacuum cleaner, and cold water only for skin. Wipe accessible surfaces, run the printer’s cleaning page if it offers one, and print several blank pages to clear the path before trusting it with real documents.
After moving house
Transport shakes dust loose inside any printer. Before the first real job in the new home, run the exterior and glass routine, check the paper path for packing material or debris that entered during the move, and print a nozzle check (inkjet) or cleaning page (laser) to confirm the journey did no harm.
Cleaning Tools and Products: What Is Worth Owning
A printer cleaning kit fits in a small box and costs very little, but the market also sells specialised products of doubtful value. Here is the honest inventory — what earns its place, and what you can safely never buy.
Worth owning: the basics
Lint-free microfibre cloths in quantity, distilled water in a small spray bottle (for the cloth, never the machine), cotton swabs for edges and corners, and a soft natural-bristle brush cover ninety-five percent of all printer cleaning. Add disposable gloves if you own a laser, and a torch — the most underrated diagnostic tool in this entire guide series — for inspecting paper paths.
Worth owning for inkjet households
A spare set of cartridges means a cleaning session never waits on a delivery, and keeping the printer’s original packaging inserts lets you move it without ink incidents. Some owners keep a small supply of the manufacturer’s cleaning or maintenance cartridges for long-stored machines; for normally used printers they are unnecessary.
Use with caution: canned air and cleaning sheets
Canned air is useful in short, upright bursts and harmful as a pressure washer — it can drive dust onto sensors and optics. Adhesive or treated cleaning sheets sold for paper paths work on some models and shed residue on others; if your manual does not mention them, skip them and clean the rollers by hand instead.
Not worth it: miracle fluids and universal kits
Bottled ‘printhead revival’ solvents of unknown composition risk more than they promise, particularly in fixed-head printers. Universal kits bundle the basics above at a markup with extras you will never open. Assemble the basics yourself, keep them with the printer, and you own everything a professional would reach for in a home visit.
Cleaning a Printer You Inherited or Bought Used
A second-hand or inherited printer deserves one thorough clean before it joins your household, because you do not know its history — what paper it ate, what spilled inside it, or how long it sat. This single session resets the machine to a known condition.
Start with a full inspection
With the printer unplugged, open every designed access point and look carefully with a torch: paper scraps in corners, toner dust patterns that suggest an old spill, ink pooling near the carriage park position, and dust thickness that betrays years of storage. What you find decides whether this is a cleaning session or a decision that the machine is not worth adopting.
Clean in the standard order, twice as patiently
Work through this guide’s normal sequence — exterior, glass, paper path, rollers — but expect each stage to need a second pass. Rollers on a long-stored printer are often glazed as well as dusty; cleaning improves them, but note how they look, because a used printer that still misfeeds after honest cleaning is telling you its rollers are at end of life.
Fresh supplies before judging quality
Never judge an inherited printer using the supplies it arrived with, which may be ancient, refilled or partially dried. Install fresh ink or toner, run the appropriate checks — nozzle pattern or cleaning page — and only then evaluate output. Many ‘broken’ gifted printers are simply printers wearing three-year-old cartridges.
Reset its digital life too
Clear the previous owner’s network settings, Wi-Fi credentials, scan destinations and any stored documents or address books. This is partly hygiene and partly privacy — the machine may hold the former owner’s email addresses and network password. A factory network reset, then your own setup, makes the printer truly yours.
Gear for This Guide
The examples below come from our verified product pool and illustrate the printer classes discussed in this guide. They are examples, not a ranked list — use the criteria in this article to judge any model, including newer revisions of these machines.

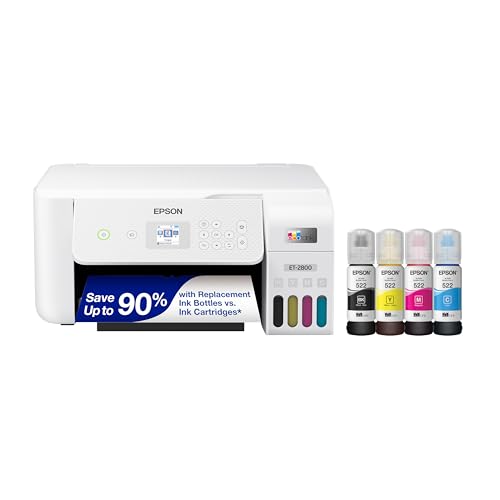
Epson EcoTank ET-2800
Tank printers like this EcoTank make cleaning easier in one respect: visible tanks and accessible maintenance menus, including nozzle checks and head cleaning, are front and centre in the driver. Epson EcoTank ET-2800 — Check on Amazon

Brother MFC-J1010DW
A typical cartridge all-in-one whose flatbed and feeder glass reward the glass-cleaning routine above — feeder lines almost always trace to that narrow glass strip. Brother MFC-J1010DW — Check on Amazon
Cleaning for Your Environment: Dusty Homes, Pets, Workshops and Kitchens
The right cleaning routine depends less on the printer than on the air around it. A printer in a spare bedroom in a new-build home breathes clean air and can go months between interior wipe-downs, while the same model in a farmhouse, a woodworking household, or a flat with two shedding dogs collects contamination at several times the rate. Read your environment honestly and adjust the schedule from the main routine accordingly, because most “unreliable printer” stories are really “printer living in difficult air” stories.
Pet hair deserves special attention because it behaves differently from dust: hairs are long, they bridge across rollers and sensors, and they work their way into the paper tray where they are picked up sheet by sheet and carried through the mechanism. If animals share the room, keep the paper tray closed or covered when the printer is idle, store the paper stack in its wrapper or a closed drawer rather than loaded for weeks, and add a monthly pass with a dry lint-free cloth across the tray and feed area. A printer cover, or even a clean cloth draped over the machine between uses, prevents more trouble in a pet household than any amount of corrective cleaning afterwards.
Workshop and garage-adjacent printers face fine abrasive dust from sanding, cutting and grinding, which wears rollers and coats internal optics. If a printer must live in that environment, keep it inside a cabinet with the doors closed except while printing, run the shortest practical paper path jobs with the rear cover closed, and shorten every interval in this guide by half. Kitchen printers collect a different contaminant: a thin film of cooking grease that makes exterior surfaces tacky and attracts dust into a stubborn paste. Wipe kitchen printers’ exteriors more often with a cloth barely dampened with water and a drop of mild dish soap, then dry fully, and never spray cleaner near the paper path where residue transfers to sheets.
Homes in humid or coastal climates add moisture and salt air to the problem. Paper left loaded absorbs humidity and feeds poorly, so store the working stack in a sealed box with the rest of the ream and load smaller quantities more often. Wipe exterior metal contacts you can see — USB ports and power inlets — only when unplugged and only with a dry cloth, and if prints emerge wavy or the machine smells musty, run a few plain pages through to dry the path before judging print quality. In every difficult environment, the principle is the same: prevention through covers, storage and placement beats repeated deep cleaning.
The Scanner’s Hidden Glass: Cleaning the ADF Strip and Document Feeder
Many owners clean the big flatbed glass carefully and still see a stubborn vertical line on every scan and copy made through the automatic document feeder. That line almost never comes from the main glass. Feeder scans pass over a separate narrow strip of glass, often no wider than a finger, located beside or beneath the main platen, and a single speck of correction fluid, pen ink or adhesive on that strip paints a line down the entire length of every feeder scan. Because the strip is small and easy to overlook, it collects debris precisely where a sheet sliding over it presses contamination firmly into place.
To clean it, unplug the printer, lift the lid, and find the strip by following the feeder’s paper path: it sits where documents pass before or after the main glass area, sometimes marked by a plastic guide or a slightly different surface finish. Shine a phone torch across it at a low angle; specks that are invisible under room light cast tiny shadows and become obvious. Clean with a lint-free cloth lightly dampened with water, using gentle strokes along the strip rather than across it, then dry with a second cloth. Stubborn spots such as dried correction fluid yield to patient repeated passes with the damp cloth — never to a fingernail, scraper or solvent, all of which scratch the coating and turn a removable speck into a permanent line.
While the feeder is open, clean its rollers and separation pad as well. Feeder rollers accumulate the same paper dust as the main path, plus ink and pencil graphite transferred from the documents themselves, and a feeder that skews pages or grabs two at once is usually dirty rather than broken. Wipe each roller with the damp cloth while rotating it by hand to expose the full circumference, let everything dry for several minutes, then test with a stack of five ordinary pages. A feeder that scans those pages straight, singly and without a line has been fully revived in the great majority of cases, and the whole job takes less time than the frustrated re-scanning it replaces.
Dirt or Wear? Telling Cleaning Problems From Failing Parts
Not every print defect is dirt, and cleaning a worn part wastes an afternoon while convincing you the machine is dying. Learn the signatures. Dirt produces defects that change: streaks that move between pages, spots that vary, feeding that worsens gradually in dusty weeks and improves right after a clean. Wear produces defects that are stable and repeatable: the identical mark at the identical interval down every page, a grinding or clicking sound at the same point in each cycle, or feeding that fails on the first sheet regardless of how carefully you clean the rollers.
A repeating mark is especially diagnostic. Measure the distance between repeats with a ruler; that distance equals the circumference of the roller or drum causing it, and your manual or a quick search for the model’s common intervals will usually identify the component. Cleaning fixes a dirty roller, but a roller with a flat spot, a nick, or a hardened glazed surface will keep marking pages after any amount of wiping. Likewise, pickup rollers eventually wear smooth and lose their grip permanently; the test is that a thorough clean restores feeding for only a few days before misfeeds return. That pattern — brief improvement, rapid relapse — is the classic signature of a part at end of life rather than a dirty one.
On inkjets, distinguish a dirty or clogged head, which cleaning cycles and rest can recover, from a failing head, which produces the same missing band in the nozzle check after multiple correct cleaning attempts spread over a day. On lasers, distinguish a dirty path from a worn drum or fuser by whether a fresh cartridge changes the defect: if the drum is part of the cartridge and the defect vanishes with a new one, the old cartridge was the problem and no cleaning of the machine was ever going to help. Making this distinction before you clean saves supplies, saves time, and turns a vague “the printer is broken” into a specific, solvable statement about one component.
A Cleaning Calendar Matched to How Much You Print
Advice to clean “regularly” fails because nobody knows what regularly means for their machine. Anchor the routine to volume instead. Light users — a few pages a week — should dust the exterior and check the paper tray monthly, run an inkjet nozzle check monthly and print something in colour at least every two weeks, wipe the scanner glass whenever scans look hazy, and do the full paper-path and roller clean twice a year. That sounds like a list, but each item takes minutes, and the monthly rhythm is easy to attach to an existing habit such as paying bills or the first weekend of the month.
Moderate users printing most days should move the roller and tray wipe to monthly, the scanner glass to monthly, and the full interior clean to quarterly, inspecting for toner spill or ink misting each time supplies are changed. Heavy home-office users printing hundreds of pages a week should treat the printer like the production tool it is: weekly exterior and tray checks, monthly roller cleaning, a fresh look at waste-ink or toner collection warnings, and a standing note of page counts so that a sudden rise in jams can be matched against volume rather than guessed at. Busy periods deserve a pre-emptive clean before they start — a ten-minute session before the week you print a thesis, a tax return or a run of event programmes is worth hours of mid-deadline troubleshooting.
Whatever your tier, write the schedule down and keep it with the printer, on paper, where the person who actually does the task will see it. Note the date of each clean and what you found: “rollers very dusty,” “toner spill under cartridge,” “feeder strip speck removed.” Those notes become diagnostic gold later, because the next problem can be compared against a record instead of a memory, and a pattern — dust doubling every spring, jams following a particular paper batch — becomes visible in a way no single cleaning session can reveal.
Keeping It Clean Between Sessions: Micro-Habits That Prevent Deep Cleans
The cheapest cleaning is the kind you never have to do. A handful of small habits, none taking more than seconds, will halve the contamination your printer accumulates. Close lids, trays and covers whenever the machine is idle; an open scanner lid and an extended output tray are dust shelves aimed at the machine’s most sensitive surfaces. Fan a fresh stack of paper briefly before loading it, which knocks loose the cutting dust every ream carries, and shake that dust away from the printer rather than over it. Keep drinks, food and houseplants away from the machine: a single coffee splash or a watering overflow reaches places no cloth can.
Handle paper and supplies with clean, dry hands. Skin oil transferred to rollers and to the top sheets of a stack is a real and underrated cause of feed problems and faint fingerprints on photo prints. When you change cartridges, do it over a surface you can wipe, work slowly, and resist shaking a toner cartridge anywhere near the machine’s open interior. Vacuum the shelf or desk around the printer — never inside it with a standard vacuum, as the main guide explains — before you open the machine for cleaning, so the dust you disturb in the room does not settle straight into the freshly cleaned path.
Finally, use the printer’s own housekeeping. Most models can print a cleaning page, run an alignment, or report supply and waste levels from the maintenance menu; running the built-in page after any interior clean confirms the path is clear and gives damp rollers a safe sheet to dry against. Paired with the storage advice in this guide — supplies sealed, paper wrapped, the machine covered in dusty rooms — these habits stretch the interval between deep cleans from weeks to seasons, which is exactly where a home printer’s maintenance ought to live. Owners of tank models, whose refill routine has its own spill risks, may also find the ownership notes in our ink tank versus cartridge comparison useful for keeping refills tidy.
Cleaning Photo, Wide-Format and Label Printers: Specialist Notes
Specialist printers share the main routine but add surfaces and sensitivities of their own. Photo printers care intensely about the output area and the rear feed slot used for thick media: dust there lands on glossy paper and shows as white specks in dark image areas, so wipe the feed slot and output tray before an important print run, and store photo paper in its box, handled by the edges. Borderless printing leaves ink overspray on the platen beneath the paper path; that sponge or pad area is designed to collect it, and while you should never scrub it aggressively, gently blotting pooled wet ink with a folded lint-free cloth after a heavy borderless session prevents it transferring to the back of the next sheet.
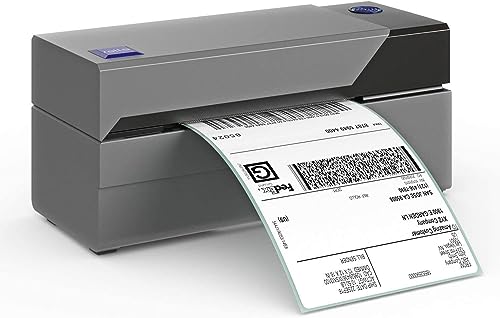
Wide-format machines add long paper paths and roll media. Clean the roll compartment and cutter area where paper trimmings accumulate, check that the leading edge of a new roll is cut square and free of handling dents, and remember that a machine wide enough to walk around collects dust on top that falls in the moment you open the cover — wipe the top first, always, before opening anything. Label printers, mostly thermal models, need their printheads cleaned far more often than page printers because adhesive residue and label coating build up directly on the heating elements; use the manufacturer’s cleaning pen or card, or a lint-free cloth with the approved solution for that model, after every few rolls, and never print with a label missing from the liner, since exposed adhesive will foul the head in a single pass. If labels are a growing part of your work, the models in our best label printers for small business roundup publish their head-cleaning method in their manuals, which is worth checking before you buy.
Frequently Asked Questions
Can I use a vacuum cleaner or compressed air inside my printer?
Neither is a good idea inside the machine. A standard vacuum’s nozzle generates static that can damage electronics, its suction can pull small parts and sensors out of alignment, and on a laser printer it can draw fine toner particles through the motor and blow them into the room unless it is a toner-rated vacuum with the correct filtration. Compressed air mostly relocates dust deeper into the mechanism and can drive particles onto optics and sensors that were previously clean. Use both freely around the printer — the desk, the shelf, the floor — and use a soft brush and lint-free cloth, as this guide describes, for everything inside.
Is it safe to use rubbing alcohol on printer rollers?
Only where the manufacturer says so. Plain water on a lint-free cloth is the safe default for pickup and feed rollers, and it restores grip in most cases by removing paper dust and surface glaze. Some manufacturers approve a small amount of isopropyl alcohol for specific rubber rollers, while others warn that alcohol dries and cracks the rubber over time. Check your manual for your exact model; if it is silent on the subject, stay with water. Never use alcohol, or any solvent, on a laser printer’s drum, transfer surfaces or scanner glass coatings.
Why do prints still look dirty right after I cleaned everything?
Usually because the contamination was in the paper, not the printer. A stack that sat loaded in a dusty room carries dust on every sheet, and the first prints after a clean simply collect what the fresh path picks up from those sheets. Try a fresh stack from a newly opened ream, print ten plain pages to flush the path, and then judge the result. If defects persist identically after that test, use the pattern-reading approach in this guide: a stable, repeating defect points to a worn component rather than to dirt, and further cleaning will not change it.
How do I clean a printer that has been in storage for a year?
Treat it as the used-printer routine in this guide, in order: exterior and interior dust removal with the machine unplugged, tray and roller wiping, scanner glass cleaning, then fresh supplies if the installed ones are old — inkjet cartridges and opened toner both age in storage. Power on, print the built-in status or nozzle-check page before connecting it to a computer, and for an inkjet, allow a full overnight rest powered on after the first cleaning cycle before judging the result, because stored printheads often recover gradually as fresh ink re-wets the nozzles. Only connect and update software once the machine proves it can print cleanly on its own.
Can I use regular glass cleaner on the scanner glass?
Avoid ammonia-based cleaners, which can damage anti-reflective coatings on some scanner glass. A cloth dampened with distilled water, buffed dry, cleans effectively and is always safe.
How do I stop my inkjet clogging between cleanings?
Print something in colour at least every week or two, keep the printer powered so it can run its own brief maintenance, and store it away from heat sources that dry ink faster.
Why do my scans have a straight vertical line?
Dirt on the narrow ADF glass strip used by the document feeder. Clean that strip carefully; flatbed scans will be unaffected, which is the diagnostic clue.
Is it safe to use compressed air inside a printer?
In short upright bursts, yes, for dust in the paper path. Keep the can upright and at a distance, and never blast directly at sensors, optics or a laser printer’s drum.
How many head-cleaning cycles should I run?
One, then a nozzle check. Repeat once or twice at most. Beyond that you are mostly wasting ink; let the printer rest powered overnight and reassess.
What should I do about spilled toner?
Wipe it up dry with a disposable cloth, avoid breathing the dust, and use only cold water on skin or fabric. Never use a standard household vacuum, which can spread fine toner through its exhaust.
Can I clean my printer with baby wipes or kitchen wipes?
It is not recommended. Household wipes leave fibres and chemical residues, and their moisture level is uncontrolled. A lint-free cloth with distilled water does the same job without depositing anything on glass, rollers or contacts.
Why does my printer smell dusty or hot when printing?
A laser printer’s fuser warms accumulated dust during long jobs, producing a faint hot-dust smell. Regular exterior and vent cleaning reduces it. A strong electrical or burning smell is different — stop using the printer and treat it as a fault, not a cleaning issue.
How do I clean a printer that has been in storage?
Expect dust throughout the paper path and, for inkjets, dried nozzles. Clean the exterior, glass and path first, install fresh supplies if the old ones are ancient, then run a nozzle check and at most a couple of cleaning cycles, resting the printer powered overnight between attempts.
Should I clean a brand-new printer before first use?
Not internally, no. A new machine leaves the factory clean, and opening it up before first use risks introducing the very dust you are trying to avoid. What is worth doing is external: wipe the scanner glass once, because protective films and packaging can leave a faint residue that shows in your first scans, remove every piece of packing tape and transport material the quick-start sheet lists, and load fresh paper from a new ream rather than a stack that has been sitting open on a desk. Then print the alignment and test pages the setup routine offers. If those pages are clean, the printer is clean, and your maintenance calendar starts from that day.
What should I do with the cloths and waste from cleaning?
Dispose of toner-contaminated cloths and wipes in household waste, sealed in a bag if they carry visible toner, and wash your hands afterwards; toner is a fine powder that transfers readily to skin and clothing. Cloths used only for dust and the exterior can be washed and reused, but keep printer cloths separate from kitchen and bathroom cleaning cloths so grit and toner never travel to other surfaces. Never rinse toner waste down a drain in quantity, and never burn it. Ink-stained materials from inkjet cleaning can go in ordinary household waste once dry.
The Bottom Line
Clean in a safe order — exterior and glass, paper path and rollers, then the print mechanism using the printer’s own utilities — with the machine unplugged, a lint-free cloth, and distilled water as your only liquid. That routine resolves most streaks, smudges and feed problems, and it takes less time than reprinting a ruined document batch.
Related Guides
Keep exploring with these guides and roundups from the same printers collection: