Disclosure: As an Amazon Associate, ilcastellomenu.com earns from qualifying purchases. Product examples below link to Amazon, where you can check current availability and specifications; this guide itself lists no fixed prices because printer pricing and bundles change frequently.
Knowing how to fix printer paper jams safely starts with stopping the printer, open the access areas the manual specifies, and remove the sheet by pulling it slowly and evenly in the direction of the paper path with both hands — never yank it backwards or tear it out in pieces. Then check the whole path for scraps, reload paper correctly, and run a test page. Most jams are caused not by the printer but by how paper is stored and loaded: damp or curled sheets, overfilled trays, mixed paper types and loose guides. This guide covers clearing a jam without causing damage, and then preventing the next one, which is where the real win is.
Jams that keep happening alongside misfeeds often trace to dirty or worn rollers — see How to Clean a Printer — while a printer that still refuses to print after clearing needs How to Fix a Printer that Won T Print.
Clearing the Jam Safely: How to Fix Printer Paper Jams Step by Step
A jam feels urgent, but haste is what turns a stuck sheet into torn fragments and damaged sensors. Work slowly, in good light, and follow the paper path rather than fighting it.
Step 1: Stop, open, and look
Cancel the job and turn the printer off. Open the rear access door and the main cover as your manual directs — most printers are designed for jam access from the rear because paper should exit along its natural path. On laser printers, wait for the fuser area to cool before reaching inside; it stays hot after printing.
Step 2: Remove the sheet in the direction of travel
Grip the sheet with both hands, evenly, and pull slowly and steadily in the direction the paper normally travels. If it resists, stop and look for what is holding it rather than pulling harder. Never pull a sheet backwards through an inkjet’s mechanism unless the manual explicitly instructs it — that direction fights the gears and the carriage.
Step 3: Hunt for scraps and debris
Torn corners and small fragments cause the next jam and can hold sensors in a ‘jam’ state forever. Use a torch and check the full path, including under the carriage and around the rollers. Remove fragments gently with fingers; if a scrap is truly unreachable, a service visit beats forcing tools into the mechanism.
Step 4: Reset and test
Close all doors firmly — many printers will not clear the jam state until every access panel clicks shut. Reload a small stack of fresh paper, power on, and print a test page. If the printer reports a jam with no paper present, a sensor flag may be stuck; power off, re-check the path once more, and restart.
In this guide
Where Jams Happen: Reading the Location
The position of the jammed sheet is diagnostic information. Each location along the path points to a different cause and a different prevention.
Jam at the input: pickup problems
Sheets that crumple at the tray or feed halfway and stop point to pickup rollers that are dusty, glazed or worn, or to paper that is sticking together. Clean the rollers, fan the paper, and reduce the stack height. The roller-cleaning method is detailed in our cleaning guide.
Jam mid-path: path and media problems
A sheet stopping mid-journey suggests debris in the path, paper too thick or stiff for the route, or a label that has peeled and stuck inside. Check for adhesive contamination especially carefully — one peeled label can cause weeks of jams, and it is the reason label sheets should never be re-fed.
Jam at the output: exit and duplex problems
Sheets bunching at the exit often mean the output area is obstructed, the paper is curling excessively in a laser’s heat, or the duplexer is mis-seated after being removed. Reseat any removable duplex unit and confirm nothing blocks the exit slot.
Diagnosing jams by location
| Jam location | Likely cause | Fix |
|---|---|---|
| At the tray / half-fed | Dusty or worn pickup rollers; paper sticking | Clean rollers, fan paper, reduce stack |
| Mid-path | Debris, peeled label, media too thick | Clear path fully, use correct path for media |
| At output | Obstruction, curl, duplexer mis-seated | Clear exit, reseat duplexer, check paper |
| Envelopes crumpling | Wrong feed position or orientation | Manual slot, small batches, follow diagram |
| ‘Jam’ error, no paper | Scrap on sensor or stuck sensor flag | Re-inspect path, close panels firmly, restart |
The Paper Itself: The Cause Nobody Suspects
Printers are blamed for paper’s sins daily. Paper is a natural material that absorbs moisture, curls and sticks — and most repeat jams vanish when paper handling improves.
Moisture and storage
Damp paper feeds in clumps and curls in laser fusers. Store paper sealed in its wrapper, flat, in a dry room — not on a garage floor or beside a kettle. If your home is humid, keep only a small working stack in the tray and the rest wrapped.
Loading technique
Fan the stack to separate sheets, tap it square, load it to (not above) the fill line, and set the paper guides snug against the edges. Guides left loose let sheets skew; skew is the seed of most jams. Never mix paper types or sizes in one stack, and never top up new paper onto old without squaring the combined stack.
Paper quality and weight
Very cheap, dusty paper sheds fibres that coat rollers and sensors. Paper heavier than the printer’s rating, or run through the wrong path, jams predictably — use the manual feed or straight-through path for card and envelopes, as How to Choose a Printer advises checking before purchase.
Printer-Side Causes and Fixes
When paper and loading are blameless, the machine itself offers a short list of suspects, nearly all user-serviceable.
Dirty or worn rollers
Rollers that slip produce the classic half-fed, crumpled sheet. Clean them with a water-dampened lint-free cloth as described in How to Maintain a Printer. If cleaning stops helping, the rollers are worn; on many models they are an inexpensive user-replaceable part.
Wrong paper settings
If the driver is set to thick or photo paper while plain paper is loaded (or the reverse), feed timing and pressure change and jams follow. Match the paper-type setting to the actual load — a mismatch people introduce while troubleshooting and then forget.
Duplexer and accessory seating
Removable duplexers, rear trays and optional cassettes that are not fully latched create a step in the paper path that catches sheets. Remove and reseat each accessory firmly whenever jams begin after the printer was moved or serviced.
Special Cases: Envelopes, Labels and Card
Special media jam for their own reasons, and each has a correct technique that prevents nearly all of them.
Envelopes
Feed envelopes through the manual slot or the tray position the manual specifies, in small quantities, with the flap oriented as diagrammed. Envelopes left in a hot laser printer can seal themselves; print them in one session rather than leaving them loaded.
Labels
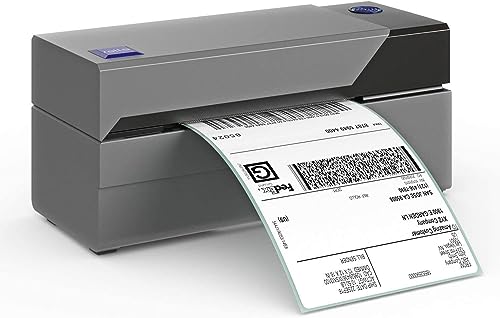
Use full, undamaged label sheets rated for your printer type — laser-rated labels for lasers, since inkjet labels can melt or peel in a fuser. Never re-feed a sheet with labels missing, and prefer a straight paper path where offered. Small-business label volume belongs on a dedicated machine from Best Label Printers for Small Business rather than through a page printer at all.
Card and heavy stock
Heavy media needs the straightest path available and often a ‘thick paper’ setting that slows the feed. Feed card one or a few sheets at a time, support it as it exits so it does not droop and catch, and respect the maximum weight in the specifications.
When Jams Signal Real Trouble
An occasional jam is life; a pattern of jams is a message. Learn to read the pattern before it becomes a repair bill.
Jams at the same spot, every time
A repeat jam at one location means something physical lives there: debris, a damaged guide, a worn roller or a failing sensor. Clean and inspect that exact area carefully rather than performing general maintenance and hoping.
Jams plus noises
Grinding, clicking or tearing sounds with jams indicate mechanical wear or a foreign object — a paperclip or staple in the path is a classic. Stop using the printer until the cause is found; continued printing converts small damage into large damage. And as always, investigation means looking through the designed access panels, never opening a mains-powered printer’s casing.
The replace-or-repair line
If rollers are replaced, the path is clean, paper is fresh and correctly loaded, and jams persist, the machine has a genuine fault. Weigh a service quote against replacement using the workload criteria in Printer Buying Guide — and keep your paper discipline, because it transfers to the new machine for free.
Jam Prevention as a System: The Five-Minute Audit
If jams recur in your home or office, run this audit once rather than clearing jam after jam. It checks the whole system — paper, environment, printer and habits — in the order causes actually occur.
Audit the paper supply
Look at where paper lives and what condition it is in. Paper stored unsealed in a humid room, a stack of mixed remnants in the tray, or a ream of visibly dusty budget paper each predict jams more reliably than any printer fault. Fix the supply first: fresh paper, sealed storage, one type per tray.
Audit the loading habit
Watch the next person load paper — possibly yourself. Guides left wide, stacks over the fill line, sheets added without fanning: these micro-habits are the jam factory. Correct them once, and if the printer is shared, a small note on the tray (‘fan it, guides snug’) outperforms any amount of after-the-fact clearing.
Audit the printer's condition
Shine a torch along the paper path, check the rollers’ grip and appearance, and confirm every removable unit is seated. Rollers that look shiny rather than matte, or a path with visible dust ridges, are a cleaning session waiting to be scheduled — before the next important print run, not during it.
Audit the media mix
List what actually goes through the printer: labels, envelopes, card, photos. If specialty media features weekly, verify each against the manual’s ratings and paths. A printer asked to run out-of-spec media will jam on schedule, and no audit of anything else will save it — the media or the printer has to change.
Teaching the Household: Jams Are a Team Sport
Shared printers jam more than personal ones, and the difference is rarely the machine. A little shared knowledge, delivered kindly, cuts jam rates more than any single fix in this guide.
The two rules that matter most
If everyone learns just two things — pull a jammed sheet slowly along the path, never yank it; and if you clear a jam, check for torn scraps — the worst outcomes disappear. Torn fragments left behind and damage from force cause the cascading failures that make a printer seem cursed.
Report, don't just clear
A jam that gets silently cleared teaches the household nothing, and the pattern — same tray, same media, same time of month — never surfaces. A quick ‘it jammed on envelopes again’ message is data. Patterns are how the real cause gets found, and they only exist if incidents are mentioned.
Put the manual where the printer is
Every printer’s jam-clearing diagram is model-specific, and the moment of a jam is the wrong time to search the internet. Keep the quick-start sheet or a printed page of the jam procedure beside the machine. The correct access door and pull direction for your model beat generic advice, including this guide’s, every time.
Paper Buying Guide for Jam-Prone Households
Since paper causes more jams than printers do, buying paper deliberately is a jam fix in itself. These are the selection rules that separate paper that behaves from paper that generates Saturday-morning incidents.
Buy mid-grade, and buy consistently
The cheapest paper is dusty, unevenly cut and variably moist — three jam causes in one ream. Mid-grade paper from an established maker is uniform enough that your printer’s behaviour becomes predictable, and predictability is what lets you notice real faults. Once you find a paper your printer loves, keep buying it; consistency is a feature.
Match weight to the printer's rating
Every printer specifies a paper-weight range. Standard office paper sits comfortably inside all of them; problems begin at the edges — very light paper that crumples, heavy stock that cannot make the turn. Check the range in your manual once, write it on the tray if you must, and buy inside it.
Store it like you mean it
Sealed, flat, dry, off the floor, away from kettles and radiators. Paper stored well behaves for months; paper stored badly starts causing jams within weeks, and the printer gets blamed for all of them. If your home is humid, smaller reams opened more often beat a giant ream slowly absorbing the season.
One ream test before blaming hardware
Before any repair conversation, run one ream — even one hundred sheets — of fresh, mid-grade paper, correctly loaded. If jams vanish, the diagnosis is complete and the repair budget is saved. This test is so cheap and so decisive that support technicians run it first, and so should you.
Jams in Specific Machines: Duplexers, Feeders and Photo Trays
Certain printer subsystems generate their own jam patterns, distinct from the main paper path. Recognising a subsystem jam saves the frustration of clearing the main path perfectly while the fault sits elsewhere.
Duplex unit jams
Two-sided printing routes the sheet through an extra loop, and jams there hide inside the duplex unit itself — which on many models slides out for exactly this reason. If jams happen only on duplex jobs, remove the unit, clear it separately, check its rollers and path, and reseat it with a firm click. Also confirm the paper is within the duplex weight range, which is often narrower than the printer’s overall range.
Document feeder jams (on the scanner)
All-in-ones can jam in the automatic document feeder while scanning or copying — a different mechanism from the printer’s paper path, with its own access cover. Feeder jams come from dog-eared, stapled or mixed-size originals. Open the feeder cover as the manual shows, remove the original along its path, and never feed stapled or taped originals again; the flatbed exists for those.
Photo and specialty tray jams
Printers with a separate photo tray or rear specialty feed jam when the tray is not fully engaged or the media is loaded print-side wrong and slips. Engage the tray until it seats, load a small stack, and select the matching paper type so the printer uses the feed timing that media expects. Specialty paths reward precision and punish approximation.
Gear for This Guide
The examples below come from our verified product pool and illustrate the printer classes discussed in this guide. They are examples, not a ranked list — use the criteria in this article to judge any model, including newer revisions of these machines.

PANTUM P2502W
A representative simple laser paper path: short, mostly straight routes like this are inherently less jam-prone than long curved paths. PANTUM P2502W — Check on Amazon

Brother HL-L2460DW
A representative duplexing laser — its removable rear access illustrates the designed jam-clearing route this guide tells you to use. Brother HL-L2460DW — Check on Amazon
The Phantom Jam: When the Printer Insists and No Paper Is There
Few messages erode trust like a jam warning on an empty paper path, but the printer is not lying — it is reporting what its sensors believe, and sensors can be fooled in a small number of specific ways. Work them in order. First, a fragment: a corner of a previous page, no bigger than a stamp, torn off during an earlier clearing and left sitting on a sensor flag deep in the path. Open every access the manual allows, use a torch, and look specifically for small, pale scraps at bends and roller pairs rather than for whole sheets; the phantom jam is a torn corner’s signature move. Second, a displaced sensor flag: the small plastic arms that pages push as they pass can be bent or knocked out of their seat by an earlier forceful clearing, after which they report a page that never leaves. If a flag is visibly out of place and does not spring back freely, that is a service item rather than a home adjustment — note it and stop, because forcing sensor arms converts a cheap repair into a broken one.
Third, contamination on an optical sensor: some paths detect paper with light rather than levers, and a film of paper dust can blind them into permanent alarm. A gentle pass with a dry, soft brush or a puff of air from a hand blower — not a compressed-air canister, whose blast drives dust deeper and can chill components — across the sensor areas you can reach is the safe remedy. Fourth, the honest false alarm after a real jam: some machines need their jam state formally cleared by opening and closing the specified cover, or by confirming on the panel, after the paper is out; the manual’s clearing sequence ends with a step owners skip because the path already looks empty. If the phantom survives all four checks with the path demonstrably clear and every cover cycled, record the exact message and treat it as the machine reporting an internal fault in its own language — that is a technician conversation, and arriving with your four checks already done will shorten it considerably.
Clearing the Difficult Locations: Fuser Area, Duplexer and Rear Path
Most jams surrender at the tray or the front access, but three locations demand extra knowledge. The fuser area of a laser printer — deep inside, where pages pass between heated rollers — carries the comparison’s only real safety note: those rollers stay hot enough to burn for some minutes after printing, and a page wrapped around them is also the most fragile extraction you will ever perform, because heat has made it brittle. Switch the machine off, wait for it to cool properly, then work with the patience the main guide prescribes, easing the sheet out in the direction of travel a few millimetres at a time. A page that tears there is not a disaster, but every fragment must be accounted for before the machine runs again, because a scrap left against the fuser will bake, smell, and eventually mark every print.
The duplexer — the unit that flips pages for two-sided printing, often a removable tray or rear module — traps pages in a path owners forget exists. If jams cluster on two-sided jobs, remove the duplexer exactly as the manual directs and inspect its rollers and its narrow turn, where a page that entered slightly skewed has nowhere to go. Rear access doors, fitted to many models precisely to give the straightest extraction route, are the correct door for thick media jams: card and labels that entered from a rear feed should leave by the rear, never be dragged backwards around the tight front turn, which is how coatings get scraped off inside the machine and rollers get their damaging workout. The general rule governs all three locations: extract along the path the paper was travelling, through the nearest door the designers provided, at the speed of the slowest fragment — and when a location is hot, deep or sensor-dense, let the machine cool and your own urgency cool with it.
Double Feeds and Missing Pages: The Jam’s Close Relatives
A printer that pulls two or three sheets at once has not jammed, but it is failing at the same job — separating one page from the stack — and it causes jam-adjacent damage: overlapped pages that crumple at the first turn, print spread across two sheets, and the occasional true jam when the doubled thickness meets a narrow point. The mechanism of separation is a partnership between the pickup roller’s grip and a separation pad or roller’s restraint, and double feeding means the restraint is losing: the pad is glazed or worn, the stack was fanned poorly and sheets cling with static, or the paper is so light, so smooth or so humidity-softened that the pair cannot tell sheets apart. Clean both partners as the cleaning sections describe, fan and reload the stack, and test with fresh paper from a sealed ream before condemning parts; paper-side causes outnumber pad failures several times over.
The opposite fault — the printer cycling but lifting no page at all — belongs to the same family. Listen: a pickup roller spinning against the stack with a faint polishing sound is slipping on glaze or dust, and cleaning it restores the grip in most cases; a mechanism that does not even attempt the lift is reporting something electrical or a tray not fully seated, which reseating the tray firmly sometimes cures on the spot. Treat feed faults and jams as one diagnostic territory with one toolkit — fresh paper, clean rollers, correct loading, honest tray guides — because in practice they are one system wearing different symptoms, and the household that masters the toolkit stops distinguishing them entirely: the printer simply feeds, which was the point.
Seasonal Jams: Humidity, Static and the Paper’s Memory
Owners in changeable climates often notice what feels like superstition: the printer jams in August and in January and behaves in between. Both extremes have mechanisms. In humid months, paper absorbs moisture unevenly, sheets swell microscopically, edges wave, and the stack’s friction changes character; pages that fed singly in spring travel in clinging pairs, and a sheet that enters the heated fuser path carrying moisture can curl hard enough to miss its exit guides entirely. The countermeasures are storage, not force: keep the working ream sealed until needed, load smaller stacks more often so loaded paper spends less time breathing damp air, and in a genuinely humid room consider keeping the paper supply in a closed box with the rest of the household’s moisture-sensitive goods rather than in the open tray.
In dry, heated winter air the enemy inverts: static electricity. Sheets leaving a stack in very dry conditions cling, repel and misalign with a life of their own, double-feeding and skewing in ways that mimic worn rollers. Fanning the stack thoroughly before loading discharges some of it and separates the sheets mechanically; handling paper less, and loading it straight from the wrapper, helps too. A room humidifier, where one is already running for the humans, quietly improves the printer’s winter behaviour as a side effect. The diagnostic lesson generalises beyond seasons: when a feeding fault arrives with the weather, suspect the paper’s condition before the machine’s, and run the fresh-ream test — ten pages from a newly opened, room-stored ream — before any part is cleaned twice or condemned once. Paper remembers the room it lived in, and it tells the printer about it on every page.
After a Severe Jam: The Inspection That Prevents the Sequel
A bad jam — a page concertinaed through the whole path, media torn in several places, anything involving labels or card — deserves a formal close-out rather than a relieved return to work, because severe jams leave souvenirs. Begin with accounting: reconstruct the removed media on the desk like a jigsaw, and if the pieces do not make a whole page, keep looking; the missing corner is in the machine, on a sensor or against a roller, preparing next week’s phantom jam. Then inspect the path end to end with a torch: rollers for new scuffs or a label’s adhesive sheen, guides for a bent edge, the exit area for a scrap riding the last roller pair. Labels demand the strictest audit — a label that left its backing sheet inside the printer will wrap a roller and must be found, patiently and completely, before the machine prints again.
Close with a proving sequence rather than a leap back to real work. Print five single blank pages and examine each: a page emerging with a new crease, mark or curl localises remaining trouble to a path section, while five clean pages acquit the mechanism. Follow with a real document, then a duplex job if the jam involved two-sided printing, since each path must re-earn trust separately. Finally, note the episode — date, media involved, where it stopped, what you found — on the printer’s record card. Severe jams that recur with the same media are the machine delivering a verdict about that stock or that tray, and the note is what lets you hear the verdict the second time instead of the sixth. If the proving pages emerge damaged despite a clear path and honest paper, the jam has likely bent or displaced something beyond home adjustment, and that finding — specific, evidenced, early — is exactly what a repairer needs to hear.
Teaching the Machine’s Limits: Media the Path Cannot Forgive
Some jams are not faults at all but negotiations the paper was always going to lose, and recognising them saves repeat performances. Every printer’s manual states a maximum media weight and a list of supported types, and those numbers describe the physical truth of its tightest turn and its rollers’ grip: card above the limit will stall at the bend no matter how new the machine is, and the correct response is a different path — the straightest rear route, if fitted — or a different printer for that job, not a firmer push. Envelopes with clasps, windows in unexpected positions, or heavy embossing; label sheets part-used, curled from storage, or printed twice; transparencies and specialty films not rated for your technology — each is a jam scheduled in advance, and laser owners add one more: media whose adhesive or coating is not rated for fuser heat can do damage no inkjet would ever face.
Build the household’s media knowledge into a small, physical system: the approved stocks live beside the printer, each labelled with the tray and paper-type setting it needs, and anything experimental gets one supervised sheet through the straightest path before it earns a batch. That system sounds fussy for a home, yet it converts the most common jam cause in this entire guide — the wrong sheet, loaded hopefully — into a non-event. The printer’s limits, once learned and labelled, stop being restrictions and become what they always were: the dimensions of a tool that will feed paper faithfully for years inside them. Sellers and heavy media users can compare machines with straighter paths and stronger media handling in our best printers for labels roundup.
A Jam Log: Turning Recurring Jams Into a Diagnosis
One jam is an accident; three jams are data, if someone writes them down. Keep the log where the printer lives and give each episode one line: the date, the media, the tray, where in the path the page stopped — tray mouth, mid-path, duplexer, exit — and what you found when you cleared it. Location is the column that pays. A printer that always stops pages at the same point is pointing at one roller pair, one guide, one sensor, and a repairer can act on that pattern in minutes; a printer whose stop points wander is usually describing paper or loading problems, which wander with it. Media is the second paying column: three episodes on one batch of bargain paper is a verdict on the paper, delivered by the machine at some inconvenience to itself.
The log also disciplines the household’s memory, which is the least reliable component in any troubleshooting. Without it, every jam feels identical and the printer acquires a reputation — “it always jams” — that no single fix can dent. With it, patterns become undeniable and fixes become testable: clean the tray-two rollers, and the log either goes quiet on tray two or it does not. Six quiet months after a fix is a cure you can point to; three more entries at the same location is the evidence that justifies spending money on a part or a service visit without a flicker of doubt about whether you tried the simple things first. Troubleshooting guides, this one included, are general maps; the log is the chart of your own coastline, and in the end it is the chart that gets your printer home.
One last habit separates households that fear jams from households that merely handle them: never leave a cleared jam unexamined. The thirty seconds spent asking where the page stopped and what the paper looked like — creased at a corner, torn at a roller, pristine but doubled — is the cheapest diagnostic in printing, and it is the raw material from which every lasting fix in this guide is built.
Frequently Asked Questions
My printer jams only when printing two-sided. Why?
Because duplexing adds a second, tighter journey that single-sided pages never take: after the first side prints, the page is drawn back in, flipped through the duplexer, and fed again — now carrying a slight curl from its first pass and, on lasers, heat-set stiffness. Any marginal weakness shows up there first: rollers clean enough for one pass but not two, paper too light or too heavy for the duplex path’s stated range, or a duplexer roller that has collected dust precisely where flipped pages grip. Clean the duplexer path and its rollers, confirm your paper weight sits inside the manual’s duplex range — which is often narrower than the single-sided range — and test with fresh standard paper. If duplex jams persist on ideal paper with clean rollers, the duplex unit itself deserves professional eyes.
The jam message appears but the printer is empty and it printed fine yesterday. What changed?
Work the phantom-jam checks from this guide in order: a small torn fragment from the last clearing resting on a sensor, a sensor flag knocked out of place, dust filming an optical sensor, or the machine simply waiting for its jam state to be cleared by the cover-open-and-close ritual its manual specifies. Yesterday’s successful printing is a clue rather than a contradiction — something from the last session, most often a fragment or a disturbed sensor, is this morning’s message. Only after those four checks come back clean should the message be read as the printer reporting an internal fault, at which point recording its exact wording and seeking service is the correct, unembarrassing next step.
Can I use tweezers or tools to pull out a stubborn fragment?
Plastic tweezers, used gently on a fragment you can see and reach without force, are acceptable in the hands of a patient person on an unplugged machine. Metal tools are not: they scratch roller surfaces and drum coatings, bend sensor flags, and can tear a reachable fragment into two unreachable ones. Never insert anything into a laser printer that is still warm from use, and never lever against rollers or the drum to gain purchase. If a fragment cannot be reached with fingers or plastic tweezers through the access the manufacturer provided, it has crossed the line from clearing into disassembly, and that line is where home repair correctly stops — a technician with the covers off will retrieve in minutes what an hour of probing might turn into a damaged imaging system.
Why does the printer jam on the last pages of a big job but not the first?
Two mechanisms conspire at the end of long runs. Heat is the first: a laser’s internals warm thoroughly across a long job, paper passing through late in the run is drier, more curled and more static-prone than the first cool sheets, and marginal paths begin to fail on it. The second is the dwindling stack: as the tray empties, the remaining sheets lose the weight and flatness the pickup system quietly relied on, and the final handful feeds at angles the full stack never did. If your long jobs jam late, split them into chapters with pauses, keep the tray topped up rather than loaded once and forgotten, and treat late-run jamming on fresh paper with clean rollers as an early wear signal worth noting on the printer’s record card.
Should I pull a jammed sheet out backwards?
Generally no. Remove paper in the direction of normal travel, slowly and with both hands, unless your manual specifically instructs otherwise. Pulling backwards can damage gears, carriages and sensors.
Why does my printer say there's a jam when there isn't?
Usually a small scrap is still triggering a sensor, an access panel is not fully closed, or a sensor flag is stuck. Power off, re-inspect the entire path with a torch, close everything firmly and restart.
How do I stop jams happening so often?
Fix the paper discipline: dry stored paper, fanned and squared stacks, snug guides, correct paper settings, and rollers cleaned every few months. Most repeat jams end there.
Can cheap paper really cause jams?
Yes. Low-quality paper is dustier, less uniform and more prone to curling and sticking. A mid-grade paper often ends a jam problem that no amount of printer adjustment could.
Is it safe to reach inside a laser printer after a jam?
Only after switching off and letting the fuser cool — it remains hot enough to burn for some time after printing. Use the designed access doors, and never bypass covers or interlocks.
My printer jams only when duplex printing. Why?
The duplex path adds turns and a removable unit. Reseat the duplexer, check its path for scraps, use paper within the duplex weight rating, and confirm the driver is set for two-sided printing with the correct paper type.
Can a paper jam damage my printer permanently?
The jam itself rarely does; the removal does. Yanking sheets, forcing them backwards or prying with tools can damage gears, sensors and, in inkjets, the carriage. Slow removal along the paper path, checking for scraps, keeps jams as annoyances rather than repairs.
Why do jams happen more in humid weather?
Paper absorbs moisture from the air, becoming limp, curly and prone to sticking together — all of which defeat the feed mechanism. Storing paper sealed and keeping only a small stack loaded makes the biggest difference in humid seasons and climates.
My printer jams only on the last few sheets in the tray. Why?
Pickup rollers rely partly on the weight and friction of the stack; a nearly empty tray feeds unreliably, especially with dusty rollers. Keep a reasonable stack loaded, clean the rollers, and avoid running the tray to the final sheet for important jobs.
My printer jams only from one tray. What does that tell me?
It is one of the most localising symptoms in this whole subject: the engine, the path beyond the trays and the paper itself are shared by every tray, so a fault confined to one tray lives in that tray’s own pickup roller, separation pad, guides or seating. Clean that tray’s roller and pad first, check the tray inserts fully and sits level, and confirm its guides are set to the paper actually loaded — a tray loaded with one size and set to another manufactures jams industriously. Swap the paper stack with a known-good tray’s stack as a test: if the fault follows the paper, it was never the tray. If it stays with the tray after cleaning, fresh paper and honest settings, that tray’s pickup assembly is worn, and it is a defined, usually economical part.
The Bottom Line
Clear jams slowly, along the paper path, and check for every scrap. Then fix the real cause — paper storage, loading technique or rollers — because a jam is rarely an accident; it is usually a habit the printer is asking you to change.
Related Guides
Keep exploring with these guides and roundups from the same printers collection: