Learning how to fix pc case fan noise starts with accepting that ‘fan noise’ is four different problems wearing one name: the honest whoosh of air moving fast, a mechanical fault in one fan’s bearing, a vibration being amplified by the case, and a fan curve that sprints at every small temperature ripple. Each has a different fix, three of the four are free, and replacing fans before diagnosing which problem you have is how people end up with new fans making the old noise.
This guide isolates the culprit fan and the noise type first, then works through fixes in order — curves and speeds, cleaning and obstructions, mounting and vibration, and finally bearing failure and replacement.
Disclosure: As an Amazon Associate, ilcastellomenu.com earns from qualifying purchases. Product examples below link to Amazon, where you can check current availability and specifications; this guide itself lists no fixed prices because pricing and bundles change frequently.
How to Fix PC Case Fan Noise: Identify the Fan and the Noise
Diagnosis needs the PC running and a minute of listening. Open your fan-control software or BIOS hardware monitor and slow or stop fans one group at a time — case fans, CPU fan, graphics card fans — noting which change removes the noise. Software control is the safe isolation method; do not reach into a running PC to stop blades with your fingers.
Then characterise what you hear. A smooth whoosh that scales with speed is airflow noise: the fan is healthy and the fix is speed and path. A ticking, clicking, or rattling suggests a blade striking something or a failing bearing. A grinding or growling that persists at low speed is a bearing at the end of its life. A hum or buzz that changes when you press the case panel is vibration being amplified by the panel — the fan may be innocent and the case is the loudspeaker. Each diagnosis routes to a different fix below.
Rule out the impostors first
Not every noise blamed on case fans comes from one. Coil whine is a high-pitched electrical sound that varies with frame rate and load, not fan speed. Hard drives click and hum on their own schedule. A pump (in liquid-cooled systems) can buzz at a fixed pitch. Confirm the noise tracks fan speed before treating it as a fan problem; the isolation step above does exactly that.
Safety notes for everything that follows
Speed adjustments in software are safe at any time. Anything involving opening the case — cleaning, reseating, replacing — happens with the PC shut down, the power supply switched off, and the cord unplugged. Fans are low-voltage and forgiving, but cables and connectors elsewhere in the case are not a playground, and a screwdriver slipped across a live motherboard is an expensive sound of its own.
In this guide
Fix 1: Slow the Fans Down (Curves, Not Just Speeds)
Most case-fan noise is a settings problem. Default fan curves are written for worst-case hardware in worst-case rooms, so they spin fans faster than your build needs. In the BIOS or motherboard software, set case fans to a curve that idles them at the lowest speed that keeps them reliably turning, rises gently through mid temperatures, and reserves full speed for temperatures you rarely reach. Tie the curve to a slow-moving temperature source where possible, so a two-second CPU spike does not produce a two-second fan sprint — the sprint-and-settle ‘breathing’ pattern is the most annoying noise profile of all, and it is purely a curve artefact.
Also check for a fan accidentally set to full-speed or DC mode mismatched to its type (a PWM fan controlled as DC, or vice versa, can behave erratically and noisily). Correct mode plus a sane curve resolves the majority of ‘my PC is loud’ complaints without touching a screw — and the airflow arrangement from How to Set Up Airflow in a PC Case determines how slow your fans can afford to run.
Fix 2: Clean the Fans and Clear Their Paths
A fan blowing through a clogged filter works harder and louder for less air, and dust caked on blades unbalances them into vibration. Shut down and clean: filters washed or brushed, blades wiped, heatsinks blown through with fans held still — the full safe method is in How to Clean a PC Case. Then check each fan’s immediate neighbourhood for the ticking culprits: a cable tie’s tail, a stray wire, or a cable that sags into a blade’s arc as the case warms and plastics soften. Ticking that appears only after the PC warms up is almost always a cable meeting a blade.
While the case is open, confirm every fan is still mounted firmly — screws relax over years, and a fan loose in its mount rattles at specific speeds. Tighten mounting screws snugly and evenly; over-tightening into plastic fan frames can crack them, which creates the next rattle.
Fix 3: Kill the Vibration, Not the Fan
If pressing a panel changes the noise, you have resonance: the fan’s vibration is being amplified by a panel, a drive cage, or the desk itself. Fixes escalate gently. Re-seat the side panels fully — a panel resting on one latch sings; a panel seated on all of them is damped by its own fit. Add or replace the fan’s mounting with rubber pins or silicone mounts if it was hard-screwed to a thin panel. Move hard drives (a classic vibration source) onto their grommets or a different cage position. Check the case’s feet on a hard desk or floor: a case rocking microscopically on one foot broadcasts every internal vibration.
Vibration noise is also why the airflow-versus-silence question in Airflow Case vs Silent Case is partly a mounting question: damped cases attack exactly this transmission path. But fix your mounts first — most resonance is a five-minute mechanical fix, not a new-case purchase.
Fix 4: The Failing Fan — Bearings and Replacement
A fan that grinds, growls, wobbles visibly, starts reluctantly, or changes pitch randomly is mechanically finished; bearing wear is not a cleaning or settings problem. Confirm by elimination (your isolation step) and by inspection with the power off: spin the blade gently by hand and feel for roughness, clicking, or play in the hub. A healthy fan spins smooth and free; a dying one feels like it is turning through gravel.
Replacement is straightforward and is a component swap, not a repair: match the size (the case’s mount determines it), the connector type, and the fan’s purpose — pressure-optimised for radiators and filtered intakes, airflow-optimised for open exhausts. Do not attempt to oil or open a sealed PC fan bearing as a long-term fix; at best it buys noisy weeks. If the failing fan is the CPU cooler’s or the graphics card’s, treat it with more urgency — those protect components directly — and if it is the power supply’s fan, do not open the PSU under any circumstances: that is a whole-unit replacement handled as a component, since power supplies hold dangerous charge and contain no user-serviceable parts.
Prevention: Keep Fans Quiet for Years
Quiet is maintained, not achieved once. Keep filters clean so fans never strain against them. Keep curves sane after any hardware change — a new graphics card changes the case’s heat map and deserves a curve review. Keep cables dressed out of blade arcs. And when you next choose components, remember that larger fans move the same air slower and quieter than smaller ones, and that the coolers and cases compared in Best PC Cases for Cooling treat noise as a design input rather than an afterthought.
Fan Curves for Specific Fans: A Practical Pattern
Abstract curve advice becomes easier with a concrete pattern to adapt. For case intake fans: run them at their quiet floor until the graphics card’s working temperatures arrive, then ramp in step with the card’s heat, since the card is what they feed. For the rear exhaust: tie it to the CPU or motherboard temperature with a gentle slope, because it serves the whole rear of the case. For any fan near your seating position — a top exhaust above all — cap its maximum below the speed where its tone becomes piercing, and let temperatures, within safe bounds, absorb the difference.
Two refinements separate a good curve from a great one. Add hysteresis or step delays where your software offers them, so fans do not change speed for temperature blips of a few seconds. And after setting curves, live with them for a week of real use before judging: the ear adapts, and the session that matters is the long evening one, not the five-minute test.
When the Noise Is the Graphics Card or CPU Cooler
This guide has focused on case fans, but the isolation step sometimes convicts a component cooler instead, and the fixes rhyme. A loud CPU cooler fan gets the same sequence: curve first (its default profile is rarely tuned for your chip), cleaning second, mounting and resonance third, and the cooler itself last — an undersized cooler on a hot processor will be loud at any setting, because its fan must sprint to compensate, and the honest fix is a larger, slower cooler. Graphics card fans add one variable: the card’s own fan curve lives in its driver software, and a custom curve that trades a few degrees for much lower speeds is the single most effective noise change in many gaming PCs.
In all cases the principle from this guide holds: the fan is the messenger. Read the message — speed, dirt, vibration, or a cooler out of its depth — before replacing the messenger.
Noctua-Class Solutions on a Budget: What Actually Transfers
Premium quiet fans earn their price with bearing quality, blade design, and tight manufacturing tolerances — but a noise sufferer on a budget can capture much of the benefit without replacing every fan. The order of value is: curves first (free, and the largest single gain), then the single worst fan (replace the convicted one, not the set), then mounting (rubber mounts cost little and kill resonance), then case placement (a PC moved off a hollow desk onto a solid floor or a pad loses its sounding board for free). A full set of premium fans is the last refinement, not the first response.
What does not transfer is bearing quality: a cheap fan’s grind cannot be curved away, and the budget move there is one decent replacement fan in the convicted seat. Diagnose precisely, spend narrowly — that is the budget version of this entire guide.
Keeping a noise log
Intermittent noises — the rattle that appears only in one game, the hum that comes and goes with the weather — yield to evidence. Note when the noise occurs: which application, how long after start-up, which fan speeds the software reports at that moment. A noise that arrives twenty minutes into gaming at a specific fan speed is a resonance at that speed, fixable by shifting the curve to step over that speed quickly. A noise present from a cold start that fades as the PC warms is a bearing in its early failure, warming into tolerance. Two lines in a notebook routinely save a weekend of random part-swapping.
Preventing the Next Noise: A Buying Checklist for Quiet
When replacement parts are eventually bought, buy quiet deliberately rather than hopefully. For fans: larger diameter over smaller at the same duty, a reputable bearing type, PWM control for case fans so curves can govern them, and rubber mounting included or added. For coolers: the largest fin stack your case and budget accept, because surface area is what lets a fan turn slowly. For cases themselves: panel solidity, fan mounts in the sizes you want to run slowly, and filters that do not force fans to strain.
Read noise claims with the scepticism this guide has taught: a fan’s quoted loudness is measured in conditions your case will not reproduce, and the system’s noise is an interaction, not a component property. The reliable predictors are size, speed, and mounting — the same three variables your fixes manipulated. Buy along those axes and the next noise complaint is years away.
Knowing when quiet is quiet enough
The pursuit of silence has a natural terminus: the room’s own ambient noise. A PC quieter than the room it sits in — quieter than the refrigerator’s cycle, the street outside, the heating’s tick — has reached inaudibility for practical purposes, and further spending buys numbers on a meter rather than peace in a chair. Measure your satisfaction at the desk, in the evening, during your real work. When the PC’s presence stops registering, the project is complete, whatever the specifications say. Silence, like airflow, is a plateau to reach rather than a summit to conquer.
The Acoustic Environment: Desk, Floor, and Room
The final variable in fan noise is not in the case at all. A PC on a hollow wooden desk sits on a sounding board that amplifies its every vibration into the room; the same PC on a carpeted floor or a solid stand can measure its owner’s satisfaction entirely differently with no internal change whatsoever. Before the next fan is bought, experiment with placement: floor versus desk, a foam pad or mat beneath the case, distance from the wall that reflects its exhaust noise back at you. Corner placement deserves special suspicion — two walls meeting behind a PC form an acoustic horn aimed at the room.
Room furnishings finish the picture: hard, bare rooms return every decibel, while soft furnishings absorb the high frequencies that make fan noise feel sharp. None of this requires buying acoustic treatment for a computer’s sake; it requires only that the PC’s placement be chosen with ears among the criteria, which this guide’s whole argument has been building toward.
A closing hierarchy to remember
Pin the guide’s order above the workbench: settings before screwdrivers, cleaning before components, mounts before money, and one convicted part before a set of hopeful ones. Noise problems feel urgent and mysterious in the evening and are usually mundane by daylight. Work the hierarchy, keep the log, and let the fans return to what they should be — the sound of a machine you no longer notice.
The Elimination Method: Silencing One Fan at a Time
Diagnosis by ear alone misleads, because a case is a resonating box that lends every fan’s voice to every panel. The reliable method is elimination: make the machine produce the noise, then remove suspects one at a time until the voice stops, changing nothing else between tests. Software is the cleanest hand — most fan-control tools let you stop or pin each fan individually — and where software cannot reach a fan, the manual method is a finger pressed gently on the fan’s central hub, never its blades, slowing it to a stop for the two seconds the test needs. Work in a fixed order: case fans first, then the cooler’s, then the graphics card’s by setting its fan curve to zero at idle loads, then listen for what remains — the power supply’s fan and any pump, the two voices that cannot be stopped by software and are identified by elimination’s remainder.
Write down the result of each step, because fan noise diagnosis is a maze of similar sounds and memory cheats cheerfully. Note the fan, the speed at which the noise lives, and the noise’s character — the three facts that decide the fix. A fan noisy only above a certain speed is a curve problem; a fan noisy at every speed including a slow hand-spin is a bearing problem; a fan silent alone but loud in company is a resonance or turbulence problem, and each of those verdicts sends you to a different fix in this guide. The ten minutes of method are what separate a repair from a shopping trip.
One safety boundary governs the whole method: never stop a fan and then load the machine. The elimination tests run at idle or light load, for seconds, with temperatures watched — a processor’s cooler fan stopped under a stress test is not diagnosis but sabotage. Keep the tests short, the loads light, and the side panel’s removal in mind as a variable too, because a case open for diagnosis sounds different from the case you actually live with; confirm the final verdict with the panels back on.
Beat Frequencies and the Two-Fan Hum
One of the strangest noises a PC makes is not a fan’s fault at all but a duet’s: two fans turning at nearly the same speed produce a slow, pulsing hum — a wah-wah that rises and falls over seconds — as their sounds drift in and out of step with each other. It is the acoustic phenomenon of beats, and it explains the machine that hums in waves, maddeningly, at a volume no single fan seems to be making. The diagnosis is the pulsing itself: a steady noise has one author, a pulsing noise has two, and they are turning within a few percent of each other.
The cure is separation, not silence. Offset the two fans’ speeds deliberately — a few hundred revolutions apart is plenty — by adjusting one fan’s curve, and the beat dissolves into two steady, quieter voices. The usual couples are paired intakes on one header, which a splitter forces into identical speeds, and a case fan that shadows the graphics card’s fans at gaming loads. Splitters deserve their reputation here: fans sharing a signal share a speed, and identical speeds are the beat’s recipe, so a paired bank that must share a header can be cured by replacing one fan of the pair with its slightly different sibling model, whose motor’s idea of the same signal differs just enough.
Resonance with the case itself is the beat’s cousin: a fan whose speed crosses the panel’s natural frequency makes the whole side of the case sing for a narrow band of revolutions, silent below and above it. The cure is to move the fan’s working range off the resonant band — a curve adjustment — or to damp the panel’s freedom to sing, which the vibration fix in this guide covers. Either way, the diagnostic skill is the same: a noise that lives only in a narrow speed band is a relationship, not a component, and it is fixed by changing the relationship.
Turbulence Noise: Grilles, Cables, and Air That Whistles
Not all fan noise is mechanical. Air itself makes noise when it is forced through obstructions at speed, and turbulence noise has a signature — a rushing, whistling, or whooshing that tracks fan speed smoothly and vanishes when the obstruction is removed. The classic obstructions are a stamped grille too close behind a fan’s blades, a cable tie or loom parked in the airstream, a filter frame’s edge, and the honeycomb of a restrictive vent. The fan is innocent in each case; it is simply blowing across a fence, and fences hum.
Diagnose by distance: turbulence noise falls sharply when the obstruction moves even a small way from the blades, so the test is to run the fan with the grille or panel temporarily removed — noise gone, culprit named. The cures are geometric. Give the fan breathing room with a spacer or a finger guard’s standoff where the design allows, reroute the cable out of the stream, and where a case’s stamped grille is the fence, accept the choice the case has made for you: run that position’s fan slower, since turbulence noise grows faster than cooling does, or fit a wire grille in place of the stamped one if the case is yours to modify and the warranty is not.
Intake turbulence has one more disguise: the fan that is quiet as an exhaust and loud as an intake in the same position, because as an intake its blades work immediately behind the case’s vent pattern. If a position sings only in one direction, believe it and use the fan the other way, rearranging the case’s path around the verdict — the airflow will forgive a reroute more readily than your ears will forgive a whistle at the exact pitch of concentration.
Panel Buzz and the Hand Test
Cases themselves become instruments when a panel, a filter tray, or a dust cover is free to vibrate at the frequency the fans supply. The result is a buzz that seems to come from everywhere, changes when you lean on the case, and is diagnosed by the oldest instrument in acoustics: your hand. With the machine making the noise, press each panel in turn — side, top, front, the filter trays, the glass if fitted. The buzz that stops under your palm has named its panel, and the fix is to remove that panel’s freedom: its screws snugged evenly, its mounting points padded with a thin foam tape or a felt dot where metal met metal, its tray seated fully in its rails.
Glass panels deserve a specific check, because their weight and their thumbscrew mounts make them champion buzzers when one corner is a fraction loose. Snug the screws in a diagonal pattern, evenly, hand-tight and no more — the glass’s enemy is the point load of an over-torqued screw, as our panel comparison notes — and check any rubber grommets the mounts use, since a perished grommet is a buzz with a part number. Drive cages and their sleds are the internal equivalent: an empty sled left in a cage is a rattle waiting for its frequency, and removing unused sleds is a legitimate noise fix that costs nothing and declutters the airflow as a bonus.
If the buzz survives every panel’s tightening, suspect the whole case’s footing: a case standing on a hard desk with one foot’s pad missing is a sounding board with a drummer. Felt or rubber under all four feet, evenly, both silences the desk’s amplification and returns you to hearing only the fans — which is where this guide came in.
Choosing Replacement Fans: Bearings, Blades, and Honest Specifications
When a fan must be replaced, the replacement’s quality decides whether you have fixed the noise or merely rescheduled it. Bearing type is the longevity specification: sleeve bearings are cheap, quiet when new, and shortest-lived, especially mounted horizontally; ball bearings are durable in any orientation and a little more audible; fluid-dynamic and magnetic bearings are the modern answer — quiet, long-lived, and priced accordingly — and for a fan you intend to forget for five years, they are the correct economy. Mounting orientation matters to the choice: a top exhaust, spinning on a horizontal axis, is where cheap bearings go to die audibly, so spend the bearing budget there first.
Size and thickness trade against each other in the usual way: a larger fan moves the needed air slower and quieter, and where a case accepts a larger diameter, that substitution is the single most effective noise purchase available. Thickness matters in tight positions — slim fans exist for the spaces standard ones cannot enter, and they move less air per revolution, which the curve must repay in speed. Connector type closes the checklist: four-pin fans accept the precise speed control the curve fixes in this guide depend on, while three-pin fans are controlled by voltage and stop at higher floors — know which your headers and your patience support before the parcel arrives.
Read the specifications with the scepticism our airflow explainer teaches: the noise figure was measured in a chamber you do not live in, at a distance and speed you may not use. The figures that predict your evenings are the speed range’s floor, the bearing type, and the reports of owners who mounted the fan in your position. A fan is a five-year relationship with a sound; choose it like one.
Software Manners: Hysteresis, Spin-Up, and the Noise of Indecision
Some fan noise is not loudness but behaviour — the fan that surges at every small load, sighs down, and surges again, announcing every temperature ripple in the room’s quiet. The cause is a curve with no manners: a control loop that reacts instantly to a sensor that jitters. Modern fan controls offer the two courtesies that fix it. Hysteresis — a deliberate temperature band the sensor must cross before the fan changes speed — stops the fan chasing ripples. Response delay or smoothing — the fan waiting a few seconds to be sure a load is real, and ramping gently rather than leaping — converts surges into swells, and swells are what ears forgive.
Set the manners per fan group, because the sensors differ in temperament. A processor’s temperature leaps with every burst of work, so its fans need the longest patience; a graphics card’s sensor moves more deliberately and can be trusted with a quicker response. Case fans following either should inherit the slower temperament. The goal is a machine whose voice changes a few times an hour, in swells, rather than a few times a minute, in chirps — the same average speed, the same temperatures, and a completely different acoustic character. Owners often find that this fix, which costs nothing and replaces nothing, is the one they would have paid for, had they known it was software all along.
The Two Voices You Cannot Curve: Power Supply Fans and Pumps
Two noisemakers in a PC answer to no fan curve you own, and identifying them early saves the frustration of tuning everything else around a sound that was never yours to tune. The power supply’s fan is governed by the supply’s own internal controller, sensing its own temperature and load. A supply that is loud under your build’s working load is either undersized for the job — running high in its range, where its fan must work — or ageing, or simply a loud design. None of those is adjustable, and the fixes are at the component level: a supply with more headroom, whose fan stays in its quiet region at your load, or a supply designed around a semi-passive mode that keeps its fan still at light loads. What you must never do is open the supply to reach its fan; the prohibition from the replacement fix bears repeating, because the supply is the one box in the PC that can genuinely hurt you.
The liquid cooler’s pump is the second untameable voice — a fixed-pitch buzz or hum that some coolers let you soften through their own software’s pump-speed setting and others do not. A pump that has grown louder over months, or that gurgles, is reporting air in the loop or wear, and its cure is the cooler’s own service path, not this guide’s fan fixes. Name both voices during the elimination method — they are what remains when every controllable fan is stopped — and you will never again spend an evening curving case fans to silence a power supply.
Recording the Noise: Making a Phone Work as a Diagnostic Instrument
A phone recording, made with a little discipline, converts ‘it makes a weird noise’ into evidence you can compare across days and fixes. Record at a fixed position — the phone on the desk at your seated spot, the same distance every time — during a repeatable load, and narrate the conditions onto the recording itself: the application, the fan speeds the software shows, the panels on or off. Thirty seconds is plenty. The recording’s value is comparative: before and after a fix, across a week of a bearing’s decline, or attached to a support conversation where the alternative is your impression of a hum.
Recordings also catch what ears adapt away. A noise that has crept up over months is invisible to the household that lives with it and obvious across two dated recordings played back to back — which is why the noise log from earlier in this guide gains a column when the recordings join it. Keep them with the machine’s other records, and the next intermittent fault — the kind that performs for nobody — will meet an owner with a archive instead of an anecdote. Diagnosis, in fan noise as in the rest of this craft, belongs to whoever kept the evidence.
Gear for This Guide
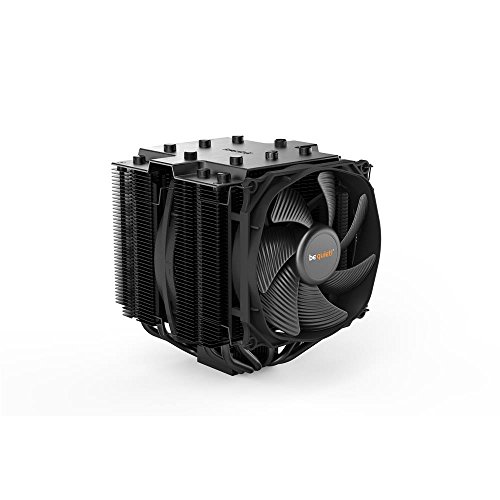
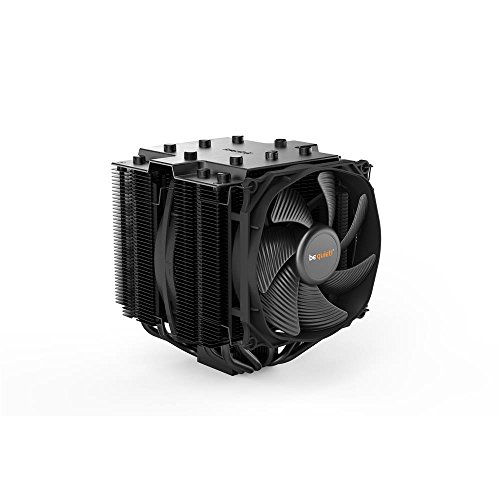
When replacement is the answer, the quiet end of the cooler market shows what ‘quiet at source’ means — both verified coolers below built their reputations on low-noise fans.
be quiet! Dark Rock Pro 4 CPU Cooler
Its two Silent Wings PWM fans are the reference example of designing noise out at the source — the standard a replacement case or cooler fan should be judged against. be quiet! Dark Rock Pro 4 CPU Cooler — Check on Amazon
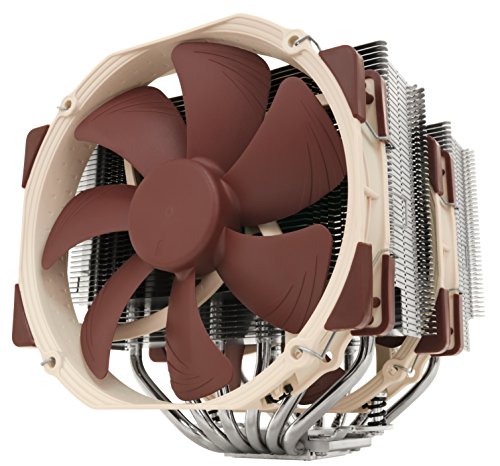
Noctua NH-D15 CPU Cooler
A dual-tower cooler whose large fans deliver flagship cooling at low speeds — the larger-fan-slower-speed principle from the prevention section, embodied. Noctua NH-D15 CPU Cooler — Check on Amazon
Frequently Asked Questions
Why is one of my case fans suddenly loud?
Sudden loudness usually means a change: a cable has sagged into the blade’s path, dust has unbalanced the blades, a mounting screw has relaxed into a rattle, or the bearing has begun to fail. Work the fixes in order — curve check, clean and inspect, mounts, then replacement — and the suddenness itself is a clue it is mechanical rather than settings.
Can I just unplug the noisy fan?
As a temporary diagnostic, yes; as a solution, only if the case’s airflow remains adequate without it and temperatures are verified under load afterwards. An intake or exhaust fan exists in the path for a reason — removing the CPU or graphics card’s cooling fan is never an option. Replace a failed fan rather than deleting it.
What fan speed is 'quiet'?
There is no universal number, because noise depends on fan size, design, and what it blows against. Practically: large fans at low-to-moderate speeds are quiet, and any fan at maximum speed is not. Set curves by temperature behaviour and your own ears in your room, not by chasing a specific RPM figure from the internet.
Is coil whine a fan problem?
No — it is an electrical sound from inductors under varying load, typically tracking frame rate in games rather than fan speed. It cannot be fixed by fan changes; limiting frame rates sometimes reduces it. Confirm the distinction with the isolation test before buying anything.
Should I oil a grinding fan to quiet it?
No. PC fan bearings are sealed units; peeling labels and adding oil is at best a short-lived experiment that often ends in oil where it should not be. A grinding fan is announcing replacement — fans are among the cheapest components in the case, and the swap takes minutes.
One fan clicks only during the first seconds after startup. Should I worry?
Listen to it for a week before deciding. A brief click or rattle as a fan spins up — a bearing settling, a blade clearing a cable’s edge at low speed — that vanishes at working speed and does not grow is usually a foible to note rather than a fault to fix. The versions that earn action are the ones that lengthen, appear at working speeds, or arrive with vibration you can feel in the desk. Keep a note of its progress; bearings announce their retirements gradually, and the note is how you will know the announcement has become a date.
My PC got louder after I cleaned it. How is that possible?
In three usual ways. A fan’s blades, cleaned unevenly, can carry a remaining patch of dust that unbalances them subtly — re-clean the blades completely rather than partially. A cable, disturbed during the clean, now sits in a fan’s airstream or against its frame, adding turbulence or a tick — open and look before theorising. And a panel or filter tray, refitted a fraction loose, now buzzes at a frequency the dust’s damping used to suppress. All three are refitting faults, not cleaning faults, and the verification pass in our cleaning guide — fans watched, panels pressed, machine listened to — exists to catch them while the tools are still out.
Are zero-rpm fan modes safe for case fans?
For case fans at genuinely light loads, yes — with the system’s temperatures, not the marketing, as the judge. A stopped case fan at desktop loads costs a few degrees that the components will not miss, and buys a truly silent idle. The conditions are that the fans restart promptly and certainly as loads rise — test the transition with a real load rather than trusting the curve’s drawing — and that no component depends on the case fans for its idle survival, which in practice means hard drives in a still case deserve a whisper of air rather than none. Set the restart temperature conservatively and the silence is honest.
Should I replace all my fans at once or only the noisy one?
Only the guilty, unless the others are the same age and model as the failure — bearings from one batch, worked the same hours, tend to retire in a season rather than a day, and a second replacement a month later is an annoyance you can price in advance. Replace the noisy fan, note the others’ age, and if a second follows within months, promote the rest to a planned set, chosen with the bearing and size guidance above, and keep the best of the old as a spare.
The noise is a high-pitched whine that follows my frame rate in games. Is that a fan at all?
Probably not — that is coil whine, the sound of power-delivery components vibrating under load, and it tracks frame rate because the load’s rhythm is the frame rate. Fans cannot be fixed to cure it, which is why it belongs in this guide as a diagnosis to eliminate. Its mitigations live elsewhere: capping the frame rate in menus and light scenes, where the whine is usually worst; trying a different power supply, since the pairing of supply and card decides much of it; and the acoustic defences — distance, a solid panel, headphones — while you decide whether your sample of the card is worth exchanging. Name it correctly first, because owners have replaced entire fan sets chasing a sound no fan was making.
My fans are quiet in winter and loud in summer. Is something failing?
Almost certainly not — the machine is reporting the room. Summer raises every temperature the curves respond to, so fans run a step faster for the same work, and a curve tuned in a cool room spends the warm months in its louder region. The honest responses are seasonal: clean the filters at summer’s start, since dust and heat compound, and consider a summer curve that accepts slightly warmer components for a quieter room. A noise that changes with the season is a climate instrument; a noise that changes week to week in the same season is the one to diagnose.
Is it worth paying more for a fan with a longer warranty?
Usually, because the warranty is a manufacturer’s own bet on its bearing — the component whose failure this guide keeps diagnosing. A maker willing to stand behind a fan for many years is telling you how long they expect it to turn quietly, and that expectation is worth more than any noise figure on the box.
The Bottom Line
Isolate the fan by software, name the noise — whoosh, tick, grind, or hum — then fix in order: curves, cleaning and cables, mounts and resonance, and only then replacement. Most loud PCs are one settings page or one cable tie away from quiet, and the rest are one honest fan swap.
Related Guides
Understand the silence trade-off at case level and the theory beneath the fixes: