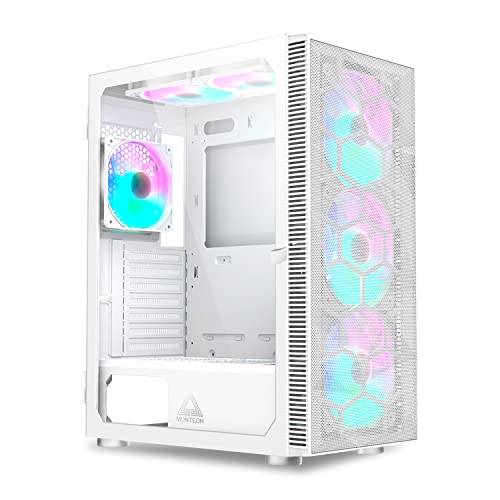
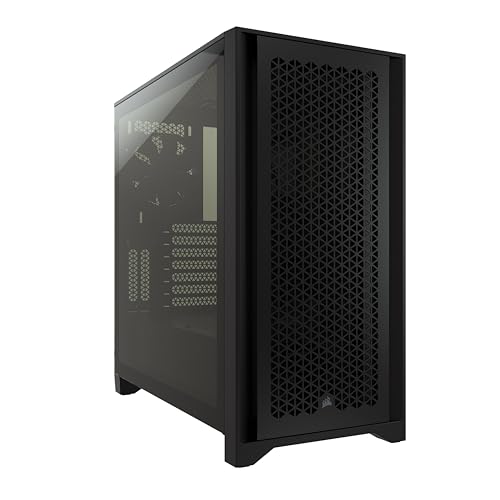
Knowing how to clean a pc case properly matters because dust is a slow tax on everything your PC does: it insulates components, clogs the filters and heatsinks airflow depends on, and makes fans work harder and louder for the same cooling. The good news is that a thorough clean is a half-hour job with simple tools, done a few times a year, and most of it is technique rather than effort — short bursts of air, fans held still, filters washed and fully dried.
This guide covers the full job: preparation and safety, filters, fans and heatsinks, panels and glass, the power supply’s exterior, and a realistic cleaning schedule so the PC never reaches the state where cleaning becomes an excavation.
Disclosure: As an Amazon Associate, ilcastellomenu.com earns from qualifying purchases. Product examples below link to Amazon, where you can check current availability and specifications; this guide itself lists no fixed prices because pricing and bundles change frequently.
How to Clean a PC Case Safely: Preparation
Shut the PC down fully, switch the power supply off at its rocker switch, and unplug the power cord from the wall. Then press the case’s power button once — with the cord out, this simply discharges residual power in the system, a standard precaution. Move the PC to a work surface you can make dusty: this job relocates a surprising amount of grime, and a balcony, garage, or a sheet on the floor beats your desk.
Ground yourself before touching internal components by touching a large metal object, and avoid working on carpet in socks if you can — static discharge is an uncommon but real risk to electronics, and the precautions cost nothing. If you wear loose sleeves or jewellery, secure them; you will be reaching around fan blades and heatsink fins.
What you need
Canned compressed air or an electric PC duster is the main tool. Add: a soft natural-bristle brush for loosening stubborn dust, microfibre cloths, isopropyl alcohol for cloth-dampening on stubborn grime, cotton swabs for corners, and a bowl of warm water with a drop of mild detergent if your filters are washable. A vacuum cleaner has exactly one role here — cleaning the room afterwards. Never vacuum inside a PC: vacuum nozzles build static charge and the suction can spin fans and tug small parts. That rule is absolute in this guide.
How often is often enough?
Filters deserve attention every month or two — they are designed to be the sacrificial, easy-clean layer. A full internal clean suits a rhythm of two to four times a year for a typical home, more often with pets, carpet, or a floor-standing case. The schedule section at the end turns this into a routine; the airflow reasons behind it are explained in PC Case Airflow Explained.
In this guide
Step 1: Filters First
Remove every dust filter: front, top, bottom (the power-supply intake filter slides out from under many cases), and any side filters. How you clean them depends on their construction. Mesh and foam filters can be rinsed under a tap with mild detergent, shaken out, and left to dry completely — completely means hours, not minutes, because a damp filter reinstalled is a mould invitation and an airflow restriction. Fine nylon filters that should not be washed get the brush-and-air treatment instead; check the case maker’s guidance if unsure.
While the filters dry, note their condition. A filter that has gone stiff, torn, or permanently grey is no longer filtering well; replacements are a normal maintenance item, and cases chosen with dust in mind — rounded up in Best PC Cases for Dust — make this step tool-free and quick, which is exactly why filter design matters at purchase time.
Step 2: Blow Out the Interior, Correctly
Work with the side panel off, outdoors or in your prepared area. Use short bursts of air, holding the can upright — a tilted can sprays propellant liquid that can damage finishes and components. Keep the nozzle a sensible distance away; the goal is to lift dust out of the case, not to sandblast it deeper into connectors.
Technique for fans is the critical detail: hold each fan’s blades still with a finger or a swab while you blow through it. A fan spun freely by compressed air can overspeed far beyond its design, damaging its bearing and, in principle, generating voltage back into its header. Work from the top of the case downward and from inside toward the openings, so gravity and airflow cooperate, and finish with the bottom and the power-supply area. Heatsinks — the CPU cooler’s fin stack and the graphics card’s cooler — hold the densest dust; blow through the fins along their direction, and use the soft brush to loosen mats of dust that air alone will not shift.
Step 3: Fans, Blades, and the Details
Fan blades collect a sticky film that blowing does not remove. Wipe each blade with a microfibre cloth lightly dampened with water or isopropyl alcohol, supporting the blade from behind so you do not flex it against its hub. This is also your inspection round: a fan with a cracked blade, a wobbling hub, or a grinding feel when turned gently by hand is a fan announcing its retirement — and a fan that has started ticking or humming is often the subject of our companion guide, How to Fix PC Case Fan Noise.
Wipe the case’s interior floor, drive cages, and cable runs with the cloth. Clean the rear I/O area and the tops of drives where dust settles. Cotton swabs handle the corners around motherboard standoffs and the graphics card’s backplate edges. Keep liquids on the cloth, never sprayed into the case.
Step 4: Panels, Glass, and the Exterior
Tempered glass cleans like any glass: a microfibre cloth, a little glass cleaner or alcohol solution applied to the cloth, and a second dry cloth to buff out streaks. Handle a removed glass panel with both hands over a soft surface — glass panels are heaviest exactly when you are tired at the end of the job. Solid and mesh panels wipe down with the damp cloth; mesh exteriors benefit from the brush to clear dust pressed into the weave.
Clean the exterior intake areas and the front panel’s edges, where dust outlines every vent. Wipe the top panel especially if it is an exhaust — dust there is evidence of what has been leaving the case. Finally, the power supply: blow air through its intake and exhaust grilles from outside only. Never open a power supply — it holds dangerous charge even unplugged, and it contains no user-serviceable parts. Its exterior and its filter are the whole of its maintenance.
Step 5: Reassemble and Verify
Refit the filters only when bone dry. Refit panels, reconnect cables, and power on with the side panel initially off if you want the verification view: every fan should spin freely without new noises, and nothing should rattle against a panel. Run the PC for a few minutes and confirm temperatures behave as expected in your usual monitoring tool — a successful clean typically shows idle and load temperatures a little better than before, and fans spinning a little slower for the same result.
If temperatures did not improve or a new noise appeared, the usual suspects are a filter refitted backwards or not fully seated, a cable shifted into a fan’s path during cleaning, or dust blown into a heatsink’s core rather than out of it — all fixable with a second, more careful pass. A clean that reveals chronic overheating despite clear airflow paths points beyond cleaning, toward the airflow arrangement itself, which How to Improve PC Case Airflow addresses.
A Realistic Cleaning Schedule
Tie cleaning to triggers you will actually notice. Monthly: glance at the front and bottom filters; if the mesh looks grey and felted, rinse or brush them. Quarterly (or with the seasons): the full interior clean from this guide. Continuously: keep the case’s surroundings honest — a PC on carpet under a desk accumulates dust several times faster than one on a hard surface with space around its intakes, and no schedule fully compensates for a bad location. When you next choose a case, weight filter access accordingly; the criteria in How to Choose a PC Case put filters on the checklist for exactly this reason.
Cleaning the Graphics Card and CPU Cooler in Place
These two components hold the most consequential dust, because their fin stacks are dense and their fans move the most air. For the graphics card, blow air through the cooler from several angles — along the fins from the card’s edge, and back through the exhaust vents at the bracket — while holding its fans still one at a time. Dust often leaves as visible clumps once the mat binding it breaks; the soft brush, worked gently along the fin direction, helps start the process. Wipe the backplate, which is a dust shelf by design.
For the CPU tower cooler, blow through the fin stack front-to-back in its airflow direction, holding each fan still. If the cooler uses a fan clipped between two towers, dust mats in the centre are normal; a long soft brush or a swab worked between the towers loosens what air cannot. Do not remove the cooler for a routine clean — breaking the thermal paste seal turns a maintenance task into a repaste job, and that belongs to upgrade day, not cleaning day.
The Room Around the PC
A case can only be as clean as its environment lets it be, and five minutes spent on the surroundings outperforms an extra deep-clean per year. Keep the floor around and under the PC swept or vacuumed — the bottom intake samples exactly that air. If the PC stands on carpet, a board or stand under it both stabilises it and lifts its intakes out of the dustiest layer of the room. Keep the wall gap behind the case clear so exhaust air disperses instead of pooling and re-entering the intakes.
Household realities matter too: a PC in a room with a shedding pet, an open window onto a busy road, or a wood stove will load its filters several times faster than the schedule in this guide assumes. Adjust the rhythm to your evidence — the filters themselves will tell you, in grey, exactly how often they need you.
Cleaning Day Troubleshooting
Occasionally the clean itself surfaces a problem, and each has a first response. A fan that was silent before cleaning and ticks after it has usually met a cable you moved — open the case and check the blade arcs before suspecting damage. A PC that will not power on after cleaning has, in almost every case, a connector disturbed during the work: check the front-panel leads, the 24-pin and CPU power cables, and the power supply’s rocker switch, in that order, before fearing the worst. A filter that will not sit flat after washing was probably dried with heat or weight on it; most recover with a day pressed flat under a book.
And a temperature that worsens after cleaning points to a heatsink whose dust was pushed deeper rather than removed, or a fan reconnected backwards — both fixed by a second, slower pass with the direction arrows checked. Cleaning is a skill; the second clean is always better than the first, and the machine forgives practice.
What not to clean, and what to leave to other jobs
Three boundaries keep cleaning day safe and short. Do not remove the CPU cooler or graphics card solely to clean them — in-place cleaning covers routine dust, and removal belongs to repaste and upgrade jobs with their own procedures. Do not use liquids beyond a cloth barely dampened with alcohol, and never spray anything into the case. Do not open the power supply for any reason, at any point, ever — its exterior and filter are its entire serviceable surface. Within those boundaries, the job is as safe as dusting a bookshelf, and it should feel that routine.
Cleaning the Peripherals and the Desk Zone
While the PC is open and the cloths are out, the surrounding zone deserves its five minutes, because the case breathes this neighbourhood’s air. Wipe the desk surface under and behind the case, where dust mats form undisturbed. Clean the monitor’s rear vents with a dry brush. If the case sits in a cubby or under-desk enclosure, vacuum that space properly — it is the intake’s whole world. Keyboard and mouse cleaning is its own topic, but a shaken-out keyboard over a bin, done today, removes another dust reservoir from the immediate area.
Finish by checking the floor path of the power and display cables for dust dams where they cross the floor; cables channel dust exactly as skirting boards do. None of this is glamorous, and all of it is why a thorough clean seems to ‘last longer’ — you have cleaned the system, not just the box.
Seasonal deep-clean additions
Once a year, extend the routine modestly: remove the front panel fully (most unclip) to clean behind it, where dust outlines the intakes; remove and wash fan filters that usually only get brushed; inspect fan cables and front-panel wires for dust packed into their connectors; and check the power supply’s exterior grille from underneath, the single most neglected surface in most PCs. Stop there. The annual clean is still a cleaning, not a rebuild — components stay seated, paste stays sealed, and the machine returns to service within the hour.
Cleaning a PC You Did Not Build
A second-hand or inherited PC deserves a modified first clean, because you are cleaning and inspecting simultaneously. Before the standard routine, photograph the interior: cable routes, fan orientations, anything unusual — the photos are your reassembly reference and your baseline. Expect the dust to be worse and the filters, if any, to be archaeological; budget double time and do not be surprised by a missing filter or a fan installed backwards by a previous owner, both common discoveries.
Use the clean as the machine’s intake physical: note fan bearings that feel rough, cables with cracked insulation, a cooler seated crookedly. A used PC’s first clean is the cheapest diagnostic it will ever receive, and it frequently explains whatever reputation the machine arrived with.
Making the routine stick
Cleaning schedules fail socially, not technically, so attach yours to events that already happen: filters with the monthly household reset, the full clean with the seasonal change you already observe — clocks changing, heating coming on, the start of a school term. A routine tied to a rhythm survives; a routine tied to a date on a calendar you ignore does not. The machine does not care which rhythm you choose. It cares, measurably and in degrees, that you choose one.
Three Levels of Clean: Knowing Which One Today Is
Not every cleaning day is the same job, and treating them as one job is how PCs get either neglected or over-handled. The maintenance clean is the fortnightly-to-monthly routine: filters out and cleaned, a quick pass over the intake paths, nothing opened that does not need opening. It takes minutes and its purpose is to keep the deep clean rare. The standard clean is the one this guide’s steps describe — panels off, interior blown out, fans and details attended — and for most homes it is a quarterly event, or the answer to visibly rising temperatures. The deep clean is annual or occasion-driven: fans removed for their blades and hubs, heatsinks washed of their dust mats, cables lifted from their channels, the power supply’s intake excavated — a half-day’s careful work that returns the machine to as-built condition.
Choose the level by evidence, not by the calendar alone. Filters loading faster than usual say the room changed — a pet arrived, building work happened nearby, a carpet was fitted — and the schedule should change with it. Temperatures creeping up at identical loads say the standard clean is due regardless of date. And the deep clean has one unarguable trigger: any time the machine is opened for major surgery anyway — a new graphics card, a transplant into a new case — because the marginal cost of the deep clean, with everything already apart, is the lowest it will ever be.
Over-cleaning is a real failure mode too. Every disassembly is a small risk — a connector worried loose, a fan blade stressed, a screw dropped into the power supply’s grille — and a machine opened monthly for ceremony accumulates those risks without buying cleanliness it needs. Match the level to the evidence and the PC gets cleaned exactly as often as its life requires, which for most homes is less often than guilt suggests and more often than neglect delivers.
The Vacuum Question, Settled Carefully
Few topics in PC care generate more confident contradiction than whether a vacuum cleaner may touch a computer. The fear is static: a vacuum’s nozzle and moving air can accumulate charge, and a discharge into a component is a genuine, if uncommon, way to kill one. The countervailing truth is that generations of technicians have vacuumed exteriors and filters without incident, and that the blower this guide recommends has its own failure mode — dust driven deeper into connectors and under components by an over-enthusiastic jet. The resolution is a division of labour rather than a winner.
Use the vacuum where it is strong and safe: on filters removed from the case, on the desk and floor around the machine, on the case’s exterior vents with the machine off and unplugged, keeping the nozzle on the panel rather than inside the chassis. Use the blower or the brush where the vacuum must not go: the interior, the boards, the fan blades, anywhere a nozzle’s static or a moment’s clumsiness could reach a component. Never vacuum the interior of a plugged-in or recently powered machine, and never let a vacuum’s suction spin a fan — an overspun fan is hard on its bearing and can generate voltage back into its header, a small risk that holding the blades still eliminates entirely.
Households with only a vacuum can still clean well: filters and exteriors by vacuum, interior by brush and patience, working over a hard floor where the dislodged dust can itself be vacuumed up afterwards. The tool matters less than the discipline — power off, blades held, no nozzle inside the case — and a careful vacuum owner will out-clean a careless blower owner every time.
Cleaning Where You Live: Apartments, Shared Houses, and Dust Containment
The classic instruction to take the PC outside assumes a garden, a driveway, or at least a balcony, and a large share of readers have none of these. Apartment cleaning is a containment problem: the dust must leave the PC without joining the room. Work in the bathroom if it has an extractor fan — hard floor, washable surfaces, one door to close — with the machine on a towel that will catch the fallout and can be shaken into a bin and washed. A large open window with the machine on its sill-side table and a fan exhausting outward is the next best arrangement; the worst is the desk where the PC lives, where the blown dust settles into the keyboard, the bedding, and the PC’s own intakes by evening.
Timing helps. Clean on a day when the room can be aired afterwards, and give the space an hour before making beds or folding laundry nearby — the fine fraction of case dust stays airborne longer than patience expects. A simple mask is worth wearing for a genuinely filthy machine, not from drama but because a year of a household’s shed skin and pet dander, aerosolised at close range, is an unpleasant and entirely optional dose. Shared houses add a courtesy rule: warn the household, because the dust you liberate becomes everyone’s air for an hour, and the bathroom you occupy with a dismantled PC is a bathroom nobody else can use.
Renters should note one more practical point: the dust mat that comes out of a long-neglected PC can stain light carpets and fabrics if the work happens over them. The towel, the hard floor, and the closed door are not fussiness — they are the difference between a cleaning routine you will repeat quarterly and one your household vetoes after the first performance.
Liquid-Cooled Machines: Cleaning Without Opening the Loop
A liquid-cooled PC changes the cleaning map in three places. The radiators are the first: their dense fins trap dust into a felt that a casual blow-through barely dents, and the honest method is the one this guide’s heatsink advice implies — fans off where the design allows, the dust mat lifted from the fins with a soft brush, then air passed through the radiator in the opposite direction to the fans’ usual flow, so the debris leaves by the door it entered. A radiator that has never been cleaned can hold a startling fraction of the machine’s total dust, and its restoration is often the single largest temperature improvement a cleaning day produces.
The loop itself is the second difference, and its rule is simple: cleaning never opens it. An all-in-one cooler’s loop is sealed for its life; a custom loop is serviced on its own schedule, with its own procedures, and neither should be drained, topped, or loosened as part of a dust clean. What cleaning day does owe the loop is an inspection — fittings looked at, not touched; tubing checked for kinks or clouding; the pump’s area examined for the tell-tale crust or discolouration that betrays a slow weep. Dust hides leaks beautifully, which is one more reason the cooled machine benefits from the standard clean on schedule.
The third difference is weight and fragility in handling. A radiator-filled case is heavier and its plumbing dislikes being tipped carelessly, so the cooled machine gets cleaned where it stands more often than carried to a bench — panels off in place, a towel beneath, the blower working in short bursts. Plan the session accordingly, and photograph the loop before you start: if a fitting’s position ever becomes a question, the photograph answers it without an experiment.
After the Incident: Smoke, Spills, Humidity, and Unwelcome Tenants
Some cleaning is not routine but recovery, and it changes the safety rules. A PC that has been through a house fire’s smoke, even in another room, carries conductive, corrosive soot in places dust never reaches; that machine is a candidate for professional assessment rather than a home blow-out, and powering it on to see is the one experiment not to run. A spilled drink is the opposite case — fast home action is everything: power off at the wall, the machine drained of its accident by gravity and patience, sticky residue cleaned with the care this guide’s panel advice describes, and nothing powered until the last hidden droplet has had days, not hours, to dry.
Humidity and its aftermath — a flooded room, a burst pipe nearby, a machine stored in a damp garage — call for drying before cleaning, because dust plus moisture is a paste that air cannot move and brushes smear. Let the machine dry in moving air for days, inspect connectors and the board’s low points for corrosion’s green and white bloom, and treat visible corrosion as a technician’s territory. The dust clean resumes only once the machine is provably dry, and the first power-on afterwards deserves the same caution as a new build’s: side panel off, eyes on, ready at the switch.
Pests are the case nobody wants and somebody gets: insects nesting in a warm power supply is a known failure of machines in the wrong climates and seasons. That clean is not a dust clean at all — power off, the machine bagged before it is moved, the work done outside or by a professional, and the power supply treated as suspect until inspected, because what nests in it can bridge what should never be bridged. Routine cleaning’s best contribution here is prevention: a machine opened quarterly is a machine in which no tenant signs a long lease unnoticed.
What Not to Use: Solvents, Sprays, and Other False Friends
The cleaning cupboard is full of products that are excellent on kitchens and wrong on computers. Household glass cleaner is for the outside of a glass panel only, never sprayed toward a machine — sprays travel, and their residue on a board or in a fan bearing is a contaminant you cannot un-apply. Furniture polish builds a film that dust then marries permanently. Solvent cleaners can craze acrylic panels, soften cable insulation, and strip the printing from components; the only liquids a PC’s interior should meet are the ones this guide names — a barely damp cloth for stubborn films on non-electrical surfaces, and proper electrical contact cleaner, used sparingly and knowingly, for the rare connector that needs it.
Paper towels and tissues shed lint into exactly the fins and fans you are cleaning, and lint holds moisture and dust against hot surfaces afterwards. Microfibre cloths and natural-bristle brushes shed nothing and wash clean; they are the entire textile requirement of the job. Compressed-air cans have their own trap, covered in the preparation steps but worth repeating in this company: tilt the can and it spits liquid propellant, cold enough to shock components and leave residue, so the can stays upright and works in short bursts, however dramatic the dust cloud makes you feel.
Finally, water. It has one legitimate interior use — none — and several exterior ones: filters designed to be washed, washed and dried completely; removable fan blades on some designs, per their maker; the case’s empty shell, in a full transplant, washed and dried for days before anything electrical returns to it. The rule that organises all of this is simple: liquids and assembled electronics meet only at the surfaces the maker designed for it, and enthusiasm is not a design document.
Keeping Score: Baselines, Logs, and Photographs That Pay Off
Cleaning without measurement is housekeeping; cleaning with measurement is maintenance, and the difference is a five-minute habit. Before each standard or deep clean, record the machine’s temperatures at a repeatable load — the same game scene, the same rendering task, the same ten minutes — and note the room’s temperature alongside, because a degree of the result belongs to the weather. After the clean, repeat the identical test. The pair of numbers tells you what the clean bought, whether the schedule you are keeping is the schedule the machine needs, and — across years — whether a slow rise is dust returning on time or a component, a paste, or a fan beginning to fail, which no amount of cleaning will cure.
Photograph the interior at the end of each clean, in the same rough framing each time. The series becomes a diagnostic archive: the cable that is migrating toward a fan, the dust’s favourite corner that argues for a filter change, the tubing’s slow colour shift, the first pale bloom of a fitting’s weep — all visible in comparison long before any single inspection would catch them. Builders photograph their work for pride; maintainers photograph it for evidence, and the second habit is worth more.
Keep the log with the machine’s other records — build date, part changes, the paste’s age if you know it. When the PC eventually misbehaves, that file converts guesswork into history, and when you sell or hand the machine on, it is the difference between a used PC and a documented one. Our airflow setup guide is the natural companion once the machine is clean: clean first, then tune, because tuning a dirty machine optimises the wrong system.
Teaching the Household: Shared Machines and Shared Standards
A family PC accumulates dust at the rate of the whole household’s life, and its cleaning goes best when it is a household routine rather than one person’s penance. Agree the visible signals — the filter’s colour, the intake’s visible mat — as the trigger everyone can read, so the machine gets cleaned when it needs it rather than when its usual keeper notices. Keep the kit together in one box near the machine: brush, cloths, the case’s own screws container, and the log. A kit that must be gathered from three rooms is a cleaning deferred, and deferred cleanings are how a quarterly machine becomes an annual excavation.
Children old enough to use the machine are old enough to learn the filter clean, which is the safe, satisfying, unplug-and-rinse end of the craft — and a young person who has cleaned a filter owns a small, permanent understanding of the machine as a physical thing that breathes. That understanding, planted early, is worth more than the dust it removes.
Frequently Asked Questions
Can I use a vacuum cleaner to clean inside my PC?
No. Vacuum nozzles accumulate static charge that can discharge into components, and the suction can overspin fans and dislodge small parts. Use compressed air (with fans held still) and a soft brush inside the case; save the vacuum for the floor afterwards.
Is canned air or an electric duster better?
Both work. Canned air is cheap to start but must be used upright in short bursts to avoid spraying propellant, and cans lose pressure as they chill during use. Electric dusters cost more upfront, deliver consistent pressure, and suit households that clean several machines — either is fine with correct technique.
How do I know if my filters can be washed?
Mesh and foam filters generally can be rinsed with mild detergent and dried completely; fine woven nylon filters are often brush-and-air only. If the case documentation does not say, treat the filter as washable only if it is clearly a simple mesh or foam sheet, and never reinstall any filter while it is still damp.
Should I remove components to clean them?
For a routine clean, no: the graphics card and CPU cooler can be blown through in place, and every removal risks a connector or mounting mishap. Deep cleaning during an upgrade or a cooler re-paste is the natural time for component-level attention, as part of that job rather than this one.
Why are my temperatures still high after cleaning?
Cleaning restores airflow paths; it cannot fix an airflow arrangement that was never adequate, a cooler that is undersized or poorly mounted, or dried-out thermal paste on an older build. If a thorough clean changes nothing, work through the airflow diagnosis in the companion guide linked above before suspecting component failure.
Can I wash dust filters under the tap?
The ones designed for it, yes — most mesh and foam filters tolerate lukewarm water and a drop of mild detergent, and it is the best way to clear the greasy dust that air cannot shift. The conditions are drying and patience: the filter goes back bone dry, which means hours, not a towel-pat, because a damp filter in a warm case is a mildew farm and an airflow restriction in one. Foam filters should be squeezed, never wrung, and any filter that comes out of the wash misshapen or torn has retired — run the machine briefly without it rather than with a collapsed one, and order its replacement the same day.
Why does my PC smell dusty for a day after cleaning?
Because cleaning redistributes the finest fraction — the particles too light to fall where you blew them — and some settle on warm components, where the heat cooks off the familiar hot-dust smell at the next session. It fades within a day or two of ordinary use. A smell that persists, sharpens, or turns electrical — hot plastic, ozone, burning — is not dust and should not be waited out: power down and inspect, because the nose is a legitimate diagnostic instrument and that particular report is the one it files before failures announce themselves any other way.
How often do the filters really need cleaning in a home with pets?
More often than the guides written in pet-free homes suggest — in a shedding household, a monthly filter check is the honest rhythm, with the full standard clean following the filters’ evidence rather than a fixed date. Pet hair’s special talent is matting: it bridges a filter’s mesh into a blanket that strangles intake while looking, from outside, like a light dusting. If your machine’s temperatures have a season that matches the pet’s shedding season, you have found the connection, and the fix is the schedule, not the hardware.
Is it safe to clean a PC that is still under warranty?
Ordinary cleaning — filters, panels, a careful blow-out without breaking any seals — is user maintenance that warranties expect and manuals describe, and it does not endanger your coverage. The line is disassembly beyond the user-serviceable: removing a graphics card’s cooler, opening a power supply, or peeling a warranty seal crosses from cleaning into modification in most makers’ terms. Clean everything this guide’s steps reach, photograph the machine’s state if you are cautious, and let the sealed units stay sealed until the warranty expires or a technician opens them.
My laptop-style mini PC is full of dust. Does this guide apply?
In spirit, with smaller tools and more restraint. Compact machines pack their cooling into tight fin stacks that clog exactly like a tower’s, and their filters — where they exist — load faster for their size. The differences are access and fragility: panels held by clips rather than screws, fans whose blades are fingernail-small, and no room for a blower’s drama. Use short, gentle bursts from a distance, a soft brush as the main instrument, and the maker’s own opening instructions rather than force. The schedule matters more, not less: a mini PC’s cooling has no headroom to lend dust, so its cleans belong closer together.
Should I clean the inside of the power supply?
No. The power supply is a sealed unit containing components that can hold a dangerous charge long after unplugging, and it is the one part of the PC that home cleaning must treat as a black box. Blow air through its vents from outside, keep its intake filter — where the case provides one — clean, and let its interior be. A power supply whose fan has failed or whose interior is visibly choked is a replacement candidate, not a cleaning project, and that boundary is the most important safety line in this entire guide.
Can cleaning fix a PC that has started shutting down under load?
Sometimes, and it is the right first suspect: a machine whose heatsinks and radiators are matted with dust will overheat under loads it once handled, and thermal shutdown is the protection working as designed. Clean it properly, then retest the exact load that caused the shutdown. If the behaviour persists in a clean machine at honest temperatures, the cause lies elsewhere — power delivery, a failing fan, ageing thermal paste — and cleaning has done its diagnostic duty by eliminating itself.
What is the one cleaning mistake that causes the most follow-up problems?
Reconnecting something almost correctly — a fan header seated on two of its pins, a front-panel lead swapped, a SATA cable worried half-loose — so the machine returns from its clean with a new, mysterious fault that gets blamed on the cleaning itself. The verification step exists for exactly this: fans observed spinning, temperatures watched, every port and button exercised once before the panels are declared finished.
The Bottom Line
Power down and unplug, hold fans still, blow in short bursts from top to bottom, wash filters and dry them completely, wipe blades and glass, and never vacuum inside or open the power supply. Done on a seasonal rhythm, the job stays at half an hour — and your fans, filters, and temperatures all stay honest.
Related Guides
Pair cleaning with a proper airflow setup and the noise troubleshooting guide: