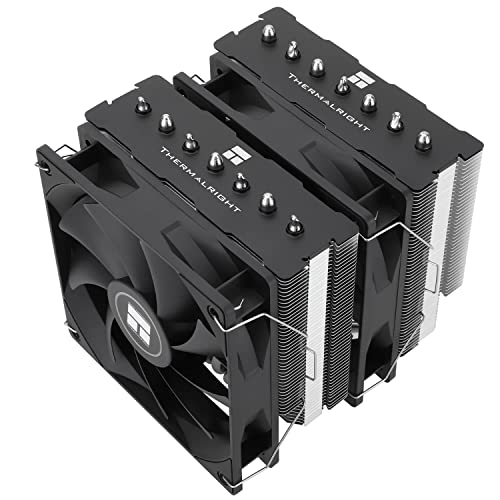
Learning how to choose a CPU cooler comes down to five checks you can do before spending anything: confirm your socket, measure your case clearance, estimate how much heat your processor actually produces, decide between air and liquid, and set a noise level you can live with. Get those five right and almost any reputable cooler that passes them will keep your CPU cool and quiet. Get one wrong — a cooler 5mm too tall for your case, or a mounting kit that skips your socket — and the best cooler in the world is just an expensive paperweight.
This guide walks through each check in order, with the measurements and specifications that matter and the marketing numbers you can safely ignore. If you would rather start from tested shortlists once you know your constraints, our roundup of Best CPU Coolers for Gaming applies the same filters to gaming builds, and Best CPU Coolers for Overclocking covers the heavier end of the market.
Disclosure: As an Amazon Associate, ilcastellomenu.com earns from qualifying purchases. Product examples below link to Amazon, where you can check current availability and specifications; this guide itself lists no fixed prices because pricing and bundles change frequently.
How to Choose a CPU Cooler: The Five Checks in Order
Work through these in sequence. Each check eliminates a chunk of the catalogue, so by the end the shortlist usually narrows itself to two or three sensible options.
Check 1: Socket compatibility comes first
Your motherboard socket decides which mounting hardware a cooler must include. Current AMD builds use AM5 (and the long-running AM4 before it); recent Intel builds use LGA1700 or LGA1851, with LGA1200 and LGA115x still common in older machines. Reputable coolers list supported sockets on the box and ship brackets for several generations, but never assume — an older cooler from a parts bin may predate your socket entirely. The full method, including how to identify a socket you have forgotten, is in our companion guide: How to Check Compatibility of a CPU Cooler. If you are also picking the board itself, the shortlists at best motherboards for ryzen 5 5600x show which sockets current gaming CPUs pair with.
Check 2: Measure height, radiator space and RAM clearance
For an air cooler, the key figure is cooler height in millimetres, compared against the maximum CPU-cooler clearance your case specifies. Measure from the top of the CPU to the side panel if the case maker does not publish the number, and leave a few millimetres of margin. For a liquid cooler, the equivalent check is radiator mounting: 120, 240, 280 or 360mm positions, usually at the front or top of the case. Finally, tall air coolers overhang the memory slots, so compare the cooler’s clearance-under-fin-stack figure with your RAM height — low-profile memory avoids the problem entirely. Clearance gets its own deep dive in CPU Cooler Clearance Explained.
Check 3: Match cooling capacity to your CPU's real heat output
A 65-watt-class mainstream processor and a flagship chip that sustains two or three times that under all-core load need very different coolers. Cooler makers express capacity as a TDP rating, and while the number is not perfectly standardised it is a useful tier guide: entry towers for modest chips, dual-tower air or 240mm liquid for high-end gaming CPUs, and 280–360mm liquid or flagship air for sustained workstation loads and overclocking. Our explainer on What is TDP for CPU Coolers shows how to read those ratings without being misled by them. When in doubt, one tier up buys quiet as well as headroom, because a larger cooler can spin its fans slower for the same temperature.
In this guide
Air or Liquid: Picking Your Cooling Type
Both technologies cool modern CPUs well. The choice is about case fit, noise character, maintenance and taste — not about one being universally better.
When air cooling is the smarter default
A tower air cooler is a heatsink and one or two fans: nothing to leak, no pump to wear out, and nothing to maintain beyond dusting. Good mid-range towers handle the vast majority of gaming CPUs at low noise, and flagship dual-towers rival mid-size liquid coolers outright. Air is also the safer choice for a PC that will be shipped, moved often, or left unmaintained for years. The dedicated head-to-head, Air Cooler vs Liquid Cooler, compares cost, noise and longevity in detail, and best air coolers for cpu collects the strongest air options we have shortlisted.
When liquid cooling earns its place
An all-in-one (AIO) liquid cooler moves heat to a radiator mounted at the case edge, which helps in two situations: very high sustained heat output, where a 280mm or 360mm radiator has more surface area than any air tower, and compact or showcase builds where a tall tower will not fit or would block the view of the build. The trade-offs are a pump that adds a faint noise source and a finite service life, plus more demanding installation. If liquid appeals, AIO vs Custom Loop Cooling explains why almost everyone should choose a sealed AIO over a hand-built loop, and Best CPU Coolers Under 100 shows what the accessible end of both categories looks like.
Form factor: tower, low-profile and downdraft
Small-form-factor cases cannot take tall towers at all. Low-profile coolers — typically under about 70mm tall — blow air down toward the motherboard and exist for exactly those builds, at the cost of cooling capacity and often noise. Standard towers run from roughly 120mm to 170mm tall and are the default for ATX and micro-ATX cases. The trade-offs are compared directly in Tower Cooler vs Low Profile Cooler, and builders working to a strict budget can cross-check the value tier in best cpu coolers under 50.
Noise, Fans and the Details That Decide Daily Comfort
Two coolers with identical temperatures can feel completely different to live with. These are the secondary specs worth reading once the five checks have produced a shortlist.
Fan size, count and PWM control
Larger fans move the same air at lower speed, and lower speed means less noise — which is why 140mm-fan dual towers are so quiet, and why a cooler straining at maximum RPM is a sign it is undersized for the chip. Insist on PWM (4-pin) fans so the motherboard can ramp them smoothly with temperature, and check whether the cooler includes a splitter or hub if it uses two fans. Fan bearings matter for longevity: fluid-dynamic and similar sealed bearings generally outlast plain sleeve bearings in horizontal mounts.
Mounting quality and included accessories
A good mounting system applies even pressure across the CPU heat spreader and does not flex the motherboard. Look for a metal backplate, sprung screws with a hard stop, and instructions specific to your socket. Included thermal paste is standard at every tier now; premium kits add long screwdrivers, spare fan clips and low-noise adapters. Installation difficulty varies more than cooling performance does, so skim our walkthrough How to Install a CPU Cooler before deciding you need the flagship — some budget towers are genuinely five-minute installs.
Looks, lighting and display extras
RGB fans, white editions and even LCD screens on pump blocks are all available if the build is on display. They change nothing about cooling, so treat them as the last filter, applied only between coolers that already pass every functional check. One functional note: a screen or lighting hub usually needs a USB header and software, which is one more cable to manage and one more background app to run.
Common Mistakes When Choosing a CPU Cooler
Buying by TDP headline alone
TDP ratings are not measured to a single industry standard, so one brand’s 220W tower is not automatically stronger than another’s 180W. Use TDP as a tier label, then confirm with the cooler’s size, heat-pipe count, fan configuration and independent temperature testing on a CPU similar to yours.
Forgetting the graphics card and side panel
Clearance is three-dimensional. A cooler can clear the side panel yet crowd the top PCIe slot or the first memory slot, and a front-mounted radiator can steal the length a long graphics card needs. Check the case maker’s full clearance set — cooler height, GPU length with and without a front radiator, and radiator thickness — not just one number.
Oversizing for a locked, low-power CPU
A flagship cooler on a modest processor is not harmful, but the money usually does more elsewhere: the chip will sit at the same temperatures with a mid-range tower, running just as quietly because neither cooler is being pushed. Match the cooler to the hottest CPU you realistically plan to install on that socket, not the hottest CPU that exists.
Matching cooler class to build type at a glance.
| Your situation | Sensible cooler class | Why |
|---|---|---|
| Mainstream gaming CPU, mid-tower case | Mid-range 120mm tower air cooler | Quiet, inexpensive, fits almost everywhere |
| High-end CPU, sustained all-core work | Dual-tower air or 280–360mm AIO | Surface area for sustained heat at low fan speed |
| Small-form-factor case | Low-profile air cooler | Height is the hard limit; capacity is secondary |
| Showcase build, windowed case | AIO with 240–360mm radiator | Clears the view of the board and memory |
| Older PC, cooler upgrade only | Any cooler with your socket’s bracket in the box | Mounting compatibility decides everything |
Reading a Cooler's Specification Sheet Like an Engineer
Once the five checks have narrowed the field, the spec sheet separates the honest contenders from the marketing. These are the lines worth your attention, and what each one predicts about living with the cooler.
Heat pipes: count, diameter and layout
Heat pipes are the cooler’s arteries. More and thicker pipes generally move heat into the fins faster, and pipes that make direct contact with the CPU spreader (or feed a well-machined cold plate) start the journey sooner. Treat pipe count as supporting evidence alongside fin-stack size rather than a standalone score: a dual-tower with six pipes and two large fans is a coherent flagship design, while a slim cooler advertising many pipes into a tiny stack is spending them where they cannot help. The pipe layout also hints at mounting orientation limits on some designs — another reason the maker’s manual, not the marketplace listing, is the document to trust.
Fin stack: volume beats density
The fin stack is where heat actually leaves the cooler, and its total volume — height, width and depth together — predicts capacity better than any single dimension. Very dense fins extract slightly more from a given volume but clog with dust faster and demand higher fan pressure, which means noise. This is one reason large, moderately-spaced stacks dominate the quiet end of the market. When two coolers claim similar ratings, the one with visibly more fin volume and larger fans is almost always the one that delivers them at lower RPM in a real case.
Fan specifications that matter
Look for PWM control, a maximum speed in a sane range for the fan’s size (big fans should top out lower), and a bearing type associated with longevity — fluid-dynamic and magnetic-levitation designs are the current standards. Ignore airflow figures quoted without static pressure, and ignore minimum-noise claims measured at distances and settings you will never use. What predicts your experience is simpler: fan size, count, and how much of the cooler’s capacity your CPU actually needs, because a fan loafing at 40% is quiet regardless of its brochure.
Three Worked Choices: Putting the Five Checks Together
Abstract criteria land better with concrete builds. Here is the choosing process applied to three typical machines.
The mainstream gaming build
A 65W-class gaming CPU in a mid-tower with 165mm of clearance and standard-height memory. Socket check passes for every current cooler. Height eliminates nothing except the very tallest flagships. The heat check says a mid-range single tower is sufficient, with headroom. Decision: a quality 120mm tower, money saved toward the graphics card, fans that will rarely exceed half speed in games. This is the build the majority of readers are actually assembling, and it is the easiest to get right.
The small-form-factor build
A mini-ITX case with 67mm of cooler clearance rewrites the problem: height eliminates every tower, the heat check must be run against the CPU’s configured power (many small builds deliberately choose efficient chips or set modest power limits), and the noise check becomes the hard one because the cooler sits close to a vented panel. Decision: the tallest low-profile cooler the case accepts, an efficient CPU, and a carefully tuned fan curve. The constraint is respected rather than fought, and the result is a machine that is quiet precisely because its parts were chosen as a system.
The workstation that renders overnight
A high-core-count CPU sustaining all-core loads for hours flips the priorities: the heat check dominates, noise matters because the machine shares a room with its owner overnight, and reliability matters because the work is the point. Decision: a 360mm AIO or flagship dual-tower, chosen by whether the case mounts the radiator well; headroom bought deliberately at two tiers, because a cooler at half capacity at 3 a.m. is a cooler nobody hears. The five checks still produce the answer — they just weight differently.
Matching the Cooler to the Rest of the Build's Future
A cooler is one of the longest-lived parts in a PC. Choosing it well means thinking about the builds after this one.
Platform longevity and bracket support
Sockets live for years, and a cooler bought today can serve two or three CPU generations if its maker supports the brackets. Makers with a tradition of supplying mounting kits for new sockets — sometimes free — turn a cooler into a decade-long asset; makers who abandon older models turn it into e-waste at your next upgrade. Before buying, check the maker’s track record and current kit policy for your socket family. This is also why keeping the bracket box matters: a complete cooler with all its hardware is reusable and resalable, while a heatsink missing one platform’s brackets is a paperweight with fins. The choosing decision is therefore partly a bet on a company’s support culture, and it is a bet worth researching for the five minutes it takes.
When to deliberately oversize
Three situations justify buying well above today’s need. First, a planned CPU upgrade on the same socket within the cooler’s life — size for the hotter chip you have already decided to buy. Second, a case with poor airflow you do not intend to change, where cooler headroom compensates for warm intake air. Third, a noise-sensitive setting — a bedroom, a studio, a shared office — where the cooler’s fans must stay in their lowest range under your real workload. Outside those three, oversizing is money parked in aluminium. The discipline is to name the reason before spending it; ‘just in case’ is not a reason, it is a shrug with a receipt.
Gear for This Guide
The examples below come from our Creators-API-verified product pool and illustrate the cooler classes discussed in this guide. They are examples, not a ranked list — use the criteria in this article to judge any model, including newer revisions.

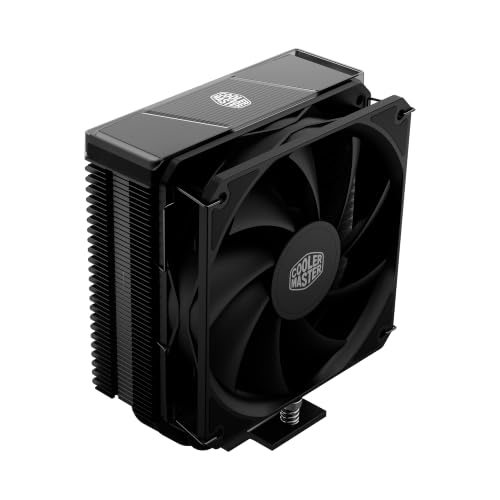
Cooler Master Hyper 212 Black II
A single-tower air cooler in the classic 120mm format is the reference point most builders start from: four heat pipes, a PWM fan and broad socket support in a height that fits the majority of mid-tower cases. Cooler Master Hyper 212 Black II — Check on Amazon
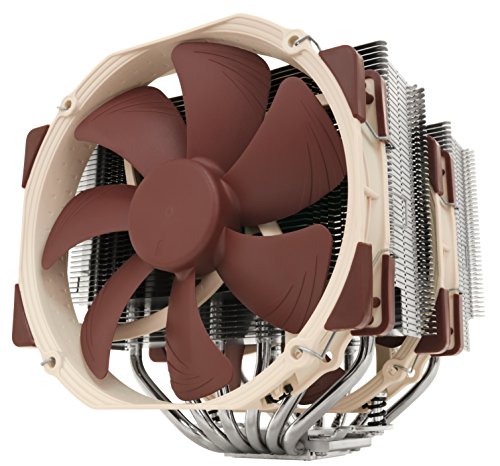
Noctua NH-D15
At the other end of the air-cooling scale, this dual-tower design with two 140mm fans shows what maximum air cooling looks like — and why you must check its 168mm height and memory clearance before ordering. Noctua NH-D15 — Check on Amazon

ARCTIC Liquid Freezer III Pro 360
A 360mm all-in-one liquid cooler illustrates the radiator route: strong sustained cooling for high-core-count chips, provided your case has a 360mm mount and you are comfortable with a pump and tubing. ARCTIC Liquid Freezer III Pro 360 — Check on Amazon
how to choose a CPU cooler: The Short Version
Socket, clearance, heat, noise, budget — in that order. A cooler that passes all five checks will serve quietly for years; a cooler that fails the first two will not serve at all, however good its reviews are.
Start From Your CPU’s Real Behaviour, Not Its Box Label
Before you compare a single heatsink, spend ten minutes watching what your current processor actually does under your own workloads. The nameplate thermal design power is a starting point, but modern desktop chips boost opportunistically: they raise clocks and voltage whenever temperature and power headroom allow, and they keep doing it until they hit a limit you set, a limit the motherboard sets, or a thermal limit. That means two builds with the identical CPU can need noticeably different cooling, because one motherboard leaves power limits wide open while the other enforces the processor maker’s default limits strictly.
Open a hardware monitoring tool while you run the heaviest thing you genuinely do — a long render, a shader-compiling game launch, a video export, a virtual machine doing updates — and note three numbers: package power in watts, the hottest core temperature, and how long the load lasts. A load that spikes for twenty seconds is a completely different cooling problem from a load that sits at full power for four hours. Short bursts are absorbed by the thermal mass of almost any heatsink; the metal warms slowly, the fans barely respond, and the job finishes before heat soak sets in. Sustained loads are where fin-stack volume, fan quality and case airflow separate adequate coolers from good ones.
Power limits quietly decide your cooling requirement
On many Intel boards, settings labelled as multi-core enhancement or automatic power-limit behaviour raise the long-duration power limit well beyond the chip’s nominal class, sometimes effectively removing it. On AMD boards, Precision Boost Overdrive does something similar from the other direction, letting the processor draw more power in pursuit of higher boost clocks. Neither setting is wrong, but both change the heat you must dissipate every second the load runs. If you plan to enable those features, choose cooling for the power draw you will actually allow, not the number printed in the processor’s headline specification. If you would rather cap power at a sensible level in the BIOS — a legitimate, often invisible-in-practice choice for gaming — a smaller, quieter cooler becomes a rational pick rather than a compromise.
This is also why copying a friend’s cooler choice can mislead. Their board, BIOS defaults, case and room may present a 30-watt difference in sustained draw and a 10-degree difference in intake air temperature. Copy their reasoning — measure, allow headroom, check fit — rather than their exact shopping list.
Headroom is really about fan speed, not survival
A cooler that is merely sufficient will keep a CPU below its throttling point, but it will do so with its fans spinning fast and audibly. A cooler with genuine headroom reaches the same temperature with fans turning hundreds of RPM slower, and fan noise rises steeply with speed, so that difference is the one you hear every day. When you read that a flagship dual-tower only beats a mid-range tower by a few degrees in a review chart, translate it correctly: at equal noise, the gap is larger than the temperature chart suggests, because the big cooler was loafing while the small one was working hard. Choose headroom if the PC lives in your bedroom, your recording space or a shared living room. Choose merely sufficient if the machine sits in another room, wears headphones over your ears all day, or runs short bursty loads that never heat-soak the heatsink.
Your Case and Graphics Card Choose Half the Cooler for You
A CPU cooler does not breathe fresh outdoor air; it breathes whatever air is inside your case, and in a gaming PC that air has usually already passed over a graphics card dissipating far more heat than the processor. If your case intake is restricted — a solid front panel, a clogged filter, fans set to near-silent speeds — the air reaching the CPU cooler may be 10 to 15 degrees warmer than the room. No cooler upgrade fully compensates for breathing pre-heated air, which is why some builders swap coolers twice and see barely any improvement: the bottleneck was the case’s air supply all along.
Before spending on cooling, check the cheap variables. Clean the intake filters. Confirm front fans actually spin up under load rather than following a curve tied to an irrelevant sensor. If your case allows a top or front intake position that feeds the CPU area directly, try it. In a tower-air build, the ideal path is cool air entering the front, passing straight through the tower’s fins, and leaving through the rear exhaust with minimal recirculation. In a liquid build, mounting the radiator as intake gives the CPU the coolest possible air but dumps its heat into the case for the graphics card to breathe; mounting it as exhaust does the reverse. There is no universally correct answer — there is only the question of which component in your build runs hotter and complains louder, and that component should get the fresh air.
Small cases change the physics, not just the fit
In a compact case the cooler sits close to the power supply, the graphics card backplate and the side panel, and every one of those neighbours radiates or conducts heat into the small volume of air available. Downdraft coolers, which blow air down through the fins toward the motherboard, earn a genuine advantage here that spec sheets miss: the moving air also washes over the motherboard’s voltage regulators and memory, components that in a tiny case may have no other airflow at all. Conversely, a tower cooler in a case with a perforated side panel directly beside it can perform better than its size suggests, because it can pull cool air straight through the panel instead of relying on the front intake path. When you shop for a small build, read reviews tested in cases, not only on open benches — open-bench results flatter large coolers and hide these interactions entirely.
Decide Your Noise Target Before You Decide Your Budget
“Quiet” means different things in a recording studio, a bedroom at night and an office with three other machines running. Give yourself a concrete target. If you record voice or instruments near the PC, your target is effectively silence at idle and near-silence under load, which pushes you toward oversized heatsinks, large slow fans and possibly relocating the machine. If you game with closed headphones, your target is simply “not audible over the game,” which almost any competent tower achieves. If the PC renders overnight in the room where you sleep, the target that matters is the sustained-load fan speed, not the idle behaviour most reviews emphasise.
Fan diameter is the lever behind most of that. A 140mm fan moves roughly the same air as a 120mm fan at several hundred fewer RPM, and it produces a lower-pitched sound that most people find less intrusive even at equal measured volume. Bearings matter over years rather than weeks: fluid-dynamic and magnetic bearings tend to stay smooth and silent far longer than plain sleeve bearings, which can develop a dry rattle as lubricant migrates, especially when mounted horizontally. When a cooler’s specification lists bearing type, treat it as a longevity specification, not marketing garnish. Finally, remember that you control the fan curve. A cooler bought for headroom only delivers quiet if you tell the motherboard to use that headroom — set the curve so fans stay slow until temperatures genuinely demand more, rather than reacting to every two-second boost spike. A short fan delay or hysteresis setting, available on most modern boards, stops the annoying revving-up-and-down that makes a PC sound busy even when it is cool.
A Measurement Worksheet to Complete Before Ordering
Work through this list with a tape measure and your motherboard manual, and write the answers down. It takes fifteen minutes and eliminates nearly every return, forced compromise and dremel moment in cooler buying.
- Socket and retention: your exact socket name, and whether the cooler ships with that bracket in the box or requires a kit ordered separately.
- Case clearance: maximum cooler height from the case maker’s specification, minus a safety margin of at least 3–5mm for side-panel flex, cable bulge and manufacturing tolerance.
- Memory height: the height of your tallest memory module, measured or from its product page, compared against the cooler’s published clearance under its front fan and fin stack — remembering that raising the front fan to clear tall memory also raises total cooler height.
- First expansion slot: whether your motherboard’s top PCIe slot sits close enough to the socket that a wide dual-tower could overhang it, and whether you actually use that slot.
- Radiator positions, if liquid is on the table: which case mounts accept 240mm or 360mm radiators, the thickness clearance at each once fans are fitted, and whether a front-mounted radiator’s tubes can reach the CPU without straining.
- Header inventory: one CPU_FAN header for the primary fan or pump, a CPU_OPT or AIO_PUMP header if the liquid cooler wants a dedicated full-speed connection, and enough chassis headers or a splitter plan for radiator fans.
- Power draw decision: the sustained wattage you intend to allow in the BIOS, written down, because every cooler comparison you make should be against that number.
If any line stays blank, that blank — not a review score — is your next task. Builders rarely regret a cooler that was slightly too large for the job; they routinely regret the one that arrived before the measuring happened. For model-level shortlists once the worksheet is complete, the roundups of the best CPU coolers for Ryzen 7 5800X-class processors and similar socket-specific pages are more useful than generic rankings, because they start from the same constraints you just wrote down.
Four Builds, Four Different Right Answers
The living-room PC that must disappear acoustically
Here the cooler is an acoustic component first and a thermal component second. A large dual-tower air cooler with its fans capped at low speed, or a 280mm liquid cooler with the radiator as front intake, both work; the deciding factor is idle behaviour, because this machine spends most of its life playing video at near-zero load. Avoid any cooler whose minimum fan or pump speed is audibly high, and check that the pump, if you go liquid, can run at a reduced constant speed rather than following a reactive curve.
The home server or NAS that never sleeps
Continuous duty reorders the priorities completely. Simplicity and bearing life outrank peak performance, because the load is modest but endless and the machine may sit unattended for months. Air cooling’s absence of a pump — the one moving part in a liquid cooler with a finite life and a talent for failing unnoticed — makes it the default choice. Pick a cooler whose fan is a standard size you can replace in five minutes, set a conservative fan curve, and enable your motherboard’s fan-failure alarm if it has one.
The hot room, the dusty room and the pet problem
Ambient temperature adds directly to component temperature: a cooler that holds a CPU at 75 degrees in a 22-degree room will hold roughly 85 in a 32-degree room, all else equal. If your room runs hot in summer, buy the headroom tier above the one spring reviews suggest. Dust and pet hair change the maintenance equation too — a fin stack you can clean in place with a brush and blower, behind an intake filter you actually remove monthly, beats a marginally better performer whose radiator is buried where you will never clean it. Cooling you maintain outperforms cooling you admire.
The PC that travels
A machine that rides in cars to LAN events, student housing or job sites faces a load no benchmark measures: shock. A tall, heavy tower cooler hangs off the motherboard on a bracket and levers against the board with every bump; manufacturers of prebuilt systems often ship such machines with foam supports inside for exactly this reason. If your PC travels upright and often, a low-profile air cooler or a well-secured liquid cooler with the radiator screwed to the case — its mass carried by the chassis, not the socket — is the structurally honest choice, even if a tower would win on a desk-bound benchmark.
Buying Used, Reusing Old and Reading Warranty Terms
Heatsinks are among the safest components to buy used, because a block of finned metal with heat pipes has almost nothing in it that wears out — but the fans and the mounting hardware are another story. A used cooler missing one bracket, one backplate or a set of screws is not a bargain; it is a paperweight until the maker sells you the parts, and some do not sell them separately at all. Ask the seller to photograph every bracket and screw, confirm the fan spins without grinding, and check the base for deep scratches or a bent heat pipe, which can indicate a drop that also cracked a solder joint inside the stack. Liquid coolers deserve more suspicion second-hand: you cannot see coolant loss, pump wear or internal corrosion from a listing photo, the warranty rarely transfers, and the failure mode of an ageing unit is not slowness but a leak or a dead pump. Buy used air freely with the checks above; buy used liquid only when the saving is large enough that you would accept replacing it within a year.
Reusing your own old cooler follows the same logic with better information. The heatsink itself is almost certainly fine after a thorough clean. Budget for a fresh mounting kit if you are changing socket generations, new thermal paste without exception, and a hard look at the fans: a fan that has run for six years may be near the end of its bearing’s quiet life, and replacing it now, while the cooler is off the board, is far easier than in six months. Check the cooler’s product page for the maker’s stated warranty length and socket-support policy too — some manufacturers have built their reputation on supplying free brackets for new sockets years later, which turns a cooler into a component that survives two or three builds, and that long view belongs in your buying decision from the start.
One Last Test After the Cooler Arrives
Choosing well ends with verifying, not with installing. In the first week with a new cooler, run your heaviest real workload for at least thirty minutes — long enough for the heatsink, the case air and the graphics card to reach equilibrium — and record the hottest core temperature, the fan speed it took to hold it, and whether the sound at your chair is acceptable. Those three numbers are your build’s baseline. Write them down with the date and the room temperature if you know it. Months later, if the machine sounds louder or runs hotter, that baseline tells you immediately whether something has changed — dust, a failing fan, a dried paste joint — or whether summer has simply arrived. A cooler chosen by measurement deserves to be judged by measurement too, and the two minutes this test takes turns vague impressions into a maintenance signal you can act on for the life of the build.
Keep the cooler’s box and spare brackets until that baseline test passes, too. If a fit problem or a defective fan does appear, returns and exchanges are painless while every screw, bracket and cable is still together in one place.
Frequently Asked Questions
Do I need a liquid cooler for a gaming PC?
No. A mid-range or flagship tower air cooler keeps gaming CPUs cool and quiet, because gaming loads are bursty rather than sustained at maximum. Liquid cooling earns its place with sustained all-core workloads, very small cases, or a showcase build — not as a requirement for gaming. Compare the two honestly in Air Cooler vs Liquid Cooler before spending on either.
How big a cooler does my CPU need?
Match the cooler’s tier to your CPU’s realistic sustained power draw, with one tier of headroom so the fans can run slowly. Mainstream 65W-class chips are happy on a modest tower; high-end chips with aggressive boost behaviour want dual-tower air or 240mm-plus liquid. The reasoning is laid out in What is TDP for CPU Coolers.
Will any cooler fit my case?
No — fit is the first thing to verify. Compare the cooler’s height with the case’s maximum CPU-cooler clearance, check RAM clearance under the fin stack, and for liquid coolers confirm a radiator mount of the right size. The five checks in How to Check Compatibility of a CPU Cooler take minutes and prevent the most common buying mistake in PC building.
Is the stock cooler that came with my CPU enough?
For a modest processor at stock settings doing everyday work and light gaming, often yes — it is designed for that chip. It will usually be the loudest component under load, though, and it leaves no headroom. If noise bothers you or temperatures sit near the limit in games, a mid-range tower is one of the most satisfying upgrades in PC building.
Does a more expensive cooler always run quieter?
Not automatically, but size and fan quality — which money buys — are exactly what produce quiet: a large fin stack with big fans sheds the same heat at lower RPM. A premium cooler also buys better mounting hardware and fans with better bearings. What money does not fix is a bad fan curve, so set that up properly whatever you buy.
Can I reuse my old cooler on a new build?
Often, yes, if the maker offers a mounting kit for the new socket — the heatsink itself does not wear out. Check the kit exists for your new board before planning around it, clean the base thoroughly, and always use fresh thermal paste on the new mount.
Should I undervolt my CPU instead of buying a bigger cooler?
Undervolting and cooling solve the same problem from opposite ends, and they combine well. Reducing the voltage your CPU uses at a given clock speed cuts the heat it produces in the first place, often by enough to let a mid-range cooler run quietly where it previously struggled. If your current cooler is close to adequate, try a modest undervolt or a sensible power limit before spending anything. If it is undersized by a wide margin, no tuning will close the gap, and the cooler upgrade is the honest fix.
Does the direction a tower cooler faces really matter?
Yes, within the limits of your socket’s mounting pattern. The standard arrangement blows air from front to back, feeding the fins with intake air and handing the warmed air directly to the rear exhaust. Rotating a tower to blow upward can work in cases with strong top exhaust, but it usually feeds the cooler with air the graphics card has already heated. Some sockets only allow certain orientations with certain brackets, so confirm the mounting options before planning an unconventional layout.
Is it worth paying more for a cooler with a vapour chamber?
A vapour chamber spreads heat across the cooler’s base more evenly than individual heat pipes, which helps most on large processor heat spreaders and on chips whose hot cores sit off-centre — a real layout on several modern designs. The benefit is a few degrees in the best cases, not a category change. Treat it as a tiebreaker between two coolers that already pass your fit, noise and capacity checks, not as a reason to buy a cooler that fails any of them.
Related Guides
Keep exploring with these guides and roundups from the same CPU-cooling collection: